"SEC-S21W1: Creating a Blog for Amazon Affiliate Marketing"
Hello Everyone
I'm AhsanSharif From Pakistan
Greetings you all, hope you all are well and enjoying a happy moment of life with steem. I'm also good Alhamdulillah. |
|---|

Design on Postermywall online
I hope everyone is doing well and enjoying their lives. This is the first course of this new season, in which we are going to participate. First, we will learn about Amazon affiliates and then do our work on the related blogger website. I hope you like my work.
Create a Blog for Amazon Affiliate Marketing |
|---|
Login Blogger With Google Account
To complete my task first I have to go to the blogger website. When I open it, I will log in with my account. I will use my Google account to log in. First of all, when we open it we will be shown an interface like below.
On the top right corner of it, we see the sign-in option, we have to click on it and sign in to our account here. I am signing it in with my Google account so choose my Google account for it. After choosing login to your account.
Create New Blog
When our account is successfully opened, such an interface will be shown to us which can be seen in the screenshot below. Some other blogs are showing up here because I already tried this. But I failed because I did not have complete guidance. So we will add a new blog here following the procedure mentioned in this course. For this, I will click on the New Blog option.
As soon as we click on the New Blog option, we will have a new interface open. That interface will prompt us to write the title, where we see a blank line, we have to write a title of less than 100 words. After writing the title we have to click on the next button.
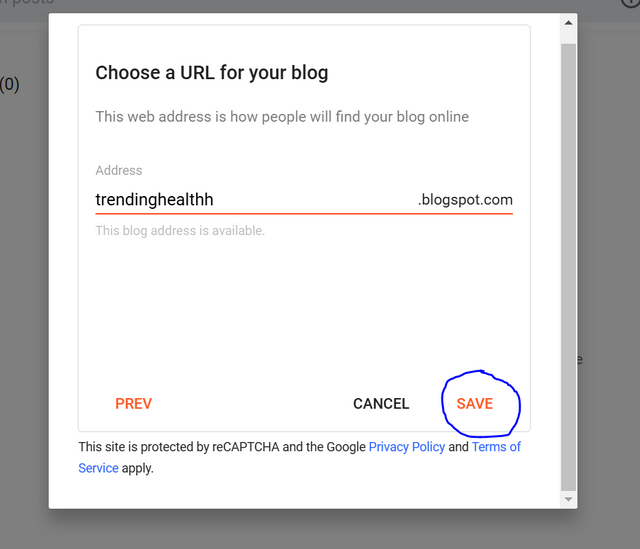
When we click on the next button, we will be asked for our address. We have to write a unique address there, which has not been used here before. Here I am writing trending health, which is unique. Then we'll click on save and that will create a new blog for us.
 |  |
|---|
View Blog
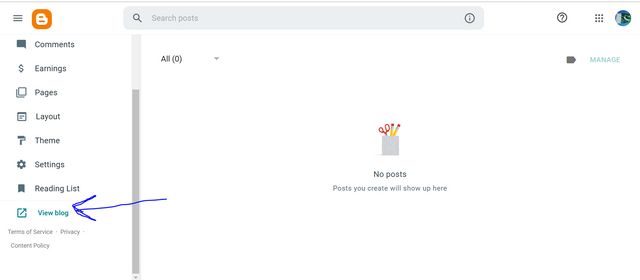
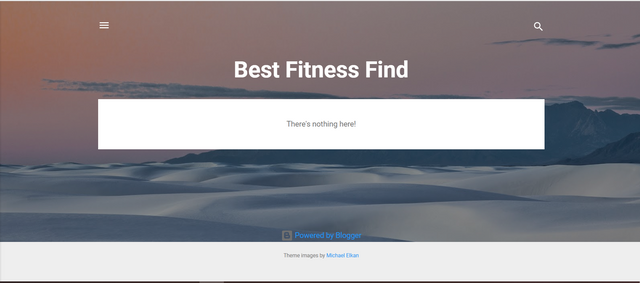
How will we know that our blog has been created? When we have saved our blog, our main interface will open in front of us. At the bottom of this, you will see a view blog option. When you click on it, your created blog will appear in front of you.
Add Theme
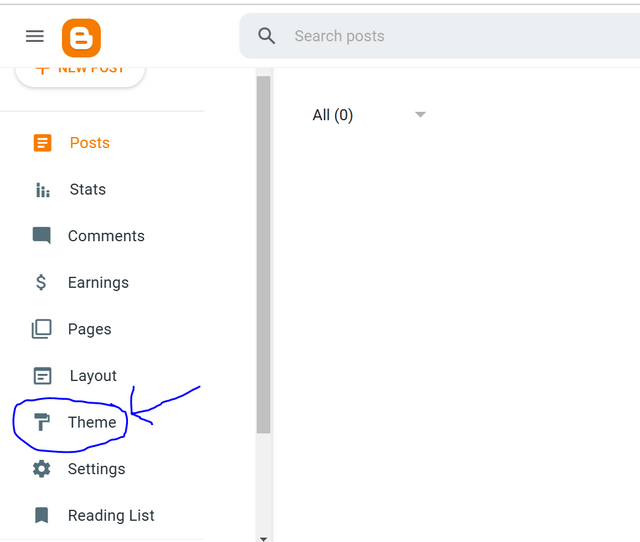
After we have created our blog, we have to add our theme. To add this theme we are given that theme in the task first we have to download this theme. And extract it which is contained in the zip file. When we extract it, we will see two types of files in it, the second one is the theme file. The first thing we need to do to put it here is to go to the theme section on our account.
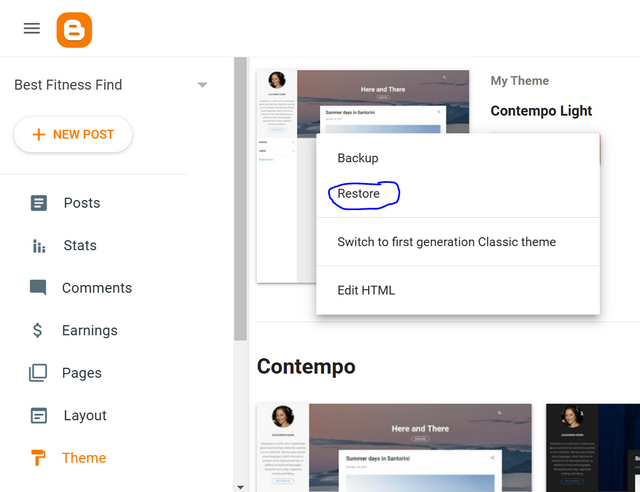
As soon as we open the theme option, in front of it we will see a customize theme option. We have to click on it when we click on it we will get four options. Among them, we have to choose the second option Restore.
 |  |
|---|
When we select it, it will show us an upload option. We have to click on the upload options and it will take us to our computer gallery. We have to select the file that we have extracted there and upload it here. This way we will have that theme.
Add Code Template
To optimize the blogs on your account to improve their performance and give a professional look we need to write some code templates. With this code, we can make our blog professional so to add this code here first we have to go to the settings in our account. As soon as we open the settings, we will see a lot more options. Among them, we have to choose the post-template option.
 |  |
|---|
As soon as we open our post template, a new interface will open and an empty box will be visible. There we have to paste our code. As soon as we paste the code there, a save button will show below. We have to click this button and thus our post template will be set. As soon as we create any post, that template will be shown to us. As soon as we click on the save option, our post template will be loaded there. And in each of our posts, it will show us this way to set any template for your post.
 |  |
|---|
This is how we set up our page layout. We did not complicate the layout of the page too much because the more complicated it is, the more it will be harmful to the user, and the user will not understand it quickly. So we don't put any kind of problems on our page. For this, we have to remove the archive labels and widgets section in our layout so that our layout is simple.
Add Three Dummy Product Posts |
|---|
Create Post
To create our post first, we have to select our blog. When our blog is selected, a large New Post option will open below it. We have to click on this New Post button so that we can create our post. Similarly in the below layout, you can see that the same option is visible we have to select it.
Post 01
As soon as we click on this new post, we will have a new interface open. At the bottom of this interface, you can see that first there is an upper line where we will write the title. There we have to write our beautiful title about our product. Due to this user interaction on your post should be more. If you keep your title unique then your post will go trending and your product will reach other people.
After writing the title, there is a main empty space below which is called the body of our post, where we have to add the description of our post. The description that will be about our product in which we have discussed the features of our product, its advantages, its disadvantages, all these things have to be discussed here. Because of this, our users will buy the product from us.
Similarly between the body and the title you see some editing tools where we can bold our text and italicize our test. And also sets its position there like in MS Word we have options to edit our content. SIM is also here but the difference is that when you do any If you select an object and make it bold, two tags are added around it. One is a starting tag and the other is an ending tag. Our post with this tag will be bold. These tags are HTML tags.
After adding the description of your post, in the same tools where we edit our post, for example, if we make it bold, we will see an import image option. We have to add our image by clicking on it which will be like the logo of the gallery. The image of our product that we want to put here.
Similarly, our post method will be complete in which we have added our title, added our product description, and added the product image. Now the next thing we have to do is to publish it. To publish you have to click on the publish button on the top right corner.
When we click on it, then we will have the next option from where we have to confirm it. When we confirm it, our final post will be published. And that post will start showing on our blog.
Post 02
Post 03
Submit Your Blog Link |
|---|
Final Post
This completes our posting process. I have posted three posts, all three posts are given in my blog. Now I want to give you the link to this blog of posts which is my blog which I made today. So you can access my blog through this link.
Here is the link
https://trendinghealthh.blogspot.com/
I hope you guys like this task of mine. Because I have tried my best to cover here all the things that we have learned in the course of our task. Keeping all these things in mind, I have created my blog, in this blog I have added three posts. And there I set my theme, my code template, everything. Hope I have met the above requirements. If I am wrong anywhere you can correct me. Thank you all for stopping by.
I would like to invite @arinaz08, @rumaisha, @josepha, and @suboohi to join this task.




Upvoted! Thank you for supporting witness @jswit.
X:
https://x.com/AhsanGu58401302/status/1850730005048824289
Congratulations, your post has been upvoted by @scilwa, which is a curating account for @R2cornell's Discord Community. We can also be found on our hive community & peakd as well as on my Discord Server
Felicitaciones, su publication ha sido votado por @scilwa. También puedo ser encontrado en nuestra comunidad de colmena y Peakd así como en mi servidor de discordia