How to make crusty French bread like a BOSS

This is my first blog post ever, and my first post on Steemit. I love the idea of Steemit and I'd like to help it grow as much as I can. So, I've decided to use this platform to begin blogging some of the best things I've discovered, in the kitchen and for home. Baking good bread has always been one of those skills that seems reserved for professionals. I'm not talking bread-maker bread. Or a sliced loaf of sandwich bread. I'm talking authentic, crusty, flavourful French bread that tastes and looks like it was lovingly crafted by a 60 year-old French baker. The kind of bread you want to just layer the butter onto. The kind of bread you can sit down and eat a whole loaf of. And if you're fancy, the kind of bread you dip in a good olive oil and balsamic vinegar combo.
I am a bit fancy, at least I like to eat fancy, so stumbling on this recipe was a convergence of some pretty awesome stuff for me: learning I could bake a very decent French bread, and then getting to consume it. And they say good things get better when they're shared. That doesn't necessarily mean you need to share your loaf with someone, but it might mean you bake someone a loaf. Give one to your girlfriend, or someone you hope could be your girlfriend. Or bring one to your parents. Slathering butter on a couple warm slices of this French oval might make a really nice Breyers moment for you and your husband. Or bring one as a host gift instead of a bottle of wine. It's cheaper, and a lot more impressive.
Here's what you need:
Time: this recipe is super easy but you have to let the dough rise overnight and then in the morning, it has to rest and rise again for just over 2 hours, and then bakes for about 45 minutes to an hour.
3 cups all purpose flour
2 teaspoons salt
1/4 teaspoon instant yeast
1 1/2 cups lukewarm water
GO!
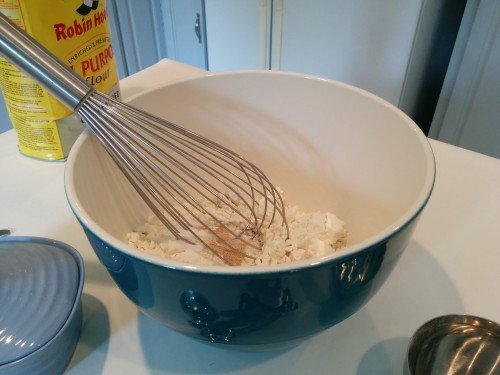
Dump the flour, salt and yeast into a large bowl.

Stir with a fork or whisk.
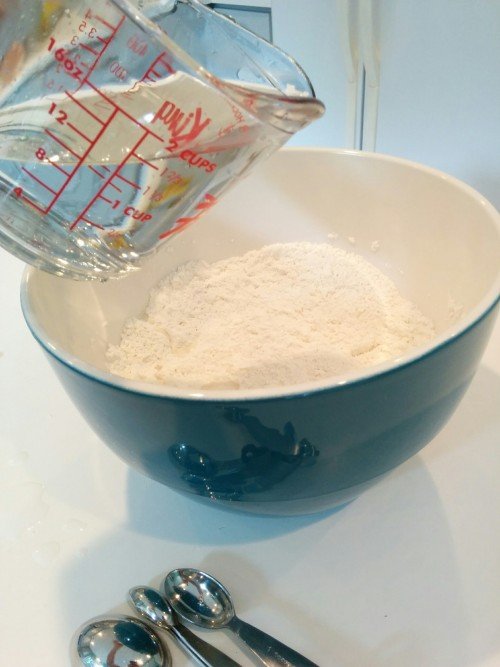
Pour the water over the dry mixture and mix with a spatula until the ingredients are sticky, stringy and a mixture of wet and dry.
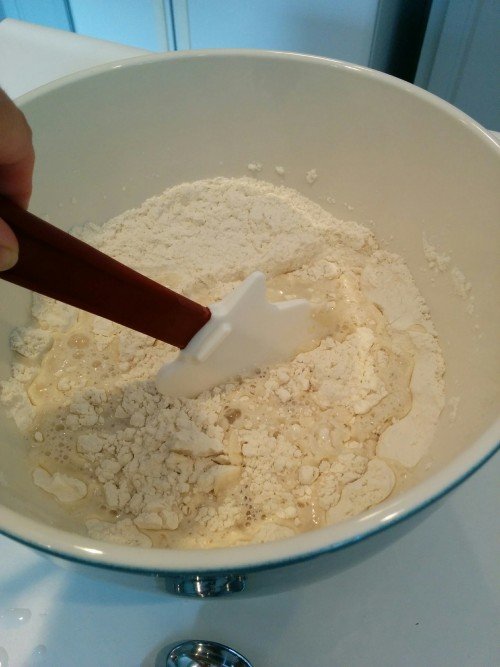
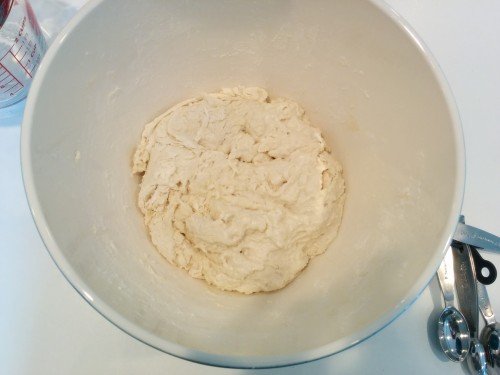
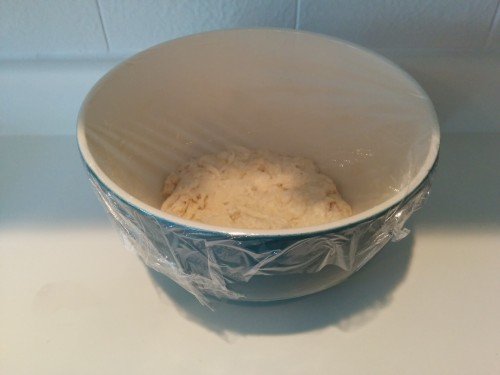
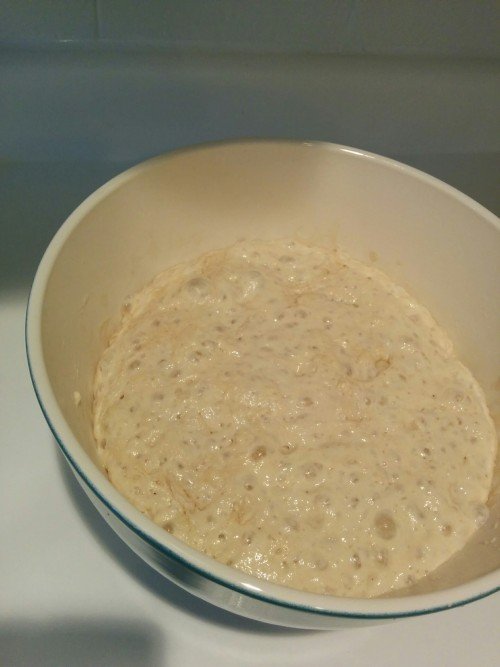
You shouldn't have much flour left at the bottom of the bowl; it should all be incorporated. Place a piece of plastic wrap over your bowl, and let it sit on the counter for 6 hours, or overnight.
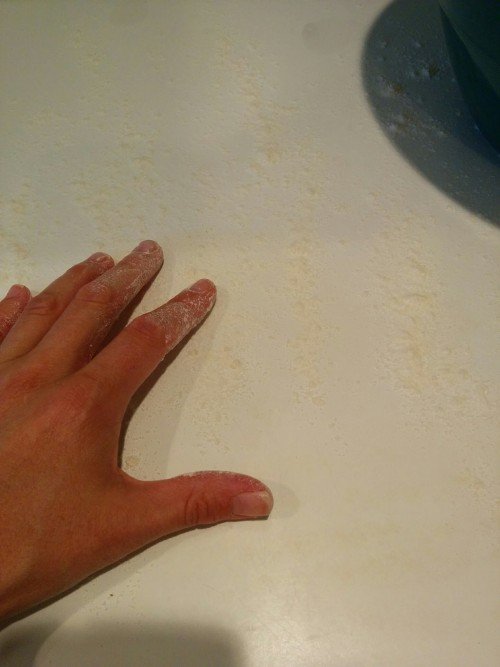
In the morning, lightly dust some flour on your work surface and keep flour on your hands.
Peel your risen dough out of the bowl and put it on your dusted surface.
Lightly dust the top of the ball of dough. Now, fold the dough over on itself a couple times and then put a piece of plastic wrap over the dough and let it sit for 15 minutes.
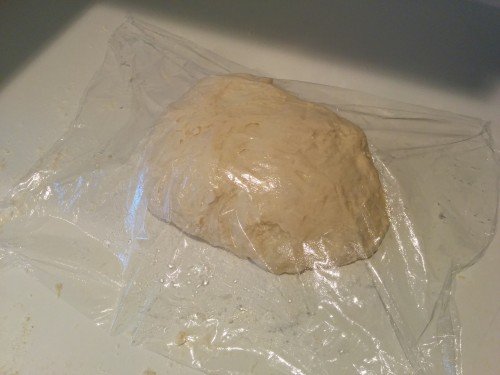
15 minutes is up. Lay out a clean cotton tea towel and generously dust it with flour. Leave some flour on your fingers. Take the plastic wrap off the top of your dough and quickly shape the dough into a ball by kind of pulling it up around the edges and bringing it into the middle. The point of this is to make a round shape with a seam in the centre.
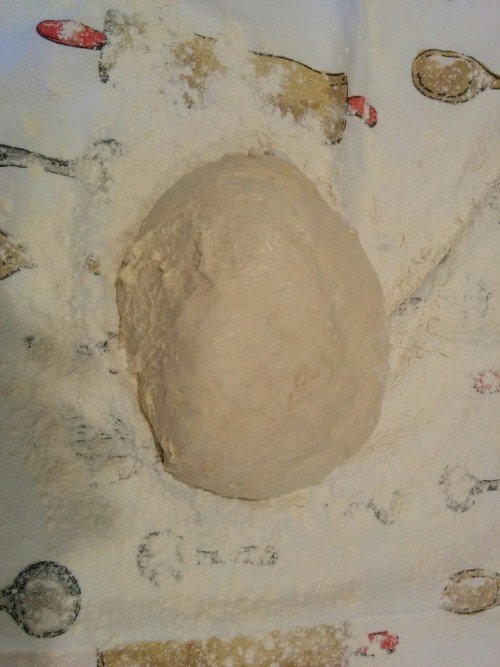
Now place your dough seam side down on the dusted tea towel, dust some more flour on top of your dough and lay another clean tea towel on top. Let your dough rise again for 2 hours.
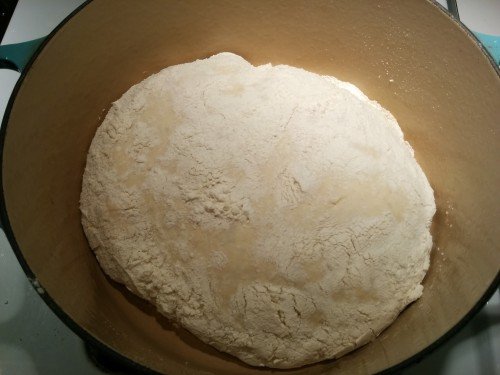
Put your oven rack in the middle position. Put your French oven (without the top) in the oven to warm up as you preheat the oven to 450 degrees F. Your dough is ready to bake into bread if you press your finger into it and it bounces back fairly easily. Remove the top towel. Lift the bottom towel which has your dough on it and gently flip the dough into your hot French oven, seam side up.
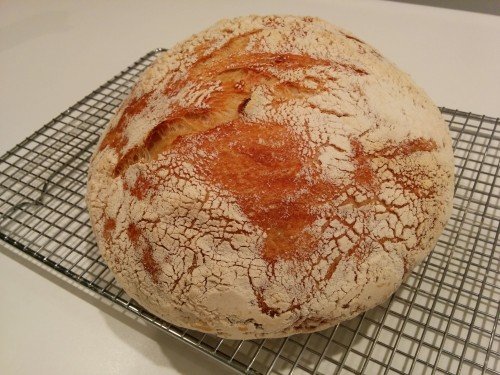
Place the lid on, put it into the oven and bake for 30 minutes. Remove the lid and continue to bake for 15 to 30 minutes more. That's it! Your crusty French oval is done to perfection if it is beautifully browned. Remove the bread from your French oven and cool your masterpiece on a rack. Serve warm, if possible.
If I see this meme again I'll shoot myself.
That's not very positive, @positive.
Realy?
upvoted because most women just mindlessly take pictures of themselves and you actually posted some type of content
Thank you for the encouragement!
When I've baked bread in the past, I kneeded quite a bit, something it seems you're not doing at all. I find that very interesting.
This is one of the things that makes going low-carb so difficult. :^)
That's why I like this recipe so much. No heavy lifting. And the crumb and flavour is very nice. Thanks for your comment.
Great step by step pictures. I love it!
Welcome to Steemit! I will try your recipe, looks like a very good bread :)
very good recipe and that bread looks delicious.
That is a post that is absolutely irrelevant for me, but it has a bit substance and you worked for it. In the cooking/baking category it is one of the best posts and thats why you deserve up votes. Good luck on steemit :)
Thanks!
BRB making this!
you should write more about your recipes. Good post!
Thanks!