Create MVC(Model View Controller) Structure in Slim Microframework part-1
This tutorial we will learn how to set the structure of slim applications, if we want to build a full web application, not just as a RestApi. So the purpose of this tutorial gives you an idea of making the MVC system in Slim. Because when we use slim, slim does not come with MVC system, therefore for those of you who want to use Slim as full web application, you will be very helpful with this tutorialjust start we start this tutorial.
What Will I Learn?
- Create a View and Controller Structure in Slim
- Use Psr-4 Autoload
- Inject Container in Controller
- Use Templating Twig and Combine With Routing System
Requirements
- Install Slim >= 3.0
- Localhost (xampp,wampp or etc)
- Intermediate OOP PHP
Difficulty
- Intermediate
Preparation
Before you start the following slim MVC tutorial, make sure you have learned basic slim. I have listed it in the curriculum section .Cause I will not explain it from the beginning.Slim structure is very flexible, slim structure that I make is the best in my opinion. You can make this tutorial as a reference to create your own MVC system.
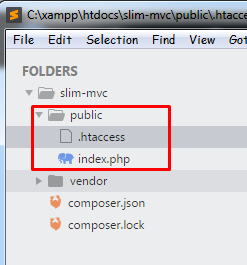
1. Public folder
In the public folder I will create the index.php and .htaccess files .
<?php
require '../bootstrap/app.php';
require '../bootstrap/container.php';
require '../routes/web.php';
$app->run();
require '../bootstrap/app.php'; : I will load all the vendors in this file, and put the instance of slim.
require '../bootstrap/container.php'; : I will put the container I created in the container.php file and I will import in this index.php file.
require '../routes/web.php'; : Import routes in folder routes and file web.php
RewriteEngine On
RewriteCond %{REQUEST_FILENAME} !-f
RewriteCond %{REQUEST_FILENAME} !-d
RewriteRule ^ index.php [QSA,L]
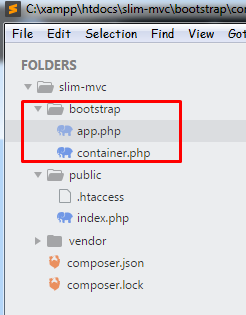
2. Bootstrap Folder
I will create a folder called bootstrap. this is not the bootstrap name of the css framework.
in the bootstrap folder I will create two files app.php and container.php.
<?php
require __DIR__ .'/../vendor/autoload.php';
$app = new Slim\App([
    'settings' =>[
        'displayErrorDetails'=>true
    ]
]);
require __DIR__ .'/../vendor/autoload.php'; : To load all file in vendor with autoload.php.
'settings' =>[ : To show error if there is an error. This setting for development mode only
'displayErrorDetails'=>true
]
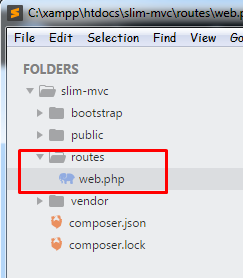
3. Routes Folder
In the folder section of the routes, in accordance with its name, this file contains all the routes in our slim application. in the routes folder, We have web.php
<?php
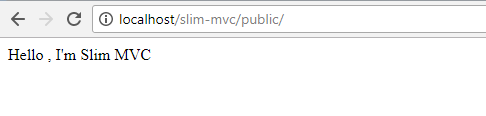
$app->get('/', function(){
return "Hello , I'm Slim MVC";
});
So far we will check whether the folder structure that we created is correct. I will check the routing $app->get('/', function(){} and will return the value return "Hello , I'm Slim MVC";. If it does not happen error then we will see its result like this .
Make View of MVC Structure
In this section I will create 'V' in MVC structure. i will use template system from twig. so. the first step that we will do we must create a container for view twig.
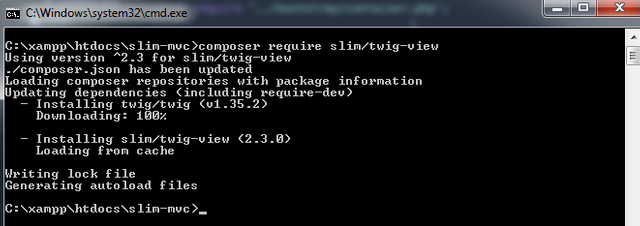
composer require slim/twig-view
Well now we have installed twig in our application. but to use it we have to register it in app/container.php. Because we have determined that every container we create must be registered in container.php file.
<?php
$container = $app->getContainer();
//container twig view
$container['view'] = function ($container) {
    $view = new \Slim\Views\Twig(__DIR__.'/../resources/views', [
        'cache' => 'path/to/cache'
    ]);
    // Instantiate and add Slim specific extension
    $basePath = rtrim(str_ireplace('index.php', '', $container['request']->getUri()->getBasePath()), '/');
    $view->addExtension(new Slim\Views\TwigExtension($container['router'], $basePath));
    return $view;
};
$container = $app->getContainer(); : This function is used to load all container
which has been registered.
It is important to remember__DIR __. '/ .. / resources / views' is our view file directory. so make sure your directory points to the correct folder. in this tutorial I will put my view in the resources / views /

<?php
$app->get('/', function($request,$response){
return $this->view->render($response,'home.twig');
});
return $this->view->render($response,'home.twig'); : We can use twig in this way, this-> view is the name of the key we registered in the container. render() is used to render twig view. I have created a home.twig file its contents very simple just to test whether our templating system is sync with routes.
home.twig
<h3>I'm templating from twig and I'm integrated with the route system</h3>
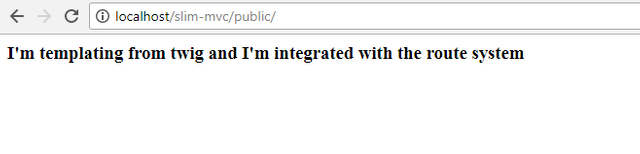
If there is no error then you will see the home.twig file renderred well.
Make Controller of MVC Structure
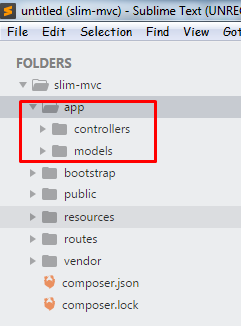
We get to the controller part, I will start to create controller by creating app folder and inside app folder i will create two folder , they are controllers and models.
Now what is important for us to do is how the controller file in the folder can access in index.php, of course will be tired really if we must require one by one in the index.php . And we also do not know which controllers and models we need. the bigger the application we make will be the bigger the file size. of course this would be a problem to maintain it. to handle it. I will use psr-4 system.
{
    "require": {
        "slim/slim": "^3.9",
        "slim/twig-view": "^2.3"
    },
    "autoload":{
        "psr-4":{
            "App\\": "app"
        }
    }
}
"App\\": "app" : "App\\"is the namespace system we will use. and "app" is the name of the folder that we will load.
Well after we specify its autoload system, we must update composer.json, in this way :
composer dump-autoload -o
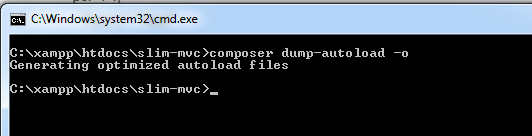
After that I will do a little test to find out if the system psr-4 autoload successful.
For those of you who do not know at all what a controller is. controller is a bridge between our routing system and also the data. routing will then see what url we access and will determine what controller will be in use. later the controller will determine the response in the form of view or json.
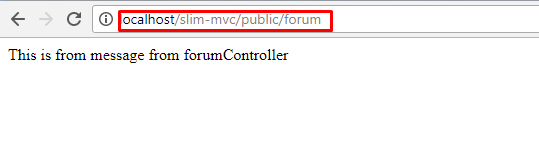
1. Created forumController
Create a controller that is placed in the app-> controllers folder. the name is forumController.
<?php
namespace App\Controllers;
class forumController{
    public function index(){
        echo "This is from message from forumController";
    }
}
namespace App\Controllers; : To user psr-4 autoload.
public function index(){} : This function names that we can use in the route system.
$app->get('/forum', 'App\controllers\forumController:index'); :
I added a new routing to test whether the controller is connected to the routing system.
App\controllers\forumController the controller directory. and :index is the function name that resides in the forumController.
To test it we can open it on localhost by '/ forum' routing, if it works we will see the contents in the index function in the forumController.
<?php
namespace App\Controllers;
use Interop\Container\ContainerInterface;
class forumController{
protected $c;
public function __construct(ContainerInterface $container){
$this->c = $container;
}
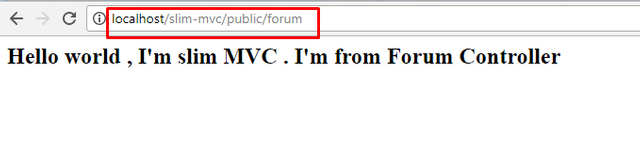
public function index($request,$response){
return $this->c->view->render($response,'home.twig');
}
}
use Interop\Container\ContainerInterface; : To get access to the container . We use this file.
protected $c;
    public function __construct(ContainerInterface $container){
        $this->c = $container;
    }
protected $c; : Provide a variable that will be used later to accommodate $container. I will put the container in the __construct function. __Construct is the function that will first be called.
Now we can use container view inside the controller this wayreturn $this->c->view->render($response,'home.twig'); .
If there is no error then we will see the contents of the home.twig.
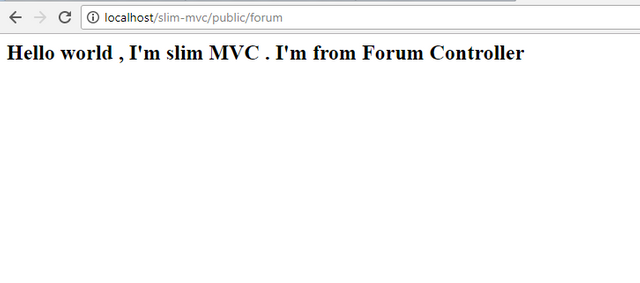
<h2>Hello world , I'm slim MVC . I'm from Forum Controller</h2>
We finished finishing the mvc structure in slim, but this tutorial only talk about VIEW and CONTROLLER, in part-2 i will discuss more about model, later we will use eloquent on slim in model part. -thank you for following this tutorial. hopefully useful for you. thank you
Curriculum
- Templating Twig in Slim https://utopian.io/utopian-io/@alfarisi94/how-to-use-twig-templating-in-slim
- Eloquent in Slim https://utopian.io/utopian-io/@alfarisi94/how-to-use-database-eloquent-in-slim
- Routing System in Slim https://utopian.io/utopian-io/@alfarisi94/how-to-install-slim-and-basic-routing-system-in-slim
- Slim MVC part-2 https://utopian.io/utopian-io/@alfarisi94/create-mvc-model-view-controller-structure-in-slim-microframework-part-2
Posted on Utopian.io - Rewarding Open Source Contributors
Thank you for the contribution. It has been approved.
You can contact us on Discord.
[utopian-moderator]
Hey @alfarisi94 I am @utopian-io. I have just upvoted you!
Achievements
Community-Driven Witness!
I am the first and only Steem Community-Driven Witness. Participate on Discord. Lets GROW TOGETHER!
Up-vote this comment to grow my power and help Open Source contributions like this one. Want to chat? Join me on Discord https://discord.gg/Pc8HG9x