Web Application Development Lesson 1 - HTML Layout
Introduction
Hi guys, I recently put out a post asking if anyone would be interested in learning how to build web applications using HTML, CSS, JS and Flask. I got a decent response almost immediately, so with that let's talk about what I am going to be teaching you guys and how this is going to be laid out.
What will you learn?
- Basics of HTML
- Basics of CSS
- Basics of Javascript
- Basics of Python
- Basics of Flask
- How to build a web application with all of the above languages.
I will cover the fundamentals of each topic over a number of Lessons, once we have covered the basics of each area, we will create our very own Flask web application.
prerequisites
I will add more prerequisites throughout the lessons, but for now, you will need the following.
You will require a text editor such as Pycharm or sublime, but for this lesson, you can use any text editor that you feel comfortable with. I am going to be using Pycharm as this is my IDE of choice.
Once that is installed launch the program and create a new project.
HTML and CSS
When planning to build a website, you should always have in mind what is that you want to achieve. I think it is a good idea to draw out a rough design layout so you have a visual reputation of what it is that you are going to build.
In this tutorial we will be creating a very simple layout, once that is done we will play with some HTML and CSS tricks within the layout.
Here is a diagram of the simple layout that we will create.
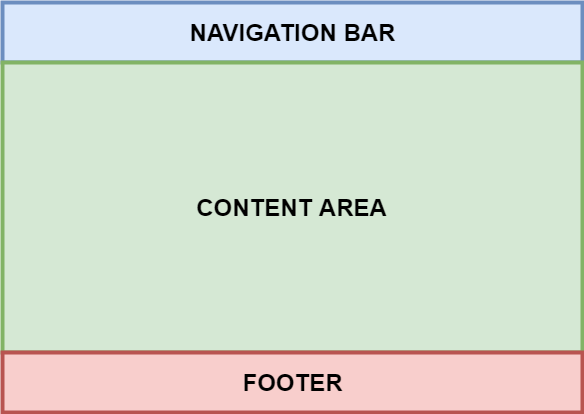
In this diagram, we have a Navigation bar, a body for all of our content and a footer. So we are going to begin this lesson by building this layout.
In your text editor if you haven't already, open a new project, for people using Pycharm just click on file > new project > pure python > create.
Now right click on the folder on the top left, click new and select HTML file.
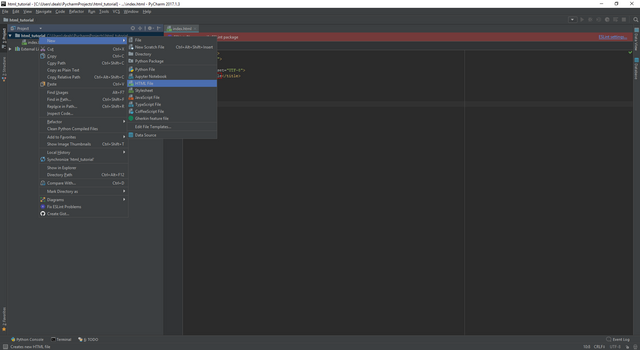
you will be presented with some text like this.
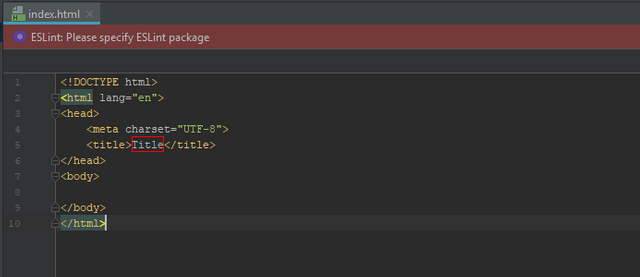
Let's go over what we are seeing here.
<!DOCTYPE html>
so that the browsers render the content correctly, but HTML 5 does not require this line, it is just a default from Pycharm as previous versions of HTML required this.<html lang="en">
The HTML lang attribute can be used to declare the language of a Web page or a portion of a Web page. This is meant to assist search engines and browsers.<head>
The head tag contains all information for the header, In this tag, you can place links to reference CSS or scripts, which we will cover later, But also to display a title, this will be displayed in the tab at the top of your web browser.<body>
The body tag is for placing all of the content you want people to see on your site. Anything placed in the body tag will be visible on the site.
Every tag needs to be ended by using a </ followed by the rest of the original tag. Example <body> </body> If you do not end tags correctly you will run into visual errors that can really affect your site.
Lets build this layout!
copy and paste this code into the body tag:
<div class="topnav">
<a  href="#home">Home</a>
   </div>
Then copy and paste this code below the above code.
<div class="body-content"> THIS IS THE BODY CONTENT!</div>
Then finally underneath your </body> tag so at the end of the body tag, paste
<footer class="footer_colour"> THIS IS A FOOTER</footer>
Let's discuss what we have just done.
<div>
A<div>is pretty much a container of sorts, where you can place content, Think of it as a small body tag. It will allow you to separate parts of your website.Classes
A class allows us to call in CSS into that class, which will affect the behavior of the thing the class is attached too.
Above we have a div with a class of topnav, This is going to create our navigation bar.
For now you can ignore the <a tag, I will cover this later. But the Home will be displayed in your nav.
Then below your body tag, you have pasted a footer. A footer is the end of your website, things like contact information or links to social media platforms generally are placed in here.
Now to make this work we are going to use some CSS magic, I am going to give you the code and tell you what to do with it, But I won't explain how this works just yet. That will be for the next blog! :D
Copy and paste this code directly underneath all of your current code. Including the body and HTML tags.
<style>
    /* Add a black background color to the top navigation */
.topnav {
    background-color: #00BFFF;
    overflow: hidden;
}
/* Style the links inside the navigation bar */
.topnav a {
    float: left;
    color: #f2f2f2;
    text-align: center;
    padding: 14px 16px;
    text-decoration: none;
    font-size: 17px;
}
/* Change the color of links on hover */
.topnav a:hover {
    background-color: #ddd;
    color: black;
}
/* Add a color to the active/current link */
.topnav a.active {
    background-color: #4CAF50;
    color: white;
}
.body-content{
    height: 500px;
}
.footer_colour{
    background-color: salmon;
}
 .body-content{
    background-color: #4CAF50;
    }
</style>
Now that is done, if you're using Pycharm navigate to the right-hand side of Pycharm and some browser links will pop up, click the browser you currently have installed.
Once you click that you should be presented with your layout!
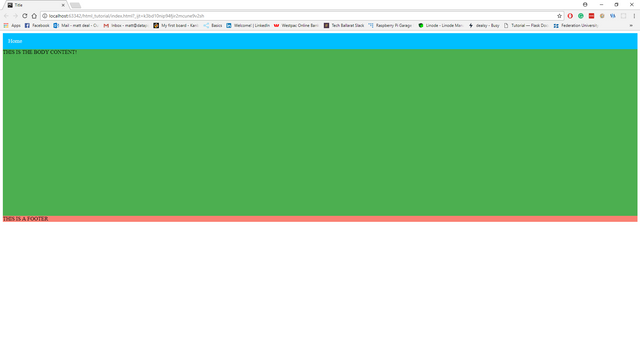
Congratulations! you have created your first HTML layout.
In the next lesson we will discover CSS and how that affects the behavior of classes it is attached to.
I hope this has given you some insight into HTML! This is a very basic look at the bare minium of HTML. If you want to learn more feel free to leave a comment and I will be happy to answer!
As always thanks for reading!
Nice work Dealsy, another great alternative for beginners would be Notepad++
This is true for HTML and CSS . But I'd rather people use an ide since we will be moving into python and flask :p
Congratulations @dealsy! You have completed some achievement on Steemit and have been rewarded with new badge(s) :
Click on any badge to view your own Board of Honor on SteemitBoard.
For more information about SteemitBoard, click here
If you no longer want to receive notifications, reply to this comment with the word
STOP