How to Draw Lips
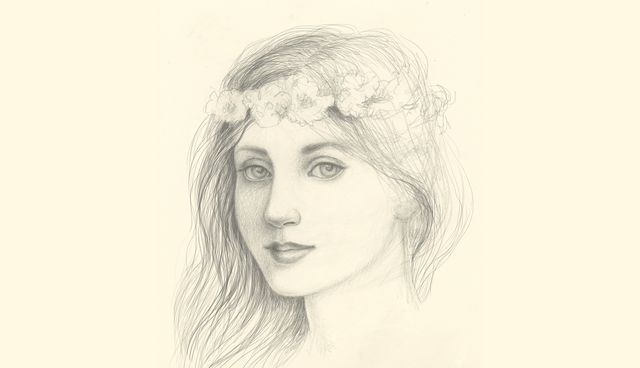
When it comes to sensuality, lips are second only to eyes. In order to be able to draw expressive lips, you must first understand how they attach to the face.
Lips are revered in human sexuality. If you can learn to draw lips well, you will be in touch with a whole new level of your own sexual energy. Use your lips to explore. Be fully present as you kiss your significant other. Learning to draw begins with touching your own lips - get familiar with their delicate curves and indentations. Feel their sensitivity. And then get to know the parts.
It would be remiss to do a lip tutorial without quoting William Shakespeare from my favorite play "Romeo and Juliet." Nowhere else have I read such an ode to the lips. I read this ode as performed by Leonard Whiting and Olivia Hussey in the 1968 classic Franco Zeffirelli film. It is a moment alive with sexual tension – as are the lips.
Romeo:
If I profane with my unworthiest hand
This holy shrine, the gentle fine is this:
My lips, two blushing pilgrims, ready stand
To smooth that rough touch with a tender kiss.
Juliet:
Good pilgrim, you do wrong your hand too much,
Which mannerly devotion shows in this;
For saints have hands that pilgrims' hands do touch,
And palm to palm is holy palmers' kiss.
Romeo:
Have not saints lips, and holy palmers too?
Juliet:
Ay, pilgrim, lips that they must use in prayer.
Romeo:
O, then, dear saint, let lips do what hands do;
They pray, grant thou, lest faith turn to despair.
Juliet:
Saints do not move, though grant for prayers' sake.
Romeo:
Then move not, while my prayer's effect I take.
Thus from my lips, by yours, my sin is purged.
Juliet:
Then have my lips the sin that they have took.
Romeo:
Sin from thy lips? O trespass sweetly urged!
Give me my sin again.
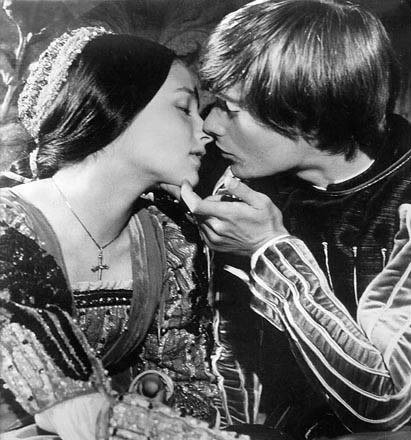
still from Franco Zeffirelli's Romeo and Juliet; see it if you haven't
Draw the lips in stages.
It’s helpful to break the lips down into a series of interlocking shapes. The upper lip and lower lip converge into the corners of the mouth. What happens as these two parts come together is vital for communicating an accurate representation of a mouth on a 2D surface.
Separated from the cheeks in two grooves called nasolabial furrows, the mouth acts as a bridge connecting the two sides of your face. It curves around the front following the shape of your skull.
When drawing a mouth, the tendency is to draw a straight line with two little peaks above and a longer swoosh of line below. This approach automatically flattens your drawing. You can’t create the illusion of 3D space with flat lines. It's much more effective to show a series of value curves and dips to give expressive life to the lower portion of the face.
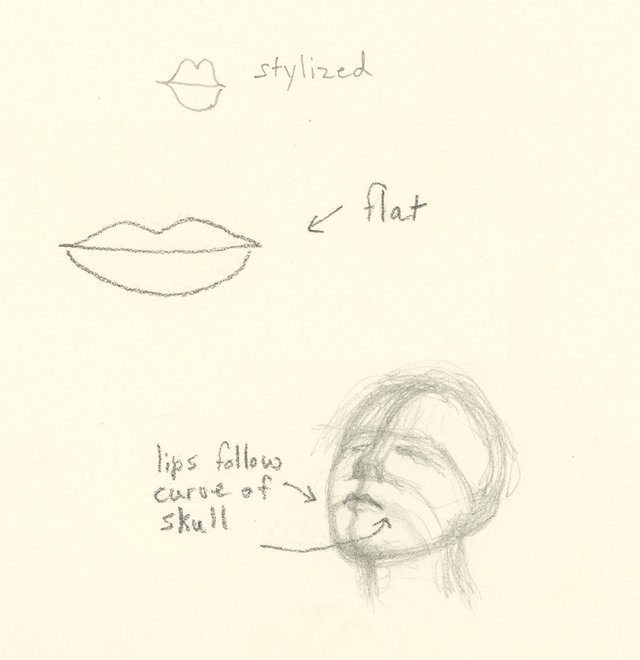
A quick sketch of the human head bent back reveals the trajectory of the mouth as it falls across the lower half of the face along the jawline.
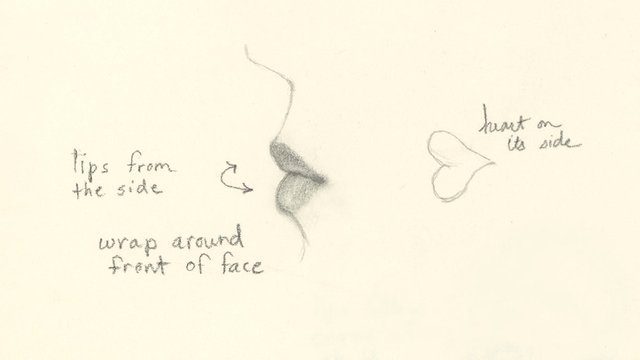
Think of the horseshoe shape of your teeth set into your jaw. The lips follows the same skeletal framework as it wraps around the front of the face. They arch backward from the center into "wings" that dip back into the corners of the mouth.

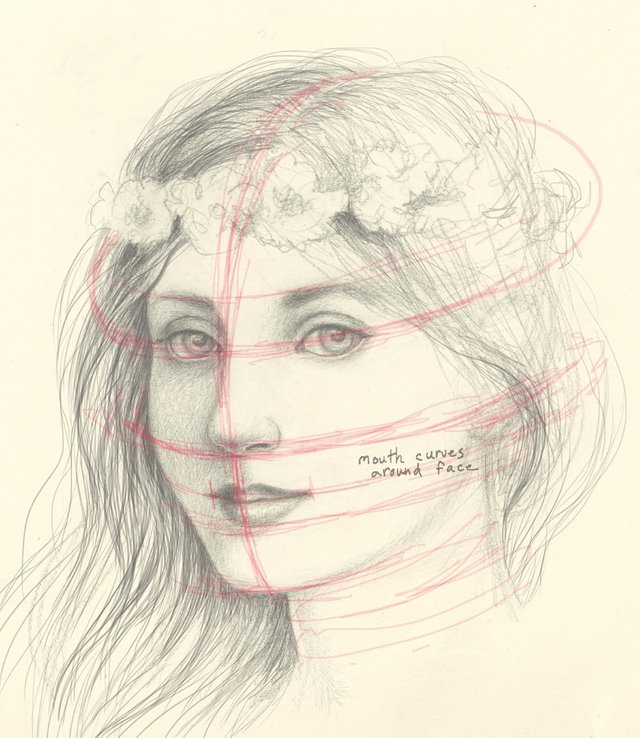
These red lines show how the features follow along the shape of the skull - imagine taking string and wrapping it around the head.
Let's begin with a loose sketch blocking in some curves. Notice how I use value instead of line. Any shape mistakes are easily corrected when you don’t get too dark too soon with your pencil. Remember, no lines exist in nature.
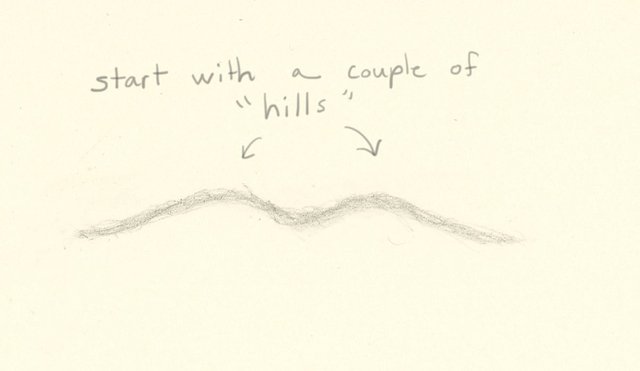
You can think of these as the bird shapes we used to draw as kids - it's a simple symbol of a bird in flight.
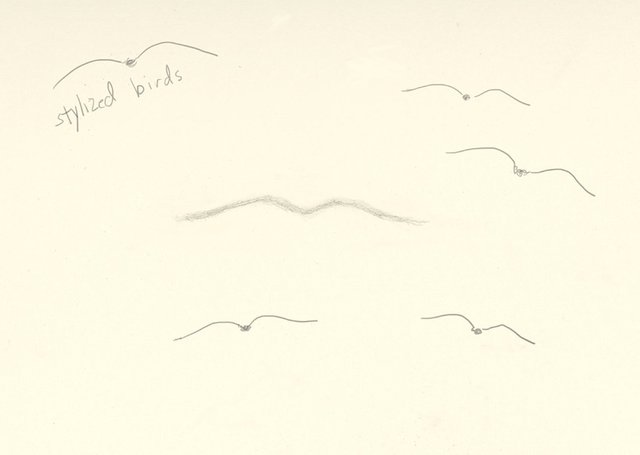
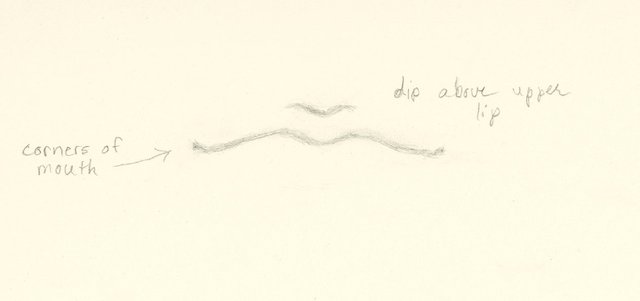
Emphasizing both corners of the lips begins to create volume; each side of the mouth recedes back towards the cheeks.
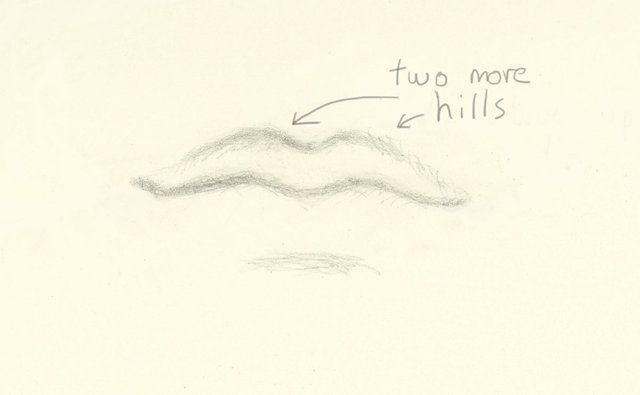
I sketched in two more “hills” above the first shape. This is what causes the dip at the top where your upper lip drops down. The center between this new double rise is known as the philtrum, a vertical indentation that runs from the bottom of your nose to the top of your upper lip.
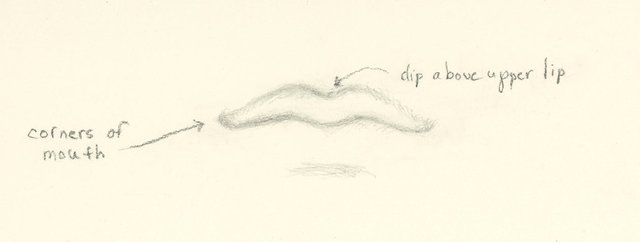
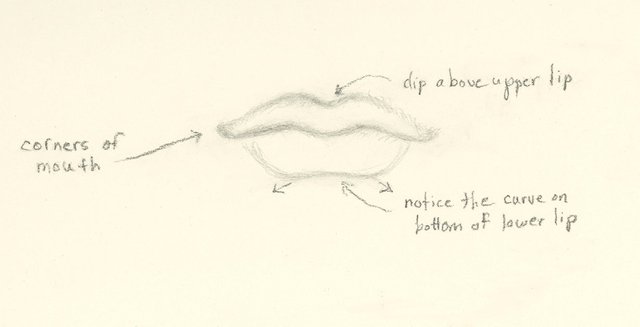
The directions of curves under the lower lip shoot off into diagonal down-sweeps. The bottom of the lower lip is not straight. Pay attention to its edge. It's similar to the top of an ellipse.
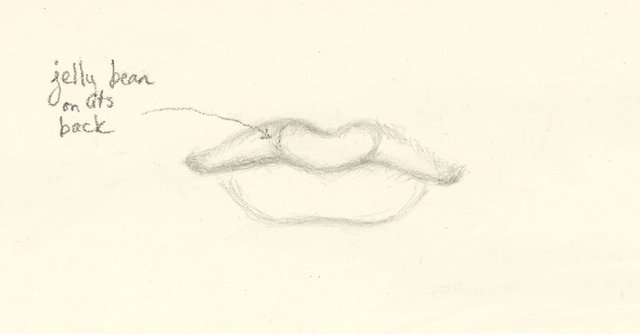
The tubercle is the puffier part of the middle upper lip that rests on a corresponding dip on the lower lip. It looks like a jellybean on its back.
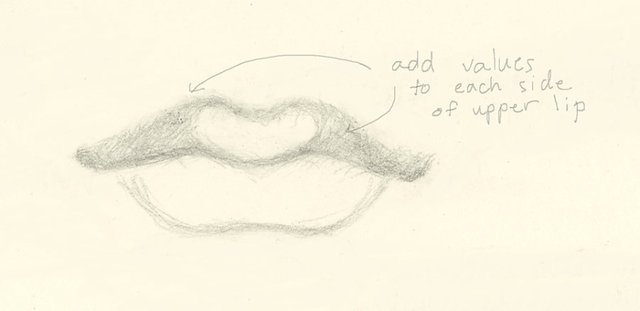
Think of that shape as you block in your structure with shadow tones. Leave the jellybean light to show that it is closest to the viewer on the face plane. Light comes forward, darkness recedes.
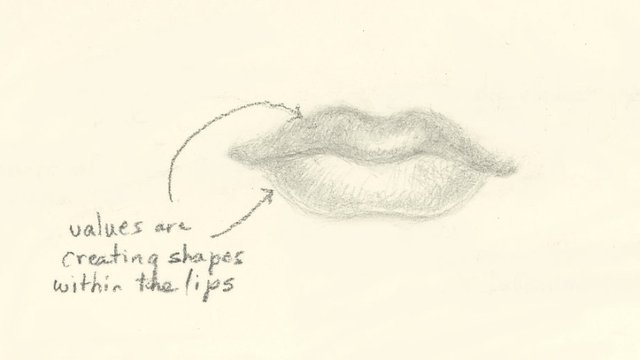
I start to add values to define the structure of the lips – still light layers of pencil so I can gradually add the darks necessary for the core and cast shadows. These would be the halftones.
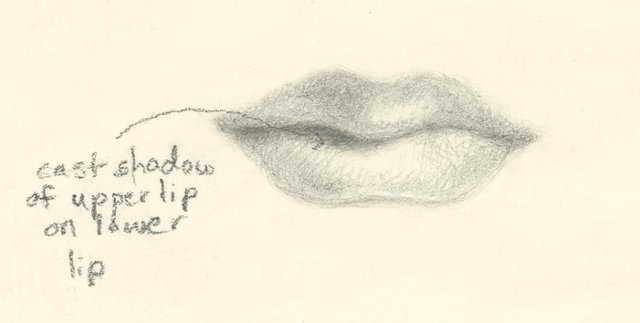
The upper lip casts a shadow onto the lower lip. Draw that shadow in as a shape. The cast shadow will help define the “line” where the upper and lower lips meet giving devision without the use of an unforgiving line.
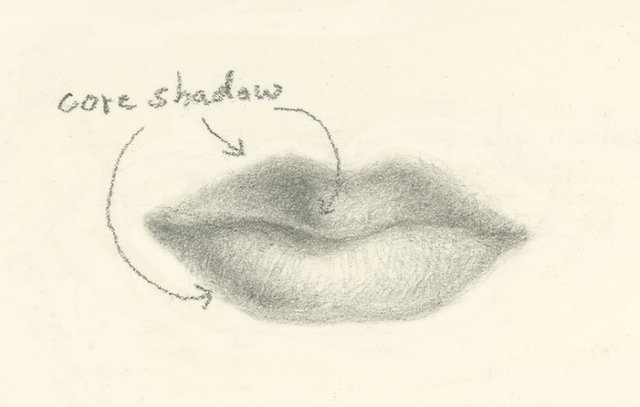
Here are the core shadows – they follow the same rule as light hitting the sphere. (Sphere here.)
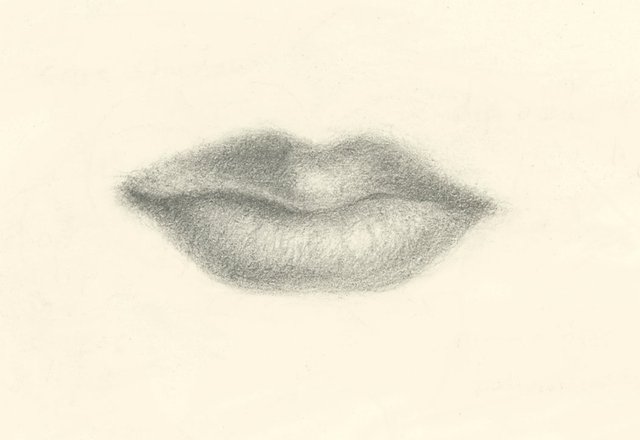
The lips become more lifelike as I blend a variety of values together. The right corner (the left of the lips) needs more contrast in the corner. Be mindful to constantly adjust the shadow shapes.
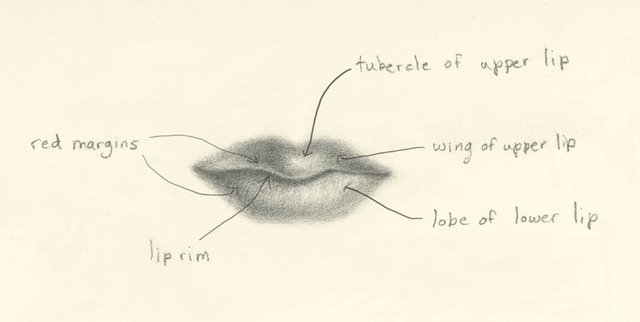
Here is an anatomical diagram of the mouth showing its parts.
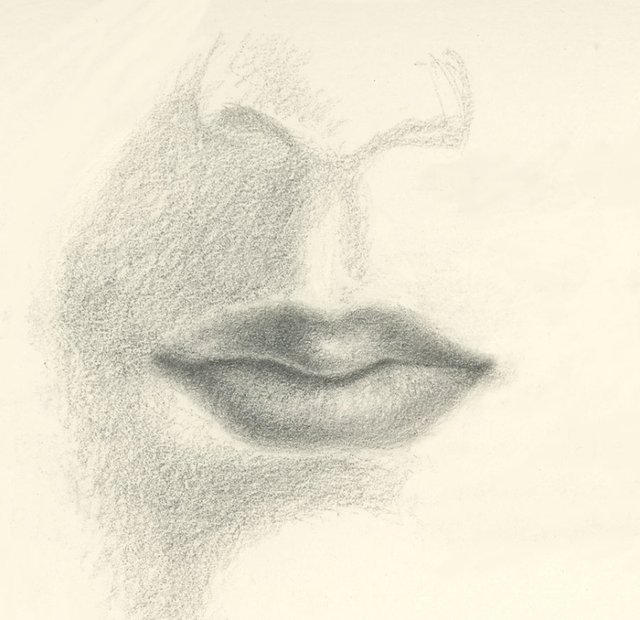
Next I block in some tone on the face and add a suggestion of a nose.
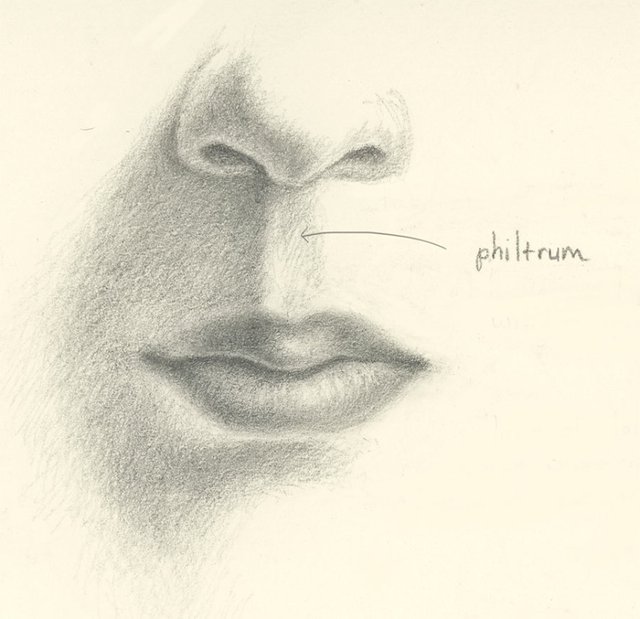
Rendered in value, it becomes clear to see how the mouth bends back across each side of the face into its corners. Having some value on the left side of the face reiterates the curve of the lips on the frontal face plane.
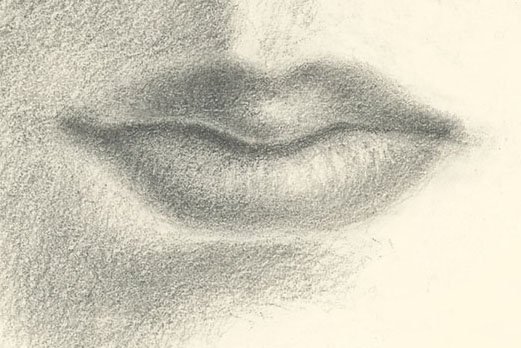
And the final drawing.
Lips aren't as simple as you think to draw, but when broken down into a series of shapes that follow a formula for the pattern of light and shadow, they become much more manageable and make sense. Look at your face in the mirror. Turn from side to side while looking. You can see how the shape of the mouth is completely determined by and follows the frontal curve of the skull.
With practice, your new understanding of how the mouth attaches to the face will make a huge difference in the how well you create accurate renderings of the face and its features. Lips are vital to the expressive quality of portraits.
Drawings © Johanna Westerman 2016 for this steemit tutorial
I am going to show this to my 8 yo daughter. She loves drawing and she is very much moving towards stylized or conceptual drawing. Which i think is great. Conceptualizing an object is a great tool for rational and philosophical development. Picasso de conceptualized, concepts so it is also an artistic view in many ways. But drawing with proportions and perspective is also an integral part so thanks for sharing. I have never seen a better guide than this :-)
Wow, @mandibil. Thank you so much for your kind words. I have many more of these planned. I think the key to understanding drawing of any kind is perspective - especially as it pertains to the human form.
Awesome! Could you do one on noses maybe (I may be stretching the relationship here)? :P
I find them really difficult. Followed. Upvoted.
Thanks, @darknet. Here you go: https://steemit.com/art/@fairytalelife/how-to-draw-a-nose
Your how to draw tutorials are great. As one of your followers, I typically look forward to seeing what you are going to post next.
Thank you for the compliment, @toxic. I have more in the works!
SO GOOD! Lips are so hard. I'm using all of your tutorials with my students this semester :) thanks!
Thanks, @storyseeker. Coming from you, that means a lot!
Its real woman? Or do you come up her?
I made her up -
You have a very good imagination!)👍
Thank you!
WOW! It is very interesting!
Thank you, @linka
Very nice post @fairytalelife
Many thanks, @marius19
cool
These are really good. Were you classically trained?
Thanks, @rampant. I guess you could say that. But I'm always learning, and doing these tutorials have "re-taught" me many things I take for granted in my own work.
This was very helpful! I have never thought about the fact that lips follow the curves of the head. Suddenly 3/4 view lips made sense. I struggled a lot with that when making my anime illustrations, so I ended up dropping 3/4 view all together. Definitely going to give it another try the next time a draw humans :D
Thanks, @pixielolz. Knowing that one thing about the curve of the face helped me enormously. I couldn't figure out the problem for the longest time. Then I looked at the skull and it made sense.