How to Categorize and Share your Steemit Posts!
Would you like to know how you can easily categorize and share your Steemit posts using an app because this might be useful for you if you have a lot of posts and need to organize them?

From time to time I am asked questions that I already answered in one of my Steemit posts and instead of trying to explain again, just linking to one of my posts is what can be most useful.
The problem is that I know I wrote a post that answer a particular question, but I can't remember the title of the post or where the post is. I try to search for it using the Steemit search, sometimes it works and sometimes it doesn't. I end up spending ten minutes just to find one post in the total of 250 plus posts I have.
Unfortunately, a Steem blog is not like a WordPress blog where you can assign categories like "Steemit Tools" or "Travel" that you can then access from the sidebar.
I first wanted to make some kind of link directory on my WordPress blog, and then enter manually every Steemit post title, description, thumbnail and URL. Disappointingly, there is not a lot of choice for link plugins, I found one at $30 with one year free updates and too many options, and another one at $22. I didn't like them for what I wanted to do, which is just bookmark posts.
So, I searched for bookmarking apps and found one, which is awesome, and that I am very excited to share with you.
How to Categorize and Share your Steemit Posts!
The app I am showing you today will work on your PC or Mac computer, but also your Android phone or iPhone. It is a FREE application called "Raindrop.io," which is an all-in-one bookmark manager that you can get here: https://raindrop.io/
They also have a Pro version at $3 per month if you want to take advantage of all the features they have, but for what I am showing you today, the free version is sufficient.
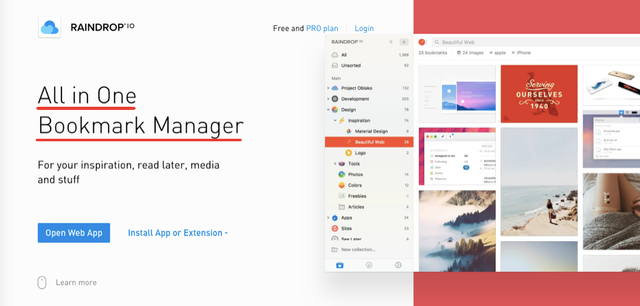
They say that you can save anything from around the Web and this must be true, because you certainly can do more than bookmarking your own Steemit posts.
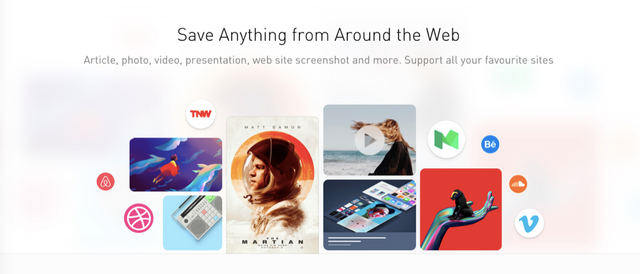
After having already bookmarked 23 of my posts, I can confirm that you can organize with ease.
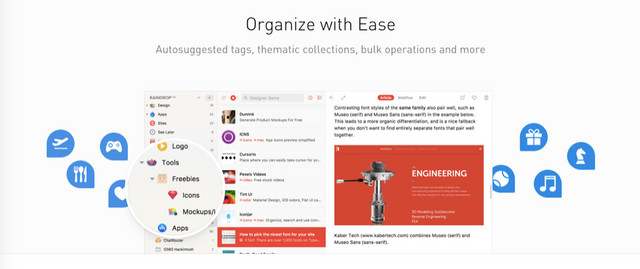
There is also a very efficient search engine and if you have tagged your posts, you will find what you are looking for fast. You can work collaboratively on your collections and share them publicly, or keep them private.

Are you ready to get started with me?
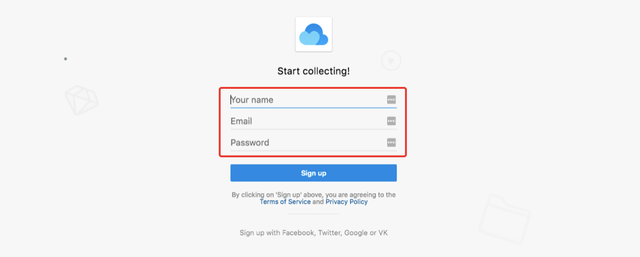
You first need to create a free account here: https://app.raindrop.io/?#/account/signup
You can sign-up with and email or use Facebook, Twitter, Google or VK.
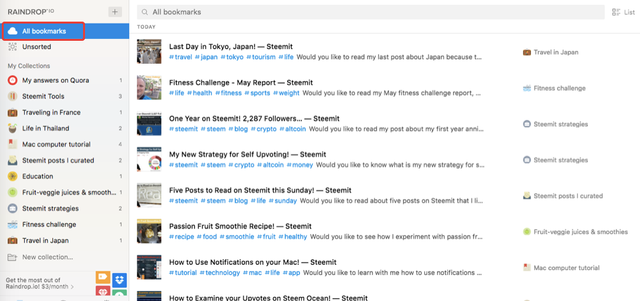
When you are logged in, you will see your bookmarks like this below, and if you are just starting, there will be none.
The next thing to do is to install the extension for Chrome or other browsers (Firefox, Opera & Safari).
You have to click the "arrow down" icon at the bottom of the left sidebar to access the extensions.
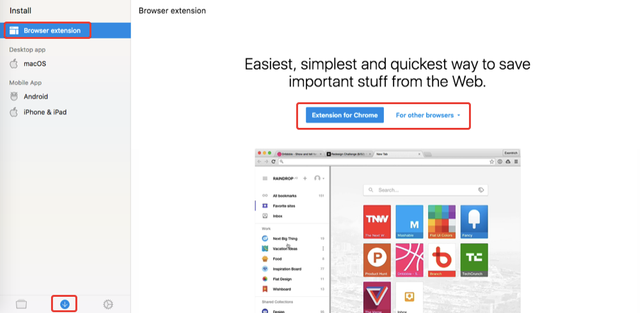
You can also install a macOS app, which I didn't try yet and mobile apps.
This is the Chrome extension ready to install, click "Add extension."

The extension will show as a small cloud icon and it is what we are going to use to bookmark all our Steemit posts.
When I click on it, you can see the existing bookmarks and collections just the same as in the web app.

Let's try to bookmark this post together: A Walk in a Street of Tokyo, Japan!
This post has to go in the "Travel in Japan" collection that I created earlier, so I click on that first, and then I click on "Add Bookmark."

The bookmark is added to the collection, and then I can click "Edit" to add the tags.

You can see that the bookmark already has a title, a description and the thumbnail from the post, without me having to do anything.
I just want to add the same tags I used in Steemit in the bookmark. So, I type them one by one, and this will be useful later to search bookmarks.
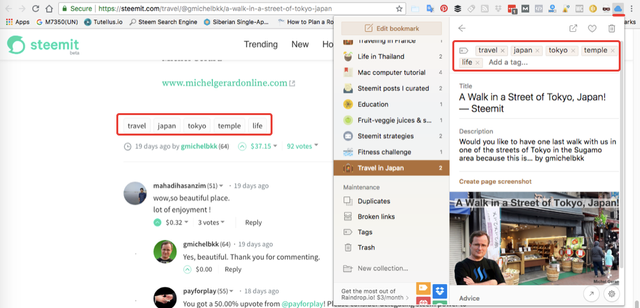
That's how you can add easily all your posts one by one. It will take some time if you already have a hundred posts, but if you bookmark each of your posts just after you have published them, then this will take 30 seconds.
Now, you can create new collections directly in the extension like you can see below.

I created a "Fundition projects" collection where I can save all Fundition projects.
The process is the same, just click the collection you want to add the bookmark to, and then click on "Add Bookmark."

You can edit the bookmark here to add your tags if you want to...

... or you can go back to the web application and edit it from there. You will see your last bookmark at the top of the "All bookmarks" section.

This will show the editor like this below.
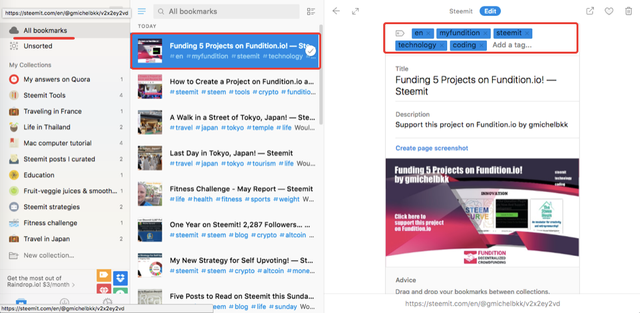
I prefer to use the extension to add the tags because you can see the tags to copy on the Steemit posts at the same time.
Now, you can also add a bookmark to the "Unsorted" section if you don't know yet where it should go.
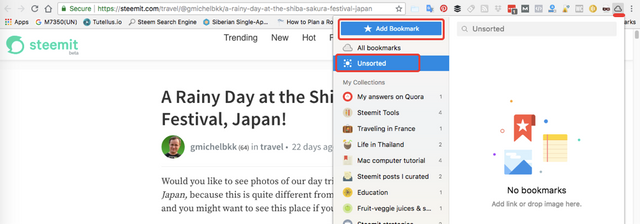
The added bookmark can also show as a card as you can see below.

When you know where to put your new bookmark, you can just drag it from the "Unsorted" sectionto the chosen collection in the web application.
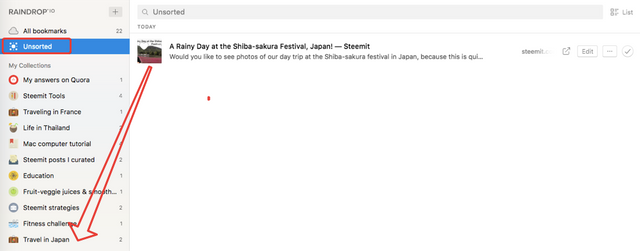
If you have used tags for your bookmarks, now is the time to enjoy very accurate searches.
At the top you can see some of the tags used and if you click "All filters," they all will show.

These are all the tags used so far for "All bookmarks." Notice that there is also a "Favorite" filter that you can use when you favorite your bookmarks. It's just a little heart you have to click on the bookmark.

If I want to see the posts about "Japan," then I just click the #japan tag.

I can also sort by date, name, popularity or sites.

These filters also work within collections.
There are different ways that you can see your bookmarks and the one you see below is for "List."
You can access the options from the top right icon.

You can make the thumbnails bigger if you wish.
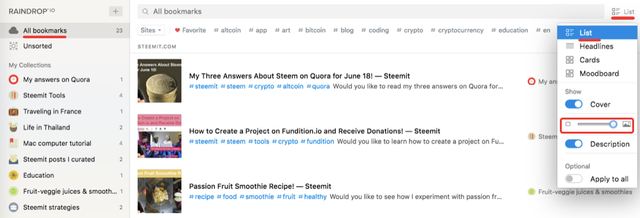
The second option is for "Headlines."
There is no thumbnails.

The third one is "Cards" and it is my favorite option because the bookmarks are easily identifiable.
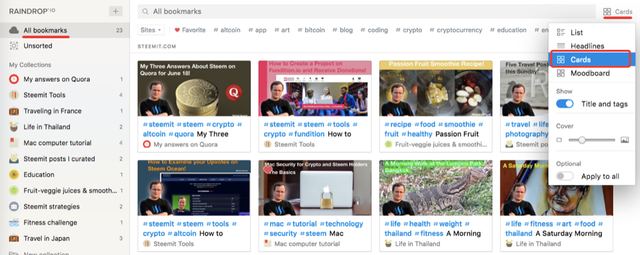
The fourth option is "Moodboard" and is similar to "Cards" except that the size of thumbnails will vary.
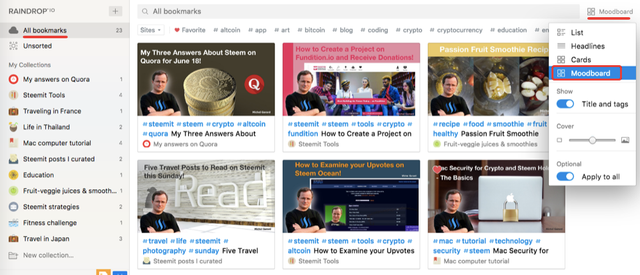
There too, you can make your cards smaller or bigger like the image below, and when you have it to your liking, you can select "Apply to all."
The "Share" option will only work in "Collection."
If you are in the "Steemit Tools" collection, for example, you will see the "Share" icon at the top tight.
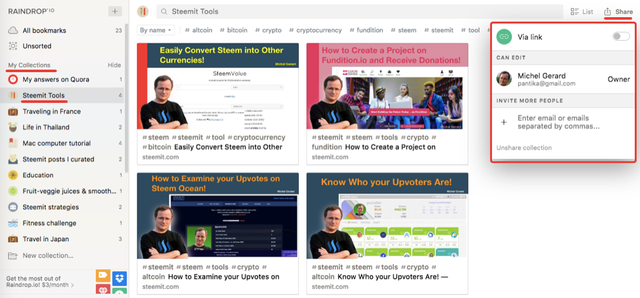
By default, the collection is "Private" and you can select "Via link" to share a link like this: https://raindrop.io/collection/4857738
If you click that link, it will show all my posts about "Steemit Tools," the one that are already there, and the future posts that I will add to it.

You can also invite people by email to see your collection.
Users that are not logged in "Raindrop" can see the collection like this and click on the bookmarks to access the posts. They can also use the different view options at the top right.
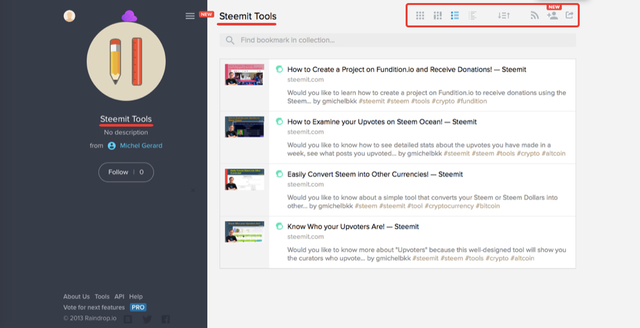
Any user can set the view like this if they desire so.
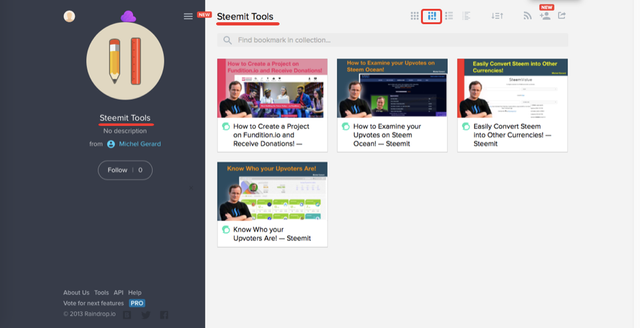
As the owner of the collection, and being logged in, I have the option to edit.

If you click on "Edit," you can add a description, change the icon, make the collection "Private."
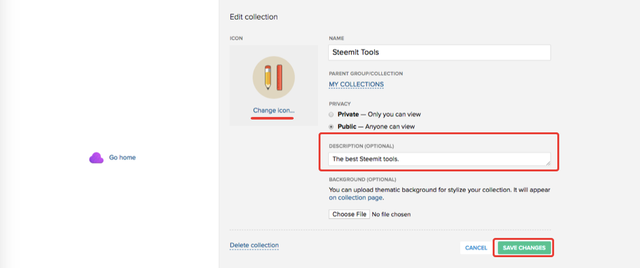
Click the "Save Changes" button when you are done.
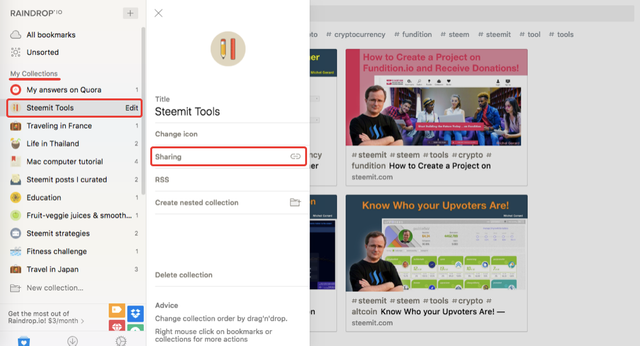
You can also edit the collection from the web application.
Click "Edit" and a panel will show up. There, you can see that your collection is "Public" in the "Sharing" section. You can change it from there, if you wish.
Another awesome feature is the "RSS."
You have one "Public RSS" feed and one "Private RSS" feed that you can use.
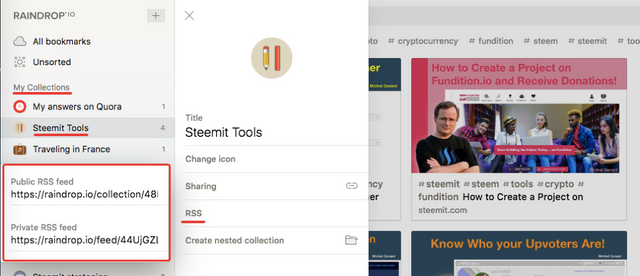
This means that they can be added to your favorite RSS reader or used on your WordPress site to show the bookmarks. It's what I will try to do next, so I can show my Steemit posts on my WordPress blog easily.
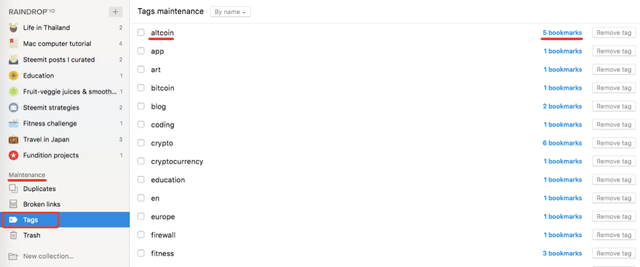
You also have a "Maintenance" section in the app and if we look at the "Tags," we can see how many bookmarks use each tag, you can sort them or remove them.
One last thing I want to show you is how "Raidrops" looks like on my Android phone.
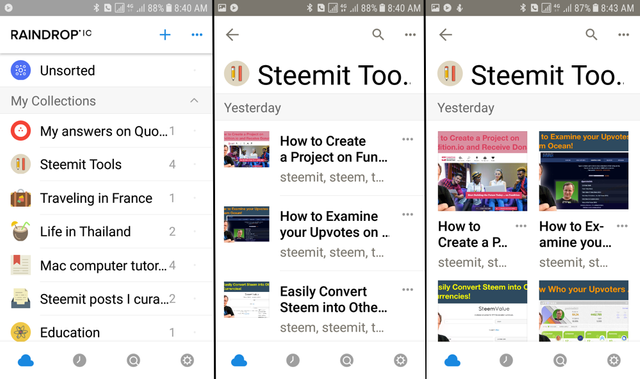
This is going to be very useful to find my posts from my phone too.
To end this tutorial, I'd like to share this collection: Steemit Strategies
I hope that you enjoyed reading this tutorial and that you will give "Raindrop" a try.
Would you upvote this post and follow me for more because this will encourage me to write more posts about useful apps like this one?
Would you please help @jerrybanfield become a top 10 Witness because he is in my opinion the witness who gives the most back to the community? Vote for jerrybanfield as a witness or set jerrybanfield as a proxy to handle all witness votes at https://steemit.com/~witnesses. Read the 5 reasons why I'm voting for Jerry Banfield as a witness and how to vote in my post. You may be interested to read: What is a Steem Witness, How to Vote and Why?
Michel Gerard
Great post:)
Thank you so much @sweettais.
We just made our SBD $ as our power (Steem-Power) to follow the Steemit event on the way.
thanks!
Thank you for commenting @razi04.
Very useful articles for Steemit member. You easily make your post undestandable. Everybody should follow it. Would you please post about" How to restreem on Steemit?" Thanks for sharing.
Thank you very much @sayemsonai for your kind comment. i am glad that you like my post. I wouldnot be the best author to write a post on resteeming because I resteem very rarely.
thanks for your contribution, already learned something again. also that you answered me yesterday, thank you. we are about to worry about it, have not yet done everything thoroughly read through. Thank you and have a nice day
Thank you @jaklassen for your kind feedback. I am glad that it is useful for you.
You got a 5.20% upvote from @upme thanks to @gmichelbkk! Send at least 3 SBD or 3 STEEM to get upvote for next round. Delegate STEEM POWER and start earning 100% daily payouts ( no commission ).
This post has received a 8.80 % upvote from @booster thanks to: @gmichelbkk.
Thanks for the introduction, I'm going to keep this app bookmarked in case I need it in the future. Right now I don't have many posts, still exploring what to write. Thanks again for your regular awesome posts!
Thank you @zhuwa for your comment and it's amazing that you are going to bookmark this bookmark manager.
Amazing post from you.
Always informed us something new.
good job.
Thank you very much @mahadihasanzim for your kind comment.
you are so pro in writing @gmichelbkk, I have so much to learn. Thank you
Thank you so much for your compliments @elvielins.