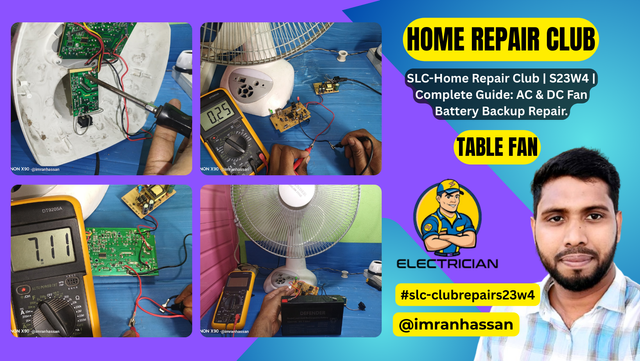
SLC-Home Repair Club | S23W4 | Complete Guide: AC & DC Fan Battery Backup Repair.
Assalamualaikum Everyone. I am @imranhassan
From #Bangladesh
Today's work summary:
Today I solved a simple but important problem—fixing the power backup of an AC DC 220 volt fan. The owner of the fan reported that it was supposed to run on battery power, but it was not working in battery mode when the power went out. To find out the root cause of this problem, I checked the connection of the circuit board and the power line.
First, using a multimeter, I measured whether there was any output voltage coming to the battery line. I found that the battery line was not giving any output. Then I checked the fuse on the circuit board and found that the fuse was blown. To repair the fuse, I shorted it using a thin transparent wire, which will act as a fuse in the future.
Main parts of a fan and their functions.
Motor Unit:
The main driving force of the fan is the motor. It can be a single-phase induction motor, which runs on AC 220V or 110V (depending on the country) electricity. Inside the motor there is a stator and a rotor, which create a magnetic field and rotate the fan blades. Over time, the motor's windings may burn out, the bearings may be damaged, or it may overheat, which can cause the fan to stop.
Capacitor:
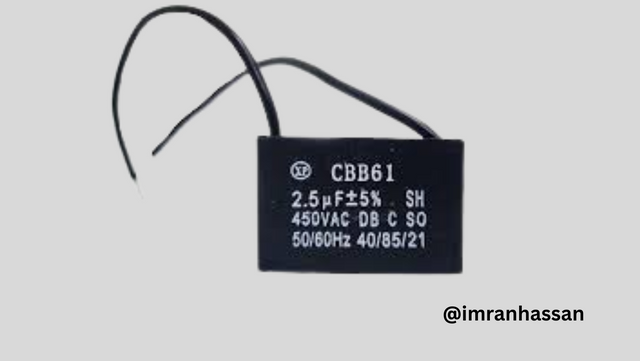
The starting capacitor plays an important role in starting the fan. It can be from 2µF to 5µF, which provides the necessary starting torque to start the motor. If the fan starts but does not increase in speed, the capacitor may be damaged. Replacing the capacitor often fixes fan problems.
Blades or fans:
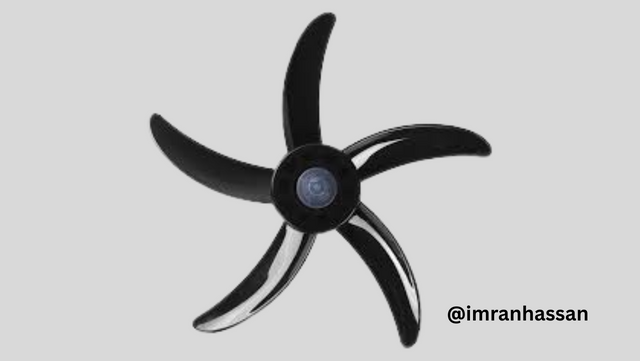
Fan blades are usually made of plastic, metal, or fibre. Over time, the blades can become heavy with dirt, which can put a load on the motor and reduce speed. If the blades are unbalanced or bent, the fan can vibrate.
Speed control circuit or regulator:
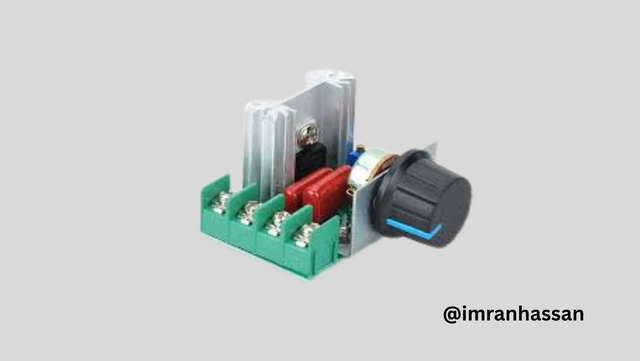
Two types of regulators are used to control fan speed: Rheostat-based regulators: older models, which use resistance. Electronic regulators: newer models, which use TRIAC and diode bridges. If the regulator is damaged, the fan may run at one speed (high speed or low speed) or may not work at all.
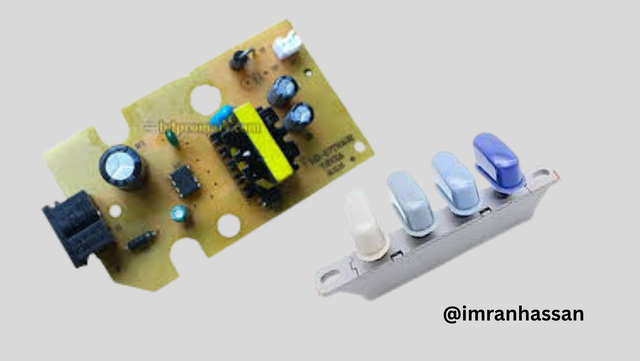
Circuit board and wires:
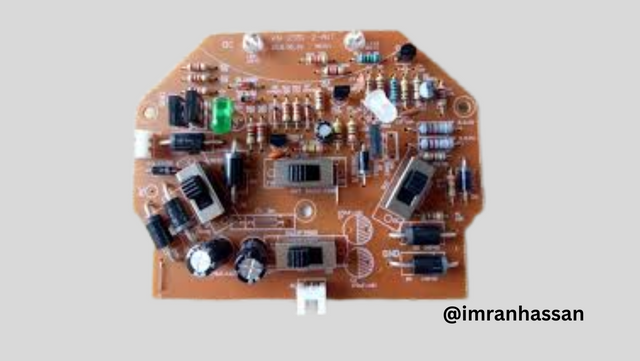
Many fans have a circuit board inside, which controls the motor and power supply. These may include relays, diodes, resistors, and transistors. If any part of the circuit board is burnt, the fan will not turn on. It is important to check the fan's wire connections. If any wire is torn or shorted, the fan may not turn on.
Bearings and Shaft:

The fan motor has brushless bearings, which reduce friction and help the fan run smoothly. Over time, if the bearings dry out, the fan may make a whistling sound and the speed may decrease. Using lubrication (Mobil) may solve the problem.
Power Plug and Switch:
If the fan will not turn on at all, then the power plug and switch need to be checked first. Sometimes the switch connection may be loose or the switch may be damaged due to carbon buildup. If there is a fuse, it also needs to be checked, because if the fuse blows, the current in the circuit will stop.
Battery:
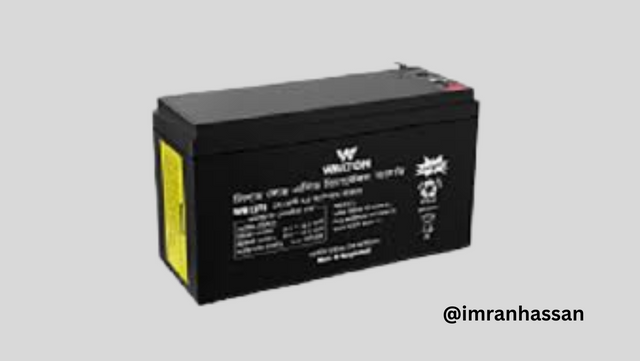
This is the main source of DC power supply for the fan. Typically, it is a 6V or 12V rechargeable battery, which provides backup to run the fan even when there is no electricity. The battery is charged by the charging circuit and supplies power to the fan as needed.
I am going to start the tutorial post.
Step -01
 |  |
|---|
 |  |
|---|
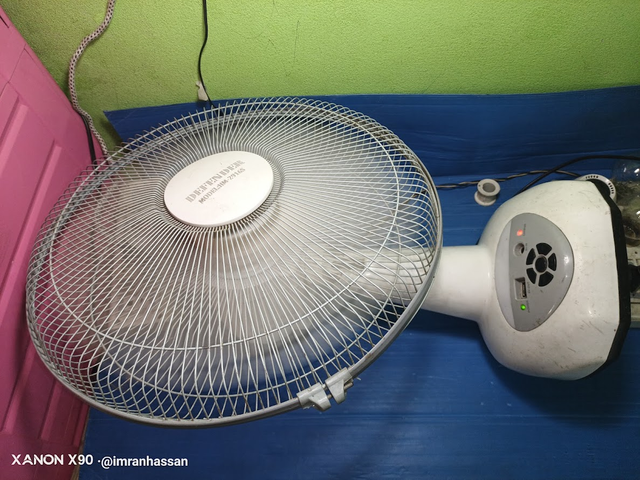
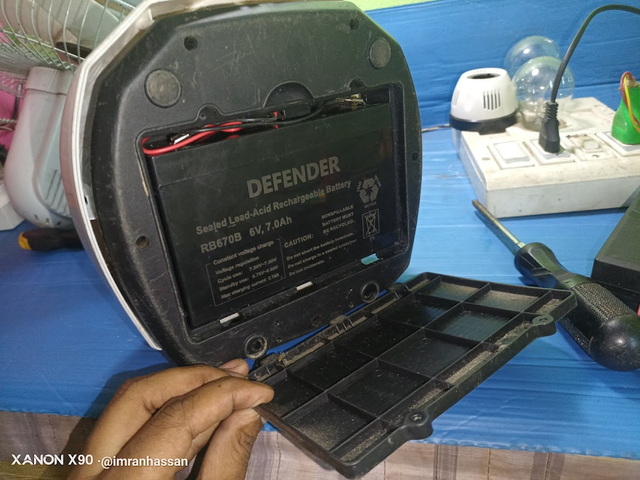
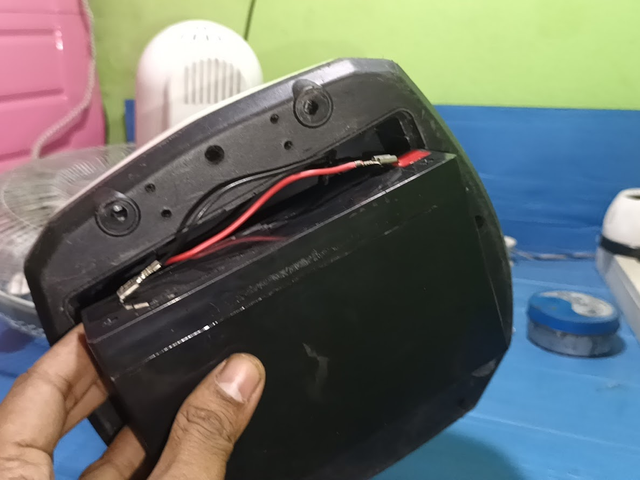
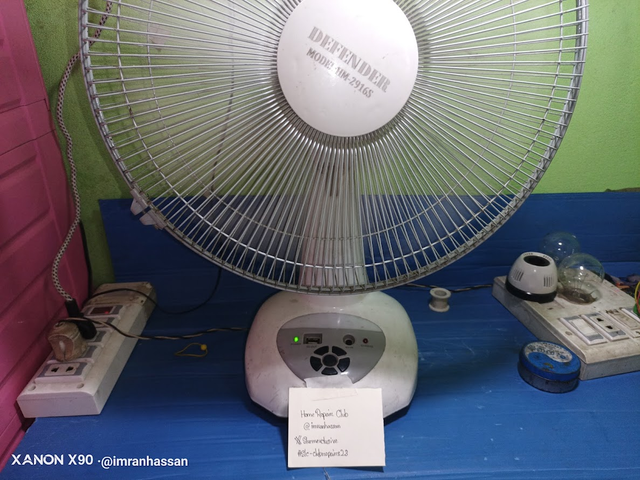
First of all, as you can see, I have taken a 220 volt AC DC fan, which runs only on 220 volt AC input but does not run on battery power. When I applied 220 volt input voltage to the fan, you can see that the fan is powered, the charging session light is on, and the fan is spinning normally. Next, I started to open the fan because I wanted to understand why it was not providing backup on the inside with the battery. As I have already said, this is my main goal. In the first step, I opened the battery cover and saw that the battery connection is fine.
Step -02
 |  |
|---|
 |  |
|---|
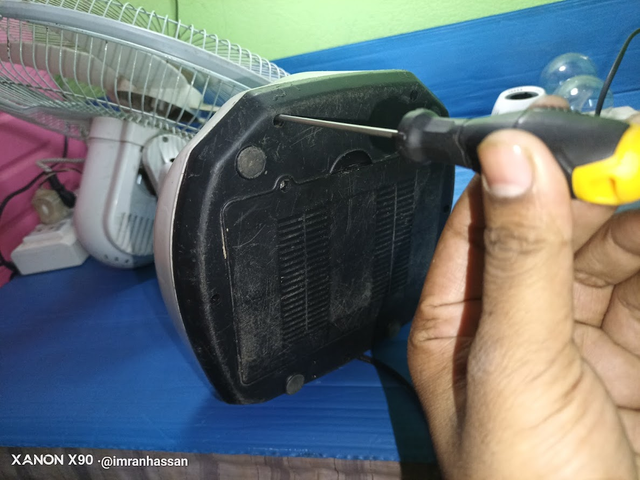
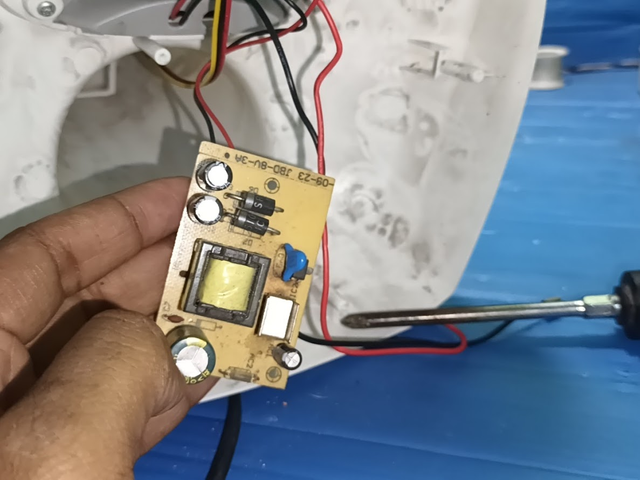
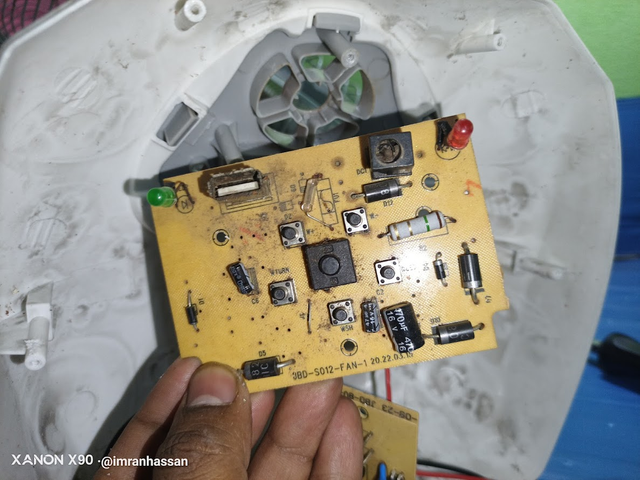
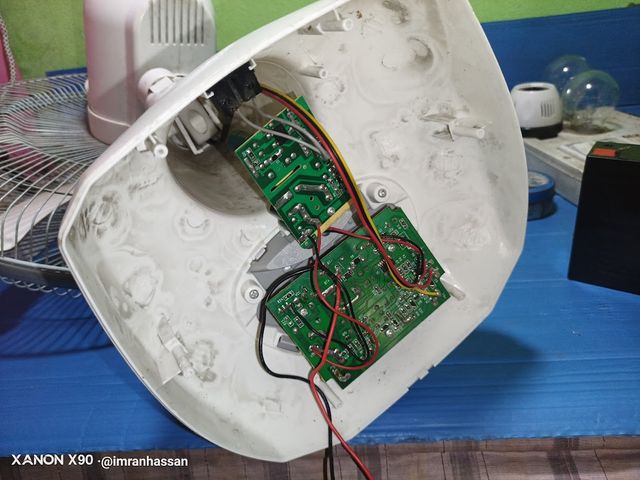
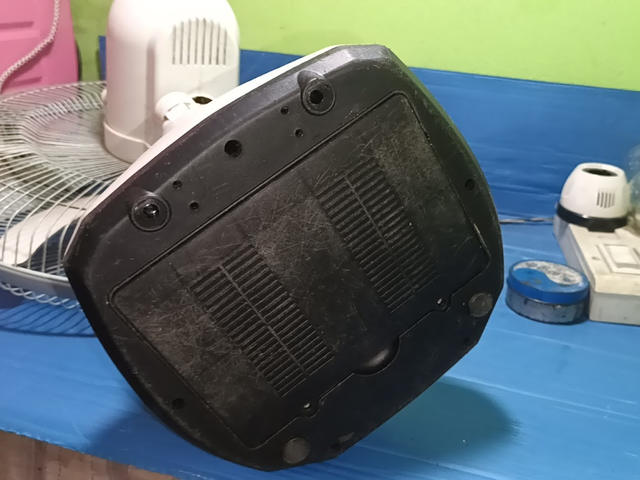
Next, I opened the entire back cover and saw that there is a 12 volt power supply circuit. There is a circuit board for the complete control of the fan, where the switch, regulator, and other important components are connected. Next, I checked the power supply and the controller circuit of the fan, but I did not find any visible problem. So, I assembled the power supply and the fan control circuit board and decided to identify the possible problem with the help of a multimeter.
Step -03
 |  |
|---|
 |  |
|---|
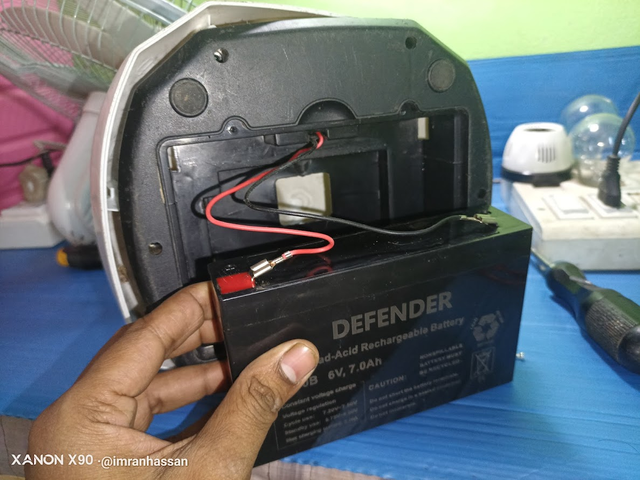
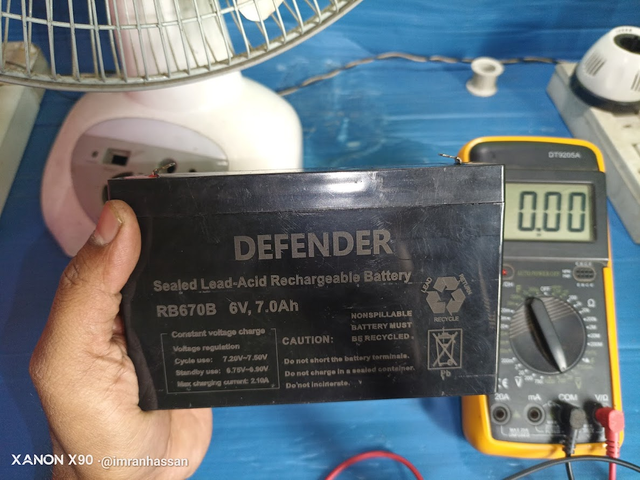
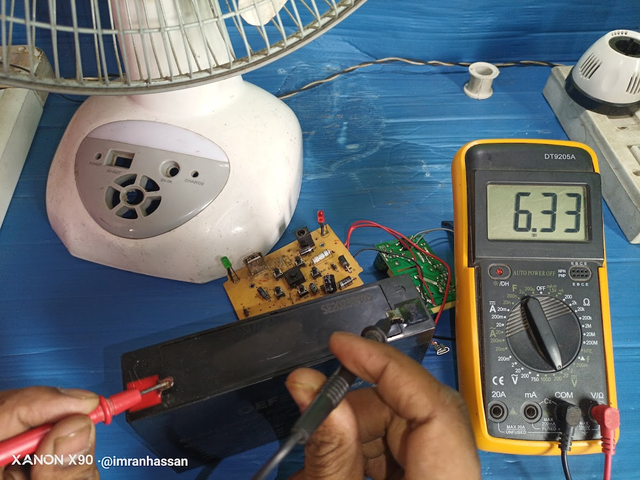
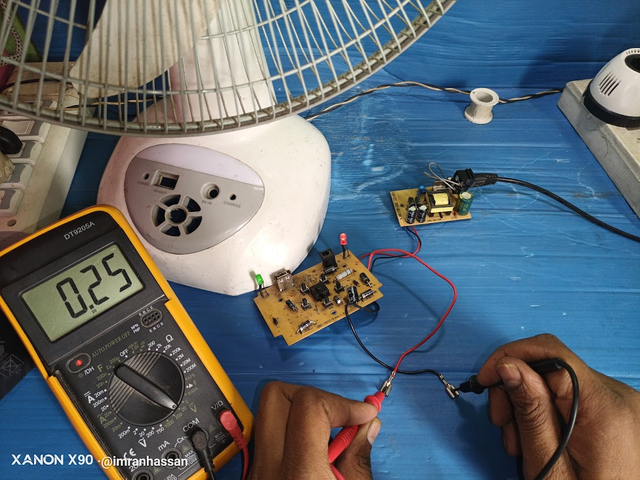
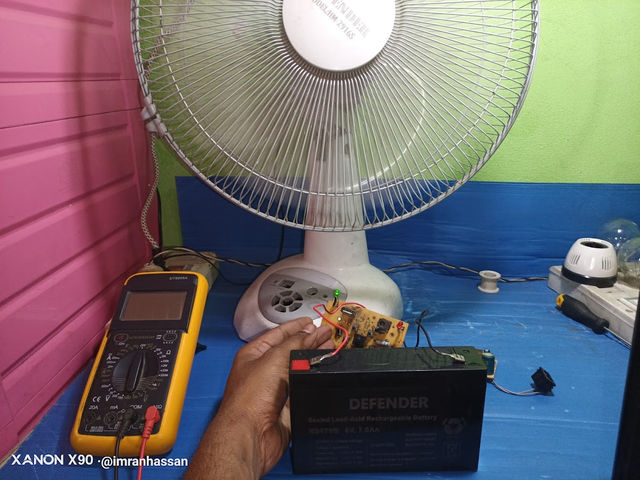
First, I took the 6 volt, 7 amp battery and measured its output voltage. As you can see, the battery output is showing 6.33 volts, which proves that the battery is fine. Next, I used a cord to provide 220 volt AC input, which I connected directly to the fan. After the 220 volt input was entered inside the fan, I checked the output voltage of the battery charging section on the multimeter. As you can see, the multimeter is showing only 0.25 volts of output. If the charging circuit of the fan was working properly, the expected output here should be 6 to 8 volts.
Step -04
 |  |
|---|
 |  |
|---|
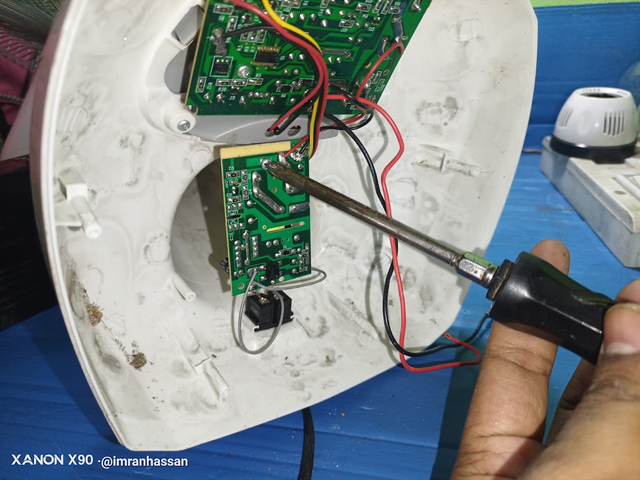
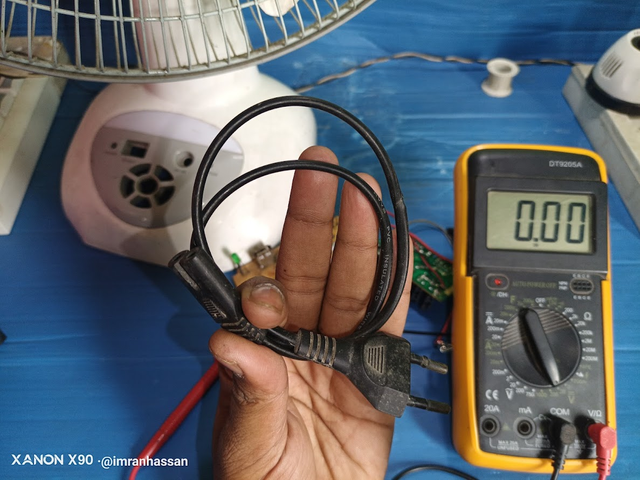
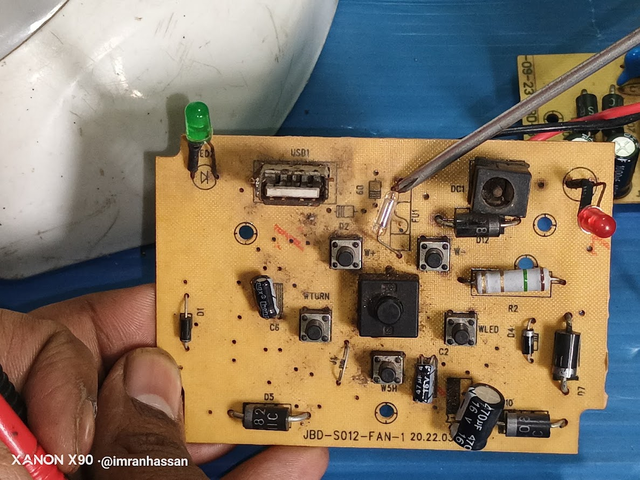
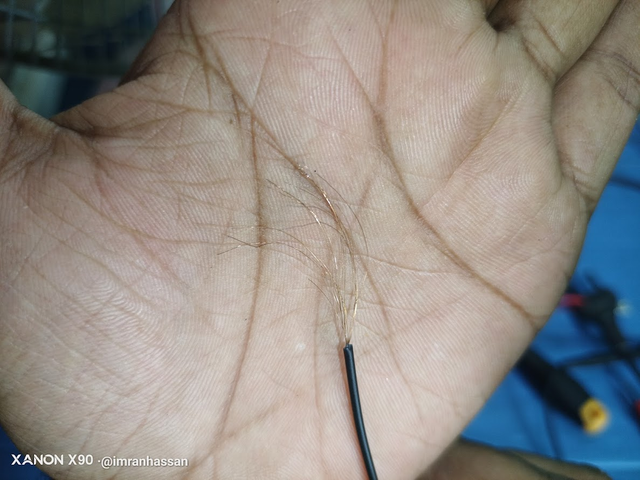
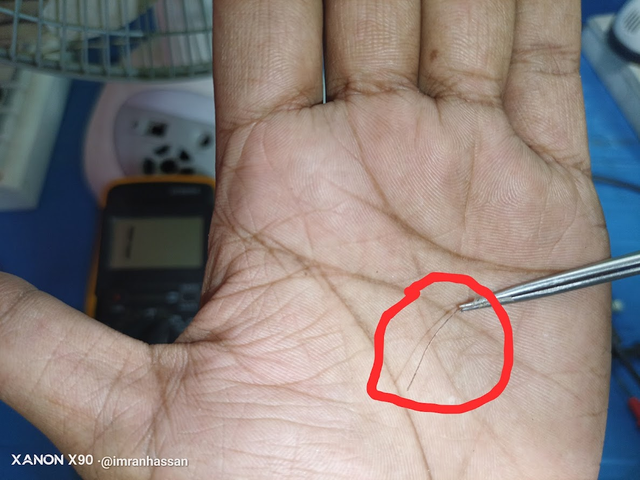
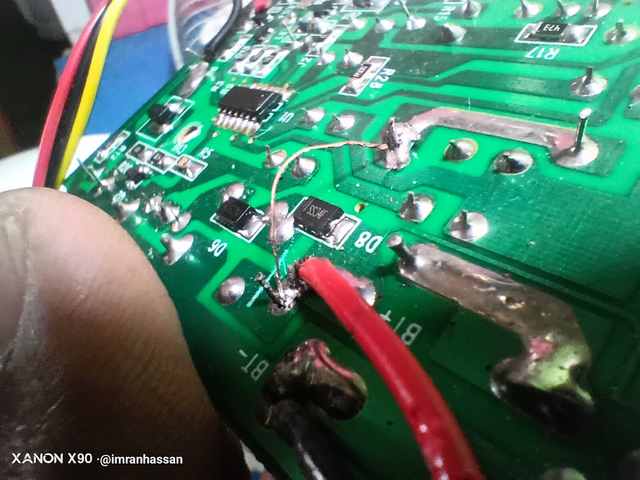
Next, I selected the multimeter in continuity mode and tested the negative and positive wires of the battery—red and black. As you can see, the meter is showing a continuity beep signal, which proves that the wires are fine. After checking for a while, I found that one of the fuses was blown and its base was damaged. This is blocking the output line. Next, I used a thin copper wire instead of a fuse, which will work properly. Then, I twisted the wire nicely to jumper the circuit board line, so that in the future if there is excess voltage, it will cut off and the circuit will be protected.
Step -05
 |  |
|---|
 |  |
|---|
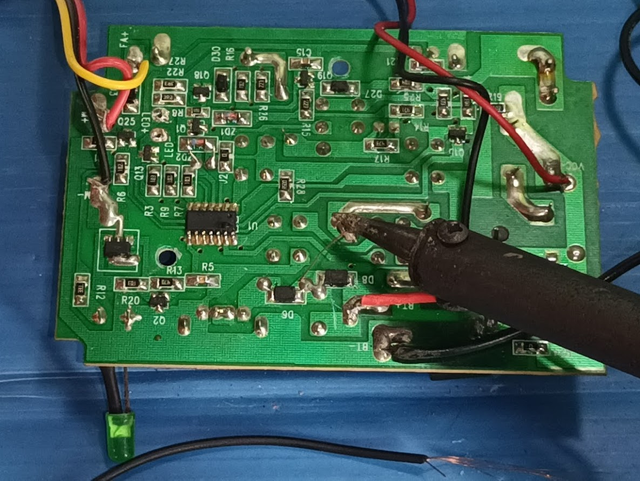
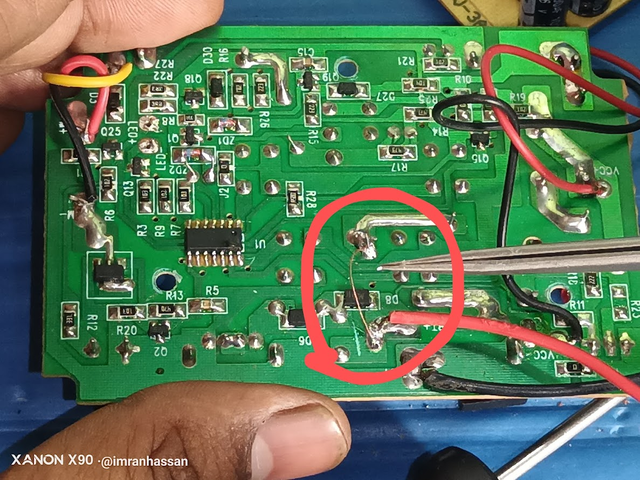
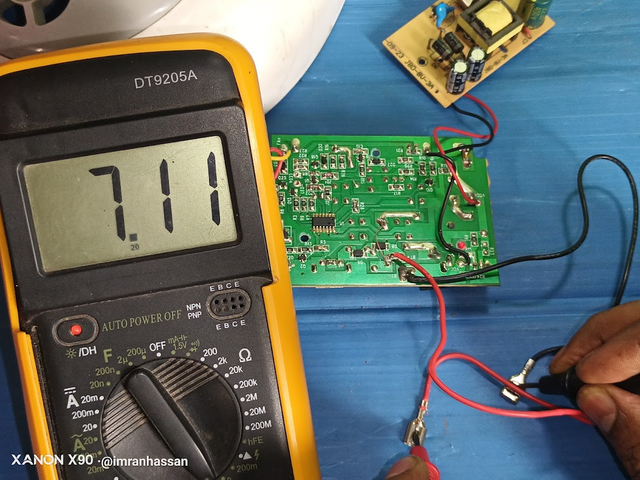
Next, I jumpered the battery charging output with that thin copper wire, and as you can see, I soldered it very nicely here. Then, after I connected the 220 volt AC input inside the fan, you can see that the charging voltage came nicely at the output of the battery section, and it shows 7.11 volts here. Then, I connected the red and black wires of the output voltage to the battery and checked with the switch that the line came to the power section of the circuit with the help of the battery DC line of my fan without any AC 220 volt input connection.
Step -06
 |  |
|---|
 |  |
|---|
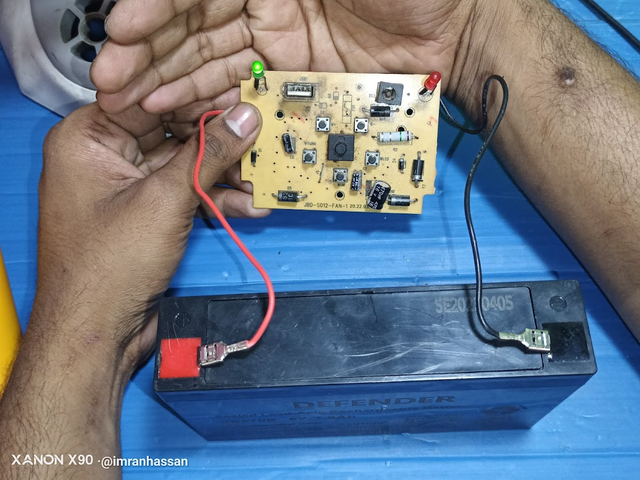
Next, after switching on the fan, you can see that the fan started running. I confirmed that my fan is now running on both AC and DC connections. Then, I first opened the power supply and control circuit and put them back in place step by step. Then, I put the covers on, put the battery in place and screwed it in.
Step -07
 |  |
|---|
 |  |
|---|
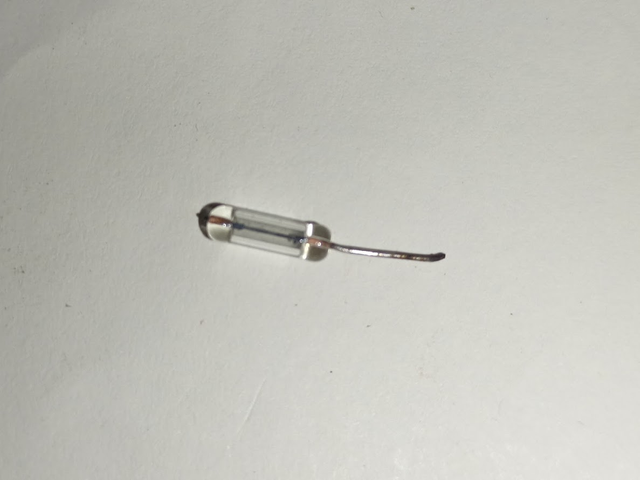
Here I am sharing an important piece of information—my fuse is broken, and I am showing you its picture. We do not always have all the necessary parts at hand since we work from home. So as an alternative, I have used a thin copper wire as a fuse here. You can also use it if you want, but if you jumper with a thick wire and use a fan, then it will not work as a fuse and the circuit board of the fan may be damaged. So it is better to buy a real fuse from the market and install it later. To prove the authenticity of my work, I have taken a picture with my username and club name and also took a selfie with myself.
| Appliance | Fan |
|---|---|
| Brand | DEFENDER |
| Model | TIM-2916S |
| Voltage | 220V AC |
| Battery | 6V 7Ah |
| Power Supply | 12V Circuit |
| Failure | Battery not charging, fan not running on backup power |
| Solution | Checked and replaced the fuse with a thin copper wire, ensuring correct power flow |
| ⚠️ Warning | Description |
|---|---|
| Do not use thick wire | It can cause excess current to flow, which can damage the circuit. |
| Temporary solution of thin copper wire | It cannot provide proper protection like the original fuse, so long-term use is risky. |
| Not suitable for long-term use | A genuine fuse should be used as soon as possible. |
| May melt if overloaded | Thin wire cannot withstand high current, so it may burn during overload. |
| Buy genuine fuse from the market | This will ensure the safety of the circuit and provide a long-term solution. |
Conclusion: Thin copper wire can be used for the time being, but it is not a permanent solution. The best option for the safety of the circuit is to procure a suitable fuse from the market.
| Video Tutorial: To better understand the practical part of this tutorial, you can watch the video below. |
|---|
| 📢 These courses and challenges will run from today until 11.59pm UTC, on Sunday, March 16th, 2025. |
|---|
Here are our selection criteria for the Home Repair Club; if you want, you can read the post and understand it: Clubes de Aprendizaje de Steemit Temporada 23 | Introducción y Bienvenida al Home Repair Club
I invite you to join the Home Repair Club. @ariful2 @pepo84 @mdpolasmia @shihabuddin48
Photography Details: 📱DeviceWalton Xanon x90
Best regards
@imranhassan
My friend @rmm31

I promoted my post X here.
Saludos amigo.
Excelente post y excelente explicación, como usted lo acota es recomendable reemplazar el fusible, dicha prueba con el alambre de cobre es para solo verificar bien la falla.
Gracias por la invitación al Club de reparaciones.
Dios lo siga bendiciendo.
Thank you very much for your nice comment. I am glad that you enjoyed the post and found the explanations helpful. Yes, replacing the fuse is an important step, and using copper wire to check the fault is an effective technique.
I hope that you will continue to be involved in the Home Repair Club activities in the future and share your valuable opinions and experiences with us. Thanks again for your support.
God bless you.
Saludos @imranhassan.
Gracias por compartir esta guia tan detallada para resolver esta falla que puede resultar muy común en nuestros hogares y es que todos hemos tenido un ventilador al cual se le tenga que cambiar la batería para que funcione correctamente.
Saludos amigo buen tutorial con utilidad para futuras reparaciones en algún momento se presente la necesidad. Es importante usar las herramientas adecuadas y tener precaución. Gracias por compartir. Dios le bendiga