Show a loading animation while your elements are loading in React
Source
What Will I Learn?
As you might have seen, some modern web sites and web application show a loading animation, also known as a throbber, when there is content being loaded. This kind of animations tell the user that there is content that is being fetched and that it is not available yet. Once the content is fully fetched, the throbber disappears. In this tutorial you will learn how to display a throbber while you are making an async request, or there is content that is not ready to be displayed.
- How to render content conditionally in a React web application according to the component's state
- How to use throbbers
Requirements
You will need the following requirements in order to complete this tutorial. In the curriculum section there are some links that you can check if you don't know much about React and how to create an application in React.
- Node.js
- NPM
create-react-app
Difficulty
- Intermediate
Tutorial Contents
Creating our application
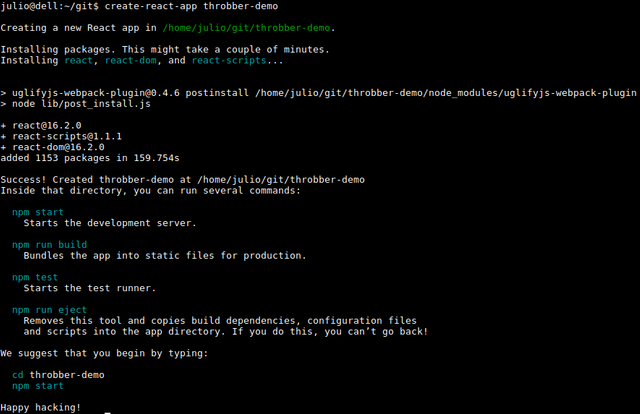
First, we need an application. Here, we are going to create a new one:
$> create-react-app throbber-demo
$> cd throbber-demo
$> npm start
Installing react-loader
Now, we should have our React application running in our browser. In another terminal tab or window we are going to install react-loader module using NPM. This module will allow us to use a throbber easily.
$> npm install --save react-loader

Ignore the warnings
Setting up our components
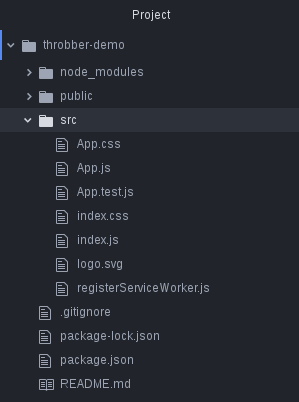
Now we are ready to start coding. First, we are going to be editing the file called App.js inside the path ~/throbber-demo/src/App.js. Here is what my project looks like:
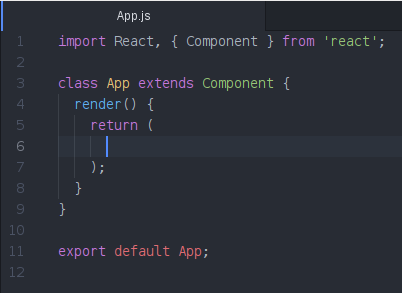
And this is what is left after cleaning up the App.js file for what we need:
Setting up the logic of the component
What we are trying to do with this tutorial is: display a throbber in the web application while there's content being loaded, and then hide it when the content is ready. We are going to use React's state to achieve this because every time we modify the state in a React component, it's re-rendered (reloaded). So, our initial state will be that the content is not ready, then we will fetch the content, and once we finish fetching the content, show it and hide the throbber.
Setting up the initial state
We need to set the default values for our state in the constructor of the component. The constructor is a piece of code that will initialize and declare some initial values for an instance of a class, so, every time we make a new instance of a certain class, we will have enough information to use it properly. In this case, we need an initial state:
constructor(props){
    super(props);
    this.state = {ready: false};
  }
So far, do not worry about what the super and props part means. We do not need them right now.
Showing the throbber when the component is mounted
Now, we need to tell our component what to do with the information we have. That means, showing the throbber while the ready value inside the state isn't true. In order to do this, we are going to need to modify the render() method of our component:
render() {
    if(this.state.ready) {
      return(
        <span>Fetched content</span>
      );
    }
    else{
      return(
        <span>Throbber</span>
      );
    }
  }
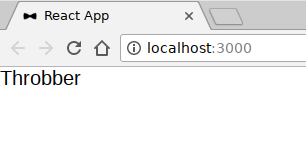
This basically means that while the value of ready inside the state isn't true, the throbber will be showed. Actually, if we go to our browser, we will see the message we just configured. But an <span> is not a throbber.
Now, we need to import the Loader module we installed before, and we do it in the top part of our component:
import React, { Component } from 'react';
import Loader from 'react-loader';
And now, we will replace the <span> with the throbber:
render() {
    if(this.state.ready) {
      return(
        <span>Fetched content</span>
      );
    }
    else{
      return(
        <Loader/>
      );
    }
  }
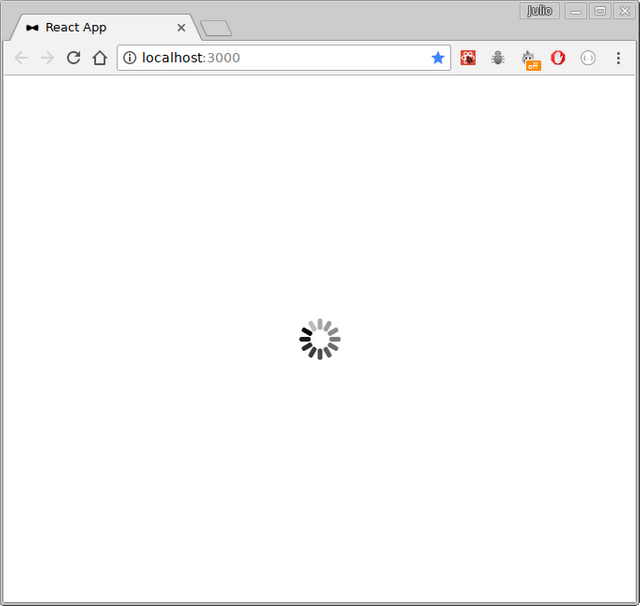
And now, we have a throbber:
Changing the component's state
If we don't do anything else, we are going to see a throbber all the time, we need to change this. We are going to fetch some information from an API. I'm going to use the CoinMarketCap API to fetch some data about the Bitcoin price.
Right now, I want my component to start loading the information right when I open the application, so I don't need to click any button. We can achieve this behavior using the componentWillMount() method. This method belongs to a set of method that conforms the React lifecycle's methods, that we can use to trigger some actions in different points during the life of the components. Right now, we need to get something done just by the time our component is mounted, so this method is perfect. In order to use it, we just put it below the constructor code:
  constructor(props){
    super(props);
    this.state = {ready: false};
  }

  componentWillMount() {
    // code goes here
  }
Fetching the information
We are going to use the fetch() method to make the request to the API. This code goes inside the definition of componentWillMount():
componentWillMount() {
    fetch('https://api.coinmarketcap.com/v1/ticker/bitcoin/')
    .then(res => res.json())
    .then(response => this.setState({data: response, ready: true}))
    .catch(err => {
      alert('An error ocurred');
      console.log(err);
    });
  }
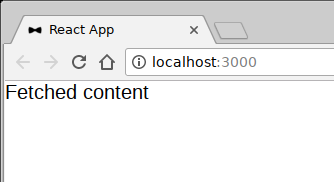
As you can see, I created a new element inside my state called data that will hold the data that was fetched, and then I changed the value of ready to true. Now, if we check our browser, we we'll see the other message we configured to appear when the throbber is not being displayed:
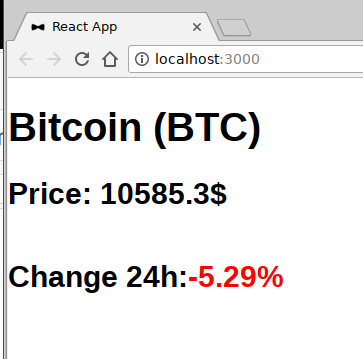
Let's display the information we just fetched:
render() {
    if(this.state.ready) {
      var change_color = this.state.data[0].percent_change_24h > 0 ? 'green' : 'red';
      return(
        <div>
          <h1>{this.state.data[0].name} ({this.state.data[0].symbol})</h1>
          <h2>Price: {this.state.data[0].price_usd}$</h2>
          <div style={{display: 'inline'}}>
            <h2 style={{display: 'inline-block'}}>Change 24h: </h2>
            <h2 style={{color: change_color, display: 'inline-block'}}> {this.state.data[0].percent_change_24h}%</h2>
          </div>
        </div>
      );
    }
    else{
      return(
        <Loader/>
      );
    }
  }
And it will look like this:
Refreshing the content
Let's create a button that will allow us to refresh the price of the currency I selected. In order to do this, we need to create a button, and associate and action when it's clicked:
<button onClick={this.refreshPrice}>Refresh price</button>
Now, let's declare this refreshPrice method inside the constructor of our component, so we can define and use it.
constructor(props){
    super(props);
    this.state = {ready: false};
    this.refreshPrice = this.refreshPrice.bind(this);
  }
This basically tells our component that there is something called refreshPrice that is inside it. After we've declared our new method in the constructor, we define it below the componentWillMount method:
refreshPrice(e) {
    e.preventDefault();
    this.setState({ready: false}, () => {
      fetch('https://api.coinmarketcap.com/v1/ticker/bitcoin/')
      .then(res => res.json())
      .then(response => this.setState({data: response, ready: true}))
      .catch(err => {
        alert('An error ocurred');
        console.log(err);
      });
    });
  }
What this method does is, activate the throbber by setting the ready value to false, fetch the info, and once it gets the new information, set the ready value to true again, so the throbber is shown while we are getting the data.
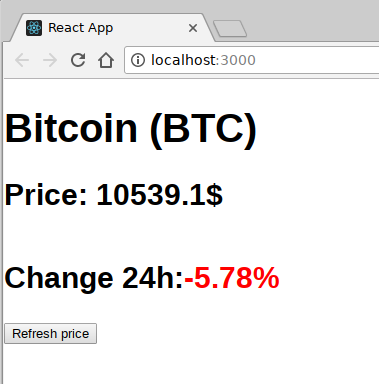
Here is a demonstration of what it looks like when working.
Here is a Github gist with all the code I used in my App.js file.
If you have any comments, questions or suggestions leave them in the comments section
All the screenshots were taken by me
Curriculum
- Create a React project using create-react-app
- Validating the props of your React Components with PropTypes
Posted on Utopian.io - Rewarding Open Source Contributors
Thank you for the contribution. It has been approved.
You can contact us on Discord.
[utopian-moderator]
Hello @yokunjon, thank you for reviewing my post. But I don't understand very well your suggestion. Even though I have been writing React tutorials, I have been writing about very different topics and using different libraries each time in order to accomplish different goals. I've been trying to cover up as much as possible in every tutorial so everything is well explained. What am I doing wrong? Can you give an example? Regards!
Instead of showing different libraries, you can generalize them by "how to use graphics libraries" and give some example. So by that way, the user can generalize what you taught them and can use all similar libraries. Of course, some aspects are not possible to merge with another. But if possible, do not be shy.
Oh, ok. I got it. Thank you!
Hey @jfuenmayor96 I am @utopian-io. I have just upvoted you!
Achievements
Suggestions
Get Noticed!
Community-Driven Witness!
I am the first and only Steem Community-Driven Witness. Participate on Discord. Lets GROW TOGETHER!
Up-vote this comment to grow my power and help Open Source contributions like this one. Want to chat? Join me on Discord https://discord.gg/Pc8HG9x
Felicidades te admiro mucho hijo Dios te de mucho mucho más conocimiento, me recuerdas alguien que ya no está a mi lado pero se que hoy en día está mejor,saludos y mucho éxito.
Congratulations @jfuenmayor96! You received a personal award!
You can view your badges on your Steem Board and compare to others on the Steem Ranking
Vote for @Steemitboard as a witness to get one more award and increased upvotes!