Electronic Project simulation using Circuit Simulator Applet : A step-by-step guide on how to simulate Delayed ON-LED project using Circuit Simulator Applet.
Good day everyone!
This is my 2nd electronic project simulation for #utopian-io tutorial contribution for Circuit Simulator Applet. In this #tutorial, I will guide you on how to simulate Delayed ON-LED project using Circuit Simulator Applet.
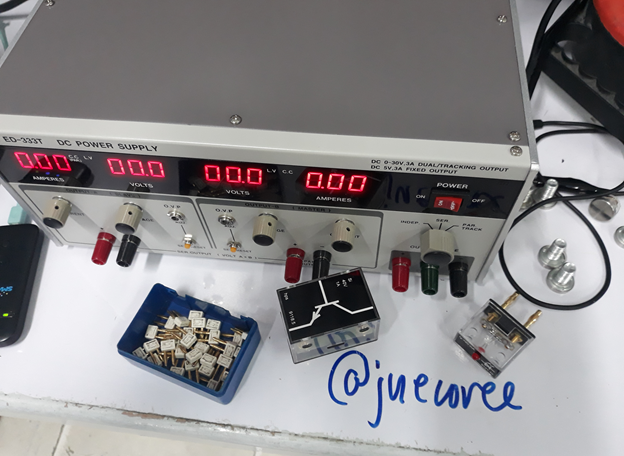
Preview
This is a preview of the output as shown in a video clip for what I would be the output simulation and physical construction for this #tutorial.
Materials needed in the circuit:
10 K resistor
68k Resistor
1k Resistor (2 units)
Transistor (BC107)
10uF capacitor
LED
9 V Battery
Output of the Project/ Simulation
The desired output of the project/ simulation is to be able to simulate a delayed ON of the LED using a transistor as switching device.
A step-by-step guide on how to simulate delayed ON-LED circuit simulation.
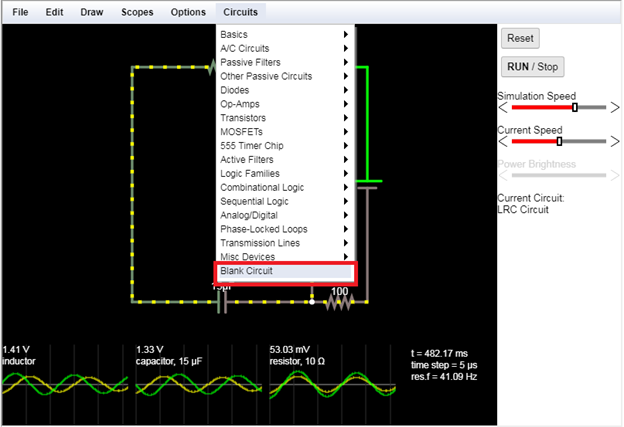
Step 1: Open in your browser the following URL: www.falstad.com/circuit. Once you load the URL in your browser, there is a pre-loaded circuit in the applet. So, you need first to go to “Circuit” option and select blank circuit.
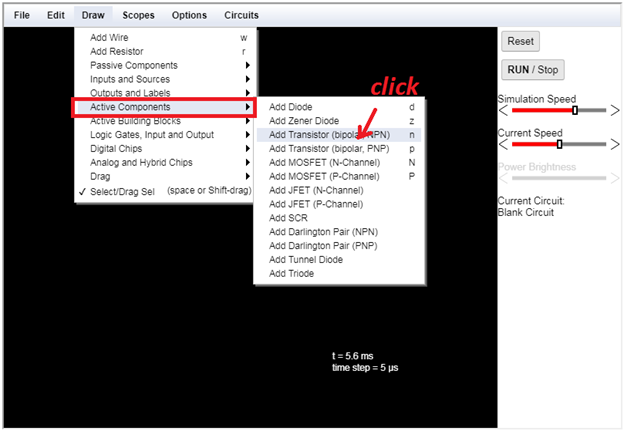
Step 2: We can now start drawing the circuit on the applet. So, go to “Draw” and select “Active components”. Then, click “add bipolar transistor (NPN)”.
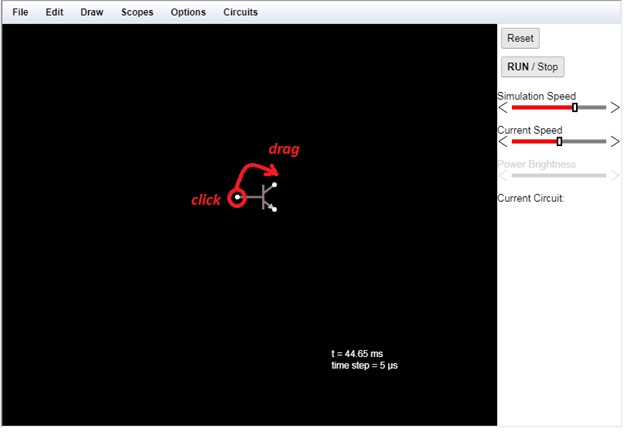
Step 3: To draw the transistor, click at where you want to add the transistor in the applet, hold and drag until your desired size of the drawing of transistor.
Step 4: Now, let add resistors as arrange according to the snapshot below. To add resistor, click at the position where the resistor to be placed, hold and drag to the desired size of the resistor.
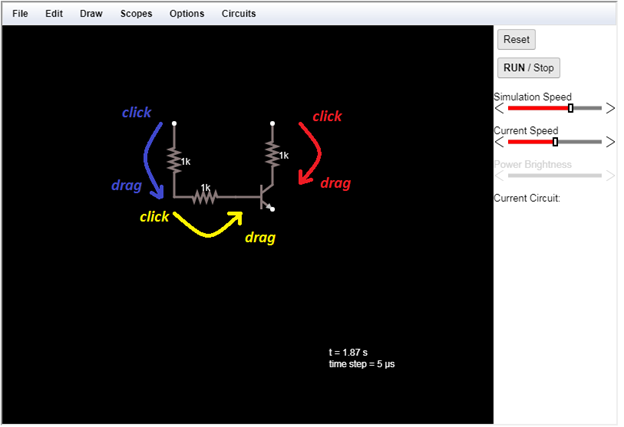
Step 5: Edit resistor values by clicking the resistor you want to edit the value, and a dialogue box will appear, where you can type in the value. For the resistor selected, change the value from 1k to 10k. Click “Apply” next “OK”.
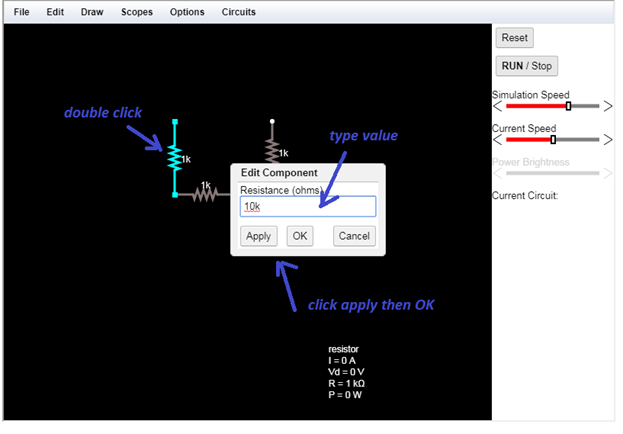
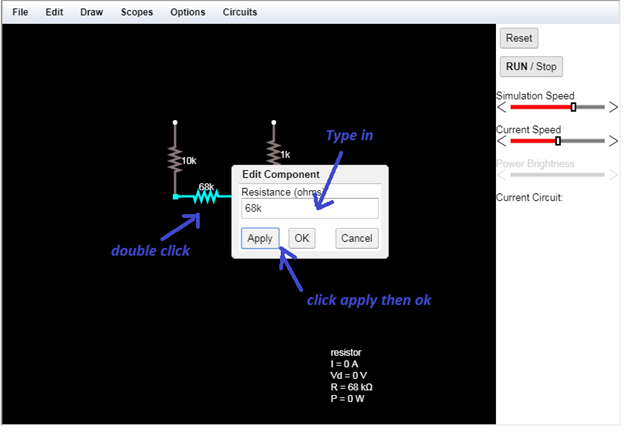
For the second selected resistor, perform the same step stated earlier. Change the value of selected resistor from 1k to 68k.
Step 6: Add 10uF capacitor to the circuit. Go to “Draw” and select “passive components”. Click “add capacitor”.
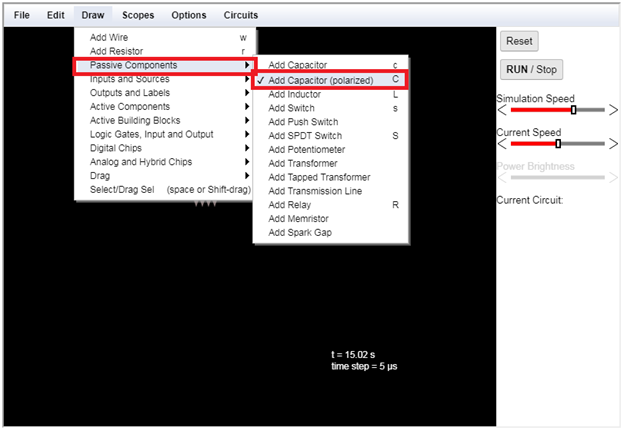
Now, draw the capacitor as shown below.
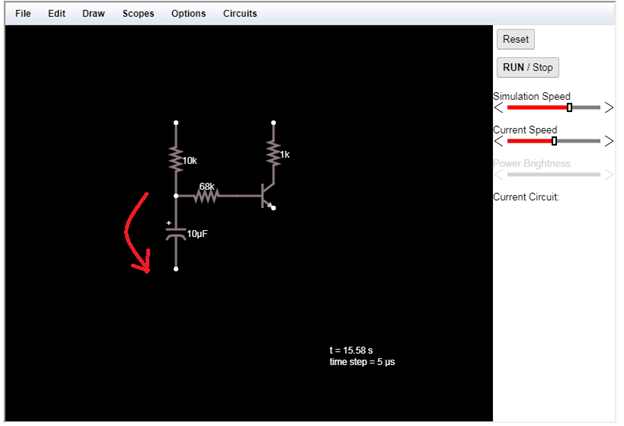
Step 8: Add a 10 V power supply. Go to “Draw”, and select “input and sources. Then, click “add Voltage Source (1 terminal)”.
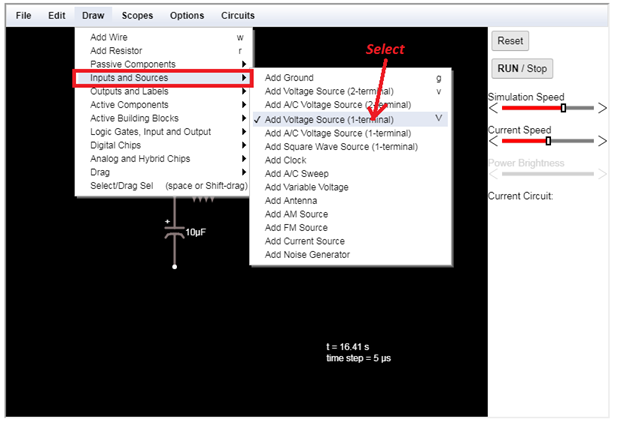
Then draw the power supply in the applet.
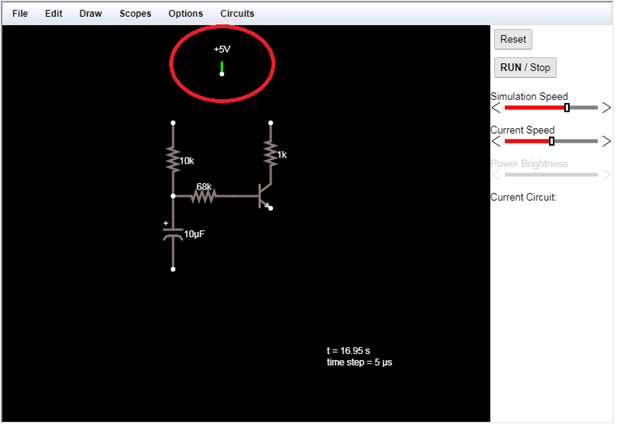
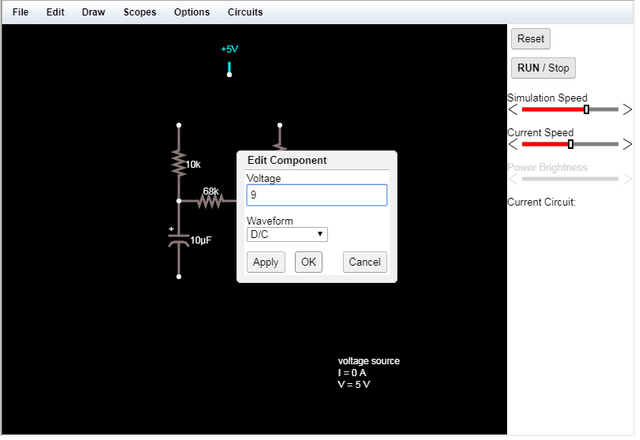
Now, edit the voltage value from +5 v to +9 v. Double click the 1 terminal voltage source then type in the new value. After, click apply and then ok.
Step 9: Add LED to the circuit. Go to “Draw” and select “Output and Labels”. Then, click “add LED”.
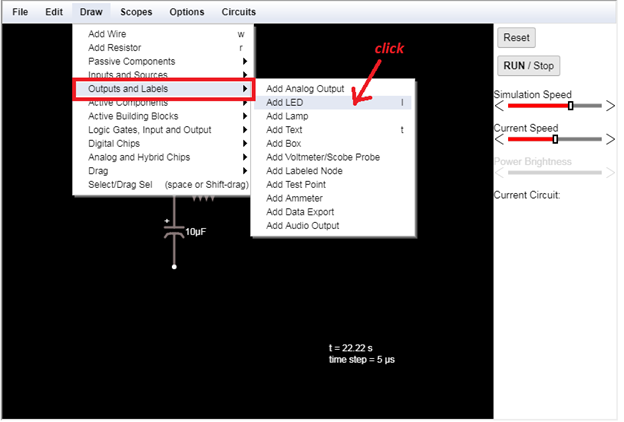
Now, draw the LED in the applet.
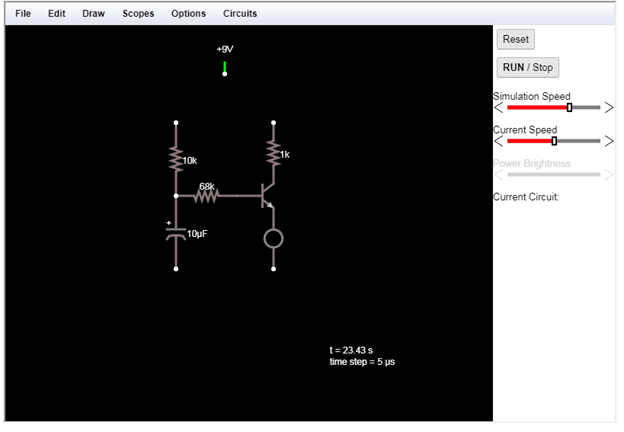
Step 10: Connect and finalize the circuit. Follow all connection shown in the snapshot
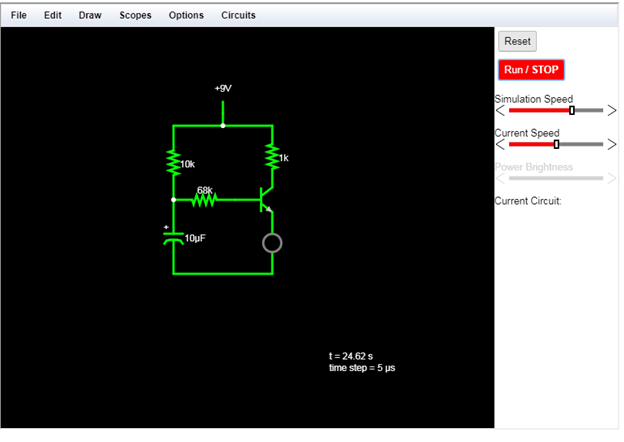
Then, add ground. Go to “Draw”, select “Output and Sources”. Then, click “add Ground”.
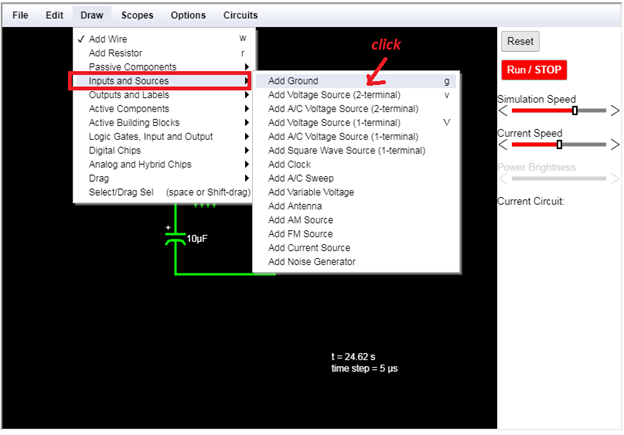
Now completing the circuit connection with ground.
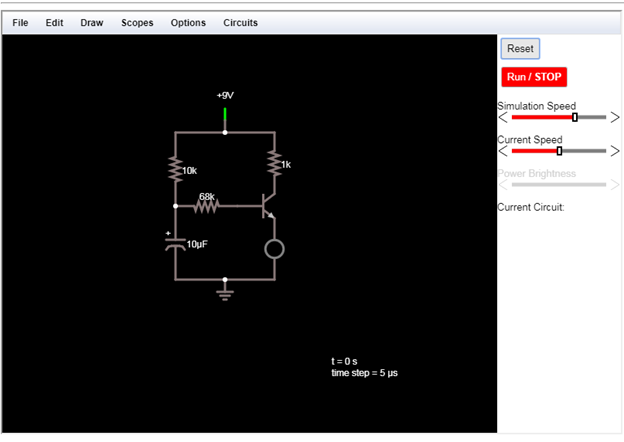
Step 11: Simulate the circuit by clicking run/stop button, as shown.
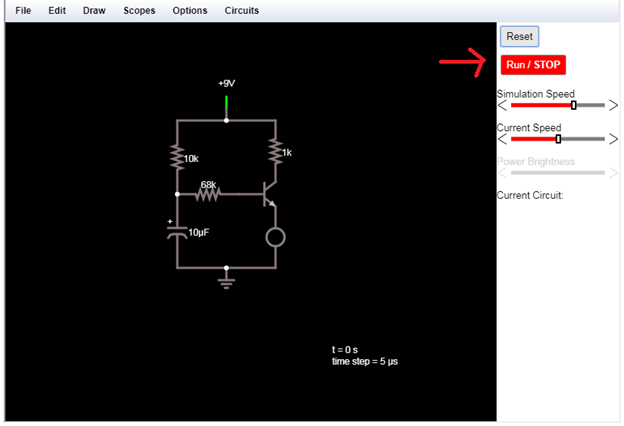
Result
The video bellow is the actual simulation of the delayed ON-Led project using Circuit Simulator applet. It is uploaded in my Youtube Account.
PART 2: Actual Physical set-up using and Electronic Trainer/Module.
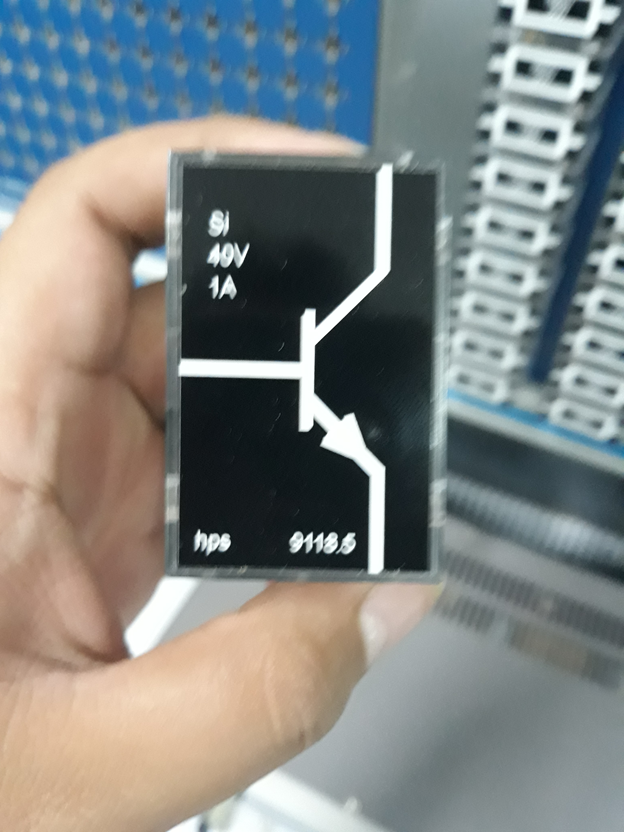
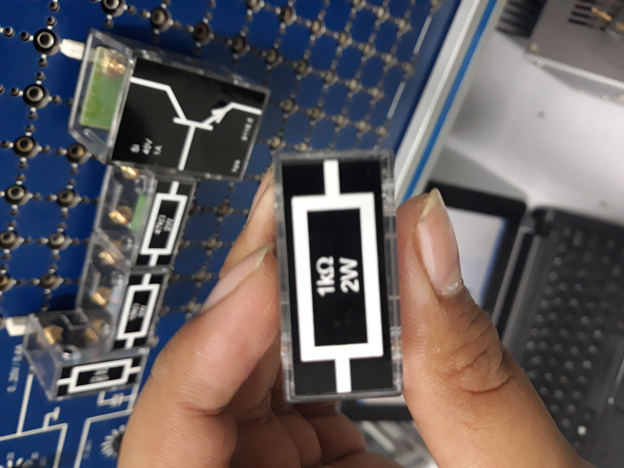
Step 1: Gather the necessary materials to be used in the project. Get the NPN transistor, as shown.
Connect it in the module/trainer.
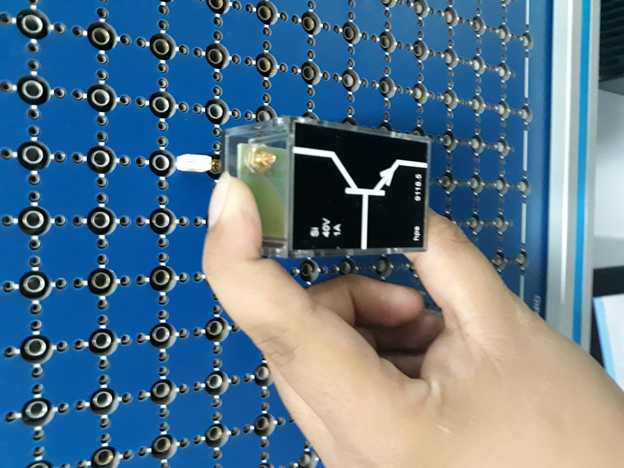
Step 2: Perform step 1 until the circuit components in the circuit simulator is constructed.
Step 3: Complete the circuit by adding connecting wires for power supply.
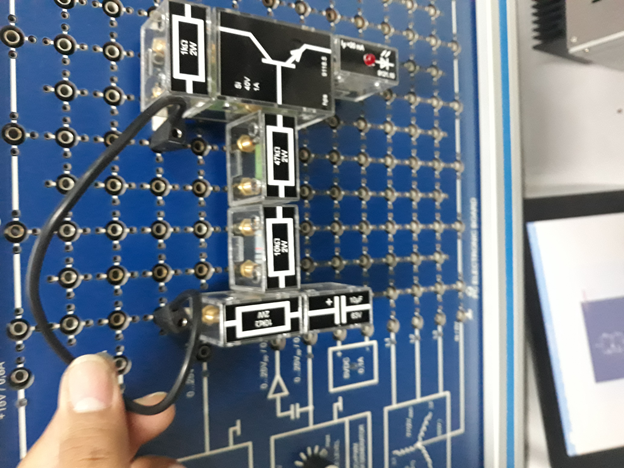
Step 4: Connect a ground wire (for negative terminal in the power supply) for the circuit.
Step 5: Turn on power supply.
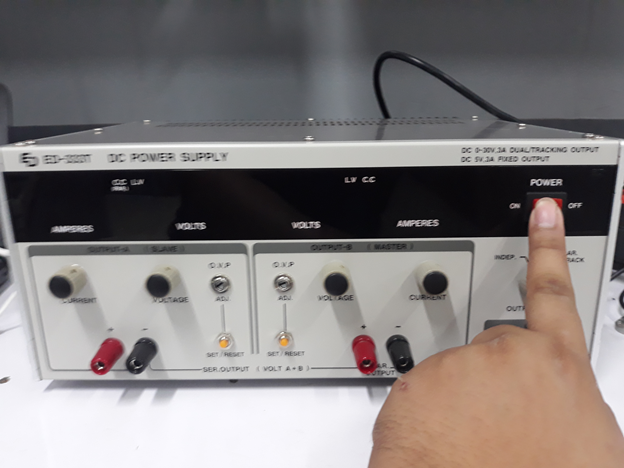
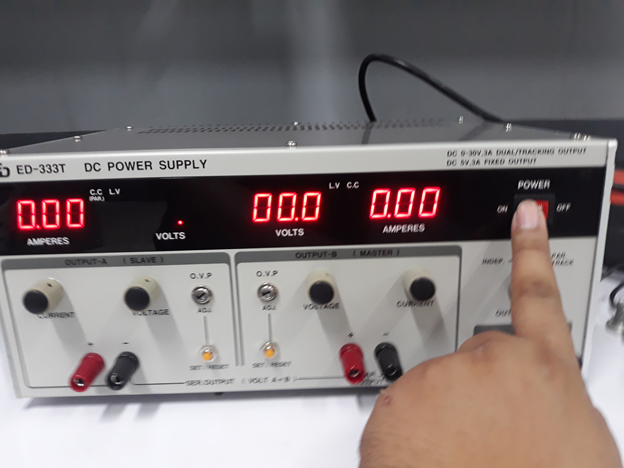
Step 6: Adjust the voltage to 9V by turning the voltage adjuster.
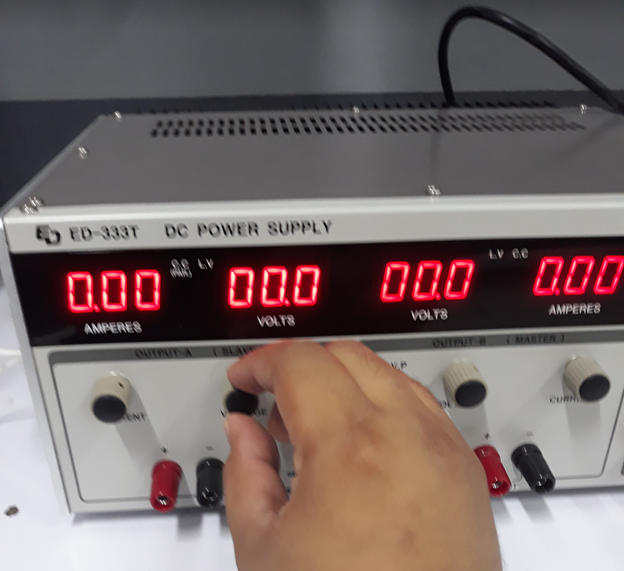
After adjusting the power supply, the voltage set to 9V, as shown.
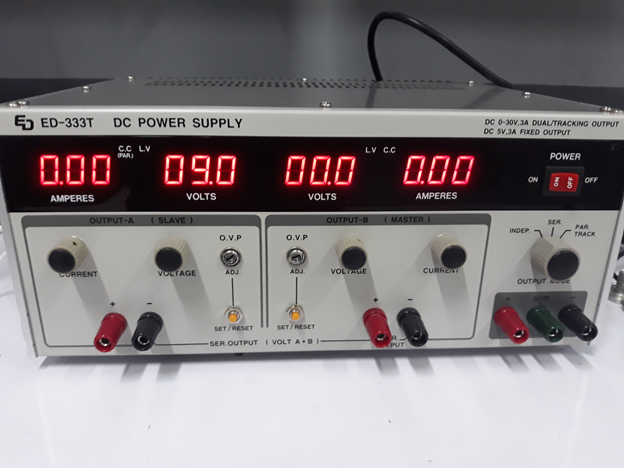
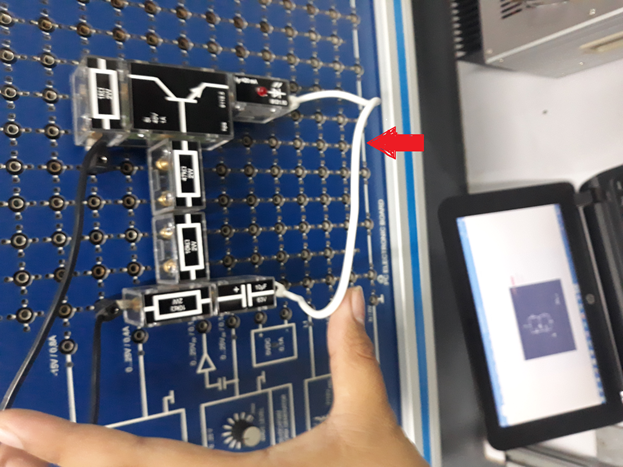
Step 7: Connect using connecting wires the circuit to the power supply. The result is shown below.
Thank you for reading this tutorial! I hope it helps you. Stay tune for more #tutorials. Once again, thank you and have a nice day!
@juecoree
(snapshot and video credit to @juecoree | references: 1 )
Posted on Utopian.io - Rewarding Open Source Contributors
Your contribution cannot be approved yet because it is not as informative as other contributions. See the Utopian Rules. Please edit your contribution and add try to improve the length and detail of your contribution (or add more images/mockups/screenshots), to reapply for approval.
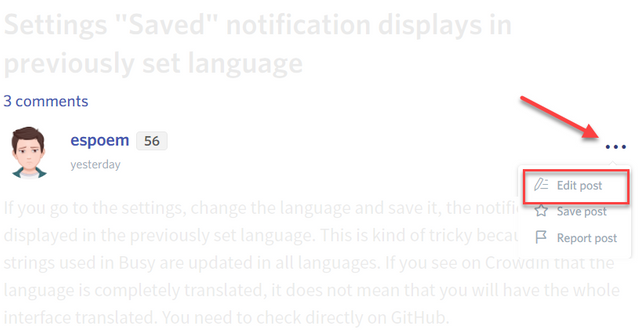
You may edit your post here, as shown below:
You can contact us on Discord.
[utopian-moderator]
I'll message you as soon as I'm done with the revision. Thank you for your suggestion @sheryasgune!
How about this @shreyasgune? I already added your suggestions. Is it already good or need another revision? Thank you for your time!
Thank you for the contribution. It has been approved.
You can contact us on Discord.
[utopian-moderator]
Thanks @shreyasgune !
Hey @juecoree I am @utopian-io. I have just upvoted you!
Achievements
Suggestions
Get Noticed!
Community-Driven Witness!
I am the first and only Steem Community-Driven Witness. Participate on Discord. Lets GROW TOGETHER!
Up-vote this comment to grow my power and help Open Source contributions like this one. Want to chat? Join me on Discord https://discord.gg/Pc8HG9x
thanks @utopian-io