SLC S22W2//Basic clothing pattern for children
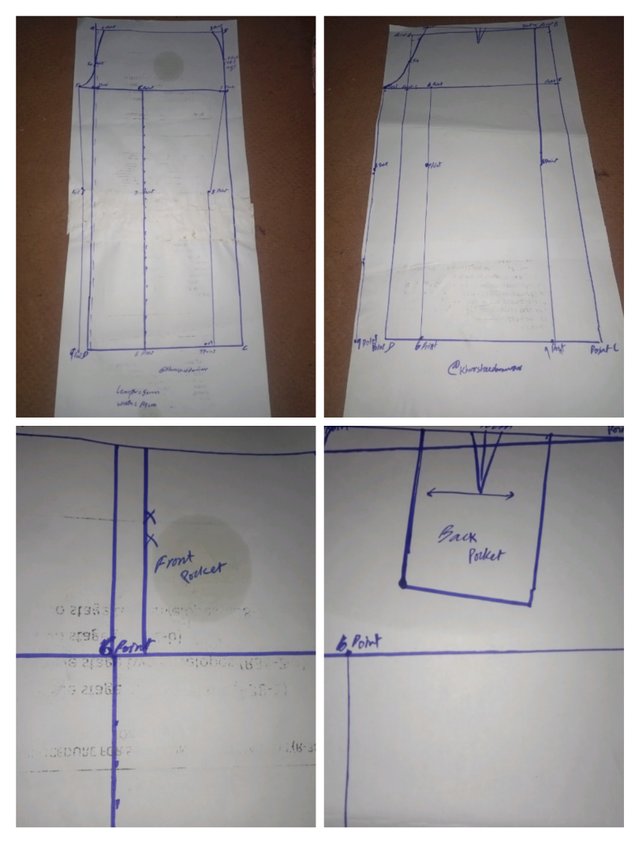
Outer length - 50 cm
Height Waist length or depth - 14 cm
Hip circumference - 56 cm
Waist circumference - 48 cm
Knee circumference - 28 cm
Hem circumference - 30 cm
Step 1: Drawing Rectangle
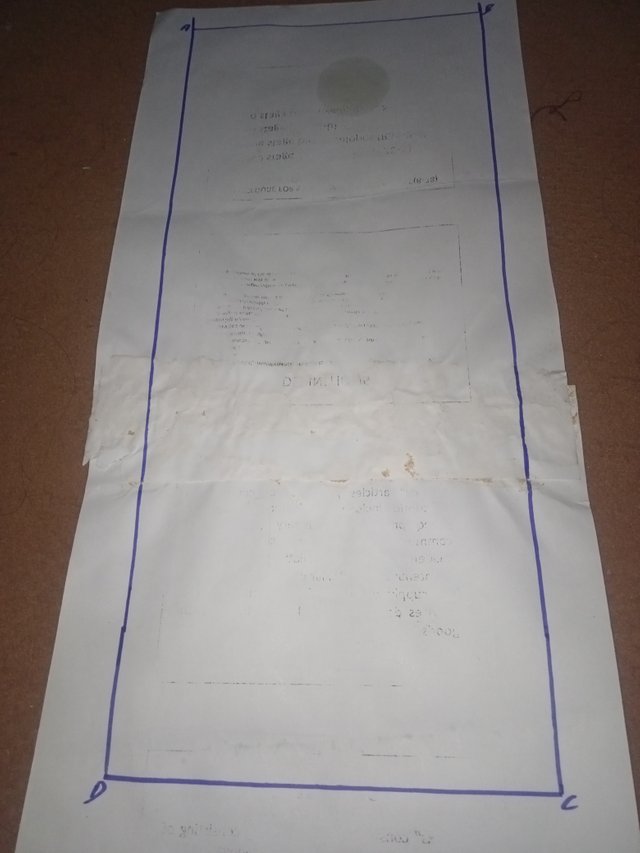
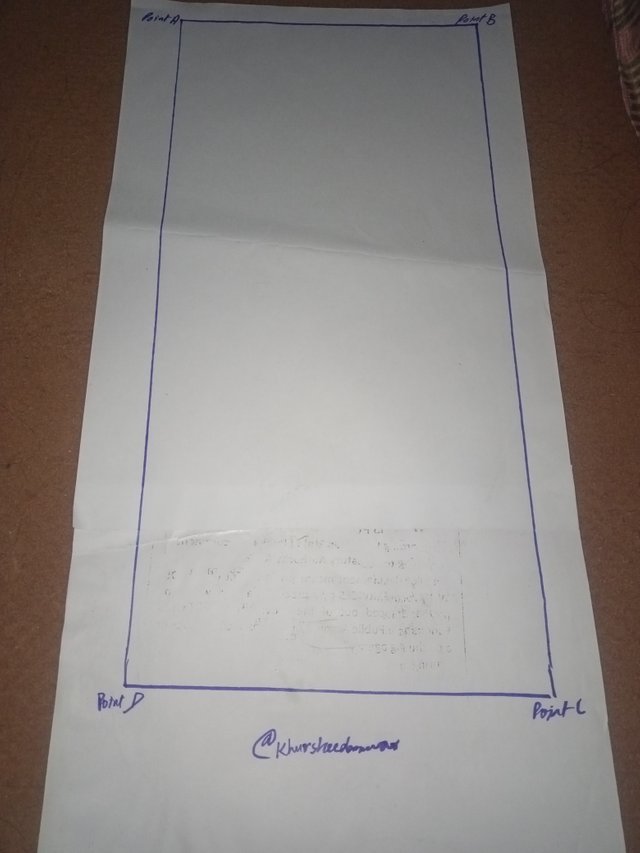
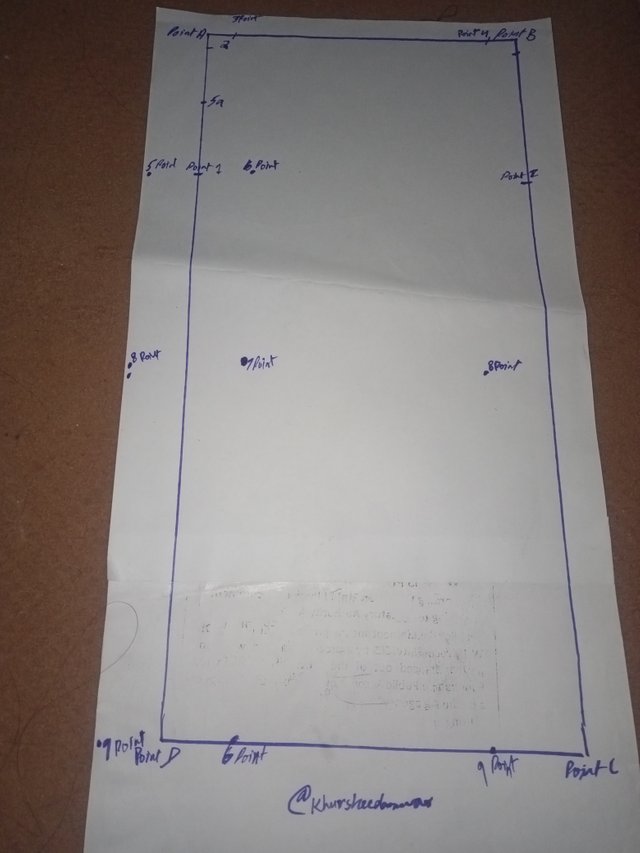
If I talk about step one then you need to draw a rectangle which should have 50 cm outer length and total with of 14 cm which is 4th part of total circumference of hip that I have taken as 56 cm.
Step 2: Marking Points
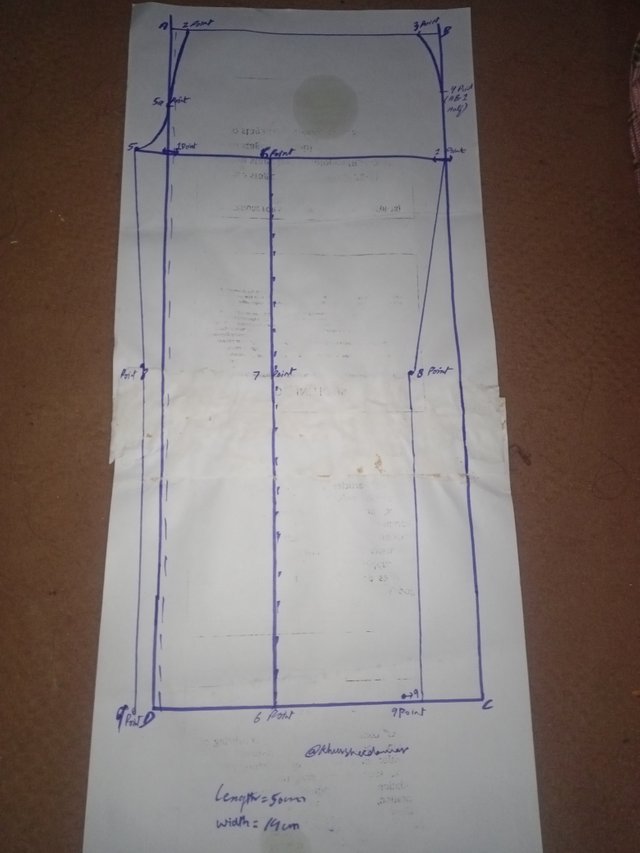
If I talk about step 2 then it is all about marking points in which above I have marked point ABC and D at corners of rectangle.
Front pattren pointe marking
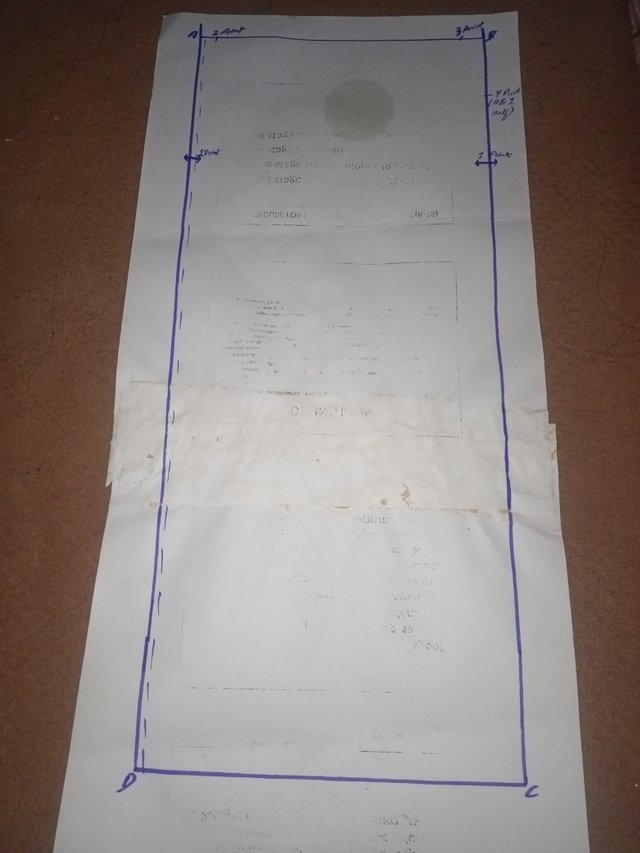
• I have started from point A to point D and we should move down to height of shot by 14 cm which is length or depth of waist which I have marked as point 1 at both sides.
• I started from point B two point A and there I enter the 1 cm which I marked as point 2 and then from point 2 to A I have measured 12 CM which is 4th part of waist circumference that I have taken as 48 cm.
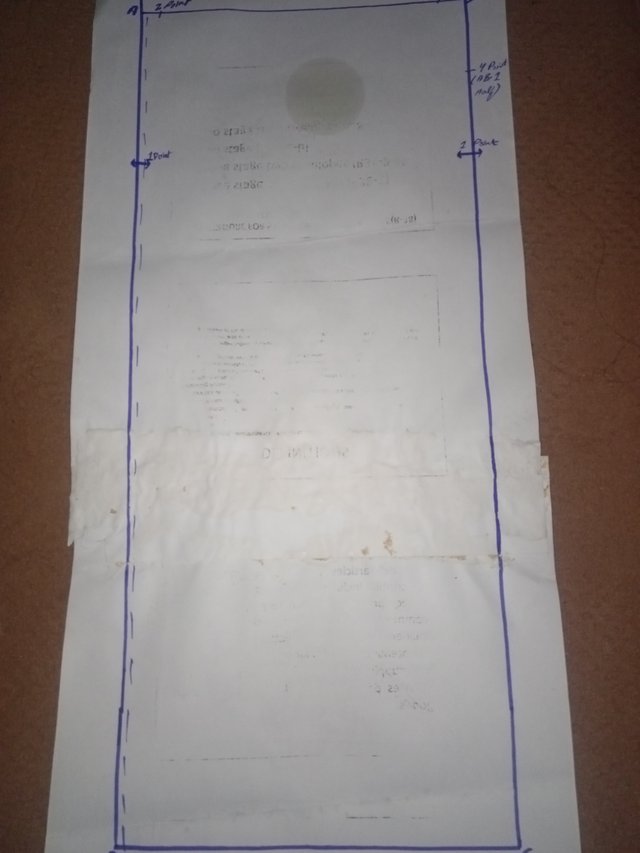
• I have measured now way in between A and 1 line and this is point 4. I have divided line number 1 into line 4 and then line 1 is extended and then I have marked a line which goes up at point A and this is I have marked as 5.a
• I have divided line between 5 and 1 and then I have transferred result to hem line which is present between D and C.
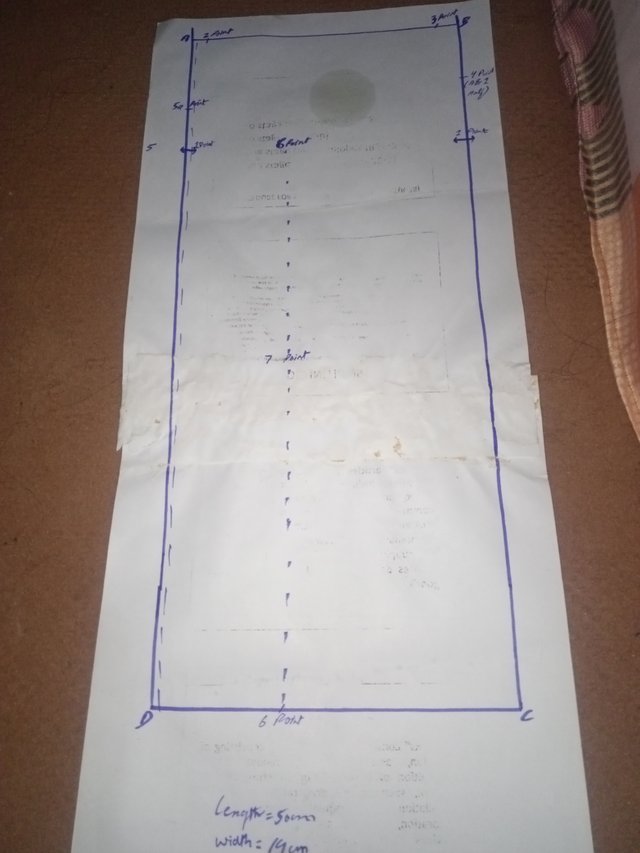
• I have taken measurements of 9 5 and add 5 cm in it starting from hem line in up direction which I named as point 7.
• I take measurements of 7 cm which is fourth part of circumference of knee and total circumference is 28 cm from which I minus 1 cm from point number 7 from each end and these points I have named as point number 8.
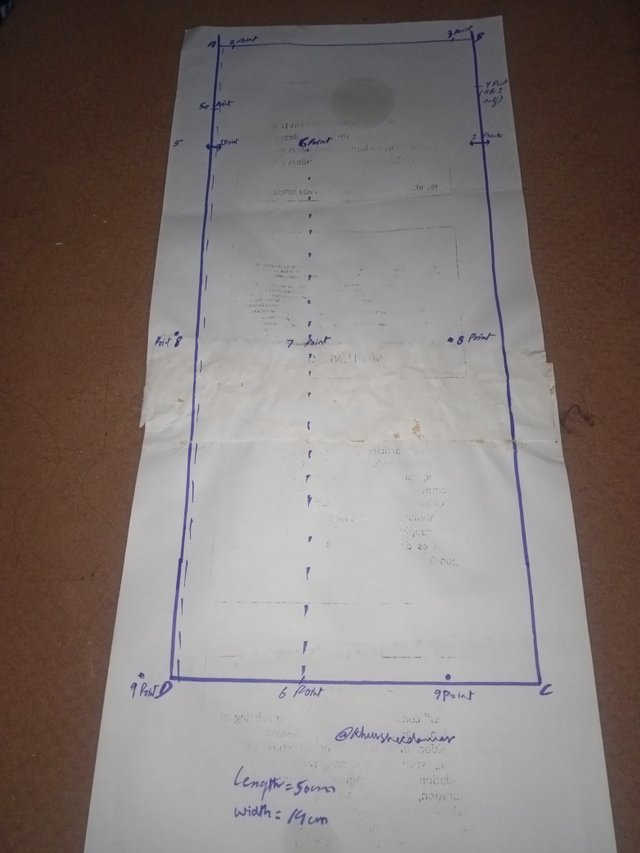
• I have taken measurements of 7.5 cm which are almost half of circumference of hem and then I minus 1 cm from 6 point at each end and this is I named as point 9.
Connecting Points
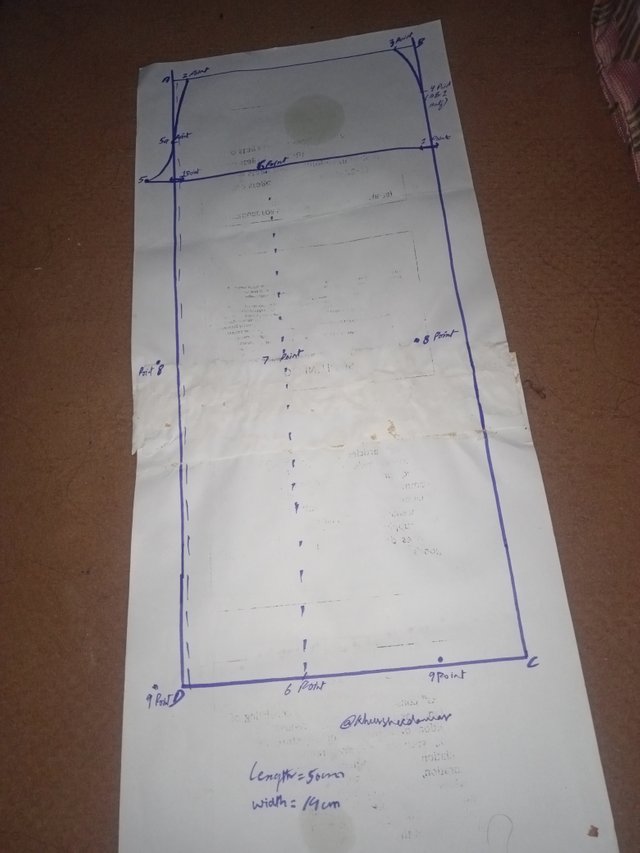
• I have connected first 2 with 5 in straight line and then 3 with in slight curve.
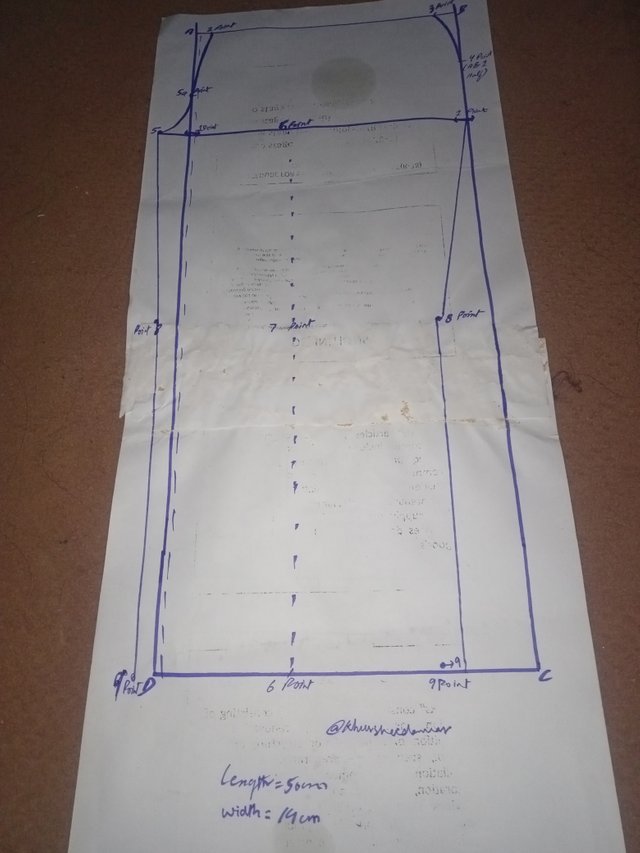
• I have connected 5 with 5.a in deep curve and then 5 with 8 in a straight line.
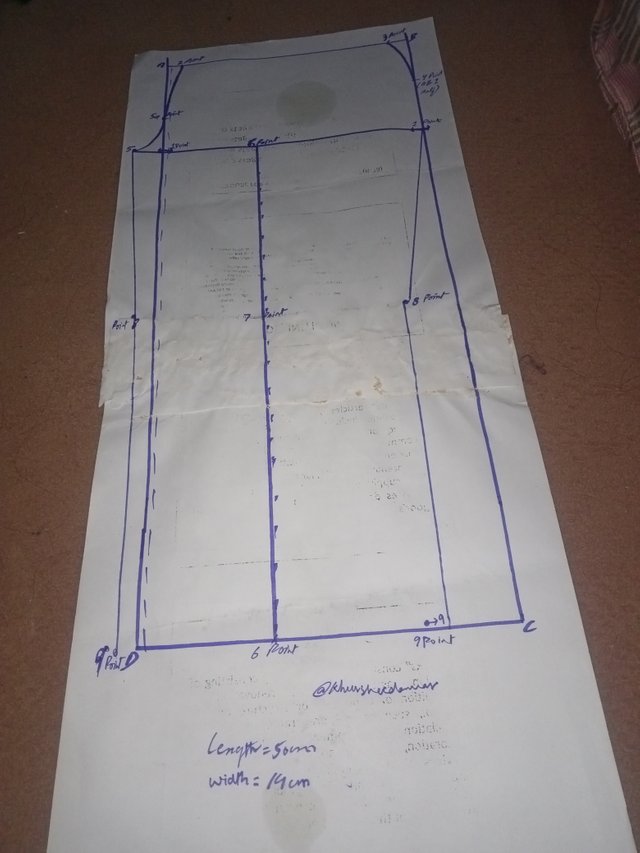
• I have connected 8 with 9 in a line which is straight and then 8 with 1 in side seam.
Back pattern marking
• I take measurement of height of shot from A to D that is 14 cm and I marked at both sides as point 1.
• I add 2 cm from point A to B and this is I marked as point 2. From to I move up and I go 2 cm out of box or rectangle which I marked as point 3.
• I take measurements from 3 to B in inclined way and 4th part of waist circumference I measured in which I added 2 and this is I marked as point 4.
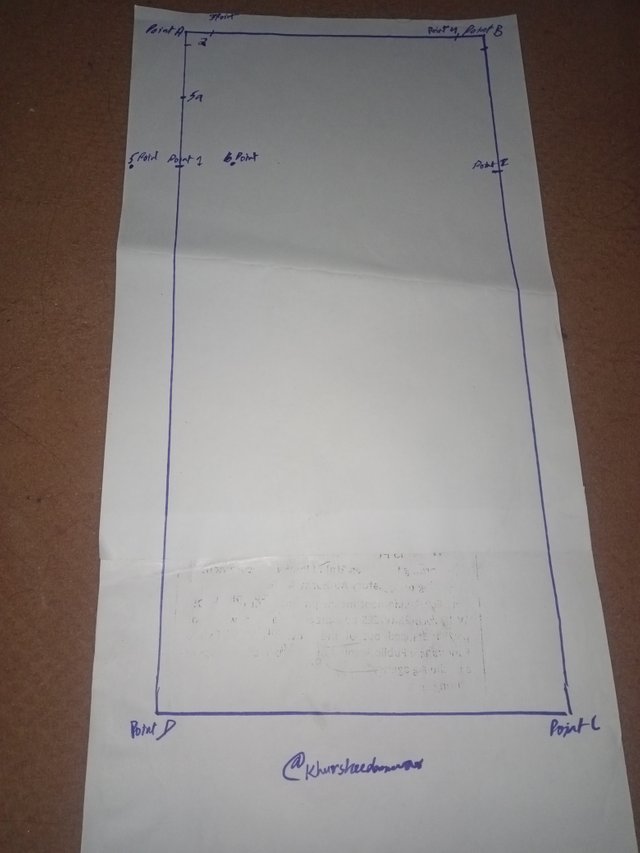
• I take measurements of half of line which is 7 cm got by dividing 14/2 and I marked at that line that was going towards A which is marked as 5.a
• I take measurement of line present between point 5 and 1,I took half 21/2=10.5 cm and then marked and transferred it at DC line which hem of trouser or pant.
• I take measurement of line 6 which is around 10.5 cm and then I take it's half which is 5.25 cm after that I added 5 cm in it which is 10.25 cm. For taking measurements I see line DC and I locate point number 7 from 6 in upward direction.
• I marked point 8 by taking fourth part of knee contour and by adding 1 cm in it and then distributing point 7 to each side.
• I take point 6 of hem and I measured fourth part of hem circumference and distributed from 6 to each side and this is i marked as point number 9.
• I made half of line between 4-3 and I move down 6-7cm from that point for having point number 11 for adding dart.
Connecting Points
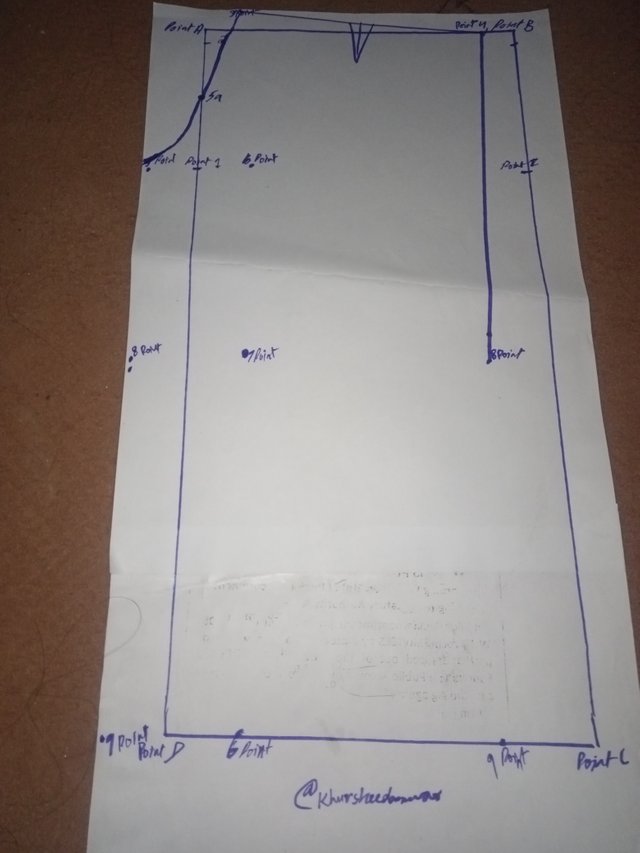
• I joined 3 with 5 in straight line and 3 with 4 again in straight line. I also joined 5 with 5.a in deep curve.
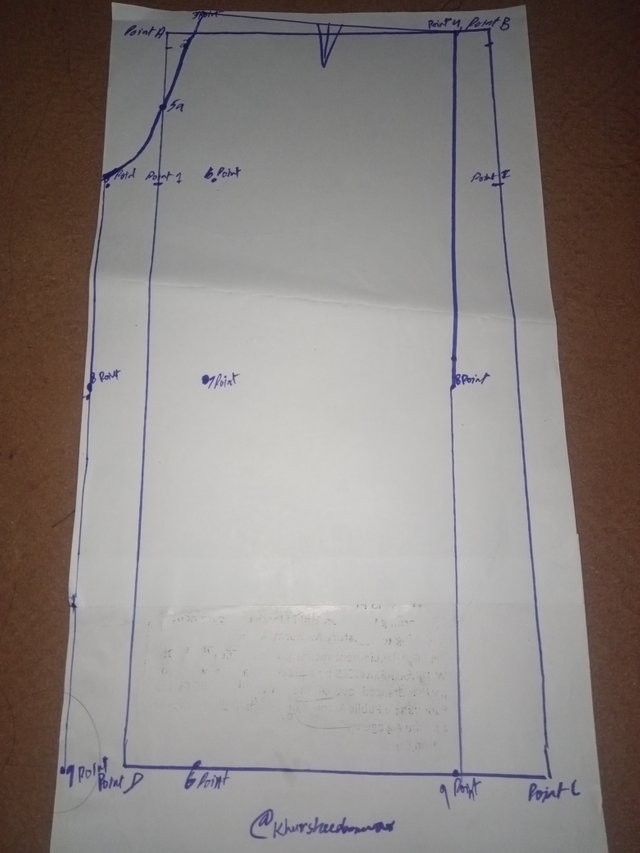
• I joined 4 with 8 in straight line and 8 with 9 in straight line again which is up to hem. I joined 5 with 8 in straight line for crotch.
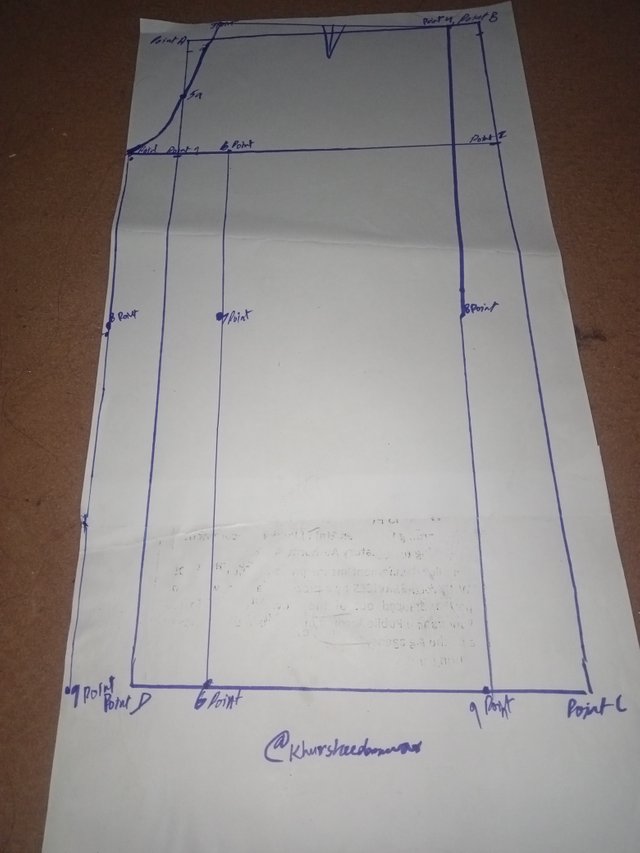
• Then 8 with 9 with straight line from crotch. And at last I made clamp by joining 10 with 11 in straight line.
Front Pocket and Flap
If I talk about creating of a front pocket and flap for a pair of pants then following things needs to follow;
• If I talk about most important thing then this is length of Tab which should be little more longer than clasp like if clasp is around 8 cm then tab should be 10 cm.
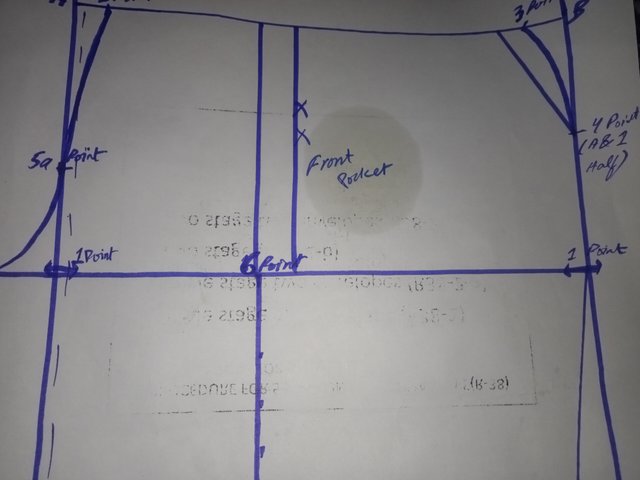
• If I talk about width of tab then if at one side of Tab is around 2 cm then other side is 4 cm.
• if I talk about width of pocket then it is drawn from crotch to waist with 10 cm width.
• If I talk about opening of pocket then this is made 4 cm from 3 to A point.
Back Pocket
For creation of back pocket you need to follow following steps steps;
• If I talk about location then you should start at point number 10 and then 4 dimensions of pocket you need to measure 6 cm at 8 side and 15 cm in length.
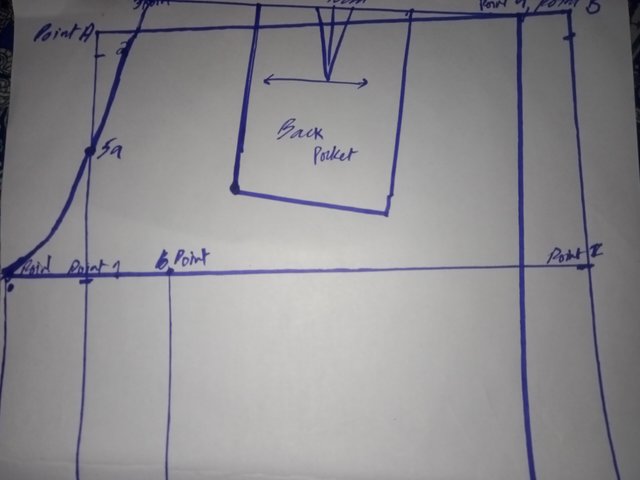
• if I talk about shape of pocket then I created it in square shape as I want to achieve a rectangular shape of pocket.
I want to invite @muhammad-ahmad,@jyoti-thelight,@steemdoctor1
Great brother.You have explained and demonstrate it very well.I am trying to post my entry too.
Best Wishes
Thank you for best wishes
My pleasure.
Upvoted! Thank you for supporting witness @jswit.
Actually presented in a way that even a beginner can understand. And also
You have presented so that we can gain more knowledge and practice in making and making children's clothing patterns. I wish you a successful journey, good luck for the competition.😊
@lunasilver
I am extremely happy that you like my sizes I have choosed for drawing this pattern with step by step stroke!
Thank you 👍
Saludos amigo @khursheedanwar, lo felicito, su explicación fue clara ☺️ Bendiciones y éxitos
@lunasilver
Saludos. Espero que puedas confeccionar pantalones para algún niño o niña con estos patrones que has trazado, los cuales se ven muy bien.
Te deseo éxito. Bendiciones
@lunasilver