Homeschool art - Upcycled Bumblebee
We enjoy our homeschooling activities through our art projects. Today we will show you our bumblebee art that was made using recycled cartolina and paper fasteners.
These are the things you will need:
- used paper fasteners
- yellow cartolina or any stiff paper
- recycled bond paper for the eyes and wings
- black watercolor
- paintbrush
- scissors
- pencil
- tape
First we made a circle on the paper, we used a paper plate but you can use any plate to make the circle.
.JPG)
Next, we cut the circle out with the scissors. Practice safety when handling the sharp scissors and make sure an adult is there to guide the use of the sharp objects!
.JPG)
Then, cut the circle in half and draw the stripes on the bumblebee body.Once you have drawn the stripes, its time to take out the watercolor!
Color the spaces in between the lines to create the stripes on your bumblebee with your paintbrush and black watercolor.
.JPG)
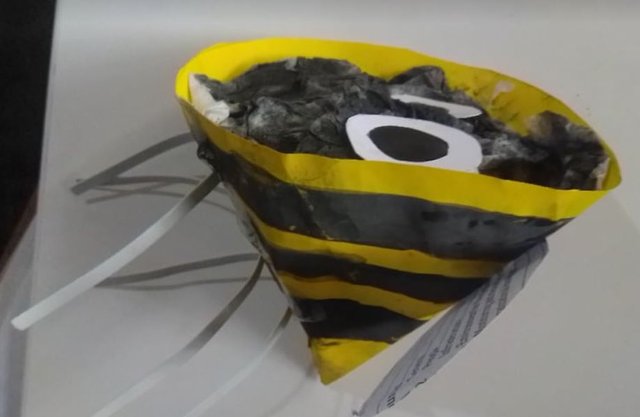
Stick the straight edges of the half circle to make a cone. Our bumblebee is taking shape! Crumple some paper to make the "body" of your bumblebee and paint it black. Then take your used bond paper and cutout circles for the eyes and wings in the shape and size you prefer.
Finally, fold the wires on your paper fasteners into the shape of a U and tape them to the bottom of the cone.
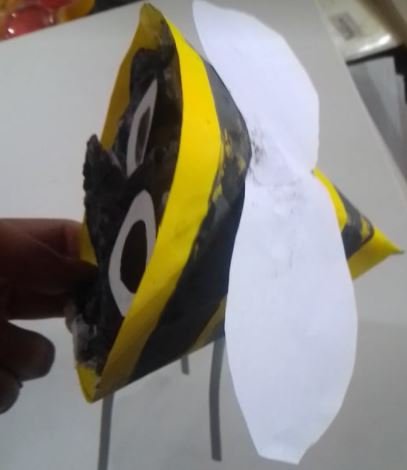
Your bumblebee is ready to fly! Hang it on a window sill for decoration or in your room.
We totally had fun making this bumblebee, and we hope you did as well!