"SEC | S20W4 | Google Sheets features and functionality (Creating Forms & Sheets)
It's been an amazing learning field here, thank you teachers for the lessons so far.
I have been using Google sheets for a while now, but never knew some of it's features, I am glad I learned most of them from this class. Now, let me share my homework below...
Explain your understanding of Google Sheets and then describe in detail the various features of a Google Sheets, a pictorial representation of these features is necessary so ensure you have clear screenshots.
Google Sheets is a web-based spreadsheet app offered by Google as part of the Google Drive service. It is available for free.
Google Sheets provides the capability for users to modify, arrange, and assess various forms of data. It facilitates teamwork, enabling multiple users to simultaneously modify and style documents, while also maintaining a record of all changes made through a revision history.
Features of a Google sheets
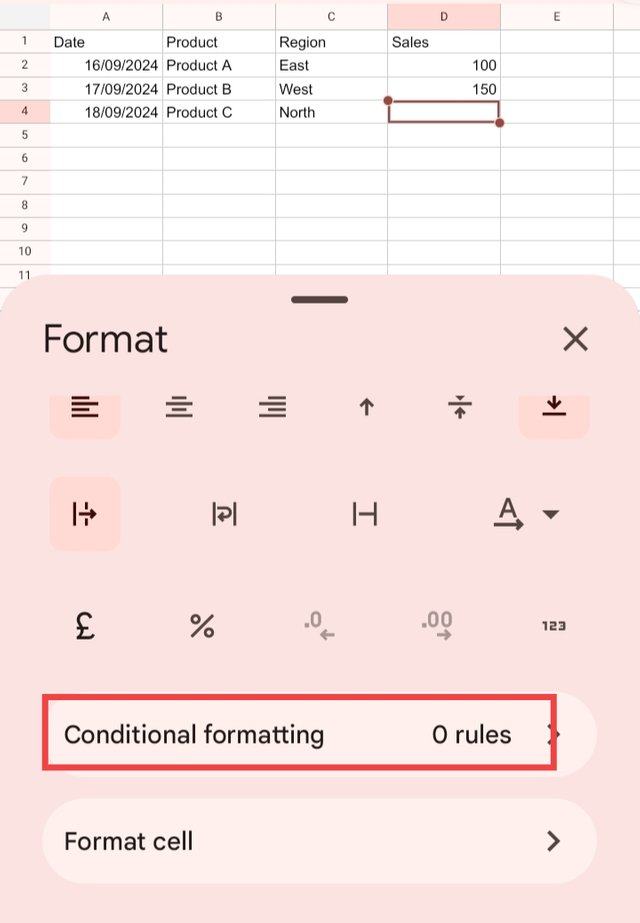
Heatmaps using conditional formatting
Heatmaps provide an effective method for emphasizing critical data within your spreadsheet. By utilizing conditional formatting, you can bring attention to specific values, outliers, or errors. Implementing a color scale enables you to swiftly emphasize both lower and higher values in your dataset. This feature proves particularly valuable when working with data imported from Google Analytics, as it allows for rapid identification of areas requiring in-depth analysis.
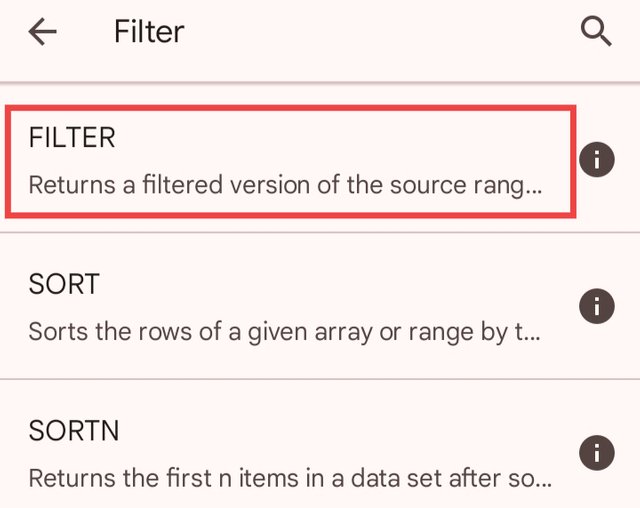
Filters
To narrow down the rows you see in the sheet, filters can come in handy. This is especially helpful when dealing with a large amount of data. Simply click on the filter icon (or choose ‘Filter’ under ‘Data’), then you can click on the filter icon in the first column row of your sheet to choose the specific value(s) you wish to display.
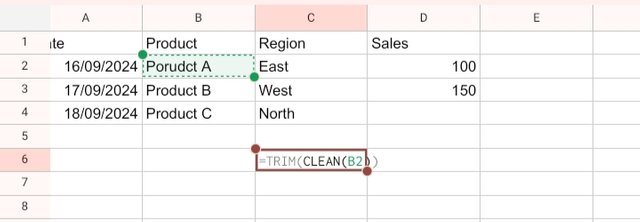
Trim and Clean
 |  |
|---|
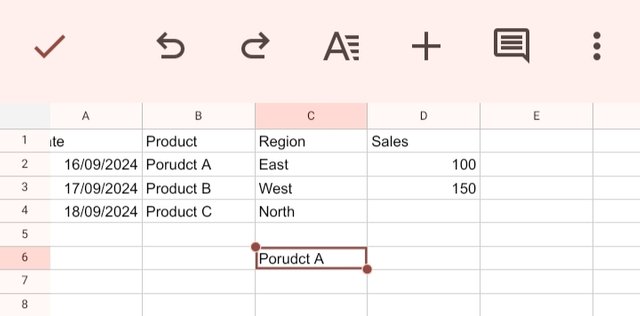
If you come across any undesired characters in your cells, you have the option to utilize the CLEAN function to eliminate any non-printable characters and the TRIM function to get rid of any extra whitespace at the beginning and end of cells. If you need any additional information from me, such as my name, company information, dates, phone number, and so on, use placeholders like “[item]”.
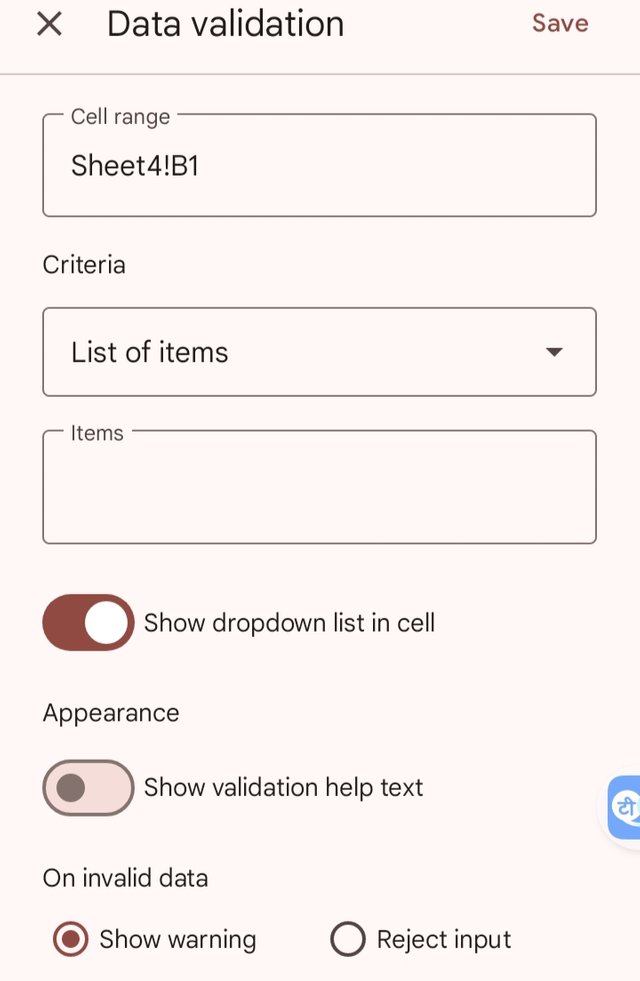
Validate data in cells
You have the ability to make sure specific cells exclusively hold chosen data by implementing data validation in your sheet. For instance, you can establish validation to ensure that specific cells exclusively contain numbers or a value from a predefined list. If you need any additional information from me, such as my name, company information, dates, phone number, and so on, use placeholders like “[item]”.
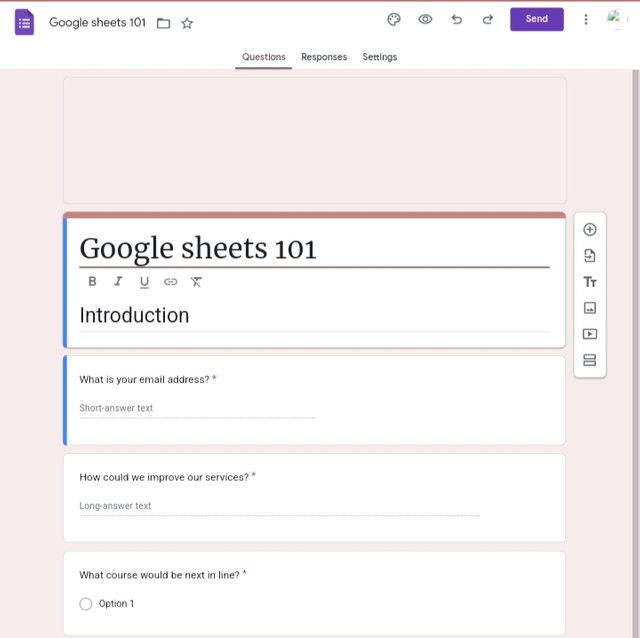
Create a simple Google form with the title Google Sheets 101 and use all the question types such as (Multiple choice, Short answer, Paragraph, Checkbox, Dropdown, etc) format to create your desired questions in the form. Customize all questions to be required and add a banner at the heading of your form. Clear screenshots are needed for this task.
Creating a simple Google form with the title Google Sheets 101
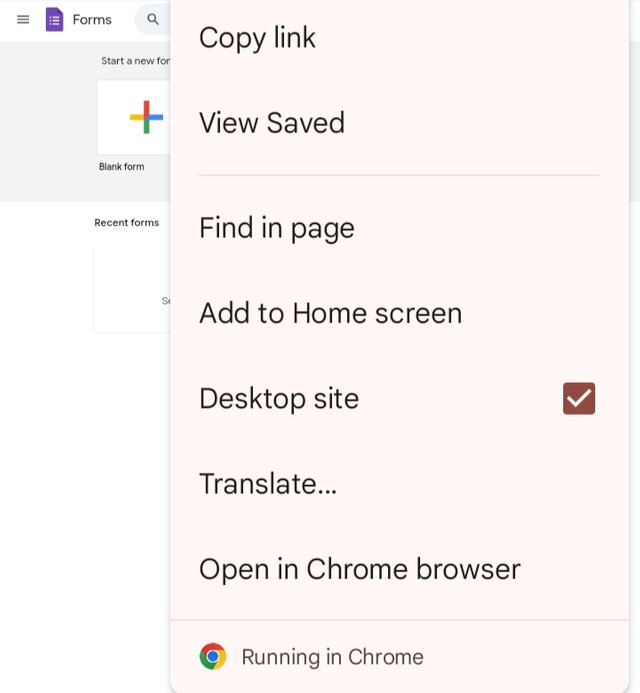
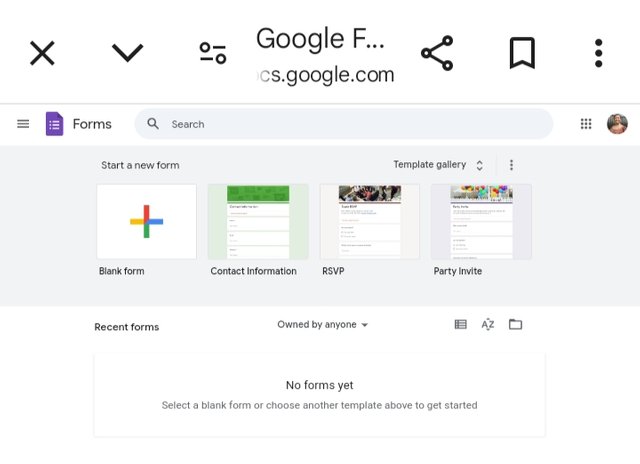
• First, I opened to my Google form sheet, and since I was using a phone, I had to change to desktop mood to allow me access my work.
 |  |
|---|
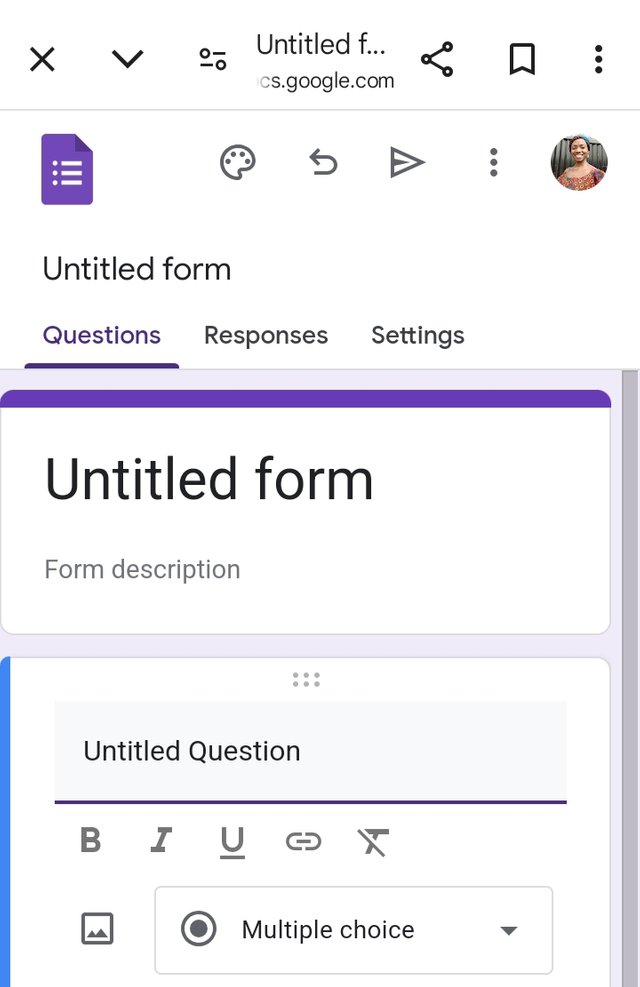
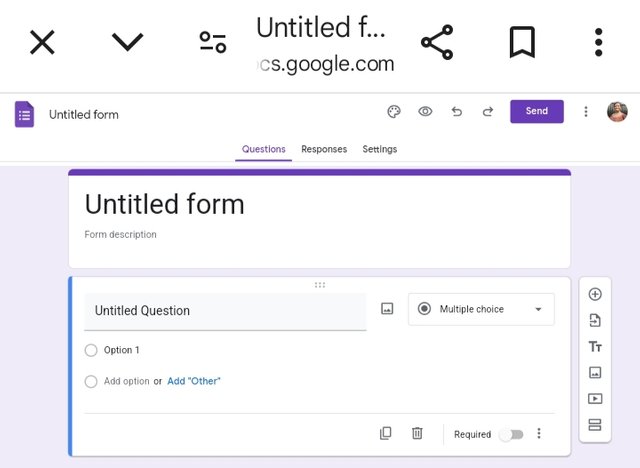
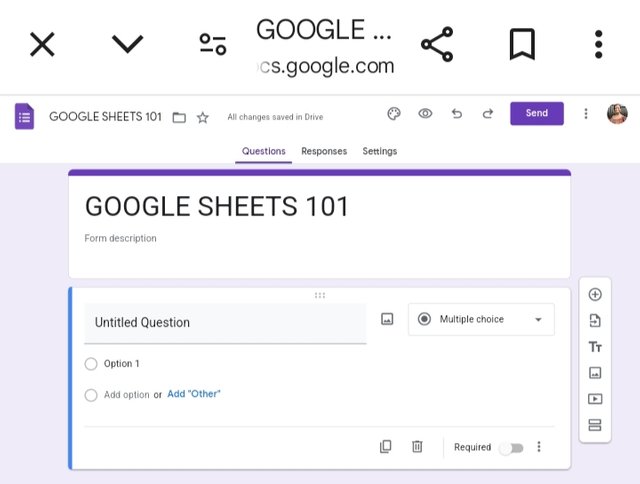
• Then I clicked on the blank form to start a new form. When it opened, it was showing untiled form, then I clicked on untitled form above to add my title.
 |  |  |
|---|
• After adding my title, I added my descriptions to explain what exactly the form is all about. Now, it's time to add my questions using all the questions types.
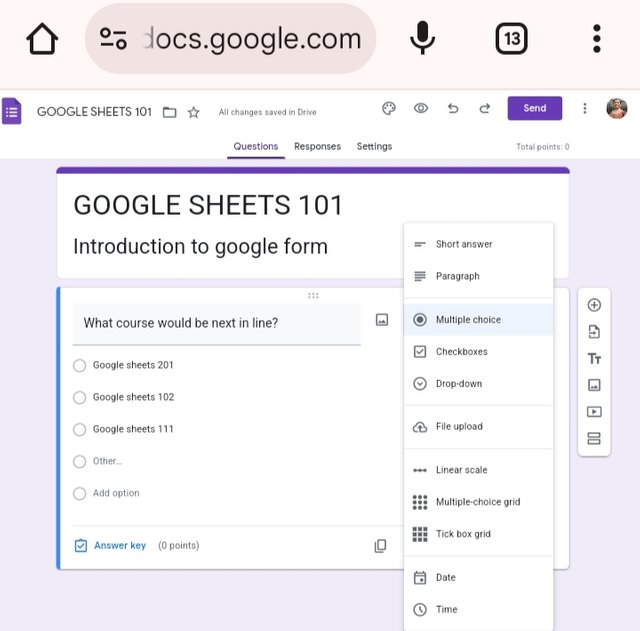
• Multiple choice question type is exactly what you’re picturing from your standardized testing days in school. With this style, respondents choose one answer from a predetermined list of options that is created.
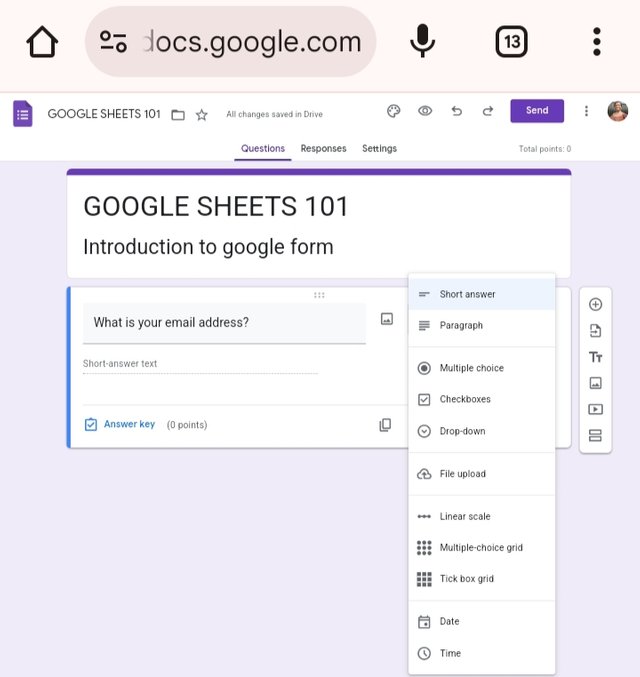
• Short answer is the most basic question type in Google Forms, the short answer field allows respondents to type in a single line of text to answer your question.
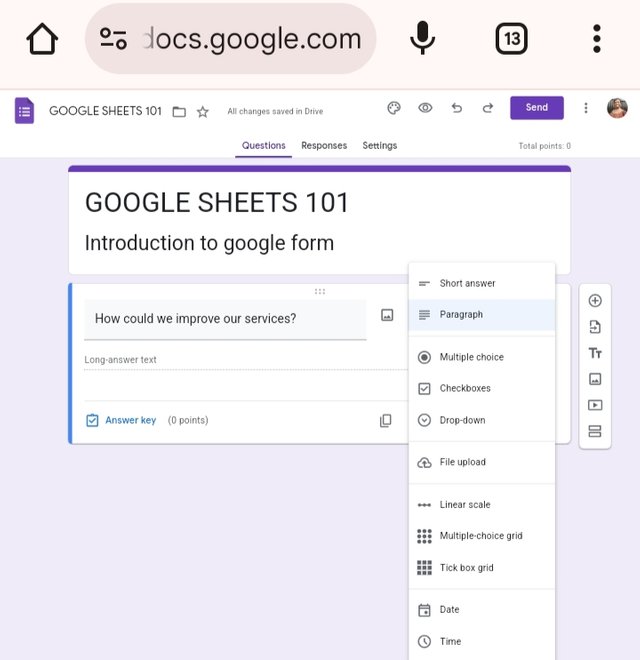
• The paragraph question type is a text field that lets people write multiple lines of text instead of just a few words.
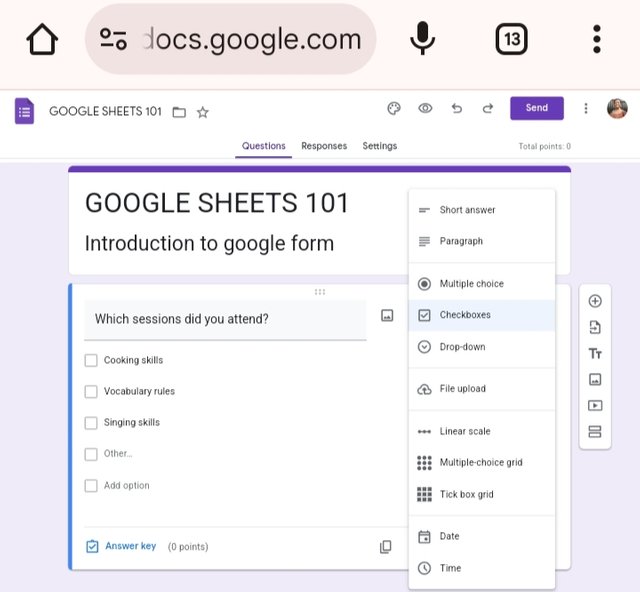
• The checkbox option works like the multiple-choice field, but it lets people pick more than one answer from the options you give, instead of just one choice.
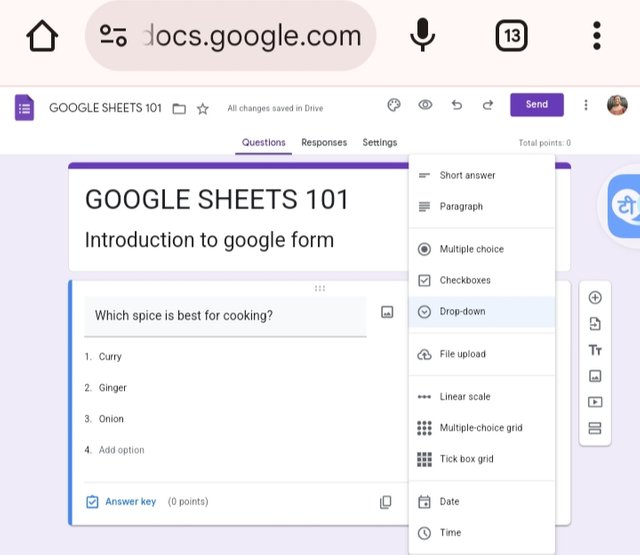
• You can use the dropdown question field to allow respondents to choose from a set of predetermined answers. Instead of showing all the options in a list, it presents them as a dropdown menu.
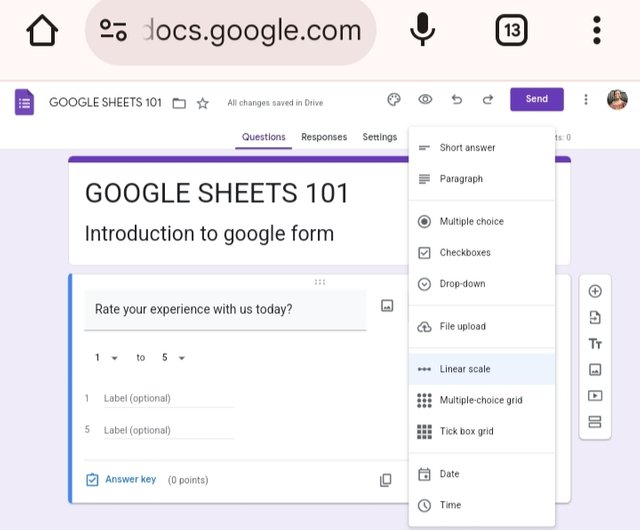
• Respondents can rate something using the linear scale field, choosing a number from 1 to 10 or any other range of their preference.
 |  |
|---|
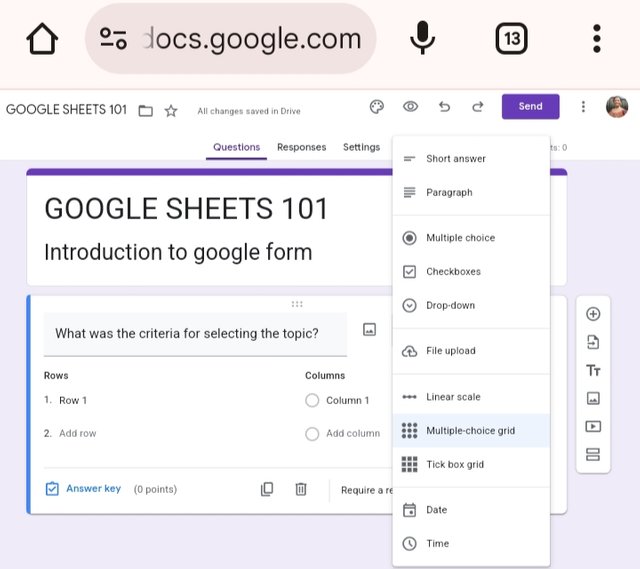
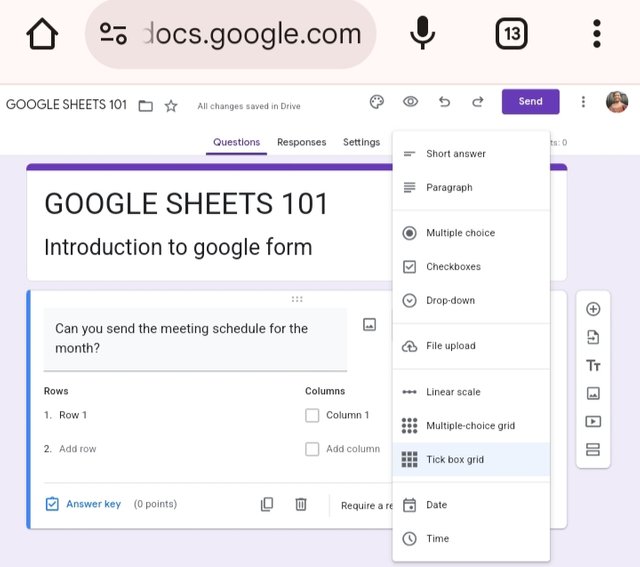
• In Google Forms, there are two types of grid field options: multiple choice grid and tickbox grid. They are quite similar, with the main distinction being that the multiple choice grid restricts respondents to a single answer per row, while the checkbox grid allows them to select multiple choices per row.
 |  |
|---|
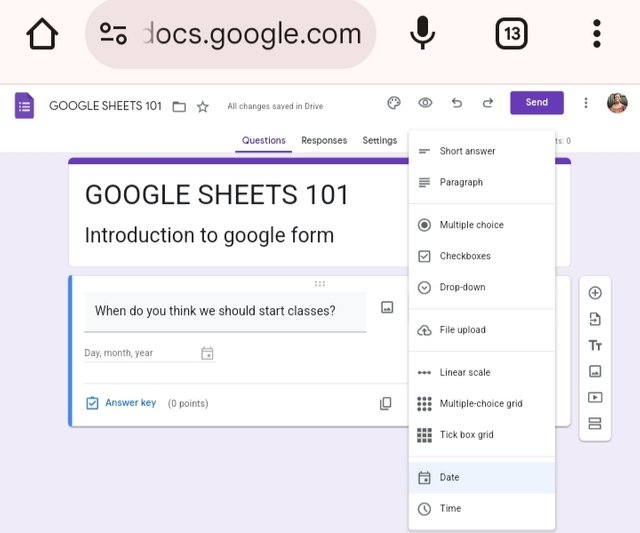
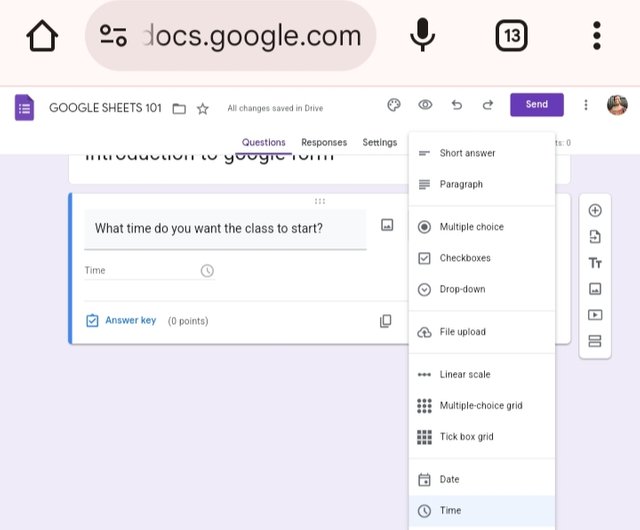
• You can easily gather basic information, like someone's birthdate, using the date or time fields. When respondents encounter the date field, they will see a calendar to pick a specific date. As for the time field, it allows them to manually input a time and choose “AM” or “PM” from a dropdown menu.
Customize and Adding Banner
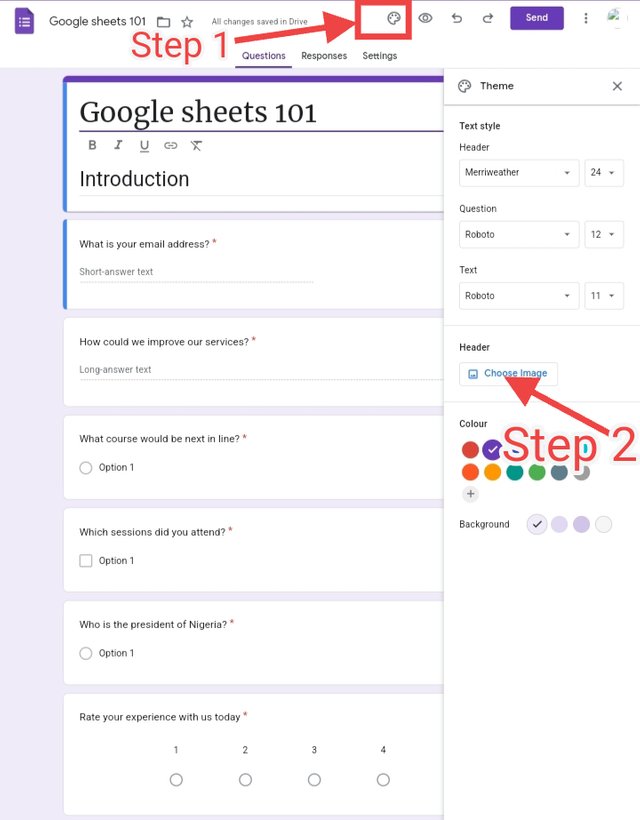
• Step 1: I clicked on the color wheel which can also be called customize theme logo.
• Step 2: When it opened, I scrolled down and clicked on the header button to choose image.
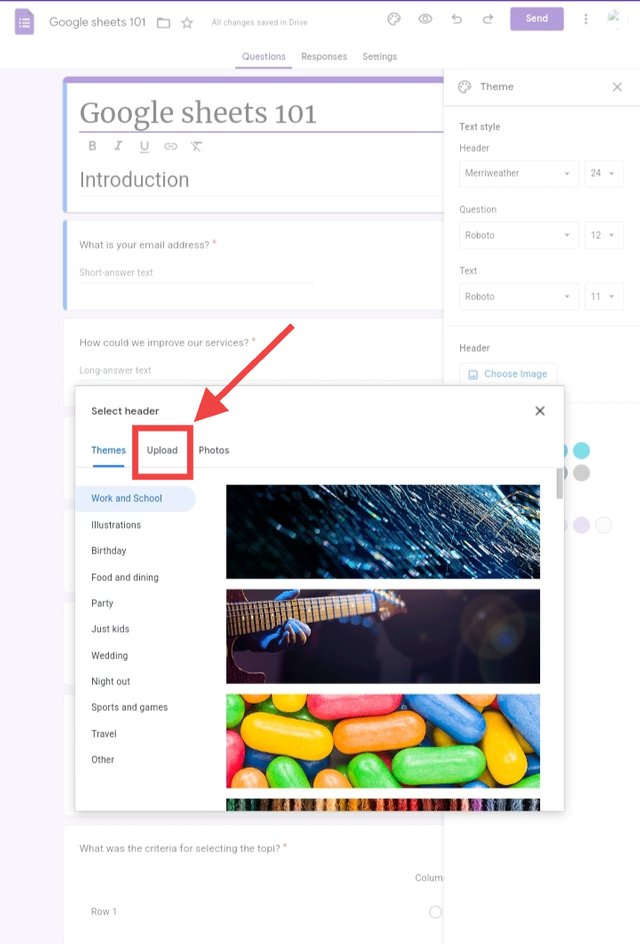
• Step 3: When it opened, I had three options (themes, upload and photos), I clicked on upload.
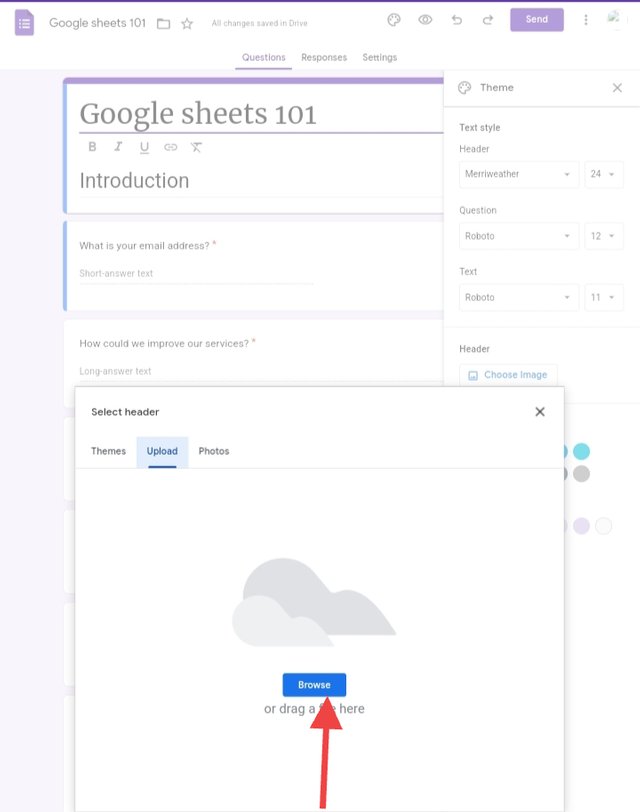
• Step 4: The browser button popped up and I clicked on it to select my image. I chose an image I designed myself.
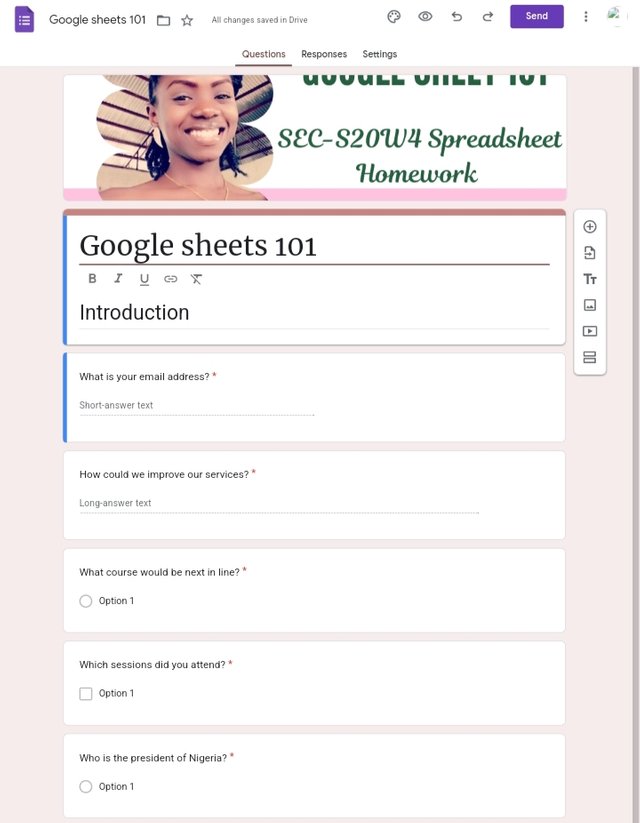 | The banner is added |
|---|
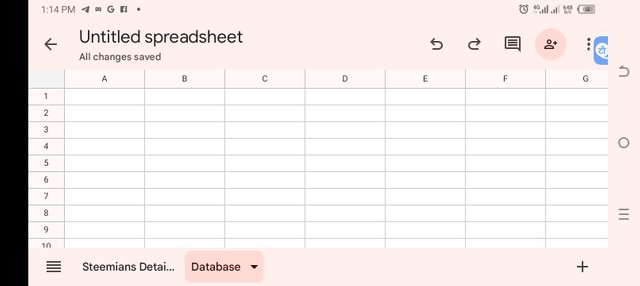
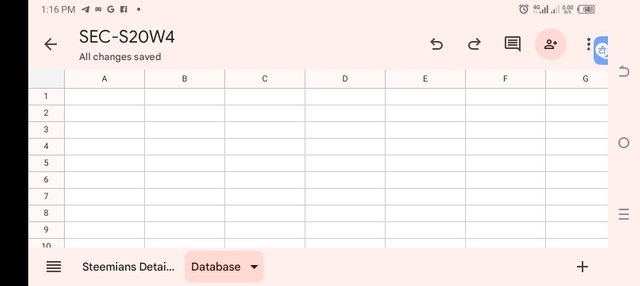
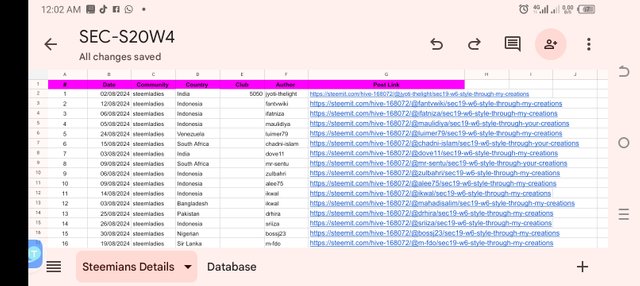
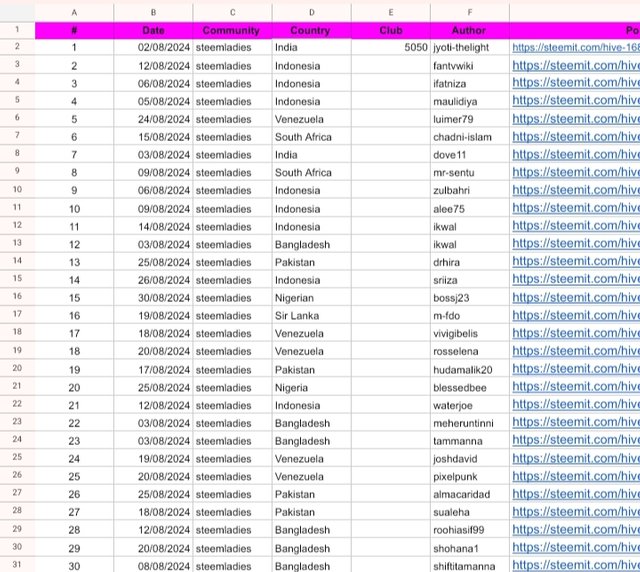
Create a Google sheet titled SEC-S20W4 with two pages, the first page will be called Steemian Details and it should include the date of post, community posted, country, club, author, and Post link and the next page should be called Database. Your database should have author, country, and club so that when a post link is dropped in the Steemian details it can fetch the details automatically. (Ensure that your database has at least 30 Steemians and the same goes with the post link). Clear screenshots are needed for this task.
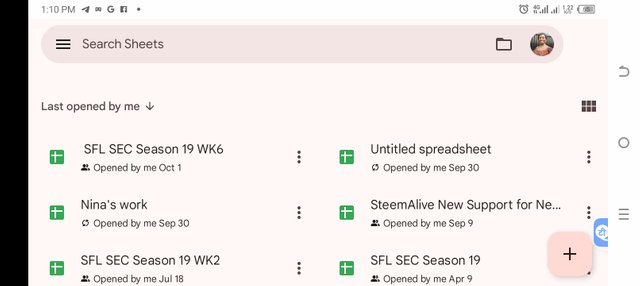
• 1: I opened my Google sheet, and clicked on the + sign by the right hand corner.
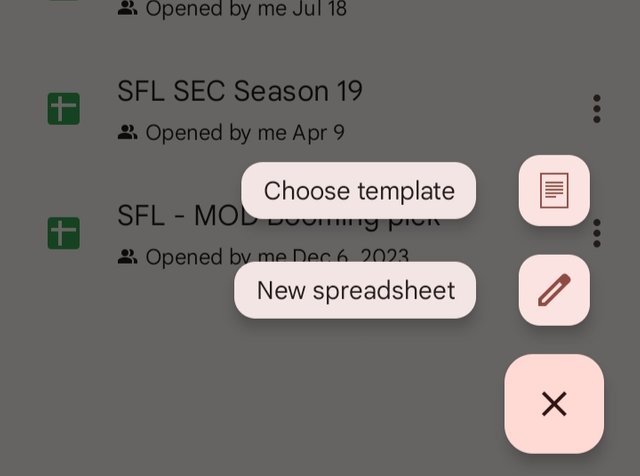
• 2: A new interface popped up and I clicked on new spreadsheet.
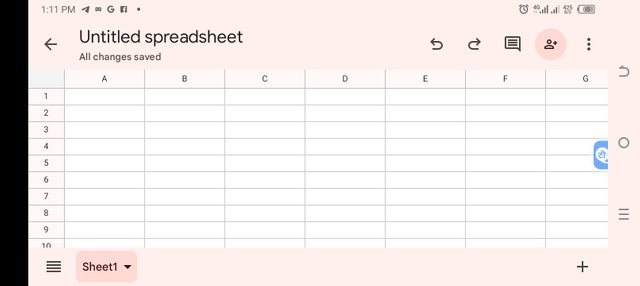
• 3: When it opened, I have sheet one ready, then I clicked on the + sign by the right hand corner to add another sheet. You continue to add more sheets by clicking on the + sign.
 |  |  | 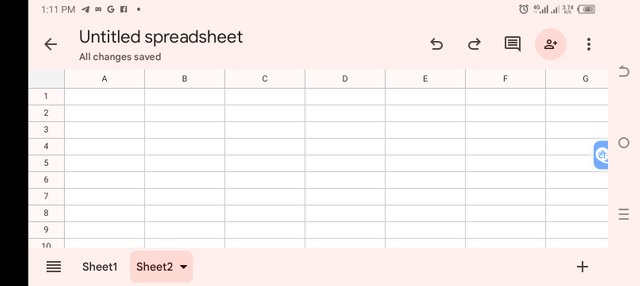 |
|---|
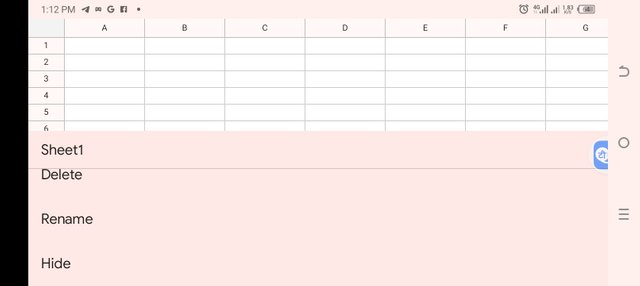
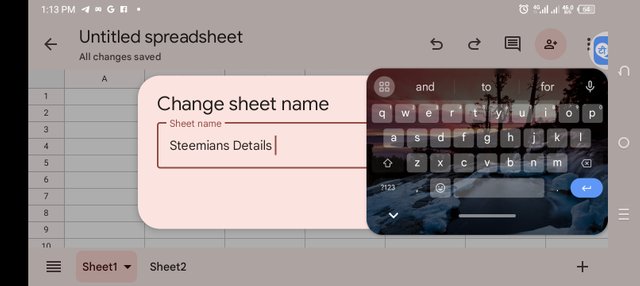
• 4: I clicked on the drop down arrow beside the sheet1 and sheet 2 to change their title. I clicked on rename and typed in the title I desired.
 |  |  |
|---|
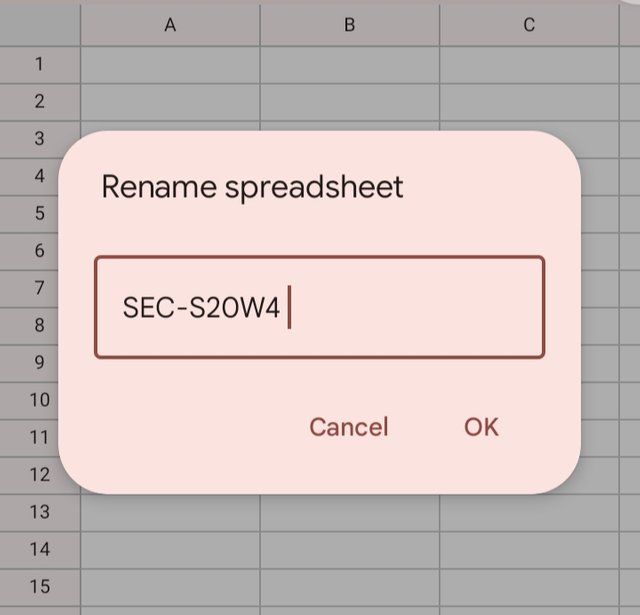
• 5: I renamed my sheet from untiled spreadsheet to SEC-S20W4
 |  |
|---|
Filling the Spreadsheet
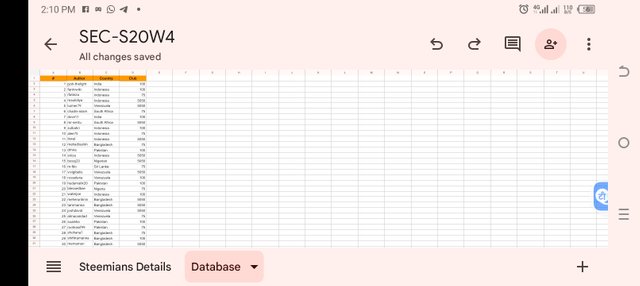
I opened the database and filled in the columns and rows with the required details provided by the teacher.
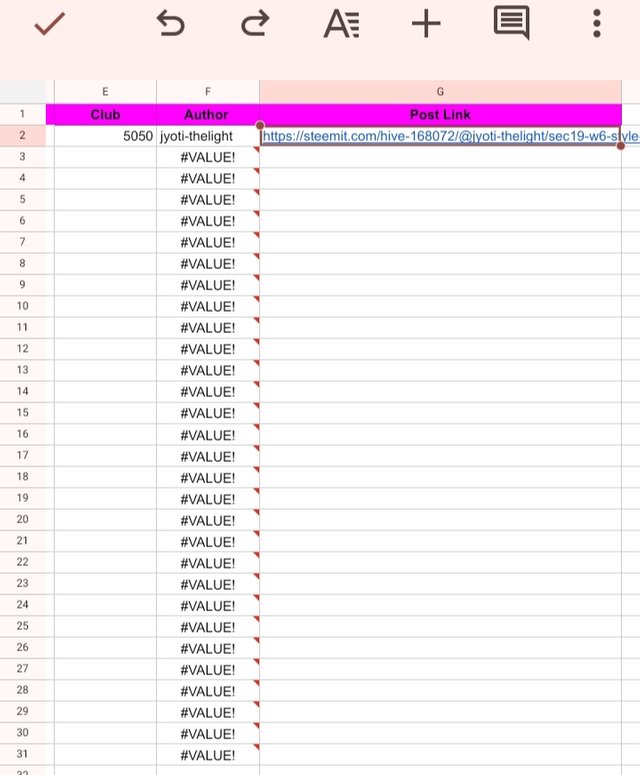
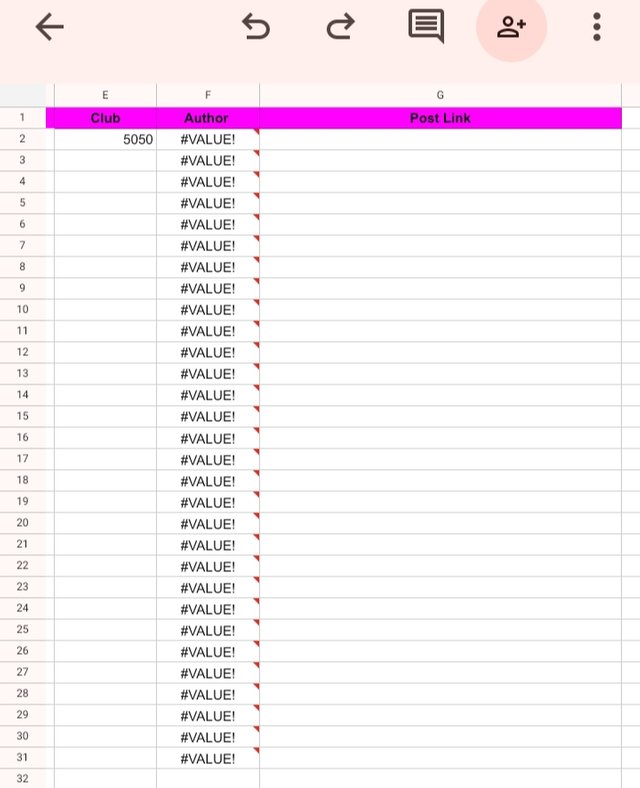
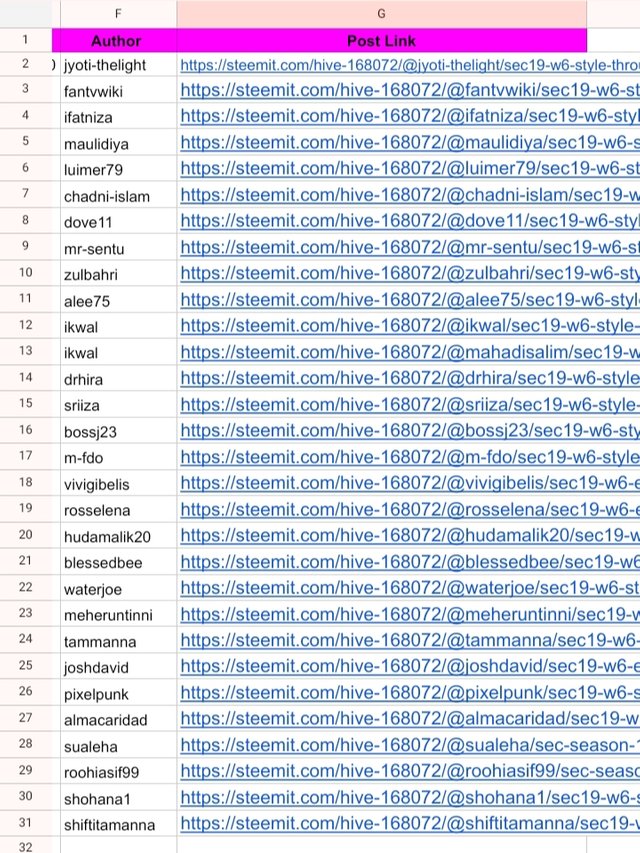
Then I opened the Steemians Details to attach the formulas given by the teacher to obtain the author =MID(D2,FIND("@",D2) + 1,FIND(CHAR(160),SUBSTITUTE(D2,"/",CHAR(160),5)) - 1 - (FIND("@",D2)))
club =INDEX(Database!$D$2:$D$720, MATCH(C2,Database!$B$2:$B$720, 0))
Country =INDEX(Database!$C$2:$C$720, MATCH(C2,Database!$B$2:$B$720, 0))
But unfortunately, the clubstatus and country formulas did not work for me, probably because I used a cell phone to do my work or it could be a network issue.
The author formula worked for me as you can see below, so I had the formula input and then copied the link and paste for the author's name to automatically appear.
 |  |  |
|---|
 |  |
|---|
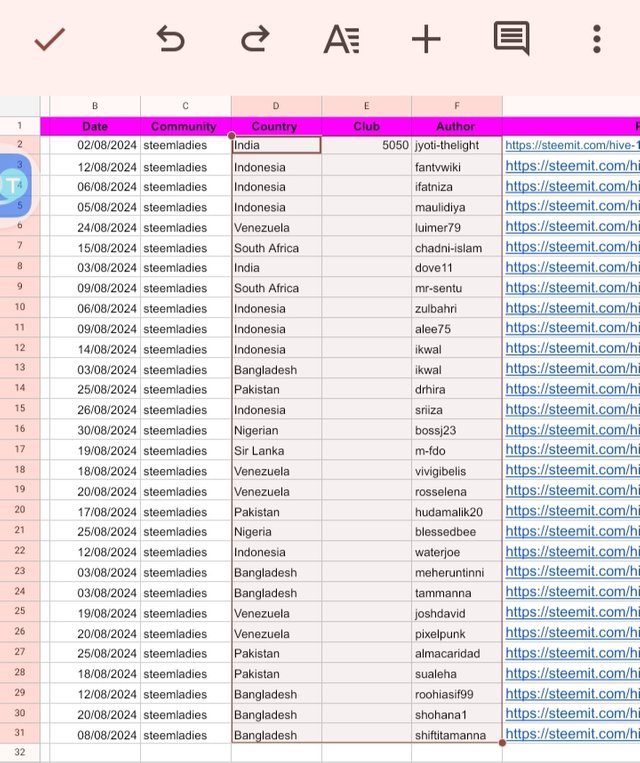
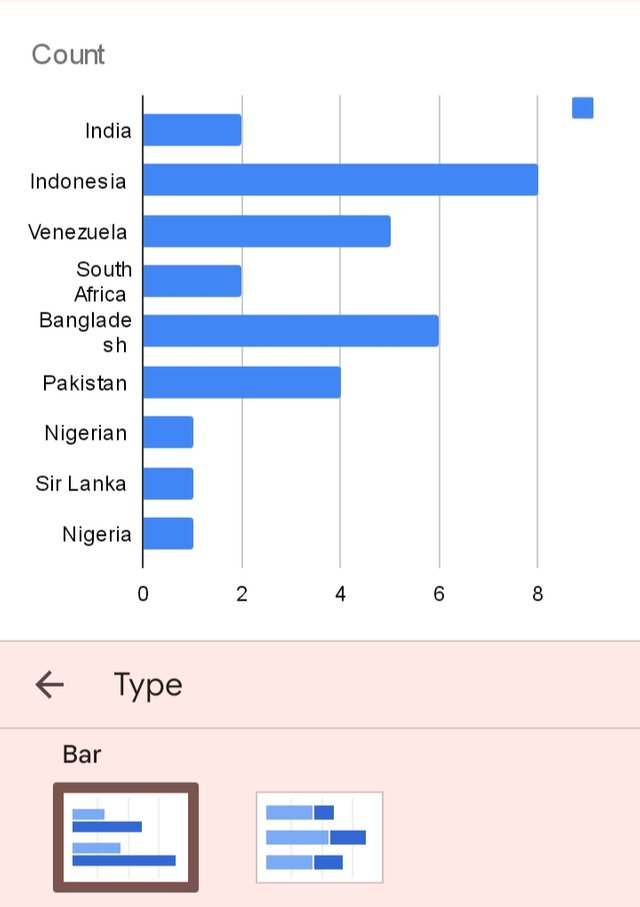
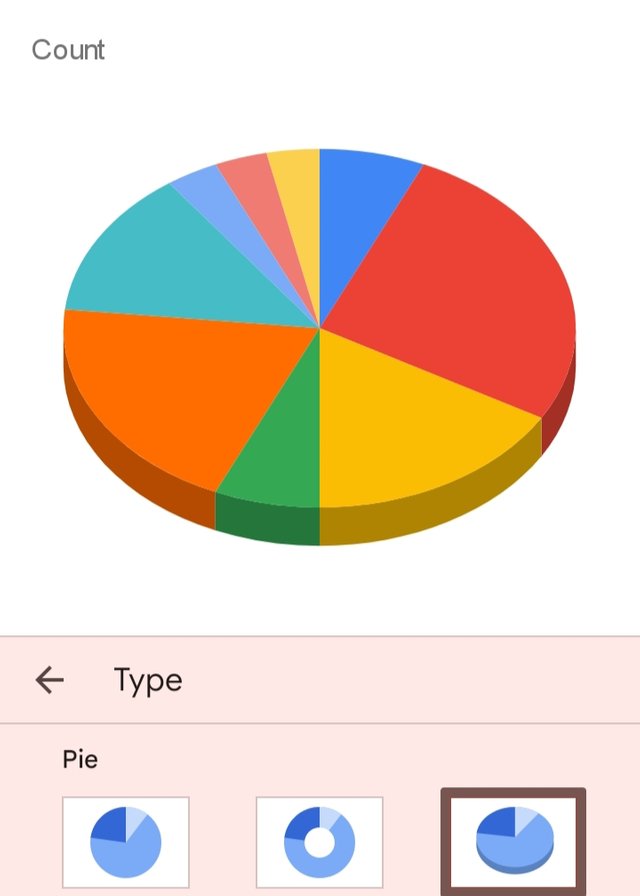
Using at least pie chart & bar chart, show us the relationship between author and country as contained in the above question.
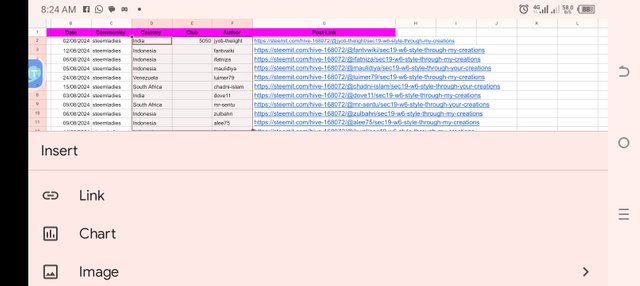
• I highlighted the part I'm working with on my sheet and then I clicked on the + button at the top.
• I clicked on chart to select which chart I would be working with.
 |  |
|---|
• I clicked on type and selected the bar chart first, then followed by the pie Chart.
 |  |
|---|
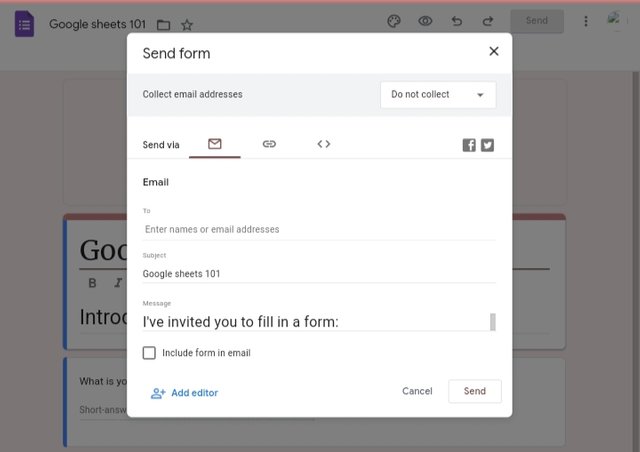
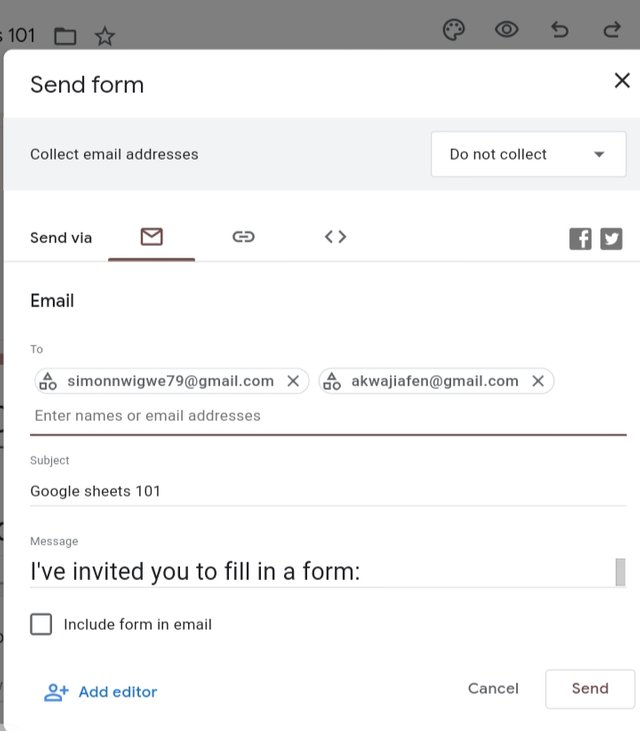
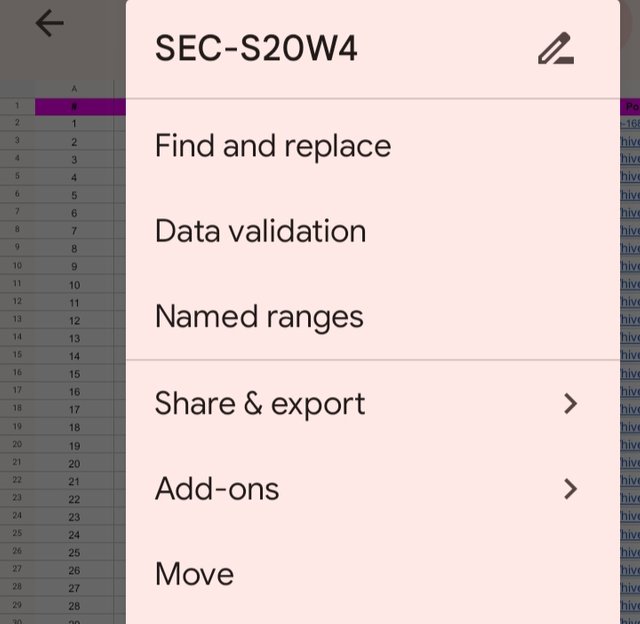
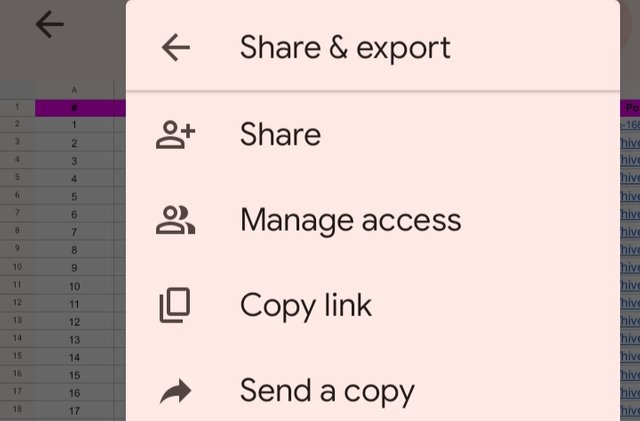
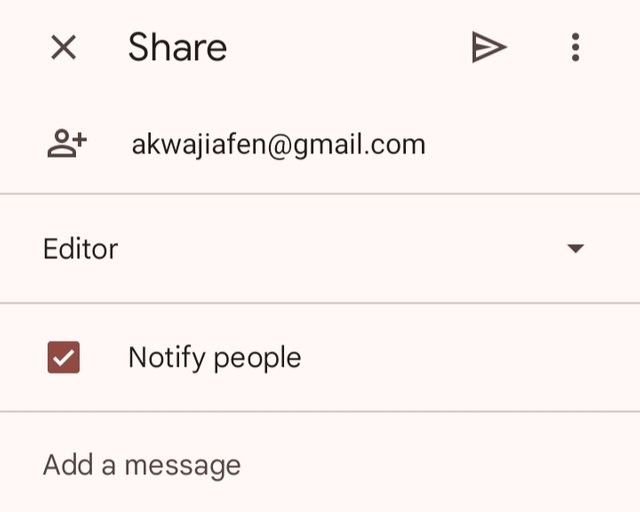
Attach the Link to the form and sheet and give access only to the following emails so that we can see your work properly.
simonnwigwe79@gmail.com
akwajiafen@gmail.com
Sending Forms to emails
 |  |  |
|---|
Sending Sheets to emails
 |  |
|---|
 |  |
|---|
It was indeed a though class. I have done my best for this week. Using a phone to achieve this task wasn't easy at all.
Upvoted. Thank You for sending some of your rewards to @null. It will make Steem stronger.