Custom PC Build Guide - Step By Step How-To
A friend had spotted a nice Alienware desktop and decided to ask "the Guru" (me) what he thinks. For those that don't know Alienware is overpriced for the specs and building your own custom PC is a lot cheaper and more powerful, albeit needing to have the knowledge. That's the exact answer I gave him, so he decided to shift me the task of picking the parts and gave me a pre-set budget to get going.
TL;DR : In this PC build guide I will show you step by step (with images and videos) how to get your own PC up and running. My budget was set to $700 as the max. He wanted it for casual gaming (mostly League of Legends), running software like Photoshop and browsing. He already had a monitor which is full HD (1920x1080 resolution) and a keyboard/mouse/headset combo.
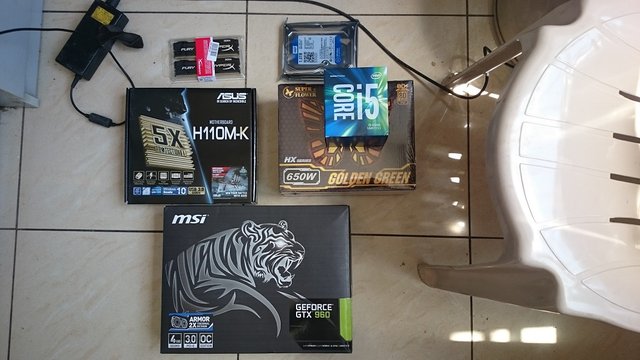
PC Parts List
CPU - Intel i5 6500
Motherboard - Asus H110-MK D3 (LGA 1151)
RAM - 2x4GB HyperX Fury Black DDR4 2133Mhz Dual Channel Kit
PSU - Superflower 650W Golden Green
HDD - 1 TB Western Digital 7200RPM
GPU - MSI 960 2xArmor 4GB
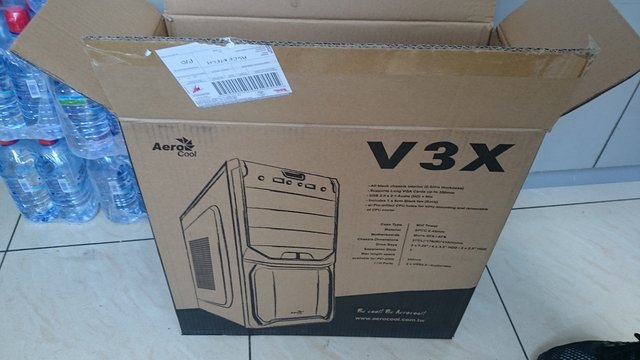
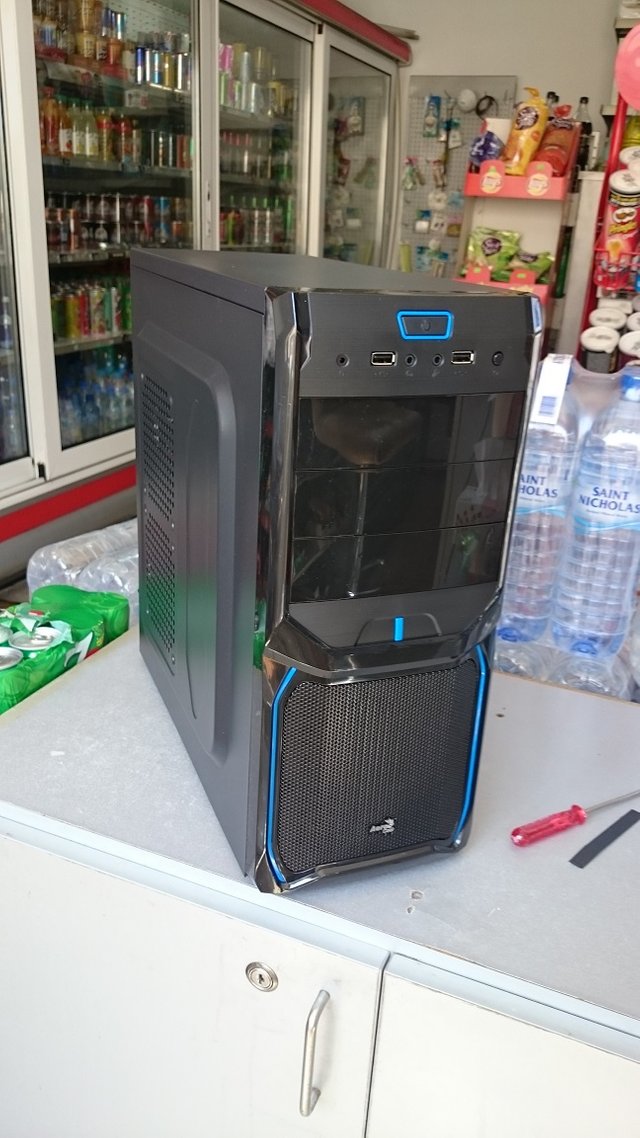
Case : Aerocool V3X Advanced (Black/Blue)
Case
For this build I'm using the Aerocool V3X which is a mid ATX (middle sized case for small ATX motherboards)
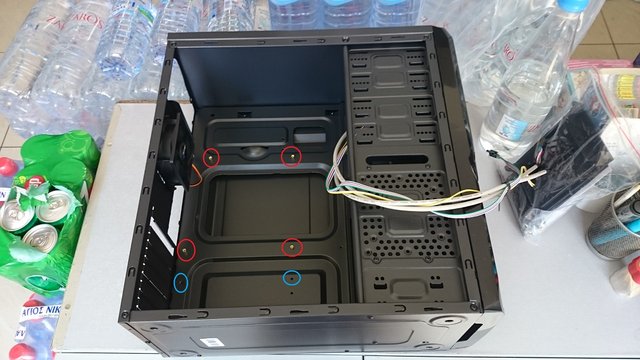
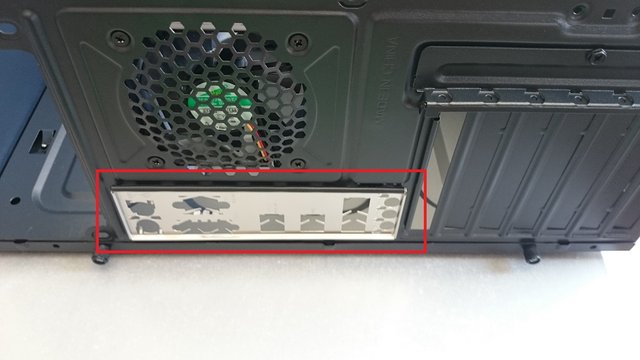
After opening up the case we need to check if our stand-offs are in place for the motherboard. The stand-offs are gold/brass spacers that are screwed to the case (circled in red on the below image) to prevent short circuiting or damaging the motherboard when we screw it to the case. The specific motherboard has 6 screws so I added another 2 stand-offs that were missing (on the blue circled areas below).
We also need to add the I/O panel which holds our motherboard I/O ports in place.
Motherboard
The motherboard I picked is a budget Asus H110-MK D3 with support for 6th generation i3/i5/i7 processors on the LGA1151 socket.
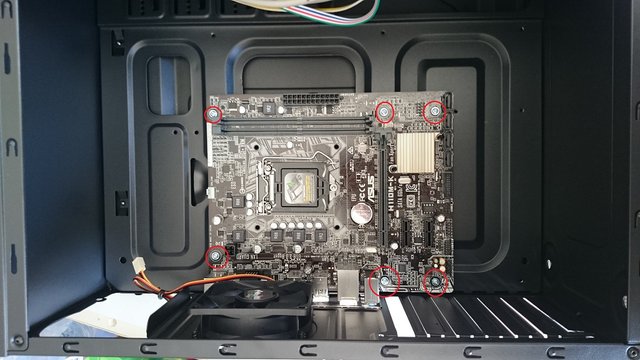
Slowly insert the motherboard in the I/O panel and add the screws to fix the motherboard onto the stand-offs we added previously.
CPU
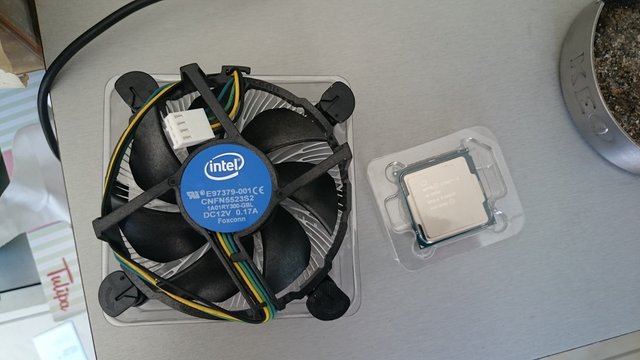
The i5-6500 is a mid-tier 1151 socket processor, good enough for just about anything you want to do from running demanding applications to gaming.
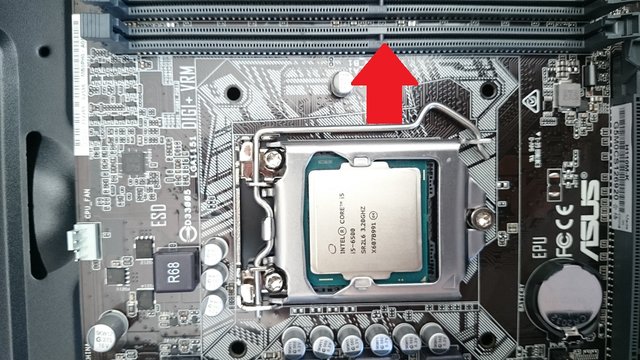
Installing the CPU is relatively easy. Pull up the hatch and place it above the pins, then pull down the hatch to close it. To be sure you're doing it right watch the video below.
Cooler
The CPU comes with it's own stock cooler, so I didn't get an aftermarket one due to the budget. It suffices for our needs anyway, so no biggie.
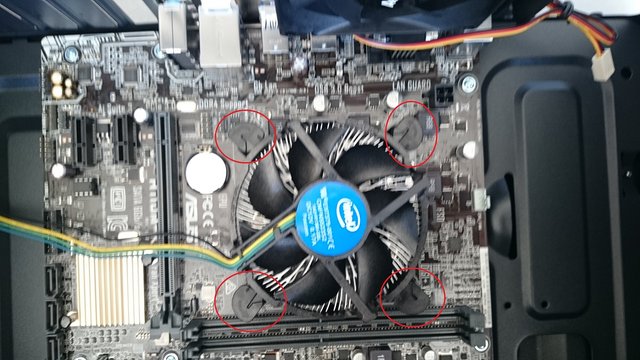
To install the cooler all you have to do is spin the plastic screws back and forth, then place the coolers plastic screws into the holes and apply pressure to each one (diagonally one after the other), you should recognize a click which indicates they are in place on each screw. Thermal paste is already pre-applied to stock coolers so there's no need to do anything else. View the video below for a small demostration and assuring you installed the cooler properly.
For the fan to be able to run we need to insert the power pin to the motherboard. Usually motherboards have indicators for various connections, for the CPU fan it's usually CPU_FAN as you can see in the image below.
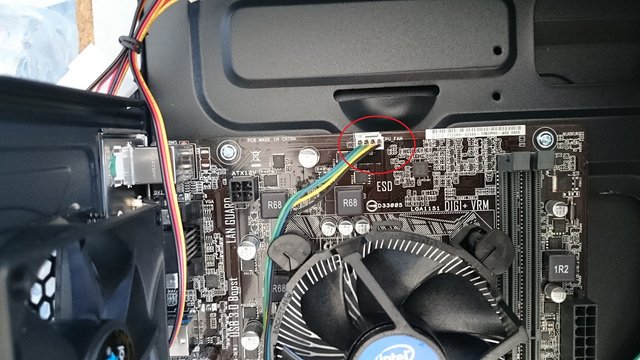
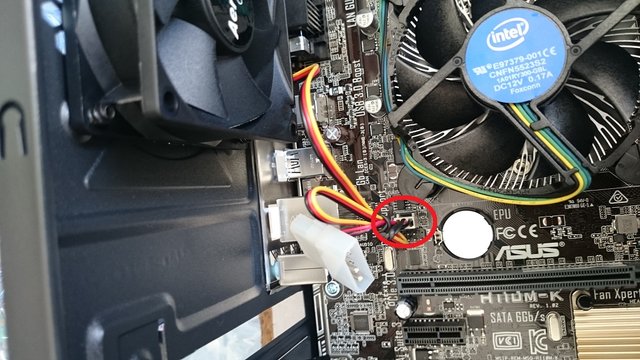
While we are at it we might aswell add the chassis fan to the motherboard aswell.
Front Panel USB, Audio, Power/Reset Buttons and LEDs
This is one of the most tedious tasks but relatively simple if you use the manual. We are going to connect all the front panel case buttons, leds and ports.
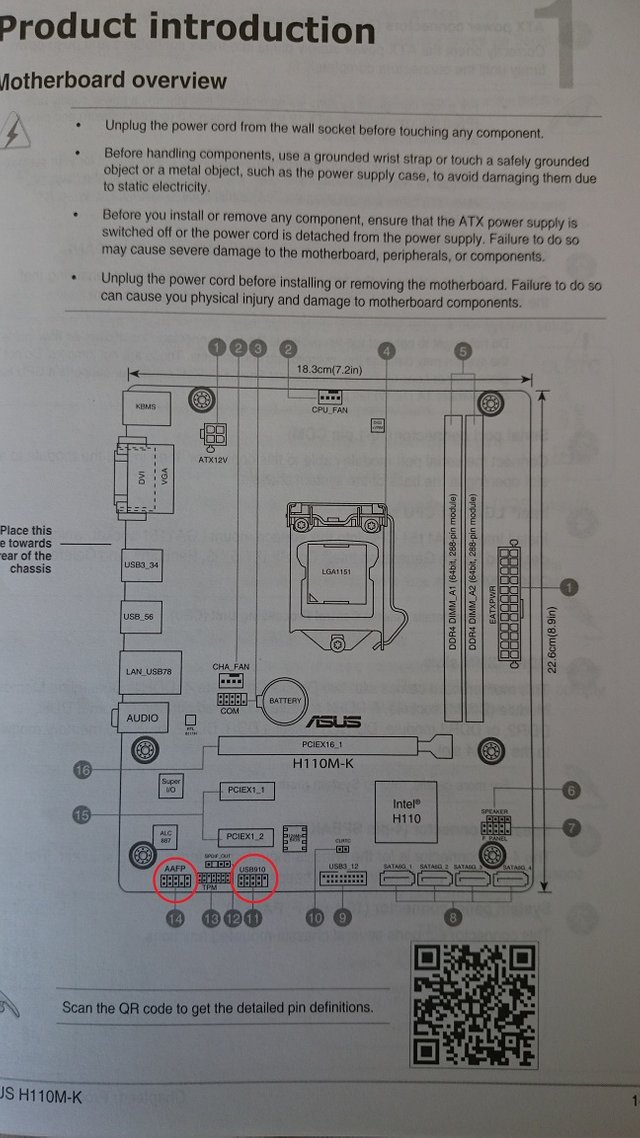
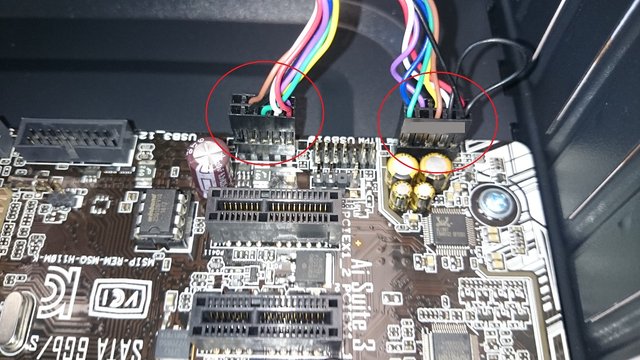
For our specific case we have 1x USB cable, 1x HD Audio cable and a mix of power/reset leds and buttons. Looking at the motherboard manual and writings on the motherboard insert each cable from the case to motherboard.
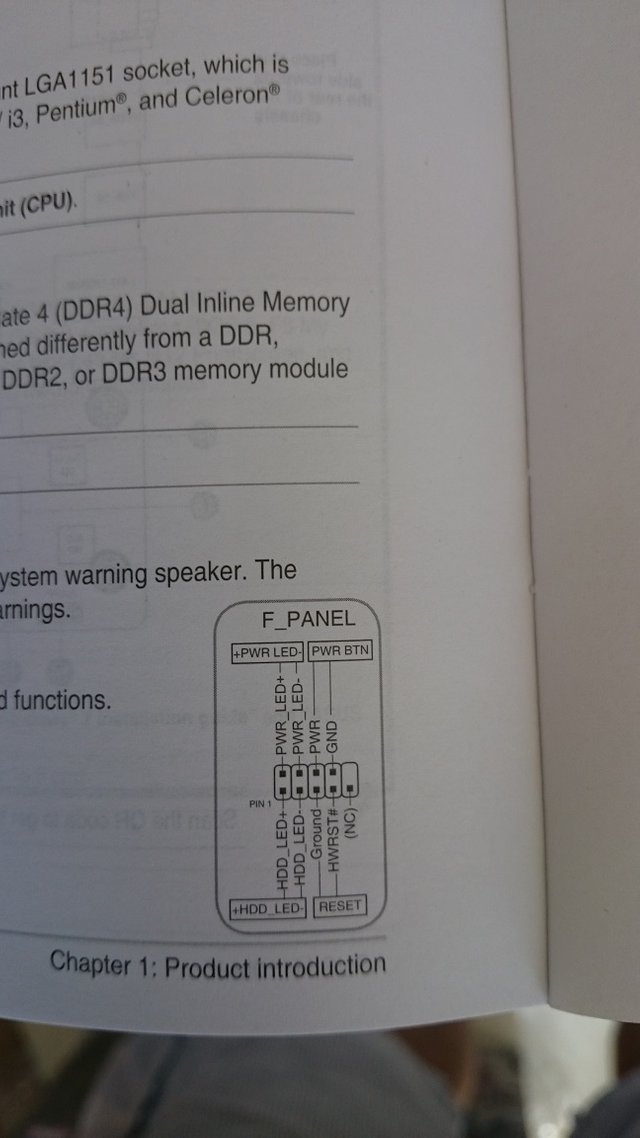
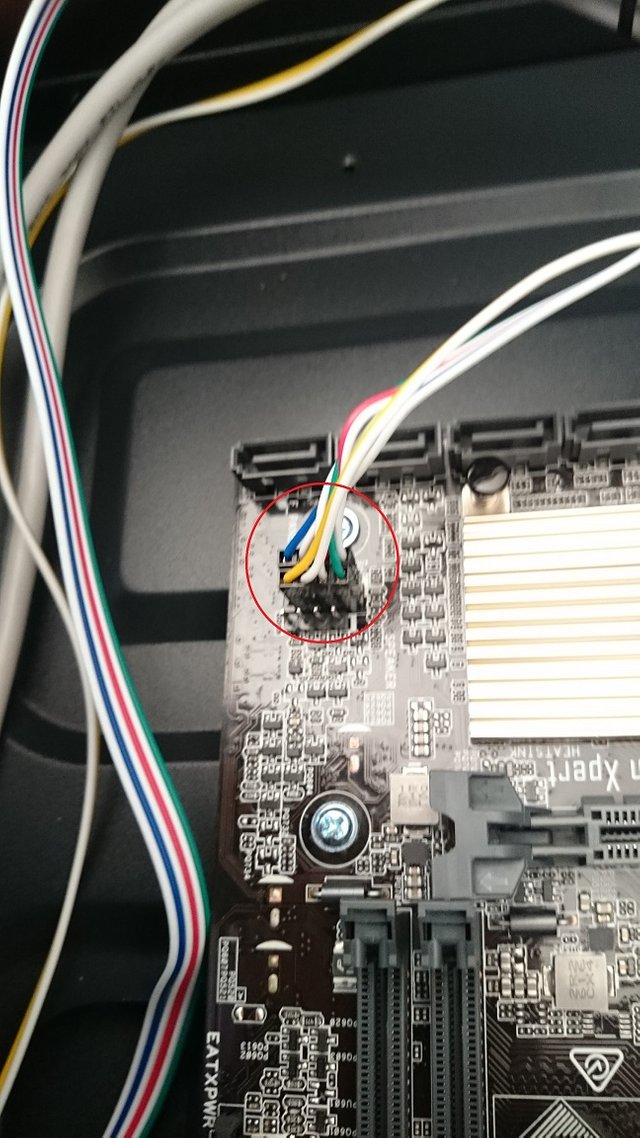
For the USB port the writing on the motherboard is clear USB 3_12, but for the HD Audio on this motherboard it's AAFP which as stated by Asus as the Front End Audio Connector.
RAM
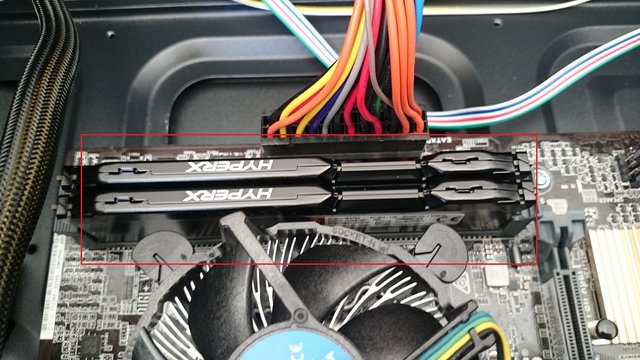
Inserting the memory is simple. There's a a small slip on the bottom of each memory stick, one side is longer than the other. Align the first ram to the DDR4 DIMM_A1 (#5 on the manual image above) and push it in. The same applies for the other memory stick which is inserted in DDR4 DIMM_A2. If you hear a click and the bronze is not visible you're good to go.
PSU
Now that we have most of our parts in the case we need to add the PSU (power supply). You can see a big hole on the back of the case. We need to add the PSU fan downwards with the power pointing outside the case.
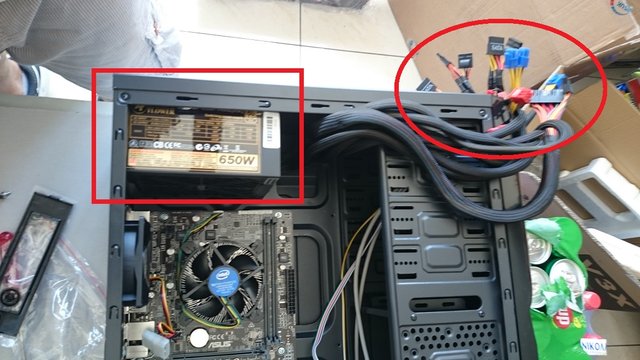
Tighten the 4 screws into the case.

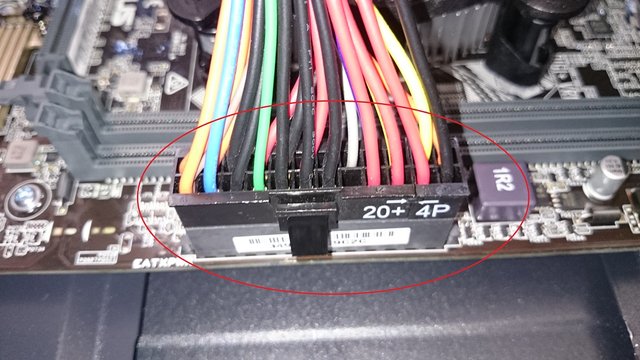
Attach the 24-pin cable to the motherboard. This is what powers everything attached to the motherboard.
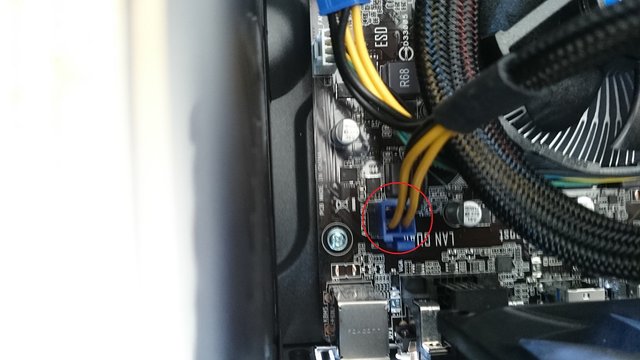
Attach the 4-pin CPU cable to the motherboard. This feeds power to the CPU.
HDD
The hard drive needs to be fixed to the case close to the front panel. The Aerocool case had a special "holder" that you put the HDD inside and screw to the case.
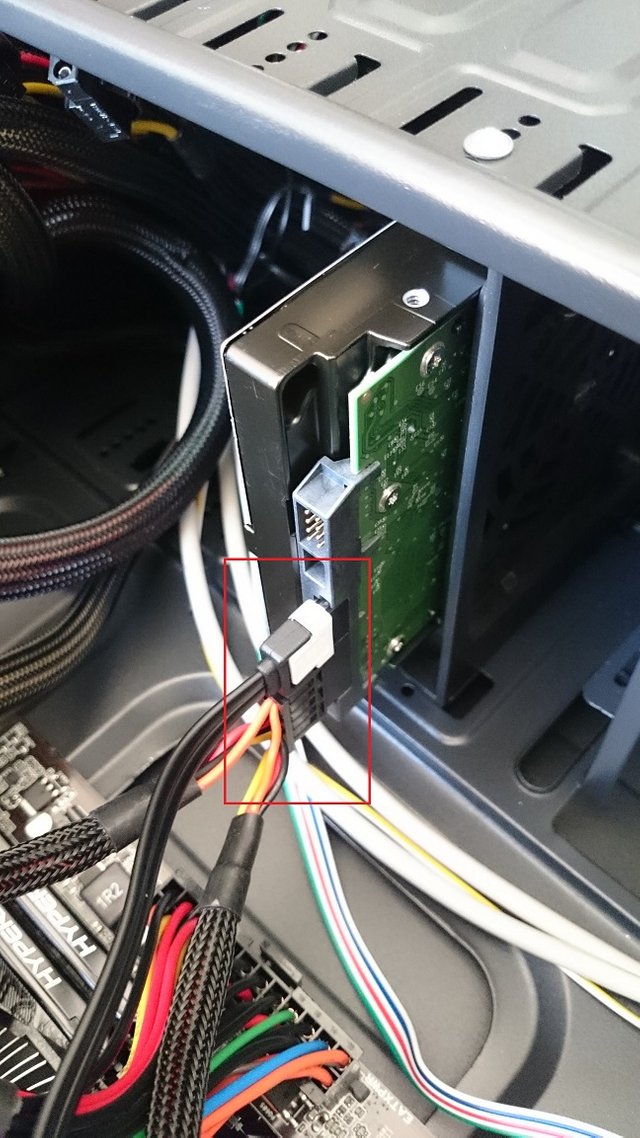
The hard drive needs to be attached with a power cable from the PSU (SATA written on the cable)
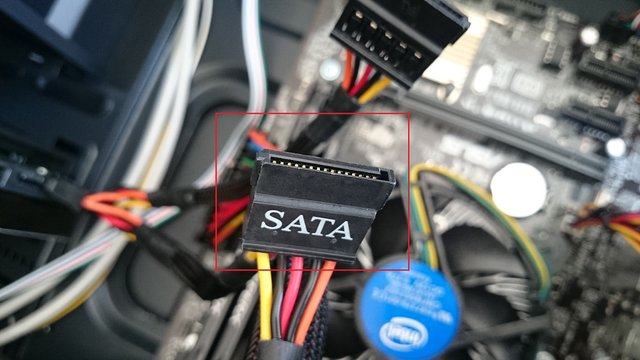
And also a Sata cable which sends data to and from the motherboard to the HDD (the image shows the cable connected to the motherboard). You can find two SATA cables in the motherboard box.
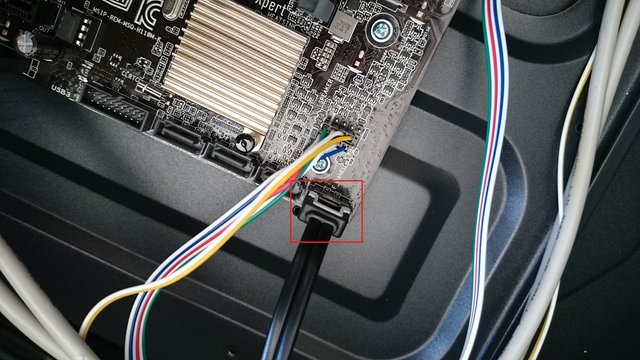
Both power cable and SATA cable need to be attached to the hard drive
GPU
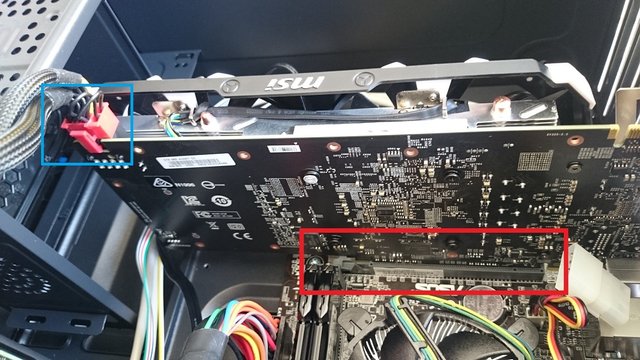
Last but not least we need to add the graphics card. Similarly to the RAM the GPU has a short and long side. There's only one PCI-E slot on the Asus motherboard stated as PCIEX16 in the manual, it's the long black slot.

Carefully put the card in the slot and push downwards. No bronze should be visible after inserting (red in image) . Then attach the PCI-E 8pin power from the power supply (blue in image).
Final Check and Testing The Build
Now that we have everything put together, we need to run a final check before powering up. Go through all the steps above and check if all cables are pushed in properly. If they are, connect a monitor then the power and give the rig a start.
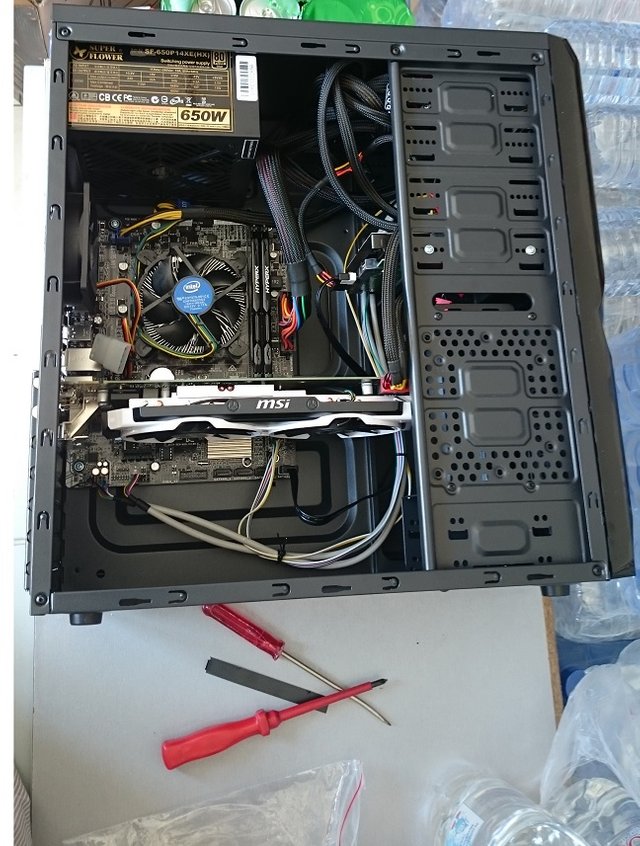
At this stage the side panel should be off so we can check the GPU fans, CPU fan and CASE fans are all running properly. If they aren't turn off the power, pull out the plug and recheck everything once again.
When starting the PC all fans were fine for me and I saw the Asus bios logo. I pressed F2 and entered the bios and left it running for a few minutes. CPU temperatures where below 40c so no major issues.
Now it's time to install your favorite OS, enjoy.
If you have any questions or liked the post please upvote and comment
Do you usually custom build or buy pre-built ?
I upvoted for having a convenience store in your garage.
LMFAO, I own a retail business. Best thing is, I had fags and cold drinks while doing the build.
me too. postmaker is smart)
Nice detailed guide and screenshots.
I've built 3 of my last computers used for mining Litecoin which are now mining Ethereum so I know how it is.
Follow his advice, you can save so much more money by building it yourself than buying it. Unless you don't have any free time or money is not a problem, then go ahead and buy one but it's still more rewarding to build it from start to finish.
We want pics of the finished product with the Steem Logo on it....seriously!
Heheheh, let me see what i can do :)
and then show us, pls. i extremelly love computers!
Whoa! I really like the cabinet and the build is great! I'm definitely going to ask you if I were to build myself a PC :D
This reminds me back in the days when I used to build computers.. Nice detailed job mate. Kudos.
TBTH I don't do it much anymore, but it was a close friend.
this photoes are like a kind of porn for me) I love PC very much)
Damn rep putting that steem money to good use. What games you going to be playing on it ??
It's a friends build. He likes LOL (meh..)
I could never get into LOL I was always more of a wow guy/ mmo person. Never got into mobas and I didnt like the idea of not being my own unique character, but it seems to be just me because it is so damn popular.
I'm more an FPS/ Driving type of gamer.
have you ever tried out war thunder? Thats been my go to game for a few short sittings of an hour or so recently. Its a ww2 plane fighting game and I really like it. Theres a steep learning curve but its fun when you figure it out and get the stronger better planes. Check it out if you think you might find it interesting.
War Thunder is quite good from my point of view.But is not only an WW2 plane fight.You can choose to play with tanks as well!I have spent over 150 hours playing and I like it!
And Thunder Show is funny and full of news and hilarious moments.
Damn we got a builder in the house... give it up to my man @repholder!
Well done, cheers.
Thanks man
Can this mine bitcoin lol ? Jk
Very nice custom made pc there mate ! With i5 for the brain the pc gonna run smooth as kim kardasian butt .
It can, but you going to need patience :)
Well patience is virtue , doesnt it .
Btw feel free to visit this anchoives blog .
Thanks .
Well done Guru @repholder :) I broken my laptop this morning maybe I will call you to fix it.
Kisses Kamila
Thanks, send me a pm in slack (@nickn) I might be able to help.
@repholder very kind of you... I am using my boyfriend laptop now because mine (maybe for the hot temperature) completely collapsed and won't switch on again! :(