IPHONE USERS: How to customize your own Ringtone using your favorite song
Many iPhone users are stuck using the iphone Opening Default Ringtone. Sometimes you mistake it when someone’s iphone rings in public for yours. So right now i want to show you a simple hack to customize your own Ringtone without paying for it.
All you need is:
ITunes installed on your laptop/pc and the mp3 music file you want to use.
STEP 1:
Get the song you want to use ready. Make sure you have it on your iTunes.
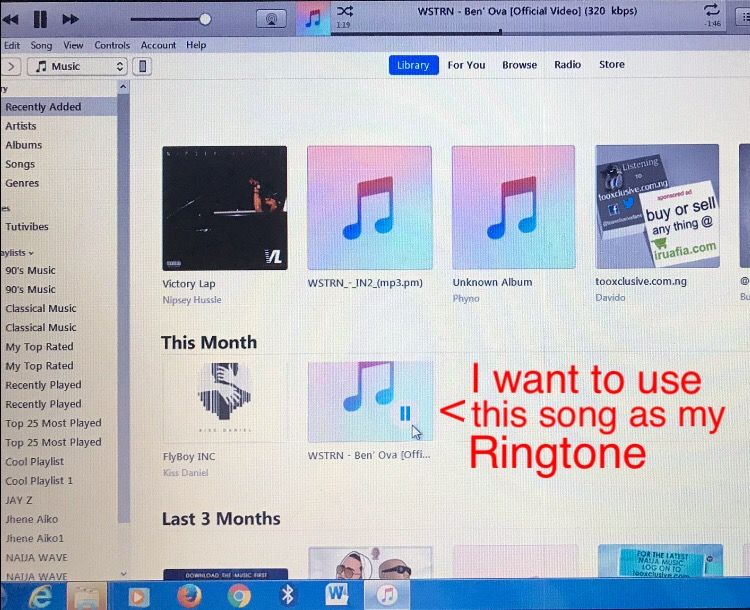
I am using an old iTunes version.
So i open iTunes on my computer
Go to the song i want to use
Listen to it and observe where i want the timing of the ringtone to start playing from. Note: iPhone ringtones only last for 30 seconds so you only time the song you want for 30 seconds.
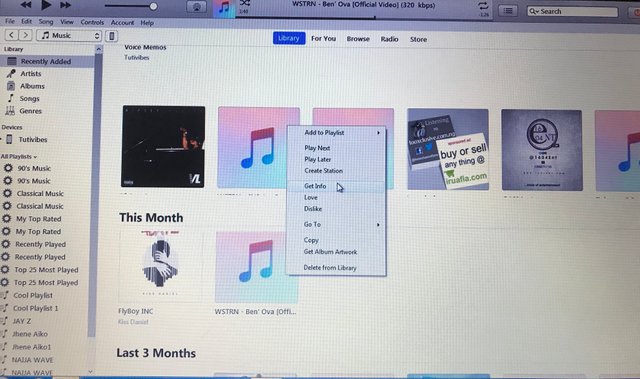 Choose Get info/Song info
Right click on the song and chose Get info (For iTunes before 12.4 - 12.5.1) while those using the latest iTunes version it is called Song info
Then choose the Options tab and time your song. Make sure timing is not more than 30 seconds. For me, after listening to the song i want to my ringtone to start from 0.58 to 1.28 because that is my favorite part of the song. So i do my timing to start from 0.58 and mark on it to stop at 1.28
Timing your song
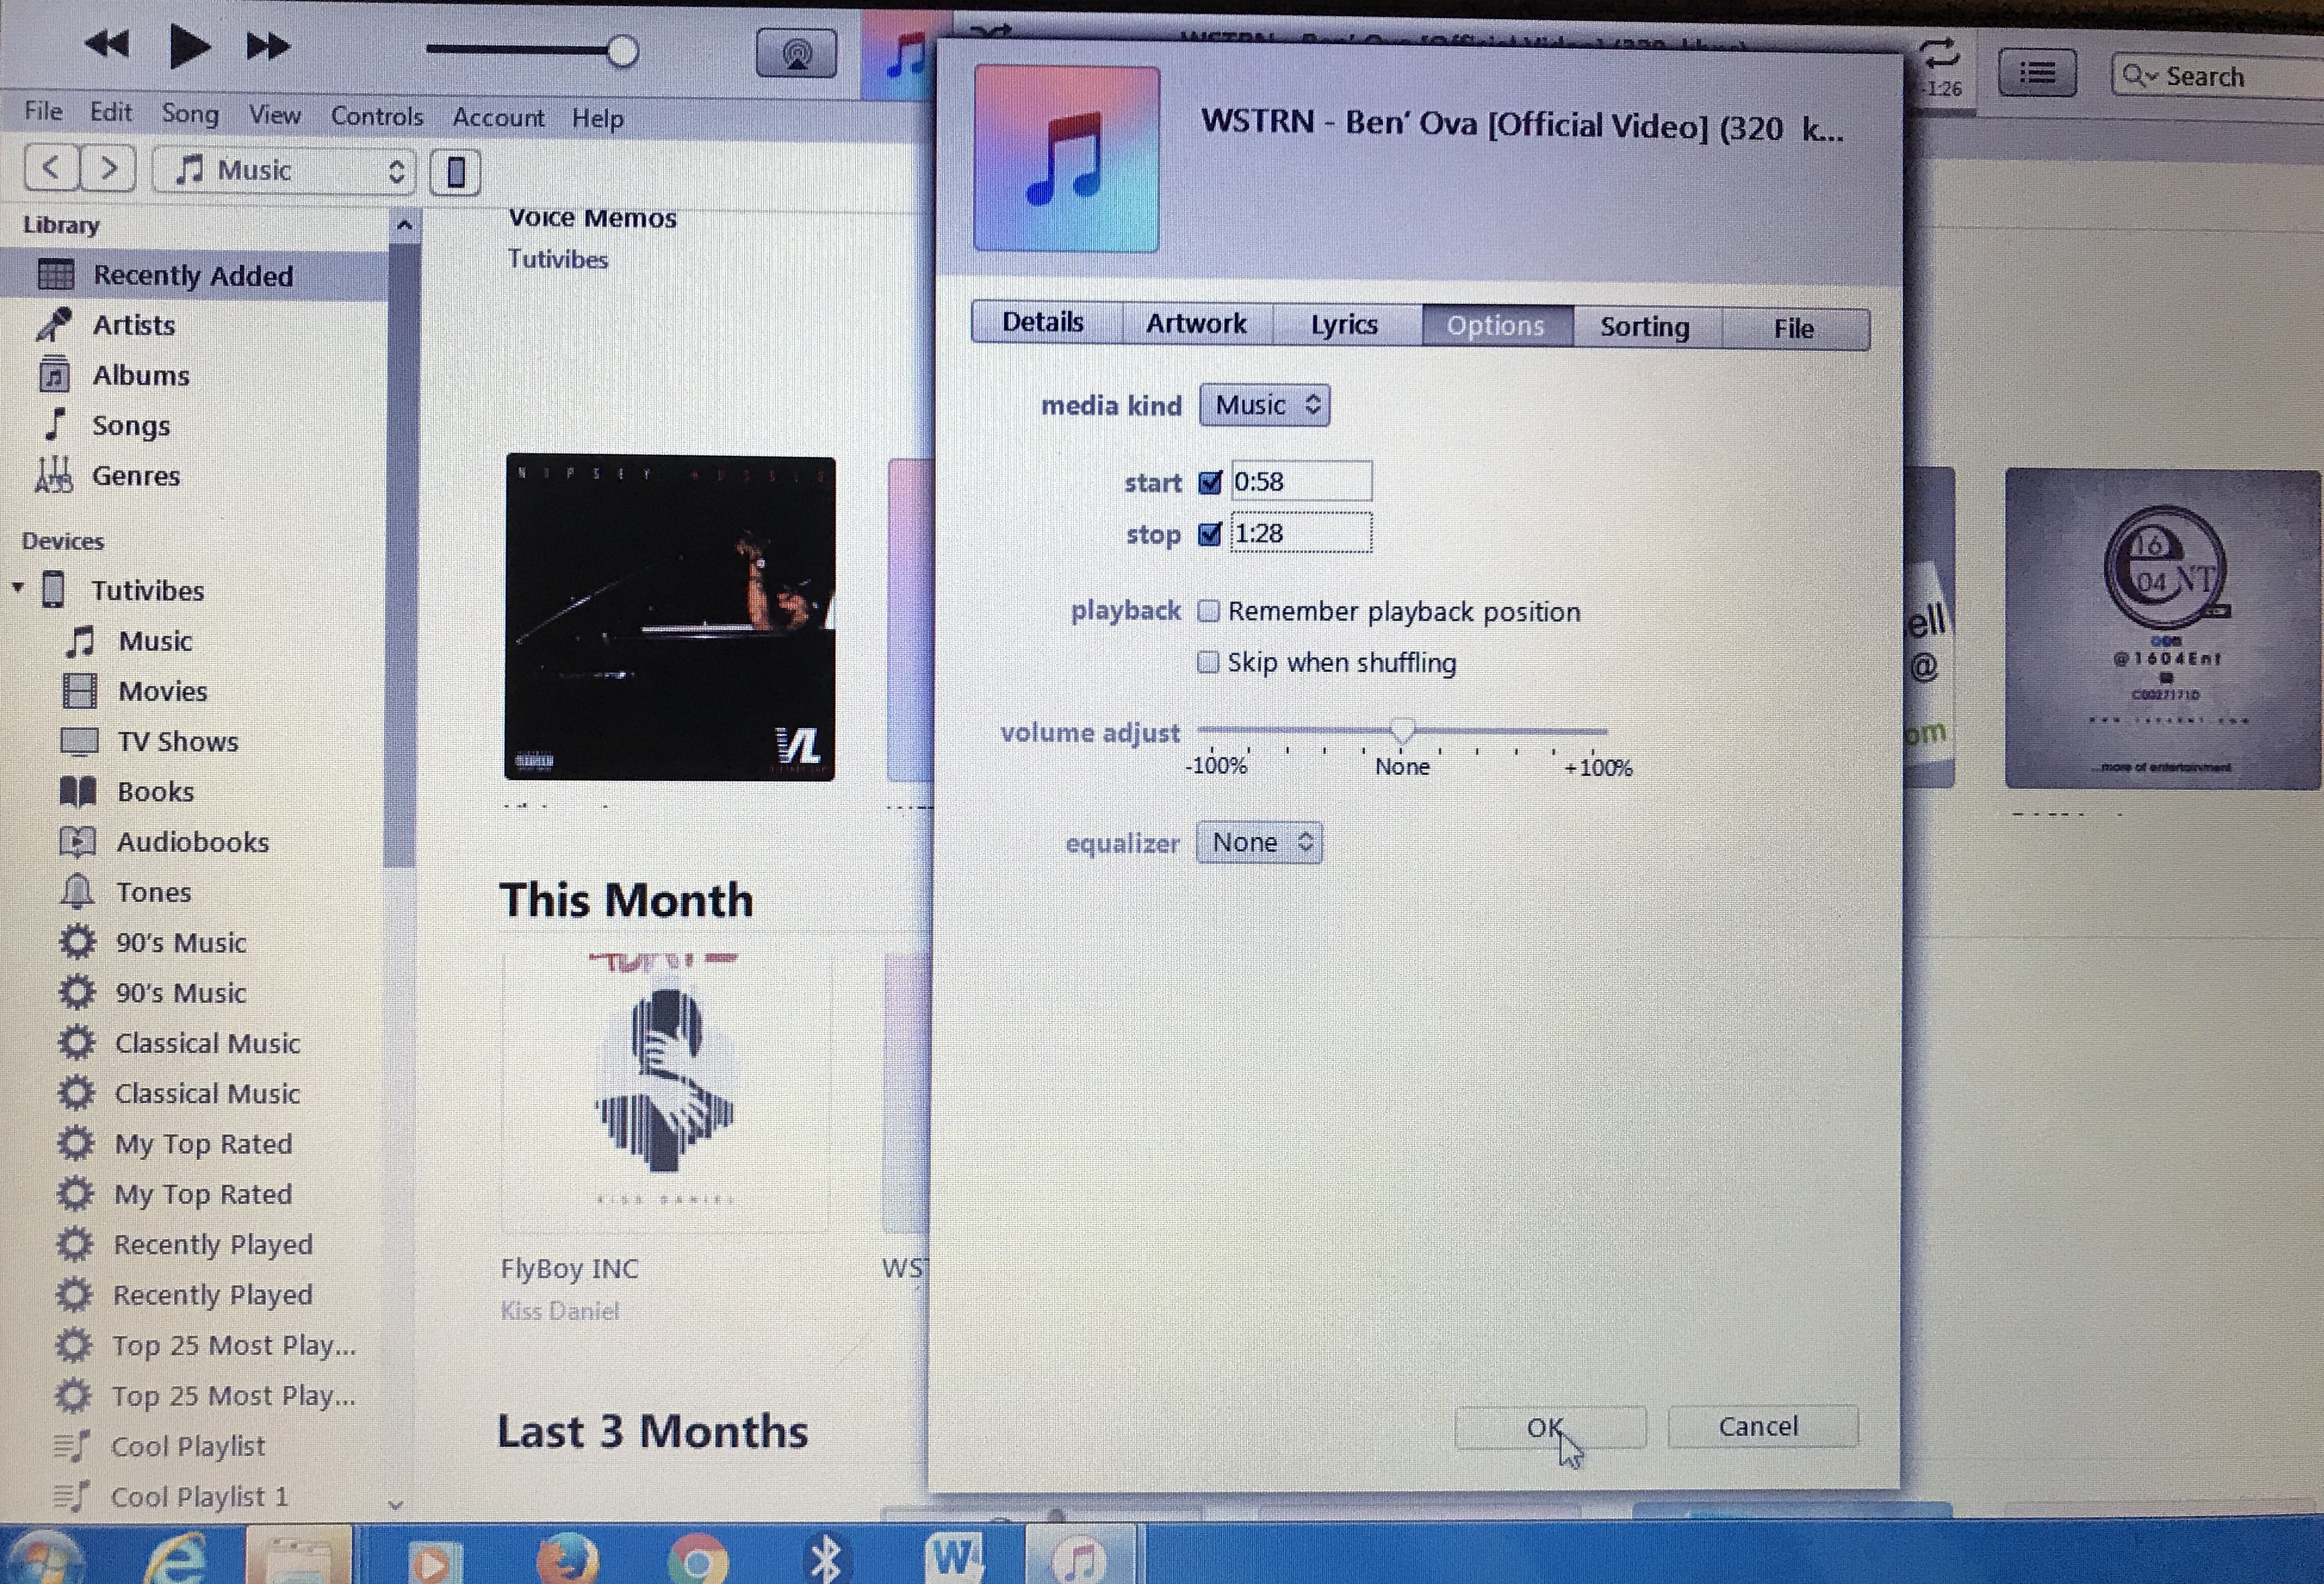 Choose Options Tab and then Time your song
Ones you are done timing click OK to close the window
NOW CREATE THE AAC VERSION OF THE SONG SO IT CAN BE USED AS YOUR RINGTONE
For those using iTunes version 12.4 and later, select the song by clicking on it ones, then go to File Menu (Top left of your iTunes) and chose Convert > Create AAC Version. BUT for older versions of iTunes if the create AAC version tab is not highlighted, Go back to the File you just timed, Right click and choose the Create Station option. After doing that, go back to the File Menu
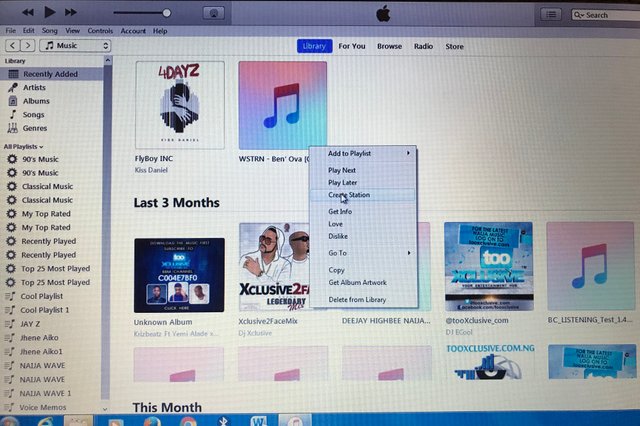 only click on this if the Create AAC version tab is not highlighted in file menu
In iTunes versions before 12.4 and 12.5.1, all you have to do is right-click on the song again, and then select Create AAC version.
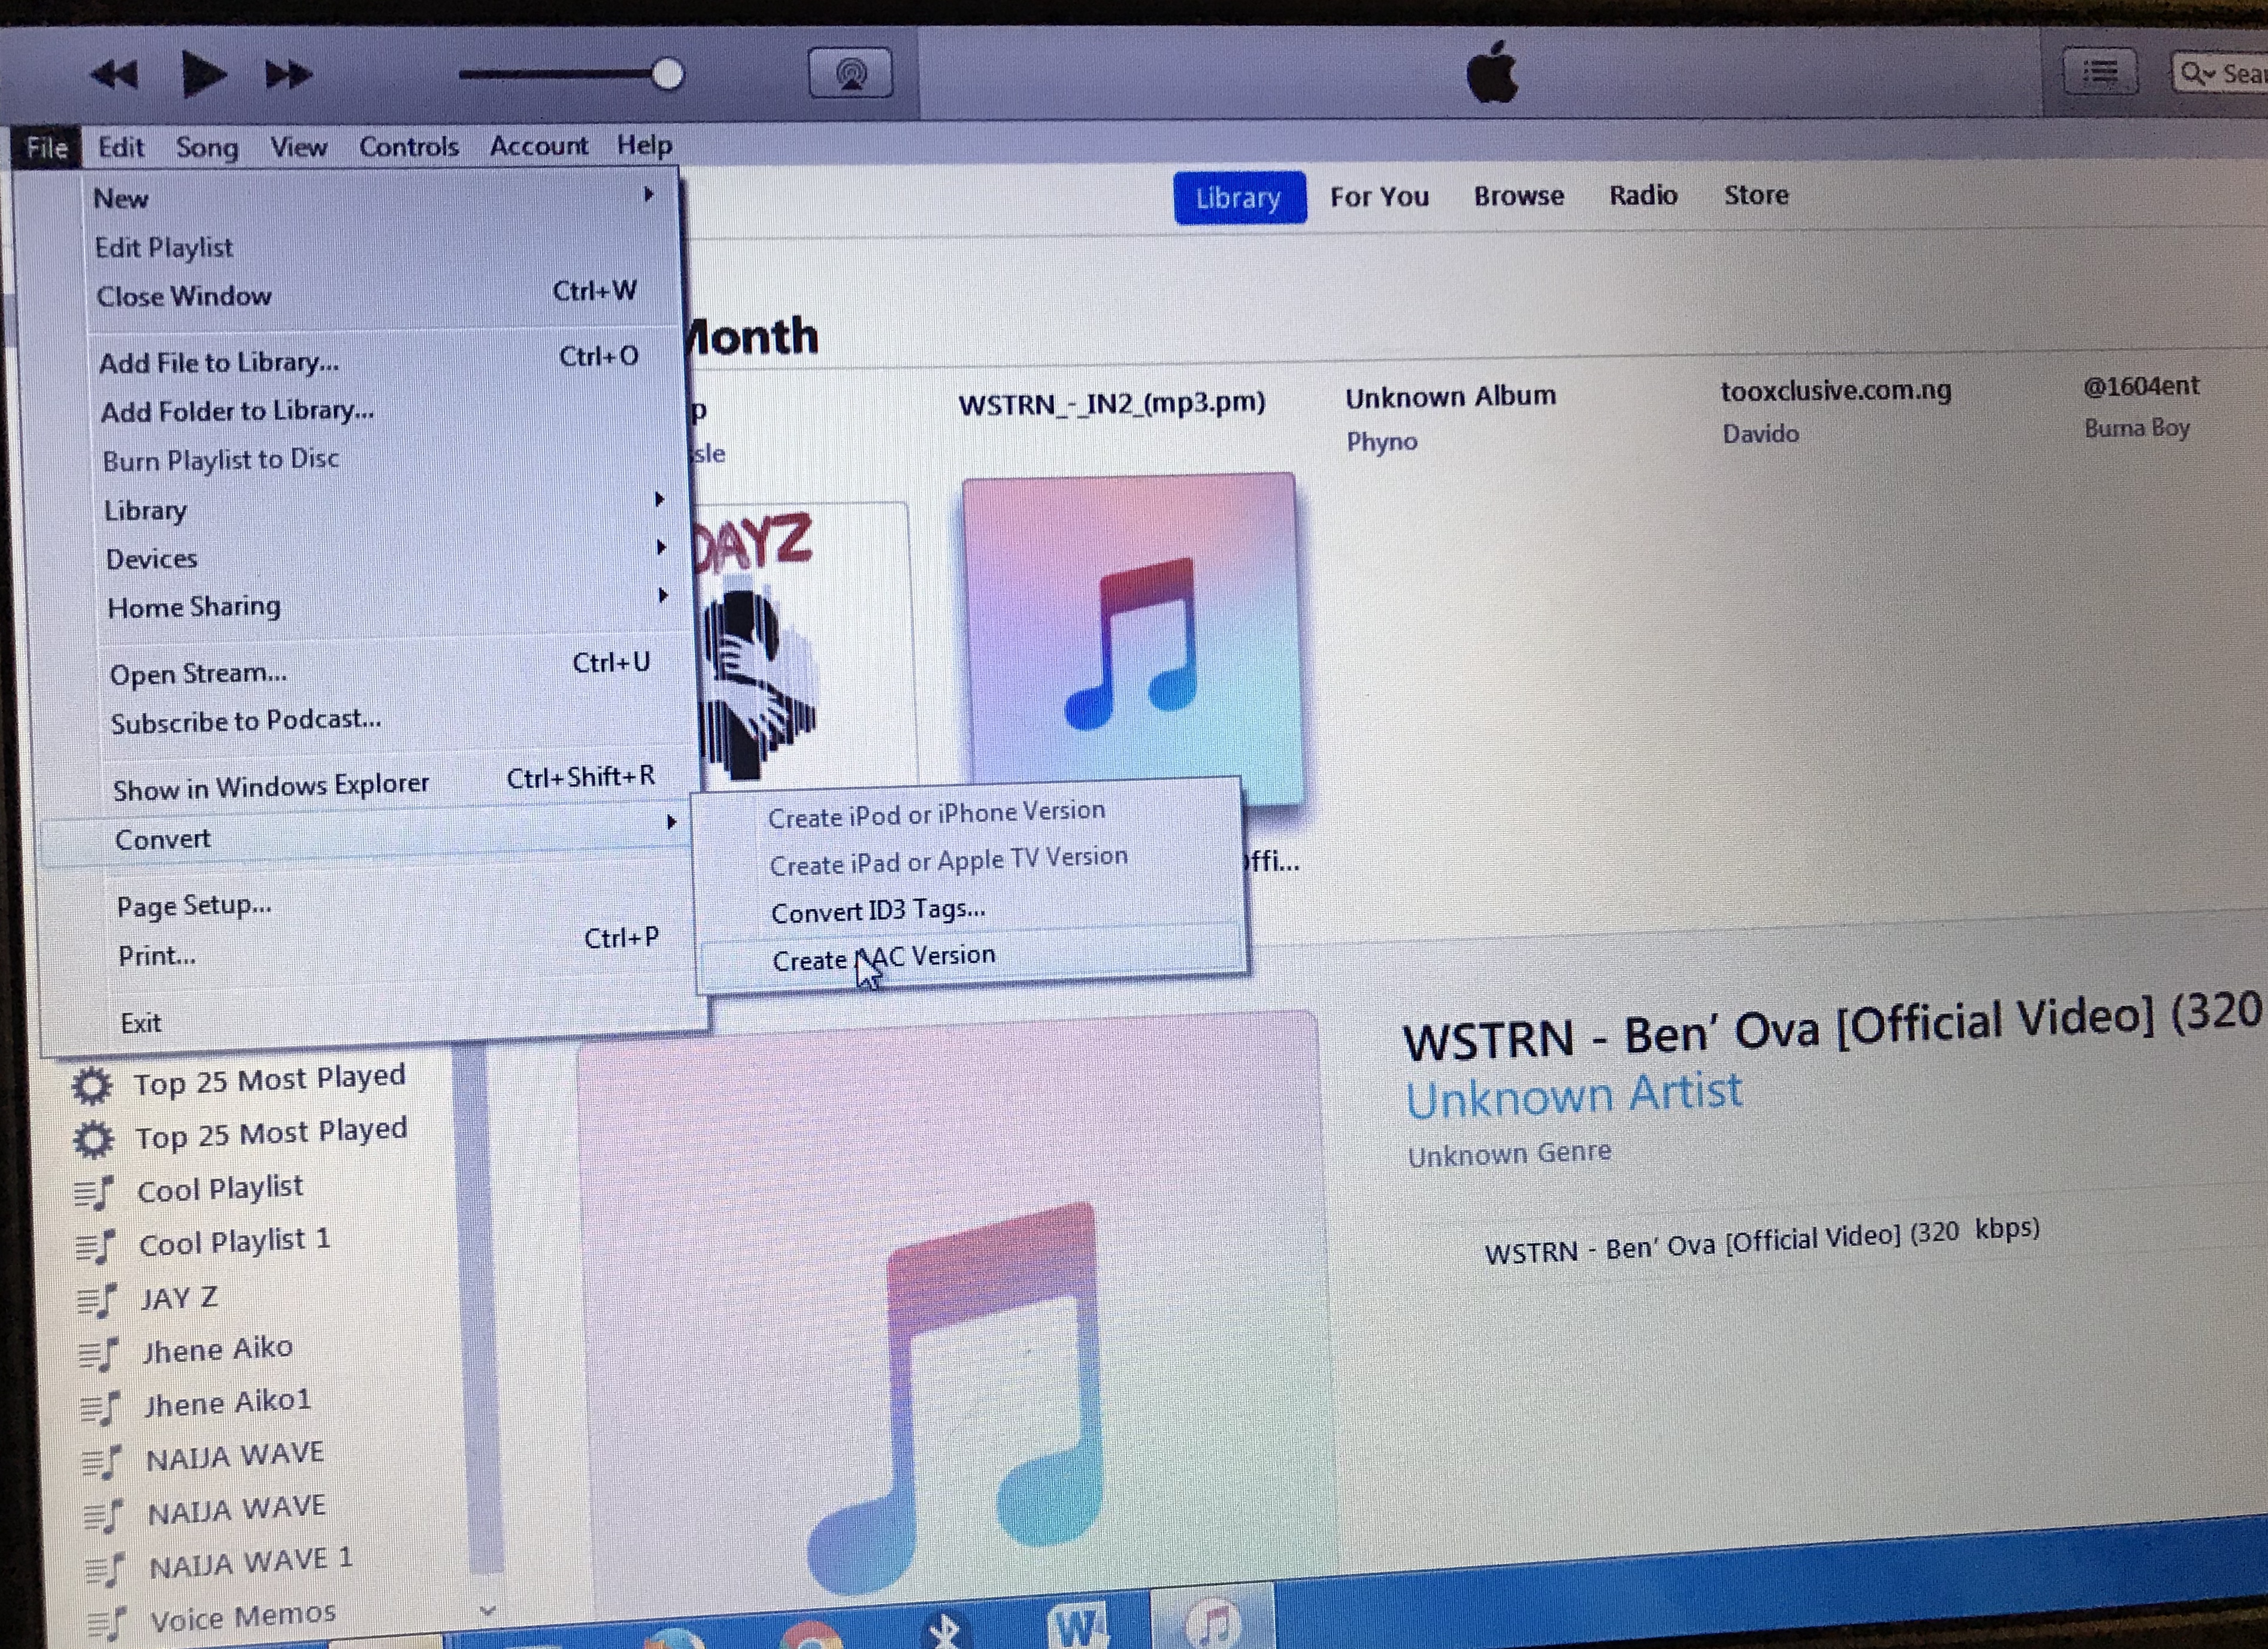 File menu > convert > create aac version
NOTE: In older versions of iTunes, the newly created song will appear in the same album, but will show the duration you set your timer so you can differentiate it from the original file. If you use a later iTunes version, it may appear as a new album or song.
After converting to AAC version, then you now need to find your File. Go to the 30 seconds Ringtone you created and select Show in Windows Explorer. If you are using a Mac click on Show in Finder. In iTunes versions before 12.4 and 12.5.1, all you have to do is right-click on the song again, and then select Create AAC version.
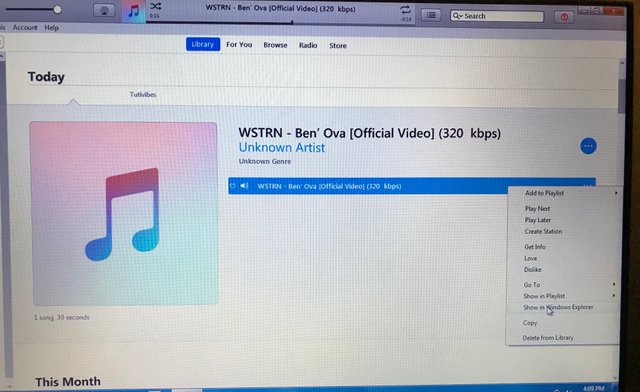 How it will appear on you Windows Explorer/Finder
Change File Extension
After selecting Show in Windows Explorer option the file will be highlighted in the next window that opens. Now all you have to do is rename the song. Right click and rename the file extension from .m4a to .m4r then click Yes to change File extension
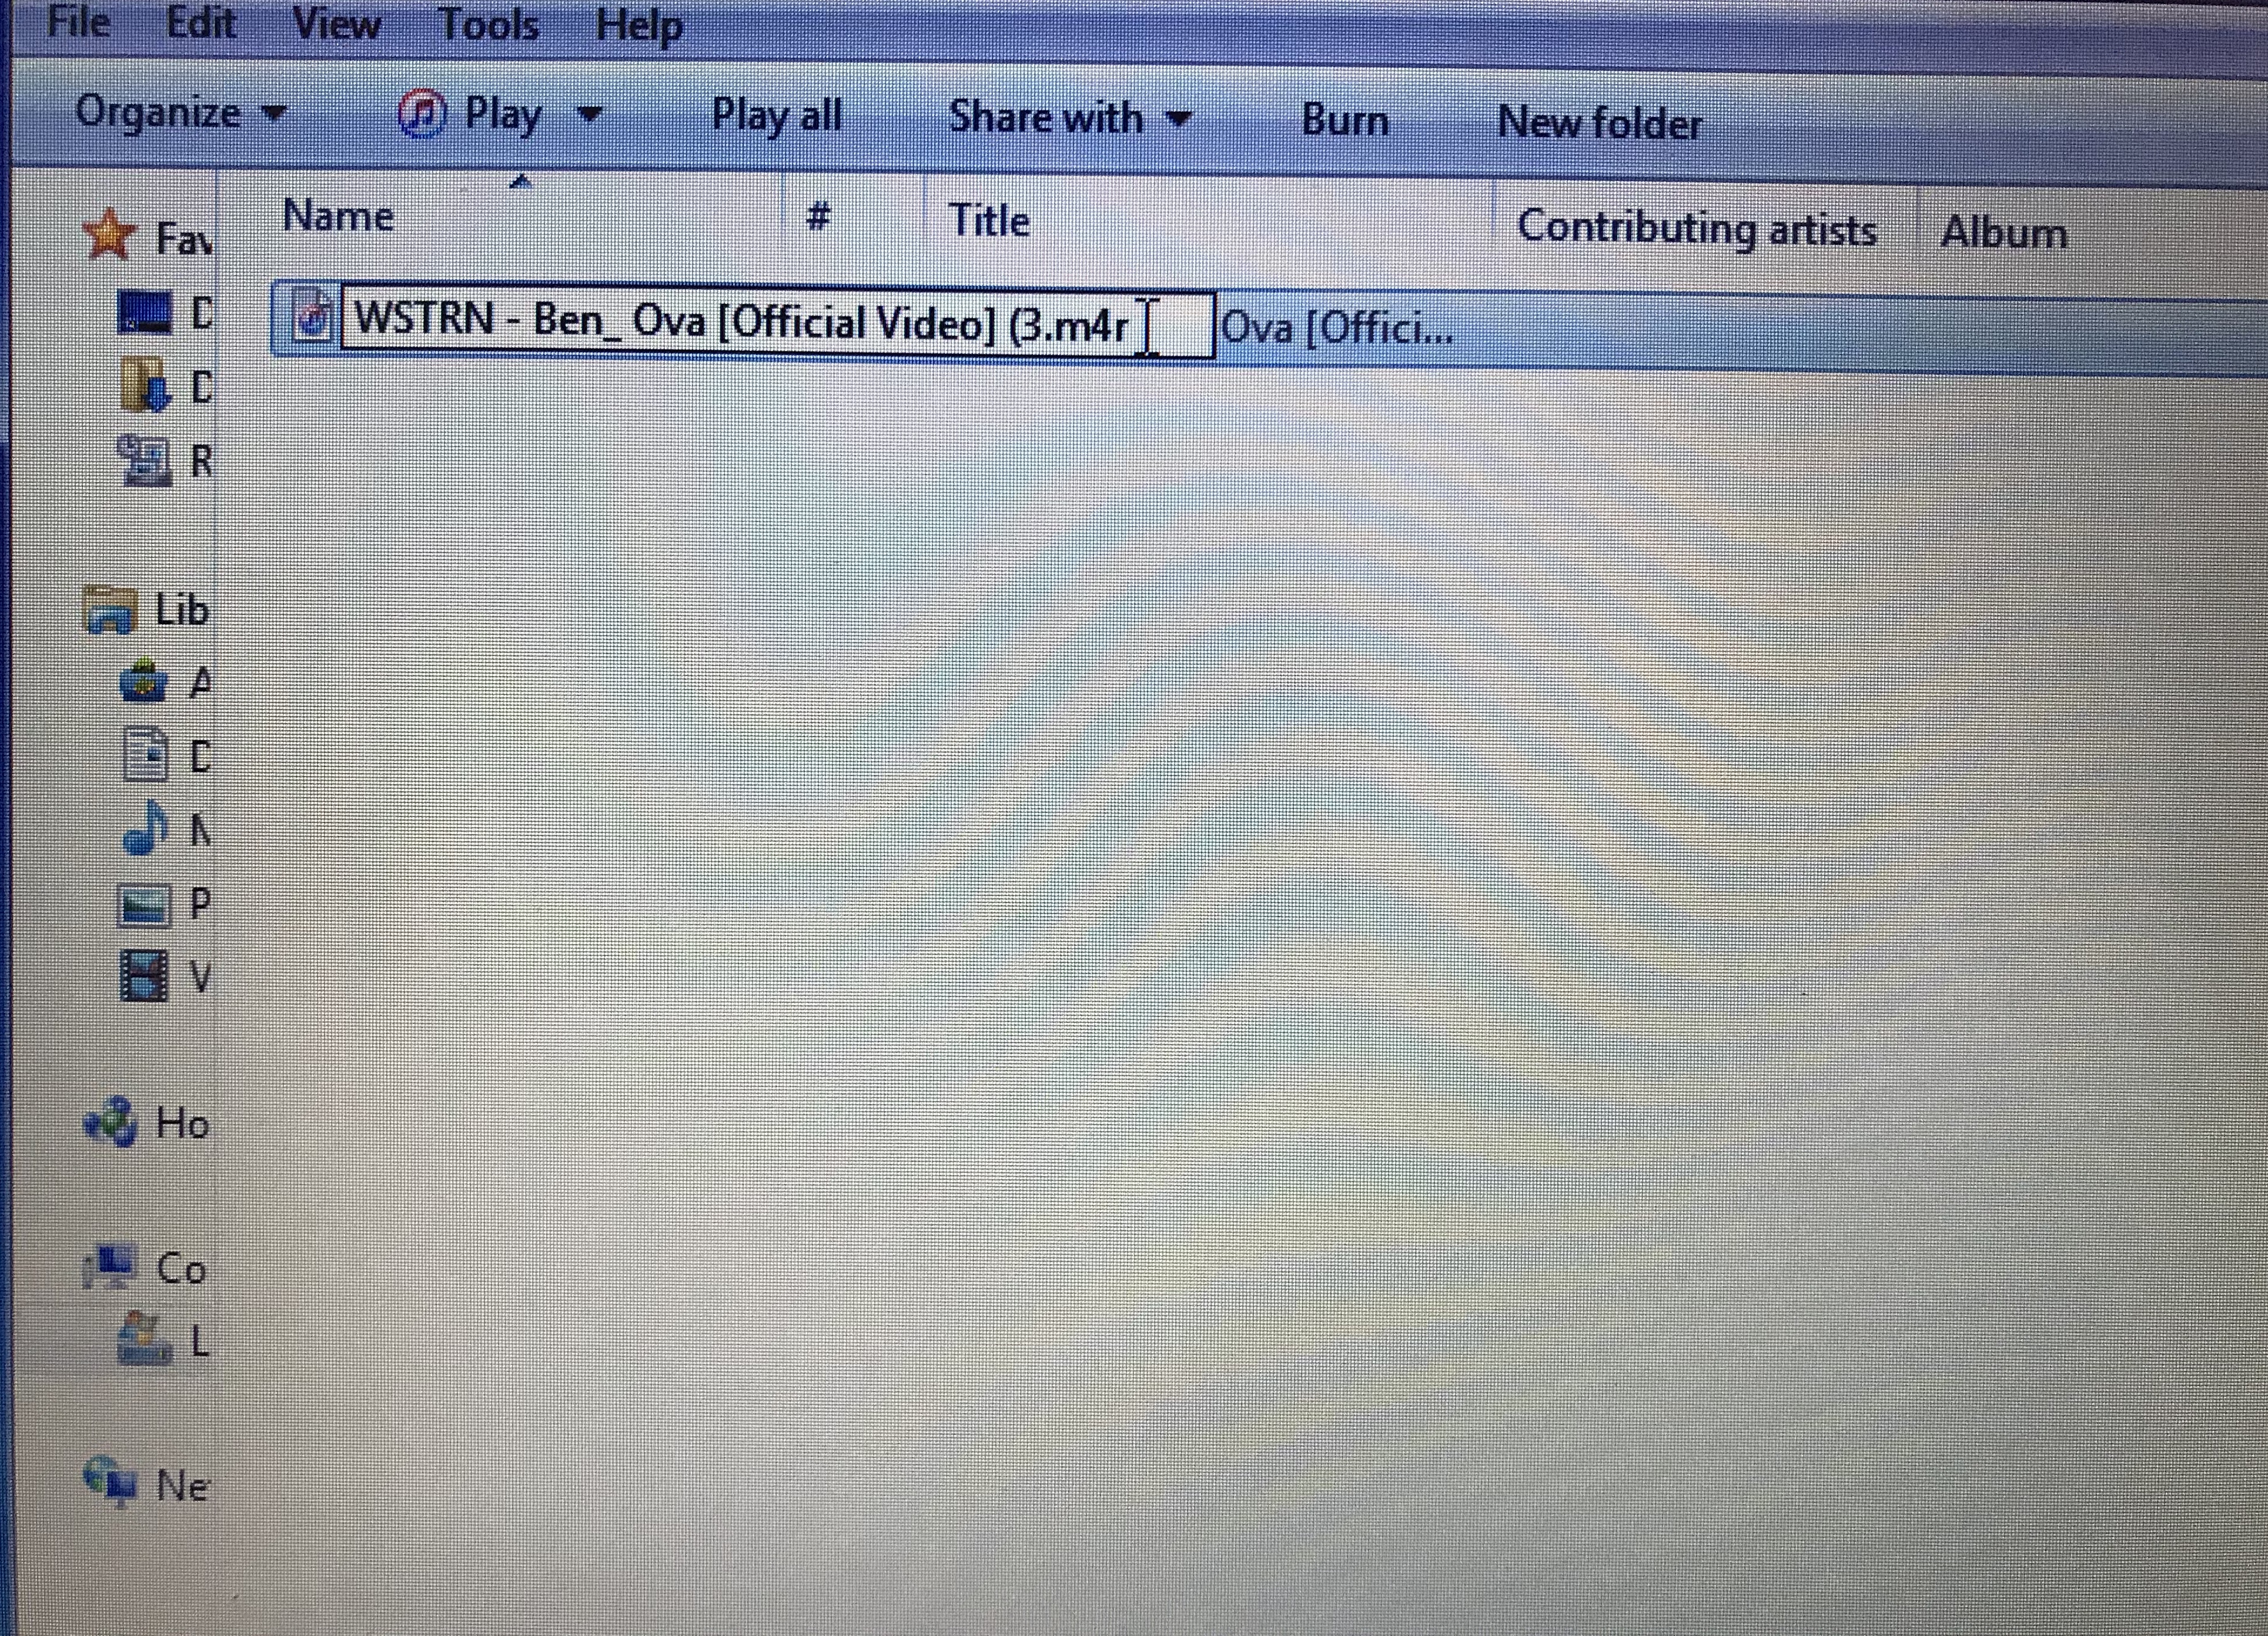 Rename File from .m4a to .m4r
Note: If you can’t see extension File name example WSTRN - Ben_ Ova.m4a, you can only see WSTRN- Ben_ Ova it is because your extensions are not visible. So go to your windows explorer, select the View tab in the window that pops up and then scroll down and untick the box next to ‘Hide file extensions for known file types’. On windows 8 and later, select Explorer Window > View tab > Thick the box next to file name extensions
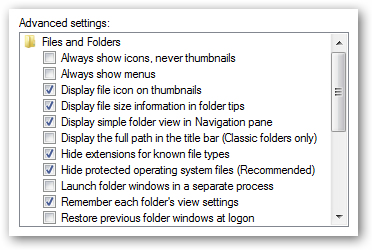
After this, Your next step is to import the ringtone you have created to iTunes.
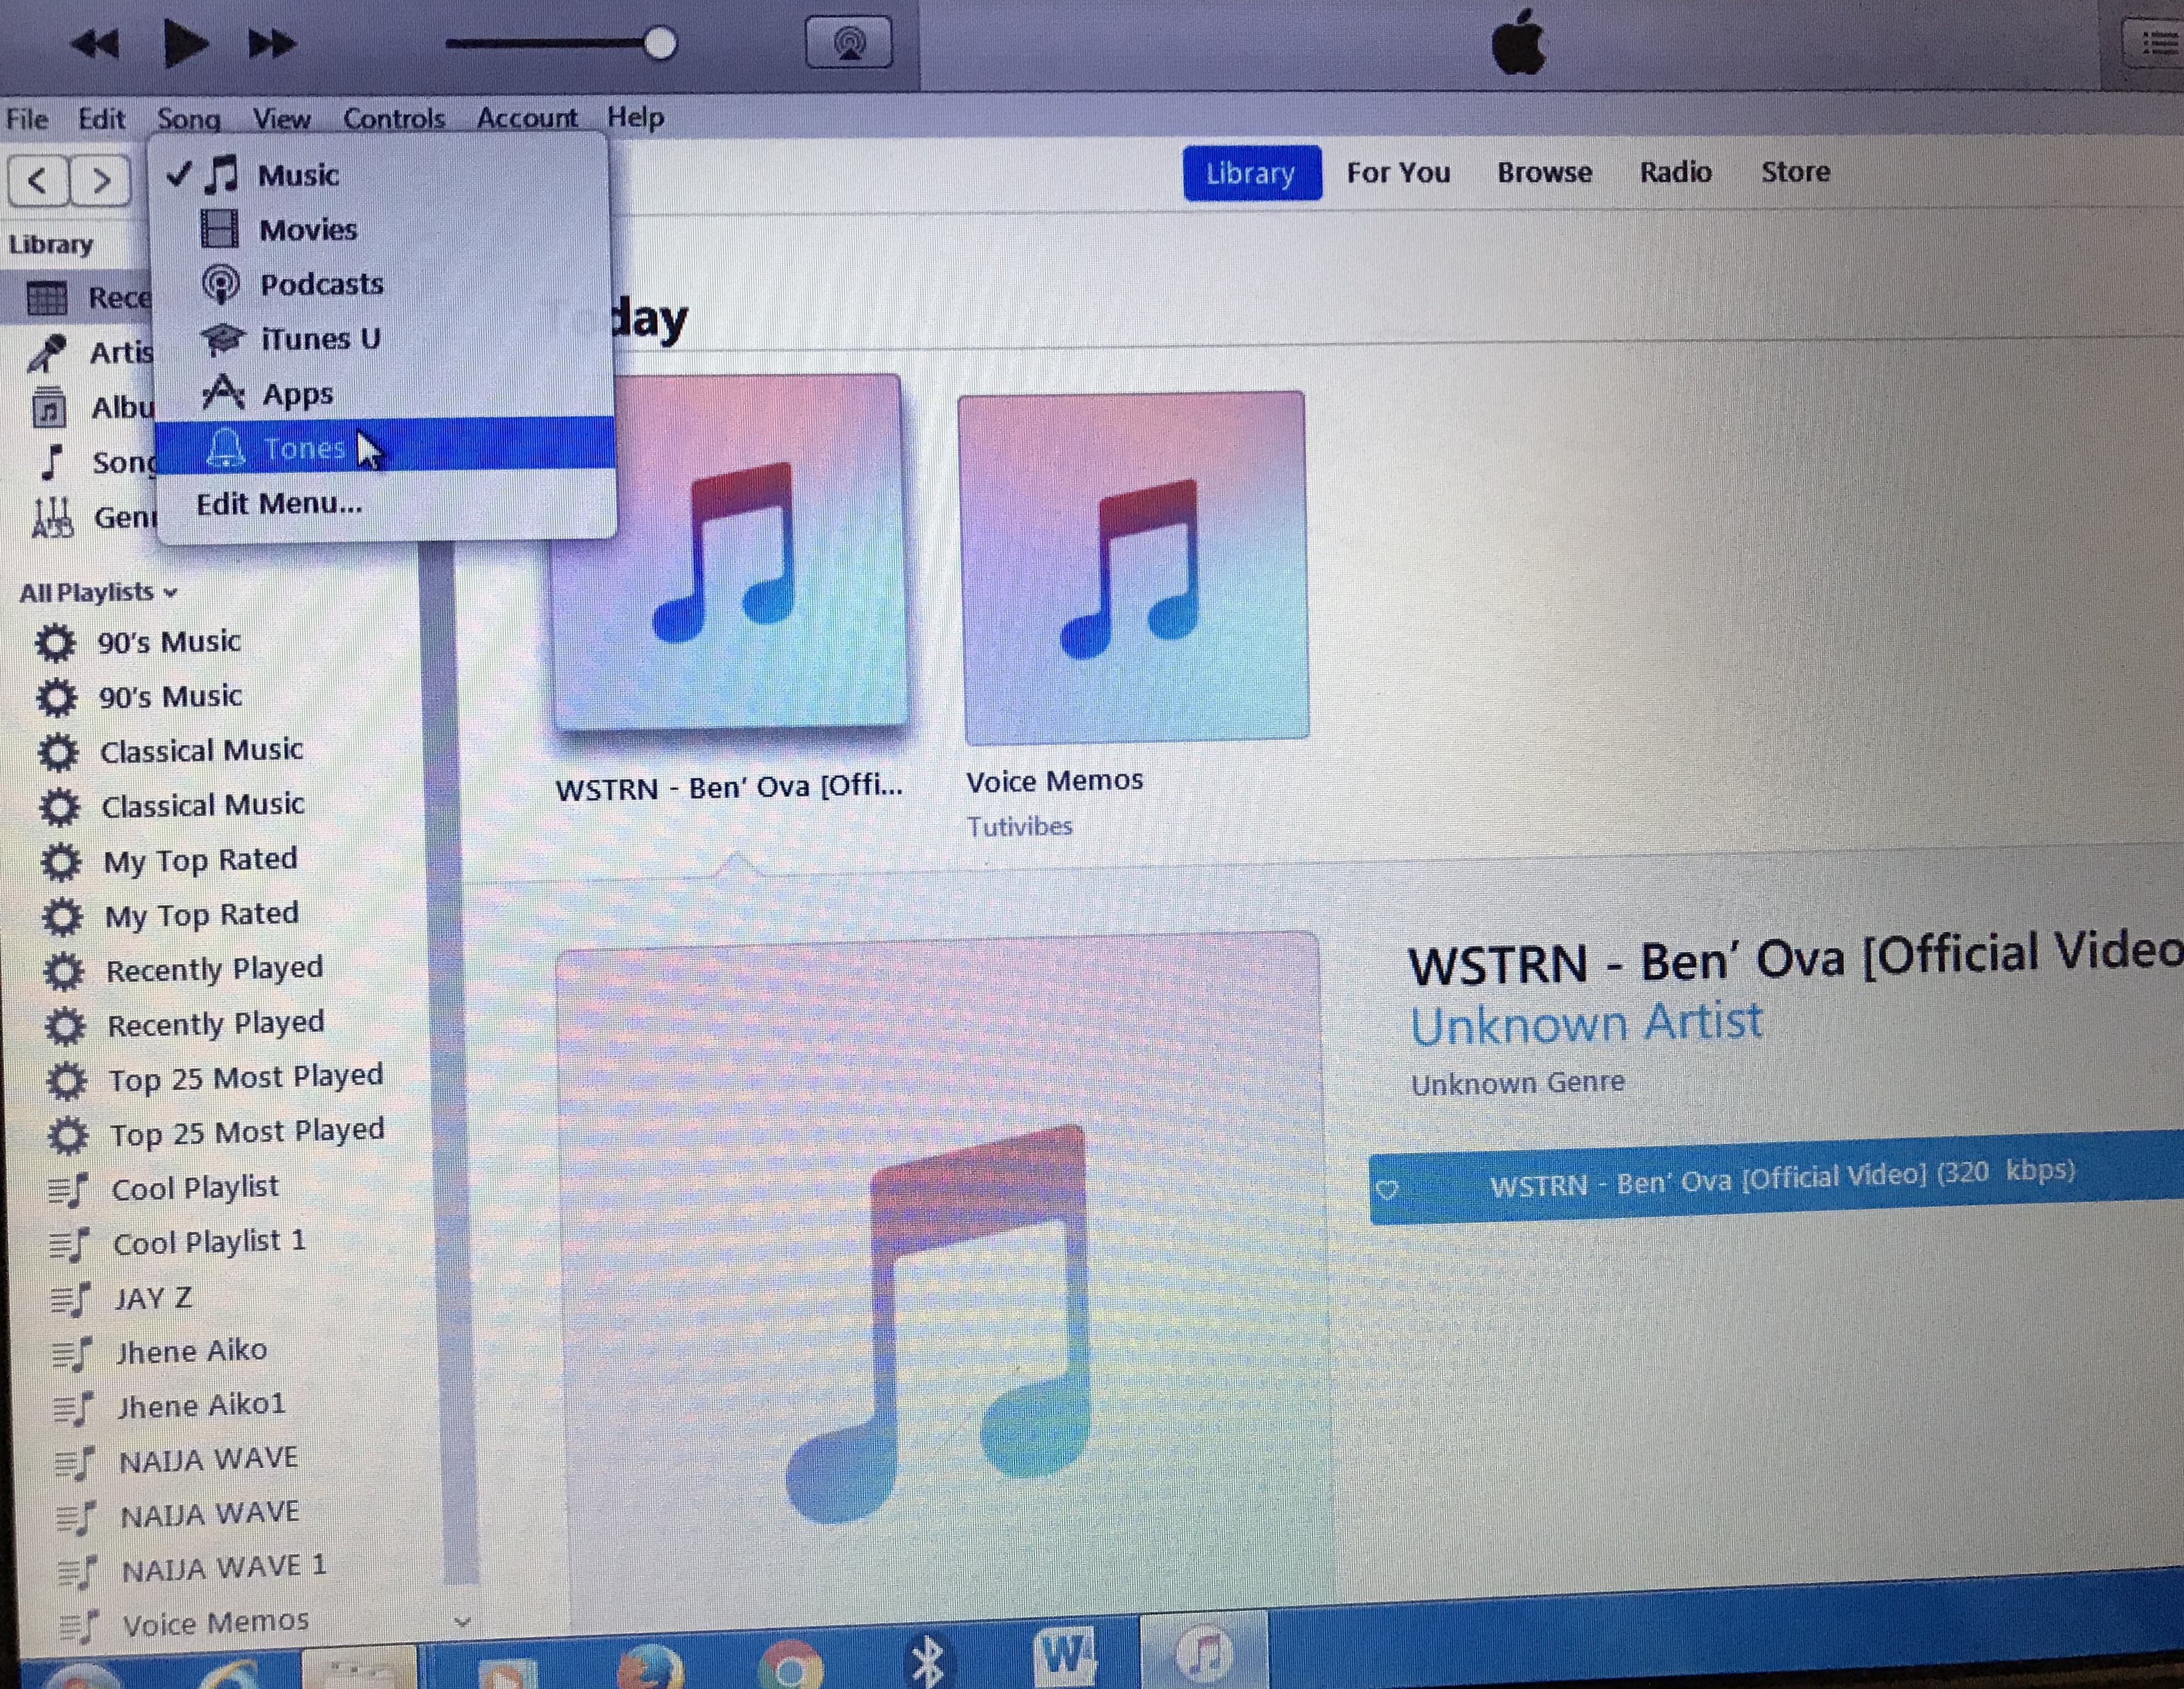 Select Tones on your iTunes
Now select Tones on iTunes. Then drag your m4r file from file Explorer or finder window into iTunes. Or on your iTunes File Menu too left. Click on it and select Add File to Library and select your new m4r ringtone to add it to your iTunes
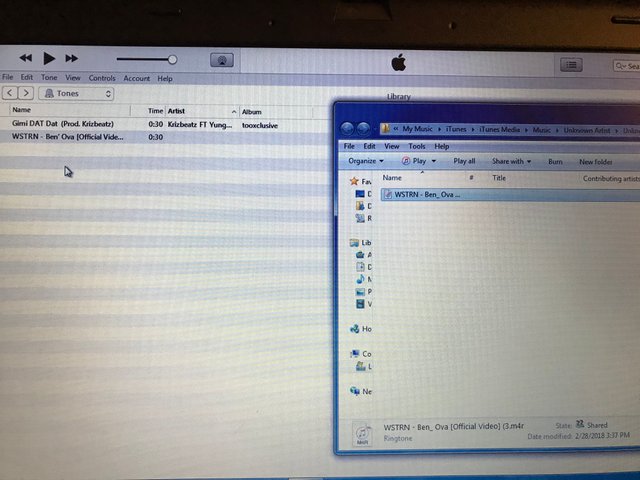 You can chose to drag the file from your file Explorer directly to your Tones on iTunes
LAST STEP: Sync your New ringtone to your iphone
Connect your iPhone to your laptop/pc using it’s USB cable, Allow your iPhone to Trust Compute, then wait for your phone to display on your iTunes. It will appear on the left. When it does click on it. Most of the times iTunes sync automatically with your iPhone, depending on the setting. But if it doesn’t sync. Click on your iPhone icon that appears on iTunes > Then Tones > Then select All tones and Sync.
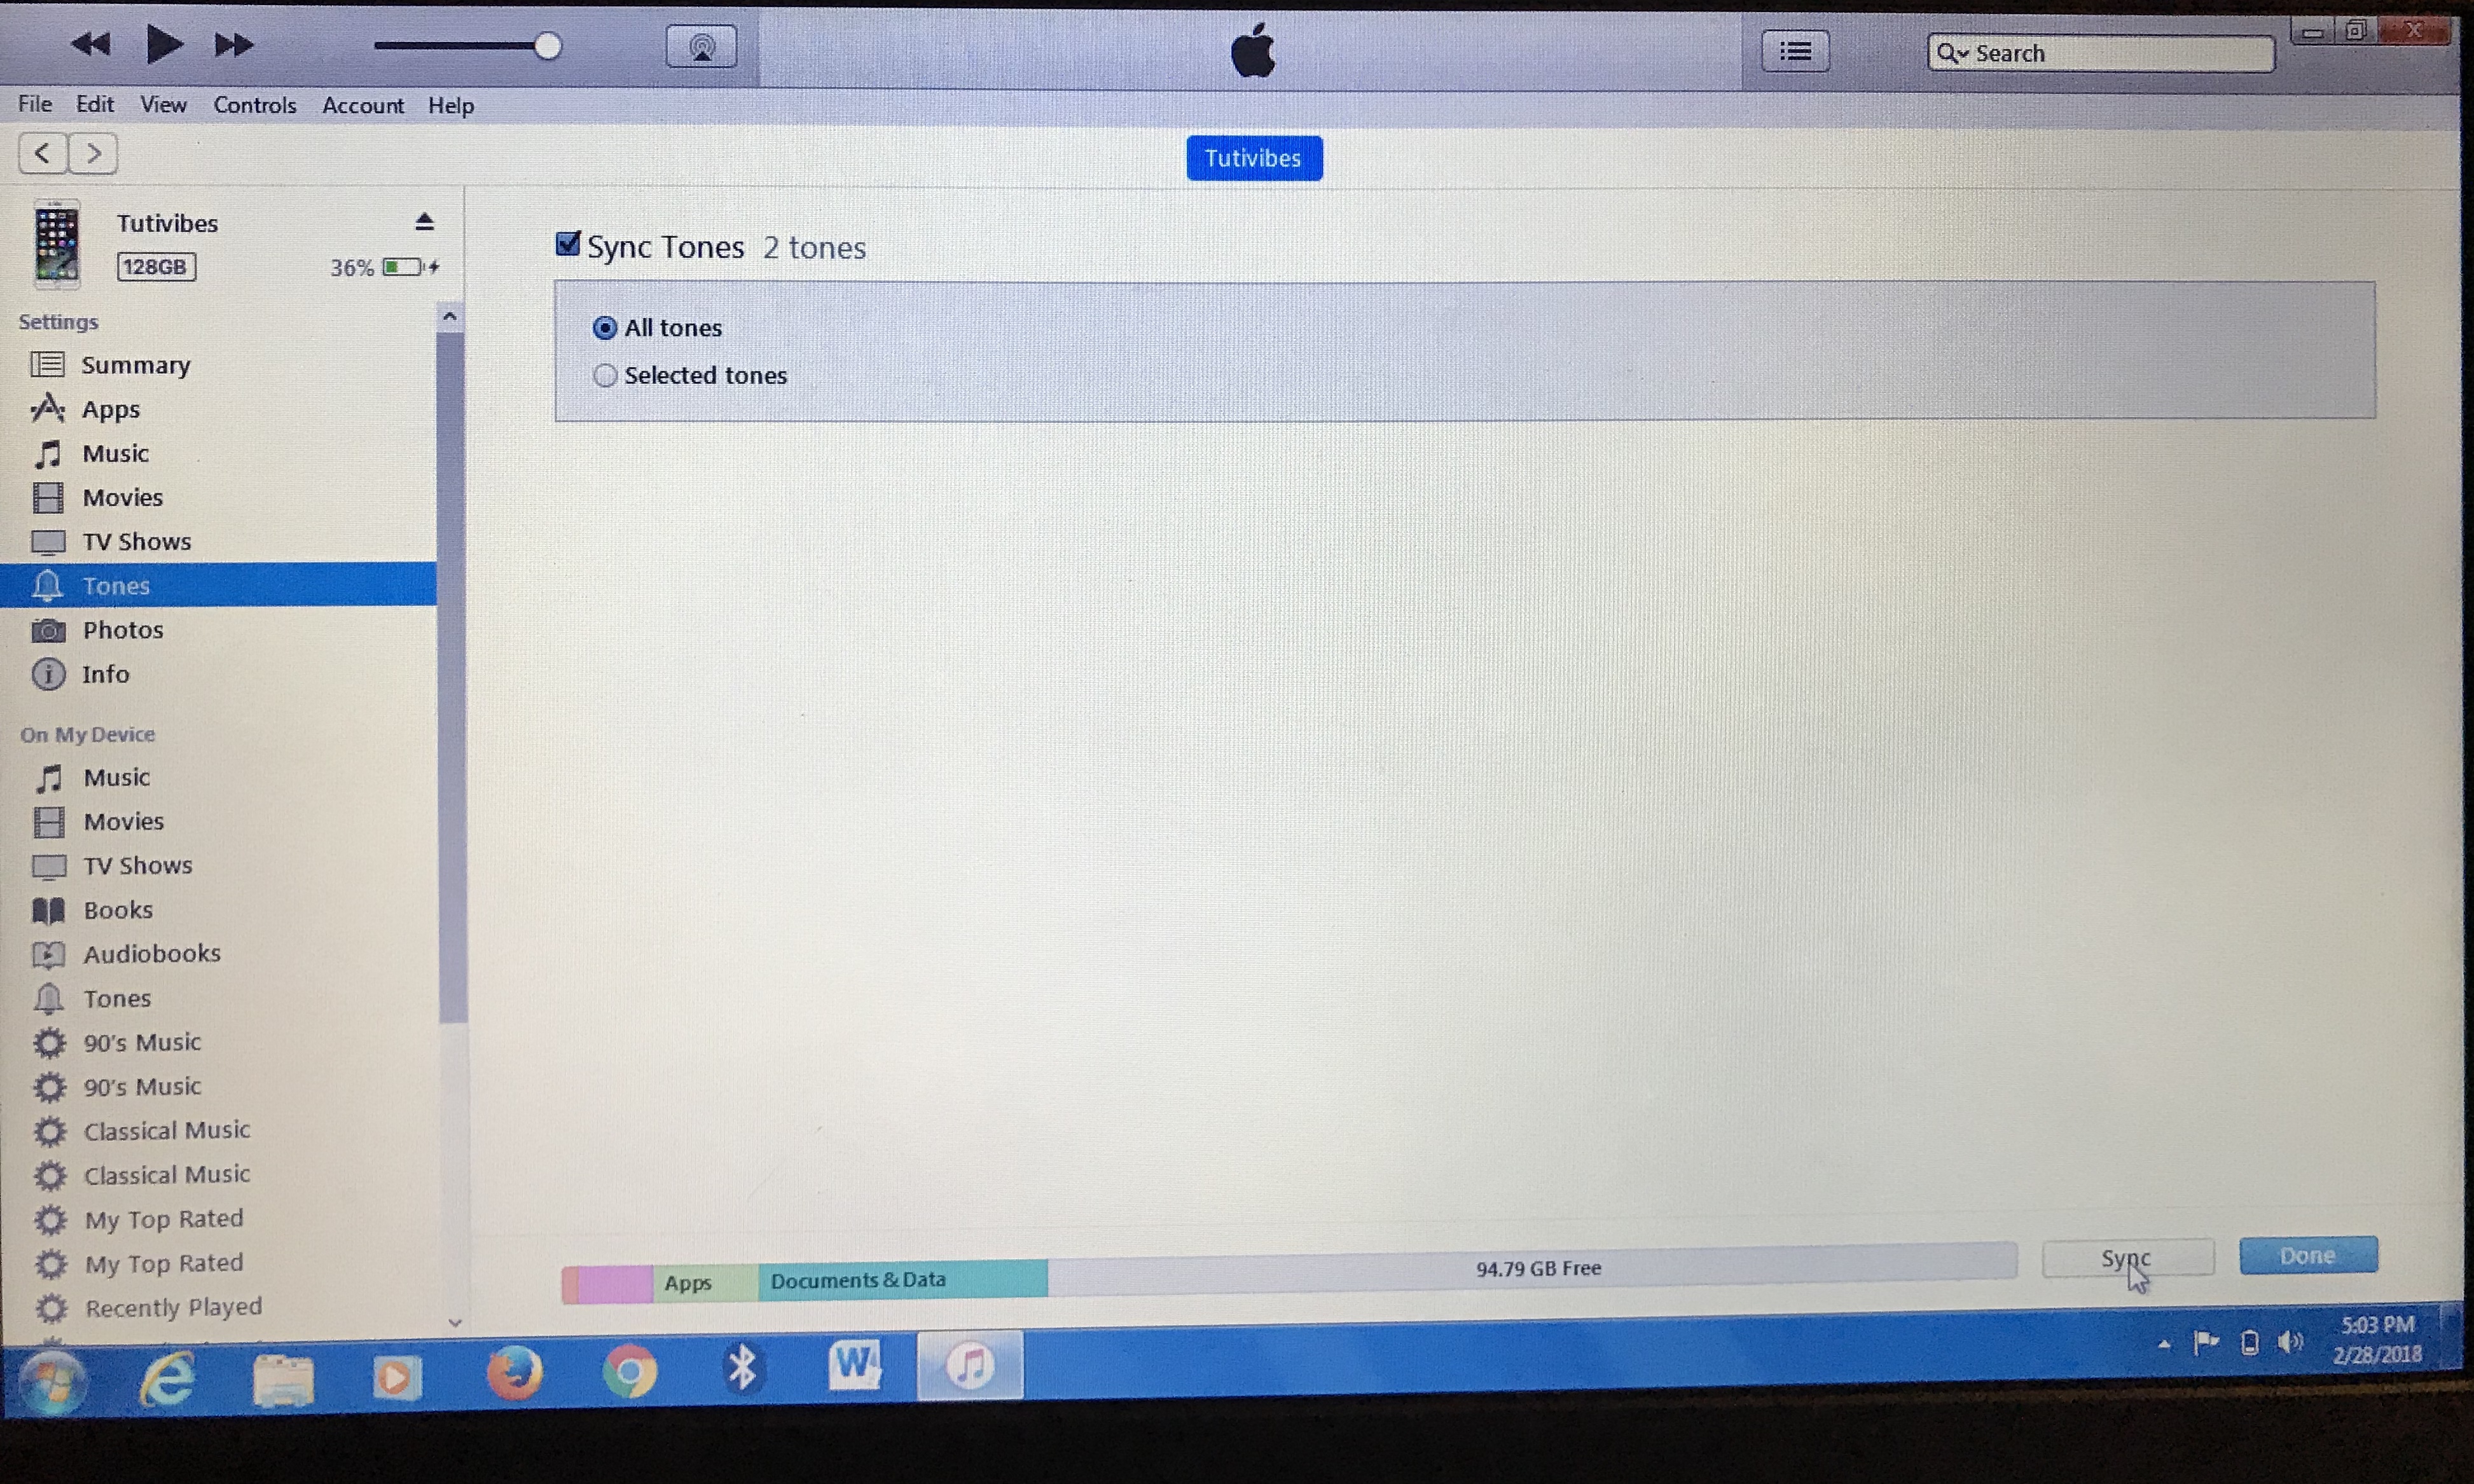 Sync your Tones to your iPhone
Ones this is done. You can now disconnect your iphone. Then go to settings on your iPhone > Sounds & Haptics > Ringtone. You’ll find your newly created Ringtone. At the top. You can now select and use as your Ringtone for incoming calls.
My Newly Personalized Ringtone As it Appears On My iPhone 7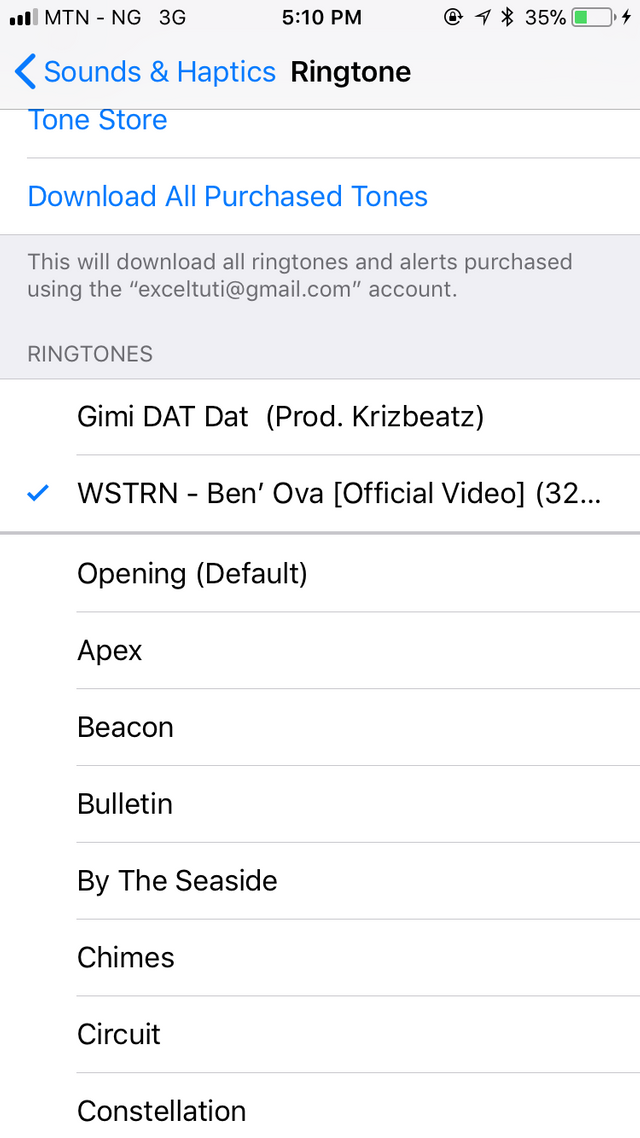
I hope this is clear enough. And have helped someone trying to solv this problem.
Hi @slausonboy, if you would like to participate in our current charity fundraising, please continue reading. @phreq kindly asks you, if you are interested to check this post in the category #howto. @slausonboy, if you would upvote and resteem it in the upcoming 24 hours, you will receive 0.067 SBD and additional 0.067 SBD will be donated by phreq to the current charity fundraising by using our escrow service. We already raised 0.02 SBD from the steem community and you @slausonboy, are able to support with a simple resteem and upvote of this link, too.
A very clear and easy tutorial. I'm sure iphone users with this issue would appreciate this post.
Good job!
Thank you so much @scarletmedia i am glad you like it