Adding the Parse Server Backend

I've added an example of backend with Parse Server in the example folder. It can be used to test the LiveQuery and I will show later how to perform additional tasks in the cloud such as beforeSave, afterSave and Jobs for example.
The files I added in this commit and this one added a server folder in the repository.
You can go ahead and take that folder out of the repository and then upload it to your Heroku account.
Launch the Parse Server on your Heroku account
- Login to your account
- Create a new free App
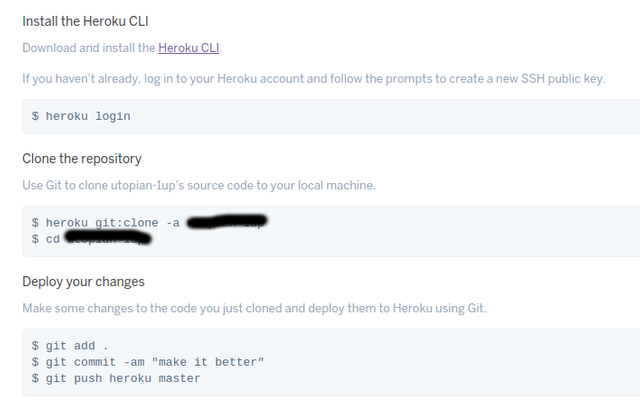
- Download and install heroku toolbelt
- Login to Heroku on the toolbelt
- On Heroku website, go to the Deploy tab and follow the instructions to deploy using Git.

- Create a free mLab database under resources tab > Add-on
- Configure all the Environment Variables you need under Settings > Reveal Config Vars
Make sure to configure the same APP_ID, MASTER_KEY, SERVER_URL and DATABASE_URI in the front end test files and you're good to go!
Let me know if you have any questions!
Happy coding and merry christmas!
Posted on Utopian.io - Rewarding Open Source Contributors
Thank you for the contribution. It has been approved.
You can contact us on Discord.
[utopian-moderator]
Hey @stoodkev I am @utopian-io. I have just upvoted you!
Achievements
Community-Driven Witness!
I am the first and only Steem Community-Driven Witness. Participate on Discord. Lets GROW TOGETHER!
Up-vote this comment to grow my power and help Open Source contributions like this one. Want to chat? Join me on Discord https://discord.gg/Pc8HG9x