SLC-Home Repair Club ||S23W5|| Tutorial: A 13 watt rechargeable LED bulb repair.
Steemian Friends,
Today, I will show you how to repair a rechargeable LED 13-watt bulb in the Steemit Learning Club's home repair club. The problem with the bulb is that it does not provide backup. The bulb is being used in my house. I have been using rechargeable bulbs for about four years. Hopefully, the Home Repair Club mentors(@rmm31 and @imranhassan) will advise me on better repair methods.
.png)
Design By Canva
| Device Name | 13 watts rechargeable LED Light |
|---|---|
| Problem | Not Backup |
I was suddenly sick last week and took a doctor's advice, so I couldn't post on the Steemit platform last week. I started posting again today.
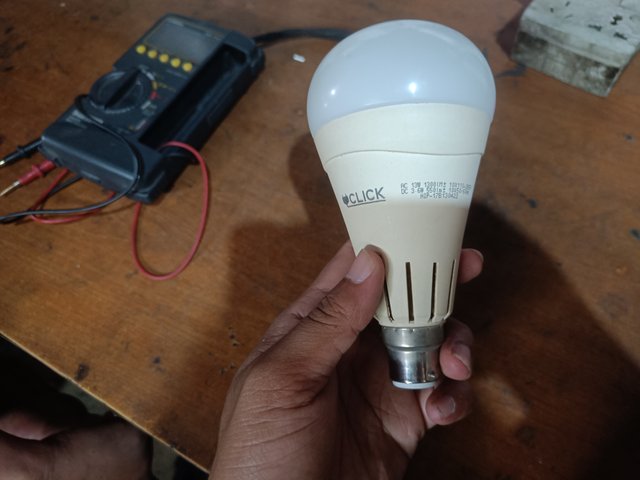
Today, I will show you how to repair my house's 13-watt rechargeable LED light. LED light is used on my daughter's reading table. The problem with LED lights is that they give light to the AC supply but not battery backup when the power supply is off. I understood the problem easily. LED light does not have battery backup. I am an electrical engineer. My office has electrical appliances, so I brought the LED light to the office for repair. So, let's start repairing LED lights.


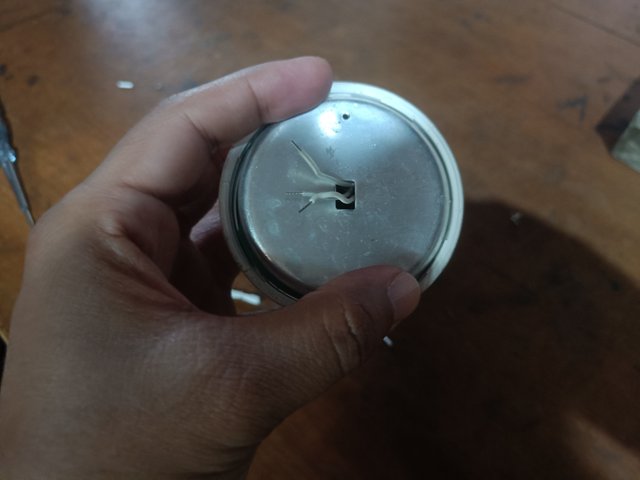
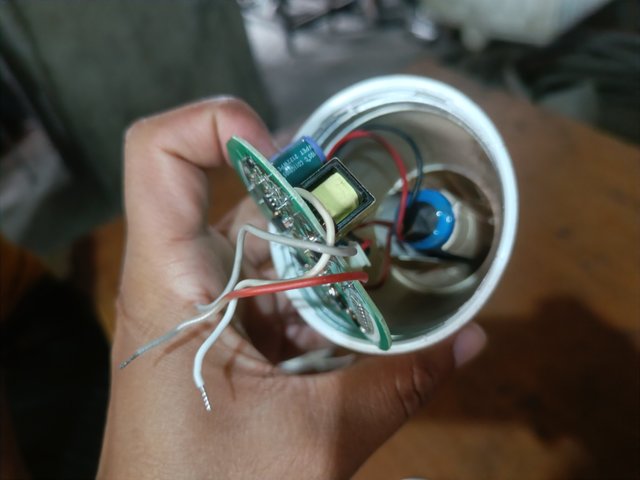
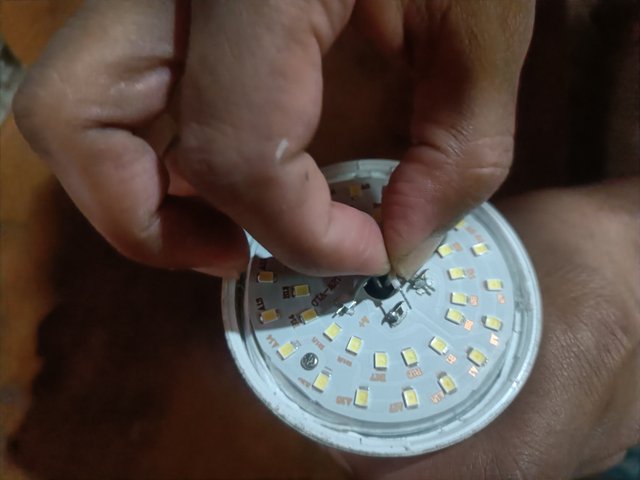
I first open the plastic glass before the LED light. Then I saw the series of LED lights. I first disconnect the three wire connections coming from the LED light circuit. The LED light is from our country's famous brand, Click Company, so its quality is very good. Because the connection points are fitted with a lock, I can easily open them. Some companies soldered the connections, and I needed to use a soldering iron. I separate the LED set by opening the connection lock from the three points.
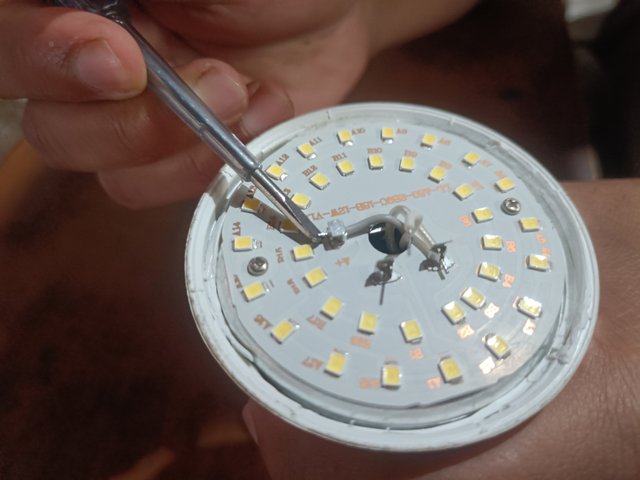
Then I see a plate. The LED set is mounted on the plate, which separates the LED set from the electronic circuit. Then, I see an electronic circuit that converts AC to DC power. There are electronic transformers, diodes, and capacitors. I haven't checked the electronic components since I had the LED light problem.
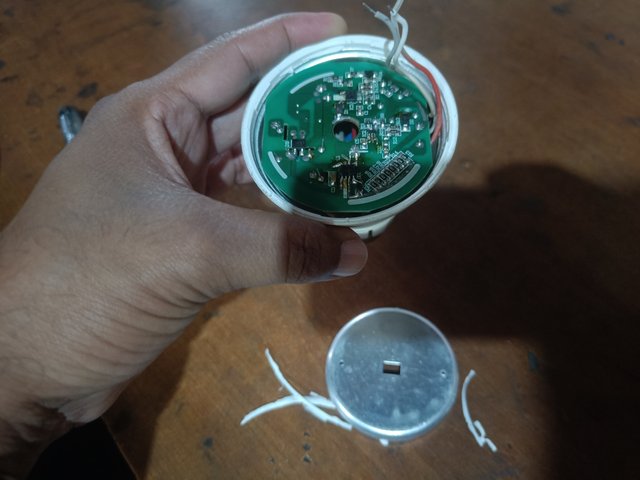
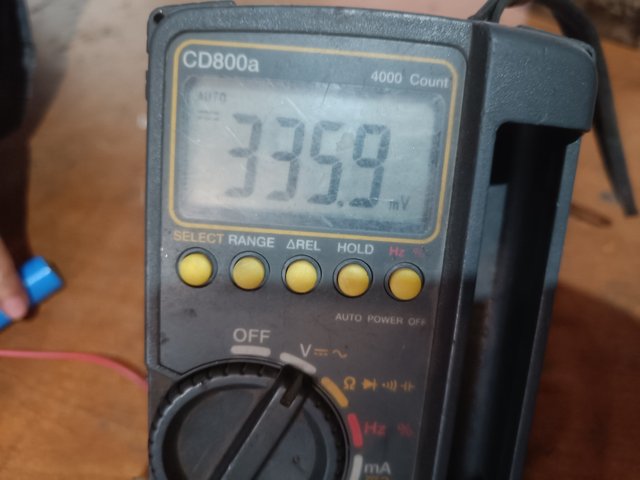
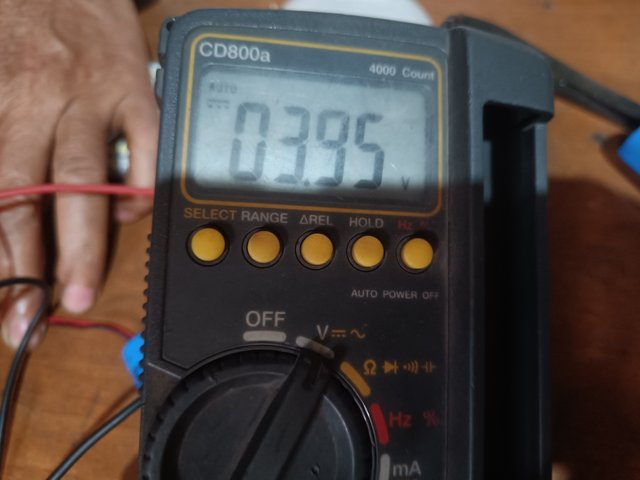
Then, I removed the battery from inside the LED light, opened the battery connection point lock from the electronic circuit, and completely separated the battery from the LED light. I looked at the battery and found that the top of it was swollen. Then, I checked the battery with a multimeter. The battery is 3.7 volts DC.
Then, I clean the positive and negative parts of the battery and connect the positive and negative knobs of the multimeter. I see millivolts on the multimeter. The battery is 3.7 volts, so I can easily figure out it is dead. I have measured the battery in the video below.

My youtube link
Then I take the dead battery and go to the electronic market about two kilometres away. I buy a 3.7-volt battery. Then, I sit at the electronics store and measure the new battery and my dead battery with an analogue meter. I drain my battery with analogue meters.
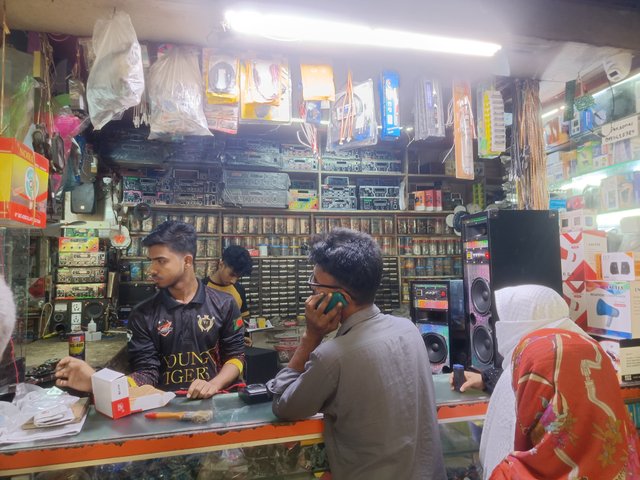
Electronic shop
| 3.7 Volt DC Battery | 1 Pcs | 80 Taka(Local) | 4.81 Steem |
|---|
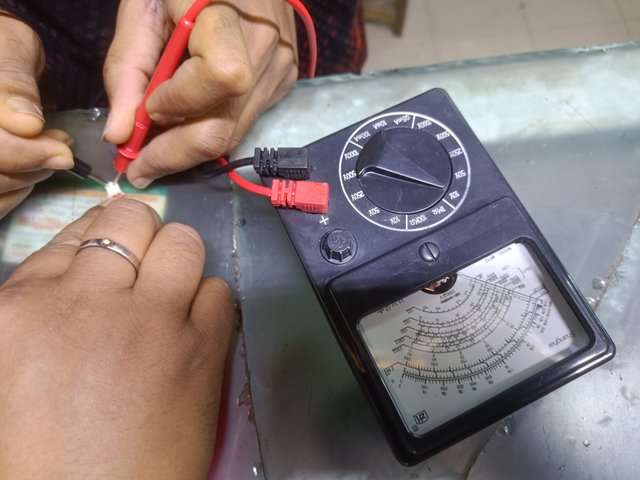
Check with an analogue meter for the dead battery
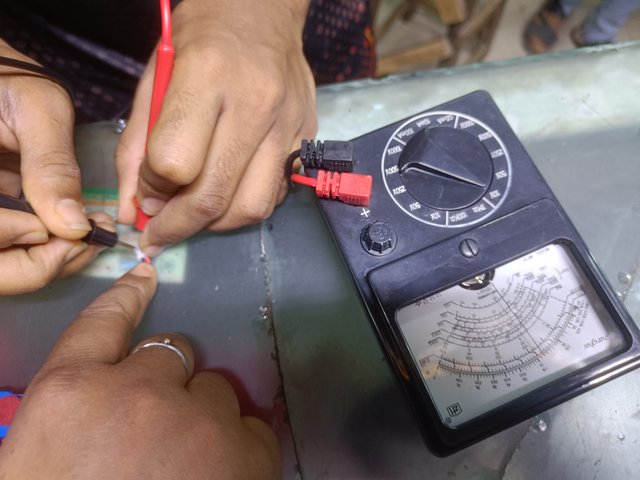
Check with the new battery analog meter
I then returned to the office. I set up the new battery inside the LED light, and I connected the battery point to the electronic circuit.
My youtube link
Dead battery
Good new battery
Then, I reset the entire LED light. I connected the three wire points to the LED set. I didn't need to use the soldering iron today. I first looked at the picture on the mobile and connected the three wires. Then, I checked the LED light with a series board.
Then, I checked the two types of LED lights. First, I turned on the LED lights with the power supply. Then, I turned off the power supply and checked the battery backup.
My youtube link
I wet my finger with water to check the battery backup. Then, I press the two points of the LED light holder with my wet fingers. The LED lights up. I have shown this in the video and pictures below. You can check out a rechargeable LED light using my method.


Dear @Mahadisalim Bro, your post is really amazing and educational. You have explained each step of repairing a 13-watt rechargeable LED light in a very constructive manner, which will serve as a great guideline for beginners. Your efforts are commendable.
Consejos del Mentor/Mentor Tips
Some of the highlights of your post:
Detailed analysis of the problem: You have accurately identified the main reason for the LED light not giving backup.
Explanation of equipment and methods You have beautifully illustrated how to check the battery status using a multimeter and an analog meter.
The addition of pictures and videos—explaining each step through pictures has been very helpful for the students to learn.
Sharing real-life experiences You have identified and solved the problem of the LED light based on personal experience, which will be a practical lesson for others.
Some suggestions for improvement:
Circuit analysis: Apart from the battery of the LED light, the post would have been richer if more details were discussed on how to test the functionality of other components like diodes, capacitors, transformers.
Battery Type and Quality: Some more information could have been added on what to look for when buying a new battery, such as brand, capacity, durability, etc.
Tips for increasing battery life: It would have been more informative if some effective strategies on how to increase battery life were added.
It was really nice to see your skills and analytical abilities. A warm welcome to our Steemit Home Repair Club. We hope you will share such educational posts regularly and enrich our club. Looking forward to your future posts.
Scores| 9.5/10
CC:@rmm31
0.00 SBD,
15.40 STEEM,
15.40 SP
This is my Twitter share link :
https://twitter.com/mahadih83660186/status/1901654145259769910?t=bO61i4VfPhyC9-19Px5g_Q&s=19