club 5050 || How to apply glowing effect || Photoshop Tutorial ||1-october-2022
Hello and Assalam u alaikum
I hope each and every member of our wonderful steemit family is fit and fine and living a peaceful life.
Here i am back with another photoshop tutorial this time with a much better skill of photoshop which almost every top youtuber uses.The glowing effect of photoshop.
So this is a model's image i took from google and on this image i will guide you how to apply outer glow effect.
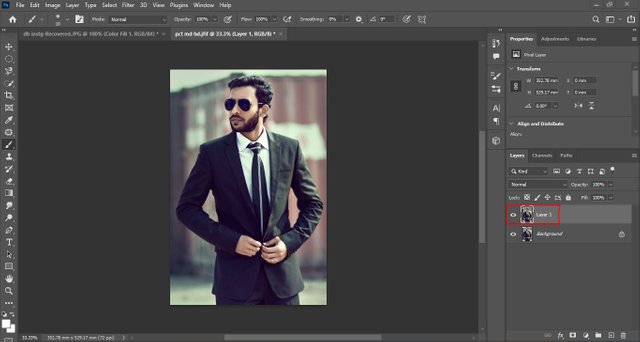
So in the step 1 we will make the copy of background layer by pressing CTRL + J .It's important always to make copy of original layer.Let's move to the second step.
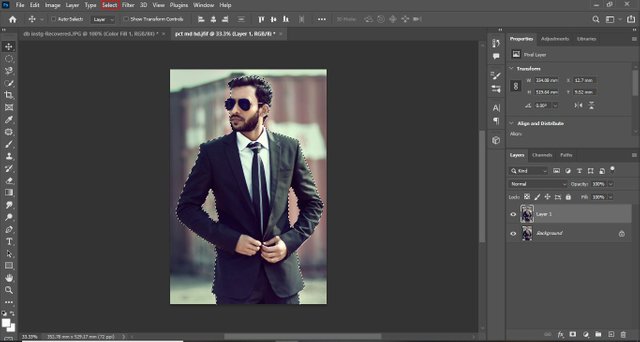
So in the second step we will simply select the subject by going to the option SELECT which is squared by red color and choose the option SUBJECT.It will automatically select the subject or if you want to select manually you can use lasso tool and other available options.
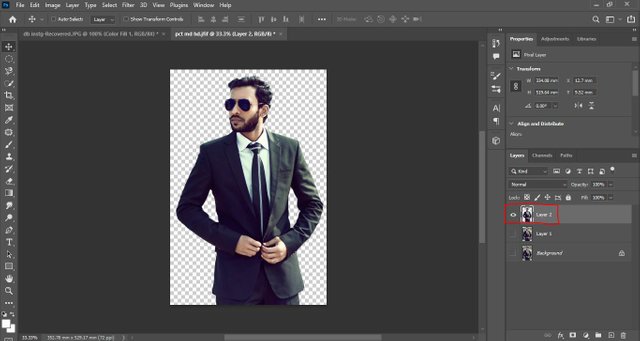
Now in the third step i just made a copy of my selection and unhided the background and its copy.I could've applied the outer glow effect on the original but it wouldn't have looked good.To make it look good i selected the subject and put it in a separate layer.Lets move on to 4th step.
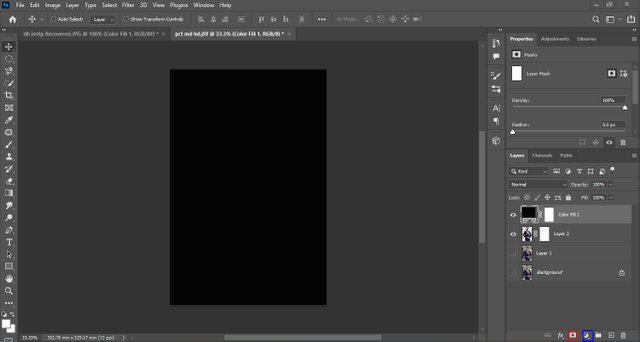
Now in the fourth step as you could see the background of the picture in the third step was transparent so to have a decent background I added a layer mask from ADD LAYER MASK option which is squared by red color and then i added a solid color adjustment layer from CREATE NEW FILL OR ADJUSTMENT LAYER option which is squared by blue color and choose the color of my choice you can choose any color you want as background.
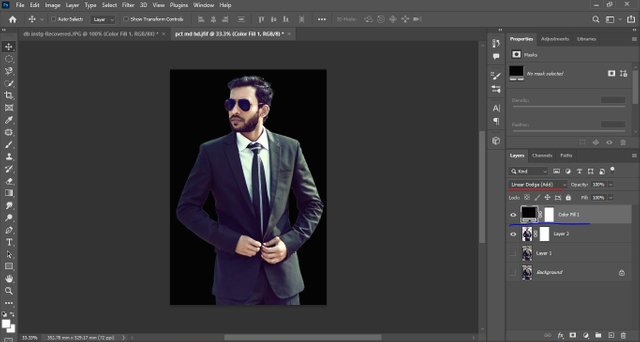
Now in the fifth step what you have to do is to change the mode of the color from normal to linear dodge which is underlined by red color and then click and hold the color fill 1 layer which is underlined by blue color and drag it under the Layer 2 layer.So the black color goes behind the subject.Let's move on to the sixth step.
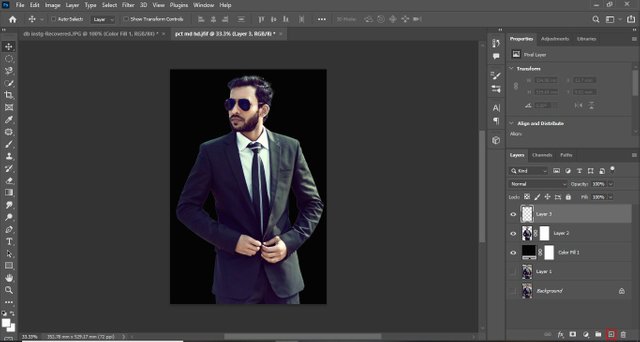
Now you can see in this step the color fill layer is under the layer 2.In this step i added a blank layer fromCREATE A NEW LAYER option which is squared by red color.Now off to the next srep.

Now this the main step how to apply outer glow effect.So what you have o do in this step is just simply right click on the blank layer or layer 3 which is squared by red color and choose BLENDING OPTION from there.Then a box like this will appear on your just choose outer glow from there as you could see a tick on outer glow option.After choosing outer glow choose the color with which you want to glow the subject and change the blend mode from NORMAL to LINEAR DODGE and make the opacity 100% and change the size to 100 and then simply press OK.
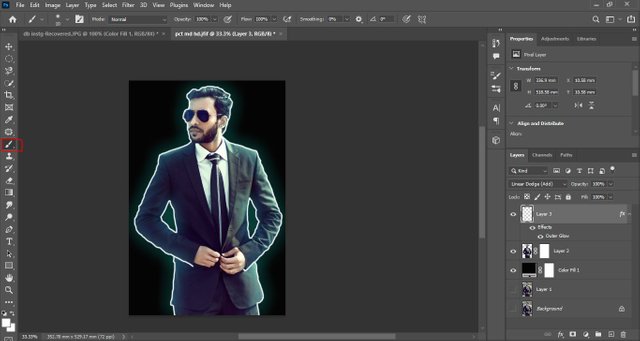
So in the eight step simply choose the brush tool(choose soft brush, change it's opacity and flow to 100) and make sure the Foreground color is white and start drawing an outline to the subject and that's it this is how to use outerglow effect on pictures.
But this picture doesn't look so good so i added gradient layer in background,applied contrast and brightness layer and a filter on the photo to make it look better.
So i hope you guys will love this tutorial as well.It takes alot of time to create this type of tutorial.
SIGNING OFF
MOHSIN ALI


| 50 SP | 100 SP | 200 SP | 300 SP | 400 SP | 500 SP |
|---|
| 1000 SP | 1500 SP | 2000 SP | 3000 SP | 4000 SP | 5000 SP |
|---|
| Checks | Status |
|---|---|
| Plagiarism-Free | ✅ |
| #steemexclusive | ✅ |
| #club5050 | ✅ |
| Bot-Free | ✅ |
| #burnsteem25 | ❌ |