Speem SEC-S32W5: (Creating a Stunning Pencil Portrait)
Hello, amazing Steemians, and welcome to my blog once again. Today, I am excited to share my latest pencil portrait drawing, which I created as my entry for this wonderful contest. Art has always been a beautiful way for me to express creativity, challenge my skills, and improve my understanding of details and shading. For this piece, I decided to draw the portrait of a beautiful lady in profile view, focusing on capturing her elegance, facial structure, and flowing hair. In this post, I will walk you through the stages I followed to complete the drawing.
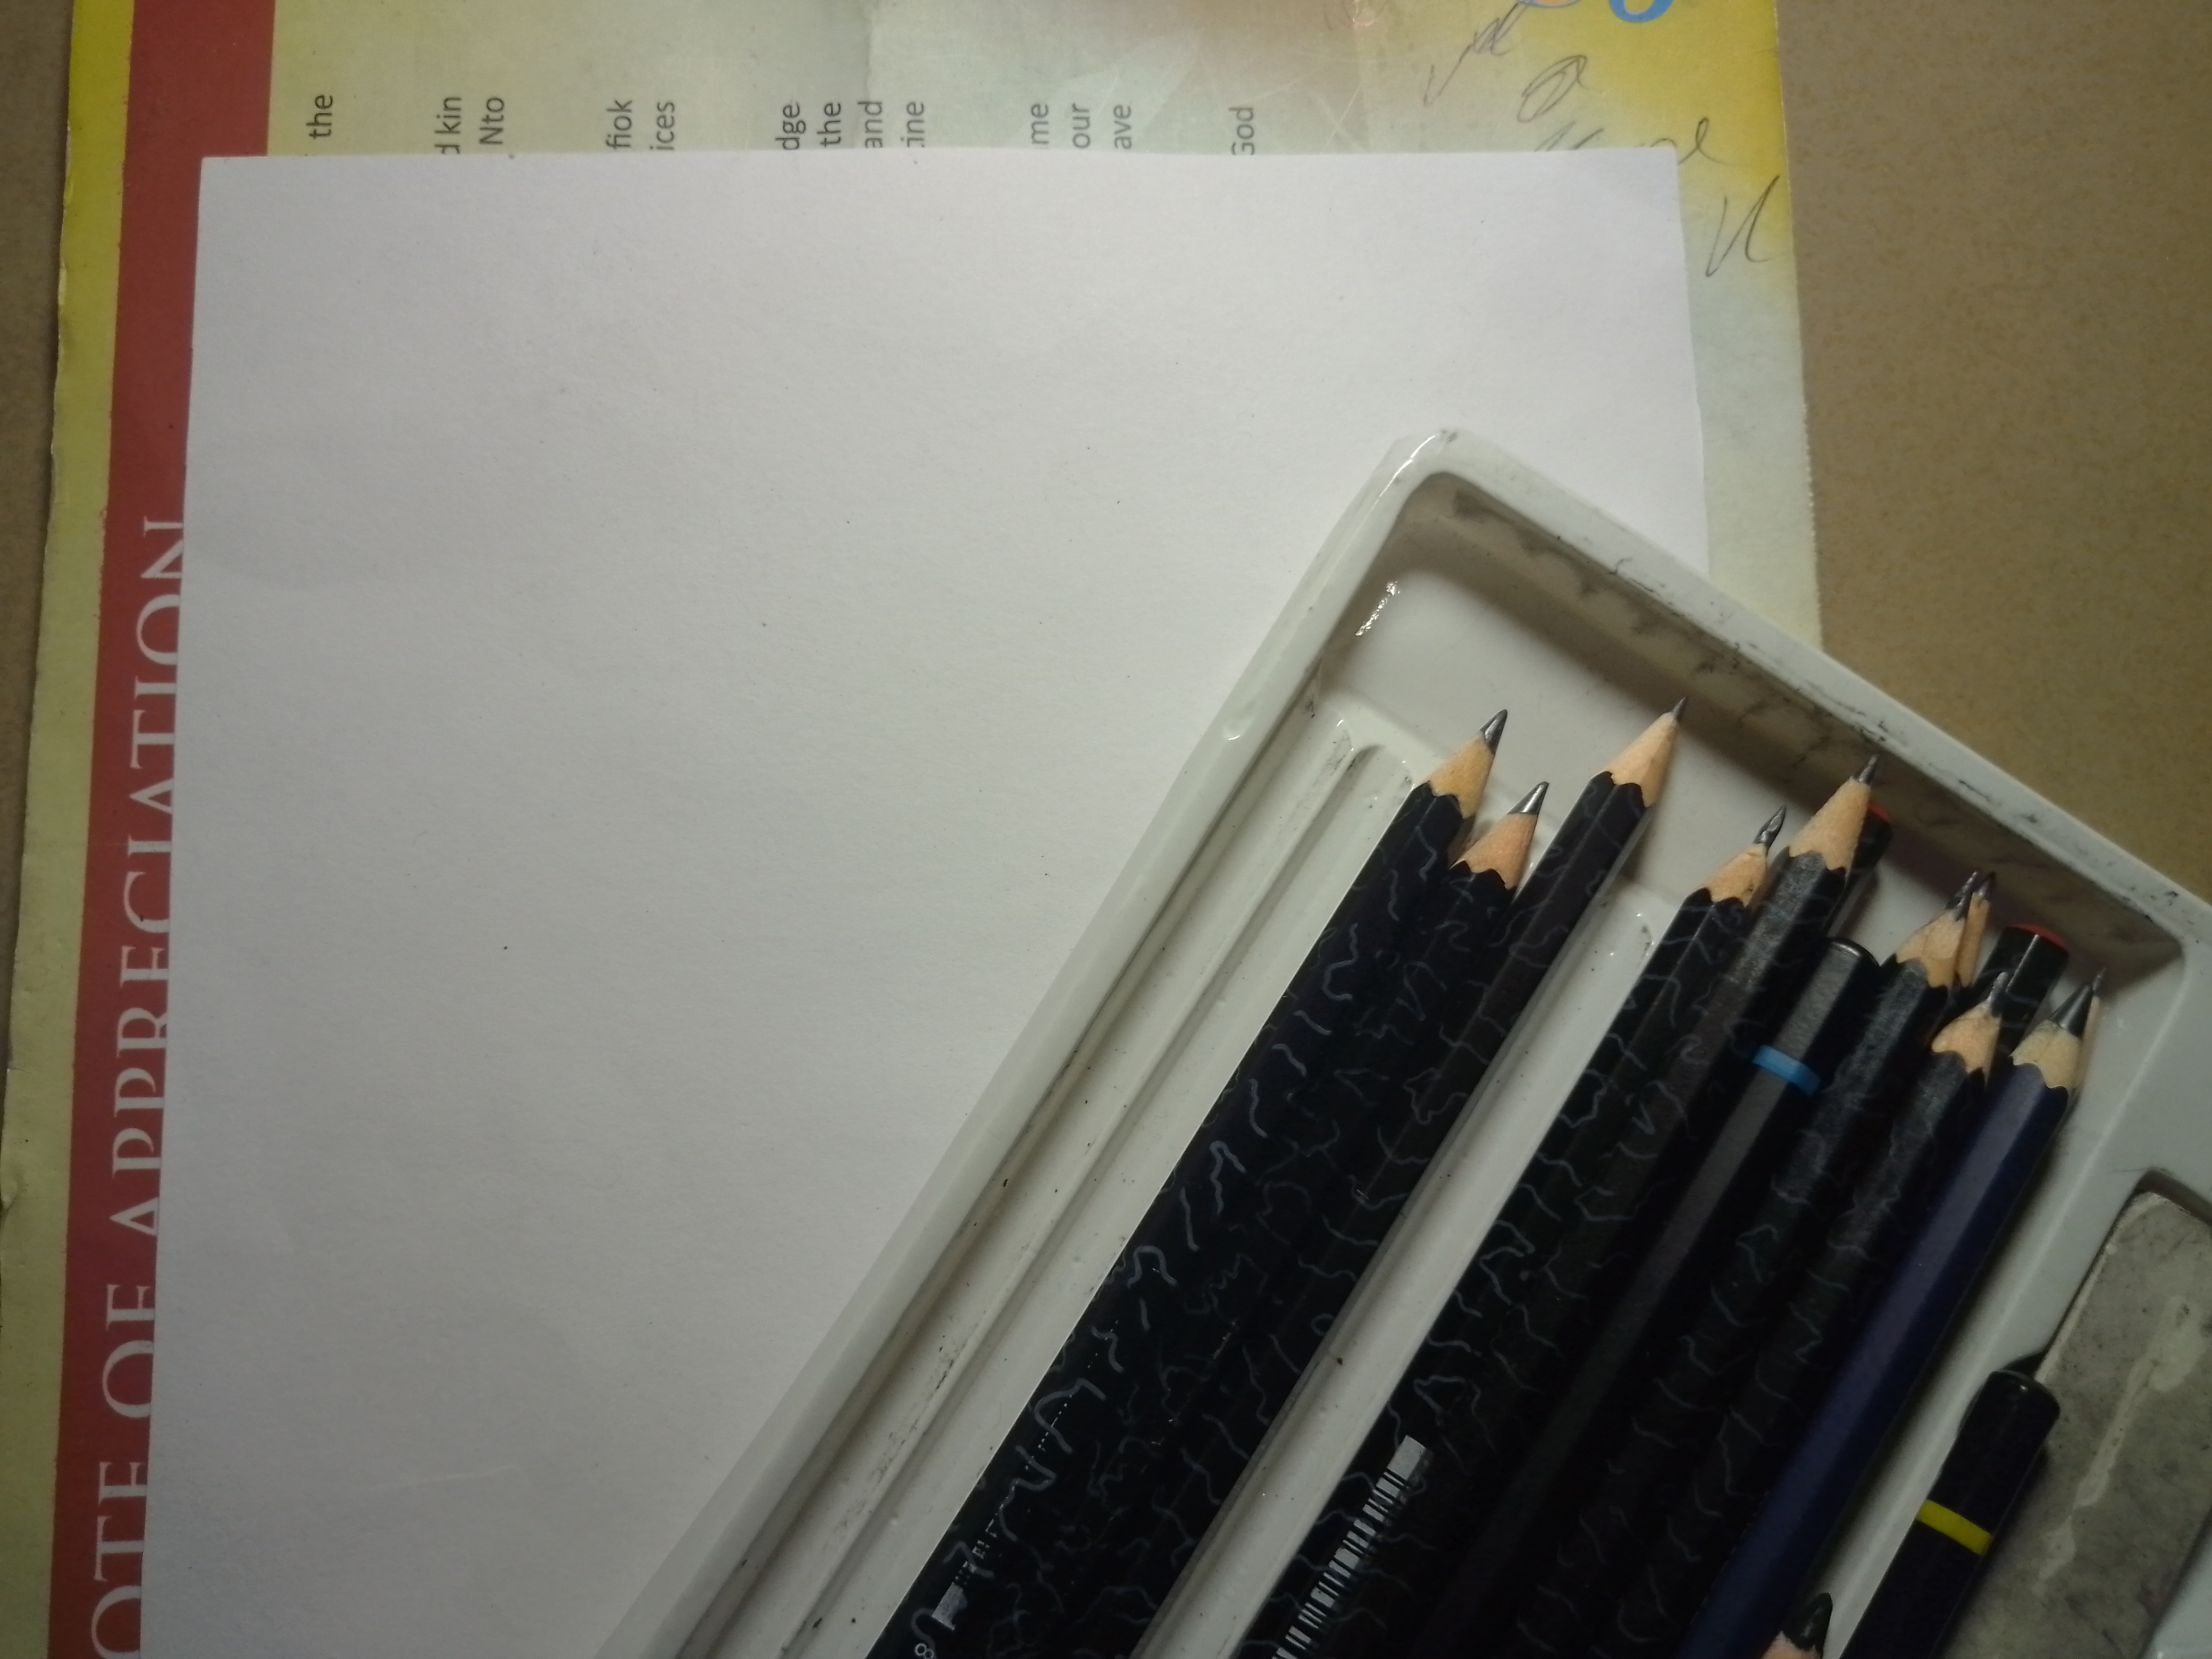
Drawing Materials
• A4 paper
• mechanical pencil
• 6B and 4B pencil
• graphite pencil
• charcoal pencil
• black pen
• blending tissue
• eraser
• sharpener
Step 1
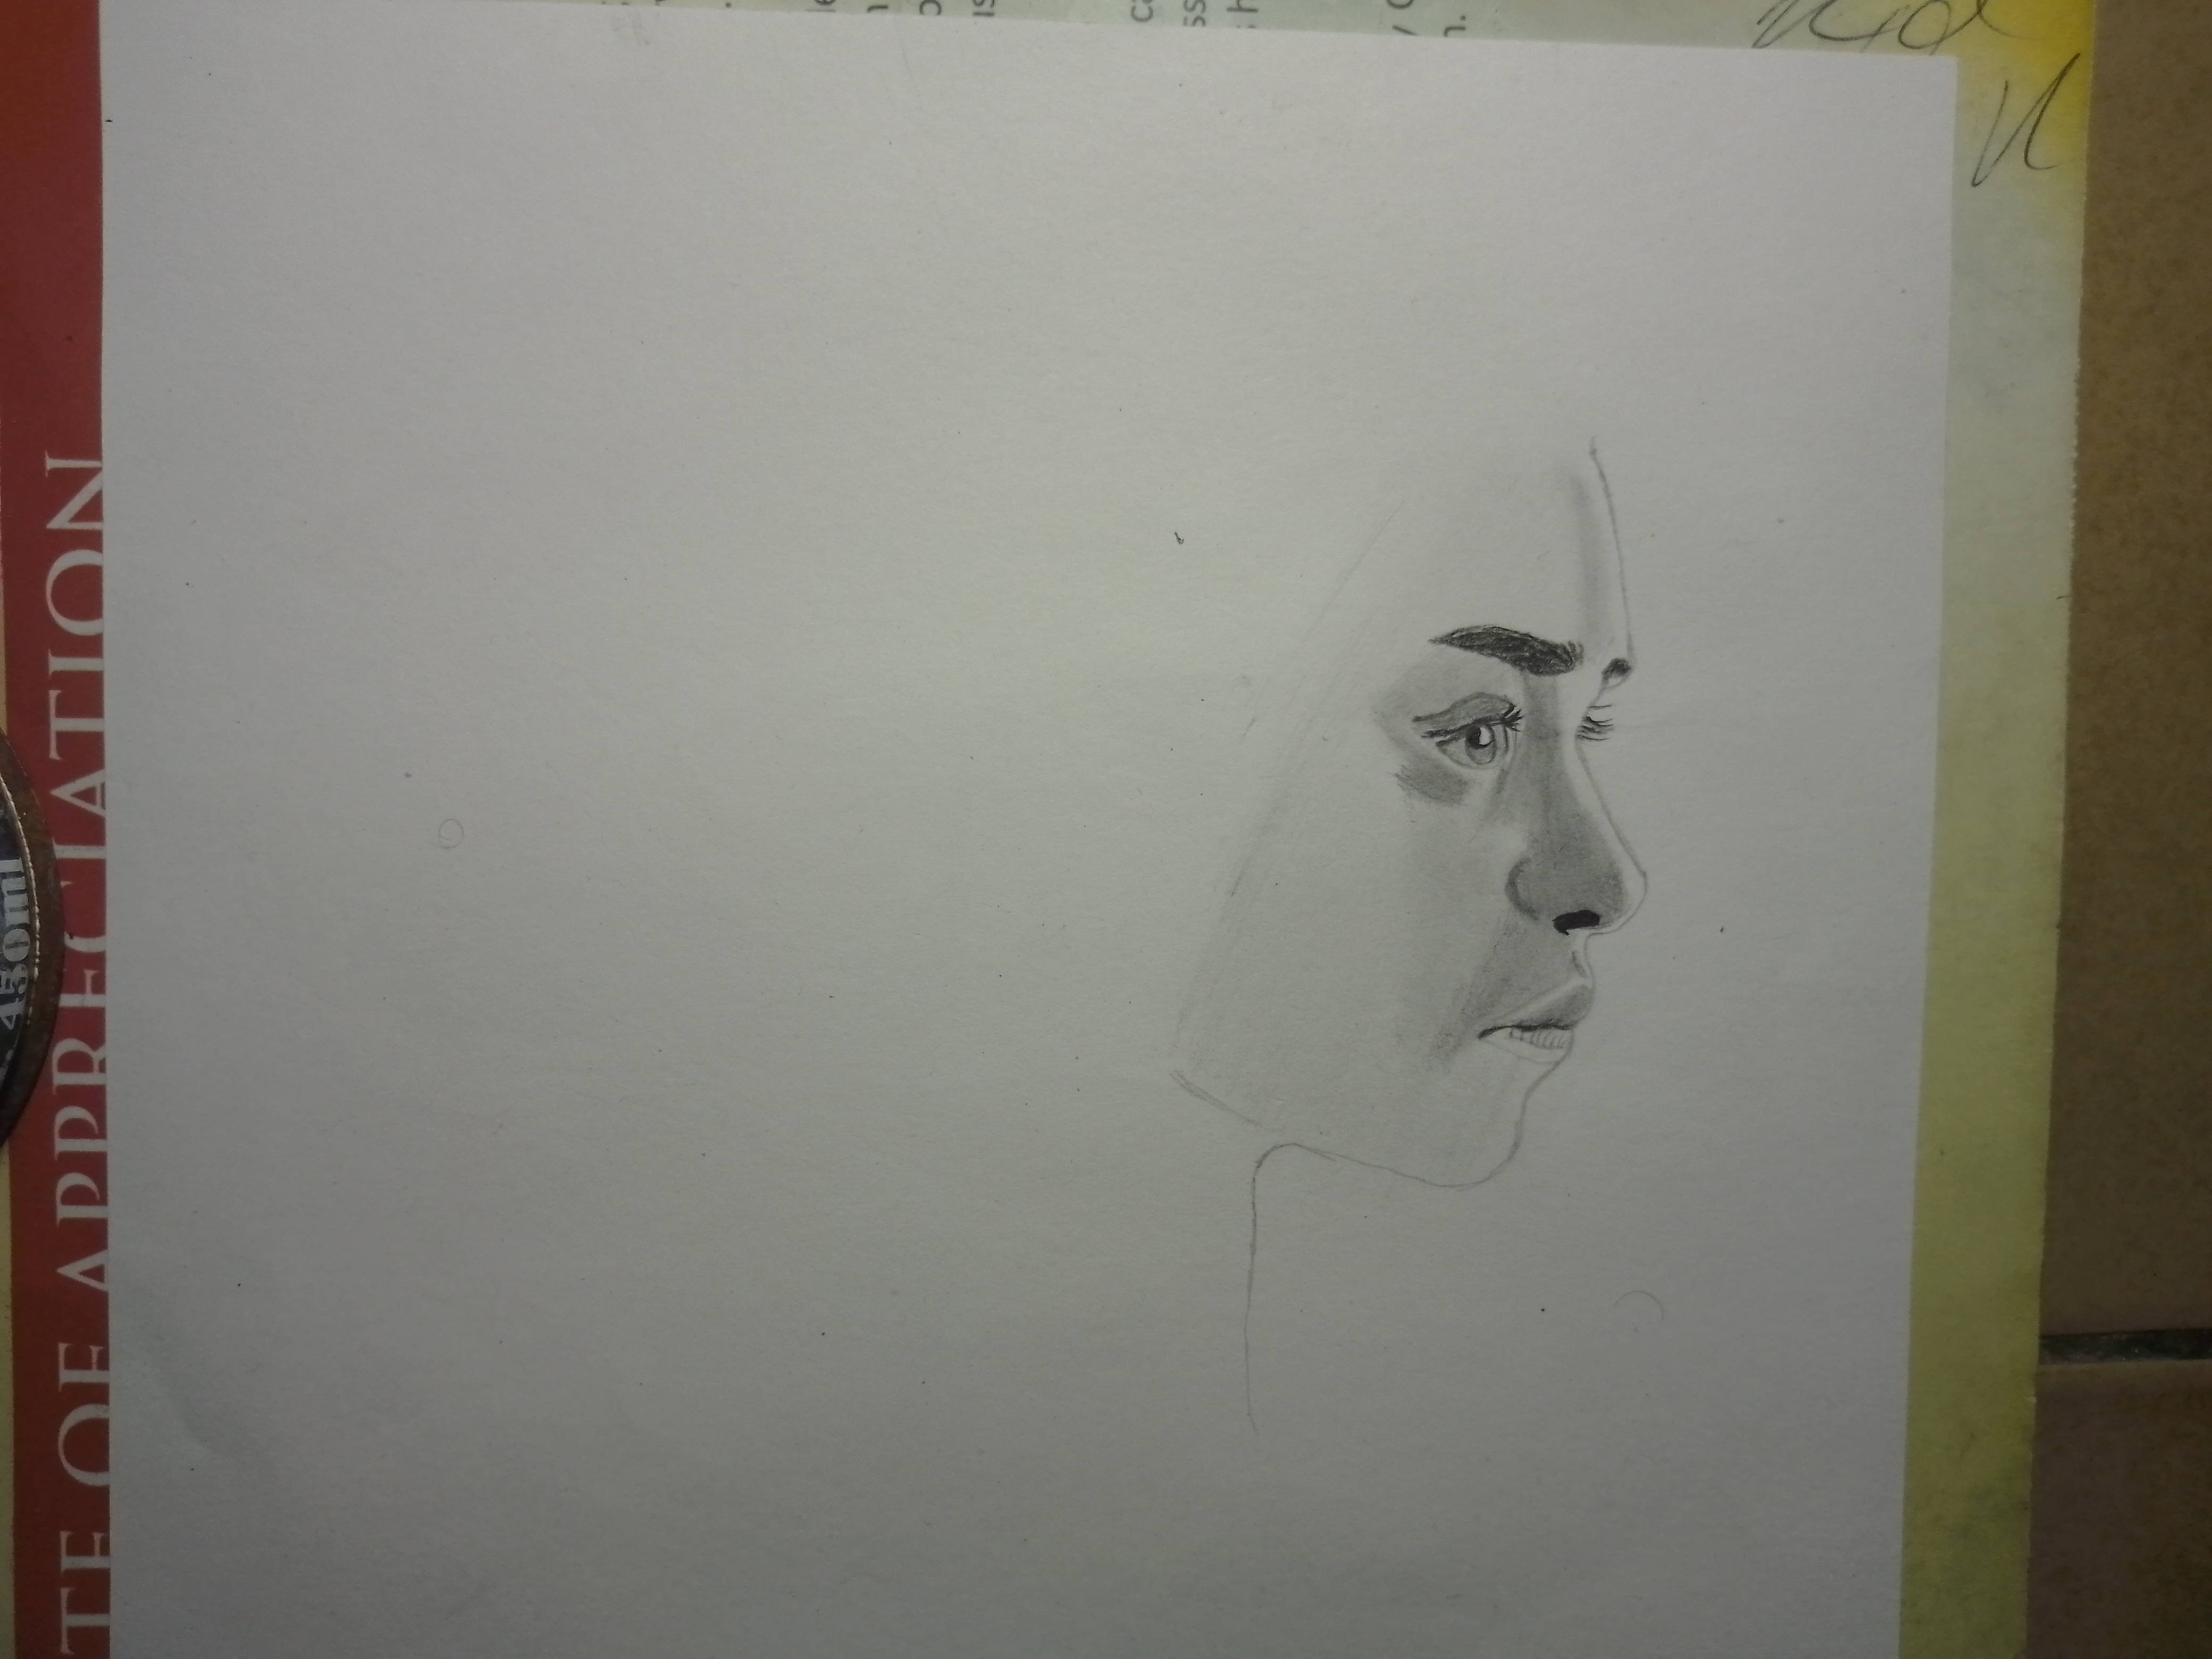
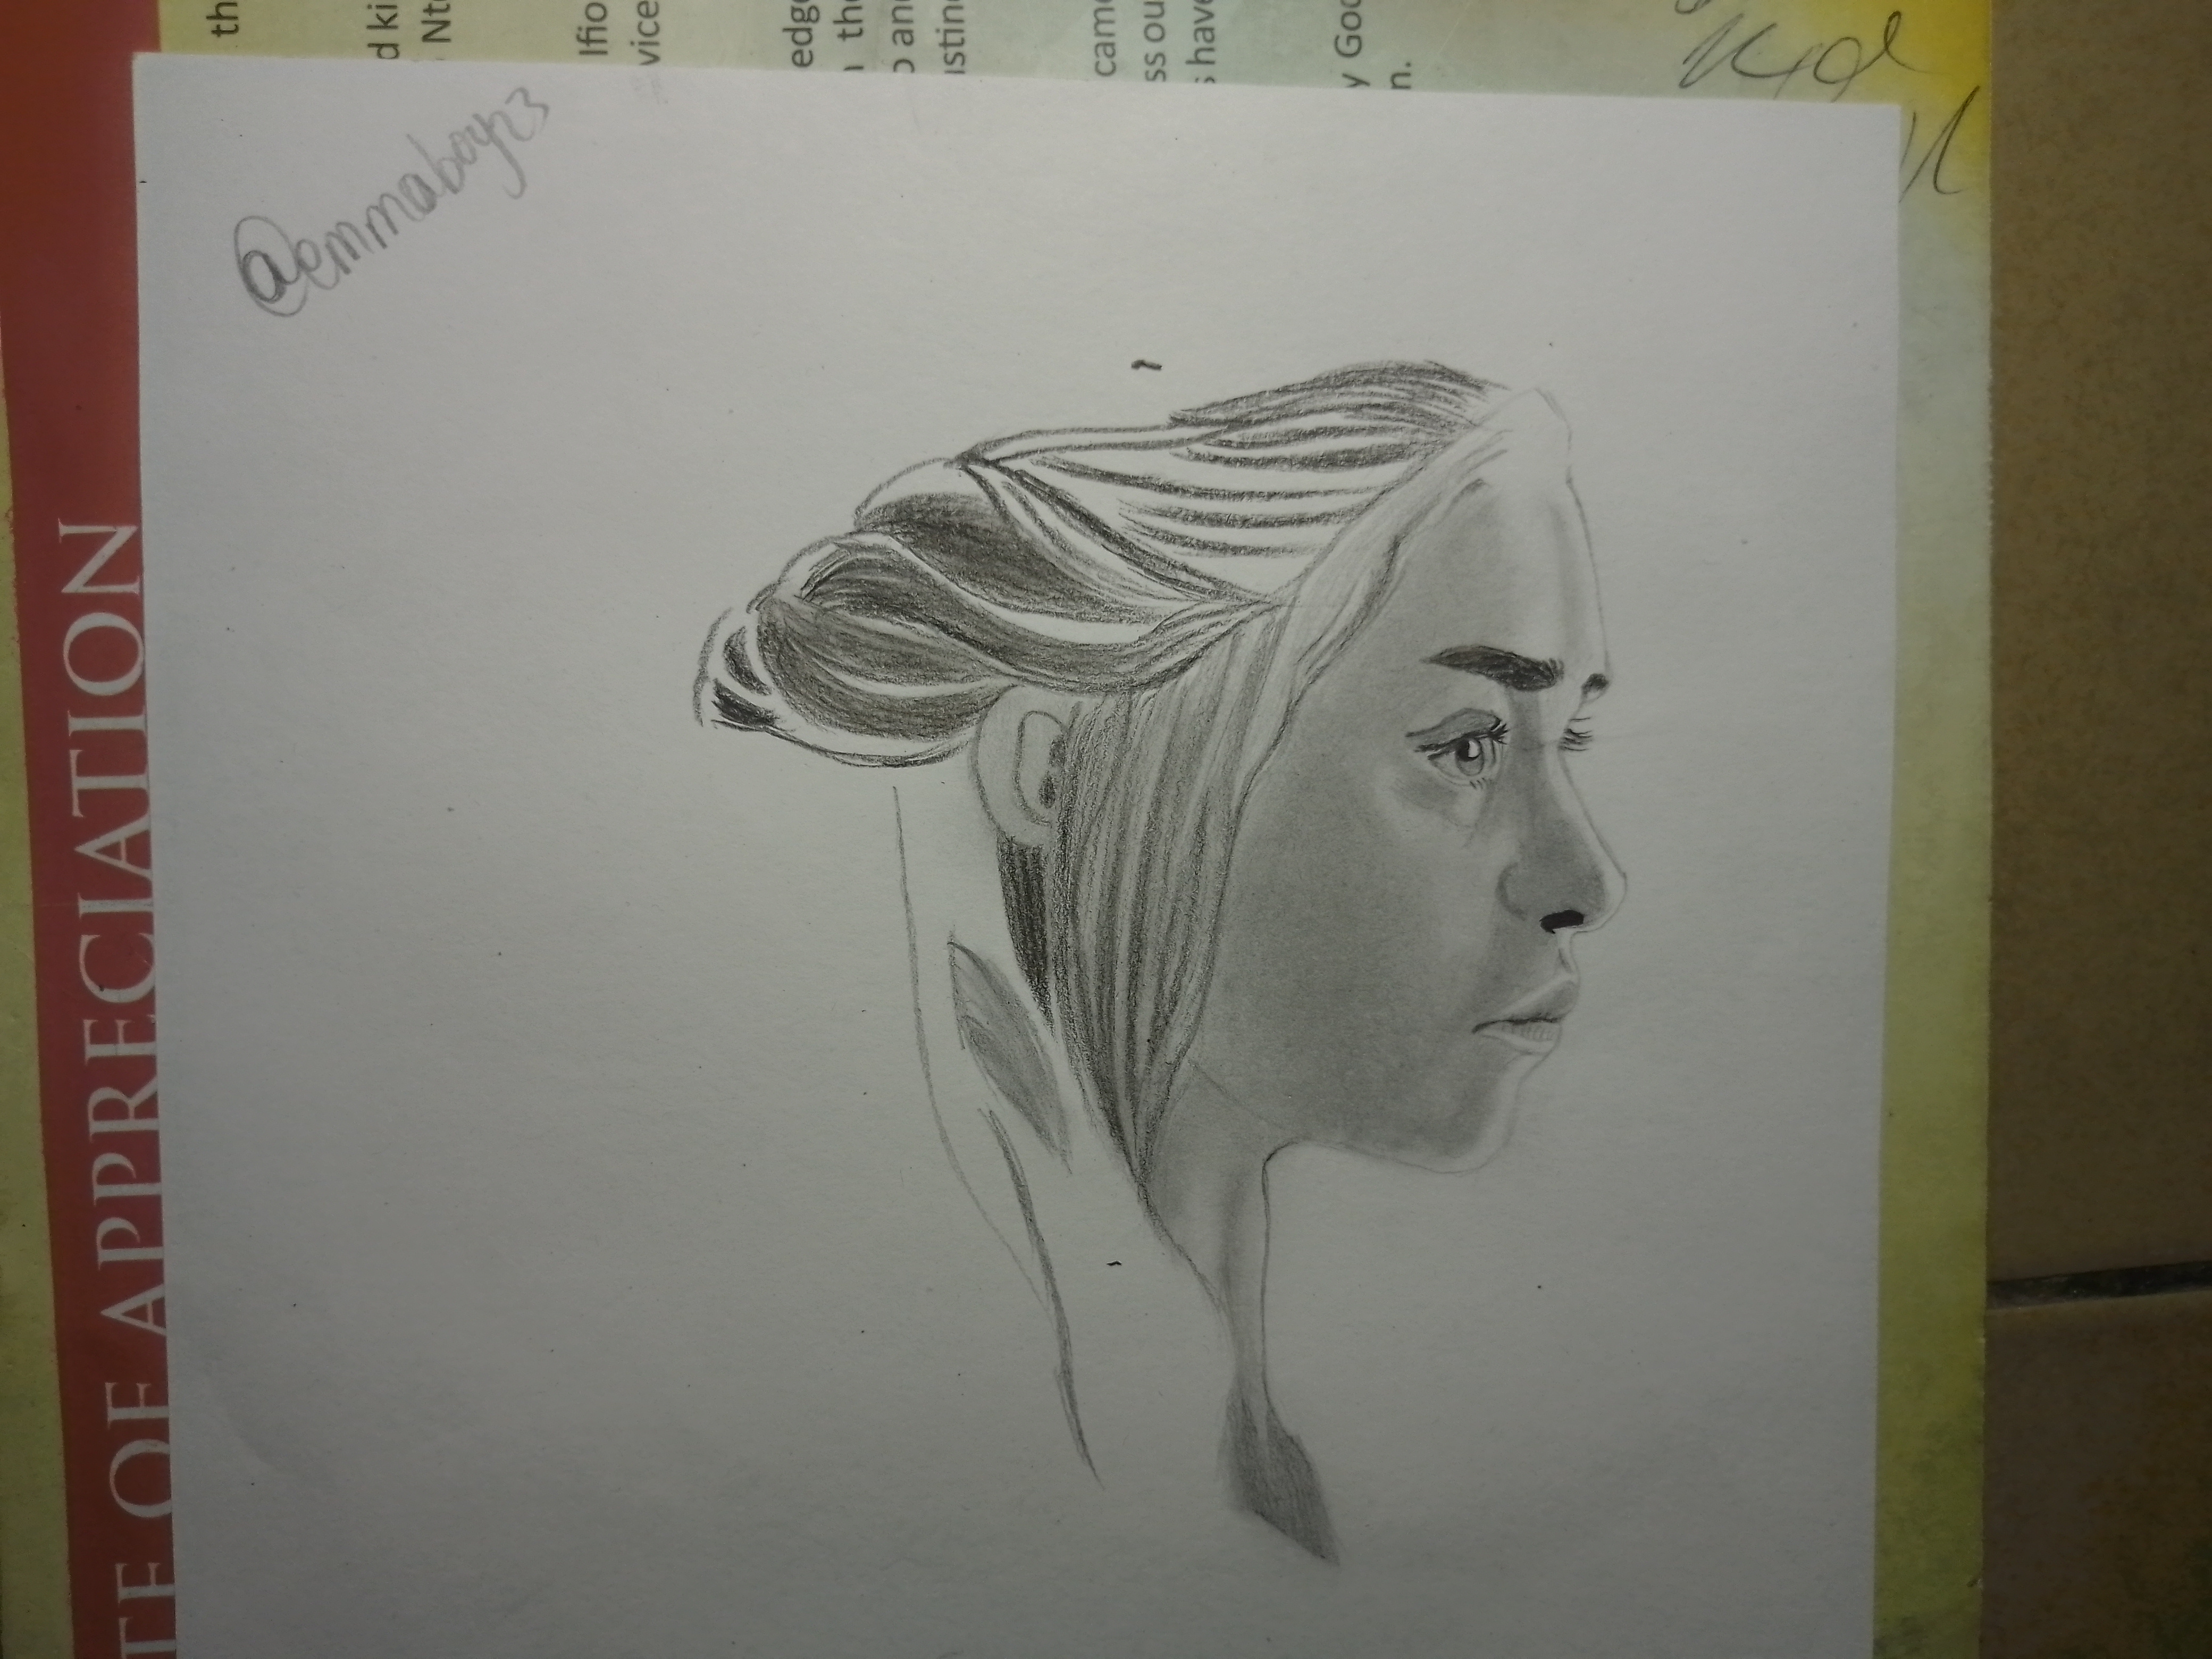
The first step was creating a light outline of the head. I carefully observed the proportions of the face, paying special attention to the forehead, nose, lips, and chin since the portrait was viewed from the side. Then I added little details to the eyes.
Step 2
After completing the outline, I began refining the eye, eyebrow, nose, lips, and ear. I also started shading the face. Using a combination of HB, 2B, and 4B pencils, I gradually developed the darker values around the cheek, jawline, neck, and eye area.
Step 3
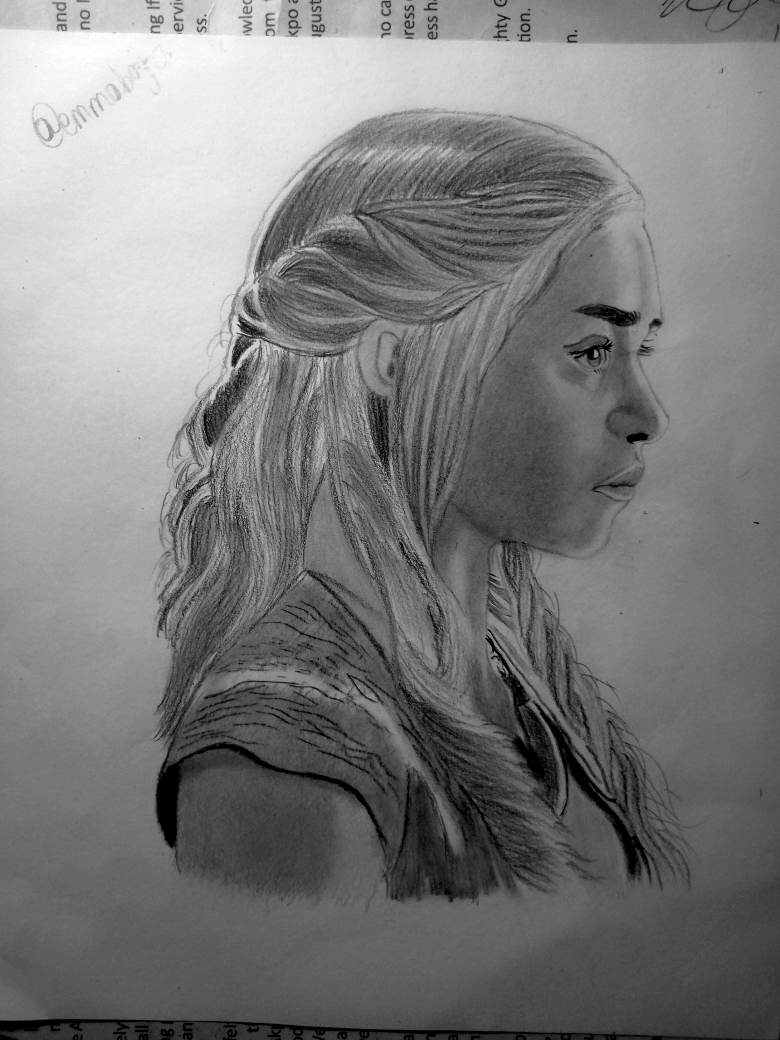
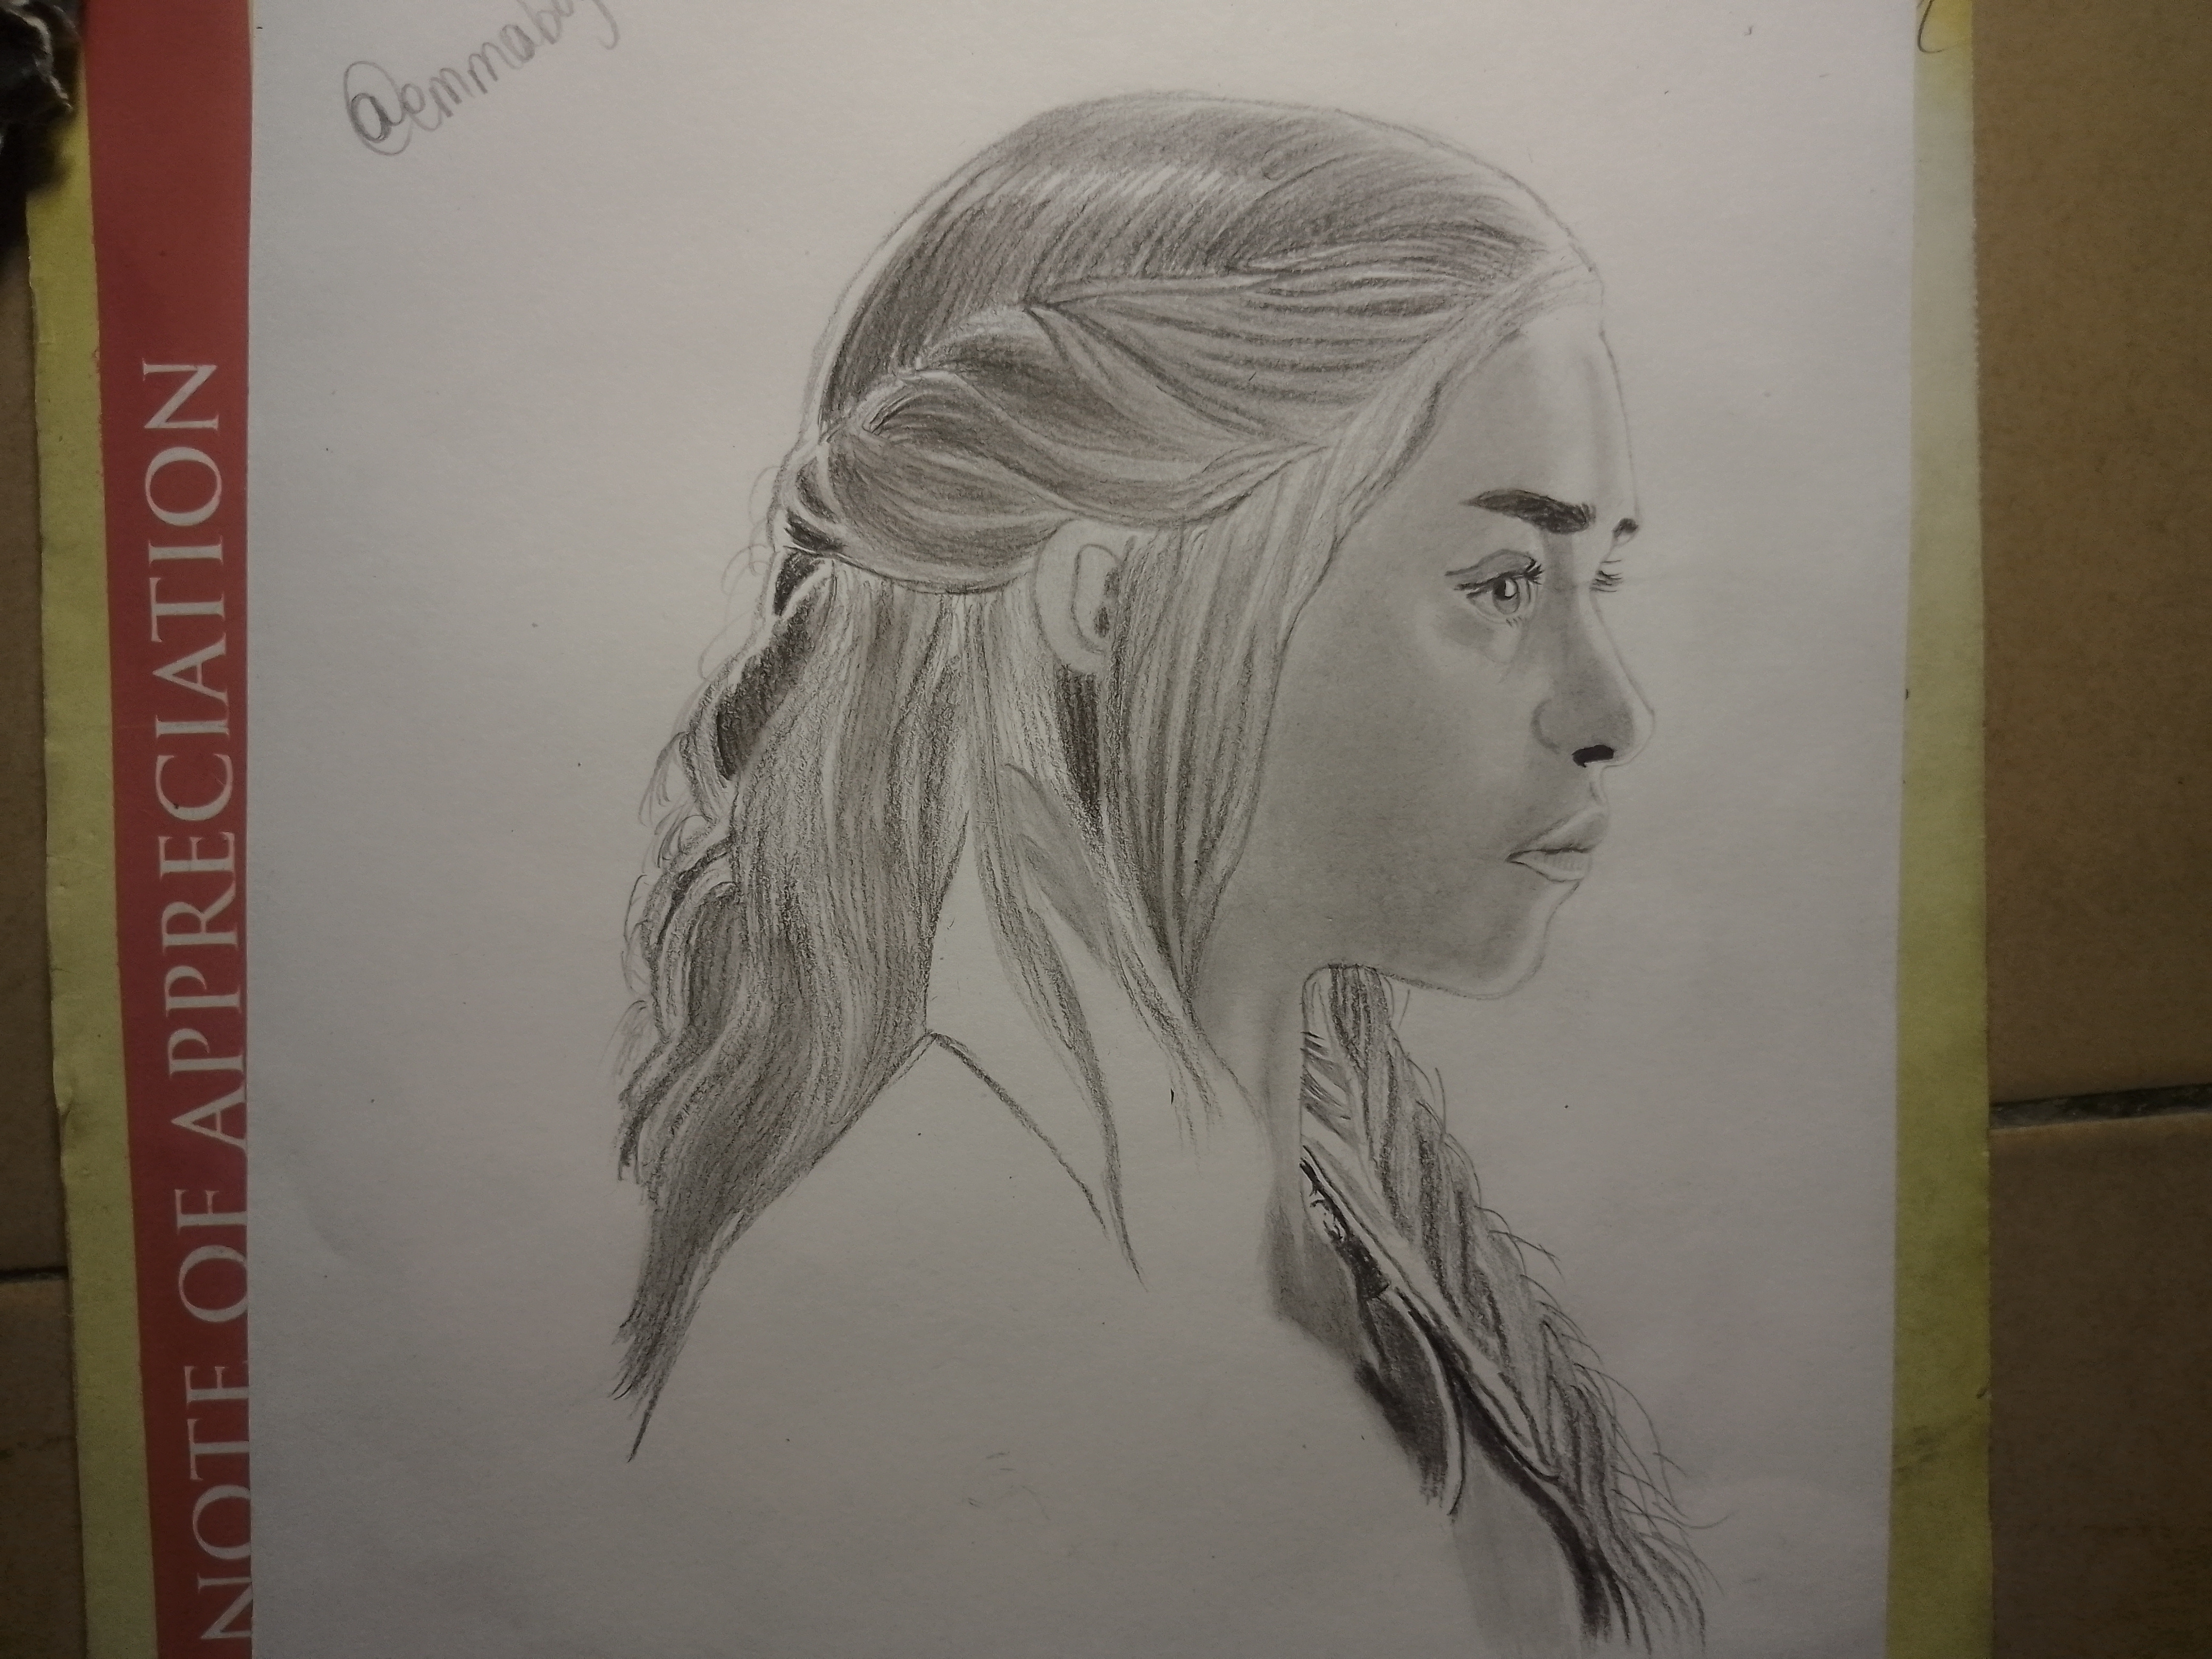
After that, I focused on working on the hair. The hairstyle contained many flowing strands and overlapping sections that required patience. I first established the darker masses and then added lighter strands using controlled pencil strokes. Highlights were preserved by leaving certain areas untouched.
Step 4
After finishing the hair, I focused on the clothing. The clothing was intentionally kept less detailed than the face and hair so that the viewer's attention would naturally be drawn to the subject's expression.
Step 5
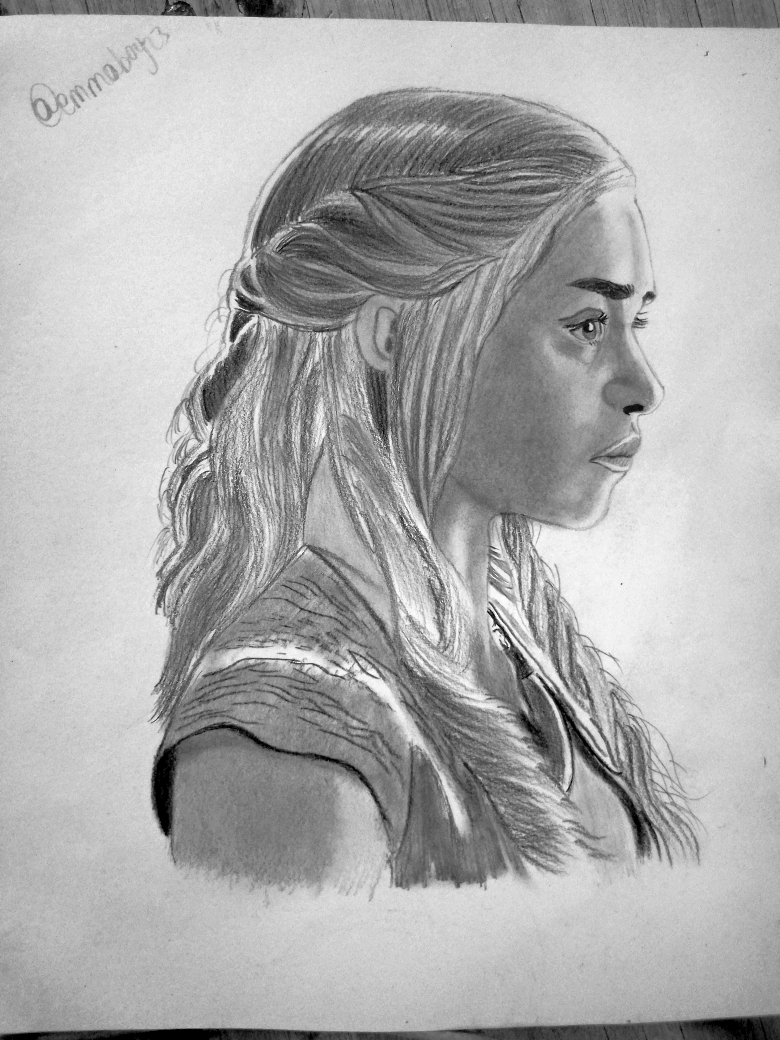
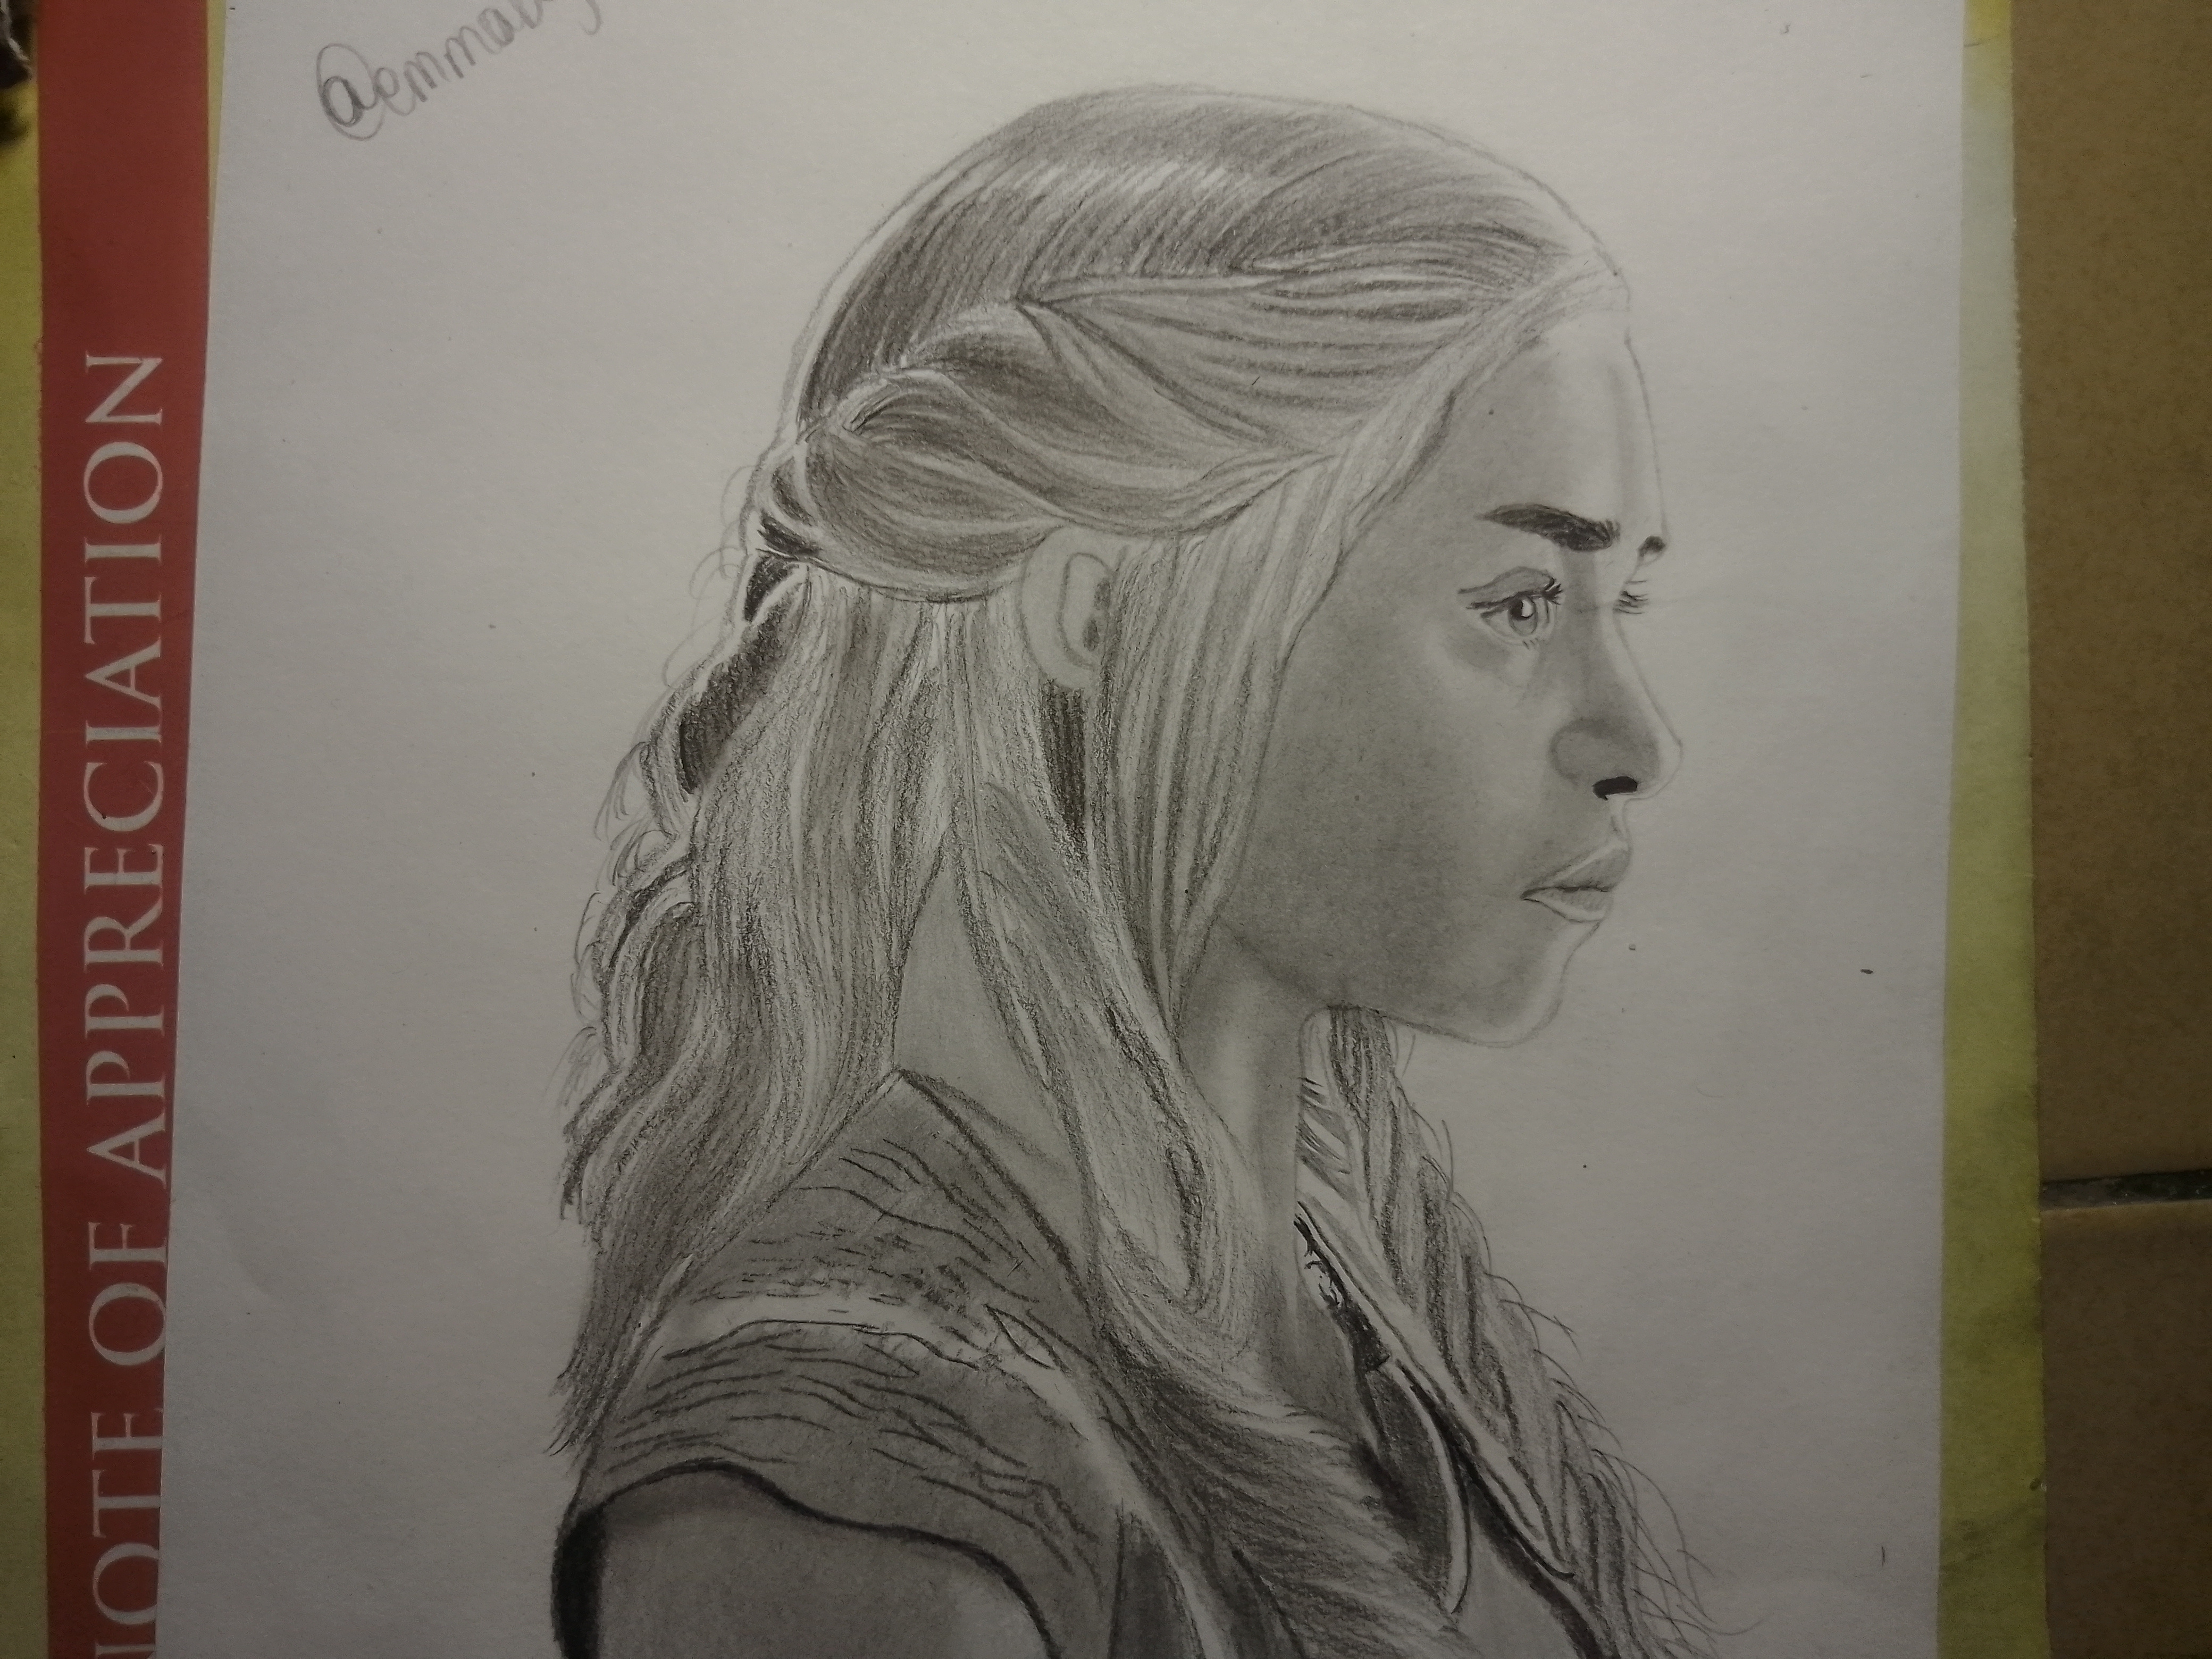
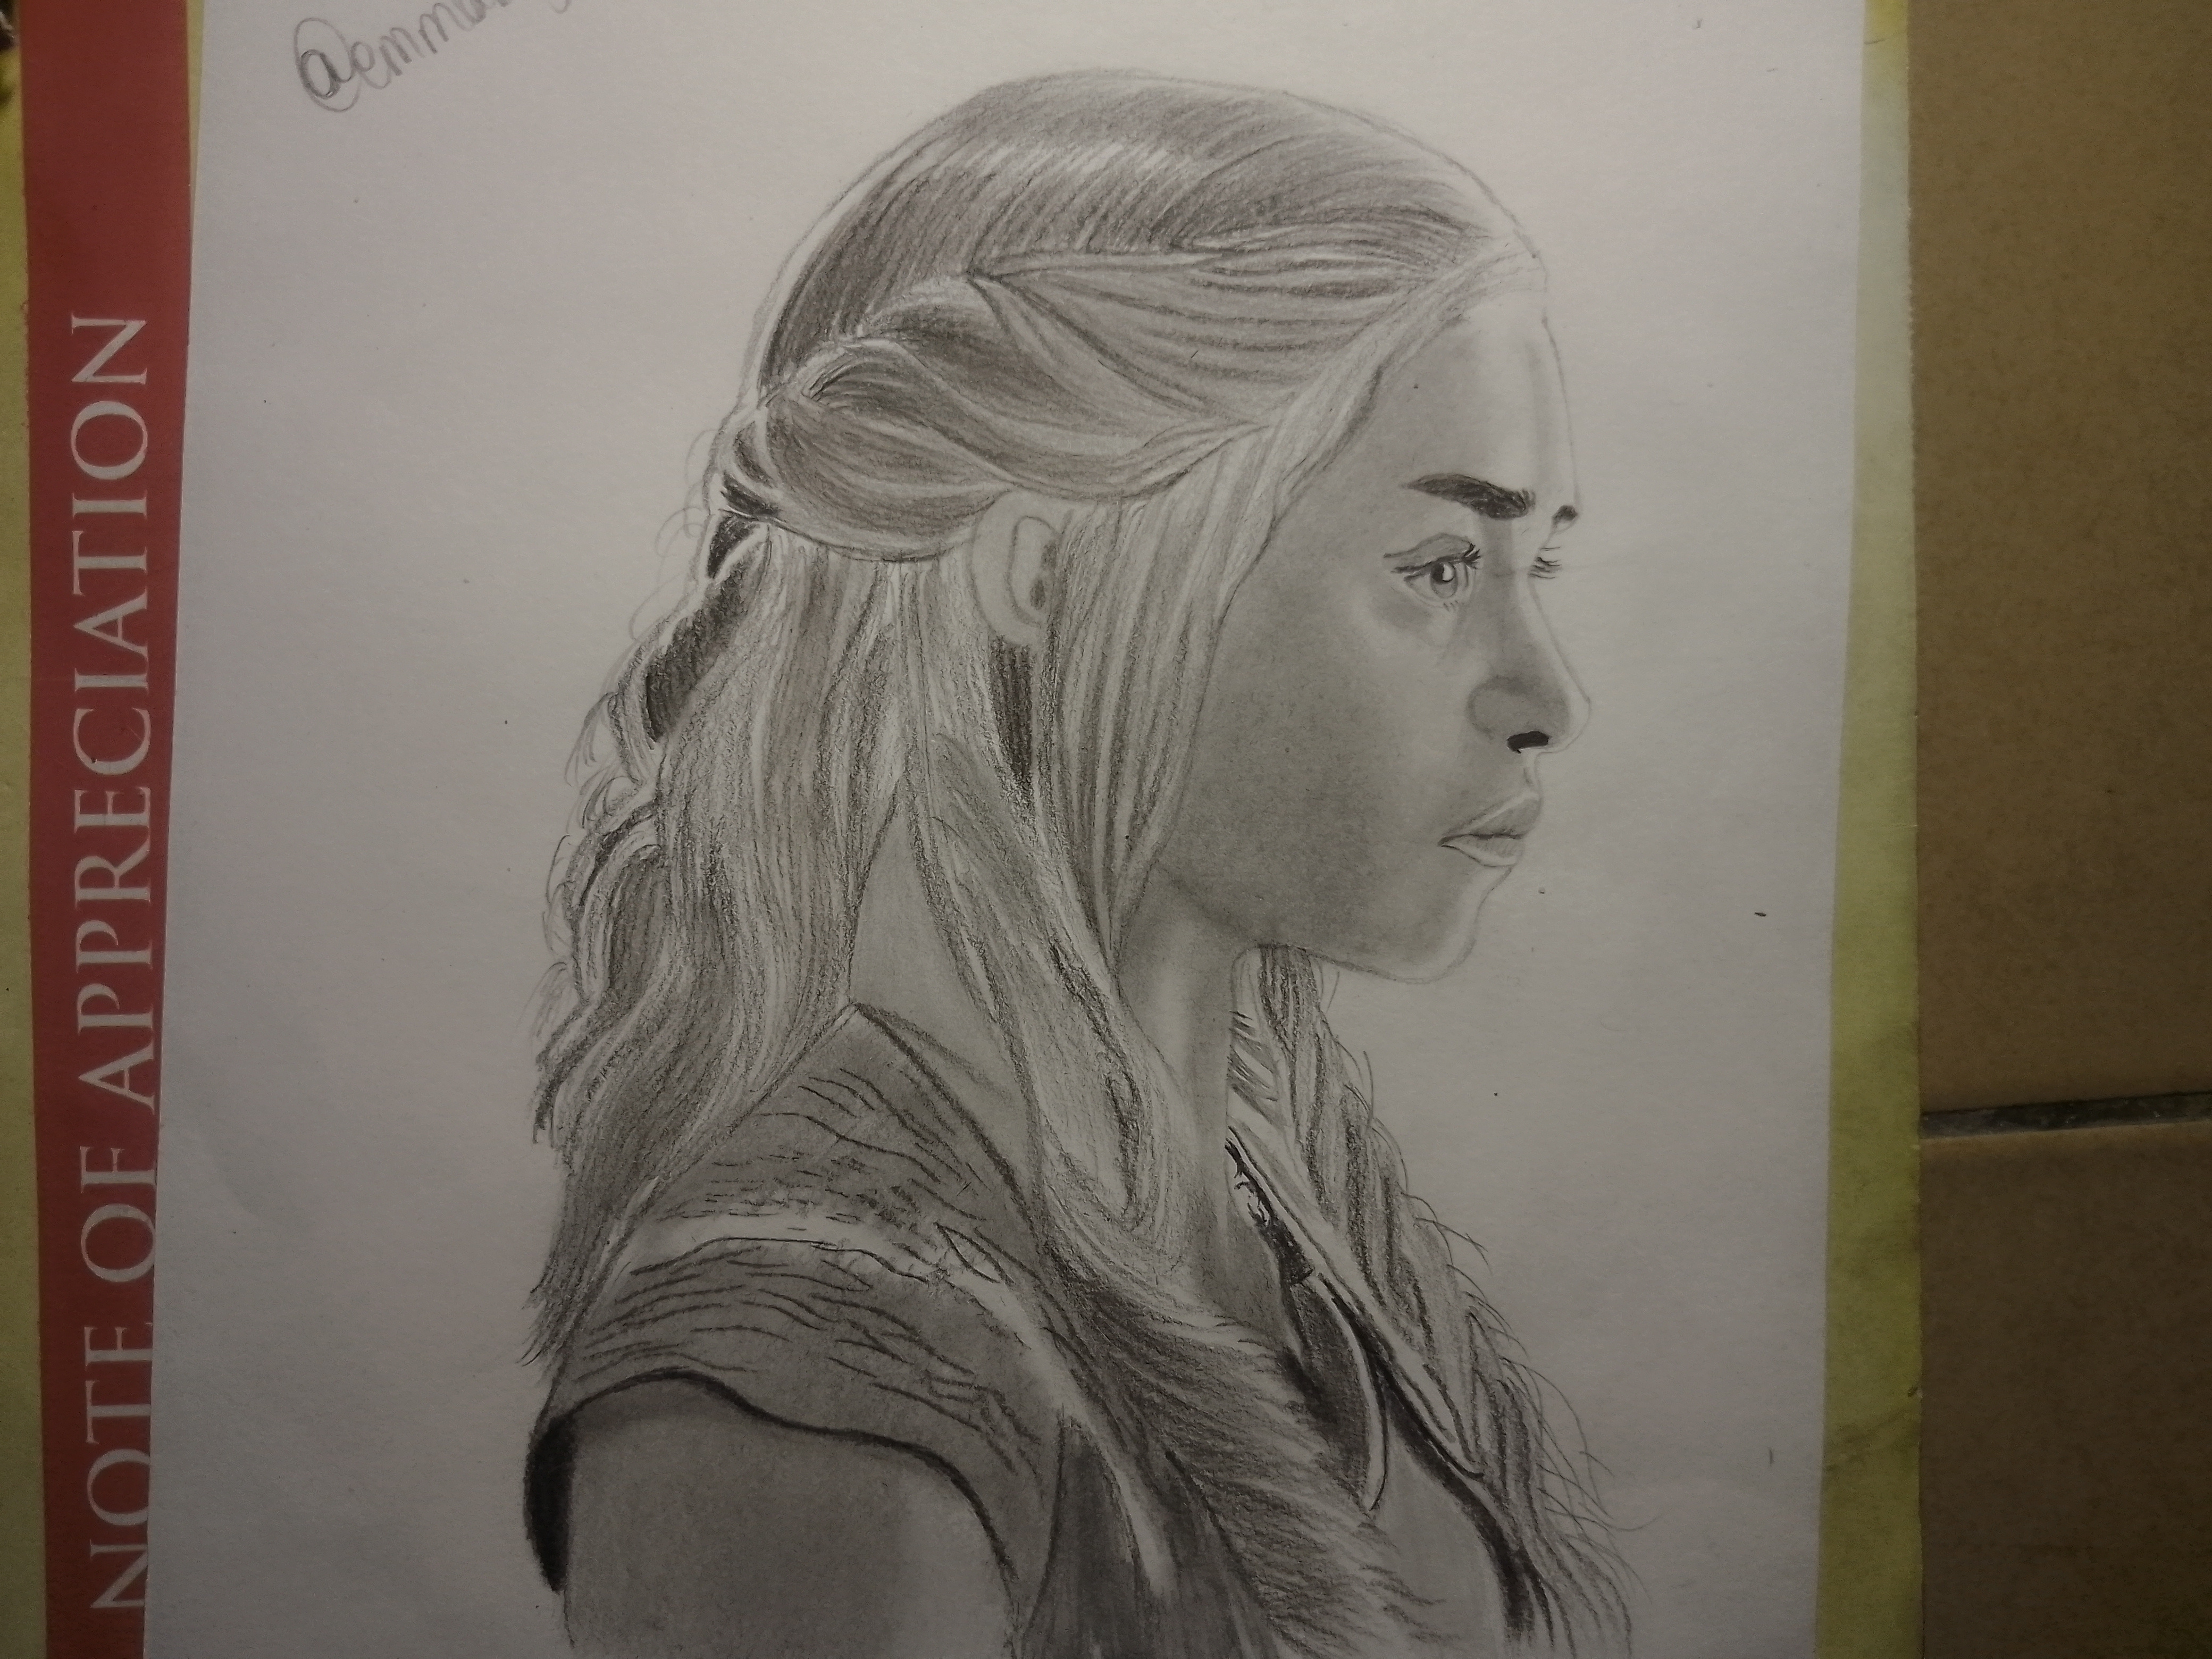
For the final stage, I carefully reviewed the entire drawing and adjusted the contrast where necessary. I deepened some shadows, refined a few highlights, and cleaned unwanted graphite marks. Below is my final result.
My selfie with my drawing
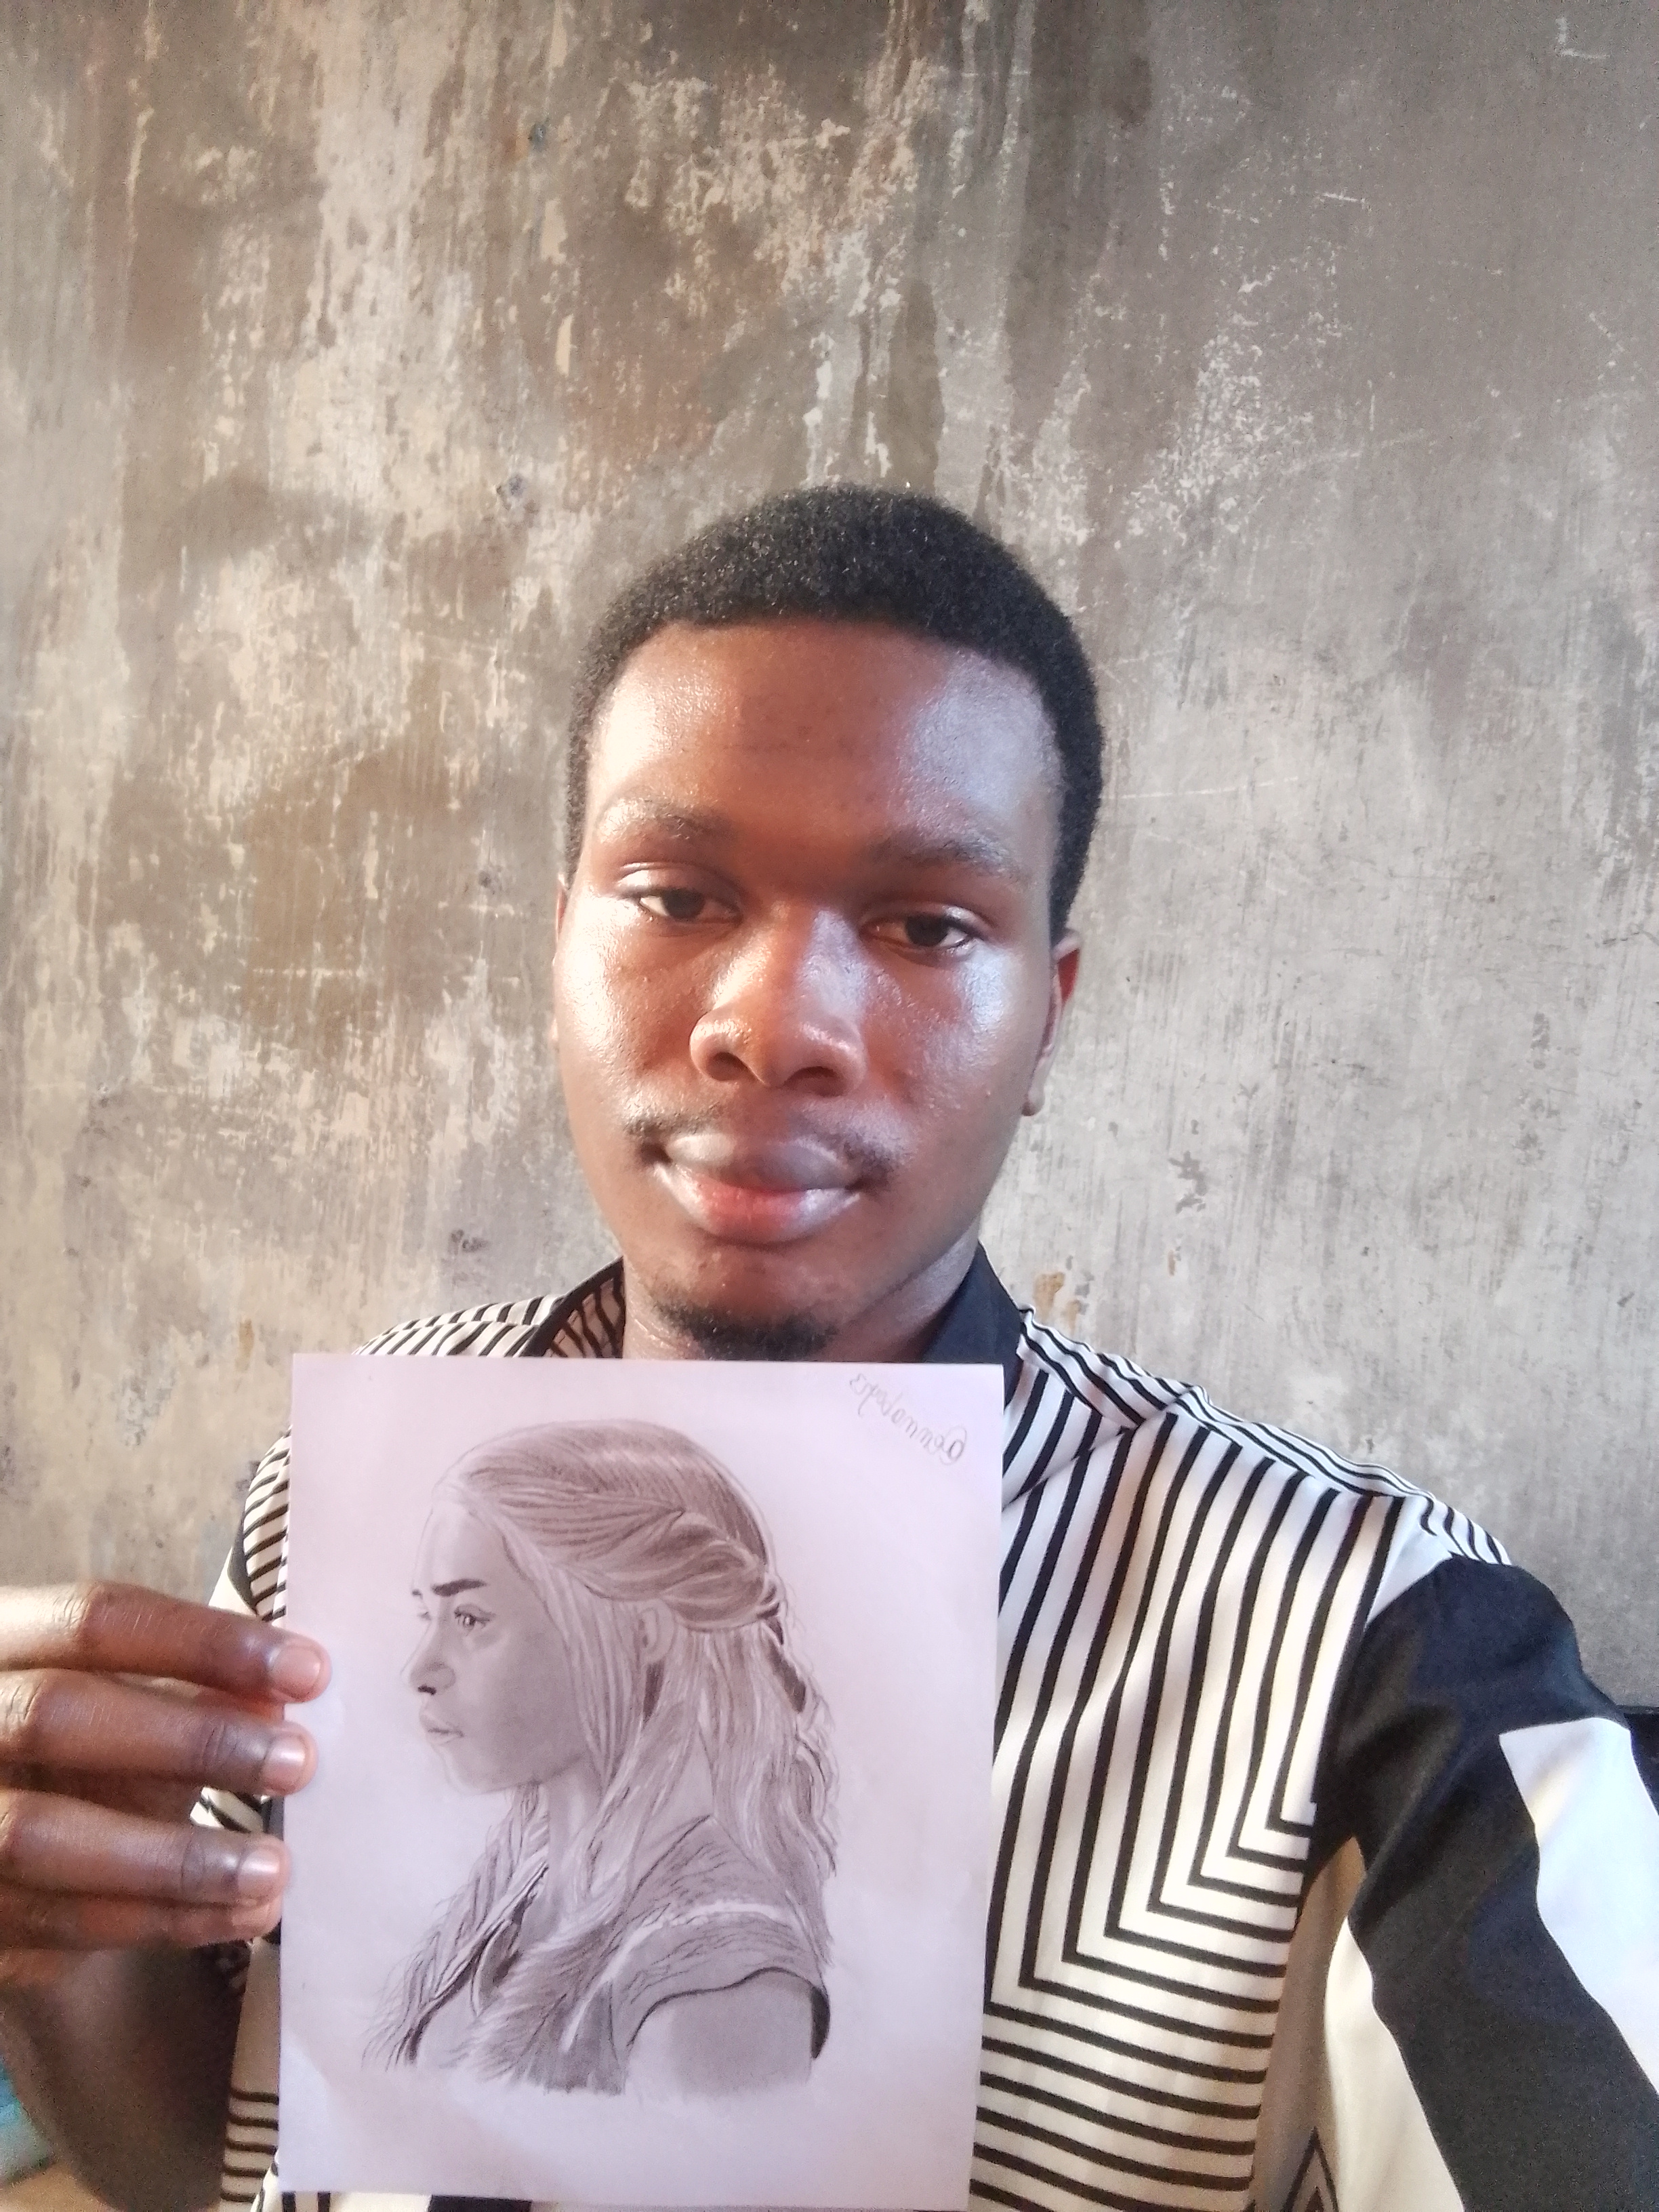
This portrait was a wonderful learning experience and another opportunity to strengthen my graphite drawing skills. Watching a blank sheet of paper gradually transform into a realistic portrait is always one of the most satisfying parts of creating art. Thank you for taking the time to visit my post and follow my drawing process. I hope you enjoyed this tutorial.
Inviting
Thank you for your time.
Posted with Speem
Hi, @emmaboy23
It's great to see that you've accepted my challenge; I'm glad you took the time to participate.
I'm a big fan of your work, and your artistic videos are among the best on the platform. There was just one small detail: the post should have included only a brief introduction, not the entire tutorial. That way, the video serves as a supplement rather than the main focus of your post. Great job.
Thank you for your review on my work, I will try to keep on sharing more of my art.
Thank you for the invitation.
I really enjoyed your creative process in the video. The drawing looks really cute. This "mother of dragons" looks spectacular 😍🤩👍🏽
Thank you
Your post have been rewarded by the Speak on Steem curator team!
Now become a plus member delegating at least 500 SP
Ways to support us:
Curated by @ dove11
Thanks for your support