SLC-Home Repair Club | S23W4 | Mosquito Racket Repair: Fixing Damaged Capacitor Wire and Restoring Functionality.
Assalamualaikum Everyone. I am @imranhassan
From #Bangladesh
.png)
Problem Cause Analysis
The mosquito swatter suddenly stopped working during use. After opening it and checking it, it was found that a positive red wire had come loose from the sparking part, probably because it had fallen off. However, the battery voltage and charging input voltage of the circuit were fine.
Solution Process
First, the input and output voltages were measured using a multimeter. It was found that the main components of the circuit were working properly. Then the loose wire was re-soldered properly. After reassembling everything, the mosquito swatter started working successfully.
Conclusion
To maintain the performance of a mosquito repellent bat, it is necessary to regularly check the condition of the circuit and connections. Many times, if a connection is loose or broken, it stops working. However, if it is checked and repaired properly, it is possible to make it work again. Through today's post, I shared this experience. I hope it will be useful to many.
Components of a mosquito repellent bat and their working principle.
Step 1: Battery and charging circuit

The main source of power for a mosquito repellent bat is the battery, which is usually a 3.7 volt lithium-ion battery. This battery supplies power to the circuit and can store charge for a certain period of time. A charging circuit is connected to the battery, which helps to charge and discharge the battery in a controlled manner. It has a charge control IC to prevent overcharging and a charging indicator light, which indicates the charging status.
Step 2: On/Off Switch and Control System

An on/off switch is used to control the connection of the battery, which turns on or off the flow of electricity in the circuit. When this switch is turned on, the circuit is activated, and a high voltage starts to be generated. When it is turned off, the battery power is preserved and the circuit is deactivated.
Step 3: High Voltage Transformer

The most important part of the circuit is the high-voltage transformer, which converts the low voltage of the battery into several thousand volts. Usually, it is possible to generate 1000 to 4000 volts through this transformer. This provides the necessary power for killing mosquitoes.
Step 4: Transistor and Switching System
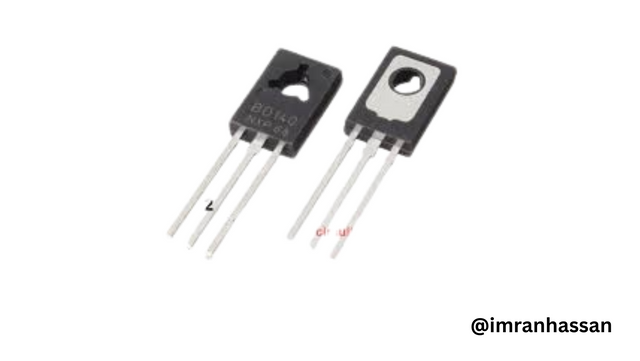
The transistor is used to control the operation of the high-voltage transformer, which controls the voltage and current in the circuit. The 882 model transistor is one of the transistors used in mosquito repellent bats, which helps the transformer turn on and off quickly and generates switching signals to generate high voltage.
Step Five: Diodes and Protection System
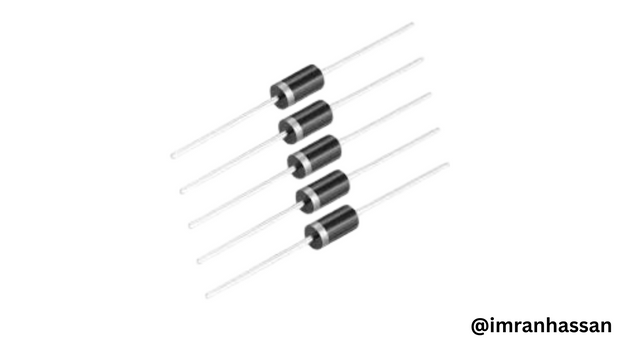
Diodes are used in the circuit to control and protect high voltage. It unidirectionalizes the current flow and ensures the safety of the battery and other parts of the circuit. This helps to prolong the life of the bat and prevents unnecessary backcurrent.
Step Six: High Voltage Capacitor
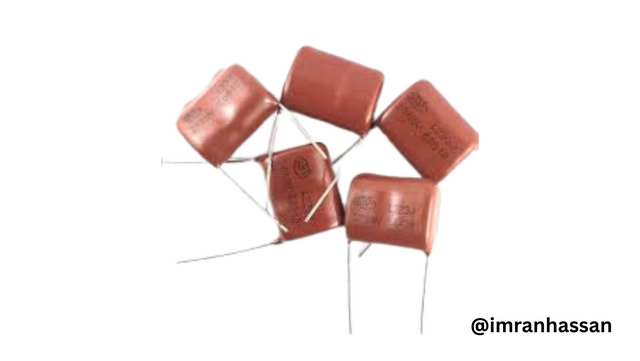
At the very end of the circuit is a large capacitor, which stores the output voltage of the transformer and creates a spark through rapid discharge. It provides the main power to destroy mosquitoes. Usually the value of this capacitor is between one and ten nanofarads, and it can hold a voltage of one to four kilovolts.
Step 7: Metal Mesh and Spark Generator
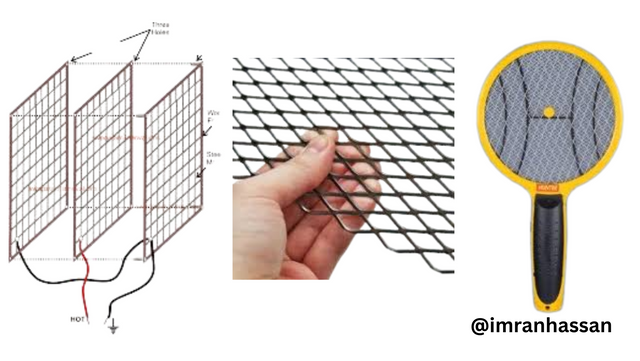
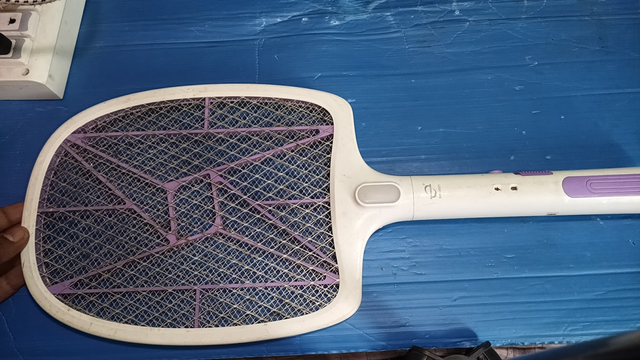
The mosquito repellent bat has three layers of metal mesh in front, which creates an electric spark when it comes into contact with the mosquito. The outer two layers of this mesh are usually grounded, while the middle layer carries a high voltage. When a mosquito makes contact with the middle layer, the high voltage is discharged and the mosquito is destroyed.
I am going to start my tutorial post.
First, I bring the mosquito repellent racket to my table and prepare for repair. Then, I observe in detail the problem that it has, which I mentioned earlier.
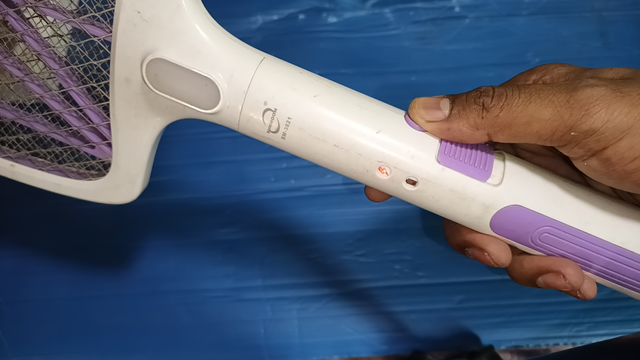
Next, I notice that when I press the power button of the mosquito repellent racket, the red light is on, which indicates that there is electricity in the circuit and it is working. However, the racket is not able to kill mosquitoes, which indicates that there is a problem in the high-voltage section.

Next, I use a 5-volt mobile charger to test the input and output voltage of the charging section of the mosquito repellent racket. Using this, I will make sure that the charging unit is working properly and that the battery is being properly supplied with power.
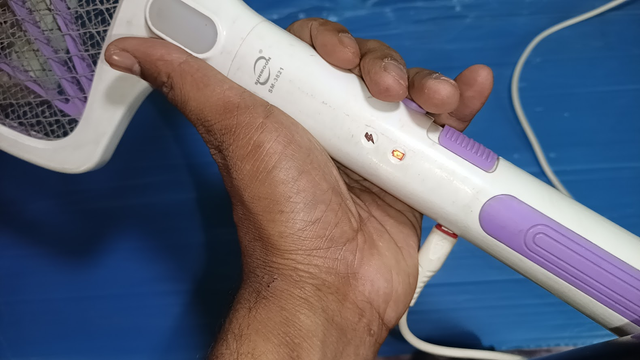
Next, after I apply 5 volts of input voltage inside the mosquito repellent racket, the charging indicator lights up, which confirms that the battery is being charged properly. This proves that there is no problem with the charging section and the battery is active.
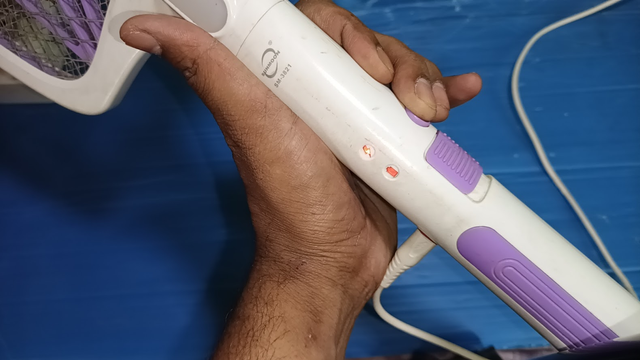
Next, you can see that I pressed the power switch of the mosquito repellent racket during charging, and a red light immediately lit up. This confirms that the switch, circuit, and battery are all working properly. That is, there is no problem with the charging system and switch mechanism so far.
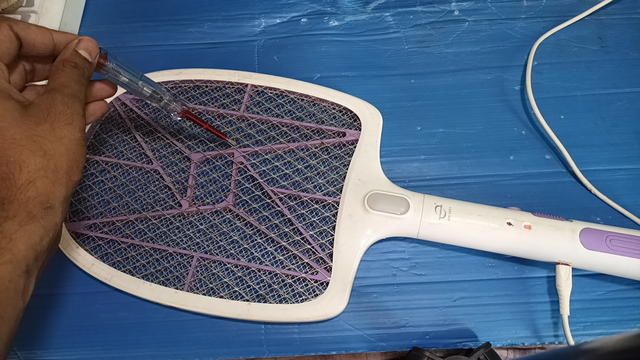
Next, if you had watched the video, you would have understood better. Normally, when a tester is used on the high-voltage part of the mosquito repellent racket, a spark or flash is seen and a buzzing sound is made, which indicates the process of destroying mosquitoes. But when I used the tester on this racket, no spark was produced and no sound was made. This made it clear that there was a problem with the output high-voltage section of the racket, which was failing to kill mosquitoes.
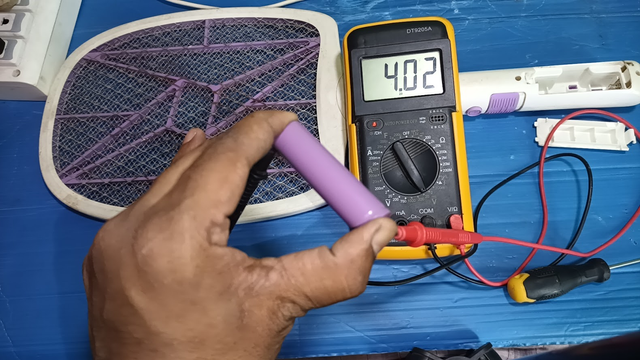
Next, I started to open the cover of the mosquito repellent racket. First of all, I opened the battery and checked it, because sometimes the racket cannot work properly due to battery problems. I used a multimeter to check the output voltage of the battery and found that it was showing 4.2 volts DC, which is completely normal. This means that the battery is in good condition and the problem may be elsewhere.
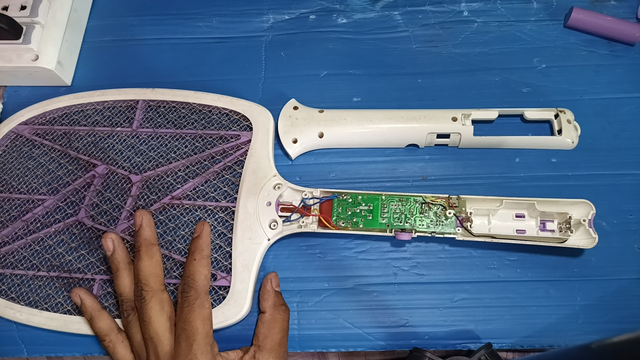
Then I unscrewed the top cover and started to look deeper into the circuit. I looked at the circuit board and tried to figure out exactly where the problem could be. Usually, when a mosquito swatter stops working, it is due to a few common reasons—battery connection, charging section, high voltage transformer, or capacitor failure. So I started checking each component one by one.
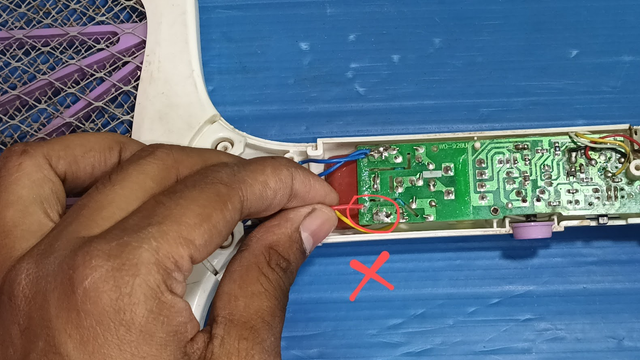
Then I found a problem. As you can see, at the very end of the mosquito swatter, where the output voltage reaches, a positive red wire from the capacitor has been damaged. It has probably been damaged or torn due to excessive stress, overheating, or wear over time. As a result, the power is not being supplied properly to the output section, due to which the mosquito swatter stops working. Now I will move on to the next step to solve this problem.
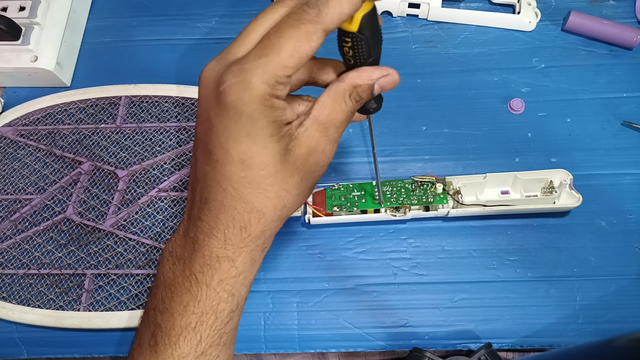
Then there was a screw in the middle of the circuit, which I removed. After removing the screw, I carefully inspected the circuit to identify if there were any other problems. I examined the various connections, transformers, transistors, and other components on the circuit board. Now I want to make sure that the problem is only the loose wire, or there are other connections as well.
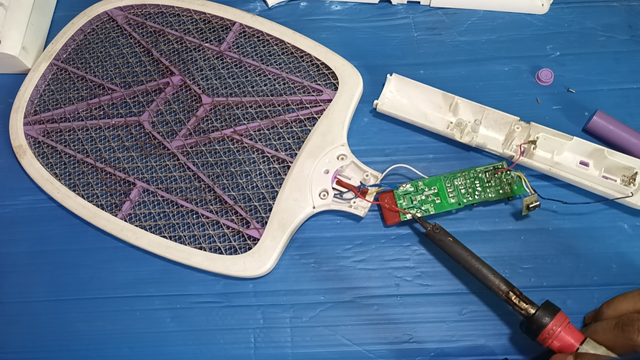
Then I made sure that there were no additional problems in the circuit. Then I soldered the red positive wire of the output voltage to the capacitor properly using a soldering iron.
While soldering, I made sure that the connection was strong and reliable, so that it would not slip again in the future.
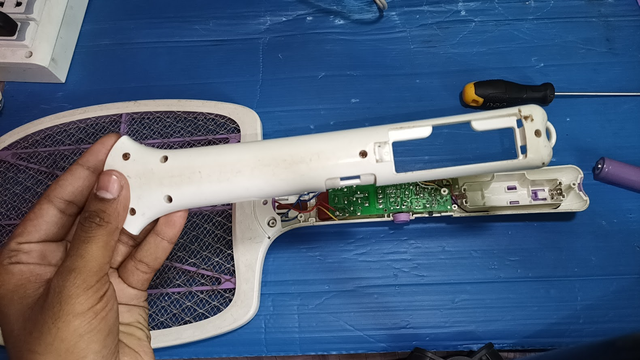
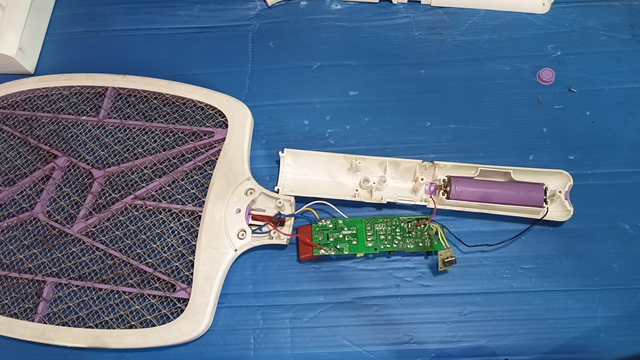
Then I replaced the circuit back in its designated place and made sure that everything was seated properly. Then I carefully put the top cover of the mosquito racket on so that the internal circuit is protected and no connections are loose.
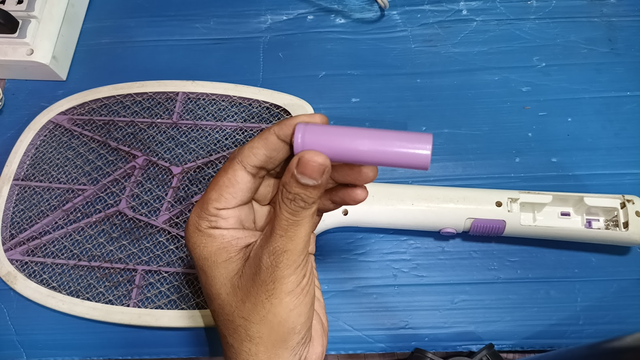
After installing the top cover properly, I placed the battery neatly in its designated place. I made sure that the battery was connected properly and that it was properly connected to the circuit of the mosquito repellent racket.

After connecting the battery properly and completing the entire repair process, I made sure that the mosquito repellent racket started working again. After turning on the power, the red light came on, and the circuit was working properly. However, to fully understand its performance, you need to watch the video, where the sparking and mosquito killing process can be clearly understood.
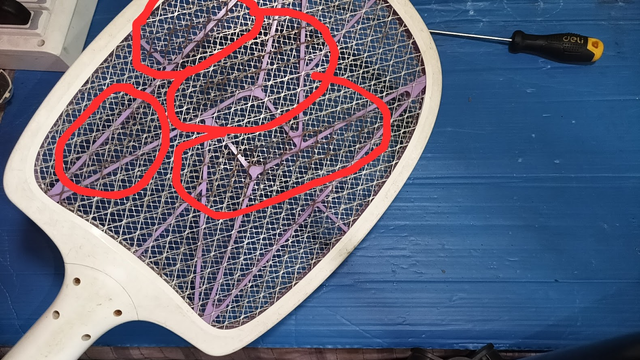
Then you can see that the net cover on the top has rusted a little over time. This is normal due to long-term use, but if it is not cleaned, the performance of the racket can decrease. So, I decided to clean it thoroughly, so that the mosquito repellent performance can be improved.
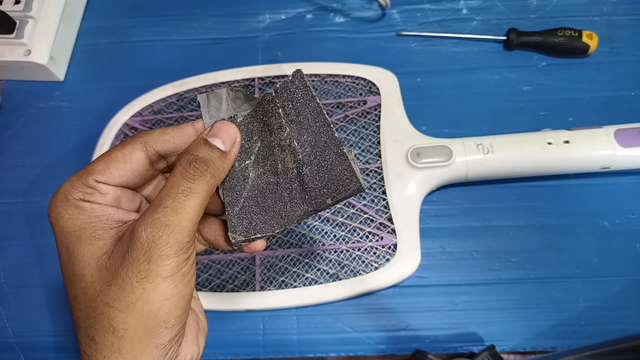
Then you can see that I took a piece of sandpaper and started to slowly clean the rust on the top with it. Using it, the rust on the metal mesh is easily removed and the electrical conductivity of the racket is restored to normal, which will help increase its effectiveness.
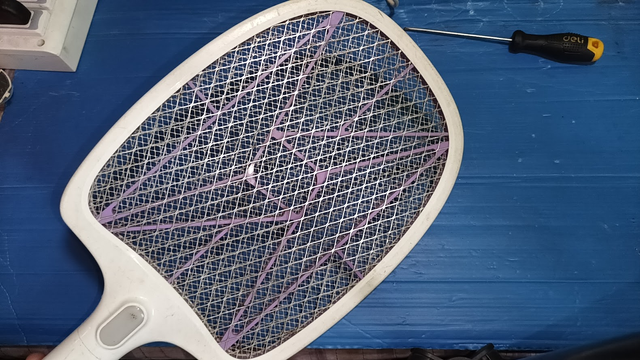
Now you can see, my net mesh cover is beautifully cleaned, and it looks white and shiny. With the rust removed, it will be able to conduct electricity better than before, which will further improve its mosquito killing effect.
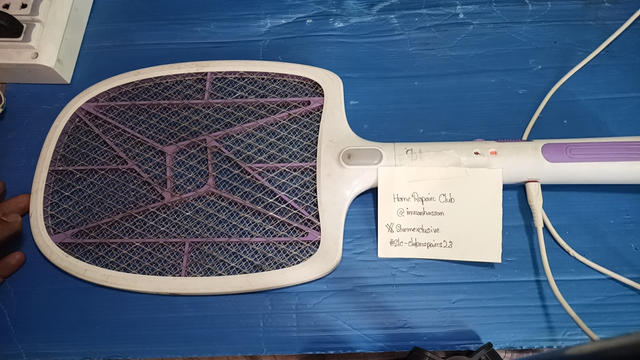
Then, when it was completely done, I took a picture with my club name and my username to confirm its effectiveness. This proves that the mosquito killing racket is working properly and is effectively usable after the repair.

And at the very last stage, I took a picture with my artwork, which reflects my completed work. It will be a precious memory of my repair experience.
| Appliance | Mosquito Racket |
|---|---|
| Brand | SUNMOON |
| Model | SM-3821 |
| Rated Input Voltage | 220V AC |
| Rated Input Power | 3W |
| Rated Output Voltage | 3000V |
| Charging Time | 3.5H |
| Failure | Capacitor wire damaged |
| Repair Process | Re-soldering the capacitor wire and cleaning rust |
| Video Tutorial: To better understand the practical part of this tutorial, you can watch the video below. |
|---|
| 📢 These courses and challenges will run from today until 11.59pm UTC, on Sunday, March 16th, 2025. |
|---|
Here are our selection criteria for the Home Repair Club; if you want, you can read the post and understand it: Clubes de Aprendizaje de Steemit Temporada 23 | Introducción y Bienvenida al Home Repair Club
I invite you to join the Home Repair Club. @caringmanasseh @chigraze @azit1980 @mueeinislam @rashid001
Photography Details: 📱DeviceWalton Xanon x90
Best regards
@imranhassan
My friend @rmm31

I promoted my post X here.