SLC-S21W2 | Mastering CPR | A Comprehensive Guide to Cardiopulmonary Resuscitation
Hello my students, future First Responders!
I hope you’ve had a chance to sharpen and boost your basic first aid skills after our first class last week on [Introduction to First Respinse and Basics of First Aid]. It’s wonderful to see so much enthusiasm, with over 35 entries in our first lesson. I’m thrilled to welcome you all to Week 2 of Season 21 of the Steemit Learning Challenge!
This week we’re diving into another essential lifesaving first aid skill: CPR—short for Cardiopulmonary Resuscitation. "Cardio" refers to the heart, "pulmonary" is related to the lungs, and "resuscitation" means to revive or restore life. Mastering CPR can make a life-or-death difference in emergencies, so let’s get ready to learn this vital technique step-by-step.
WHAT IS CPR AND ITS IMPORTANCE |
|---|
CPR is an essential life-saving medical procedure, that involves proper chest compressions combined with rescue breaths. It is performed in crucial emergency conditions where a person’s heart stops beating (cardiac arrest) or when they are not breathing normally/breathing abnormally, with the purpose of restoring circulation and provide oxygen-rich blood entry to the brain and other vital organs until more advanced life support or medical personnel arrives, thus preventing or minimizing the extent of brain damage and death.
SITUATIONS WHERE CPR IS NEEDED |
|---|
Sudden cardiac arrest: People with history of angina/heart attack in their families, or people with history of previous heart attacks events are prone to get sudden cardiac arrest (a condition where heart stops pumping blood), however unfortunately nowadays anybody can get sudden cardiac arrest due to sedentary lifestyles, in such cases providing initial care with CPR can save one’s life. It is also indicated in a person who’s unresponsive, unconscious and has no peripheral pulse or any sign of life.
Drowning incidents: CPR can help people who have suffered from a lack of oxygen while drowning, this technique facilitates oxygen supply to the ischemic brain.
Respiratory arrest due to Choking or airway obstruction: When the airway is blocked and the person can no longer breathe, thus oxygen level in blood and ultimately to the brain is decreased, doing CPR can provide adequate oxygen supply to the brain and other vital organs.
Severe allergic reactions or anaphylaxis: If any sort of allergy had led to respiratory or cardiac arrest, then CPR can be a life-saviour technique for them.
Severe Electric Shock or Electrocution: High-voltage electric shocks can stop the heart and breathing, immediate CPR can restore vital function of heart and body.
Drug overdoses: Drug overdoses, especially from opioids, can cause the heart to stop or the person to stop breathing, then the best initial antidot can be CPR.
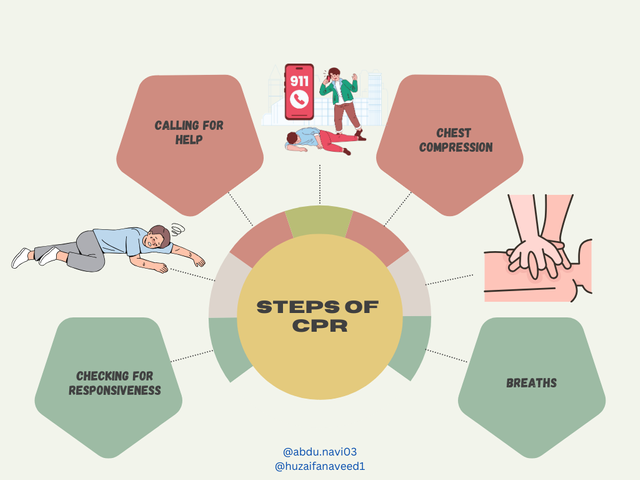
BASIC FIRST RESPONSE PROTOCOL AND THE CHAIN OF SURVIVAL |
|---|
Remember from previous class the DRABC protocol? Don’t forget it in any case. Always starts from scene safety and your own safety, for instance you rushed to save a person who’s in respiratory arrest because of drowning, although he’s in shore there’s high chance that high waves at any time can take you along with it, so feel the safety of the scene first. Then check for Response, Airways, Breathing and Circulation. If absent or abnormal, then go for American Heart Association’s guidelines called "Chain of Survival". It is a series of 5 steps that improve survival chances during cardiac arrest, these are:
Recognition of Cardiac Arrest and Activation of Emergency Response: This is the hardest step to recognize a cardiac arrest, people can easily confuse it with syncope (temporary loss of consciousness due to decreased blood flow to the brain), stroke or hypoglycemia attack, so skill is required to perfectly identify Cardiac Arrest and then call for medical emergency and help.
Early CPR: Beginning chest compressions immediately to maintain blood flow to the brain and other vital organs of the body.
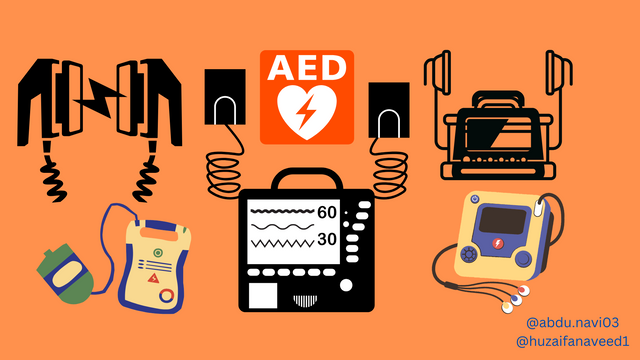
Rapid Defibrillation: Use an Automated External Defibrillator (AED), if available if not then don’t. AED helps restore a normal heart rhythm.
Advanced Resuscitation: It’s not the part of our module as it is provided by medical professionals with drugs/medications and other techniques.
Post-Cardiac Arrest Care: It includes hospital care to improve long-term outcomes.
TYPES OF CPR |
|---|
Although the basic steps are same but there are few variations in CPR techniques depending on the age or size of the person and the most important- the situation
Adult CPR:
It is the standard technique for people aged 8 and above.
Child CPR:
For children aged 1 to 8, with slightly less force in compressions and breath volumes.
Infant CPR:
For infants under 1 year old.
Hands-Only CPR:
Focuses on chest compressions only, suitable when the rescuer is unable or unwilling to perform rescue breaths (especially when the person is poisoned, or bleeding through mouth or excessively salivating). It’s commonly taught to the public as an effective method for out-of-hospital cardiac arrest.
| Steps | Adult CPR (Ages 8+) | Child CPR (Ages 1-8) | Infant CPR (Ages 0-1) |
|---|---|---|---|
| 1. Assess Scene & Check Responsiveness | Ensure scene and your safety first. Then gently shake and shout, “Are you okay?” Call for help, ask someone from the mob to call emergency services and get an AED asap. | Ensure scene and your safety first. Then tap and shout, “Are you okay?” Call for help, but if alone, perform 2 minutes of CPR before calling emergency services if no help is available. | Ensure scene and your safety first. Then gently tap the infant’s foot or shoulder and shout in the ear to check for responsiveness. |
| 2. Check Breathing | Look for chest rise and breathing using LLF protocol for no more than 10 seconds. If not breathing normally and is only gasping, start CPR. | Look for chest rise and breathing using LLF protocol for no more than 10 seconds. If not breathing normally and is only gasping, start CPR. | Look for chest rise and breathing using LLF protocol for no more than 10 seconds. If not breathing normally and is only gasping, start CPR. |
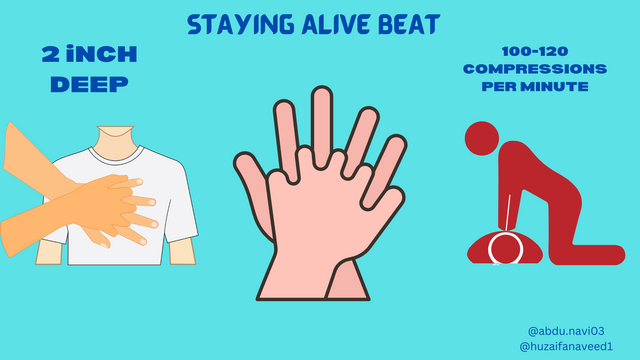
| 3. Chest Compressions | - Hand and knee Placement: Kneel down just right lateral to the casualty. Place heel of one hand in the center of the chest on the lower half of the sternum (breastbone); place the other hand on top of it, interlocking fingers. There are 2 perpendiculars formed: 1st between ground and your knees/legs, and 2nd between the casualty’s chest and your arms. This position will not make you tired soon. - Depth & Rate: Compress chest about 2 inches (5 cm) at 100-120 compressions per minute. Count aloud, this will boost your energy and help you with numbers. - Allow full recoil between compressions. Try to minimize the gap between the compressions. | - Hand Placement: Kneel down to the right lateral position. Use one hand in the center of the chest (smaller children) or both hands for larger children, depending on the physics of the body. - Depth & Rate: Compress about 2 inches (1/3 depth of chest) at 100-120 compressions per minute. Count aloud to boost your energy and remember counting. - Allow full recoil between compressions. | - Hand Placement: Place infant on a flat surface and stand by his right side. Use two fingers (index and middle) just below the nipple line in the center of the chest. - Depth & Rate: Compress about 1.5 inches (4 cm) or 1/3 depth of chest at 100-120 compressions per minute. - Allow full recoil between compressions. |
| 4. Open the Airway | Perform head-tilt, chin-lift maneuver (taught in last modular class). | Perform head-tilt, chin-lift, careful not to overextend due to delicate airway. | Gentle head-tilt, chin-lift, with minimal tilt to avoid airway obstruction due to flexibility. |
| 5. Provide Rescue Breaths | - Pinch nose tightly, create a seal over mouth, so that air into mouth is not lost through these openings. Mouth is in a tilted position. - Give 2 breaths (1 second each) with chest rise. - Continue 30 compressions:2 breaths cycle until help arrives or AED is available. You can use an AMBU bag as well if available. If you are uncomfortable doing rescue breaths, then only do hands-only CPR. | - Pinch nose, cover mouth with yours. - Give 2 gentle breaths (1 second each) with chest rise. - Continue 30 compressions:2 breaths cycle. Continue this until advanced life support arrives. If you get tired, ask someone else to do this until paramedics arrive. | - Cover both mouth and nose with your mouth, or just the nose if needed, or if the child is too weak. - Give 2 gentle breaths (1 second each) with chest rise. - Continue 30 compressions:2 breaths cycle. Continue until paramedics arrive or the child recovers. |
| 6. Using an AED | - Turn on AED and follow prompts. - Place pads on the chest (right collarbone, lower left side). - Ensure no one is touching during analysis and shock. - Resume CPR after shock. | - Turn on AED and follow prompts. - Use child pads if available, or place one adult pad on the chest and one on the back if not. - Ensure no contact during analysis and shock. | - Use AED only if available and has infant setting; otherwise, infants don’t need it. - Place one pad on the chest and one on the back if using adult pads. - Follow prompts, no contact during analysis and shock. |
COMMON MISTAKES ENCOUNTERED DURING CPR |
|---|
Not pressing deep enough into the chest during compressions or inadequate compressions.
Performing compressions either too fast or too slow, not at 100-120compressions/min speed.
Not allowing the chest to fully rise back up between compressions.
Taking too often or too long pauses during compressions.
Wrong hand position like Positioning hands too high, too low, or off-center on the chest.
Not sealing the mouth properly or delivering breaths too quickly.
Focusing solely on CPR and neglecting to call for emergency assistance or use an available AED.
Using only arm strength for compressions, especially when performing CPR on adults.
Continuing CPR despite fatigue and not giving this responsibility to another person, leading to weaker compressions.
Attempting rescue breaths without knowing the technique or feeling uncomfortable doing so.
Trying to perform CPR on a bed or other soft surface.
Ceasing CPR prematurely when the person shows minimal movement or gasps.
CONTRAINDICATIONS OF CPR |
|---|
Although CPR is a life-saving procedure,but it is not always indicated, there are few conditions in which you are not medically allowed or refrained from performing CPR, this includes:
Do Not Resuscitate (DNR) Order: If the person has a legally recognized DNR order, (can be recognized by a hand band on right wrist or visible tattoo on an exposed area of body) CPR should not be performed on such people. In end stages or terminal illnesses people usually want to get rid of chronic pain, that’s why they get this DNR, so that no one save them from dying.
Obvious Signs of Death or Clear Evidence of Non-Survivable Condition: When there are clear signs that death has already occurred, such as stiffening of muscles, settling of blood in the lowest parts of the body or decomposition or In cases where there is evidence that the person’s condition cannot be survived (e.g., certain irreversible brain injuries), CPR is not performed.
Massive Trauma Incompatible with Life: Individuals with catastrophic injuries that are incompatible with life e.g., decapitation or transection of the body or severe trauma with uncontrolled external or internal bleeding, CPR is not effective at all and hence is not performed.
Unsafe Scene or Environment: Lastly, if the scene is not safe for the rescuer, then of-course he/she shouldn’t be risking his/her life for CPR.
HOMEWORK |
|---|
Perform all steps of cpr on a mannequin (your productivity) and explain each and every step in detail. Teach CPR to only 3 people (may it be your family, friends, relatives, or fellow mates and attach pictures of you teaching them)
(Edited- if you don’t have a mannequin, use a firm pillow or stack of towels)How to perform CPR on pregnant lady, obese people and weak elder people, write modifiable procedures for each in detail.
Write explanation for all the mistakes people do during CPR, aswe highlighted in the class topic.
Plan a simple campaign to raise awareness about CPR in your community. Write down the main goal of your campaign, who you want to reach (your target audience), and key messages you want to share. Think about how you can spread the word (like using social media or holding a community event). Your plan should be clear and include a basic timeline showing when you will do each part of the campaign. (You only have to devise a working plan and not practically implement it.)
Design a simple infographic (Illustration) that summarizing the basic steps of CPR for adults, children, and infants, including why CPR is important and list situations when CPR might be needed (like drowning or heart attacks).
RULES |
|---|
Your title should be "SLC21/WK2: Mastering CPR | A Comprehensive Guide to Cardiopulmonary Resuscitation"
Make sure to use the #firstaid-s21w2 , #steemexclusive, #teachingteam , #learnwithsteem tags, and your country's tag (e.g., #pakistan)
Plagiarism or the use of artificial intelligence of any kind will not be tolerated.
Only your own images will be accepted (Try to create it on various softwares like Canva, etc) Images for free use will not be allowed.
Write a minimum of 800 words
The link of your task must be added in the comments of this publication.
Use the #burnsteem25 tag only if you have set the 25% payout to @null.
You can publish homework in any community and in any language. But don't forget to use the original tag.
Invite three of your active Steemian friends.
The participation schedule is between Monday, November 4, 2024, at 00:00 UTC to Sunday, - November 10, 2024, at 23:59 UTC.
REWARDS |
|---|
SC01/SC02 would be checking on the entire 17 participating Teaching Teams and Challengers and upvoting outstanding content. Upvote is not guaranteed for all articles. Kindly take note.
At the end of the contest, I will be nominating four (04) users who have had a great performance in the contest and have complied with the previously established, and therefore, are eligible to receive SC01/SC02 votes.
—----
Contact Information (Discord)
@abdu.navi03 (abdu.navi03)
@huzaifanaveed1 (huzaifa_1114)
Best regards,
Dr @abdu.navi03
Dr @huzaifanaveed1
Hi Doctors, I am pleased that you are getting such a great response. This time I won't disturb your orderly routine, I promise ;-))
However, there is one note that may be of interest to you: in this country, laypeople are now advised to sing one of the songs from the following playlist during chest compressions - the rhythm corresponds exactly to the perfect compression...
https://open.spotify.com/playlist/7lWGVP3tzyg8yoSwSOvFz1?go=1&sp_cid=8f535fb0e41a3728ba8570c4ca2320f2&utm_source=embed_player_p&utm_medium=desktop&nd=1&dlsi=b0aaeb1d79f54140
This sounds such a cool idea but I don't think this would be accepted widely in Pakistan ;)
No kind of music?
What about those that don’t have a mannequin? What’s another alternative?
Thank you for asking this! For those who don’t have a mannequin, that’s why I mentioned '(your productivity.)' You can use alternatives if needed.
If you don’t have a mannequin, you can use a firm pillow or even a stack of folded towels as an alternative. While it won’t be exactly like a mannequin, it allows you to practice hand placement, compression depth, and rhythm. When teaching others, you can also demonstrate on the pillow, emphasizing correct technique and explaining each step as you go
Ok thank you
https://steemit.com/hive-118902/@xkool24/slc21-wk2-mastering-cpr-or-a-comprehensive-guide-to-cardiopulmonary-resuscitation
https://steemit.com/hive-168072/@ninapenda/slc21-wk2-mastering-cpr-or-a-comprehensive-guide-to-cardiopulmonary-resuscitation
This is my entry
https://steemit.com/firstaid-s21w2/@adese/slc21-wk2-mastering-cpr-or-a-comprehensive-guide-to-cardiopulmonary-resuscitation
https://steemit.com/firstaid-s21w2/@simonnwigwe/slc21-wk2-mastering-cpr-or-a-comprehensive-guide-to-cardiopulmonary-resuscitation
https://steemit.com/firstaid-s21w2/@goodybest/slc21-wk2-mastering-cpr-or-a-comprehensive-guide-to-cardiopulmonary-resuscitation
My entry : https://steemit.com/firstaid-s21w2/@pea07/slc21-wk2-mastering-cpr-or-a-comprehensive-guide-to-cardiopulmonary-resuscitation
Mi participación
https://steemit.com/hive-188619/@sammy1109/slc21-wk2-mastering-cpr-or-a-comprehensive-guide-to-cardiopulmonary-resuscitation
Compartido en twt(X)
https://x.com/SamxioI/status/1855624768029880583
My Entry Link
https://steemit.com/firstaid-s21w2/@shabbir86/slc-s21w2-or-mastering-cpr-or-a-comprehensive-guide-to-cardiopulmonary-resuscitation