Modeling 3D Candle
Candle

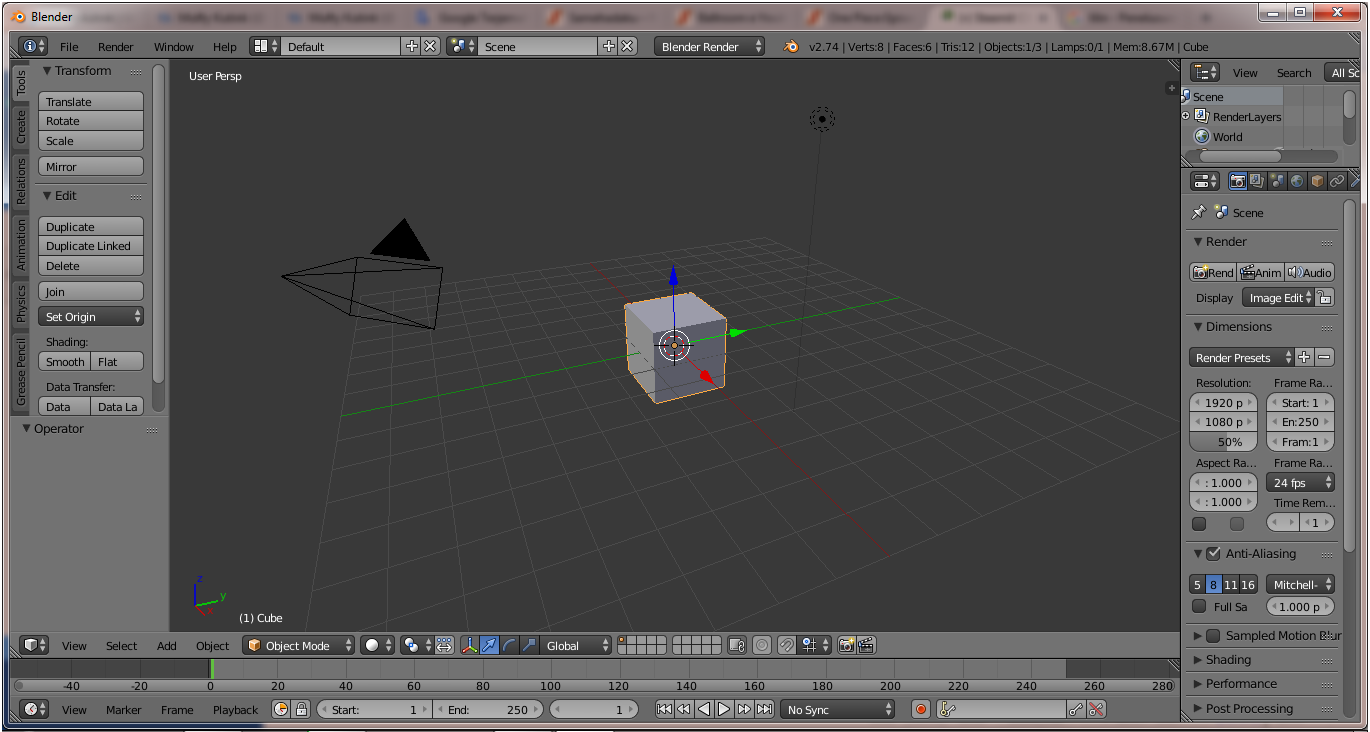
Change the angle of the field into an ortho front by pressing numpad 1 + 5 so that it looks like the following image :
Cube will be made into floor, for that Scale cube by using S + Z then set as shown below :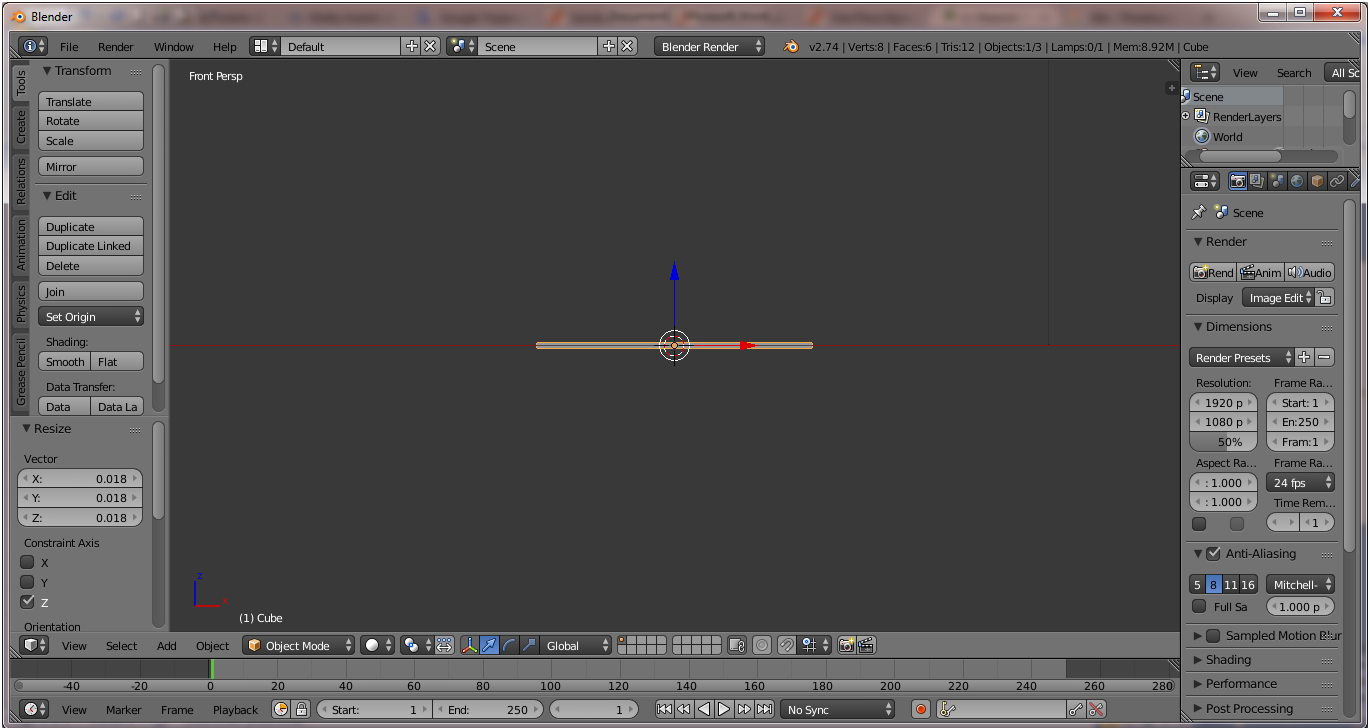
Make a candle using cylinder, add cylinder by pressing Shift + A on keyboard then select Mesh >> Cylinder :
After the Cylinder appears then adjust the location of the cylinder and press Tab on the keyboard it will appear as in the following image :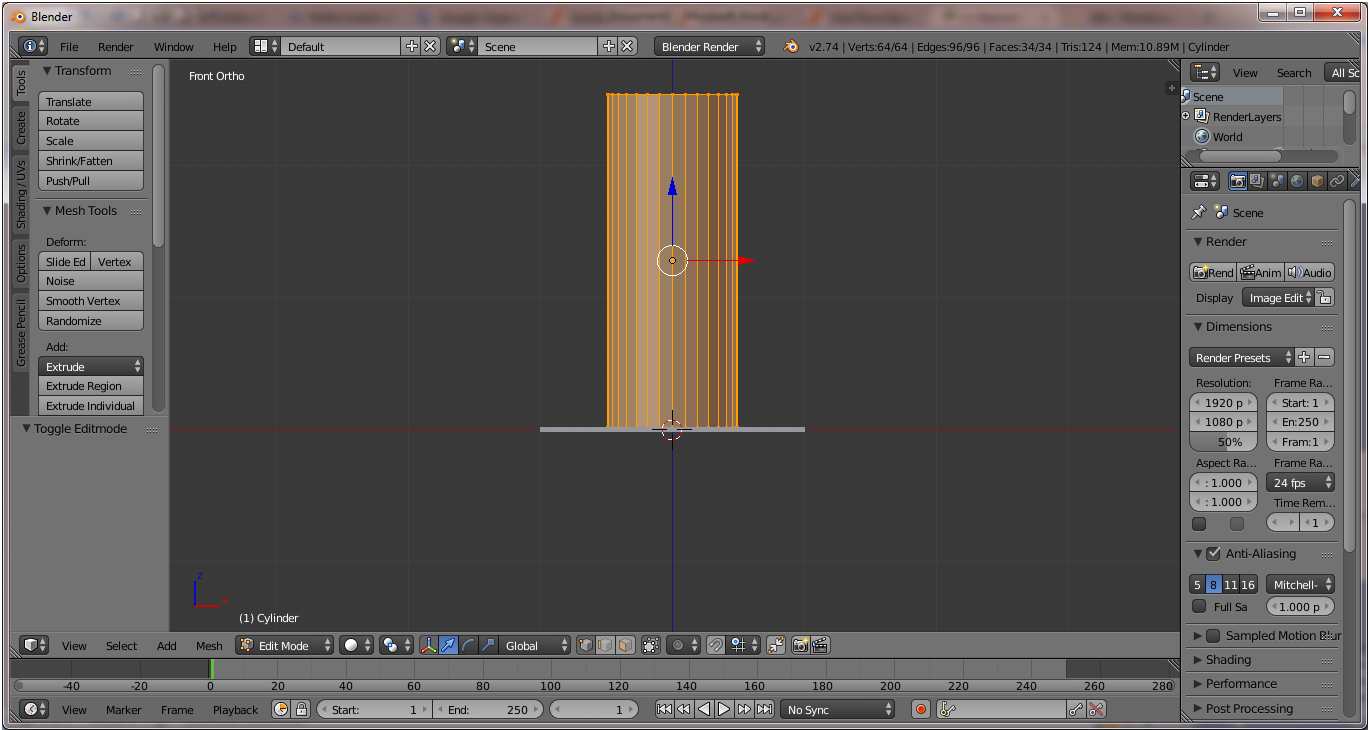
Add a segment by using Ctrl + R and then adjust the location of the segment as shown :
Press Z on the keyboard to switch to Wireframe view and then adjust the shape by adding segments and changing the location of the segment as shown :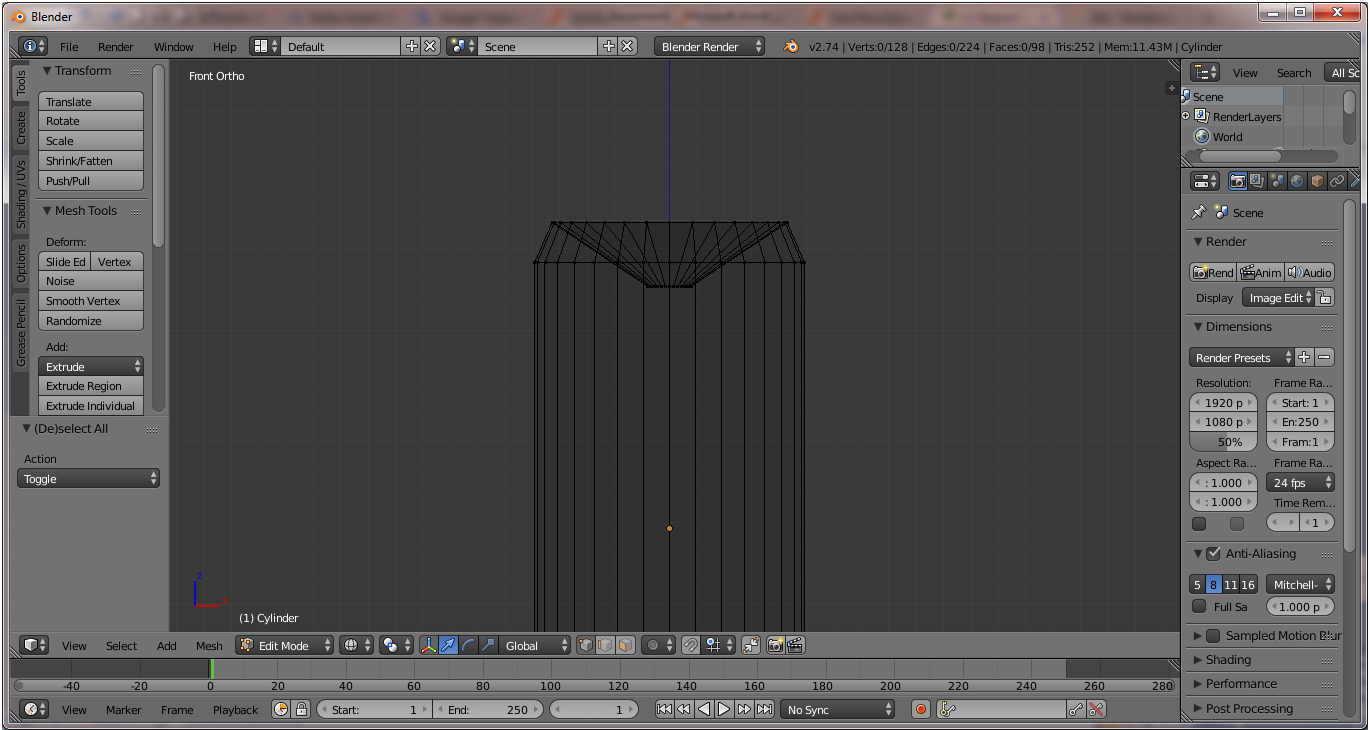
Next make wick axis by using Cylinder, press Shift + A, Mesh >> Cylinder :
Adjust the shape of the wick axis, after the wick axis finish and then refine the object by way back in Object mode press Tab, click the wax object then click smooth on the Tools menu on the left panel then on the right panel select Add Modifier >> Subdivision Surface :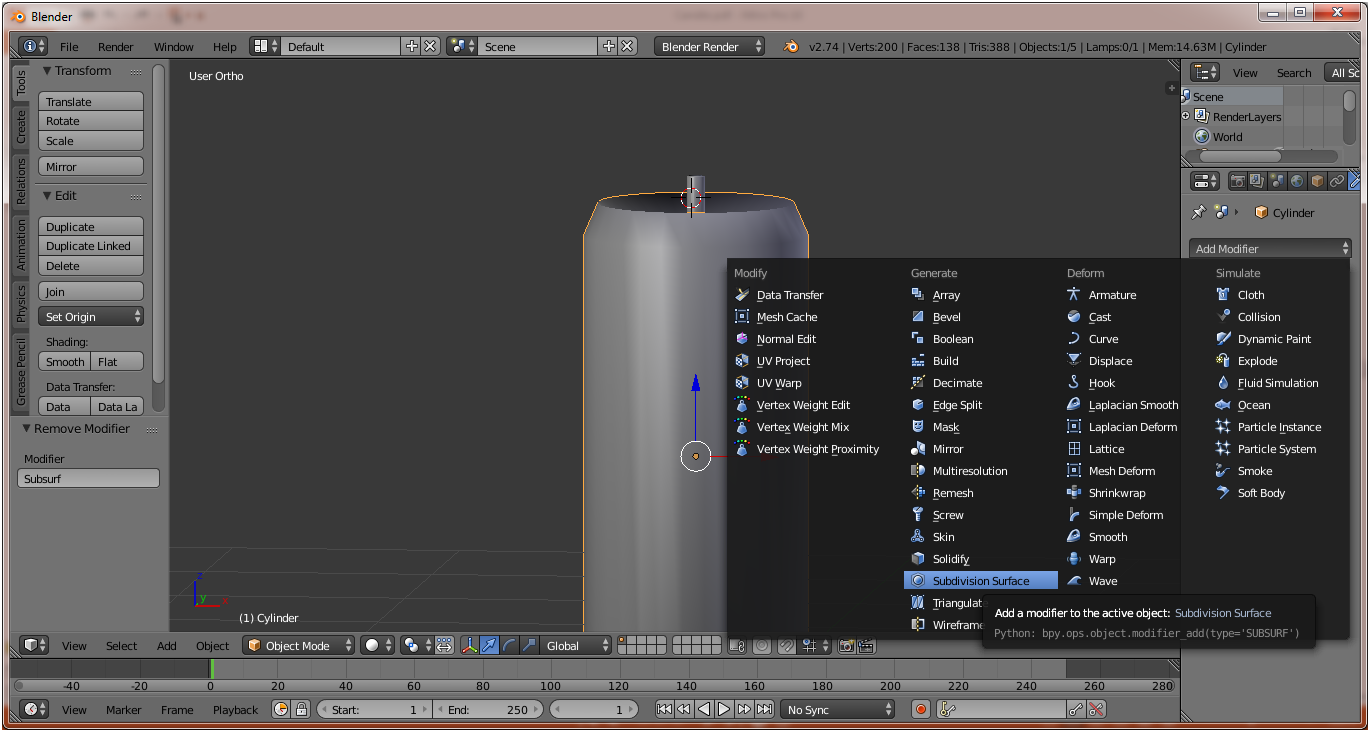
On the Subdivision menu there Views then change to 3, then adjust the shape of the candle by pressing Ctrl + R to add segments for the object can be adjusted :
Result after segment setting, do the same thing on the wick axis then add color material by select object then click on material menu and click New. Next set the color according to what you like and do also on the wick axis :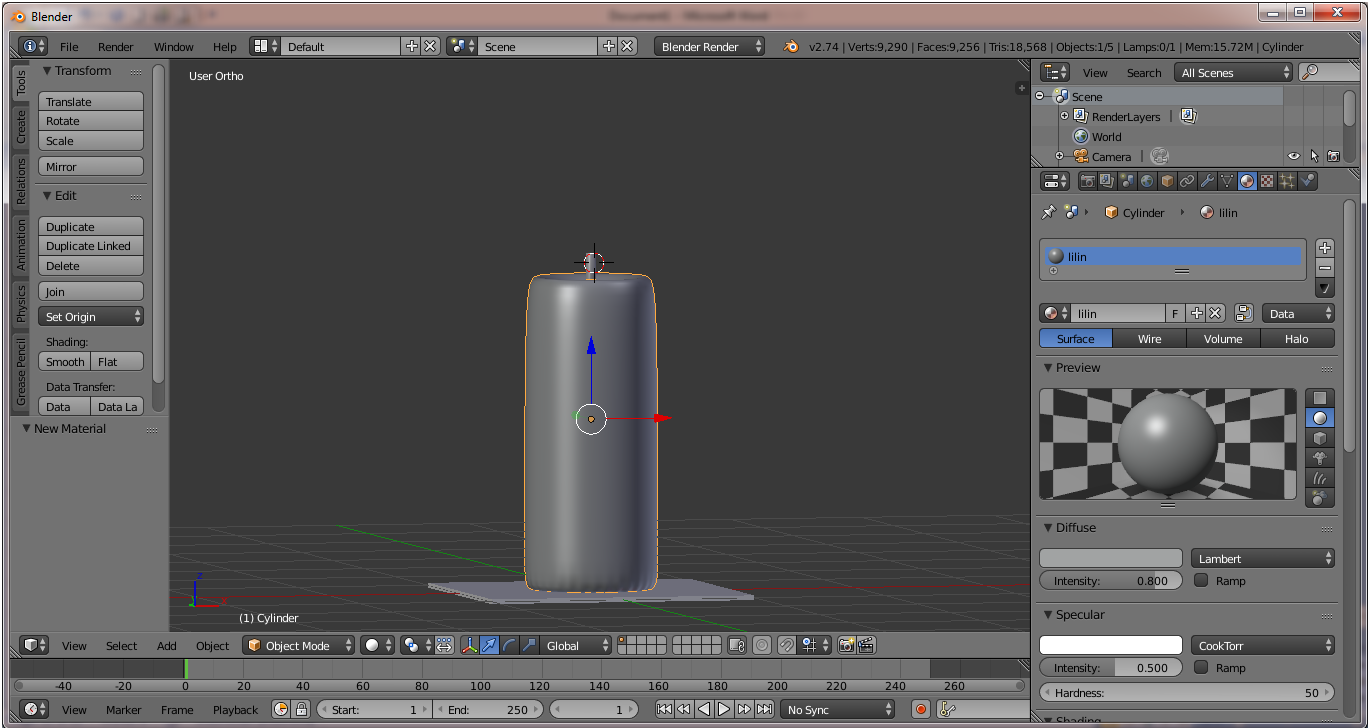

Adding sphare by press Shift + A, Next set as in the following image :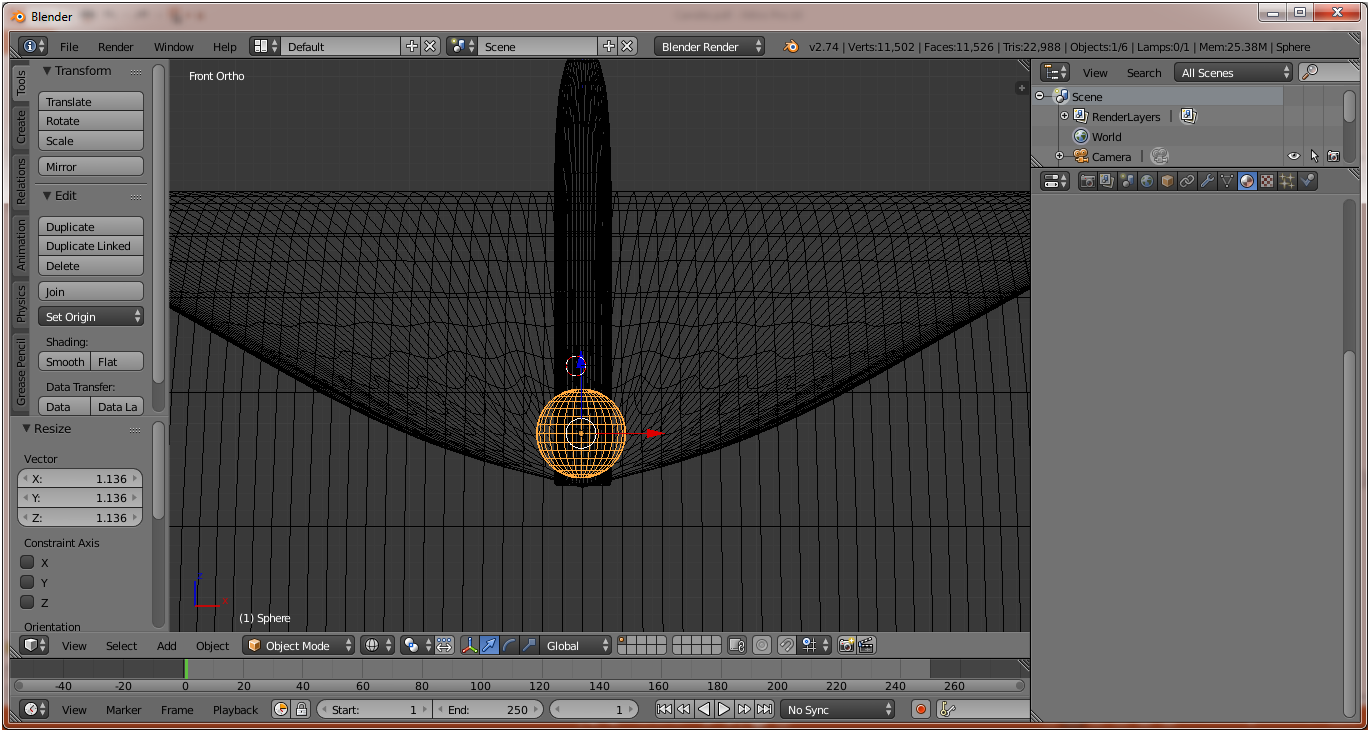
The sphere will be used for candle light for it must make settings on the material menu, click New then on the material menu select Helo as in the following image :
Set the sphere material like the following :
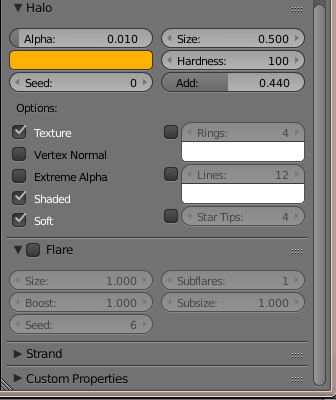
Next select the Texture menu then click New and on Type select Clouds :
In the Texture menu set as shown below :
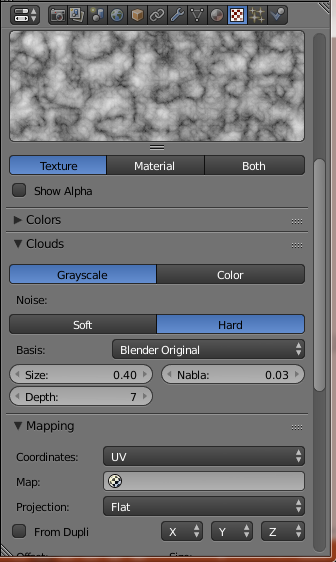 |  |
|---|
Add circle by press Shift + A and then select Mesh >> Circle and set as shown below :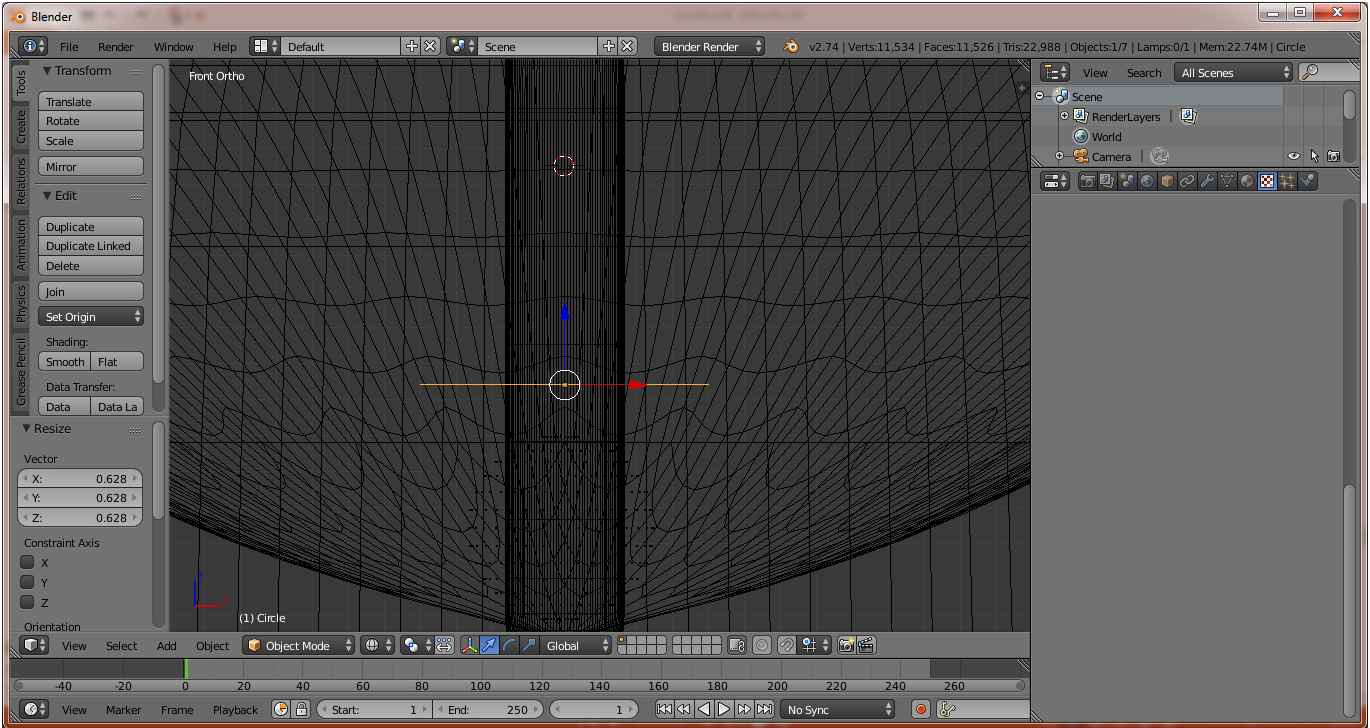
This Circle will be set to Flame, select Material then click New next select Helo :
Make settings on the material menu as follows :
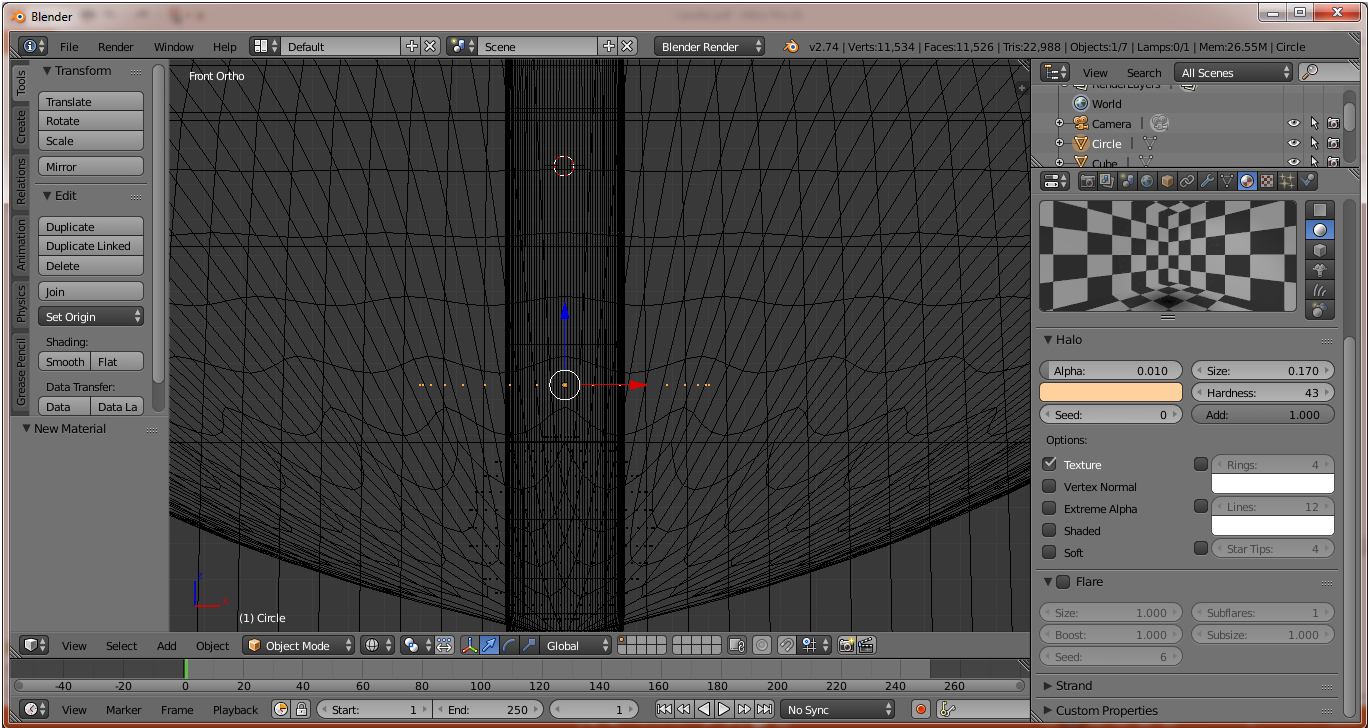
Then select Texture click New and change the Type to Marble :
In the Texture menu do the settings like the following image :
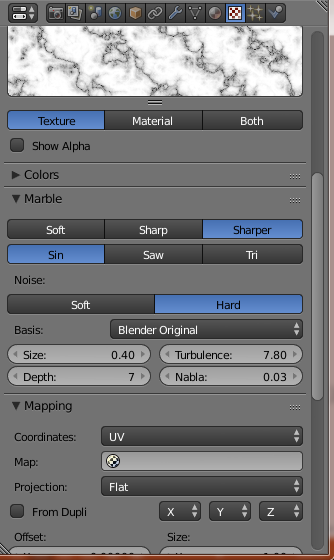 |  |
|---|
Next add a particle to the circle object by clicking New on the Particle menu :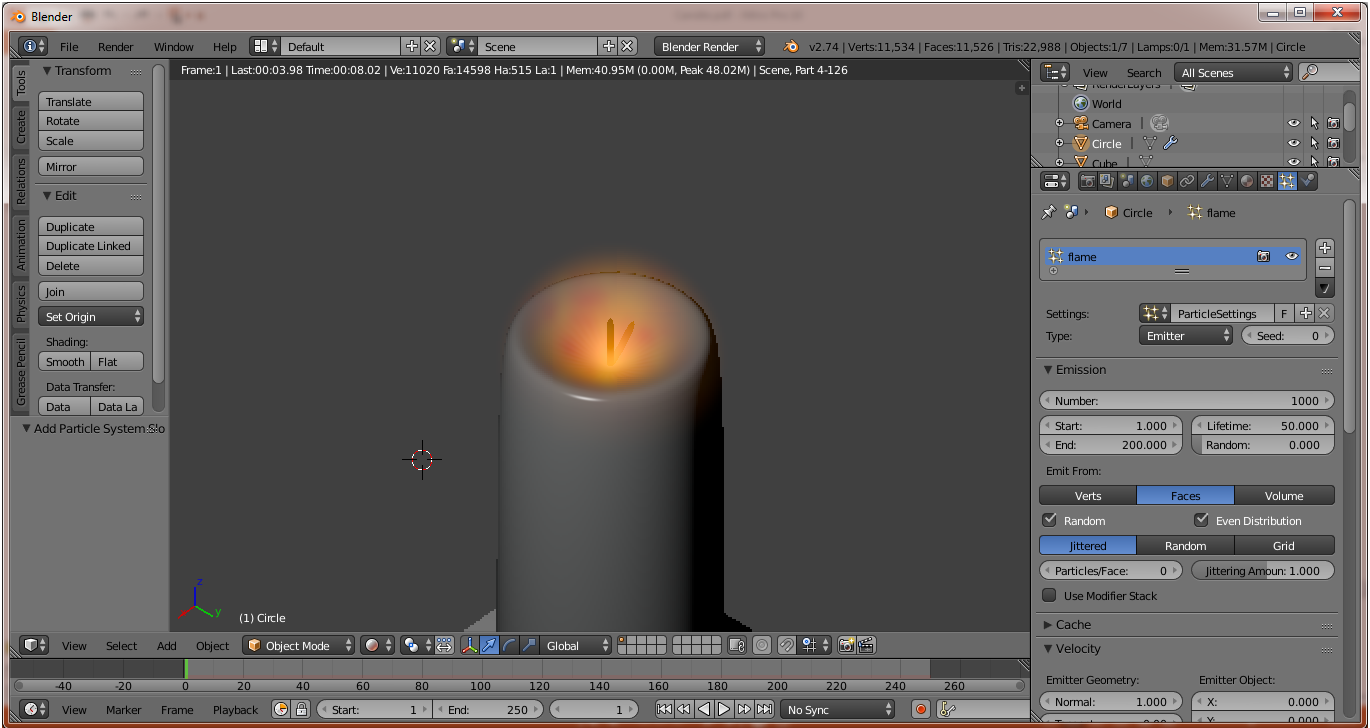
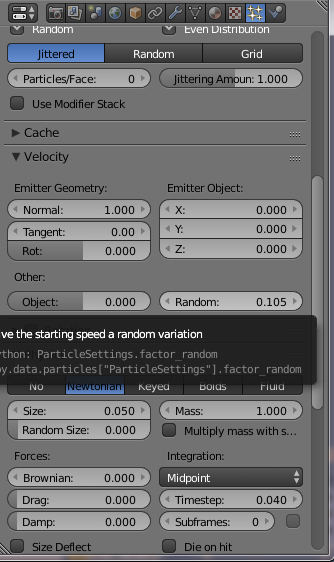
Make arrangements on particles like the following :
 |  |
|---|

After setting the particle it will get the following results :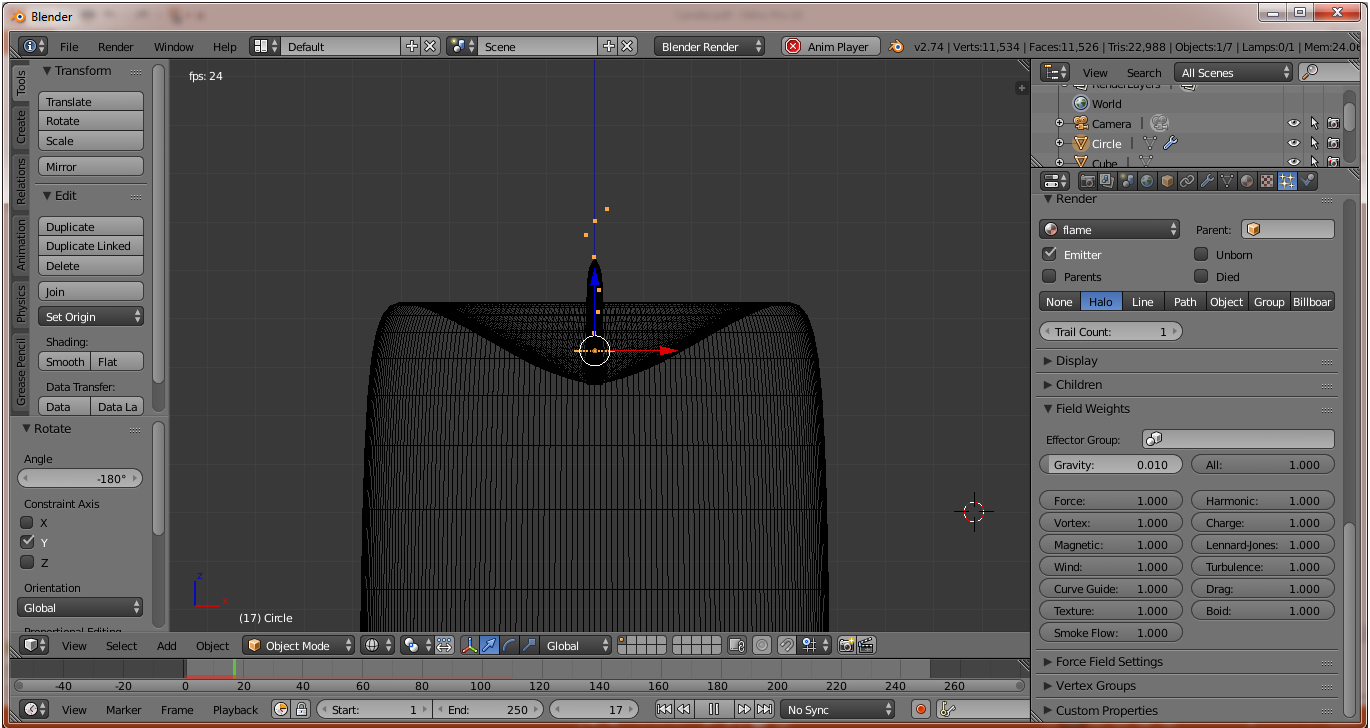
For completion, do the addition of Lighting then select floor then Scale then select view render, the end result of candle making as follows :
RESTEEM RESTEEM RESTEEM
UPVOTE UPVOTE UPVOTE
& Follow Me @muftykutink
I'M TEAM ACEH STEEMIT
My Recents Post :
ColorChallenge - ThursdayGreen : 3D Animation
Trying Modeling 3D Planets Colliding
Simple 3D Animation Modeling - Dining Tables #7 Combine Object Tables, Chairs, Plates, Glasses, Bananas, and Breads
Simple 3D Animation Modeling - Dining Tables #6 Bread Object
Simple 3D Animation Modeling - Dining Tables #5 Banana Object
Simple 3D Animation Modeling - Dining Tables #4 Glass Object
Simple 3D Animation Modeling - Dining Tables #3 Plate Object
Fantasy 3D Animation
Simple 3D Animation Modeling - Dining Tables #2 Seat Object
Simple 3D Animation Modeling - Dining Tables #1
Children, What We Can Learn From Hime
📷 ColorChallenge ThursdayGreen - Historic Place
3D Modeling of Compost Grinder Machine
3D Modeling Steemit
Veru good and clear tutorial @muftykutink, its look really candle.
thank you @darklog, I try hard to make it, hopefully my future can produce more realistic work
Goodjob and very creative, I am learning to you off the 3
thanks @albuluhi, it is a simple 3D modeling
Good post @muftykutink. You are very creative
thanks @azirgraff, I am trying to produce the best for steemit
@muftykutink. I like hearing you use Blender, I need to learn blender. I have used truespace 3, 4 and a little TrueSpace 7.6
By the way, nice Steem logo over your face. 💖
extraordinary
bereh
Congratulations, your post received one of the top 10 most powerful upvotes in the last 12 hours. You received an upvote from @curie valued at 42.52 SBD, based on the pending payout at the time the data was extracted.
If you do not wish to receive these messages in future, reply with the word "stop".
Congratulations @muftykutink, this post is the third most rewarded post (based on pending payouts) in the last 12 hours written by a User account holder (accounts that hold between 0.1 and 1.0 Mega Vests). The total number of posts by User account holders during this period was 1004 and the total pending payments to posts in this category was $1604.09. To see the full list of highest paid posts across all accounts categories, click here.
If you do not wish to receive these messages in future, please reply stop to this comment.
Great initiative. I would love to see more videos on 3D modeling
resteemed