8 Creative (and Easy!) Fall Craft Ideas
1 # Ombre Pinecones
couple of years prior I discovered two extremely excellent pinecones around my neighborhood. I took them home and set them on my cabinet not realizing that it would start an affection for gathering pinecone from the better places that I have gone to inside the U.S. I have brought home a foot long pinecone from a campground at Idyllwild and some modest pinecones from my trek to Oregon. In the wake of gathering a bushel full, I began considering approaches to dress them up. One day I had some paint laying around and chose to add a fly of shading to a pineAcone by painting only the tips of the pinecone. What's more, the rest was history!
Materials
A pinecone
Acrylic paint in three or four diverse shade of a similar shading
Angled paint brush
An old toothbrush
Construction
Take your toothbrush and wipe off any soil or bugs (prescribe doing this progression open air).
Take your paint brush and apply the primary shade on to 1/4 of the pinecone (suggest beginning with the darkest shade at the base of the pinecone and working your way up).
Keep painting the following shade to the following 1/4 of the pinecone.
Rehash stage 3 with whatever is left of the shades until the point that you achieve the best.
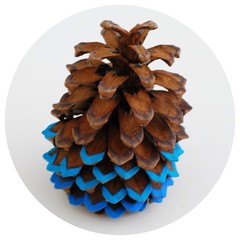
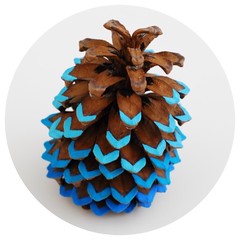
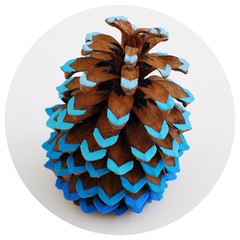
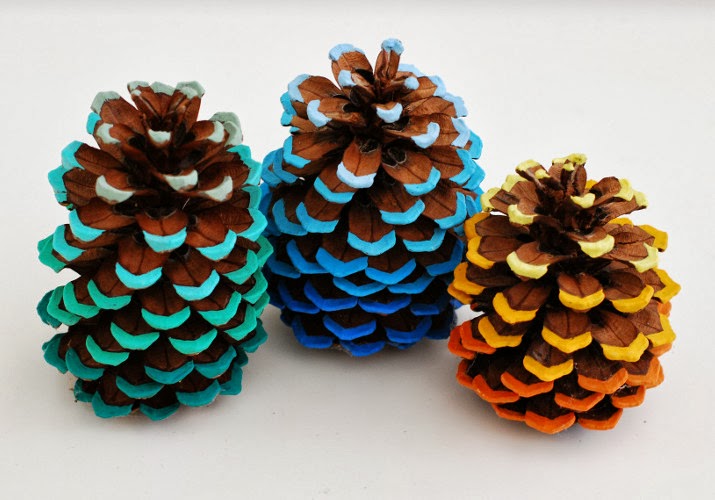
Contingent upon the measure of the pinecone you can either utilize three shades for a little to medium size pinecone or four unique shades for an extensive size pinecone. This will enable you to plainly observe the ombre impact. The effortlessness of including a tad of shading to the tip of the pinecone can truly change it into something that is both dynamic and enlivening. I cherish how the pinecones can add a fly of shading to any bubbly events or a generally exhausting room. I have them shown around my chimney however one month from now I anticipate utilizing them in my nephew's Cowboy and Indian Theme birthday party. How would you anticipate utilizing them to light up your home or regular day to day existence?


2 # Marbled Leaves
CREATE MARBLED FALL LEAVES WITH SHAVING CREAM!

Greetings companions! I can hardly wait to impart to you the marbled fall leaves my children made today! The same number of you definitely know, my kids are snared on the shaving cream craftsmanship ventures. Their dependence started with the Marbled Shaving Cream Eggs. Next, they influenced the Shaving To cream Earths for Earth Day and after that Fourth of July Shaving Cream Stars. So obviously they requested to make fall leaves with the shaving cream.
However, before I start sharing the photographs, I should admit that I might experience the ill effects of a mellow instance of blogger's envy. I adore looking and perusing other individuals' online journals. Numerous bloggers have delightful photographs that could without much of a stretch be in a magazine, notwithstanding their nitty gritty well ordered headings. I need to blog that way! Be that as it may, here is my world.
To start with, I don't have a pleasant camera and most likely won't for a l-o-n-g time. Why? Do you see this honest face? She adores cameras and will swipe a camera whenever she can (and drop it sometimes as well). In this manner, my hubby stated, "No pleasant cameras!" A cheap camera is significantly less difficult to his wallet to supplant. Yet, she is a cutie so it's justified regardless of the pause.
.JPG)
Second, I can never again snap activity shots. Why? Do you see the kid in the Mickey Mouse shirt? This child will keep you on your toes! He continued endeavoring to eat the shaving cream since he thought it was whipped cream, and in addition attempting to eat the "ketchup and mustard" paint.

Last, my posts are normally short and to the point. I wish I had room schedule-wise to compose expand points of interest. Those two little children above intrude on me no less than ten times previously I hit distribute on my presents so I'm content on simply bode well until further notice.

Is it true that you are still with me after all my meandering? Assuming this is the case, you won't be frustrated with this craftsmanship venture! Your children will love it and the outcomes are perfect exceptional outlines. I broadened and printed the leaf formats on cardstock and had my kids cut them out before plunging them into the shaving cream. Snap HERE to peruse how to make shaving cream workmanship from a past post, or you can watch my child and I clarify it in the video underneath.
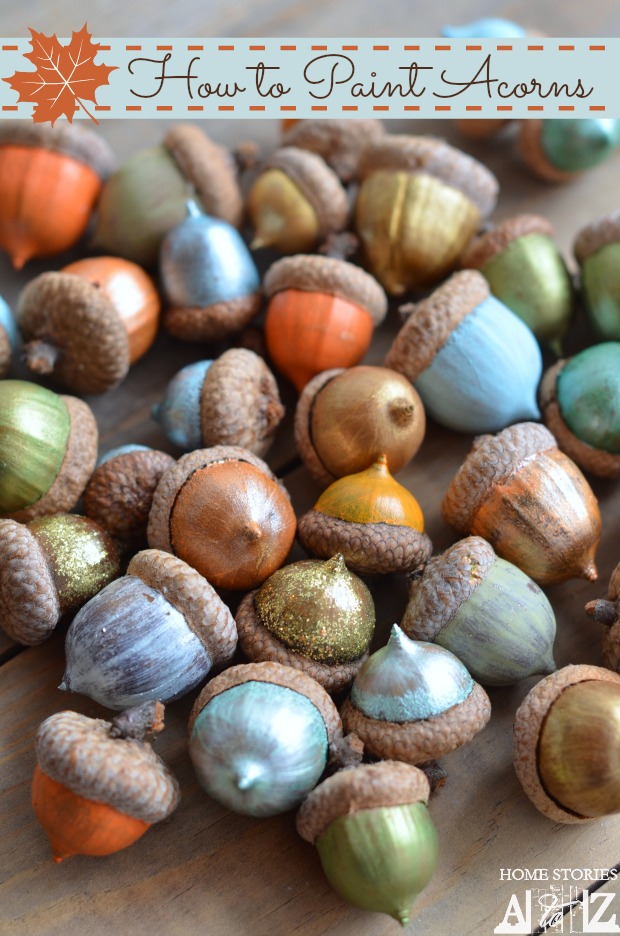
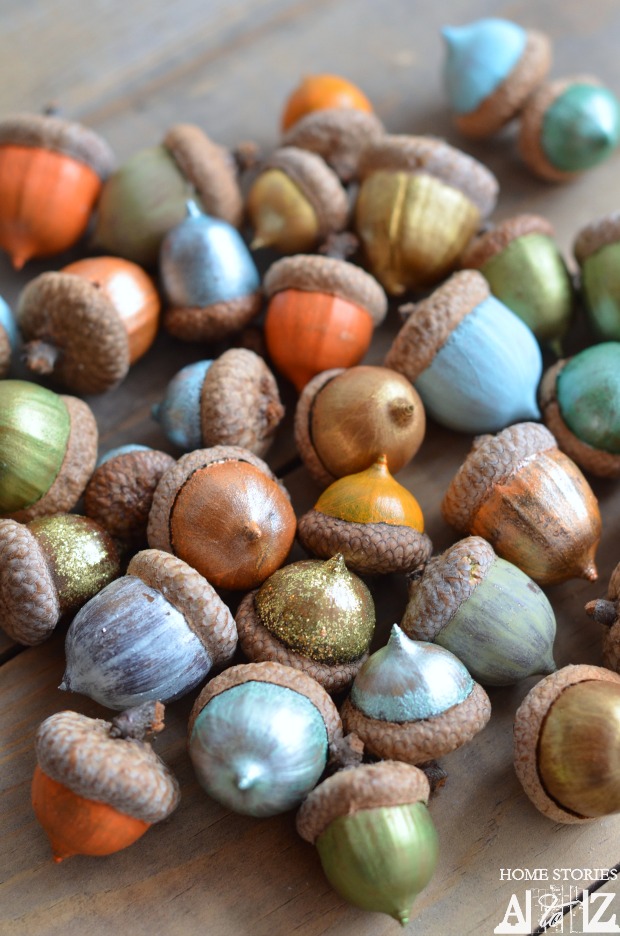
3 # Colorful Acorns
HOW TO PAINT ACORNS
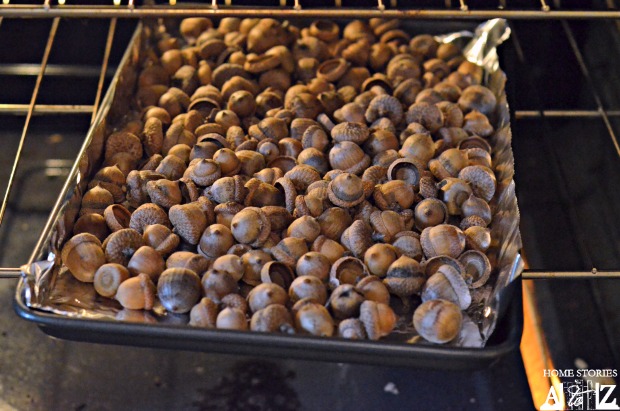
Stage 1: Place oak seeds on thwart lined treat sheet and prepare at 170* for a couple of hours. I prepared dig for around two hours just to make certain everything was great and dead. One oak seed split and was somewhat scorched looking yet the rest turned out looking great.
Stage 2: Use acrylic create paints and a paint brush to paint your oak seeds. Brush strokes will have any kind of effect in the oak seeds' appearance so brush with the grain of the nut. I didn't evacuate my tops with a specific end goal to paint them. A couple of tops had tumbled off, and I utilized craft glue to reattach them. I found the oak seeds substantially less demanding to paint with tops in place. I have a TON of acrylic paint in my art room and utilized diverse shades of green, blue, orange, and gold on my oak seeds. I didn't try giving any of the oak seeds two layers of paint however you may need to on the off chance that you lean toward a more misty look.

Put the oak seeds aside to dry and don't stress excessively over the wet paint. The greater part of the oak seeds will normally move back to their tops when you put them down.
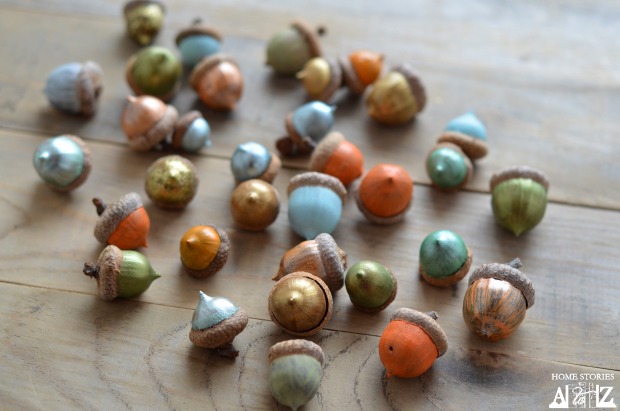
Furthermore, it's just as simple as that!

I put my oak seeds on my table in a beautifying leaf holder that I've clutched for ages. I adore how delightful they look. Possibly this is on account of I'm slimming down right presently, yet don't they look adequate to eat? They help me to remember thwart wrapped chocolates. Truly, I believe it's protected to state that it's the absence of desserts talking here :).
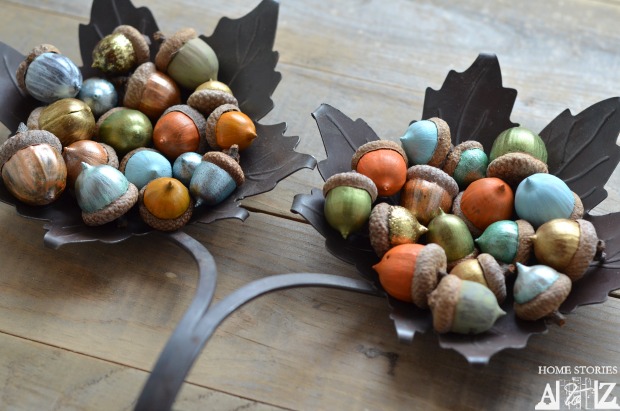
I think these would look charming stuck to put cards for Thanksgiving, or you could craft glue little bits of twine to the tops to make adornments for a focal point of sticks. There are numerous potential outcomes of how I may utilize these this season! For the time being, I'm simply appreciating them on my table. A debt of gratitude is in order for halting by! In the event that you need all the more speedy fall adorning thoughts, make certain to look at 10 Easy Fall Crafts.
4 # Leafy Wreath

Cut from designed plaids and fluffy felt, this current wreath's false foliage will look new until the end of time. Follow a leaf onto substantial card stock and use as an example to cut texture. (For wool and more slender textures, press on create support to include firmness.) With straight sticks, secure leaves to a 18-inch Styrofoam wreath canvassed in tan felt, covering somewhat to conceal pins
5 # Foliage Mobile

This versatile mirrors vacillating foliage — less the raking. Gather leaves with in place stems and press in a substantial book for a couple of days. Wrap twine or strip around a 18-inch weaving band; secure finishes with craft glue. Tie eight 3-foot-since quite a while ago waxed strings at even interims around it, appending pinecones at the bottoms as weights. Bunch the string around each leaf's stem, dispersing haphazardly. Secure band to a roof snare utilizing twine
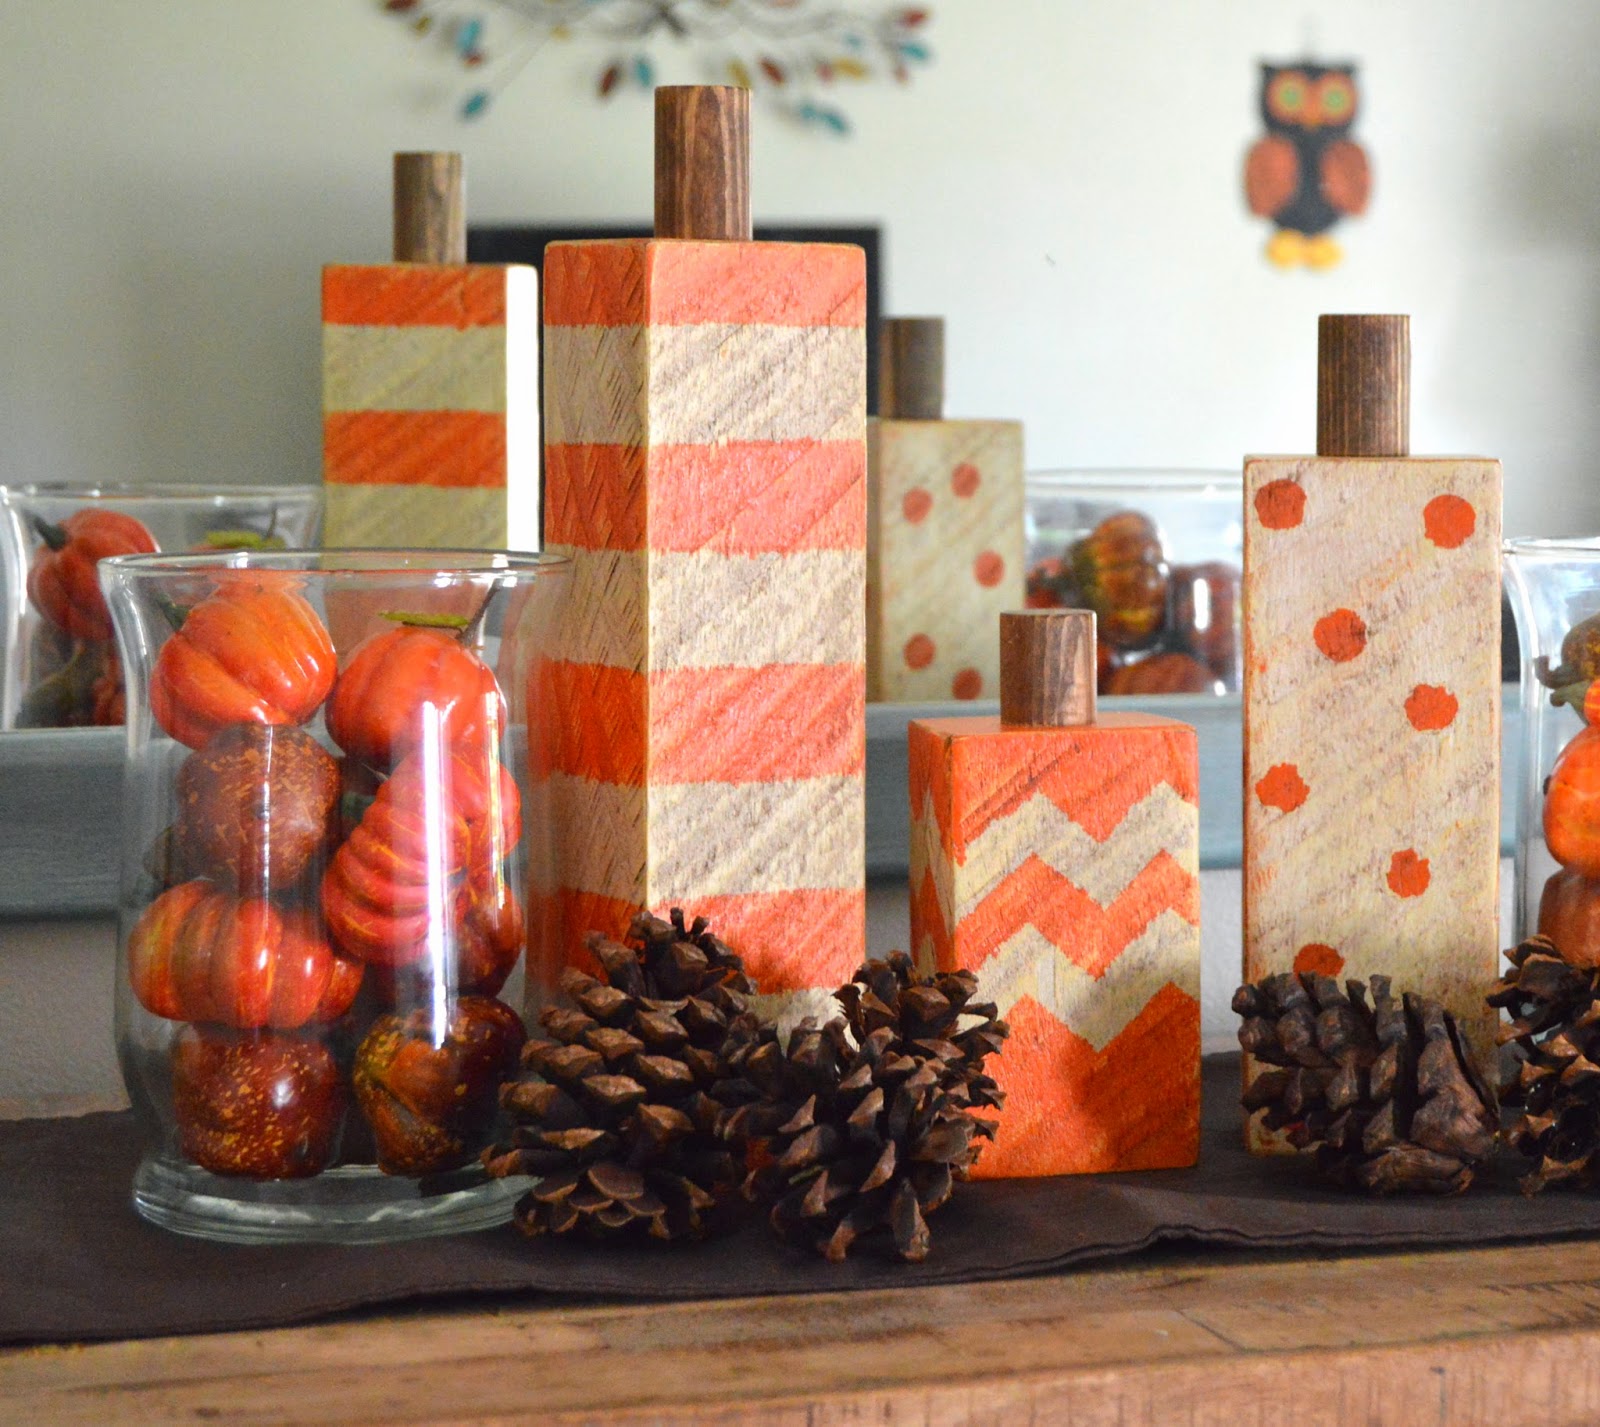
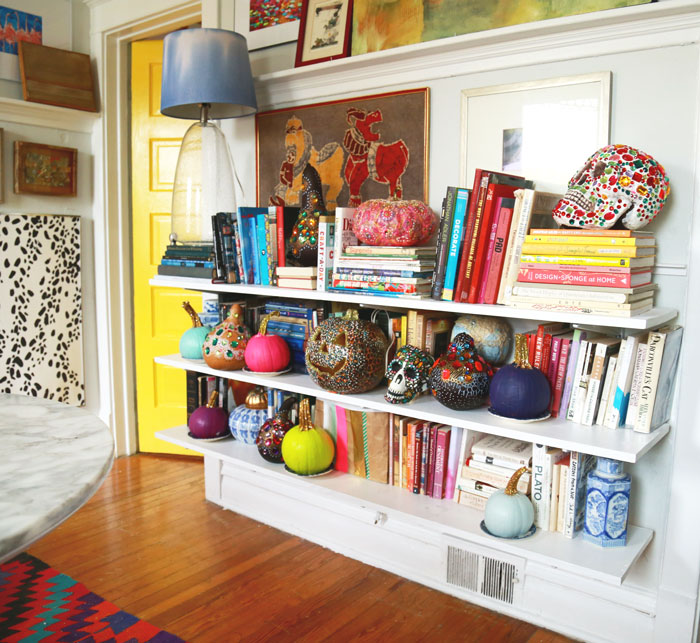
6 # Striped and Spotted Pumpkins

Ideally everybody had an incredible Labor Day end of the week! Three days off consecutively never at any point get old in my book! I realize that we should utilize Labor Day as an opportunity to revive and unwind, so we did only that - aside from our rendition of unwinding is somewhat more unusual. Building and making is our family's outlet for easing stress...so when we woke up at 6:30am on Monday, Sept. first, the children and I had a rundown of stuff that we needed to make together!
The main thing we would make was, say it with me here, "this think I saw on Pinterest!" Adorable little pumpkins made out of 4x4 posts! But we didn't have any 4x4 pieces, we just had some recovered timber that is more similar to 3"x2.5" however with huge amounts of surface. Better in my book! Also, free...the objective of the majority of our undertakings is to assemble them out of what we happen to have laying around.
I cut them at various statures until the point that they looked perfectly. At that point we sanded everything extremely well with a sanding piece and an orbital sander.

Emma painted the expansive and the little with one layer of old fashioned white. Since we would have been sanding them subsequent to painting, we didn't try utilizing any introduction first. Owen painted the medium measured piece orange.


After the paint had dried, we taped off our examples on the pieces. For the polka specks, we utilized the main circles we had - smiley confront stickers. The chevron design was somewhat more disappointing in light of the fact that we just had the wide blue painters tape. I would not like to go the distance to the handyman shop for a senseless part of tape so I cut the more extensive tape into thin strips. Did it turn out great? Nope - yet Emma continued advising me that we weren't going for culminate. Brilliant young lady.

our tape and stickers safely set up, we painted each square in the contrary shade of the principal coat. After that layer of paint dried, we peeled off the tape and stickers and sanded the squares again with the sanding piece.


What's more, obviously, such as everything else in our home, they at that point got a layer of darker coating. This was Emma's first time coating anything and she LOVED it!


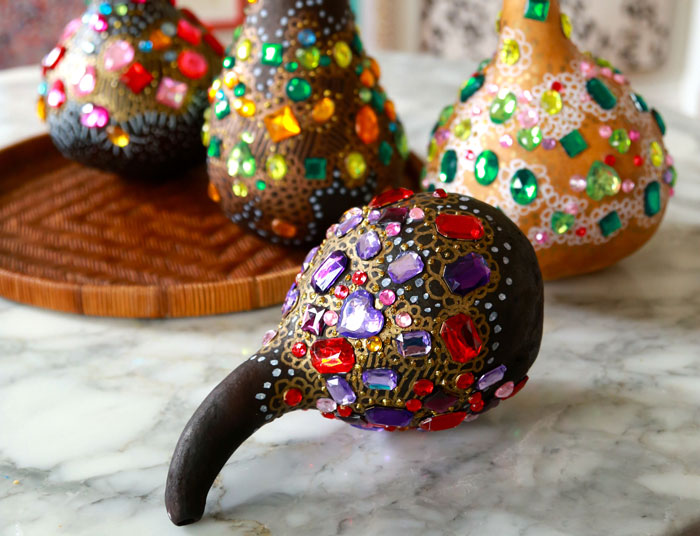
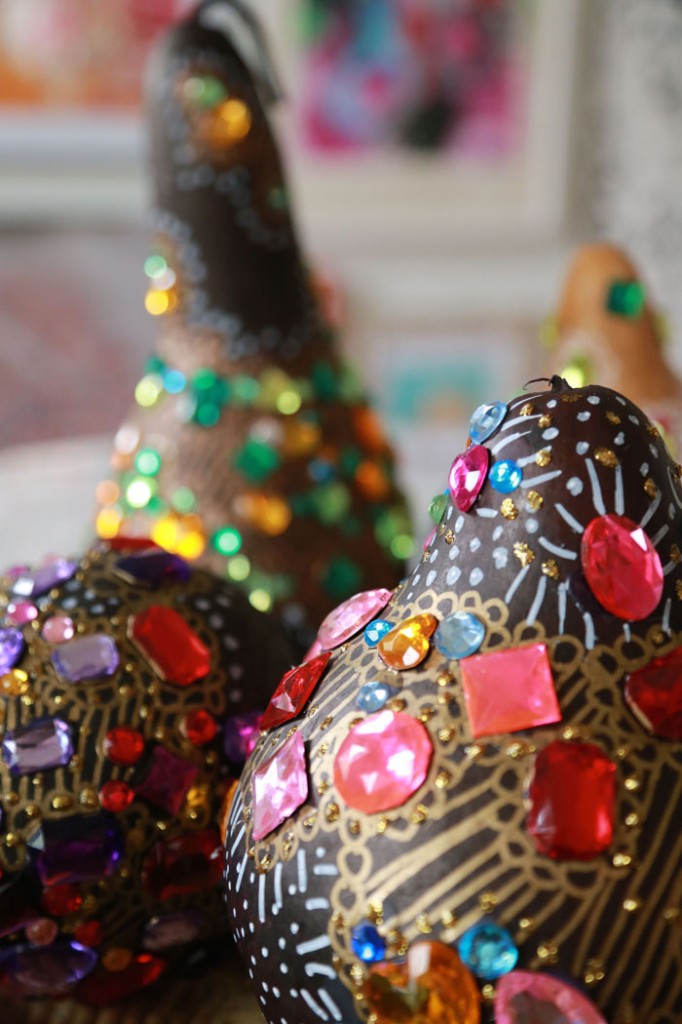
7 # Bedazzled Gourds

Presently is as great of a period as any to reveal to you that I watch ice artists on youtube late around evening time and now and then I get extremely furious that they are not sufficiently wearing bling. That is to say, the hellfire? In the event that you can't rely on ice-effing-artists to hold down the sequin share, who would you be able to depend on? No one. That is who. It used to be the Russian possibility could simply be depended on to trim themselves in shimmers (that is the thing that 80 years of socialism will do to a country) yet now they have all gone classy as well. I point the finger at Vera Wang.
Anyway. Since the climate is cooler and it'll be another three winters 'til I get a not too bad round of icecapades, I turn my eyes to the unassuming bounties of the Midwest: gourds.
![]()
Here in Illinois, gourds are anything but difficult to discover. Pretty much anyplace that offers pumpkins will offer a type of gooseneck gourd circumstance. Home Depot offers little ones for a buck, and huge ones for $10. Vital side note: my neighborhood Home Depot likewise keeps a sanctuary feline in their nursery named Xena The Warrior Princess, so you know they are great individuals. With the goal that's the reason I purchase my gourds from them. A year ago I shower painted a group of them gold, at that point I let them set out in a crate on my sun yard all winter supposing they would dry out and by this fall the gourds would be pleasant and dry. In any case, you know what was the deal? One of the gourds went spoiled and as opposed to drying it simply dissolved over alternate gourds and one day I opened the case and resembled a fender bender. A major, mildew covered, wet fart noticing pile up. So. That is my method for saying I don't recommend you dry your own gourds. Unless you have a pleasant cool/dim place you can dry them without touching each other. In any case, that is not me. Where was I? Goodness better believe it, gourds.

In the event that you needed to make these I'm speculating you essentially recognize what you'll require.
Dried Gourds
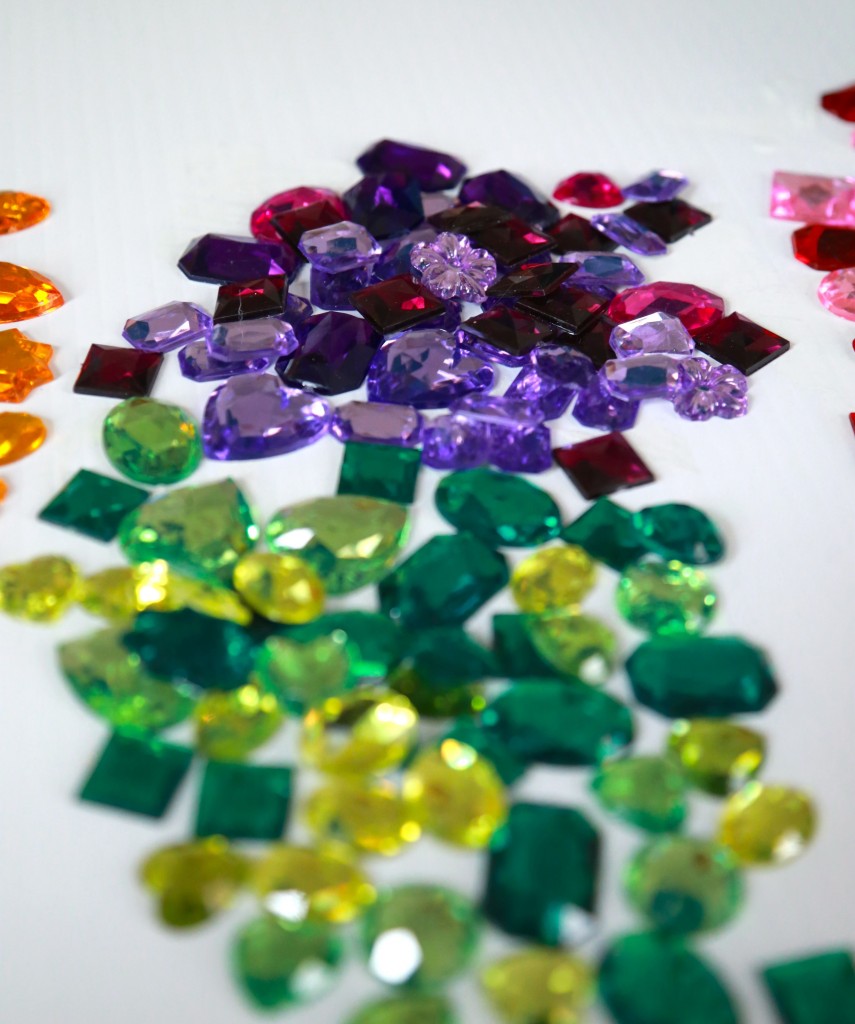
Rhinestones*
Tacky Glue*
White or potentially Gold Sharpies**
Gold sparkle shimmer stick paint***
*Note on rhinestones. There are a ton of things in life I know next to no about, however shoddy rhinestone isn't one of them. On the off chance that you are hoping to purchase/utilize/accumulate acrylic pearls, the best deal is this one pound sack from Michael's on the web, civility of Darice. My neighborhood store offers some littler snatch packs of gem rhinestone-thingies, and they are incredible, yet in the event that you need some value for your money, this is it. It arrives in a mammoth scramble sack, which I like, however in the event that you don't, arranging rhinestones by shading is strangely calming. It's likewise an awesome method to involve a squirrely kid for a hour or two. This sack keeps running for $15 on the web, yet in the event that you utilize one of their 40% coupons it runs under $10. Ten bucks for a pound of cheerful is a decent arrangement.
** Note on Tacky Glue. I don't know why anybody tries to utilize some other sort of paste. Simply don't. Tasteless paste is THICK. What's more, it holds stuff. What's more, it dries clear overnight. Rhinestones merit a firm paste. They merit it!
***Note on White/Gold sharpies. There are a great deal of good paint pens available, yet to compose on a gourd it should have a felt tip or the nib will get gooked up composing over the finished surface, particularly in the event that you buy the gourd and it's oiled. No water-based ink will stick. Sharpies are the best/least expensive/best.
gourds-production gold-sparkle 700

***Note on gold sparkle shimmer paint. I'm crazy for the Scribbles brand of gold sparkle puff paint. All things considered, I shouldn't call it puff paint since it doesn't puff. It dries level, in any case, the thickness of the sparkle is substantially higher than different brands. You'll discover fundamentally the same as sparkle paints/sticks in any given art store, yet the Scribbles packs significantly more punch. I utilize it on parcel's of ventures similarly as small little dabs like putting tinsel on a Christmas tree. It includes an additional layer of profundity and shimmer. Furthermore, it's shabby, so you know I adore it.


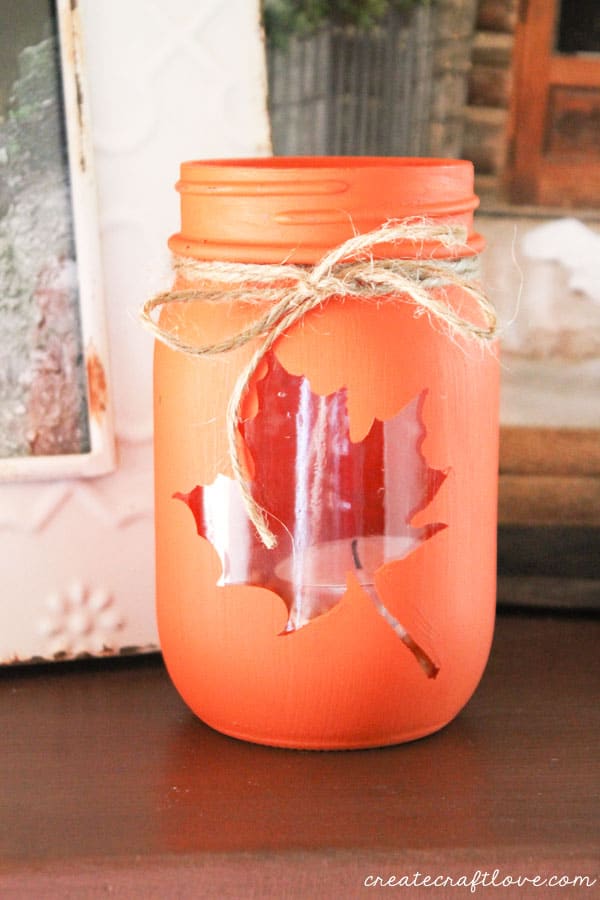
8 # Leaf Luminary

I began by cutting out a maple leaf of adhesive vinyl with my Cricut Explore. If you don’t have a cutting machine, you can trace and cut out a leaf design on adhesive vinyl.
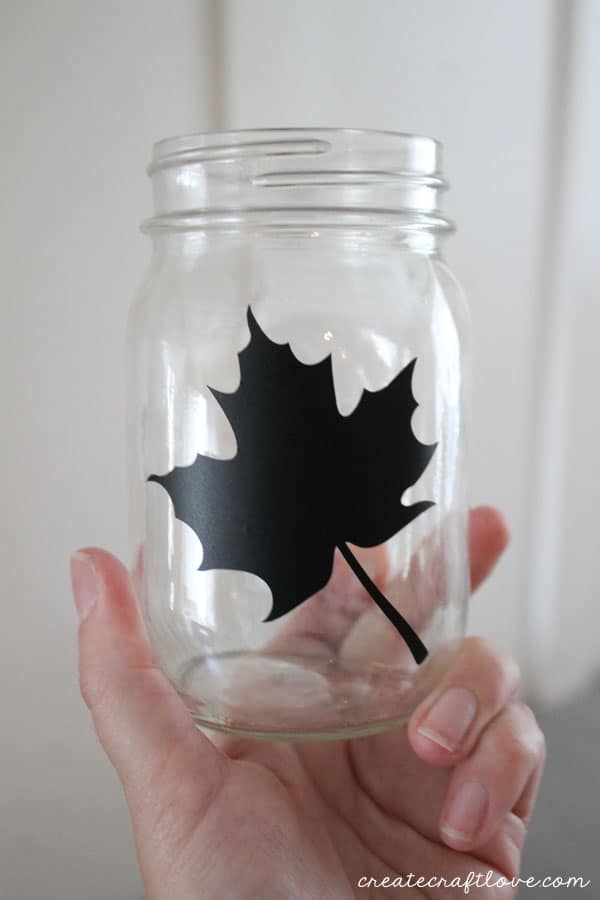
Pick an acrylic paint shading that you need to utilize. I picked persimmon.
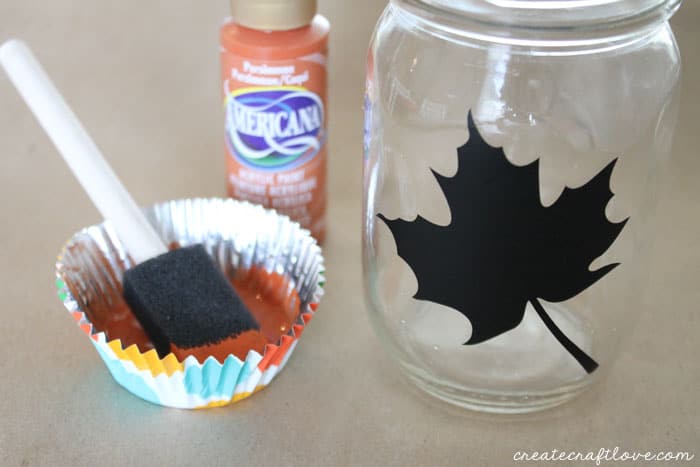
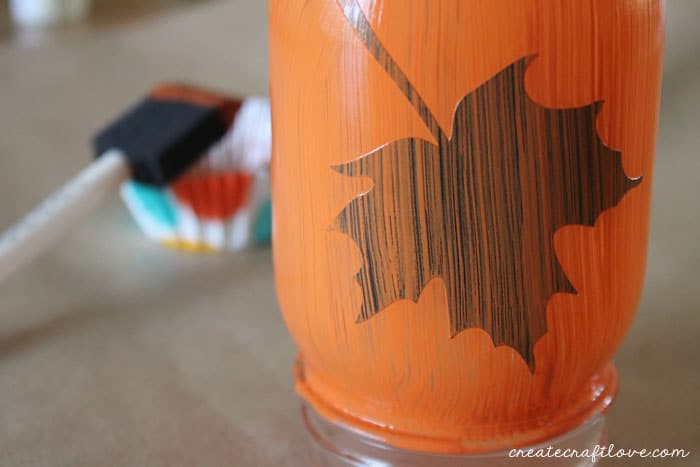
Make certain you enable the paint to dry totally between each coat. Else, it will cluster and force far from the glass. It took around 3 coats for it to be totally secured.
When it is dry, delicately peel away the vinyl leaf. Touch up any harsh edges
More Than you Can Think
Get 20 upvotes and 10 followers only for join the site.
The 20 upvotes worth 1SBD so why wait get it quickly before the campaign over.
CLICK HERE TO JOIN
WARNING - The message you received from @sadiajafri is a CONFIRMED SCAM!
DO NOT FOLLOW any instruction and DO NOT CLICK on any link in the comment!
For more information, read this post:
https://steemit.com/steemit/@arcange/phishing-site-reported-postupper-dot-ml
If you find my work to protect you and the community valuable, please consider to upvote this warning or to vote for my witness.
Hello @amirmirza, thank you for sharing this creative work! We just stopped by to say that you've been upvoted by the @creativecrypto magazine. The Creative Crypto is all about art on the blockchain and learning from creatives like you. Looking forward to crossing paths again soon. Steem on!