How to make a Screen Printing with alternative staff
You don't have to spend a ton of money on equipment or have a screen printing studio to make some pretty good quality prints.
I taught some friends how to reuse old picture frames and curtains to make screens, burn them in the sun, and clean them with a garden hose. While we were at it we took some pictures so we could share the lesson with you.
Step 1: Gather Up Your Materials
Materials you will need include:
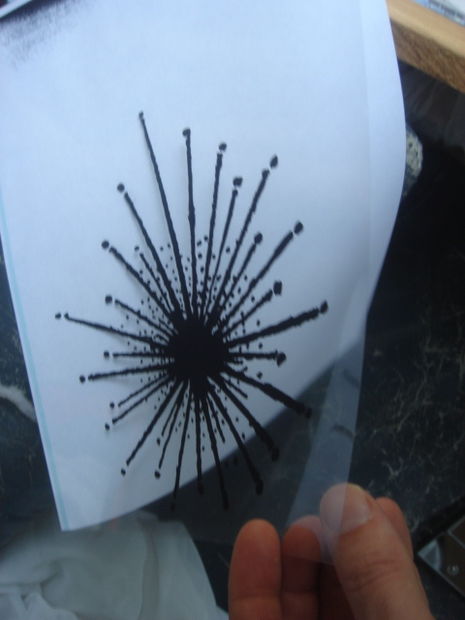
The image you want to use. The best is to have your image photocopied onto a transparency at maximum darkness. You can also paint or draw with white out on transparent plastic (cellophane wrap or clear packaging from toys work). Another option is to make a cut-out with dark-colored construction paper or to lay some flat object (pieces of lace are nice) on the screen. Objects that aren't flat (skeleton keys, for example) can also work, but you have to move the screen around in that case to avoid a shadow.
You want your image on the transparency to be super dark because the image won't transfer to the screen if light gets through. If you want subtlety and shading you can do it with dots, like a newspaper image. In this instructable we're keeping it simple and only printing one color. Very fine lines are not recommended with this technique. Start out with something big and bold and then start experimenting.
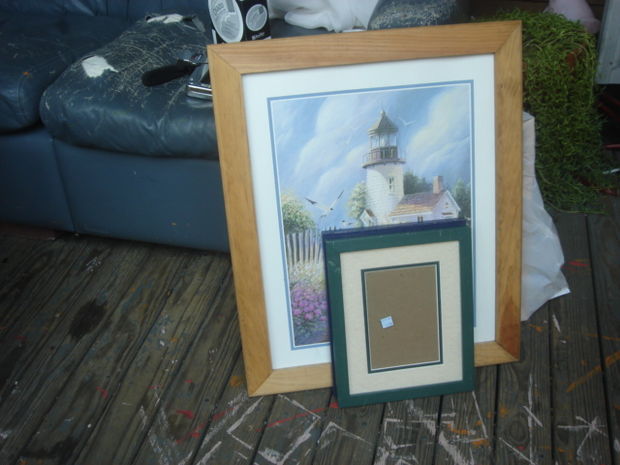
Wooden picture frames which are completely flat on the front surface. You can find these in all kinds of sizes at the Goodwill or Salvation Army or at garage sales for about a dollar each. You will also be using the pieces of glass that come in the frames. You will need a piece of glass from a frame smaller than the frame you use to make your screen.
An old, gauzy curtain. Color doesn't matter, but it does need to be in reasonably good condition. It can't have too many holes. The more tightly woven the curtain, the more fine your print can be, but you can get pretty nice results with any gauzy old thing. I keep my eye open for these at thrift stores and yard sales.
A piece of black or dark-colored fabric big enough to put the frame on.
A staple gun and staples. Don't get staples that are too long or they'll poke out through the frame. Even that isn't such a big deal, but it's preferable to not have sharp little metal points sticking out along the inside of your screen.
Photosensitive goo and activator. Speedball is the most common brand you will find for this at the art store. You need the emulsion and the activator and they come in two different bottles which you have to mix together. Don't bother with the screen cleaner. If you want to reunse the same screen for other designs, you can get screen cleaner.
I recommend buying an art squeegie specially for screen printing. You can get along without one, but it's a lot easier to print with this tool than to do it with a hunk of cardboard. But in a pinch, the hunk of cardboard will work, too. The lip of a box works best because it has a good straight edge and is rigid yet flexible.
Sceen Printing ink. You can get this at the art supplies store. I have also printed on wood with acrylic paint and gotten good results.
Masking tape
Old cereal boxes or similar kinds of cardboard scrap. You'll want to have a little supply of pieces of thin cardboard around. They are super useful for all kinds of things, like scraping ink off sreens and putting it back in the jar.
Old newspaper to protect the surfaces you're working on
If you are printing t-shirts you'll need paper to put inside the shirt when you print so that the ink doesn't bleed through the side you're printing on all the way through to the other side. I use regular printer paper for this, but old newspaper would work fine.
A garden hose. It's best to have an attachment on the hose that shoots the water out with some pressure, but you can get away with not having one. I have used the scratchy side of a kitchen sponge to help me get the emulsion off while spraying the screen with the hose. It damages the screen a little, but it works. Just rubbing with your hand even helps.
An old rag for spills
Clothes you don't care about. You're going to mess up your clothes.
A garden hose, the more pressure the better, but you can by without an attachment if you have to.
Step 2: Build Your Screen
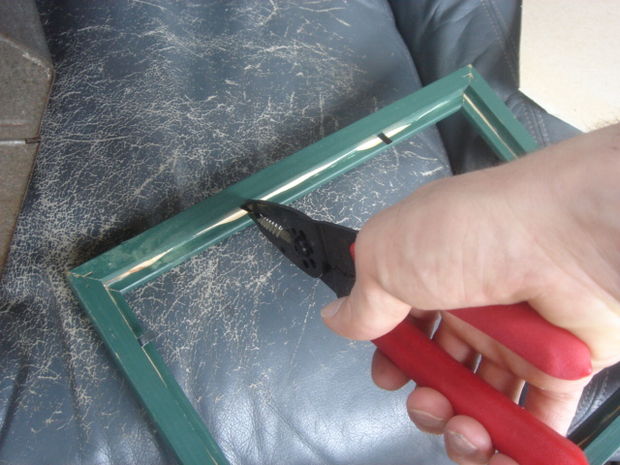
Take apart the picture frames. Remove all the little metal bits and put the glass aside. You will need a piece of glass from a frame smaller than the one you are using for your screen. Watch out for the edges of the glass. Don't cut yourself.
Cut a piece of the curtain rather larger than you need to cover the front of the picture frame and wrap around the edges. You are going to stretch the curtain over the frame just like stretching a canvas for painting. It helps to keep an edge, so that you have a straight line to go by.
Stretch the fabric over the front of the frame and staple it into Place. Try to keep the fabric as straight as possible. If you staple it on diagonally, with the grain of the fabric too far off from the square of the frame, you will run into trouble later. You don't have to be too anal about it, just try to put it on straight.
Staple the fabric onto the sides of the picture frame fairly close to the front edge. Pull it hard to make it as taut as possible.
I recommend putting a couple staples on one end, then a couple on another end, then on one side, and then another, and keep going round and round, pulling all the time.
- Cut the excess fabric off around the sides of the frame. Don't cut too close to the staples or the fabric will fray and come loose.
That's it. Now you have a screen for printing
Step 3: Spread the Photo Emulsion Onto the Screen
This is where all those scraps of cardboard come in handy. The backs of old notebooks work particularly well.
Read the instructions on the emulsion and activator bottles and follow them carefully to mix them together properly. Pour a little bit of the emulsion onto the screen and spread it as evenly as possible onto the screen. You have to coat both sides. You can scoop the excess back into the pot of emulsion. Don't put it on too thick. You need a thin coat, as even as possible, and on both sides. Try to avoid drips. Again, you don't have to be a perfectionist. Just do your best.
Once you've got the emulsion on there, put the screen in a darkish place to dry. Closets work pretty well. It doesn't have to be totally dark like a photo lab or anything. I like to point a fan at the screen to help it dry faster.
Once it's dry you're going to want to go straight on to the next step so that the emulsion doesn't get exposed and harden completely on your screen. You can touch the screen to feel if it is dry.
Step 4: Burn Your Image
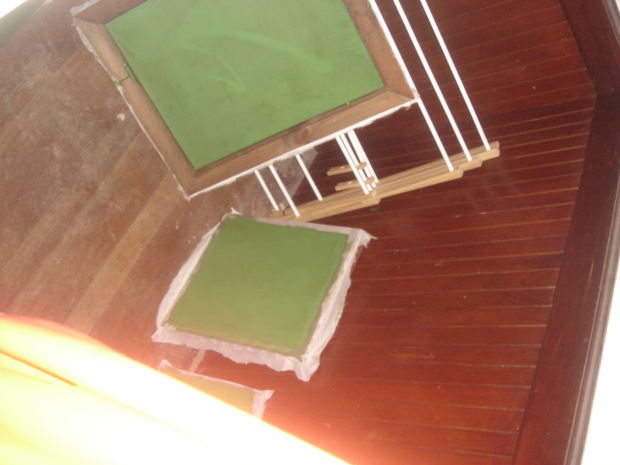
Once the screen is dry, take it out in the sun and lay it face down on a piece of black cloth. The back of the frame is facing up and the screen is flush against the cloth. You need UV rays to expose the emulsion. Even on a cloudy day, you can get exposure. A lamp at night will not work.
Now place your transparency (or bit of lace or leaves or whatever) on it, inside the frame and lay a piece of glass smaller than the picture frame on top of the image.
Leave it there for a while.
The sun is going to harden the emulsion. You'll notice it change from a lighter green to a sort of blueish color. Be careful of shadows. Even the piece of glass can cast a shadow. It's a good idea to carefully move the whole thing a little bit to avoid shadows. If you do end up with a shadow, you can always patch it up later by dabbing a bit of photo emulsion on the gap. Still, it's preferable not to have to do that.
Any part of the screen which doesn't get hit by the sun is going to wash clear. Be very careful not to let your image move around. The glass helps keep it in place and also makes sure no sun gets in under the edges of the image.
How long this takes depends on how much sun you've got.
Step 5: Rinse Off Your Screen
Once you feel pretty confident that the photosensitive emulsion is hardened in the sun, take your screen to the garden hose and start getting the emulsion off where your image was.
This is easiest to do with a lot of water pressure, but it's still possible to do without a hose attachment. Rub the screen with your hand to help the emulsion wash out. I've even gently rubbed with the scratchy side of a kitchen sponge. This can damage the screen a little bit, but it works pretty well. Don't scrub hard or you'll screw up your screen.
I find this part to be the hardest part. I always get a little frustrated that the emulsion doesn't wash off fast enough and worry that it'll harden while I'm in the process, especially on a sunny day. If your image was opaque enough you shouldn't have any troubles, though.
Step 6: Print!
Now that you've got a screen you are ready to print.
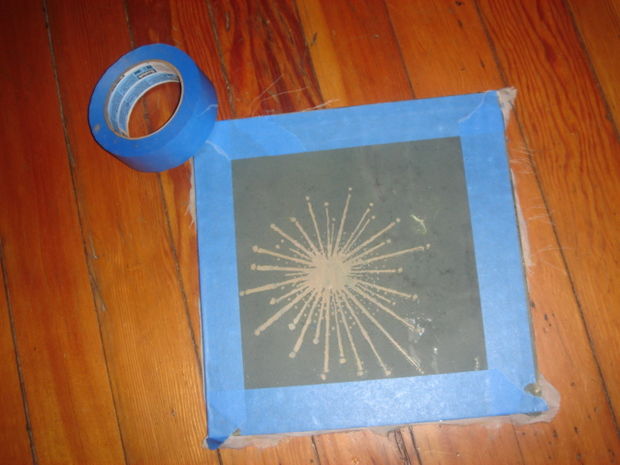
Mask the edges. The main weakness of these home screens is the edges. It's a good idea to put some masking tape along the edges of the screen before you start printing so you don't get any sloppy leaks off the sides.
Place your fabric on some papers to protect the surface underneath. If you're doing a t-shirt, put a piece of paper inside the shirt.
Put the screen down on your fabric, put some printing ink along the top of the screen, and pull it over the image with your art squeegie. If you can't afford a squeegie, use a piece of cardboard.
Be very careful not to let the screen move while you are printing. Hold it down firmly. You absolutely have to print on a good flat surface or you will get terrible results.
- Lift the screen and admire your work. You rule!
SOURCE : http://www.instructables.com






Copying/Pasting full texts is frowned upon by the community.
Some tips to share content and add value:
Repeated copy/paste posts could be considered spam. Spam is discouraged by the community, and may result in action from the cheetah bot.
Creative Commons: If you are posting content under a Creative Commons license, please attribute and link according to the specific license. If you are posting content under CC0 or Public Domain please consider noting that at the end of your post.
If you are actually the original author, please do reply to let us know!
Thank You!
@steacleaners FUCK OFF !
Hi! I am a robot. I just upvoted you! I found similar content that readers might be interested in:
http://www.instructables.com/id/Screen-Printing:-Cheap,-Dirty,-and-At-Home/
we really have a lot to learn...steemit makes life better...thanks for sharing
Congratulations! This post has been upvoted from the communal account, @minnowsupport, by AxS from the Minnow Support Project. It's a witness project run by aggroed, ausbitbank, teamsteem, theprophet0, someguy123, neoxian, followbtcnews/crimsonclad, and netuoso. The goal is to help Steemit grow by supporting Minnows and creating a social network. Please find us in the Peace, Abundance, and Liberty Network (PALnet) Discord Channel. It's a completely public and open space to all members of the Steemit community who voluntarily choose to be there.
This post has received a 0.63 % upvote from @drotto thanks to: @banjo.