How I Paint Realistic Eyes Using Adobe Photoshop CC
Based on my experience, painting traditionally can be hard at times especially when you get frustrated because you mixed the wrong color. Bad news is, your failed mixture will be a waste if you don't find any other spot on your canvas to place it.
Painting digitally is actually easier if you are practicing on using colors, blending and mixing it, and improving proportions.
So, I am going to share with you how I paint realistic eyes using Adobe Photoshop CC.
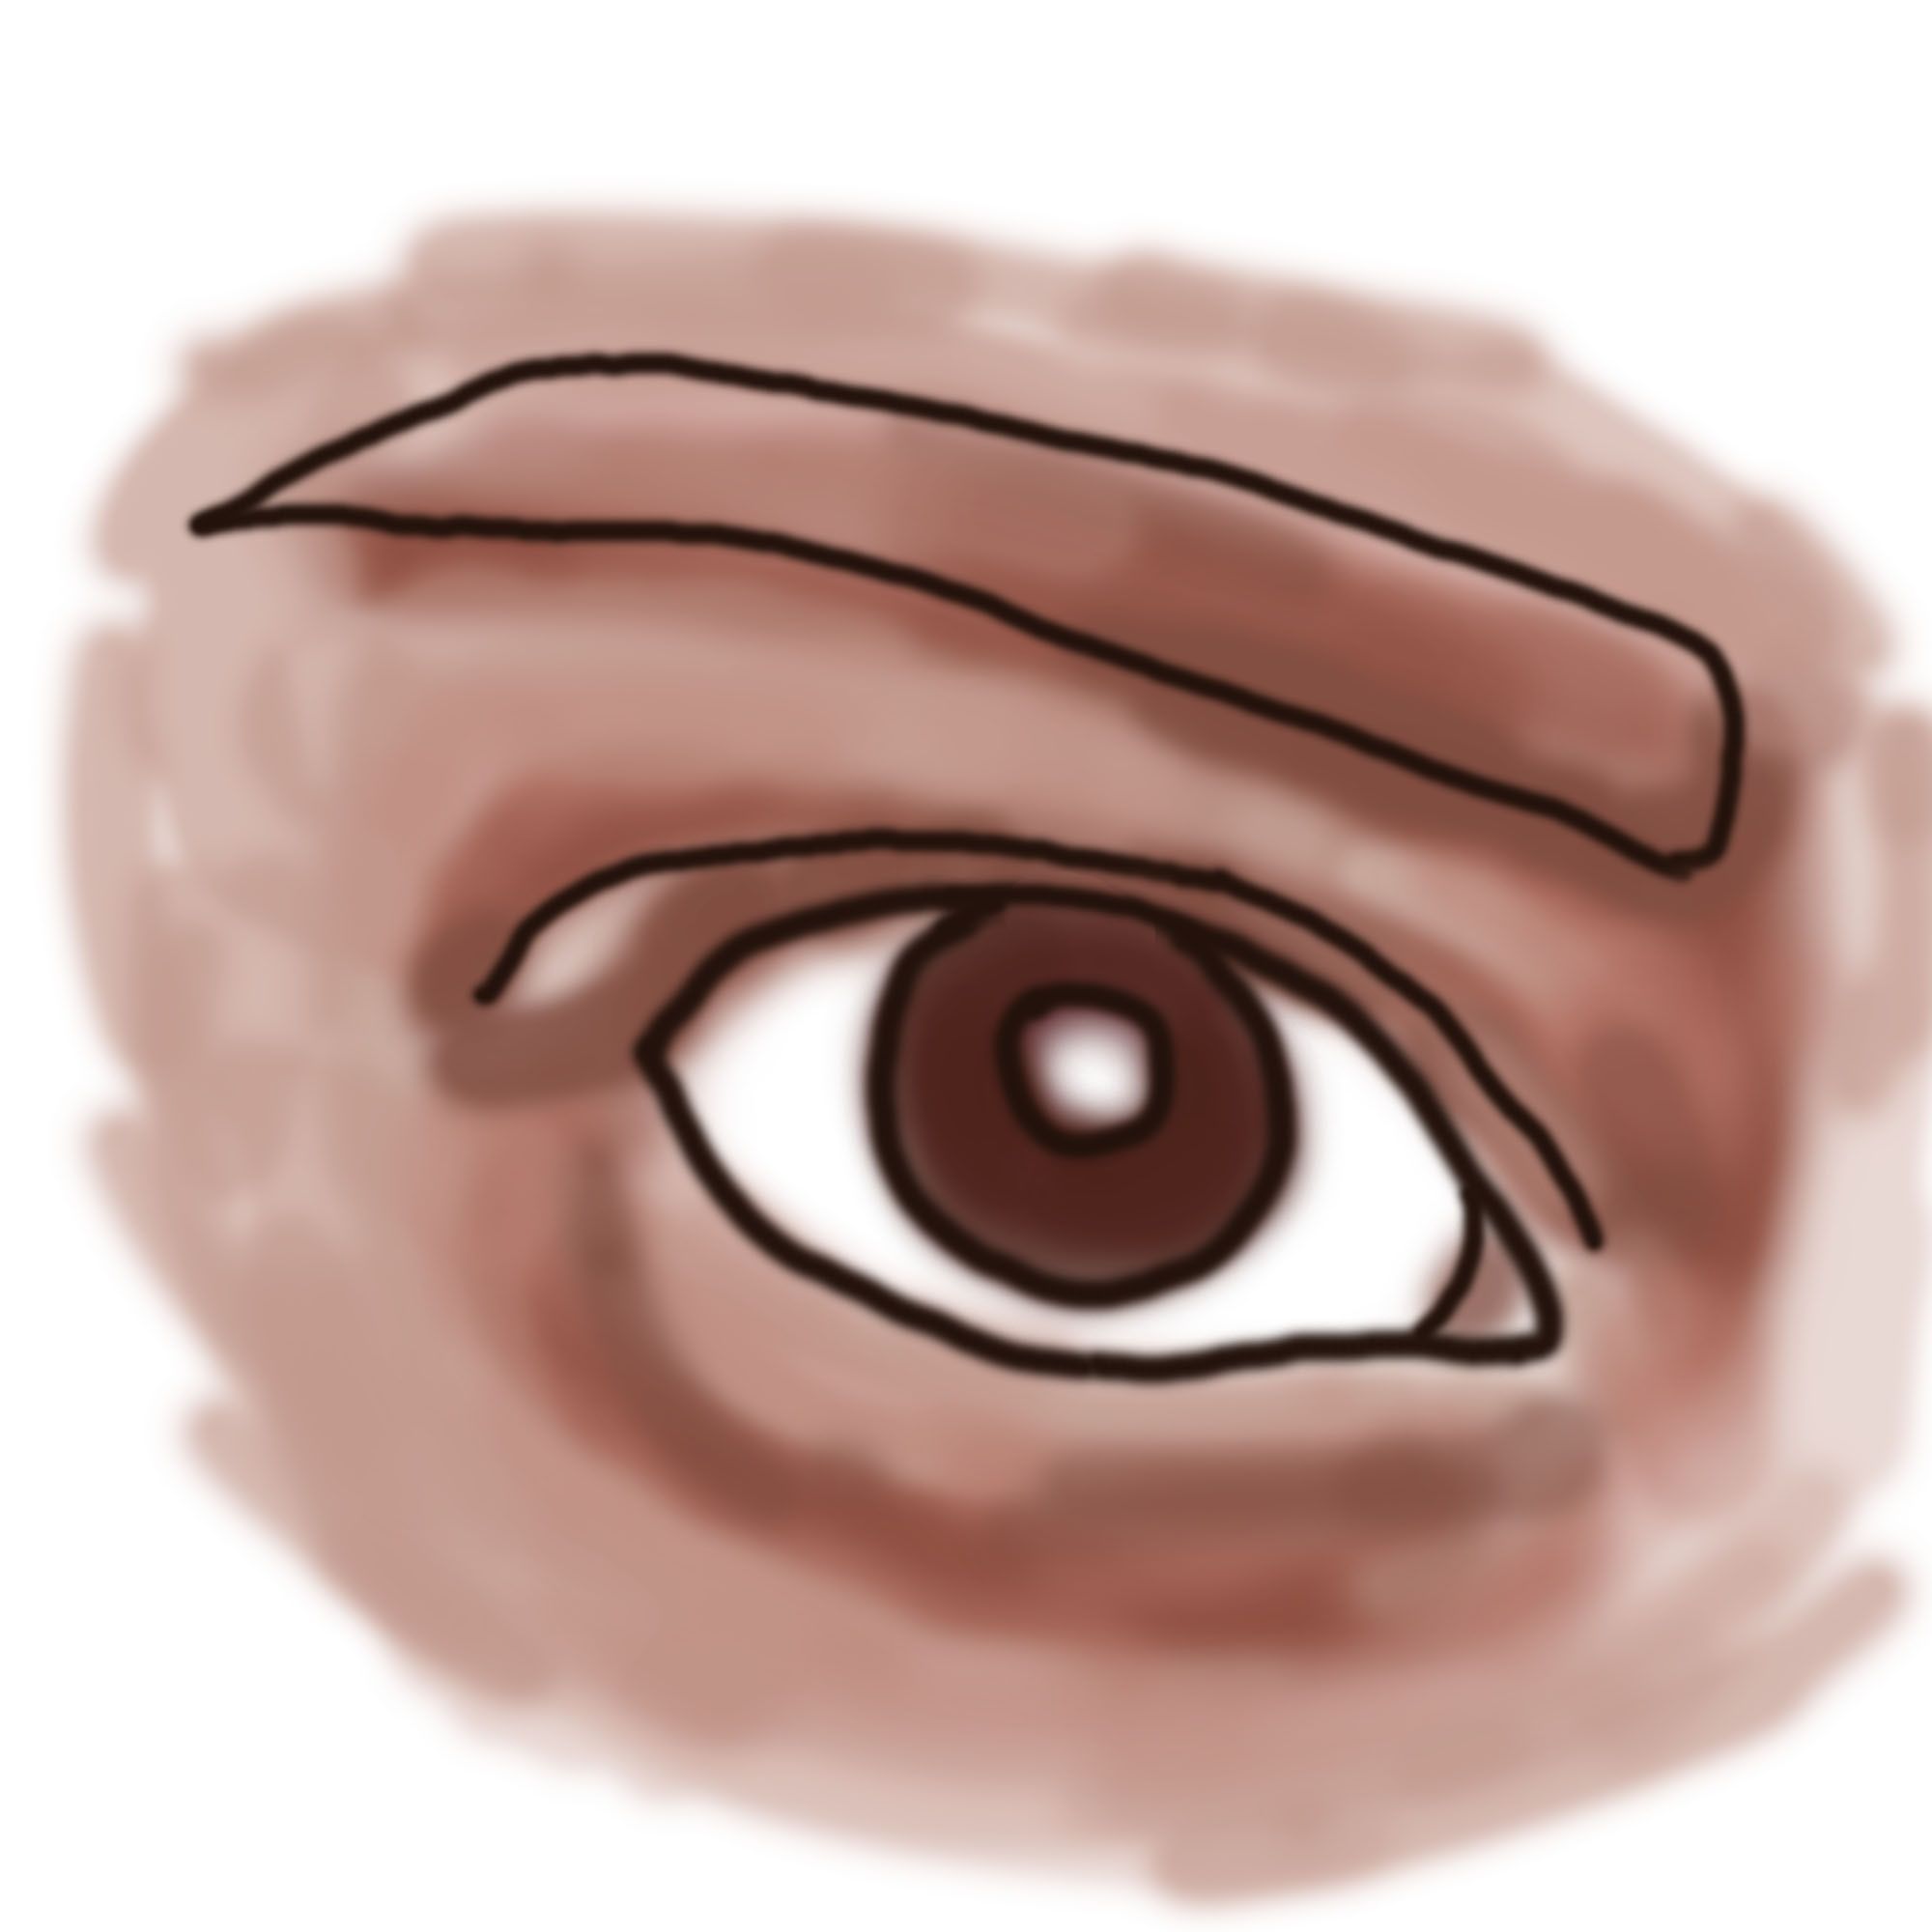
Contour Line Drawing
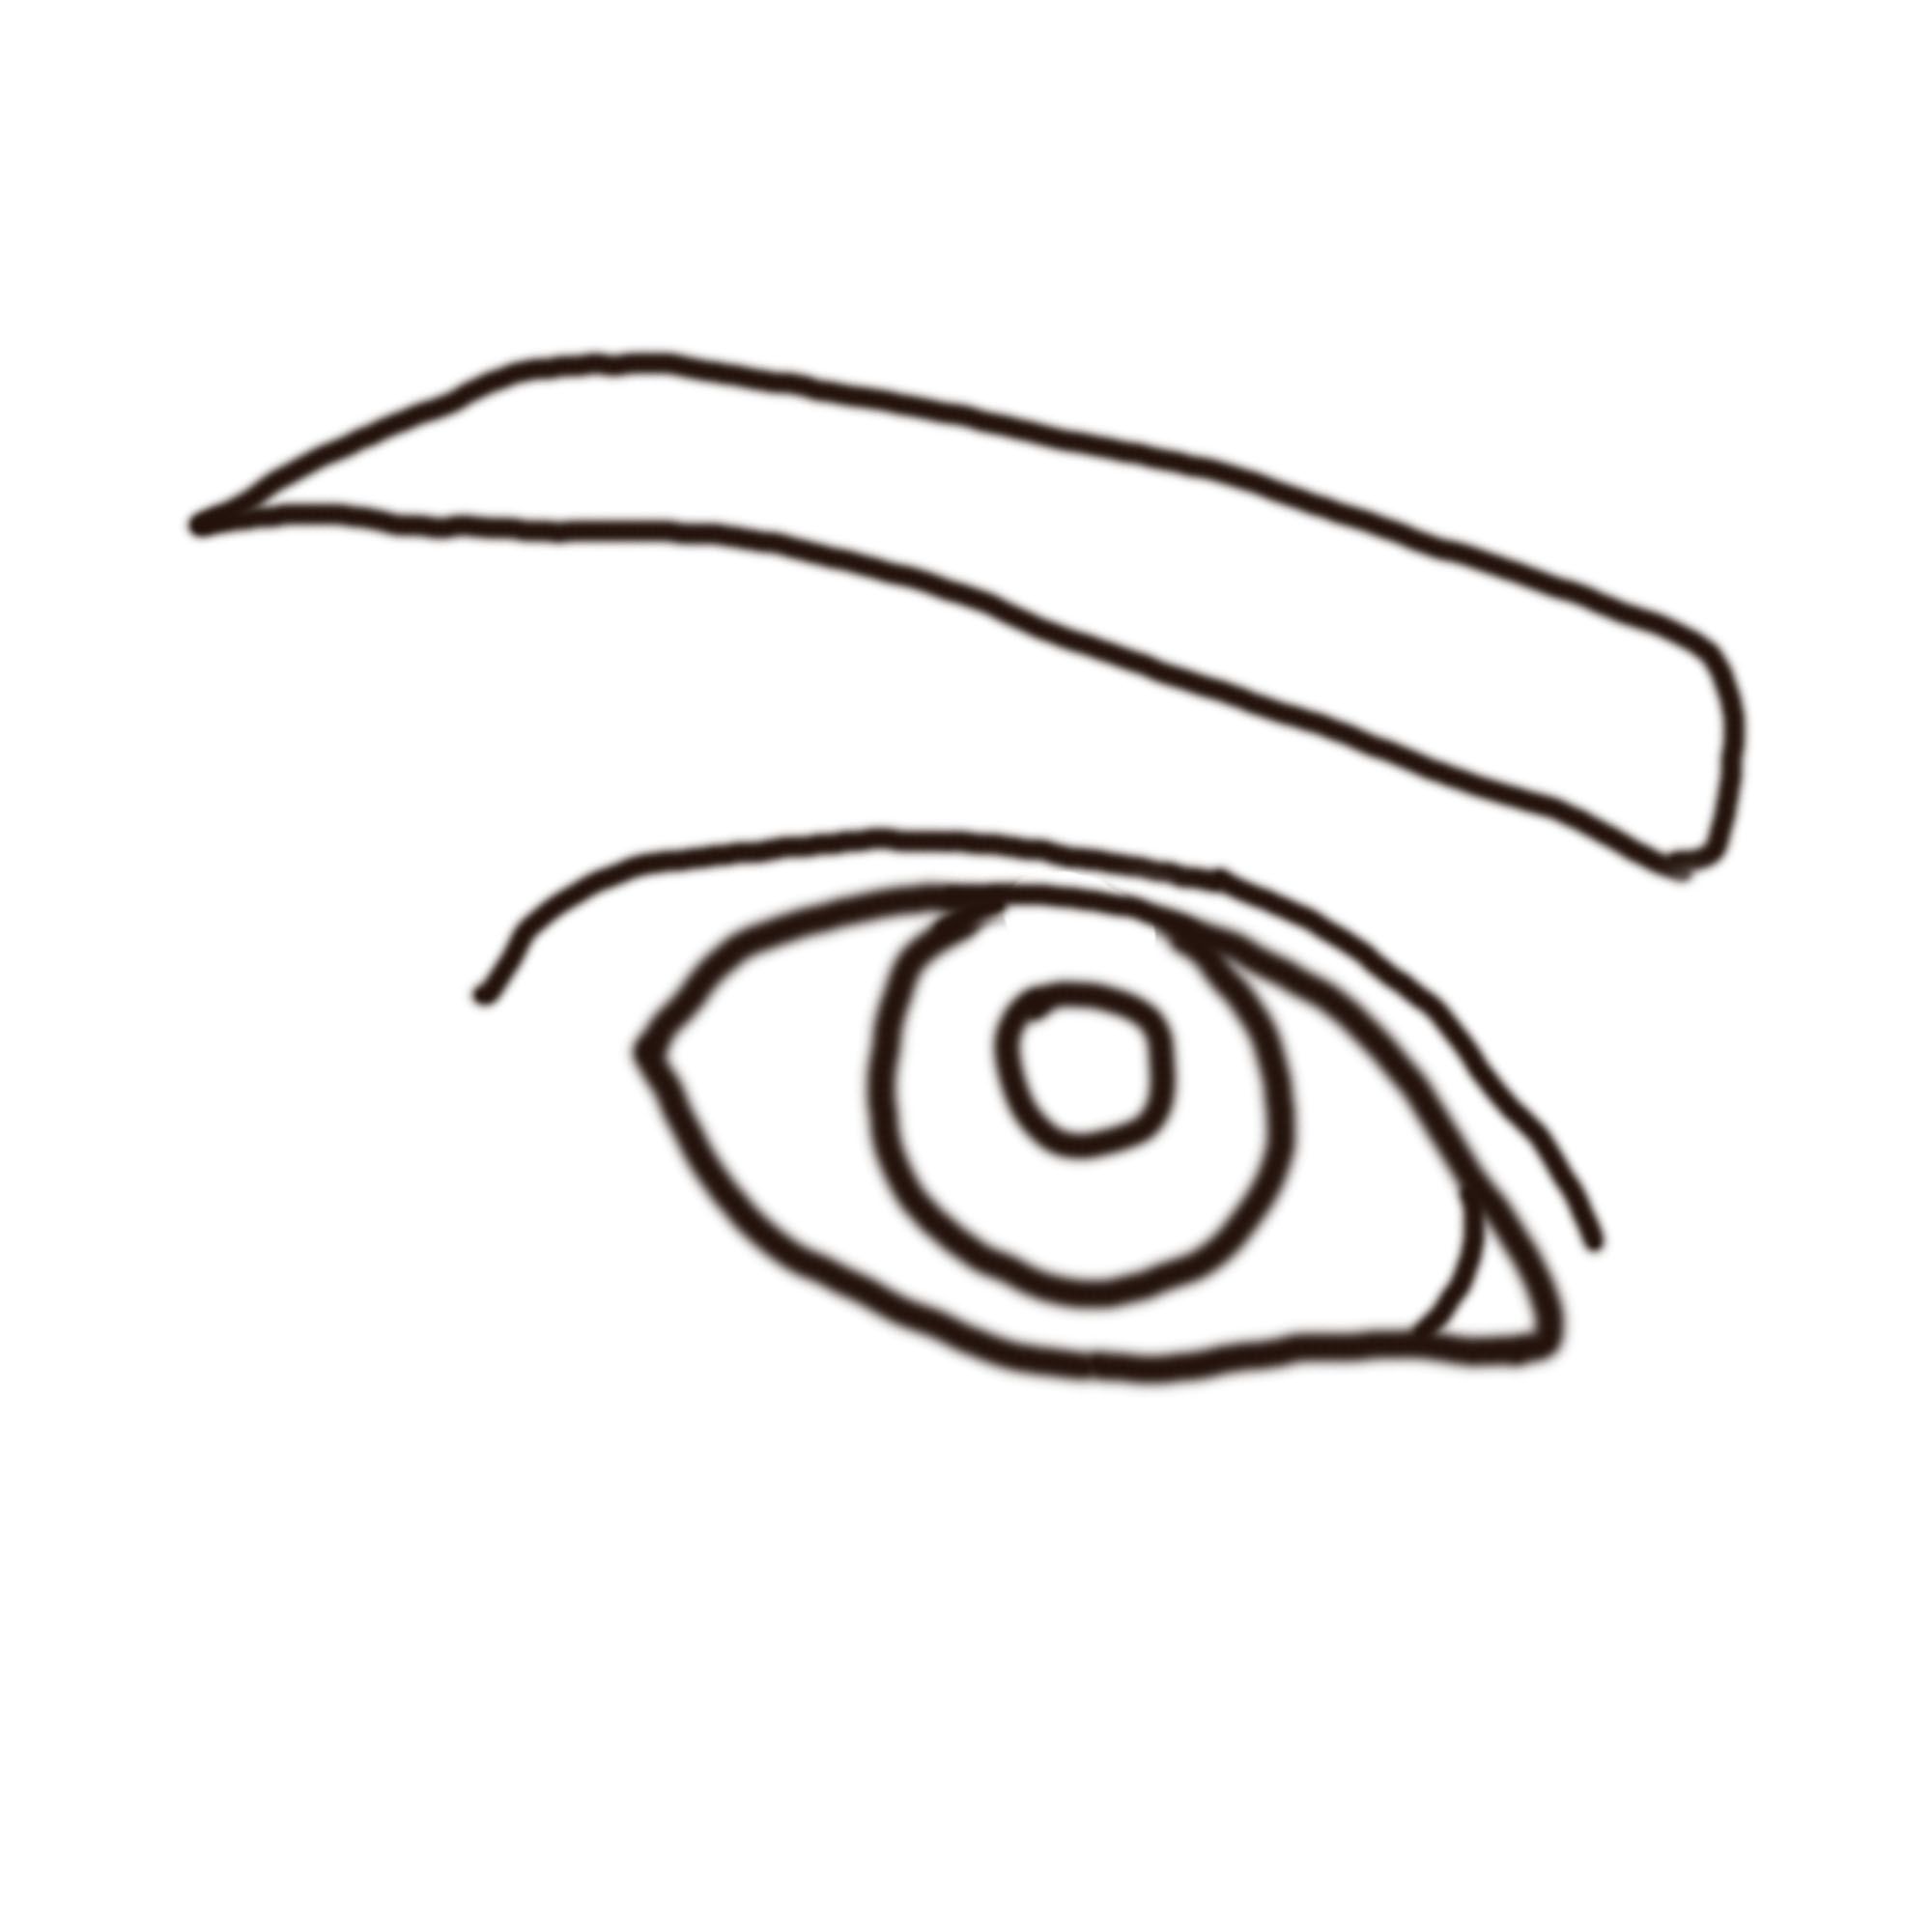
I made a contour that will serve as my guide. For the whole process, I'll be using the Soft Round Brush.
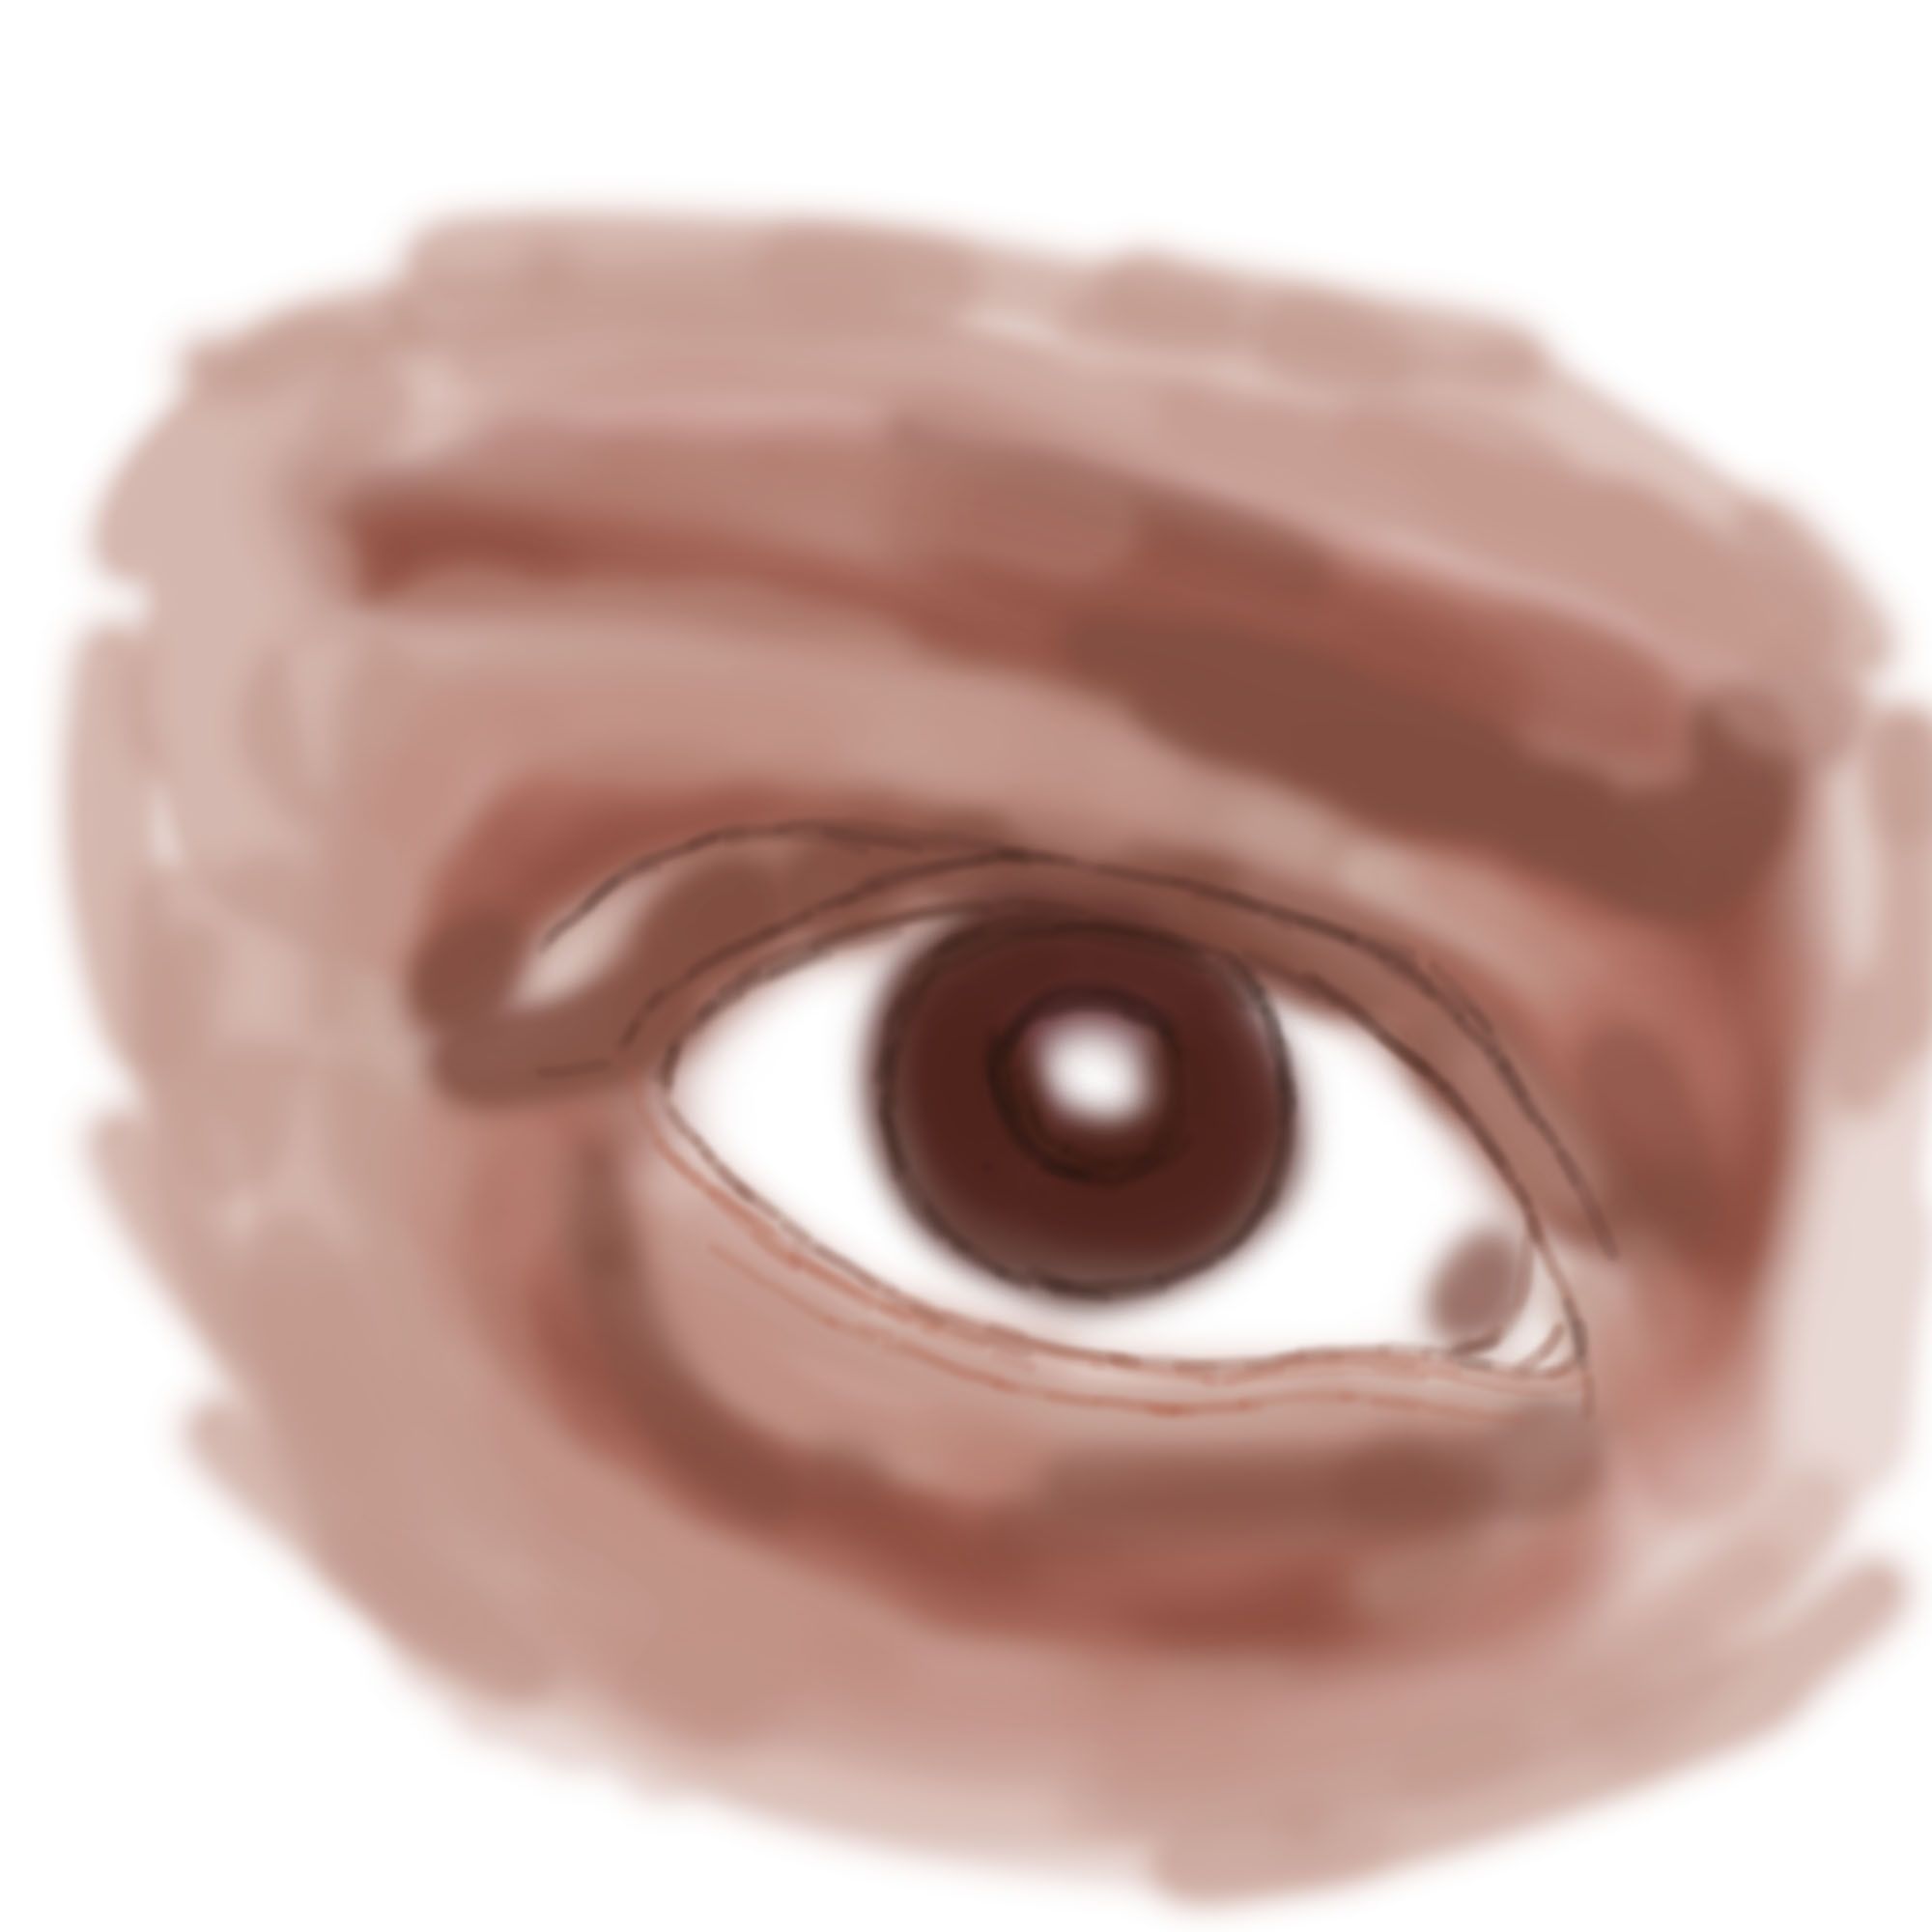
Distinguishing the Light and Dark Parts
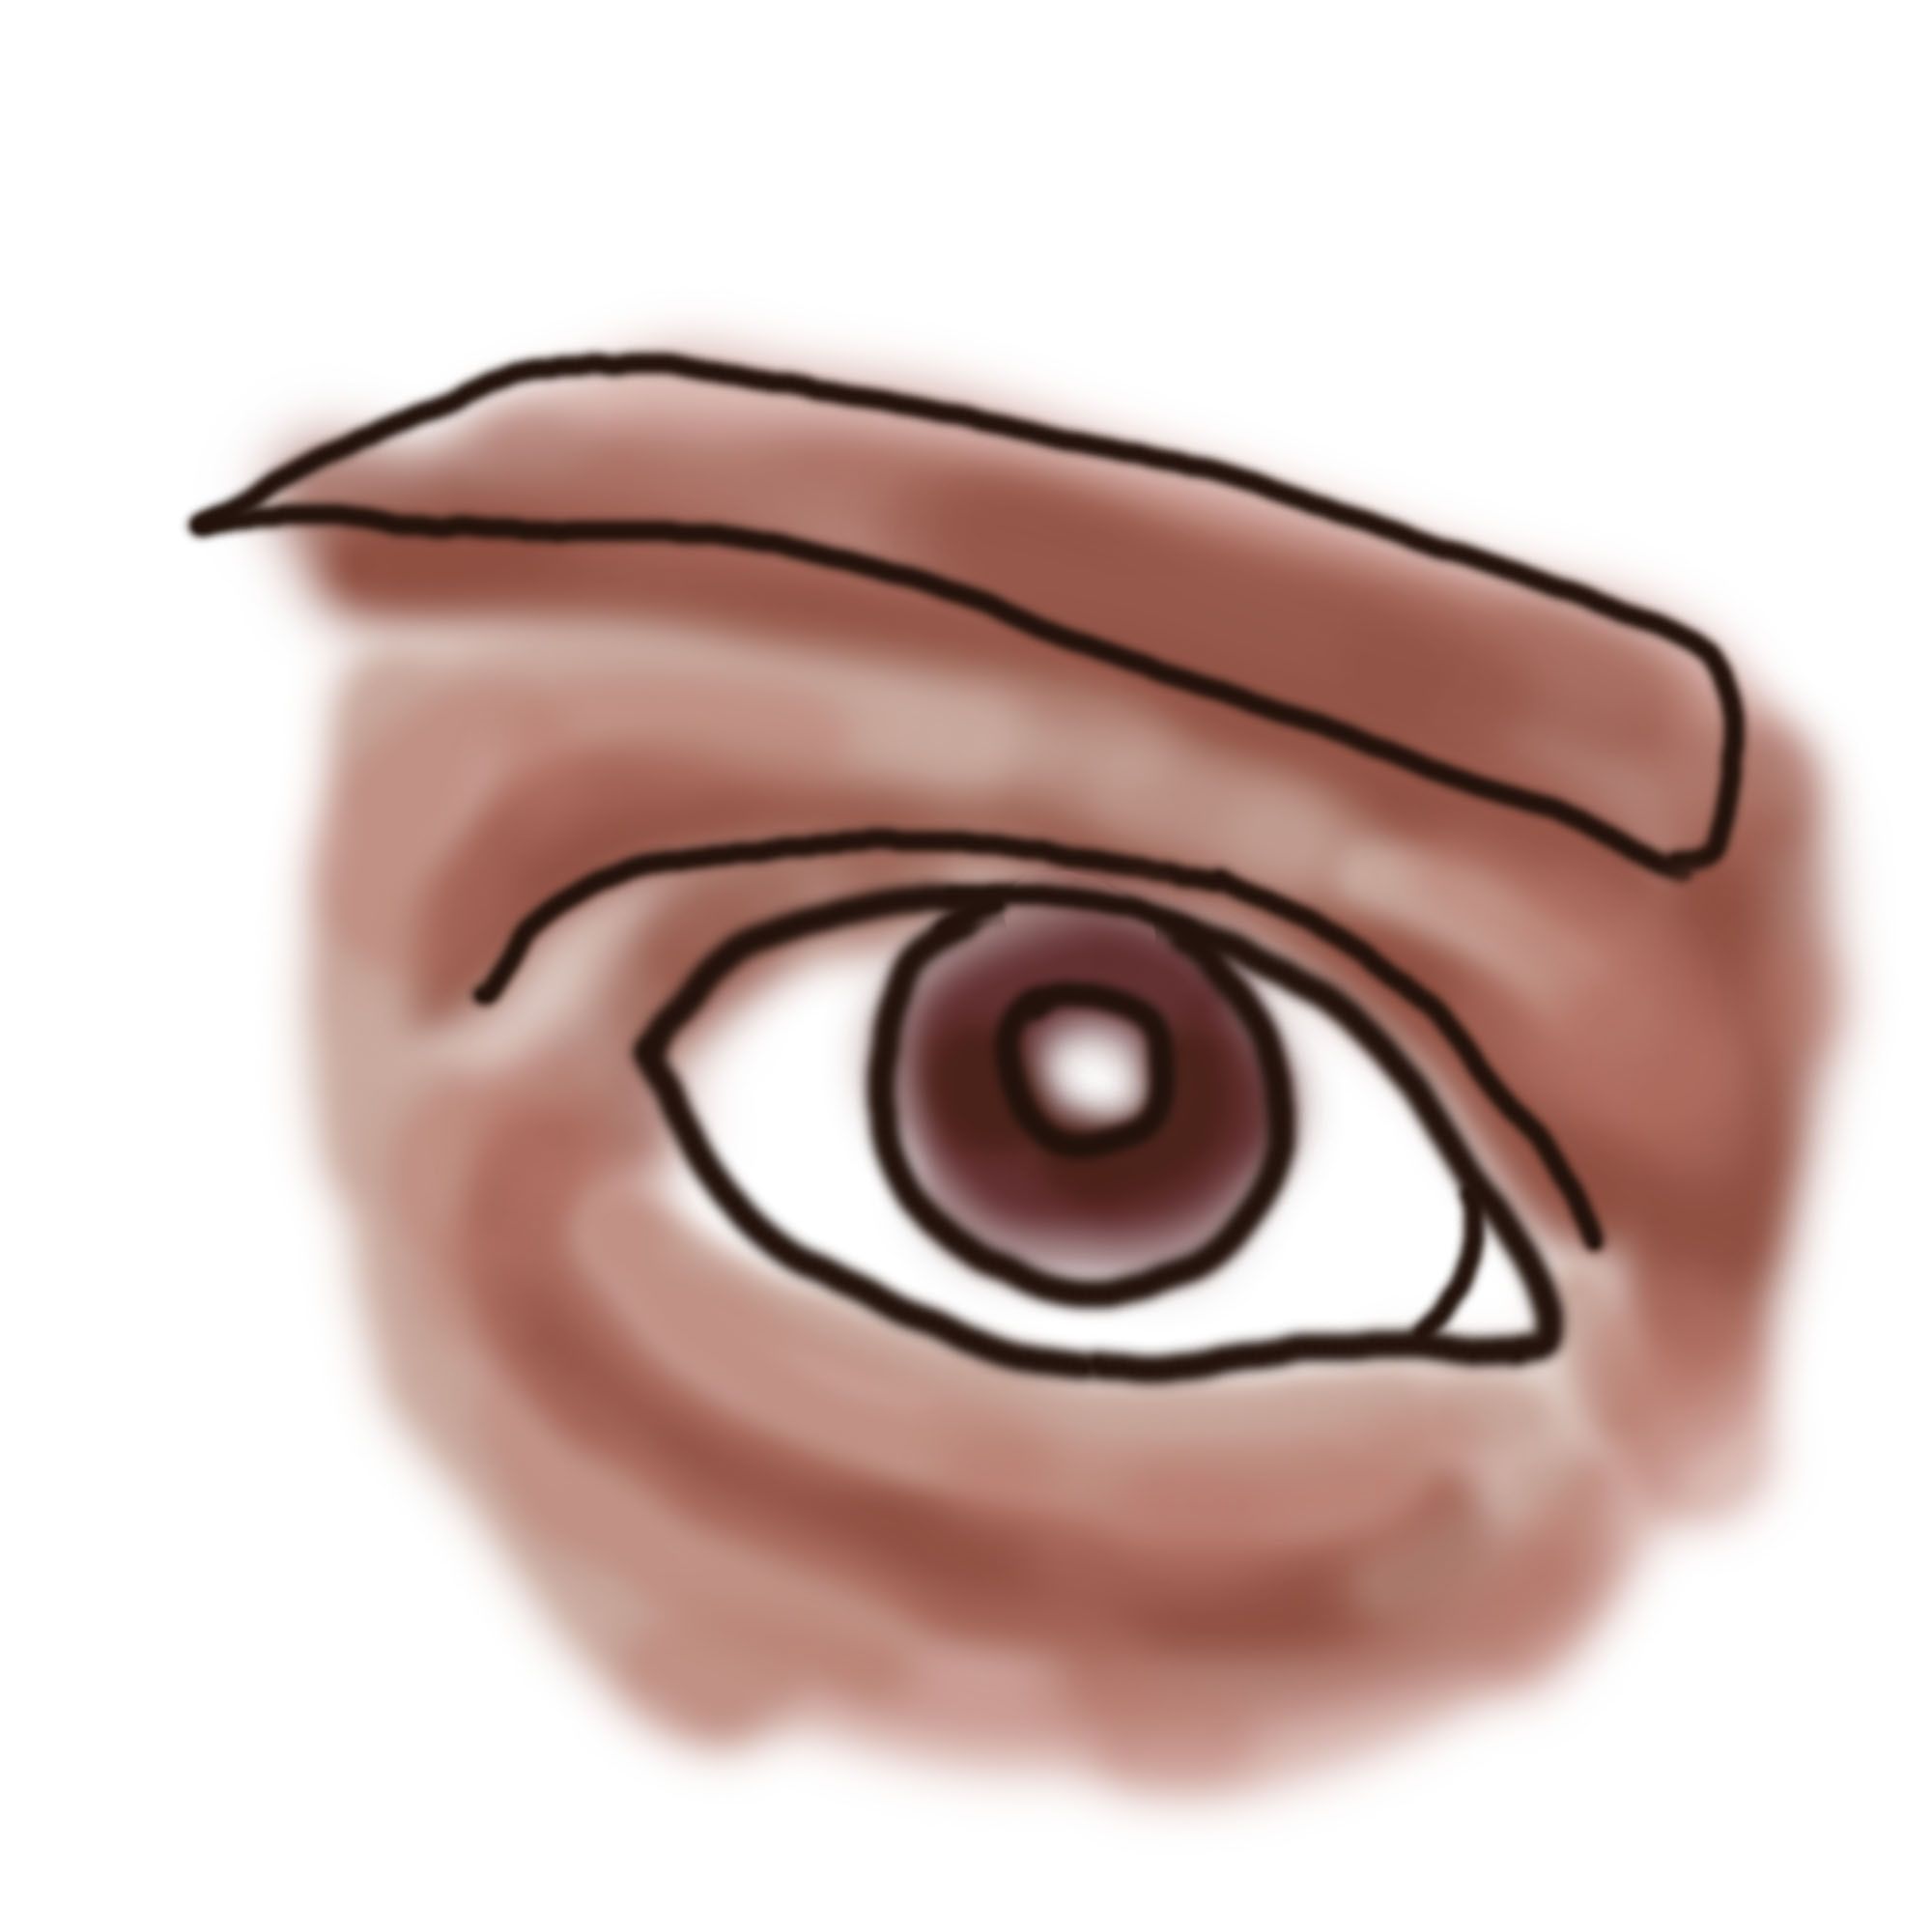
I created a layer underneath the line and this is where I painted the colors. It is important so that I would not overlap and lose track of my contour drawing. For a smooth blend of colors, Opacity and Flow are actually my best friends. I prefer not to use the smudge tool so I could practice blending the colors. It's like glazing in traditional painting.

Adding More Colors
I added more colors around it while still being mindful of the light and dark parts.
Hiding the Contour Line Layer
Since I am aiming for a realistic approach, keeping the contour line that I had earlier would make no sense because it's thick and sharp. Though I can blend it with other colors, I just prefer this method since this is easier. Then I drew thin and less opaque lines for the details of the eyes.
Adding More Colors
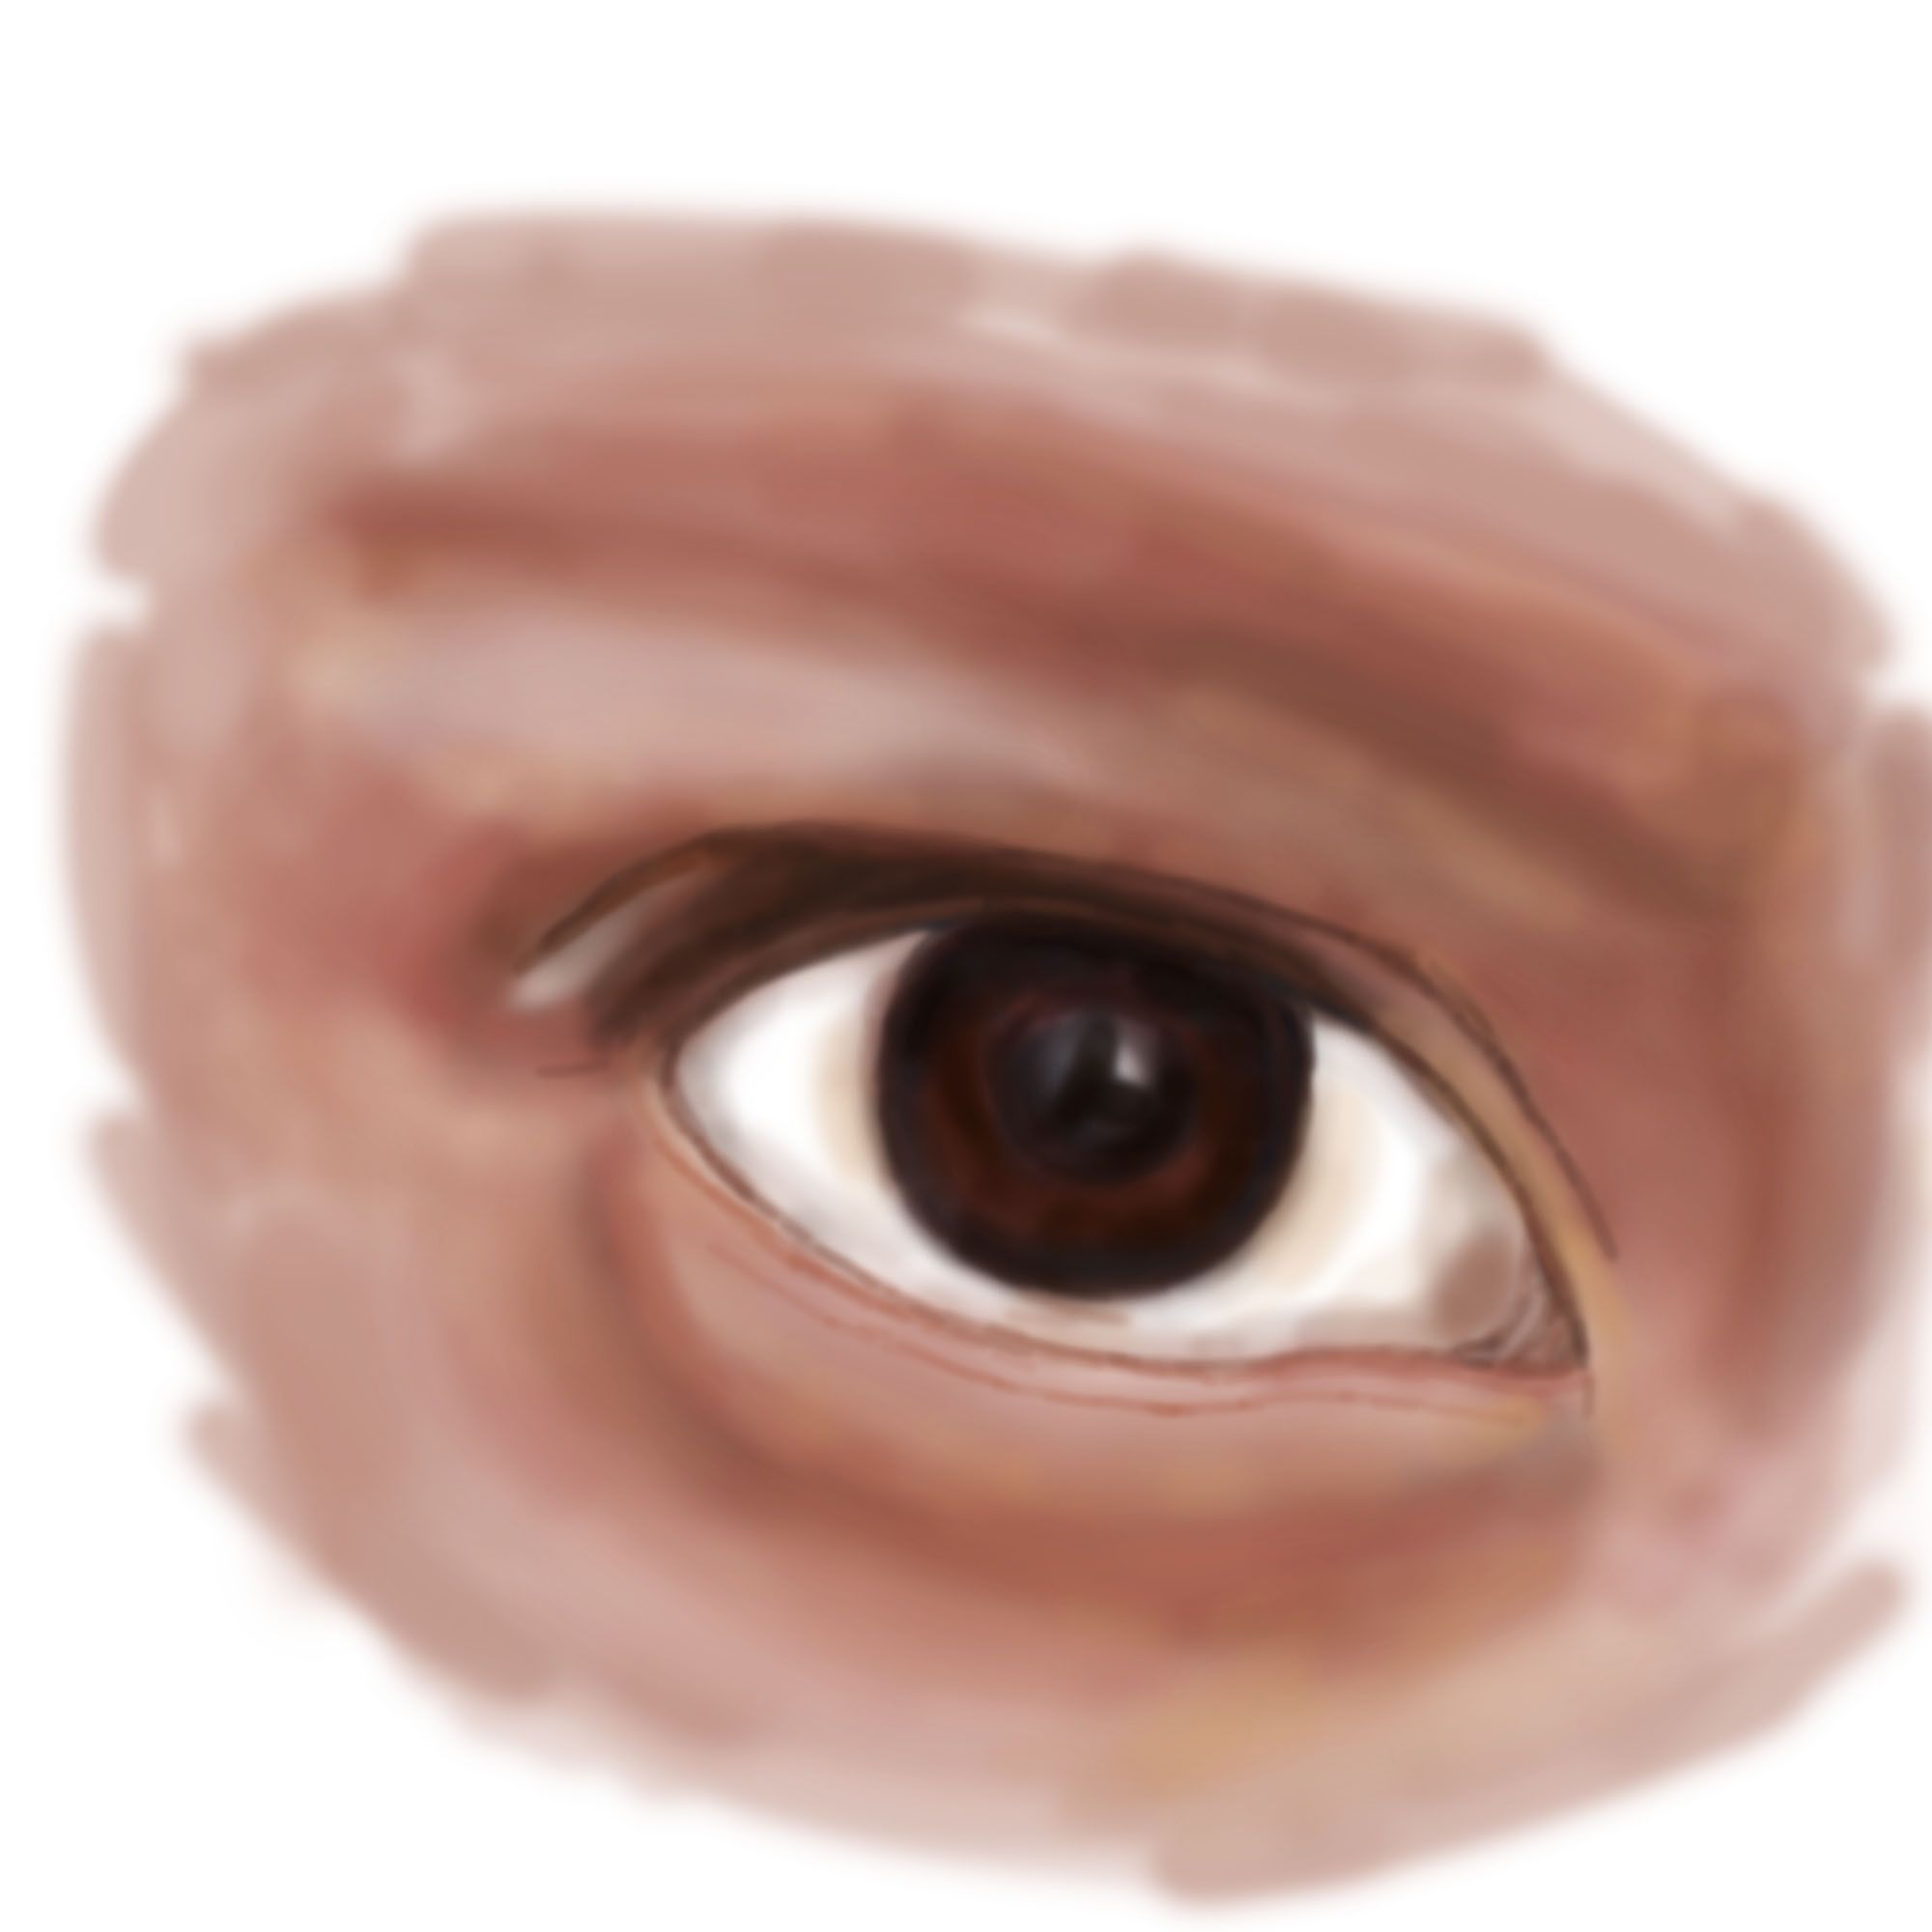
This time, I added more colors and created a softer blend with the help of Opacity and Flow feature.
Adding Details
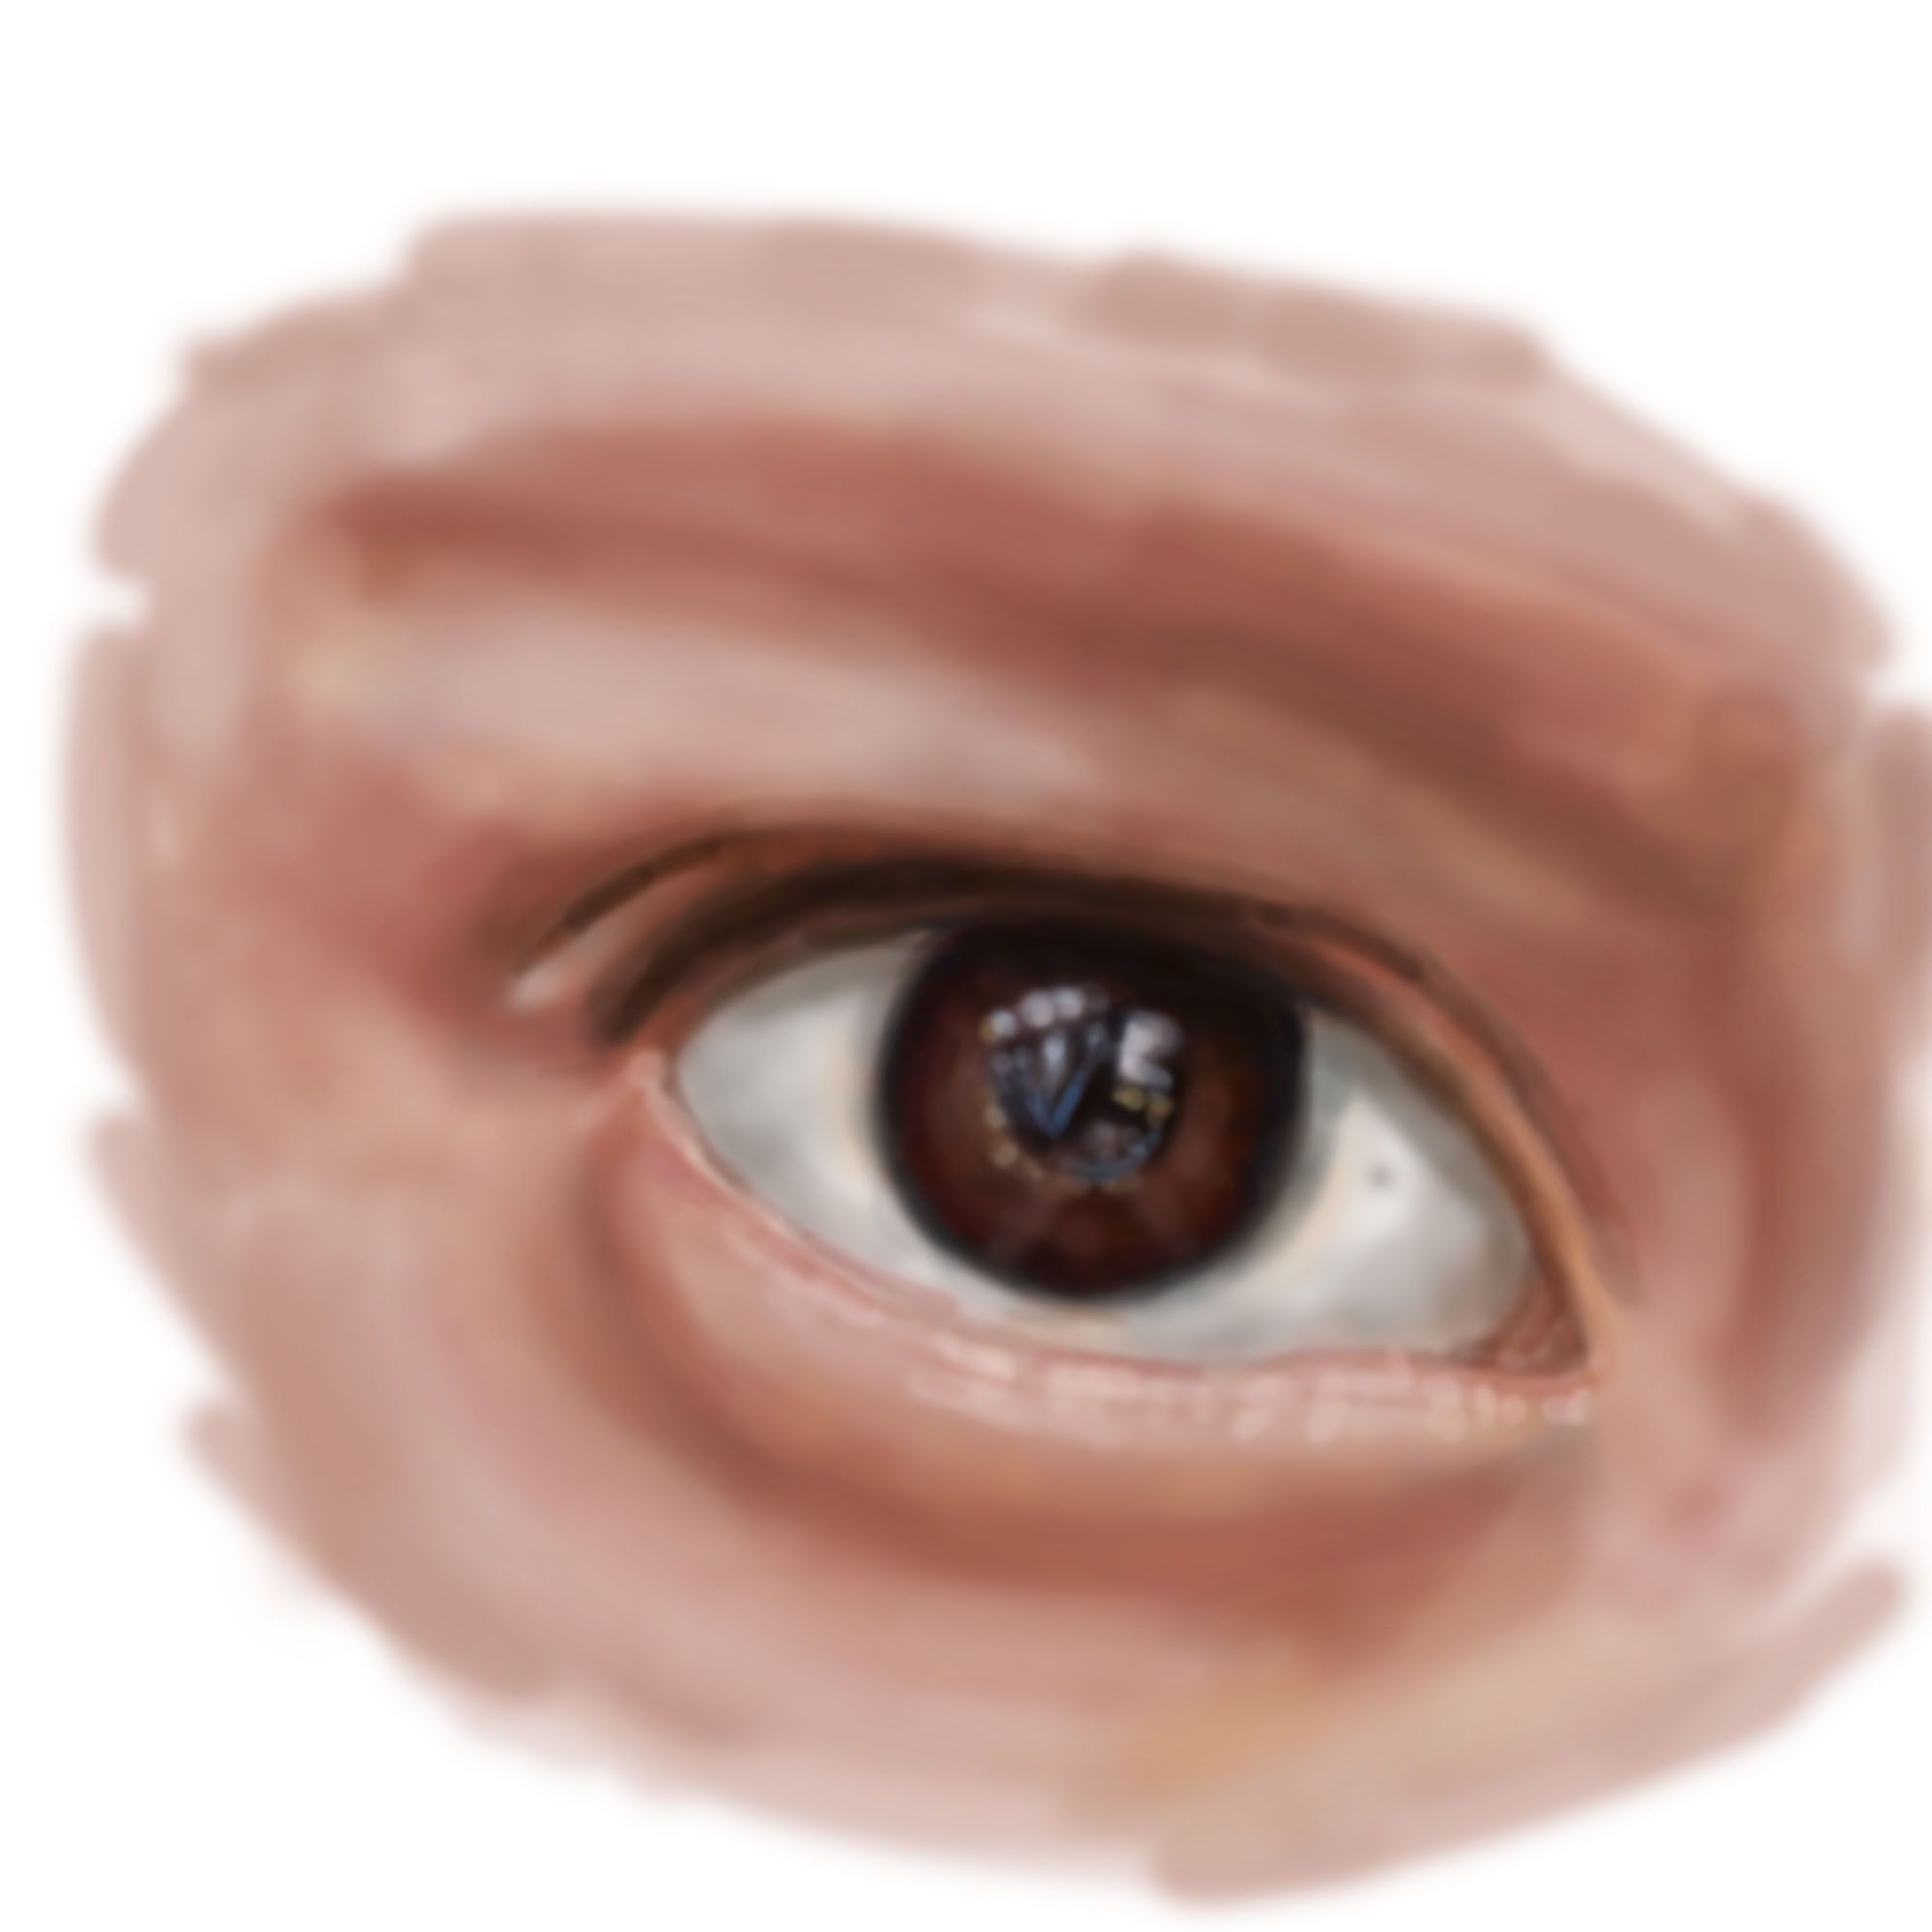
I started adding the necessary details. This is also the part where I add more colors to enhance the highlight and shadows.
Adding More Details
I added the eyelashes and the eyebrows.
Filling the Eyebrows

Just like how we do make up for our eyebrows, it's also the same here. I used a wide brush to have a natural look on the eyebrows. I also added additional hair.
Finalizing the Brows
I added more details for a more natural look on the brows.
Finalizing Everything

Adding the final touches to the highlights, shadows and color corrections are done here.
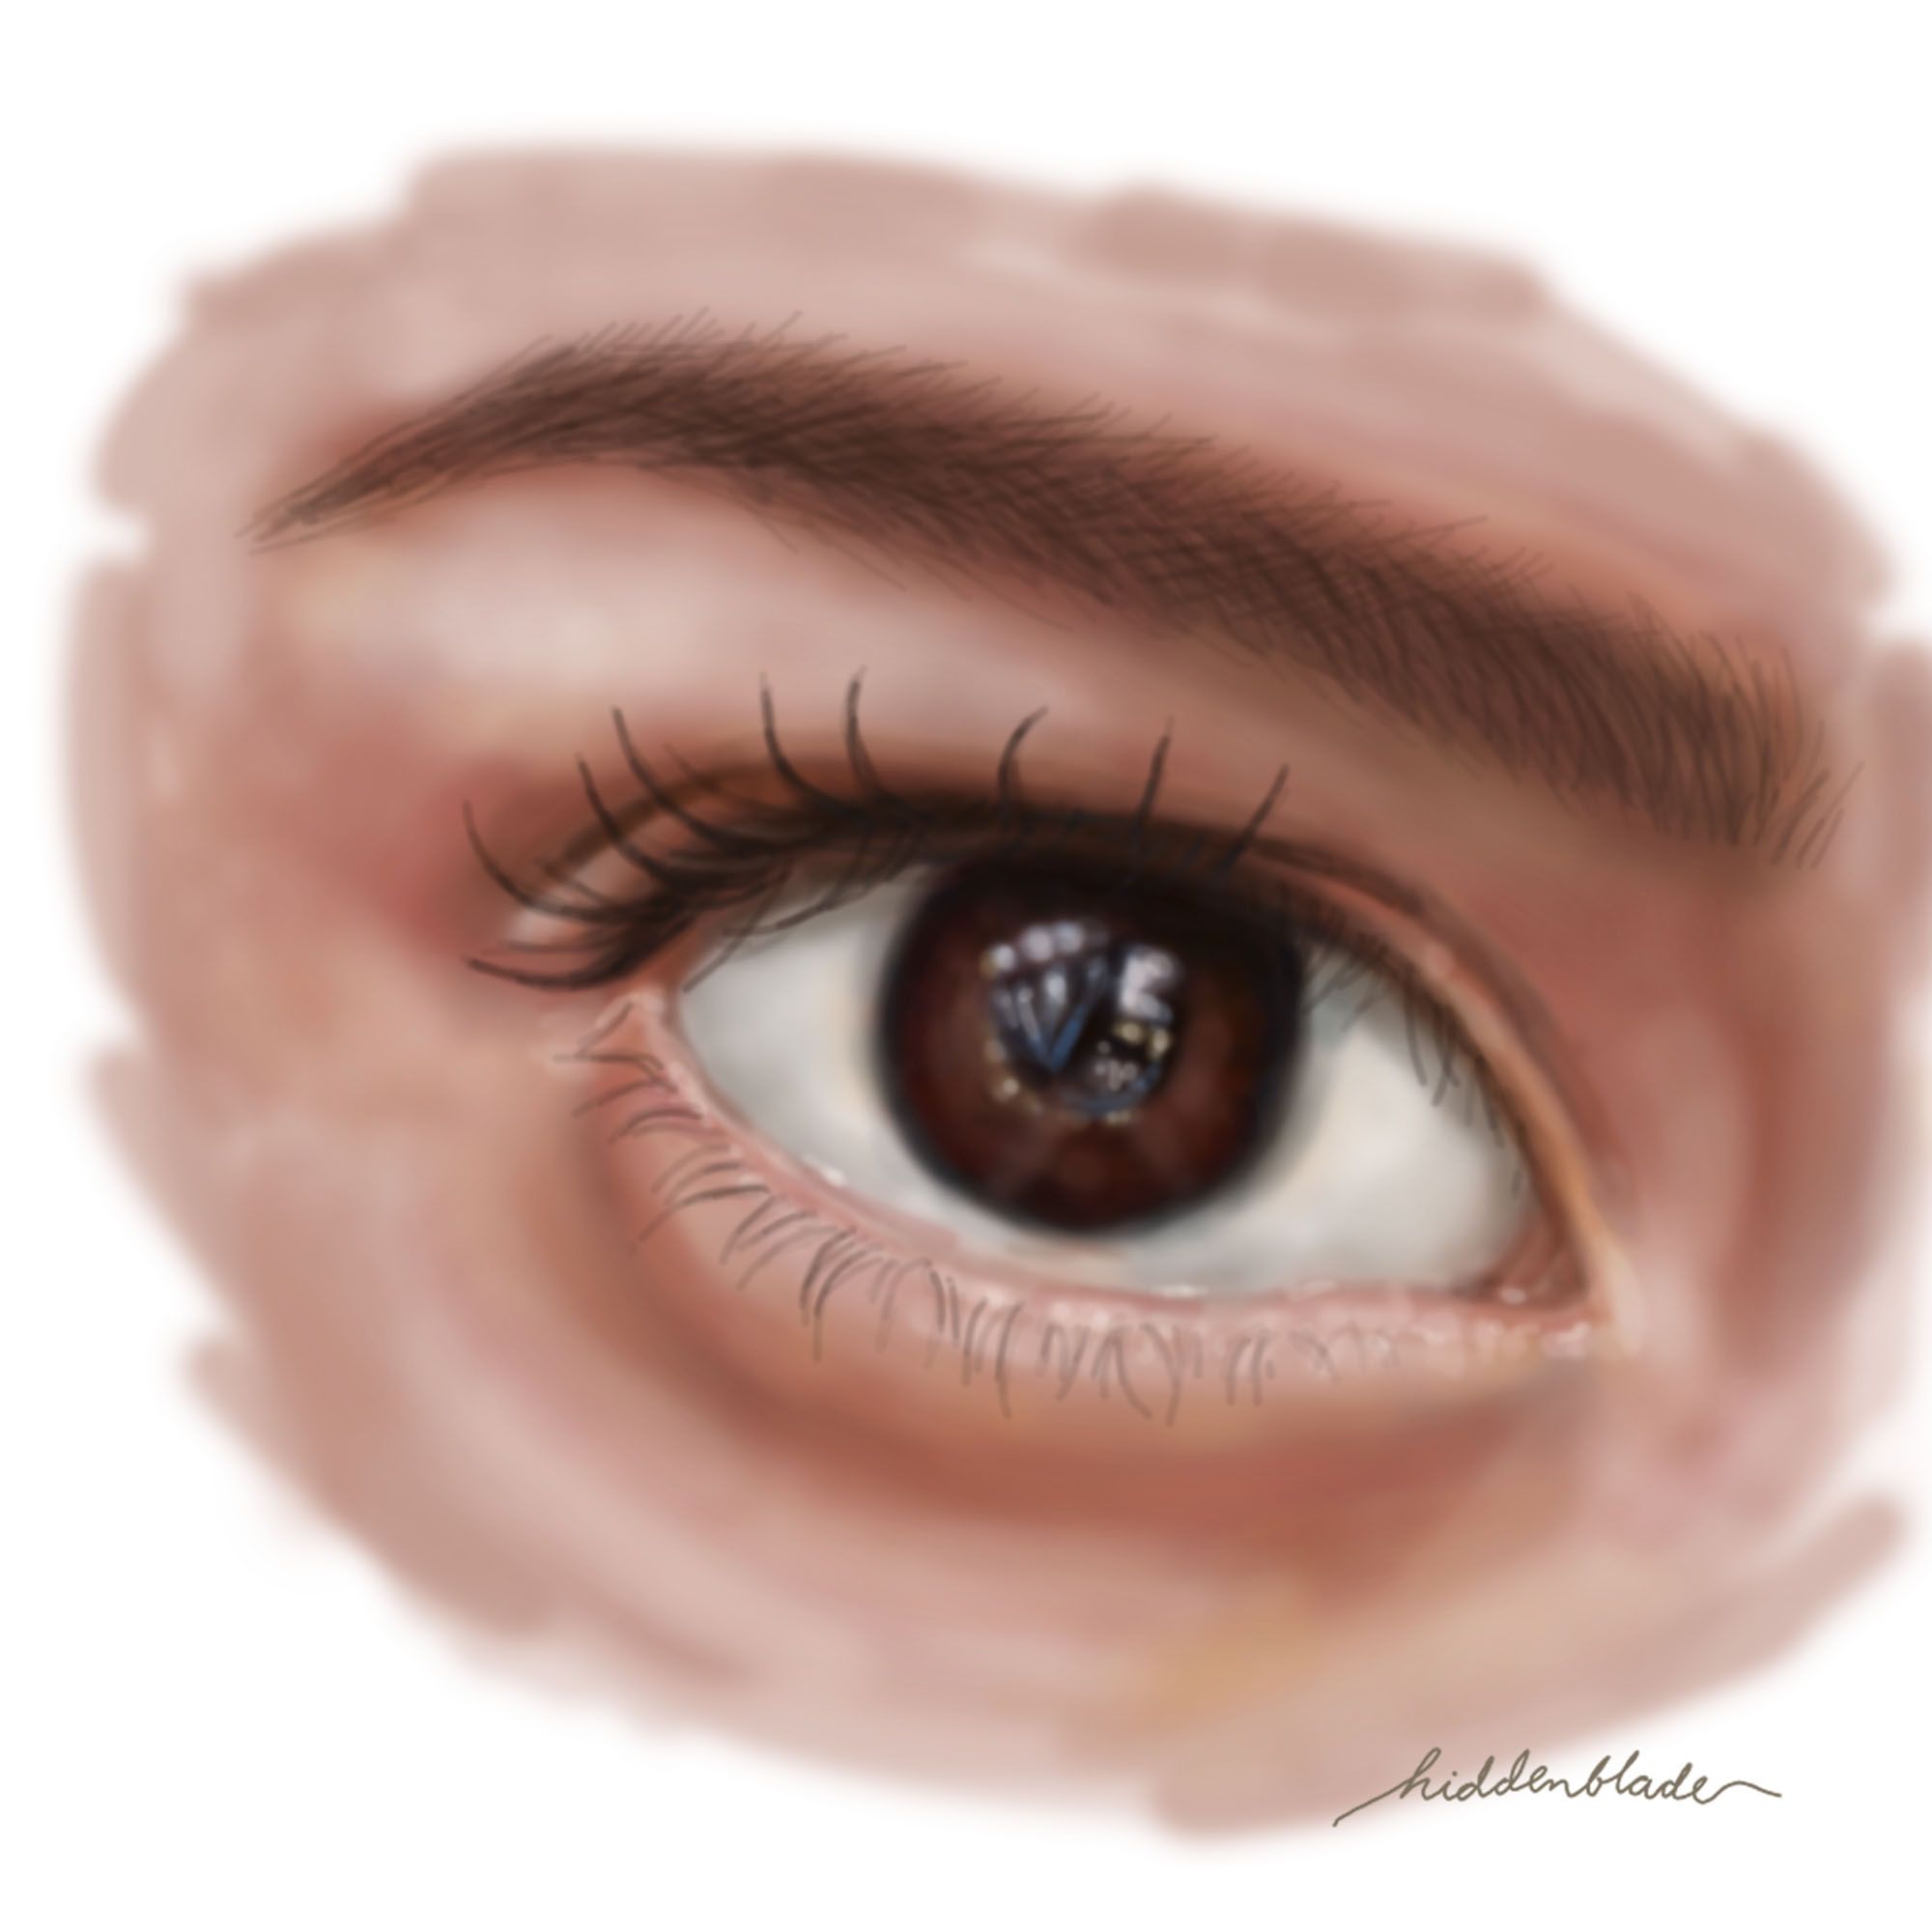
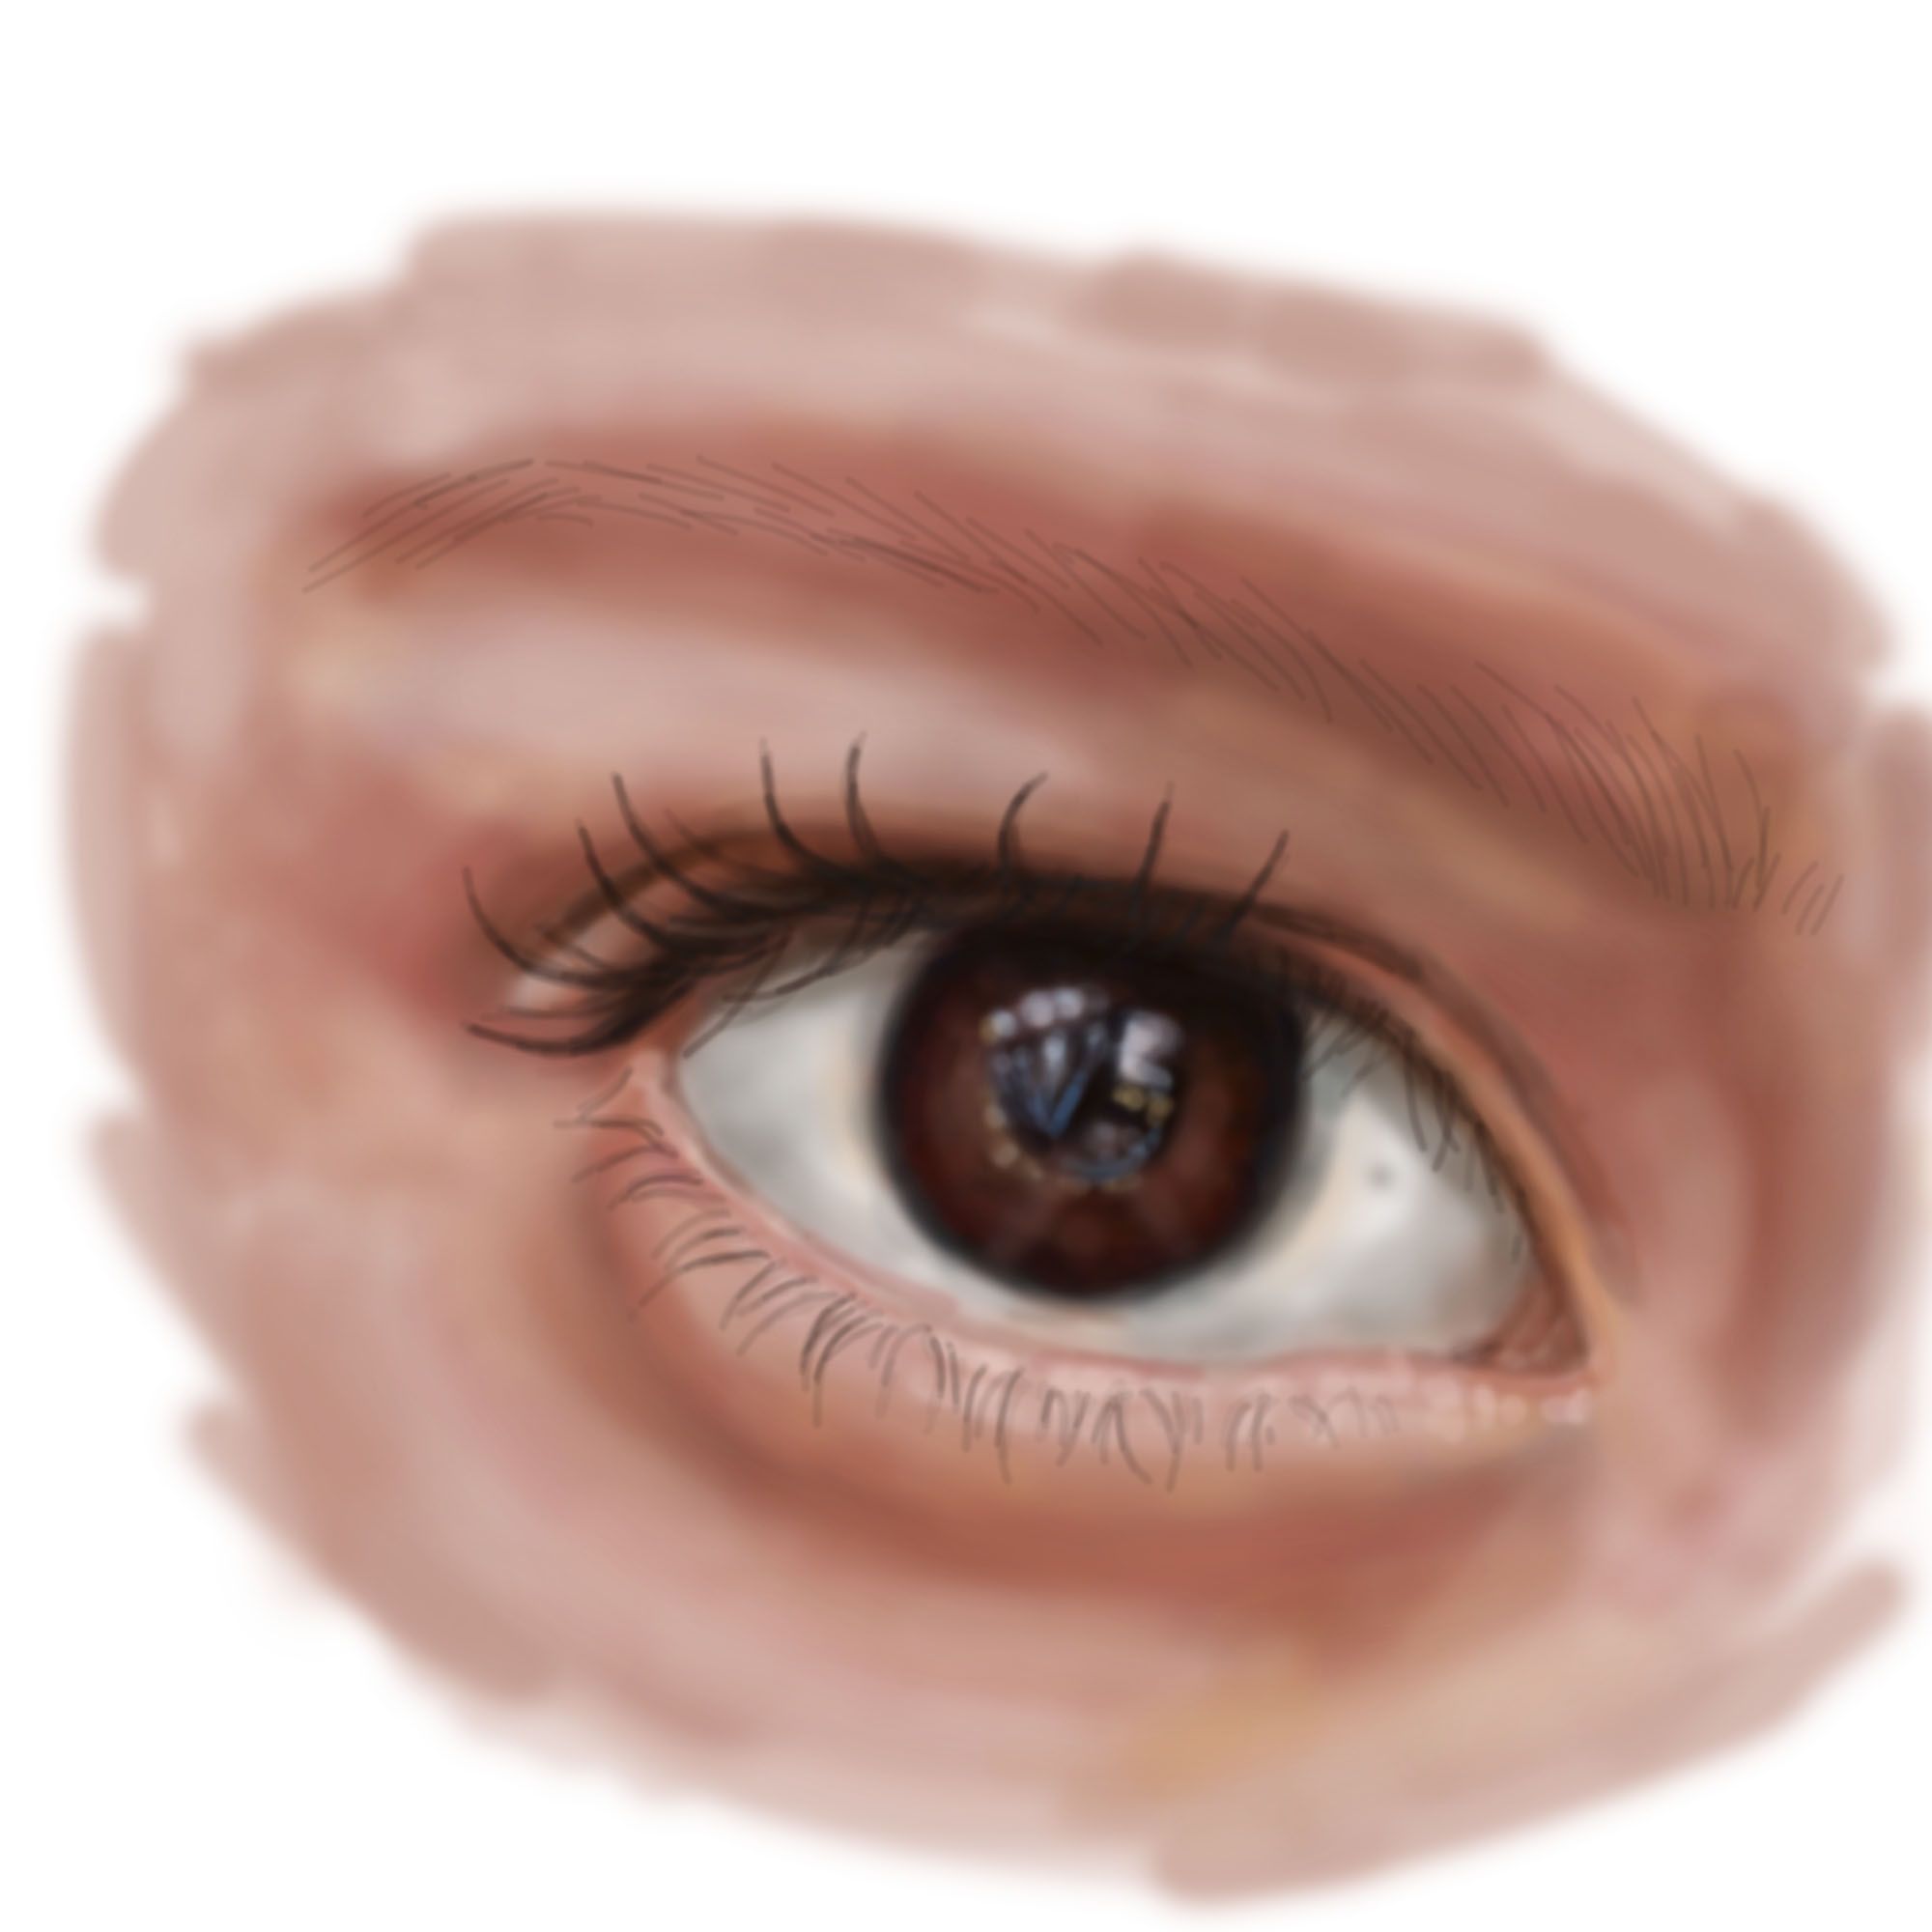
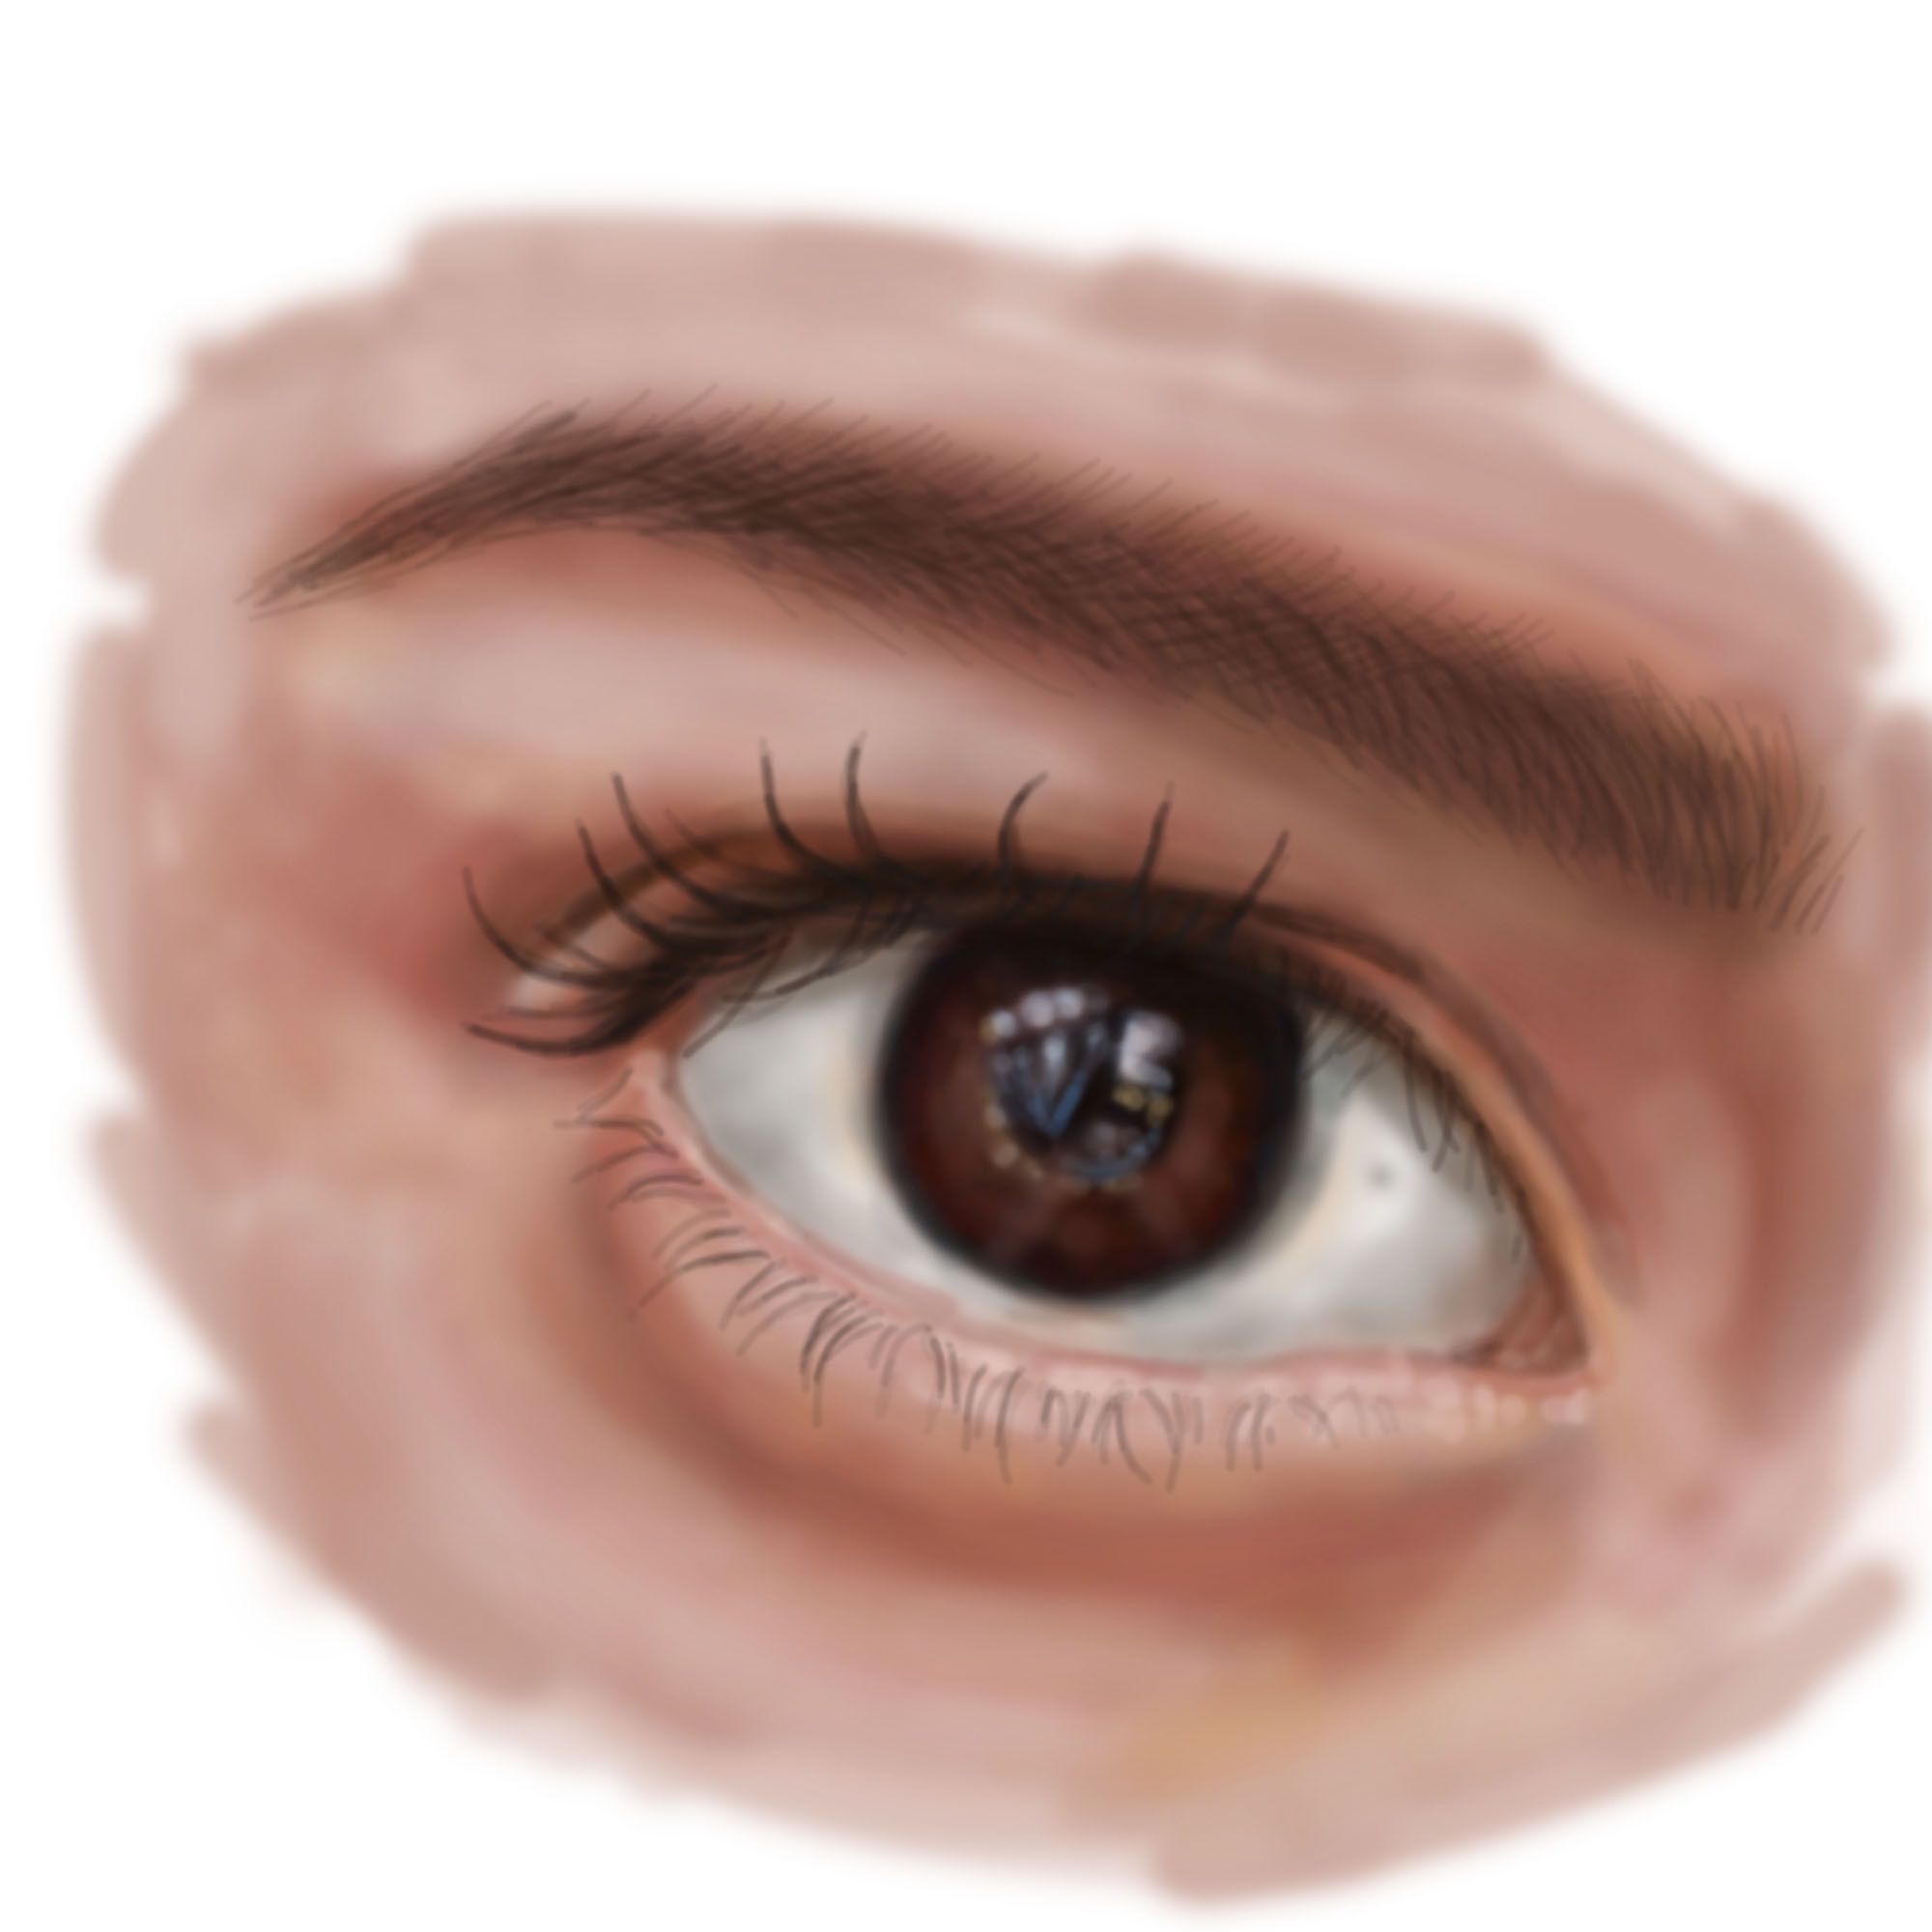
Final Look!
This is the final look. I also added the signature on the lower right part of the painting.
That's it!
See you next time!
Very nice! Thanks for sharing the steps, helpful!!
Thank you! I’ll continue to post more. I’ll try my best to give a more detailed explanation next time 😃
I always love drawing eyes. This is awesome.
Thank you! Me too, I always focus on the eyes hehe.
Your tutorial is very detailed. I love the realistic appearance.
Thank you!!
Wonderful and excellent art. Very talented you are god bless you for your work. Soon you will rock here
Thank you for your kind words. Yes, I hope so too. Hehe. God bless you too :D
Such a great step by step demonstration, and the finished eye is amazing! Great job. Welcome to SteemIt, I look forward to more of your great art. The flowers on the bags post is amazing too.
Thank you!!!
Amazing ♥️ so proud of youuuu
Thank you for your help!!
Wow! A huge wow! At my glance, I never thought that it is just a painting. Very impressive @hiddenblade
Thank you so much!!
Congrats to this curied blog. Amazing!
I was surprised! Hehe thank you!!
Woow! This is so amazing!
Thank you!
art and beauty is a gift from god, it is truly noble who shared his knowledge. Thaks on his knowledge
Yes! Hehe