photoshopHi everything! This is Hüseyin Şahin (@ninjalaskar). I really hope you like my manipulation.
- photoshopHi everyone! This is Hüseyin Şahin (@art.side). I really hope that you like my manipulation. Today I’m going to show you how to create such a visual by mixing two different images. Swipe through to see my #Ps_Swipe tutorial!
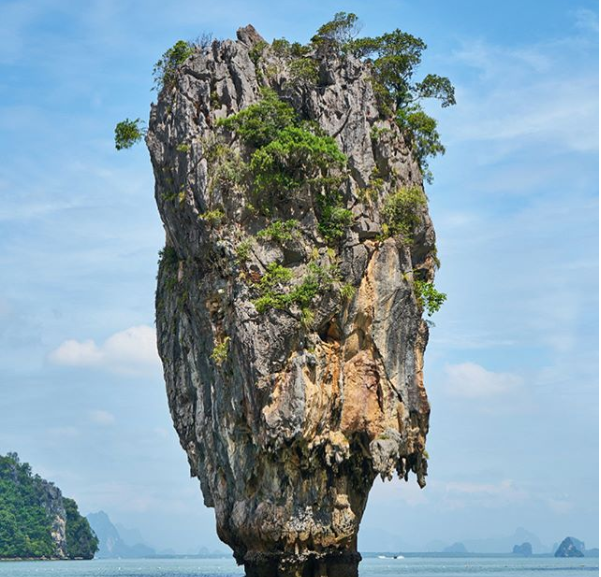
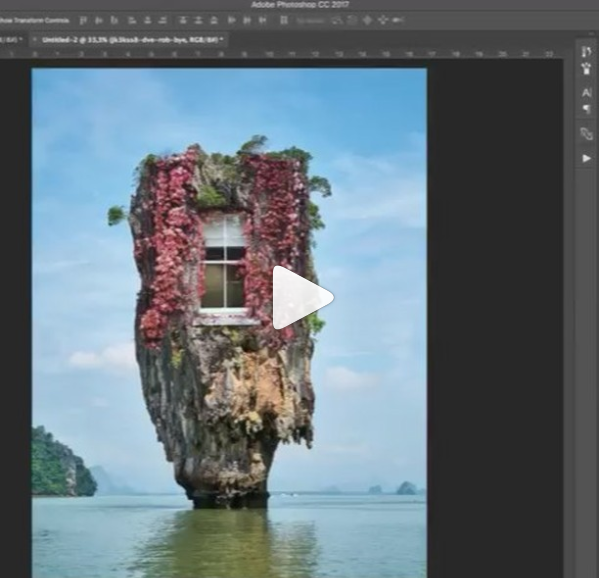
- You will notice the busy patterns in the island picture, which is covered by rocks and vines. This is where we’re going to choose the right match (second picture) to create the perfect visual. Find the photo you want to include and add it in your file.
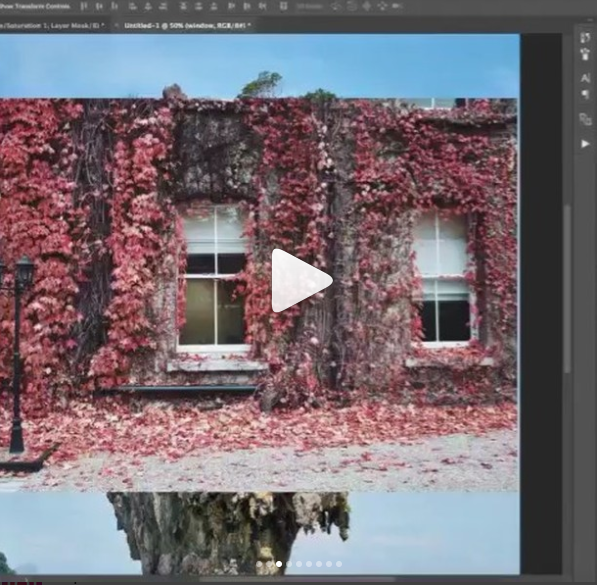
Now we’ve got a second layer, which is the window surrounded by leaves. Use the Layer Mask and choose black from the color palette to wipe the bits off that you no longer need. I can tell that it already looks better. Let’s keep going!
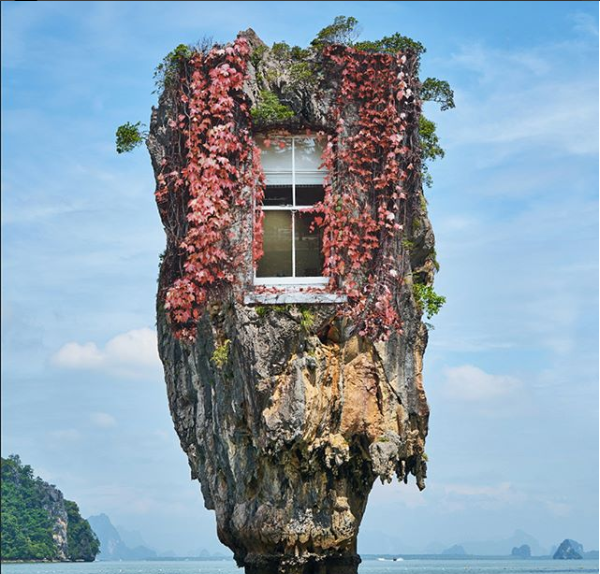
Next, go to the menu and click Image / Adjustments / Hue-Saturation (Ctrl+U or Cmd+U). This is the easiest part. Adjust the contrast of the leaves by using the Hue Tool and drag the slider to the right to make those leaves look prettier.
Go to the menu on the left, click Image / Adjustments / Levels (Ctrl+L or Cmd+L). This is where the three types of contrast panels come up on the screen showing light tones, midtones and dark tones. Use the midtone and drag the slider to the right until you’re satisfied with the colors.
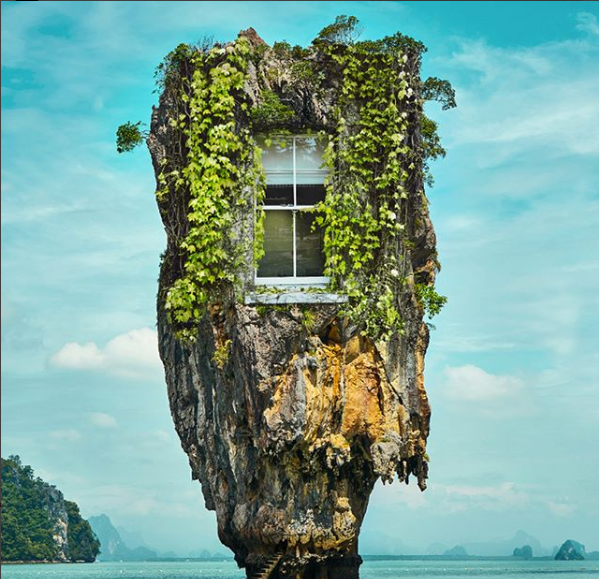
To combine all the layers, go to the Layer Panel on the upper left side and click Flatten Image on the bottom of the panel. Next, choose Filter and add the Camera Row Filter. This looks great after being modified by hue, saturation and contrast.
I’m guessing not many of you use the “Color Lookup” that’s in the menu. Here is a little tip…you can get some really great shades simply by using a few fixed color palettes and toggling the visibility.
Be patient, we’re nearly there! We need some steps to get into the new house. Small details are what makes the image epic. After you add the steps, click and drag the Dodge Tool over your image to lighten some of the areas. You can use the Burn Tool to darken areas too.
The image is now ready. I hope you enjoyed learning how to change a rock formation into a house!