SHEKEL REMOTE MASTERNODE SETUP ON Ubuntu 14.04, 64 bit for NOOBS
COLD WALLET SETUP USING QT GUI WALLET ON WINDOWS (PART 1)
This is the wallet where the MasterNode collateral of 25000 JEW coins will have to be transferred and stored. After the setup is complete, this wallet doesn't have to run 24/7 and will be the one receiving the rewards. wallet: https://github.com/shekeltechnologies/JewNew/releases
- Install and open the Shekel-Qt wallet on your machine.
- Create a receiving address for the Masternode collateral funds.
Go to File -> Receiving addresses...
Click New, type in a label and press Ok.
Select the row of the newly added address and click Copy to store the destination address in the clipboard.
Send exactly 25000 JEW coins to the address you just copied. Double check you've got the correct address before transferring the funds.
After sending, you can verify the balance in the Transactions tab. This can take a few minutes to be confirmed by the network.Open the debug console of the wallet in order to type a few commands.
Go to Tools -> Debug consoleRun the following command: masternode genkey
You should see a long key that looks like:
3HaYBVUCYjEMeeH1Y4sBGLALQZE1Yc1K64xiqgX37tGBDQL8Xg
We will use this later on both cold and hot wallets.
- Run masternode outputs command to retrieve the transaction ID of the collateral transfer.
You should see an output that looks like this:
[
{
"txhash" : "6782efab3a76fa557370ec3b9c13bf0d0df3d4df63adc018e1dd90e1c8da088e",
"outputidx" : 1
}
]
Both txhash and outputidx will be used in the next step. outputidx can be 0 or 1, both are valid values
- Go to Tools -> Open Masternode Configuration File and add a line in the newly opened masternode.conf file. The file will contain an example that is commented out, but based on the above values, I would add this line in:
MN1 45.76.33.125:5500 3HaYBVUCYjEMeeH1Y4sBGLALQZE1Yc1K64xiqgX37tGBDQL8Xg 6782efab3a76fa557370ec3b9c13bf0d0df3d4df63adc018e1dd90e1c8da088e 1
Where 45.76.33.125 is the external IP of the masternode server that will provide services to the network.
If you want to control multiple hot wallets from this cold wallet, you will need to repeat the previous 2-10 steps. The masternode.conf file will contain an entry for each masternode that will be added to the network.
- Restart the Qt wallet to pick up the masternode.conf changes.
- Go to Masternodes tab and check if your newly added masternode is listed.
At this point, we are going to configure our remote Masternode server.
HOT WALLET MASTERNODE VPS SETUP ON UBUNTU 16.04, 64bit only (Part 2)
Requires details from (Part 1).
This will run 24/7 and provide services to the network via TCP port 5500 for which it will be rewarded with coins. It will run with an empty wallet reducing the risk of loosing the funds in the event of an attack.
- Get a VPS server from a provider like Vultr, DigitalOcean, Linode, Amazon AWS, etc.
Requirements:
Linux VPS (Ubuntu 14.04, 64 bit)
Dedicated Public IP Address
Recommended at least 1GB of RAM
- Login via SSH into the server and type the following command in the console as root:
If you are using Windows, PuTTY is a very good SSH client that you can use to connect to a remote Linux server.
Update and Install new packages by running these commands one by one: remember if you are not using root always put sudo before any command
apt-get update -y
apt-get upgrade -y
apt-get install wget nano unrar unzip -y
apt-get install libboost-all-dev libevent-dev software-properties-common -y
add-apt-repository ppa:bitcoin/bitcoin -y
apt-get update
apt-get install libdb4.8-dev libdb4.8++-dev -y
- Configure swap to avoid running out of memory:
fallocate -l 1500M /mnt/1500MB.swap
dd if=/dev/zero of=/mnt/1500MB.swap bs=1024 count=1572864
mkswap /mnt/1500MB.swap
swapon /mnt/1500MB.swap
chmod 600 /mnt/1500MB.swap
echo '/mnt/1500MB.swap none swap sw 0 0' >> /etc/fstab
Allow the MasterNode p2p communication port through the OS firewall:
ufw allow 5500/tcp
ufw logging on
ufw --force enable
If you are running the MasterNode server in Amazon AWS or another place where additional firewalls are in place, you need to allow incoming connections on port 5500/TCPInstall the Shekel CLI wallet. Always download the latest release available, unpack it
apt-get install libzmq3-dev libminiupnpc-dev -y
wget https://github.com/shekeltechnologies/JewNew/releases/download/1.3.0.0/shekel-Ubuntu16.04-1.3.0.zip
mv download shekel-Ubuntu16.04-1.3.0.zip
unzip shekel-Ubuntu16.04-1.3.0.zip
rm shekel-Ubuntu16.04-1.3.0.zip
chmod +x shekel-cli shekeld
mv shekel-cli shekeld /usr/local/bin/
cd ..
shekeld
You'll get a start error like Error: To use shekeld, or the -server option to shekel-qt, you must set an rpcpassword in the configuration file. It's expected because we haven't created the config file yet.
The service will only start for a second and create the initial data directory(~/.shekel/).
- Edit the MasterNode main wallet configuration file:
nano /root/.shekel/shekel.conf
Enter this wallet configuration data and change accordingly:
rpcuser=(alphanumeric_rpc_username)
rpcpassword=(alphanumeric_rpc_password)
rpcport=5501
listen=1
server=1
daemon=1
maxconnections=250
masternode=1
externalip=(ip_address_here):5500
masternodeaddr=(ip_address_here):5500
masternodeprivkey=(the_cold_wallet_genkey_value_here)
Exit the editor by CTRL+X and hit Y + ENTER to commit your changes.
- Start the service with:
shekeld - Wait until is synced with the blockchain network:
Run this command every few mins until the block count stopped increasing fast.
shekel-cli getinfo
Give it 30 mins now for this node to "get social" with the other nodes in the network. Once it peers up with a good number of other masternodes, the following activation steps should work fine.
ENABLING MASTERNODE (Part 3)
- Go back to the local(cold) wallet and open Tools > Wallet conf.
type in these
rpcuser=(alphanumeric_rpc_username) same as the one you used on the vps
rpcpassword=(alphanumeric_rpc_password) same as the one you used on the vps
rpcallowip=127.0.0.1
listen=1
server=1
daemon=1
staking=1
logtimestamps=1
Save and exit
- Go back to the local(cold) wallet and open Tools - debug console.
Type this command to see all the MasterNodes loaded from the masternode.conf file with their current status:
masternode list-conf
You should now see the newly added MasterNode with a status of MISSING.
Run the following command, in order to enable it:
startmasternode alias false MN1
In this ^ case, the alias of my MasterNode was MN1, in your case, it might be different.
- Verify that the MasterNode is enabled and contributing to the network.
Give it a few minutes and go to the Linux VPS console() and check the status of the masternode with this command:
shekel-cli masternode status
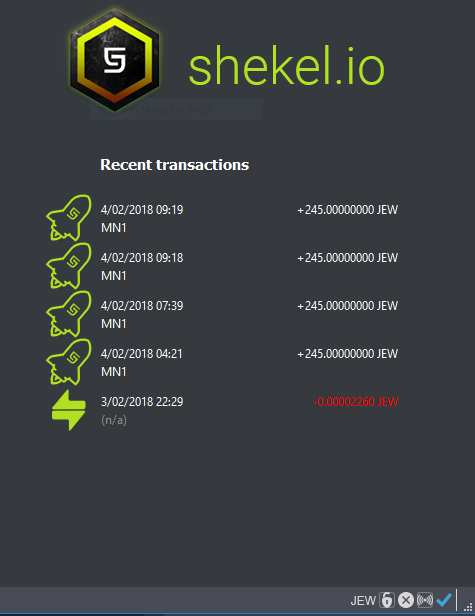
If you see status Masternode successfully started, you've done it, congratulations. Go hug someone now :) It will take a few hours until the first rewards start coming in.
Instead, if you get status Masternode not found in the list of available masternodes, you need a bit more patience. Distributed systems take a bit of time to reach consensus. Restarting the wallets and retrying the start has been reported to help by community members. This is how you restart the Linux wallet from the CLI:
shekel-cli stop
wait 30 seconds or so for the wallet to gracefully stop and then start it again
shekeld
Rerun the startmasternode command again in the Qt (Cold) wallet.
The masternode debug log (/root/.shekel/debug.log) will contain this line on a successful activation:
2018-02-02 02:07:12 CActiveMasternode::EnableHotColdMasterNode() - Enabled! You may shut down the cold daemon.
You can watch the log as it's being written by using this command:
tail -f /root/.shekel/debug.log
Stop watching the log by pressing CTRL+C
As the log entry says, your MasterNode is up and running and the hot wallet that holds the collateral can be closed without impacting the operation of the MasterNode in the network.
You should now be able to see your MasterNode(s) on this web page: http://shekel.mn.zone
Cheers !