How to Create your wallet on ICONex
Go to our website at https://icon.foundation
Click ‘Wallet’ button on the top
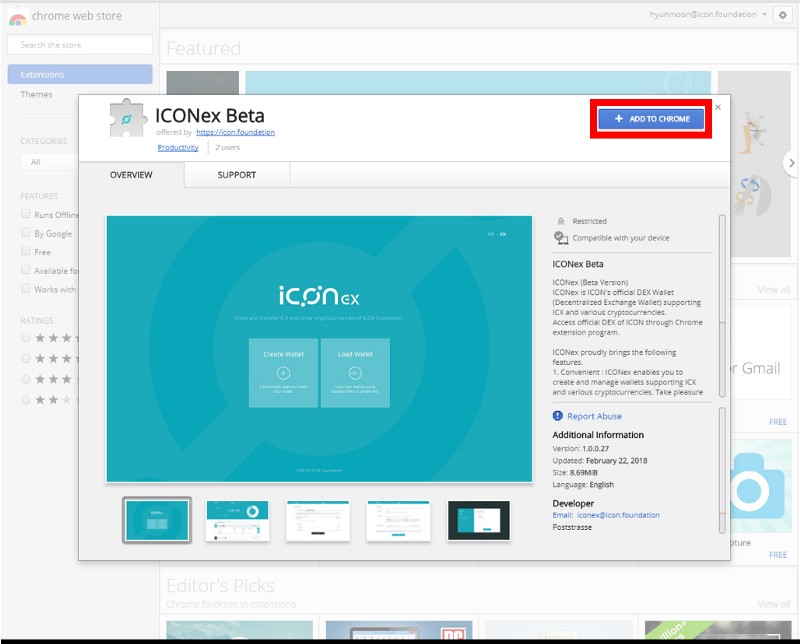
Move to Chrome extension page (https://chrome.google.com/webstore/detail/iconex-beta/flpiciilemghbmfalicajoolhkkenfel?hl=en)
Click “Add on +CHROME” button on the upper right corner
Start Chrome after installation
Click ICON logo on the upper right corner (next to the website address)
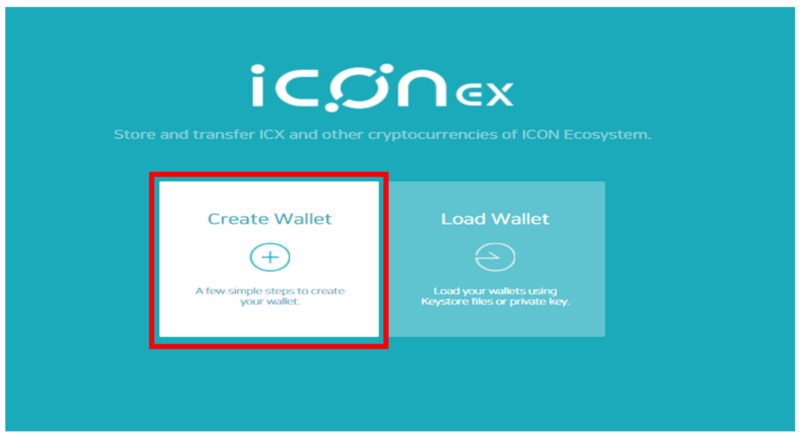
Move to ICONex
Click ‘ Create new wallet ‘
- Select a token
ICX wallet: To receive Airdrop ICX and store mainnet ICX after token swap
ETH wallet: To store ETH and ICX ERC20 tokens
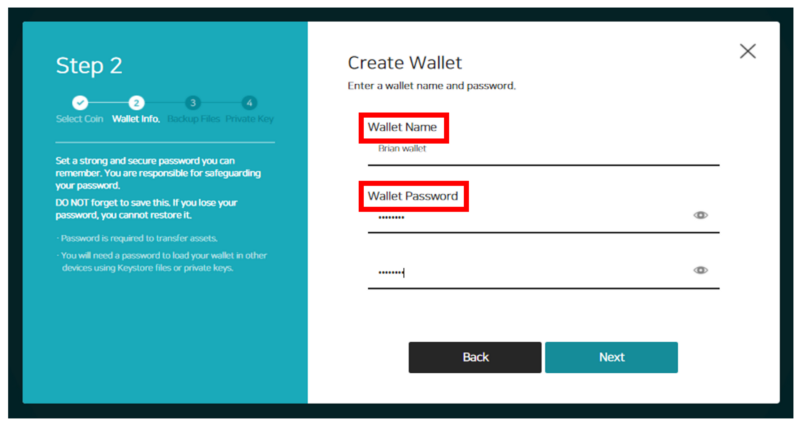
- Wallet name and wallet password page
- Password can not be restored under any circumstances. Take special precautions.
Click ‘next’.
Download wallet backup files page
Wallet backup files are encrypted files of the private keys. These are very important as anyone can have access to the wallet with the correct password and the backup files.
Store safely.
You may download the backup files later at anytime you want by clicking the ‘wallet backup’ menu.
Click ‘next’.
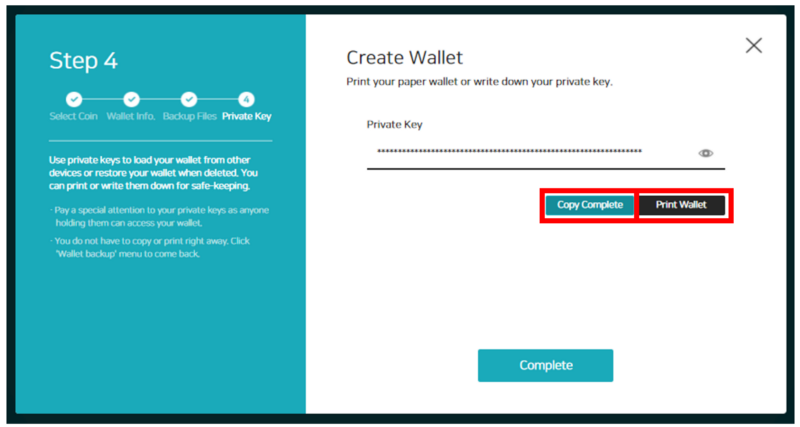
Private key page
Private keys allow access to the wallets. Do not lose or expose the private keys to others.
Copy button will enable you to copy and paste your private keys. Paper wallet button will print the QR codes and the private keys of your wallet.
Click ‘complete’.
My wallet page
Click ‘My wallet (each individual’s wallet name)’
Move to wallet information page
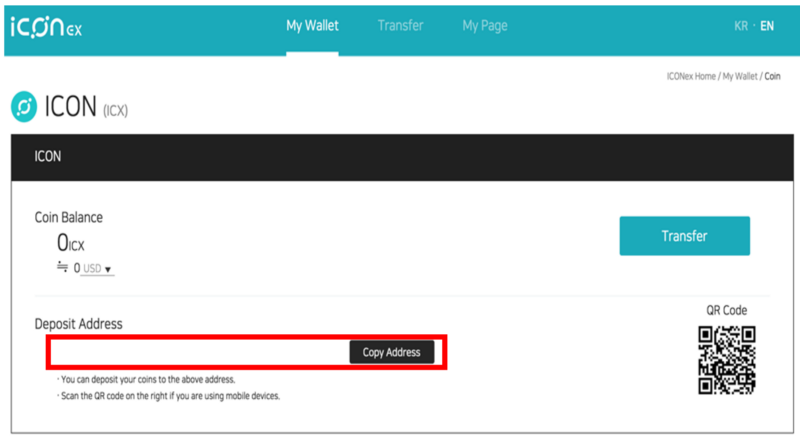
Wallet information page
You can check your coin balance and the wallet address.
Copy button will allow you to copy and paste the wallet address.
https://medium.com/helloiconworld/launching-of-iconex-b88c998442cf

