Australian bush cherry bonsai carving and repotting
I spend the greater part of my sunday carving this australian bush cherry. I have had this tree for a few years now and have been building a good branch structure. This was quite a challenge as I made the mistake of making a huge cut in towards the front of the tree to shorten the tree. Now I'm left with this great big scare. I have considered carving but was not to sure if that would help. Also I have not had good best of luck when it comes to carving. There is always that one slip that costs you greatly. I took the tree with me to the place where I apprentice. I asked for advise as we all need some input on trees that we have been training for some time now.
This is the tree before I started any work on the tree.

The problem I have with this tree is I have had it for so long but I have not had a clear picture of what it should look like. So I'm stuck. The tree was placed on the coffee table in the living room and there was a great discussion on the tree. For me it just felt like a long stretched out process but in the end all made sense.
The comments that came out of the discussion. The trees' angle needed to decrease and the large cutting needed to be carved to make the trunk have a bit more taper. This would also help with the flow of the tree. At this point the tree goes left and then up. If I raise the tree and decrease the angle the tree leans at the tree will have a better flow.
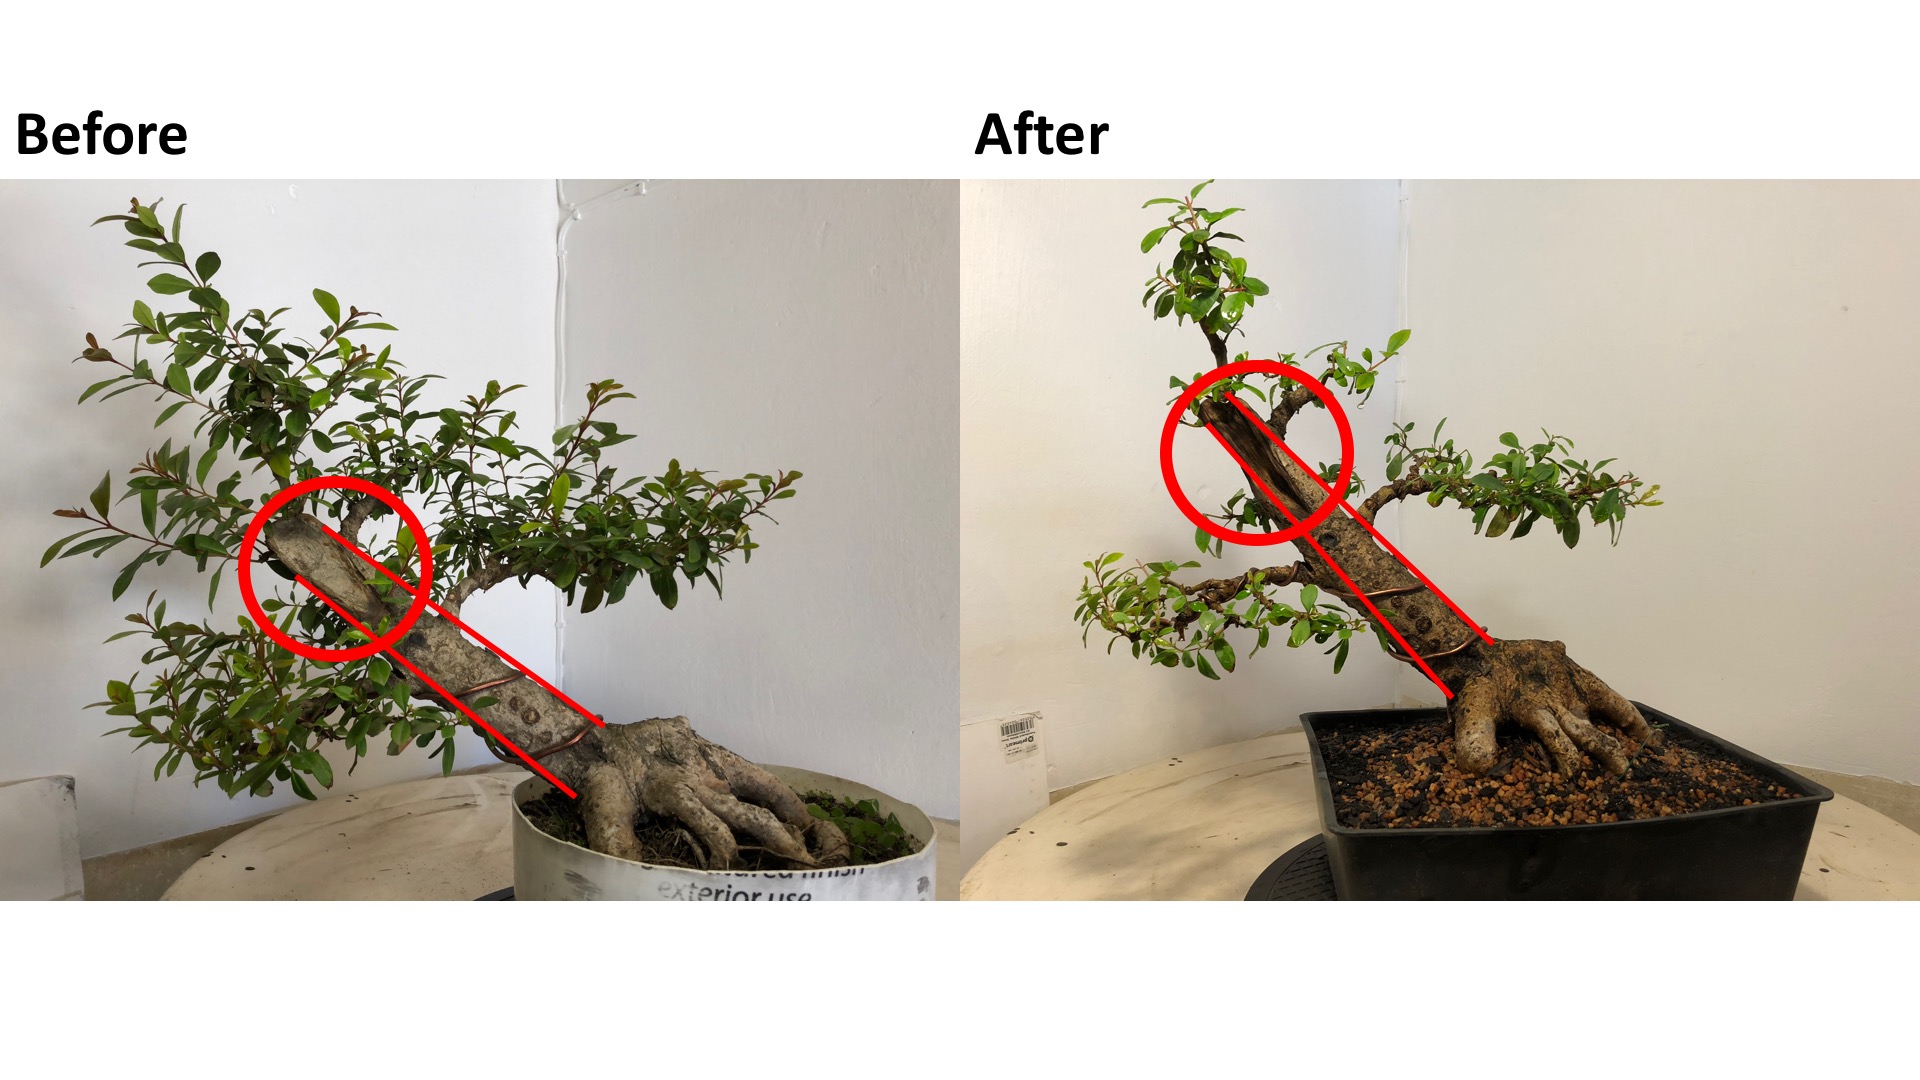
In the illustration above you can see that the carving has added to the taper of the trunk.

Please note that when using power tools you need to wear your safety cloths like eye-ware, gloves and mask.
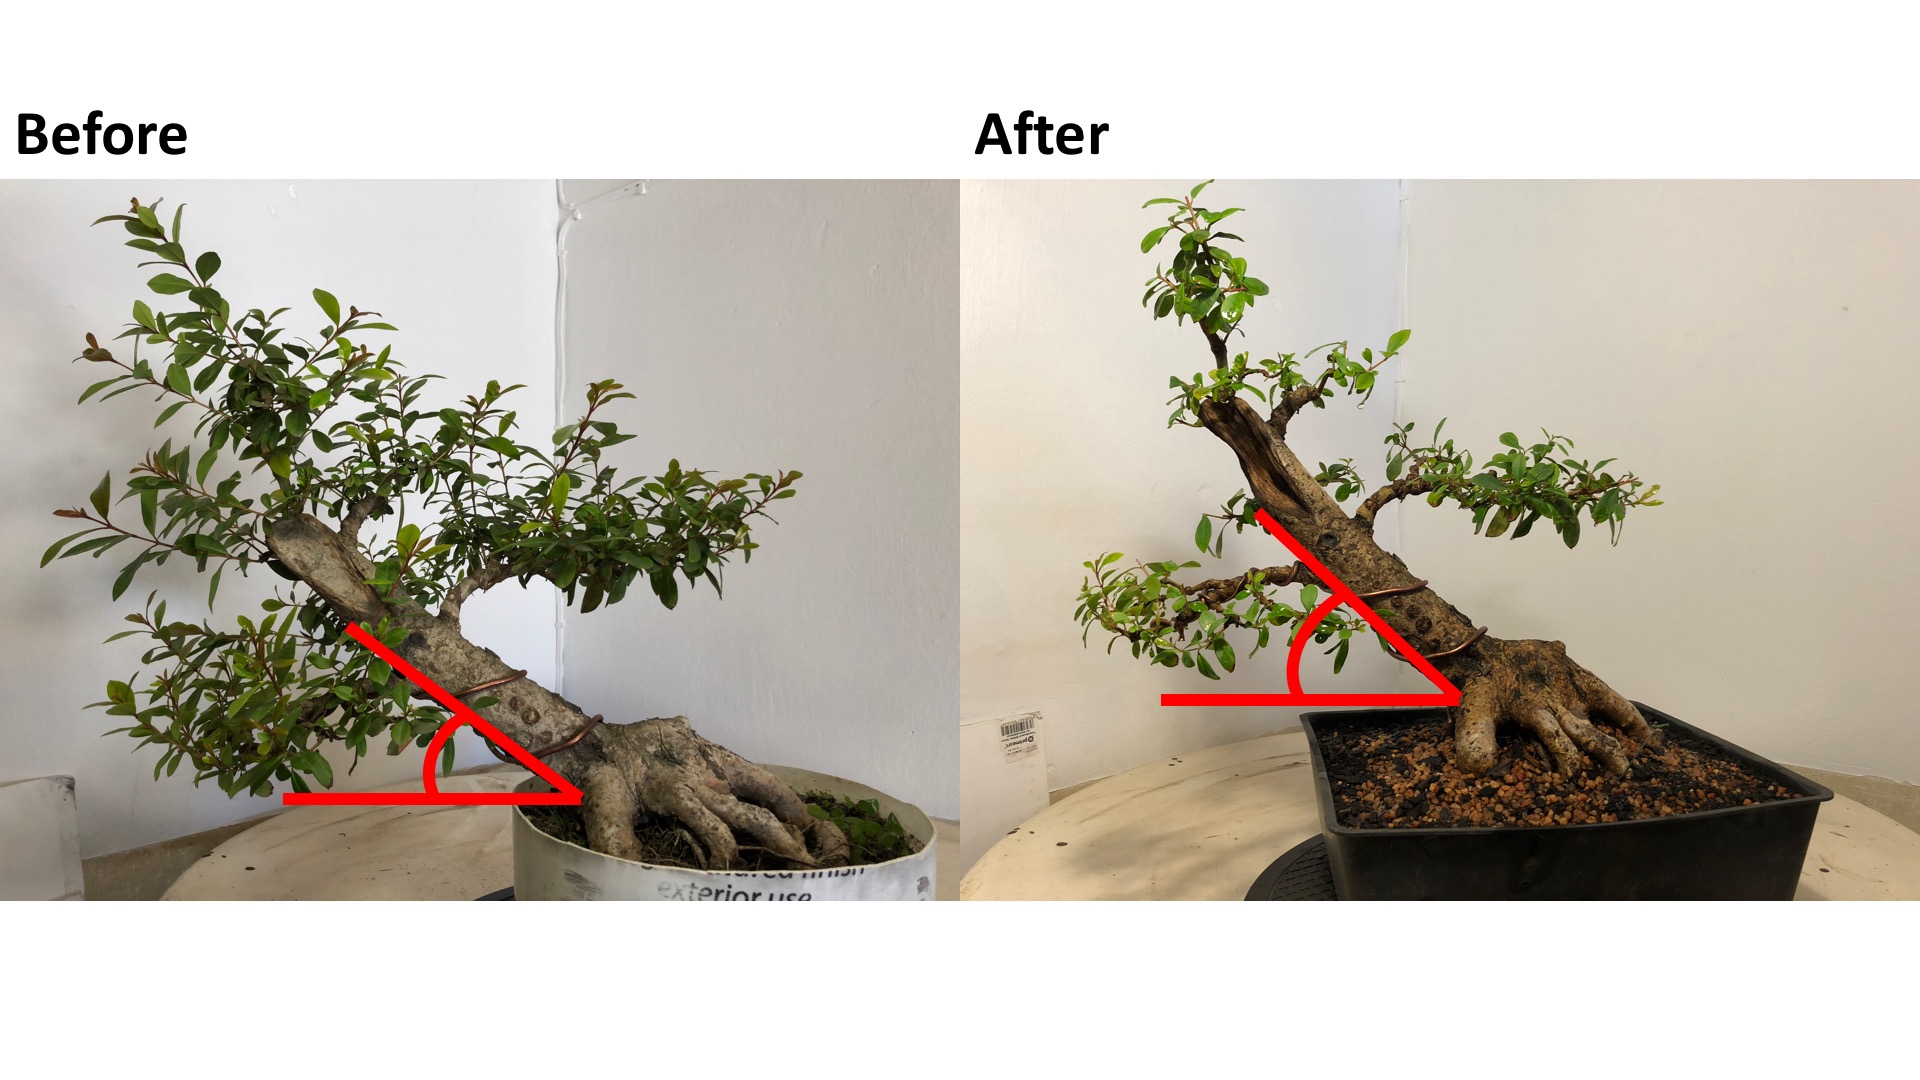
Here you can see that the planting angle was changed an the tree look much better.

Here you can see a flow diagram of the tree. As you can see the tree was a much smoother flow that before.
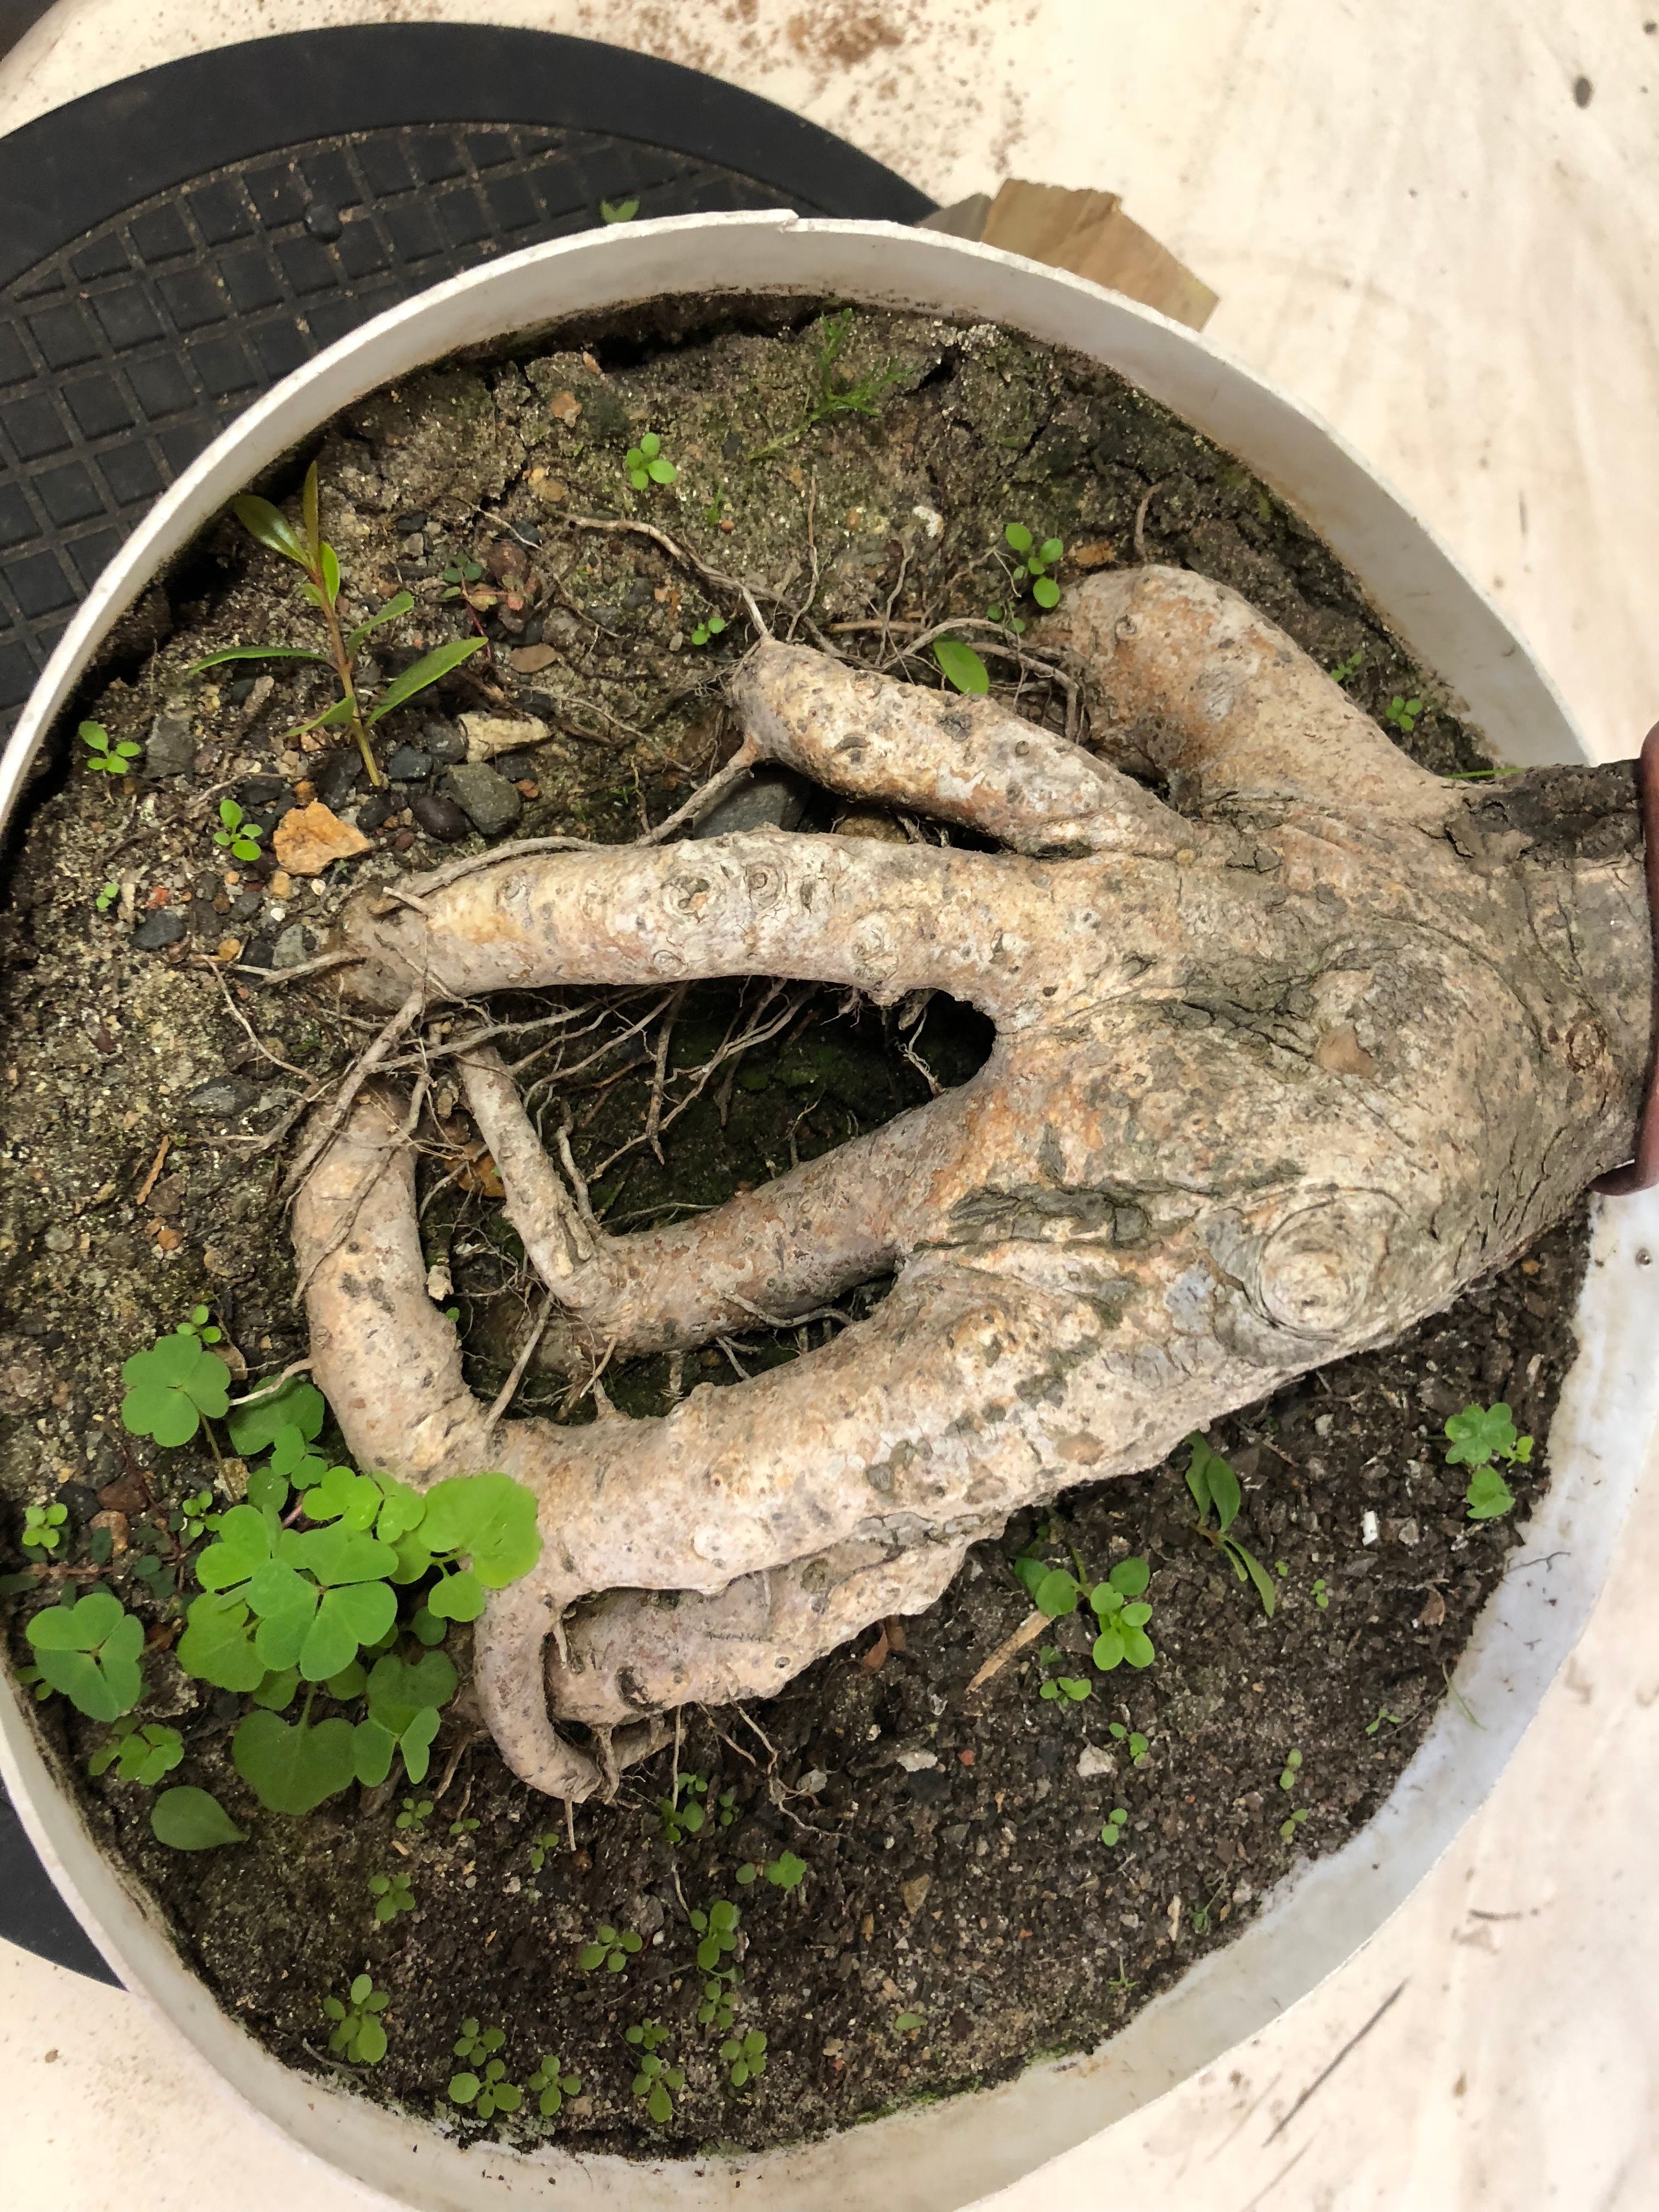
After all this was done I repotted the tree at the right angle. I did not remove a lot of roots and only removed the soil mixture from the roots. In preparation to the repotting I did not water the tree this morning and left it to dry out a bit before I removed it from the pot. This helps as the soil then comes loose from the roots much easier. See photo below.
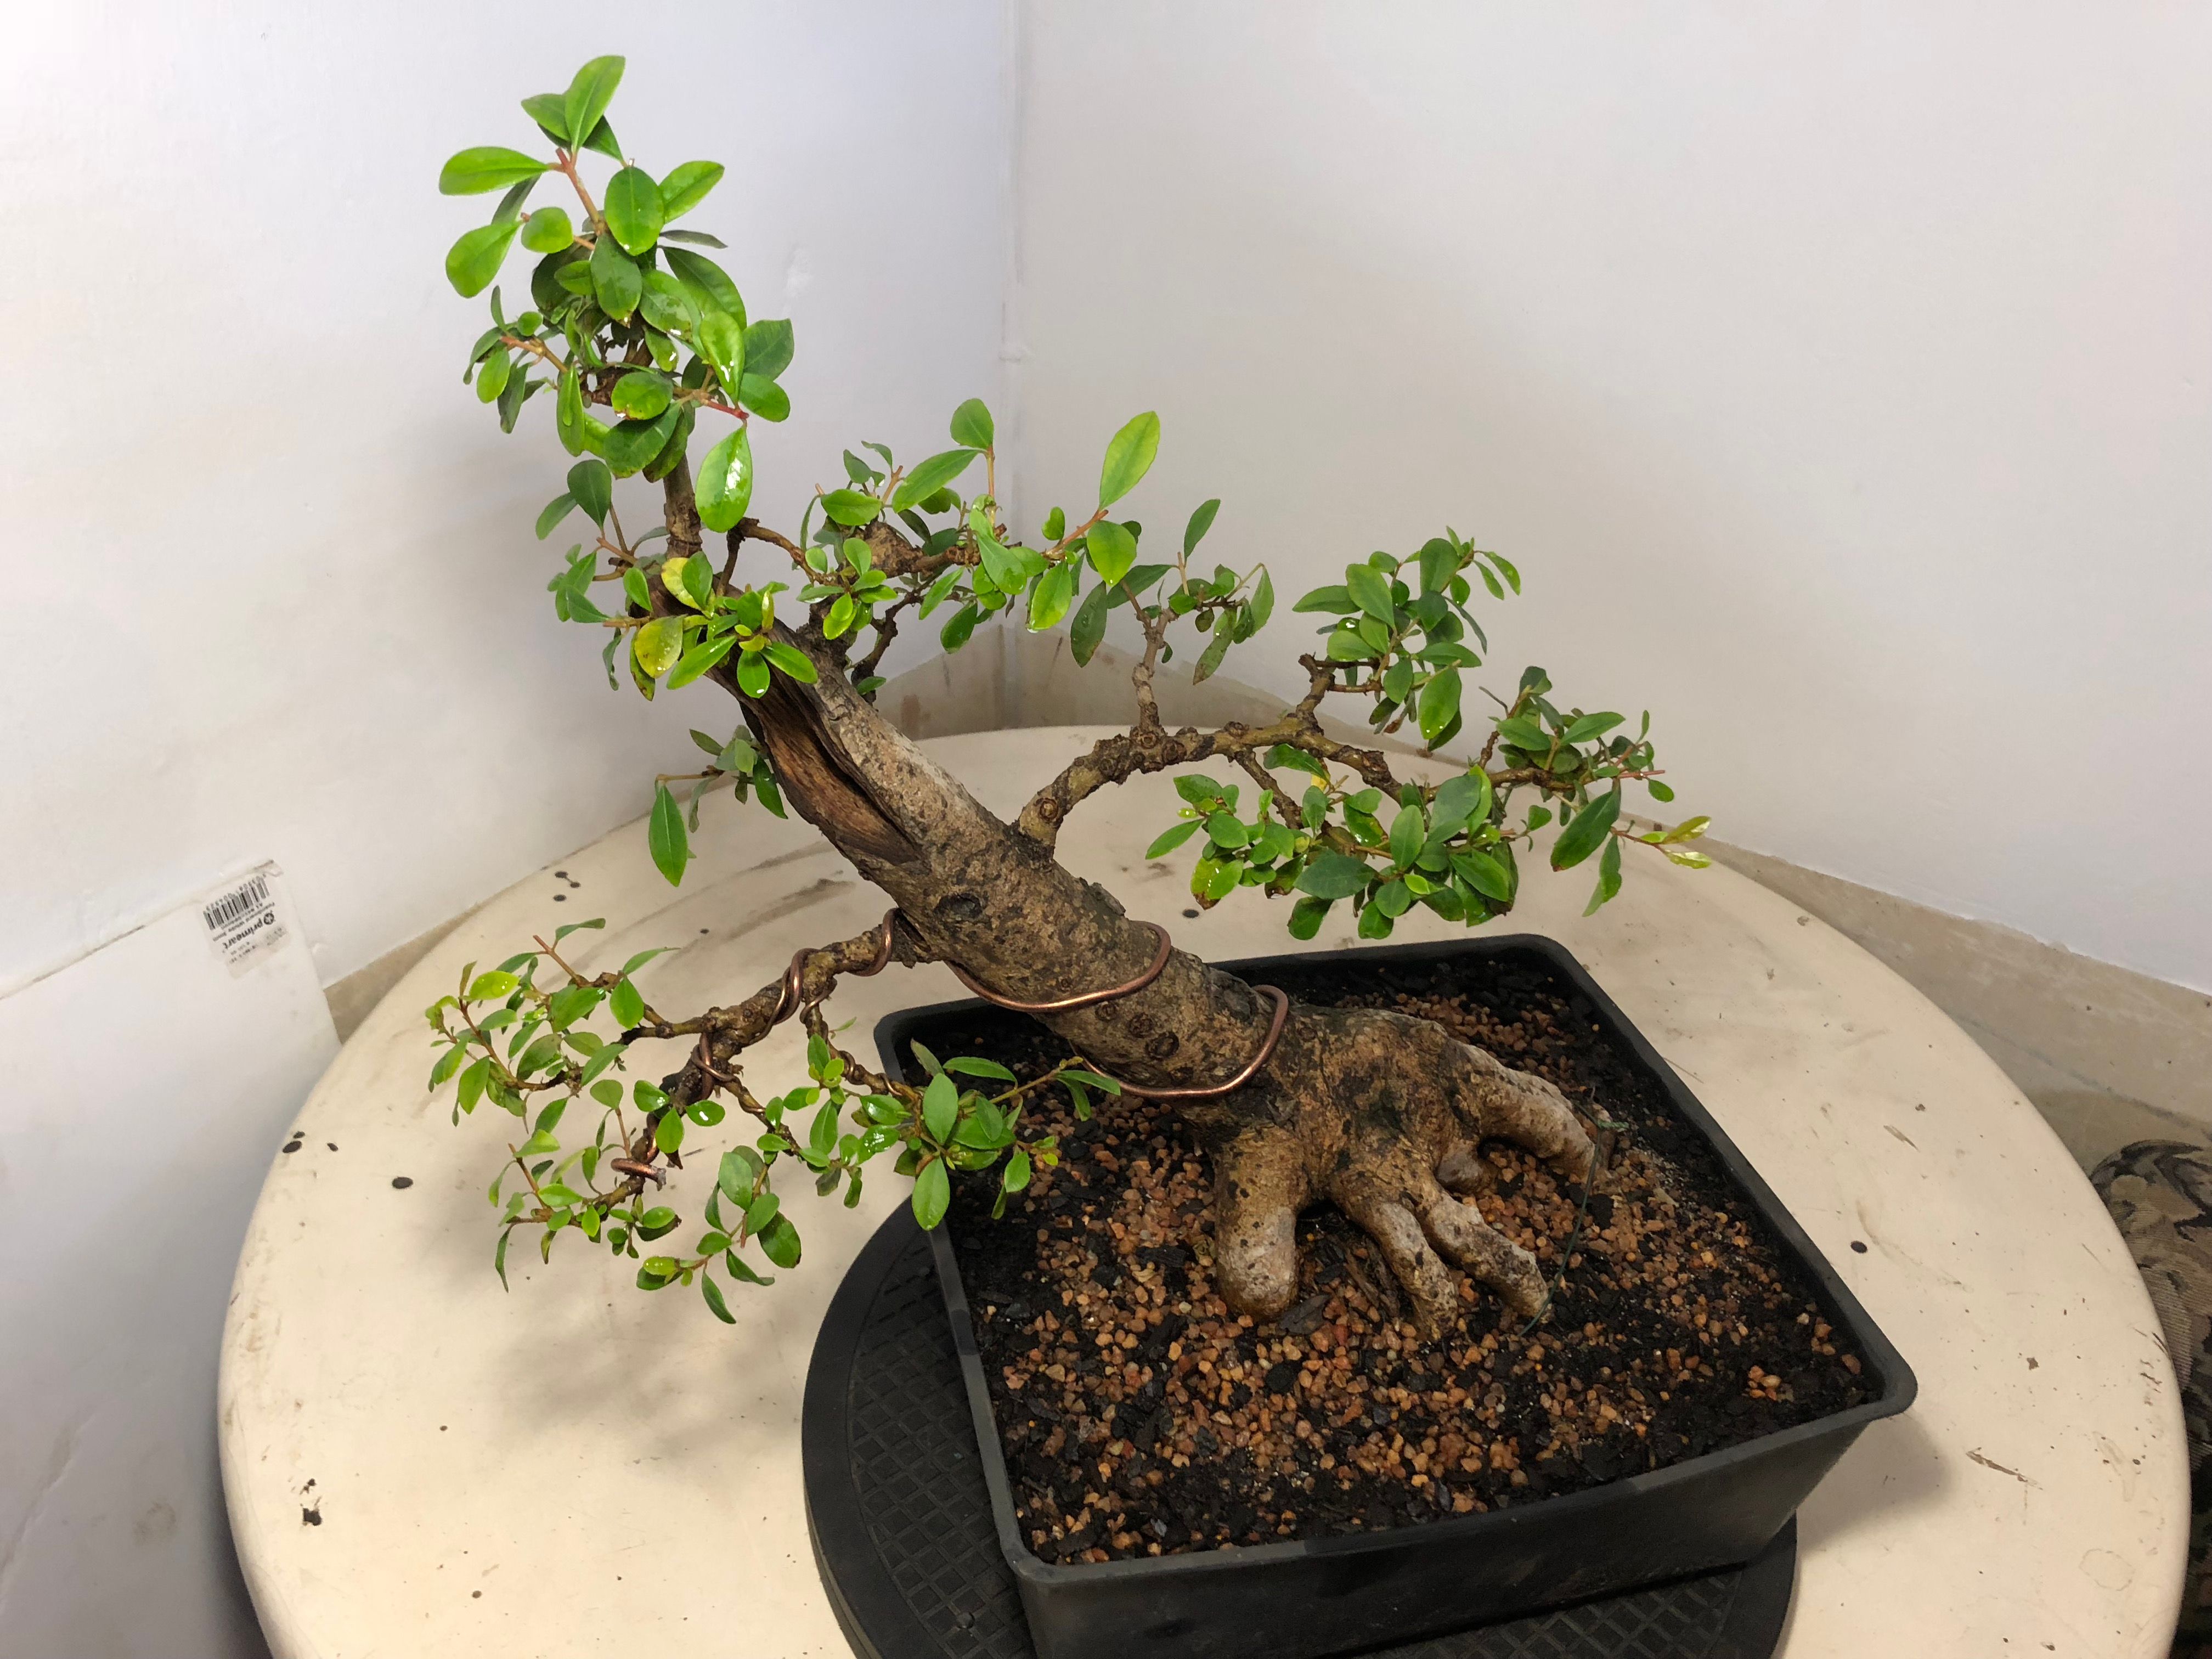
Here is the tree after I successfully replanted the tree and I watered it thoroughly. This is very important as you need to make sure that all the air in the soil mixture is filled and after the watering all the access water should drain freely. It the water dams up you soil mixture to to heavy.
Here is a time - lapse of the carving and repotting of the tree.
Thank you for reading my blog hope you enjoyed it. Please feel free to leave you comments below.

World of Photography
>Visit the website<
You have earned 5.95 XP for sharing your photo!
Daily photos: 2/2
Daily comments: 0/5
Multiplier: 1.19
Server time: 21:01:48
Total XP: 156.90/200.00
Total Photos: 28
Total comments: 0
Total contest wins: 0
Follow: @photocontests
Join the Discord channel: click!
Play and win SBD: @fairlotto
Daily Steem Statistics: @dailysteemreport
Learn how to program Steem-Python applications: @steempytutorials
Developed and sponsored by: @juliank
Hi, I am developing an interest in bonsai. This article is quite helpful, thanks.
No problem. If you need and help is starting and choosing a tree let me know and I’ll help you as best as I can👍🏻
Congratulations @romanolsamuels!
Your post was mentioned in the Steemit Hit Parade for newcomers in the following category:
I also upvoted your post to increase its reward
If you like my work to promote newcomers and give them more visibility on Steemit, feel free to vote for my witness! You can do it here or use SteemConnect