How to create a Decentr Validator
We’re going through difficult times for freedom. Western world authorities have turned their back to fundamental civil rights, sush as progress, equality, people’s sovereignty and freedom. Nevertheless as corporations and political powers crack on freedom of speech, a new technology emerges as the full realization of whatever the net of nets was meant to be: a decentralized network of nodes, aimed to be censorship resistant and save data even though a catastrophe happens.
Blockchain technology solves this uncanny trajectory that web 2.0 has followed in recent years of centralized services, creating unique oportunities to preserve financial and speech autonomy in face of authoritarian leaderships that globalization entails.

Decentr is in the inner core of this development, offering usersa magnificient and user friendly opportunity to access worldwide information with a set of decentralized tools: web browser, search engine(partnered with Preseach), in-app wallet and VPN service at a low cost (along with Solar Labs), and now testing a loan service .

As a Cosmoschain network, Decentr needs validators and relayers to work smoothly, validating around one new block every six seconds. Whoever can set a new validator should run a node on a 24/7 basis. For this purpose, nodes must download the entire history of blocks, transactions and consensus to be synchronized with the network. A server running is the optimal option, but we know that main Big Tech providers lack of cheap solutions.

In order to stay away from big actors and provide an easy, fully decentralized and affordable access to VPS, Threefold labs is an advanced web3 platform offering storage, kubernets and virtual machines. From now on, I’m describing the process to a full node deployment from zero and almost cost free.
OPEN A NEW THREEFOLD ACCOUNT AND PURCHASE SOME TFT TOKENS
• Go to https://dashboard.grid.tf/ and follow instructions. You need to install Polkadot extension for your browser and connect your wallet. Create a new account if you don’t have one, and save mnemonics. Enter your contract page here.
• Go to the upper right corner, create profile manager. Follow the instructions.
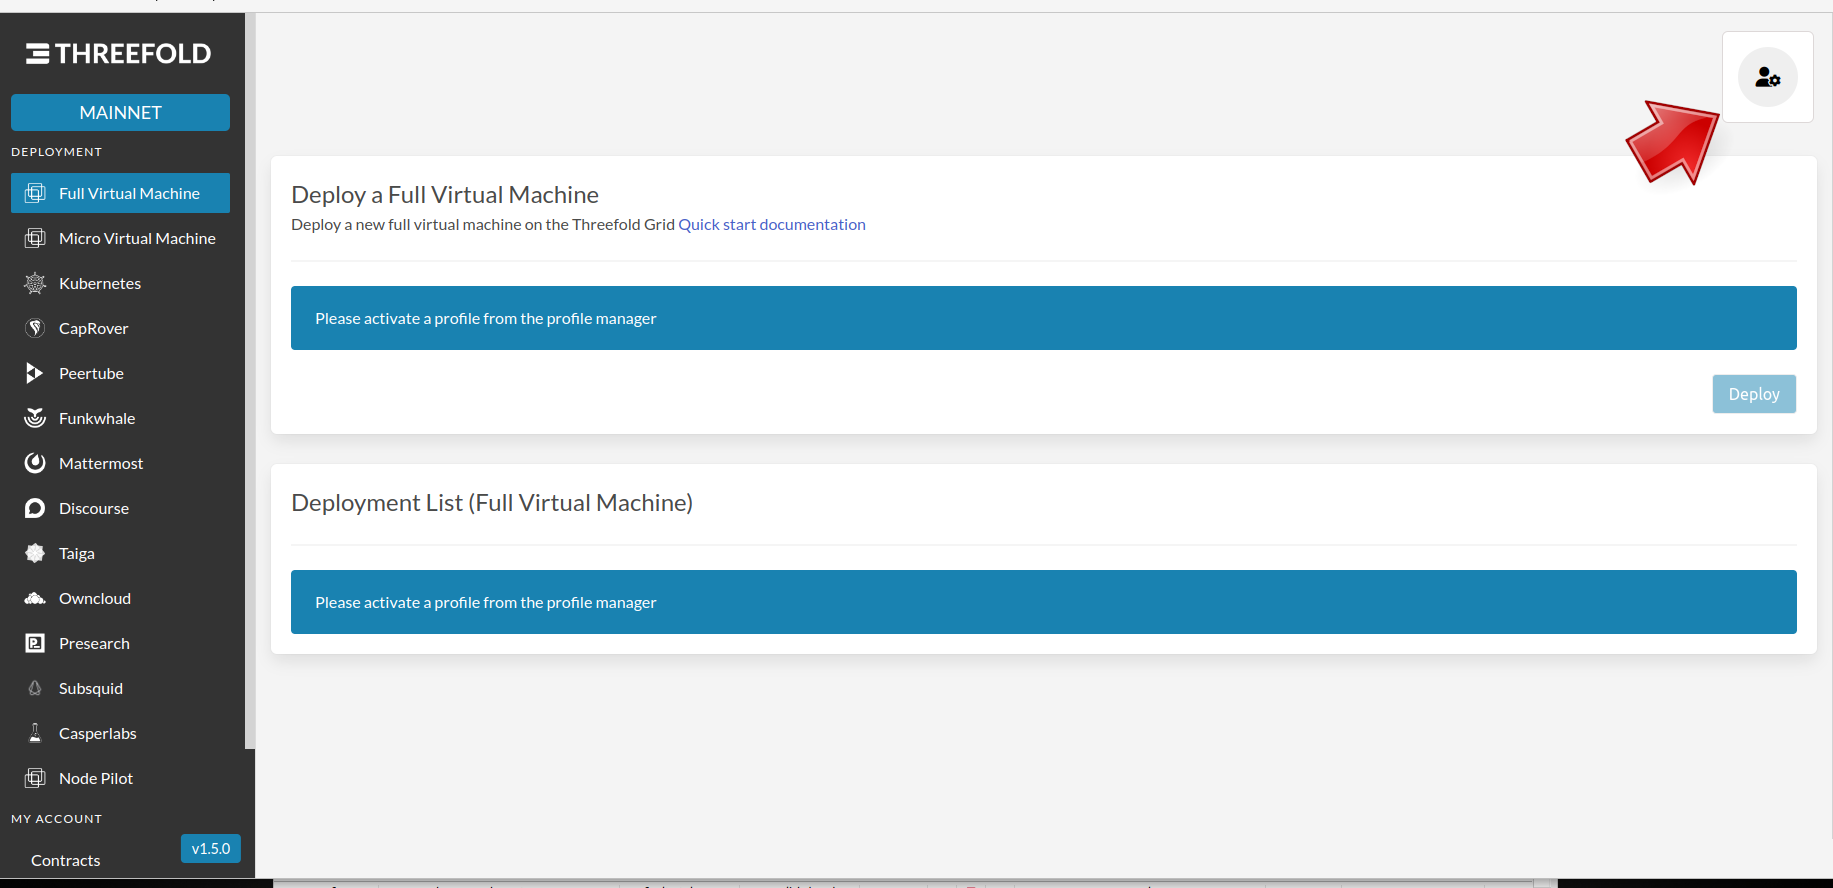
• Download Threefold Connect on your mobile device. Fund your wallet with TFT and send them to the address coded in the QR.
* For this purpose, the simplest and cheapest way is to purchase or swap XLM (Stellar Lumens) in your favourite exchange, send them to a XLM account at https://stellarterm.com and exchange them for TFT. About 500 TFT will last for some months.
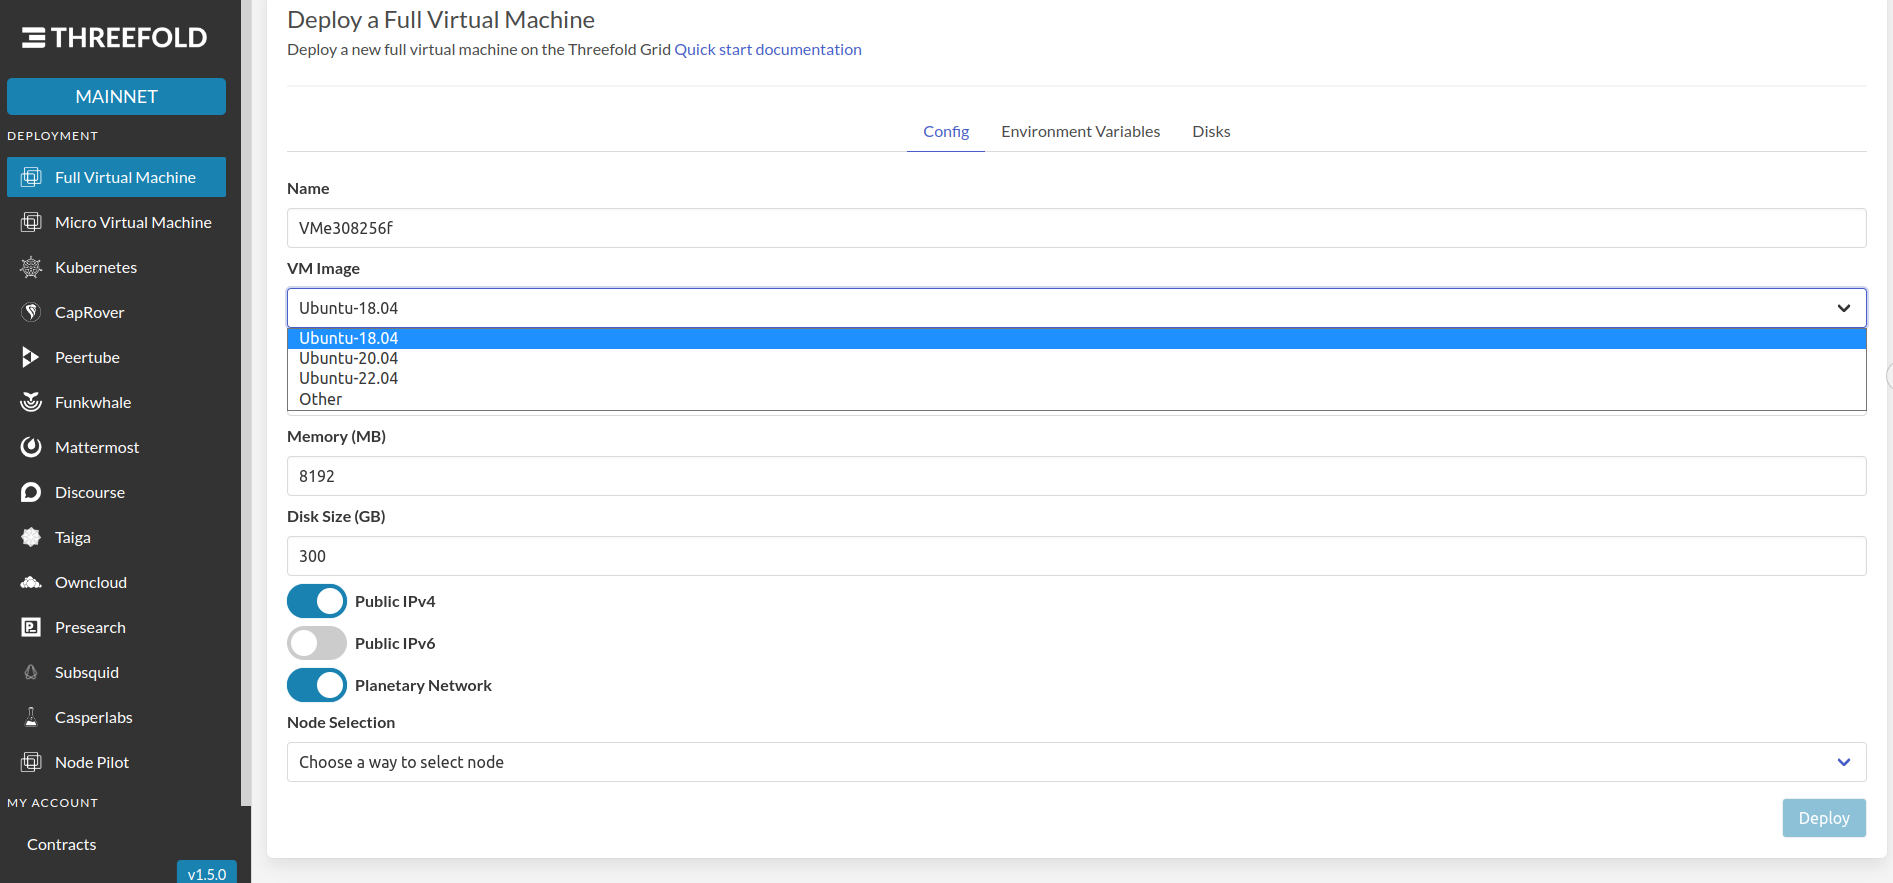
• Once you receive funds, deploy a Full Virtual Machine. Configure it with at least 4 vCPU, 8 GB RAM and 300 GB disk. Activate at least IPv4 and IPFS, scroll down to select the latest Ubuntu version and choose a working node to deploy your VPS (node 1 seems to work well).
• Wait some minutes for the new contract, and copy the IP4. You can connect by running the command

 $ ssh [email protected]

  (where XXX.XXX.XXX.XXX is the VPS Ipv4 address). You can always consult your remaining funds, hourly costs and deployments by browsing to https://play.grid.tf/#/and activating your existing profile with your password. If you clean the web cache or access from a different browser/computer, you will have to create it again using the mnemonics and SSH key, so be warned to keep these data secure!
DOWNLOAD DECENTR BROWSER AND INSTALL KEPLR EXTENSION
DEC is the native token for Decentr network. It’s used to pay VPN and you get some on a monthly basis just for using the browser. To get DEC to stake and start your validator folow the next steps:
• Download the platform binaries from https://decentr.net/. Install the browser following instructions. Create a new account (or import it using your cosmos mnemonic). Remember to save the mnemonic and never share it with anyone, otherwise you may lose access to your wallet.

• Browse to https://www.keplr.app/ and install Keplr wallet. Use the same mnemonic, as your Decentr account is Cosmos compatible.

• Transfer any token from the Cosmos ecosystem (ATOM, OSMO, LUNA, LUNC…) to the corresponding account in your wallet and, once received, go to https://app.osmosis.zone/ and connect your Keplr wallet.

• Go to assets in the left menu, search for the asset you have available (i.e. ATOM) and deposit them in the app. Accept the transaction in Keplr. (in fact, the deposit process consists of an IBC transfer to your osmosis account, so your funds will never leave your wallet).

• Once the transaction is complete, which usually takes seconds , you will see your assets appear. Now go to the swap option on top of the left menu. Search for DEC and the amount you want to swap (MAX for all your assets).
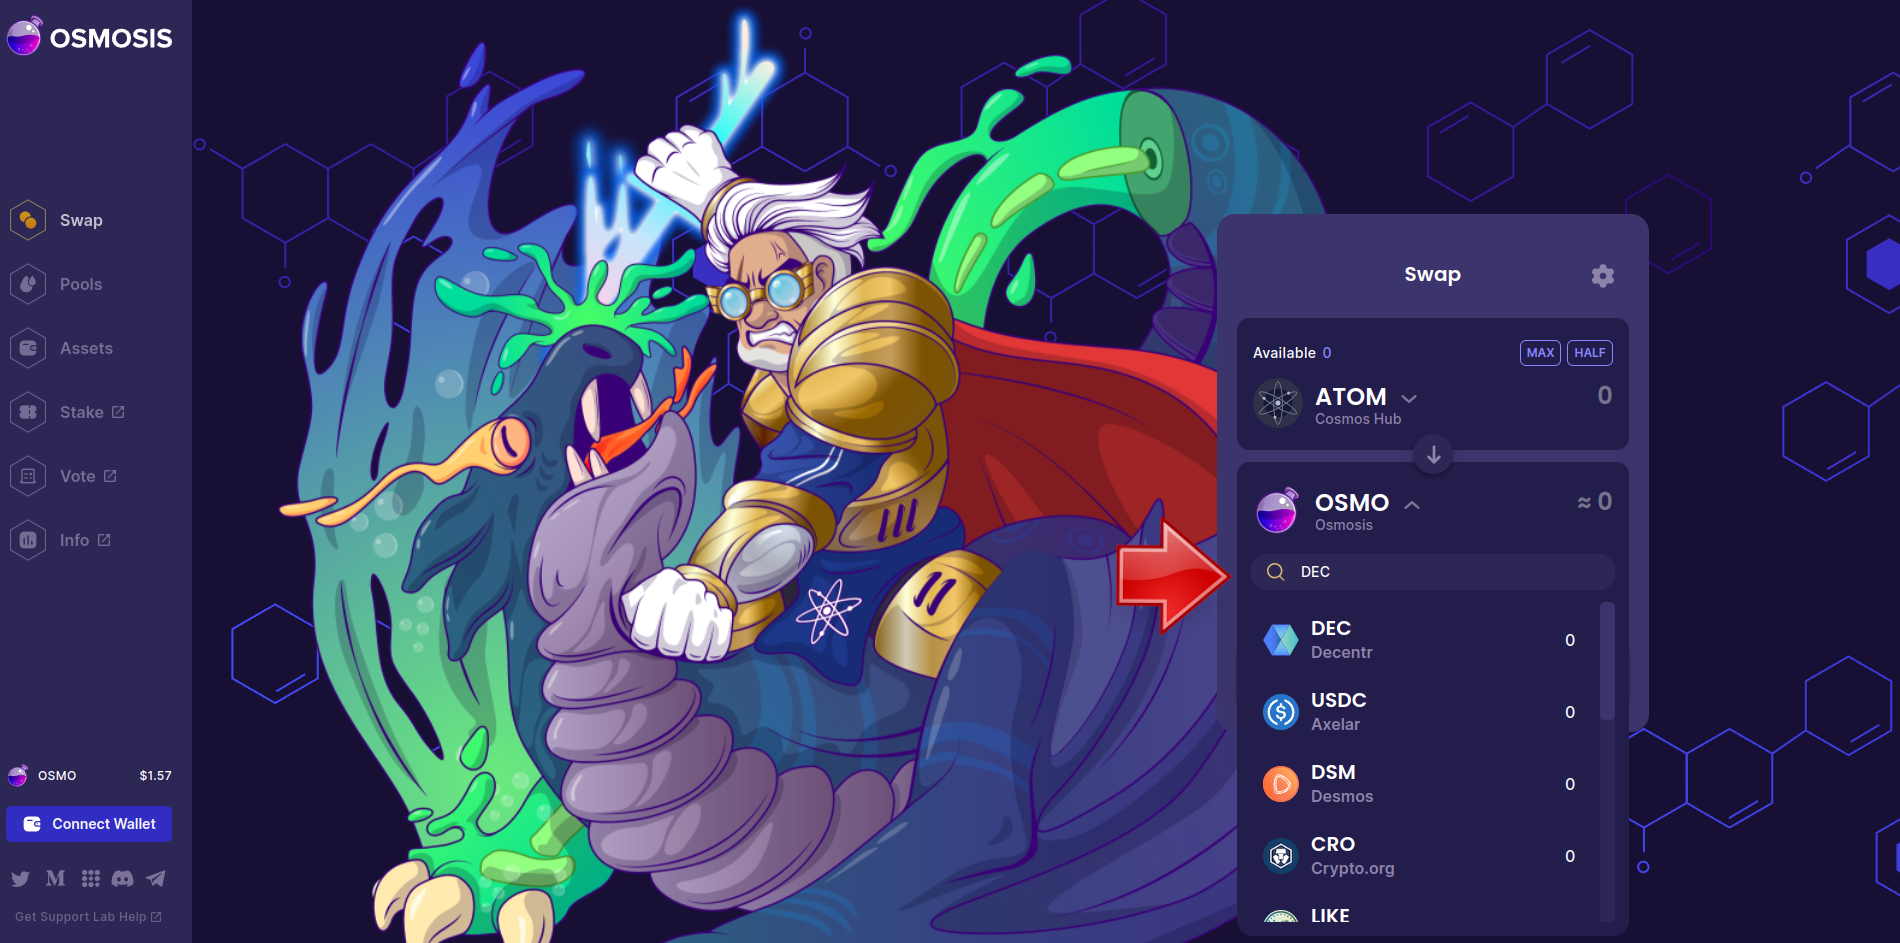
• Go again to Assets to withdraw your DEC (IBC transfer from Osmosis to Decentr account).
PREPARING VPS ENVIRONMENT
Enter the virtual console by typing this command.
$ ssh [email protected]
Then, the console will ask for permission to create a key pair for the new remote connection. Accept the key creation, and you will switch into your server shell.
Upgrade the installed packages
$ apt update && apt upgrade
Install critical packages
$ apt install software-properties-common nano git curl make ufw jq build-essentials unzip snap -y
Optional: create a separate user for your node
$ adduser decentr #decentr is the name for the newuser, you may choose any other
$ adduser decentr sudo #add decentr to the superuser group
$ su - decentr
Install the compiler
$ sudo snap install go --channel=1.19/stable –classic
$ go version #check the version installed
$ export PATH=$PATH:$HOME/go/bin
$ echo export PATH=$PATH:$HOME/go/bin >> ~/.bashrc #add go binaries directory to path
Compile and install node binaries
$ git clone -b v1.6.2 https://github.com/Decentr-net/decentr
$ git checkout v1.6.2
$ cd decentr
$ make install
$ decentrd version #check the installation is correct
Initialize the node
$ decentrd init YourNodeName #Choose the public name to be displayed
$ wget -O ${HOME}/.decentr/config/genesis.json https://raw.githubusercontent.com/Decentr-net/mainnets/master/3.0/genesis.json #Download genesis file
Add seeds to your config file
$ sed -E -i 's/seeds = ".*"/seeds = "7708addcfb9d4ff394b18fbc6c016b4aaa90a10a@ares.mainnet.decentr.xyz:26656,8a3485f940c3b2b9f0dd979a16ea28de154f14dd@calliope.mainnet.decentr.xyz:26656,87490fd832f3226ac5d090f6a438d402670881d0@euterpe.mainnet.decentr.xyz:26656,3261bff0b7c16dcf6b5b8e62dd54faafbfd75415@hera.mainnet.decentr.xyz:26656,5f3cfa2e3d5ed2c2ef699c8593a3d93c902406a9@hermes.mainnet.decentr.xyz:26656,a529801b5390f56d5c280eaff4ae95b7163e385f@melpomene.mainnet.decentr.xyz:26656,385129dbe71bceff982204afa11ed7fa0ee39430@poseidon.mainnet.decentr.xyz:26656,35a934228c32ad8329ac917613a25474cc79bc08@terpsichore.mainnet.decentr.xyz:26656,0fd62bcd1de6f2e3cfc15852cdde9f3f8a7987e4@thalia.mainnet.decentr.xyz:26656,bd99693d0dbc855b0367f781fb48bf1ca6a6a58b@zeus.mainnet.decentr.xyz:26656"/' $HOME/.decentr/config/config.toml
Set StateSync module
SNAP_RPC="http://75.119.157.167:28657"
SNAP_RPC2="http://75.119.157.167:28657"
LATEST_HEIGHT=$(curl -s $SNAP_RPC/block | jq -r .result.block.header.height);
BLOCK_HEIGHT=$((LATEST_HEIGHT - 1000));
TRUST_HASH=$(curl -s "$SNAP_RPC/block?height=$BLOCK_HEIGHT" | jq -r .result.block_id.hash)
echo $LATEST_HEIGHT $BLOCK_HEIGHT $TRUST_HASH
sed -i.bak -E "s|^(enable[[:space:]]+=[[:space:]]+).$|\1true| ;
s|^(rpc_servers[[:space:]]+=[[:space:]]+).$|\1"$SNAP_RPC,$SNAP_RPC2"| ;
s|^(trust_height[[:space:]]+=[[:space:]]+).$|\1$BLOCK_HEIGHT| ;
s|^(trust_hash[[:space:]]+=[[:space:]]+).$|\1"$TRUST_HASH"| ;
s|^(seeds[[:space:]]+=[[:space:]]+).*$|\1""|" $HOME/.decentr/config/config.toml
Create daemon service
$ sudo tee /lib/systemd/system/decentrd.service > /dev/null << EOF
[Unit]
Description=Decentr Node Service
After=network-online.target
[Service]
User=$USER
ExecStart=$HOME/go/bin/decentrd start
Restart=on-failure
Restart=always
RestartSec=10
LimitNOFILE=4096
Environment="DAEMON_HOME=$HOME/.decentr"
Environment="DAEMON_NAME=decentrd"
[Install]
WantedBy=multi-user.target
EOF
sudo systemctl enable decentrd #enable the service to run at startup
sudo systemctl start decentrd #start the service manually
Check the node daemon is synchronized and validating transactions
$ sudo -uf journalctl decentrd -o cat #CTRL+C to exit
Create keyring pairs
$ decentrd keys add key_file_name -i #you can choose any name foryour key file
At this point you will need to insert your Cosmos account BIP39 mnemonic (to access your wallet). Click enter. For the second question,just hit enter. Finally, establish a password (any password you choose) to save your key pair. If no error is displayed, you are ready for the last step!
CREATE VALIDATOR
$ MONIKER=YourNodeName #repeat the public name chosen for your node
decentrd tx staking create-validator
--amount=1000000000udec \ #The amount of DEC tokens to autostake *1000000
--pubkey=$(decentrd tendermint show-validator)
--moniker="$MONIKER"
--commission-rate="0.02"
--commission-max-rate="0.05"
--commission-max-change-rate="0.01"
--min-self-delegation="1"
--from=key_file_name \ #repeat the name of your key file
--chain-id=mainnet-3
--gas=auto
--gas-adjustment=1.4
--gas-prices="0.025udec"
In the example above, we are autostaking 1000 DEC (note that any amount is given in microunits, so it’s necessary to multiply it by a million, adding six zeros). The commission rate is the part of all delegators’ rewards you will receive. In this case, it is 2% (0.02). The maximum commission rate is a warrant to delegators you won’t be able to rise it above this value. In this case, it is 5% (0.05). This data can’t be changed, so specify a comfortable value margin.
Rate change is the maximum amount you will be able to change at once, using the edit options. Minimum self delegation is the minimum amount you ought to autostake. If you ever fall below this minimum, your validator will be jailed.
Once created, check your validator status by typing
$ decentrd status | jq '.validator_info'
Also check your validator is visible here:
https://explorer.decentr.net/validators?networkId=mainnet
Don’t forget to backup also this file
$HOME/.decentr/config/priv_validator_key.json
It’s the blockchain identity of your validator. If you ever lose it, you won’t be able to restore it again.
Good luck and enjoy your staking.