From milk to cheese - halloumi - my first DIY cheese - recipe
At the beginning of this year I broke my wrist and I couldn’t really do anything without a functioning arm. Because of this I spend many hours by watching cooking videos and looking for inspirations that I could use in the future. One day, I have watched a tutorial of how to make edam cheese by a cheesemaker called Gavin. He made cheese making process look so easy and sort of relaxing that I immediately wanted to follow and make cheese by myself. So when my arm got better, I bought a book titled: “Home cheese making: recipes” by Ricki Carroll to learn about cheese making techniques and recipes for making different cheeses. Today, after gathering my theoretical knowledge about cheesemaking, I decided that it is time to make my first cheese.
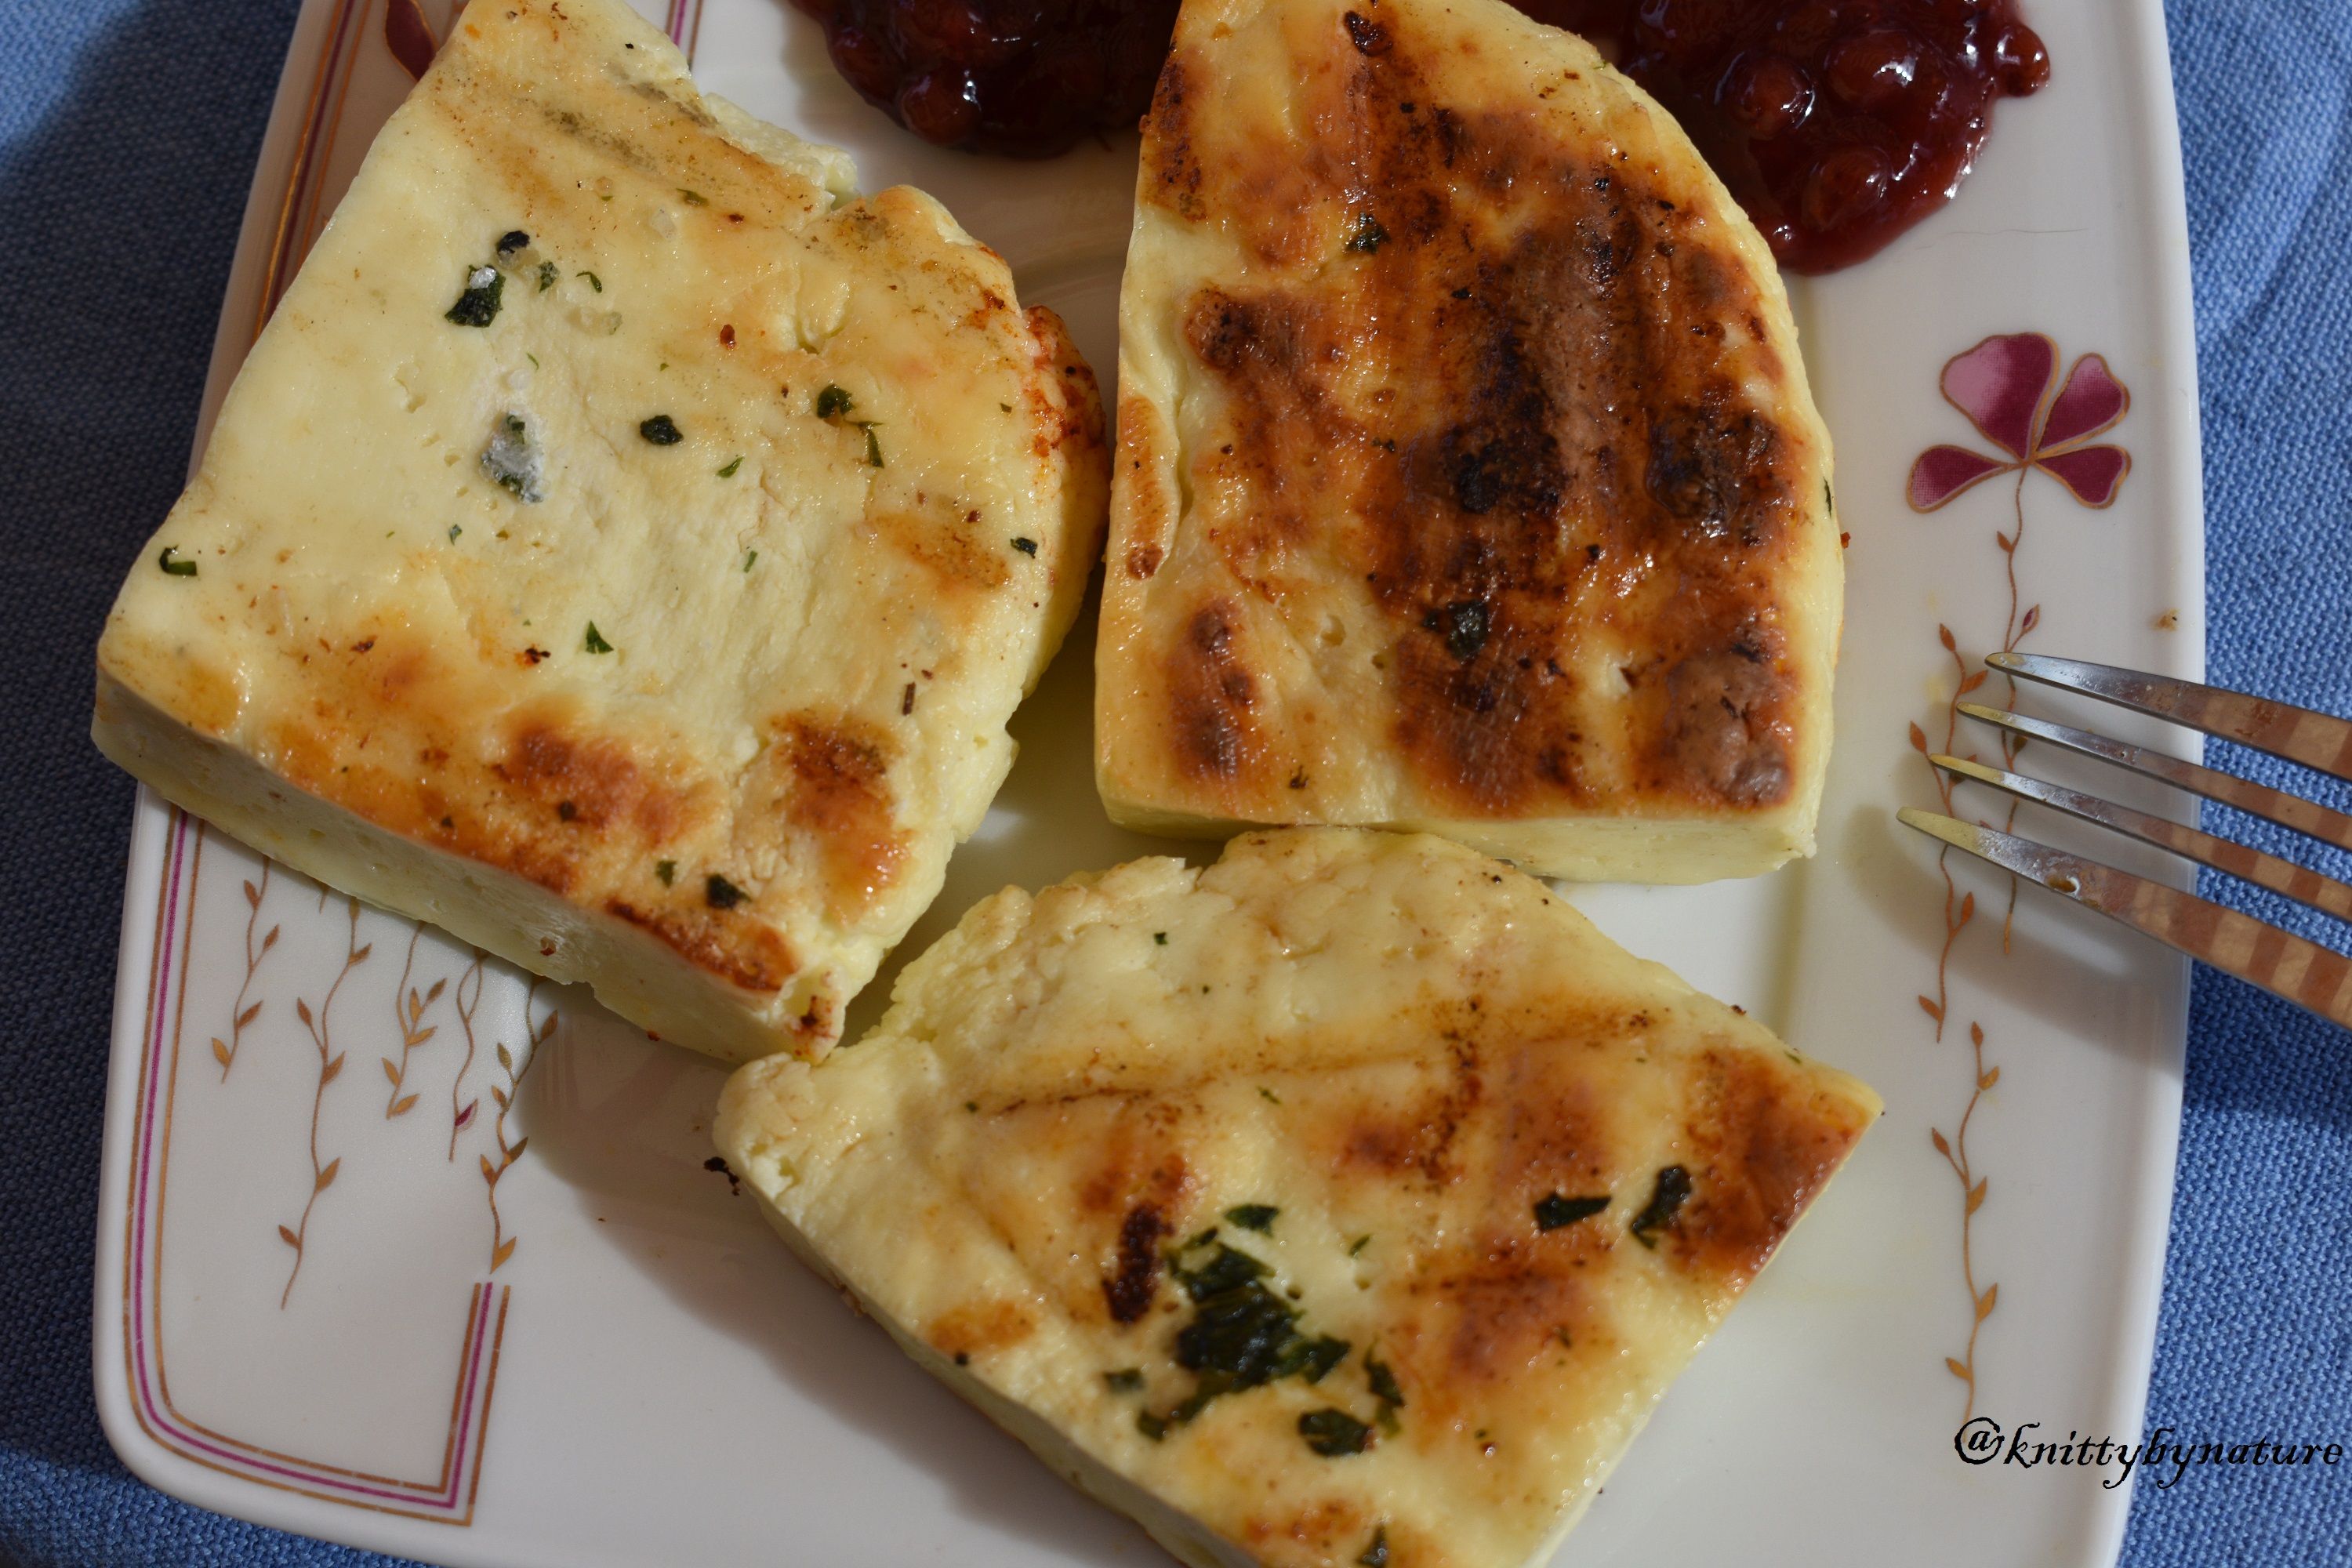
I really love grilled halloumi so I picked it as my first cheese that I will make. In general, it should be salted for 30-60 days but any cheese can be consumed straight away so my family and I, as very curious and impatient people had to grill it after 24 hours. The cheese itself was very tasty a bit sweet but really good. I think it really needed longer salting time to be called halloumi but for my first ever handmade cheese, I was happy with how it came out.
The procedure that I followed comes from the Ricki Carroll’s book “Home cheese making recipes”. I also made some changes according to Gavin’s the cheesemaker comments.
Cheers
Suzannah
Ingredients:
- 3 L of milk – I had micro-filtrated, unpasteurised one. It is the best to use milk straight from the cow (and I am actively looking for someone from who I could purchase some for my next cheese 😊). Also, milk that was pasteurised in low temperatures is good to be used but then calcium chloride (a natural occurring mineral) is added to the milk to bring back the calcium balance. UHT milk that was pasteurised in very high temperatures cannot be used as it will not for curd.
- Couple of drops of liquid rennet – now nearly all rennet available is either of a microbiological origin or plant based, which means that it is safe to use for vegetarian.
- salt with no iodine
- Mint – optional
- Calcium chloride – optional – as it says on the package
- 60 mL of non-chlorinated water – to dissolve the rennet. Filtrating and boiled water is perfect.
Tools:
- All tools must be disinfected by immersing them in a boiling water or in case of cheese cloth by ironing it at high temperature.
- Big pot
- A big spoon
- Long knife
- Colander
- Cheese cloth
- Two cutting boards
- Milk bottles filled with water as weight
Step 1. – make the rennet set the milk
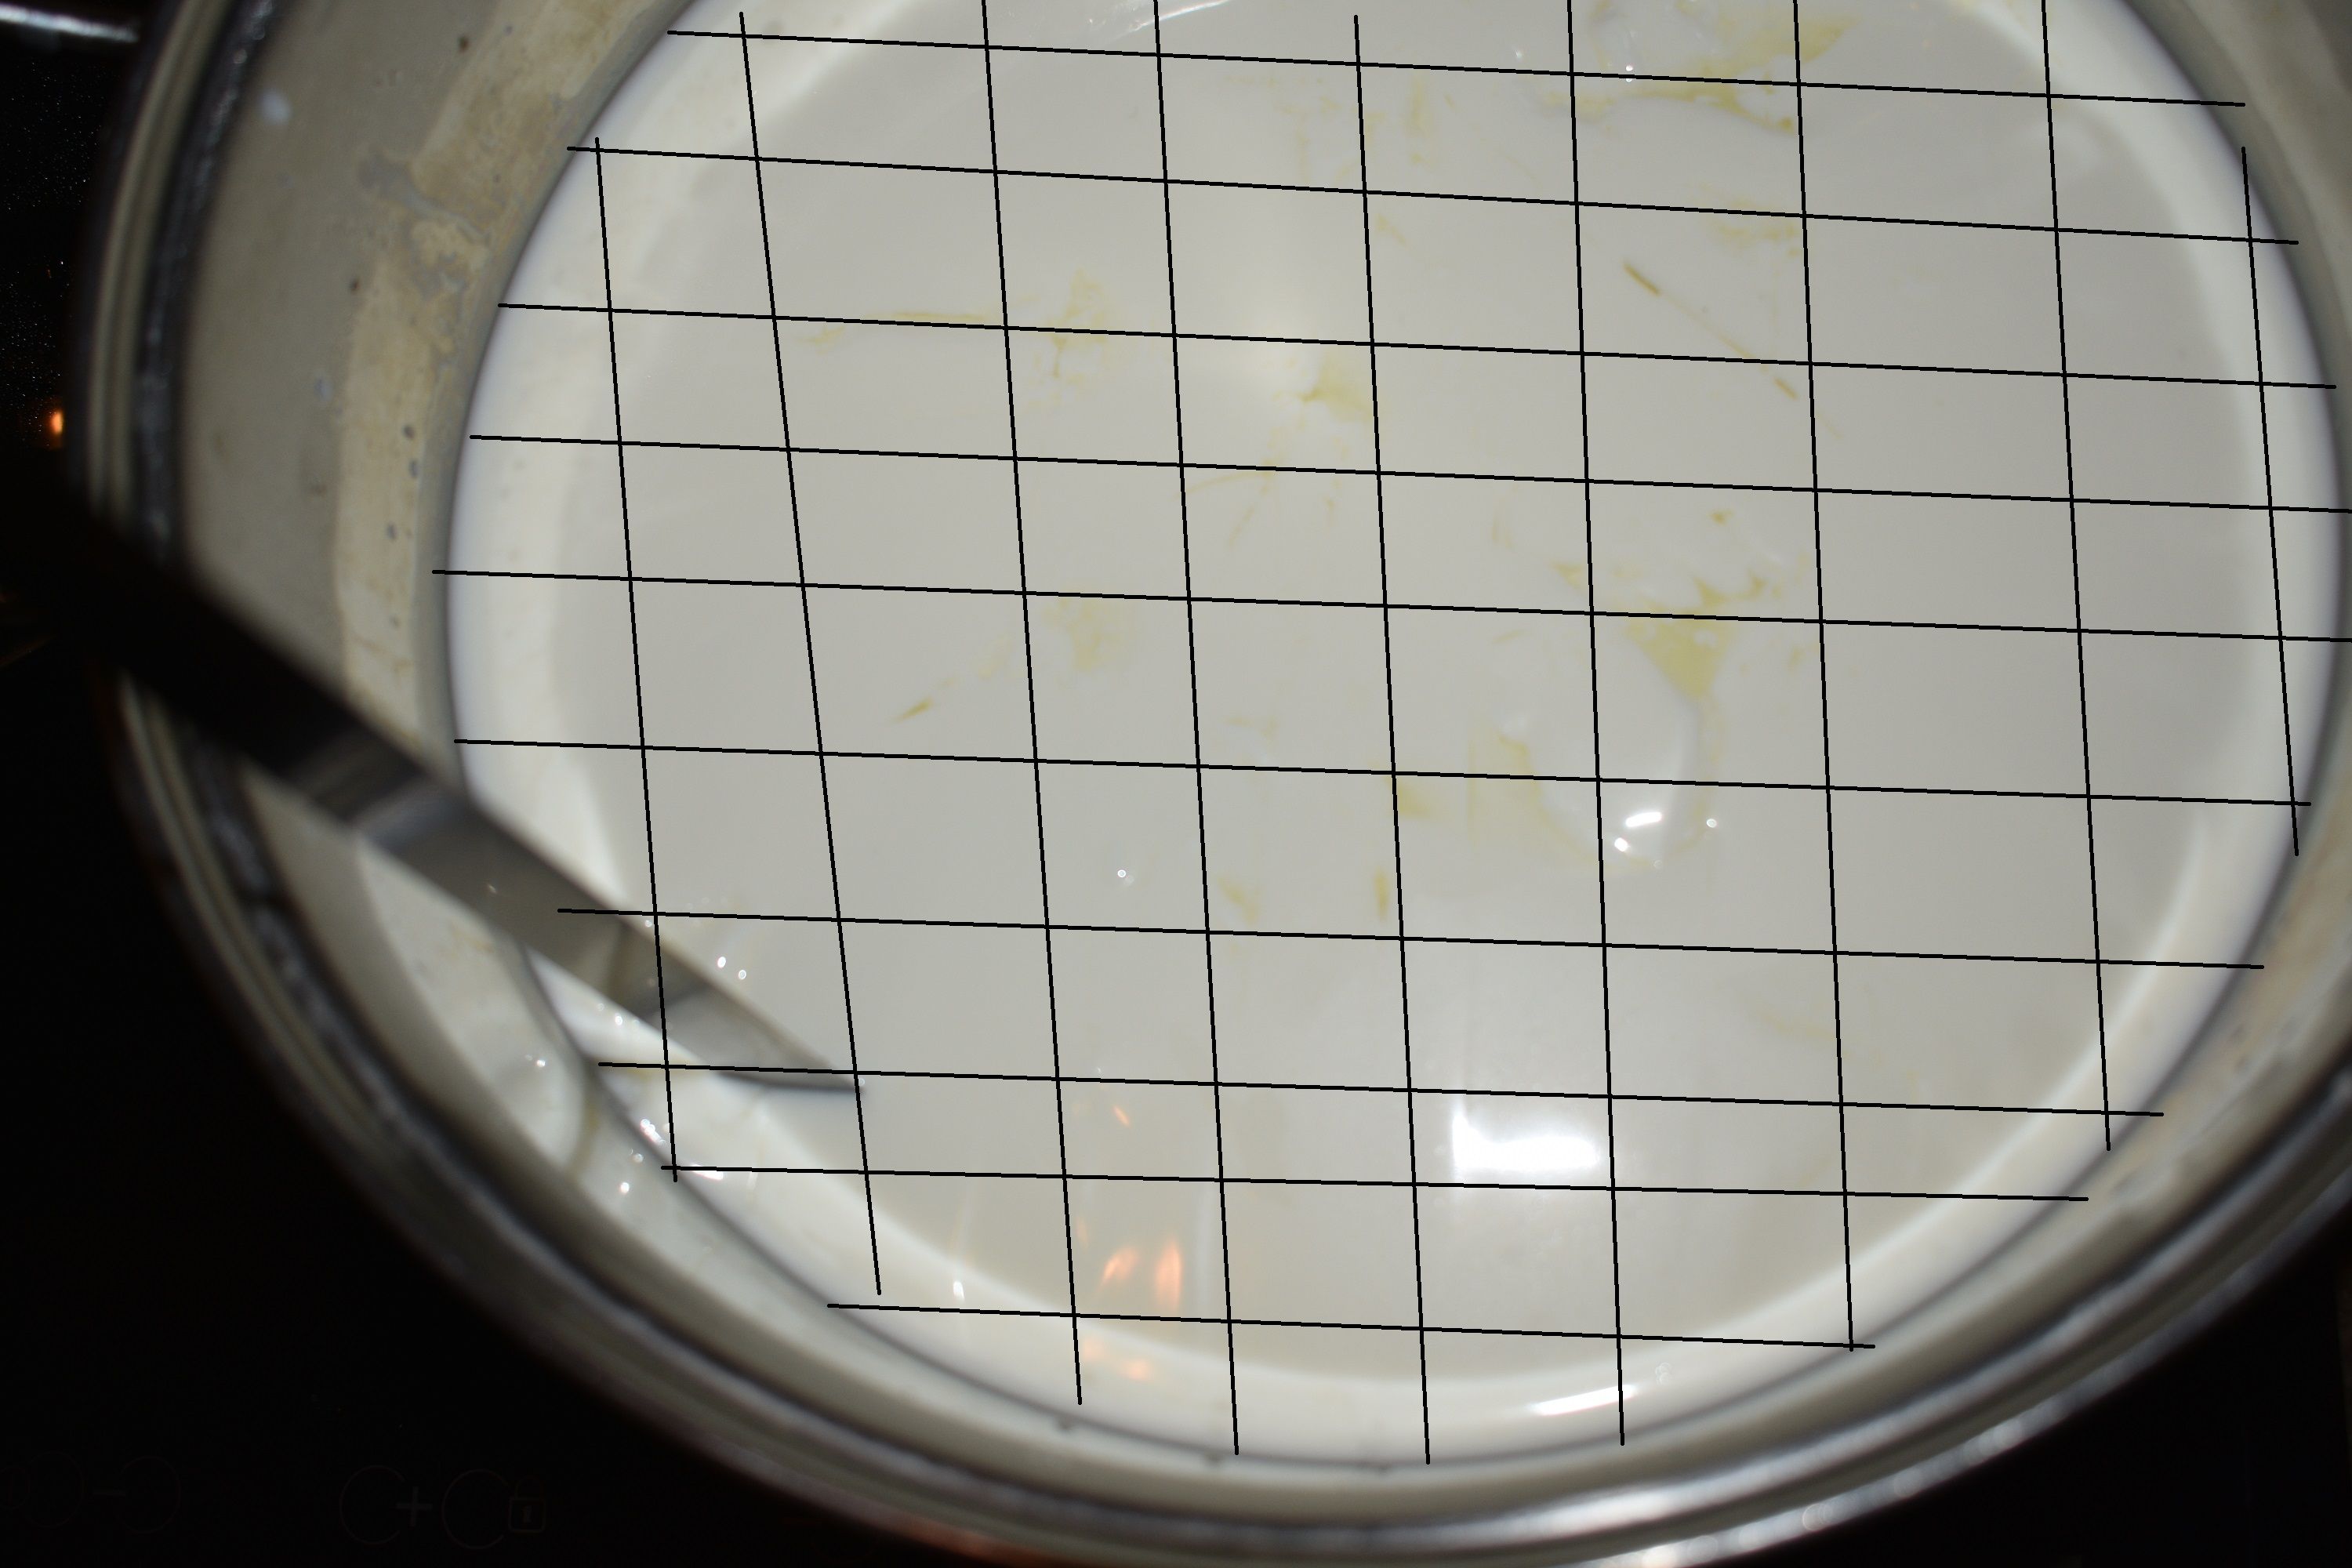
Heat up milk to 30 oC (it is best to heat it up in the water bath but the pot I used was my biggest pot so I just heated it up on the stove). Then dissolve the rennet in water according to the instructions as different rennet have different strength and add it to the milk. Mix everything for 2 minutes.

Step 2. – wait for clean break
Then keep the pot warm and let the rennet set the curd (the milk will become jelly-like consistency). Now we are looking for clean break – I still have to get a hold of how to do it properly so no photo here sorry ☹. So this means to insert a finger horizontally, below the surface of the curd then slowly lift it up and observe if the surface of the curd split cleanly or not. If there is a clean split then the curd is ready for next step, if not then it need some more time.
Step 3. – cut the curds
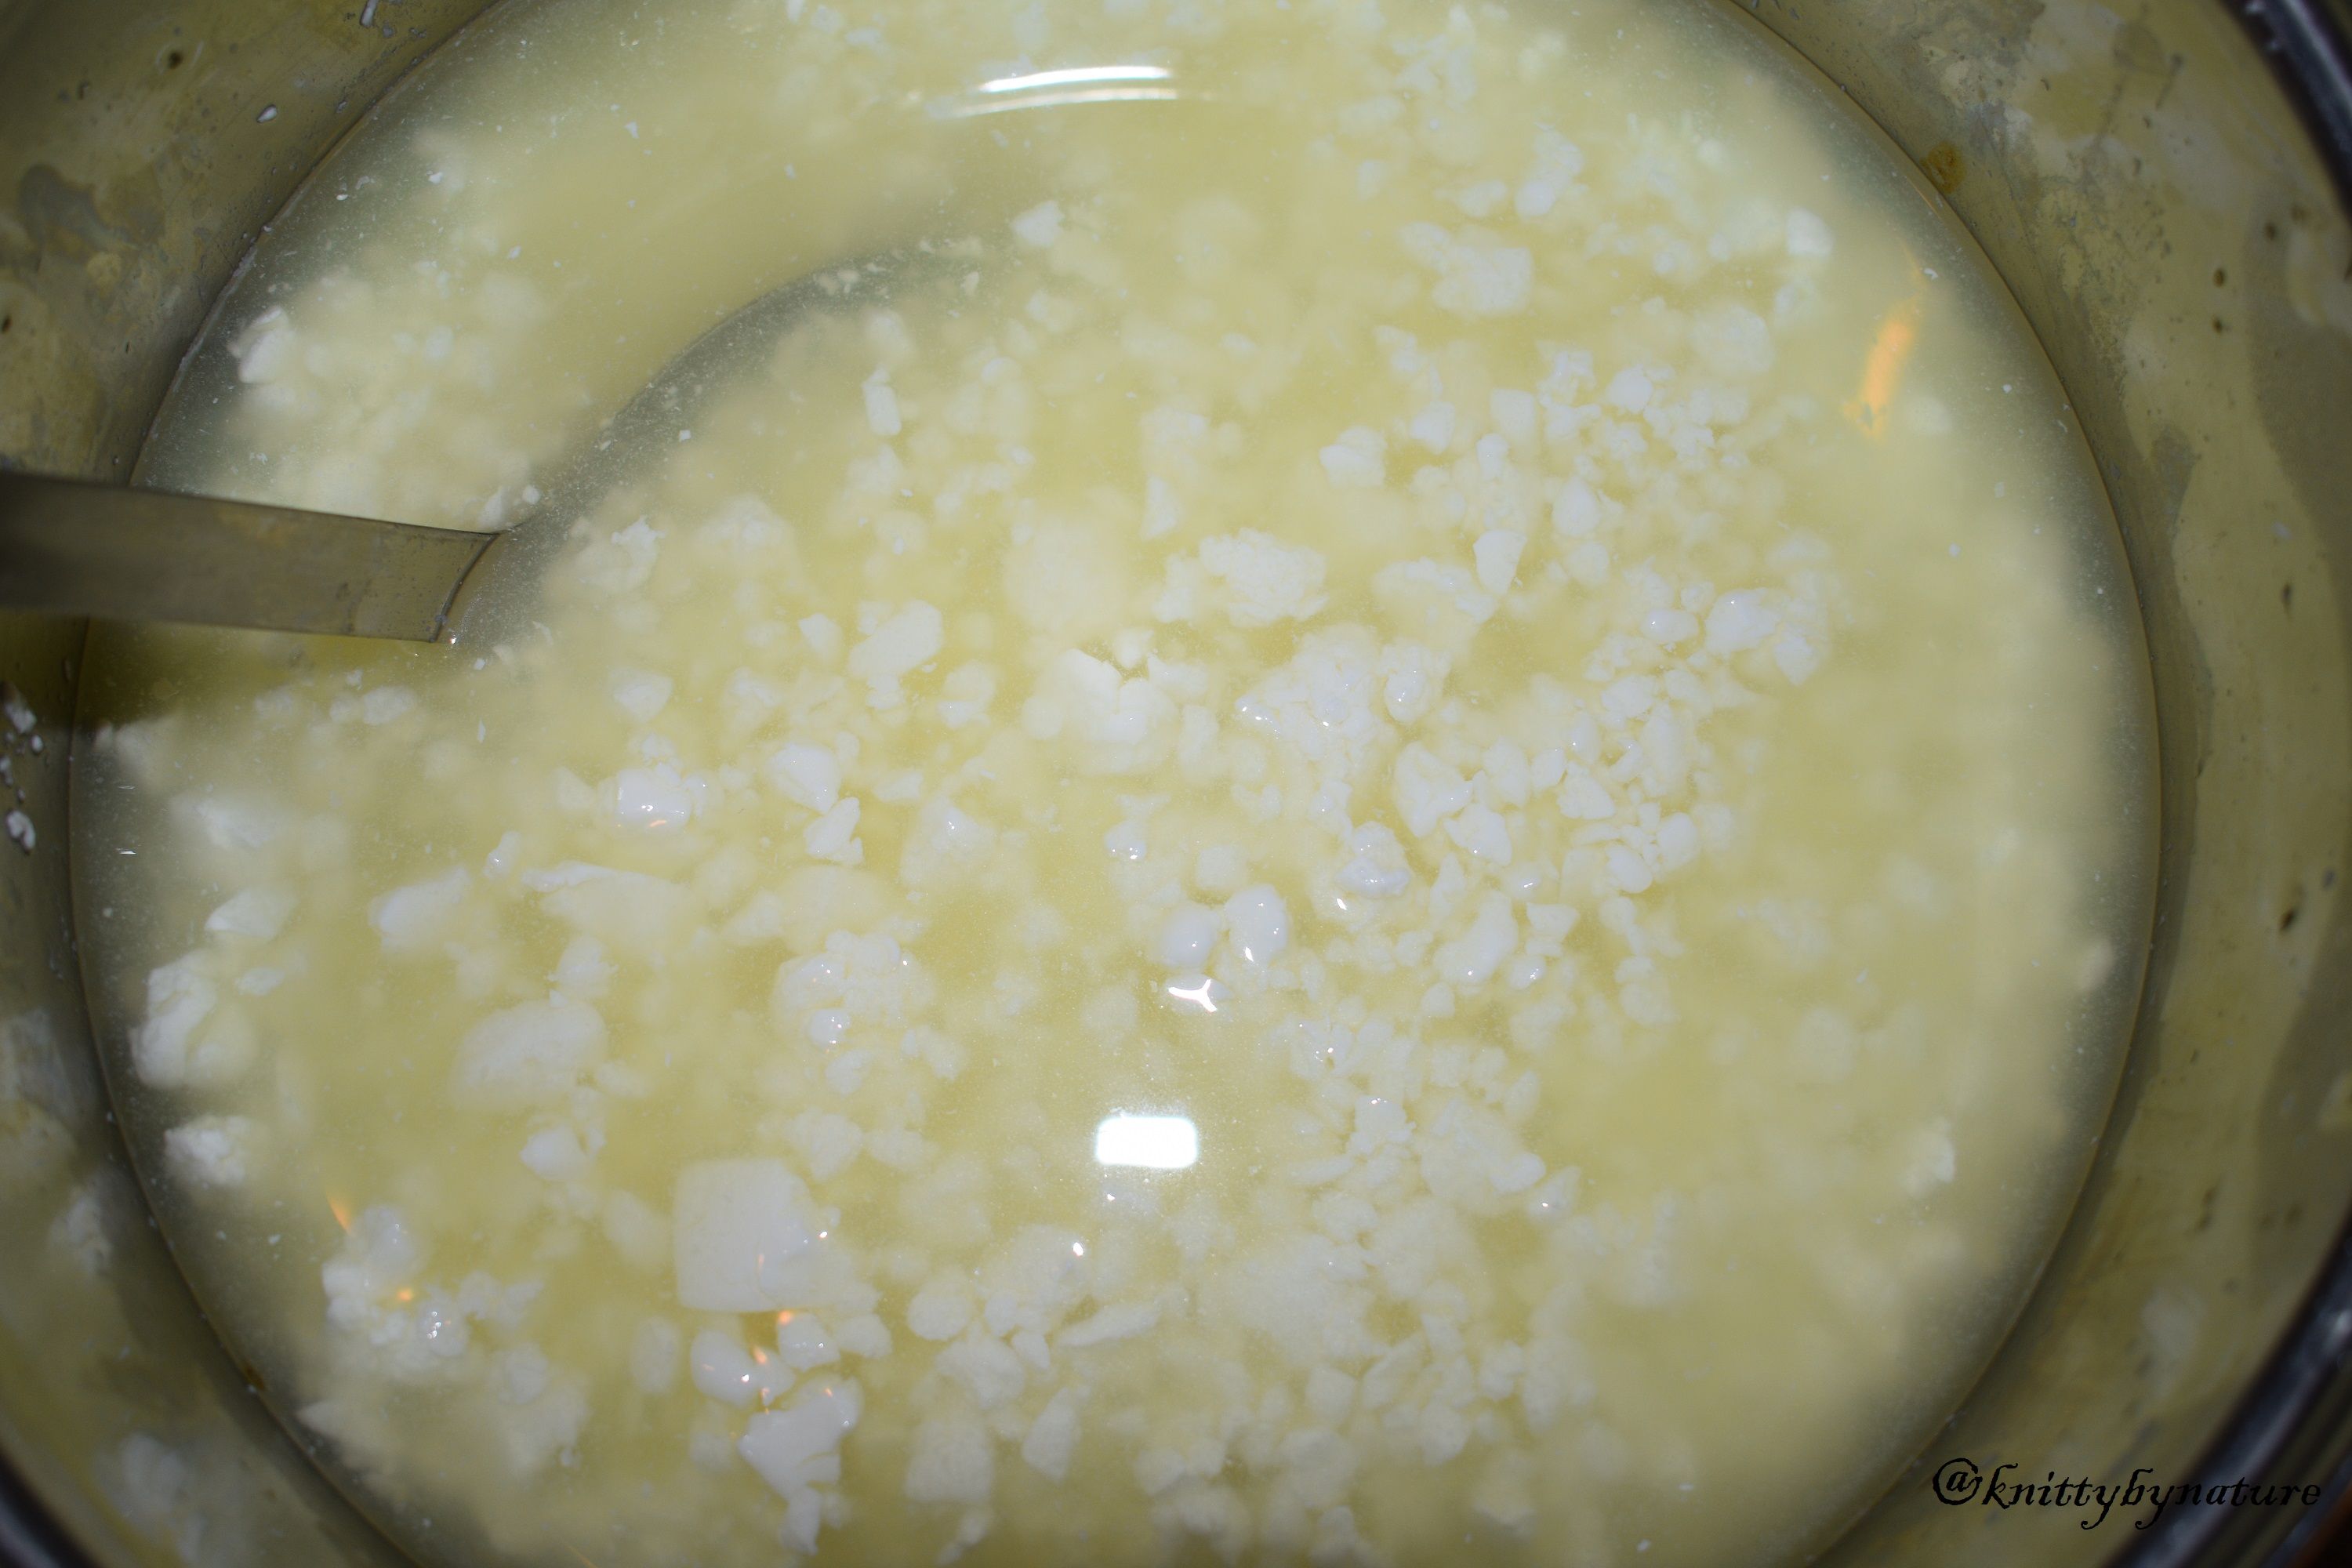
A clean break was observed so it is time to cut the curds in approximately 1.5 cm or about half an cube. Then let the curd set for 10 minutes. During this time curds will release some whey.
Step 4. – heat up and mix
Now start increasing the temperature of the curds to about 40 oC at a rate of 0.5-1 oC/ minute. Do it while gently mixing the curds. Over time the curds will release more and more whey and they will shrink substantially.
Step 5. – allow curds to rest and then strain
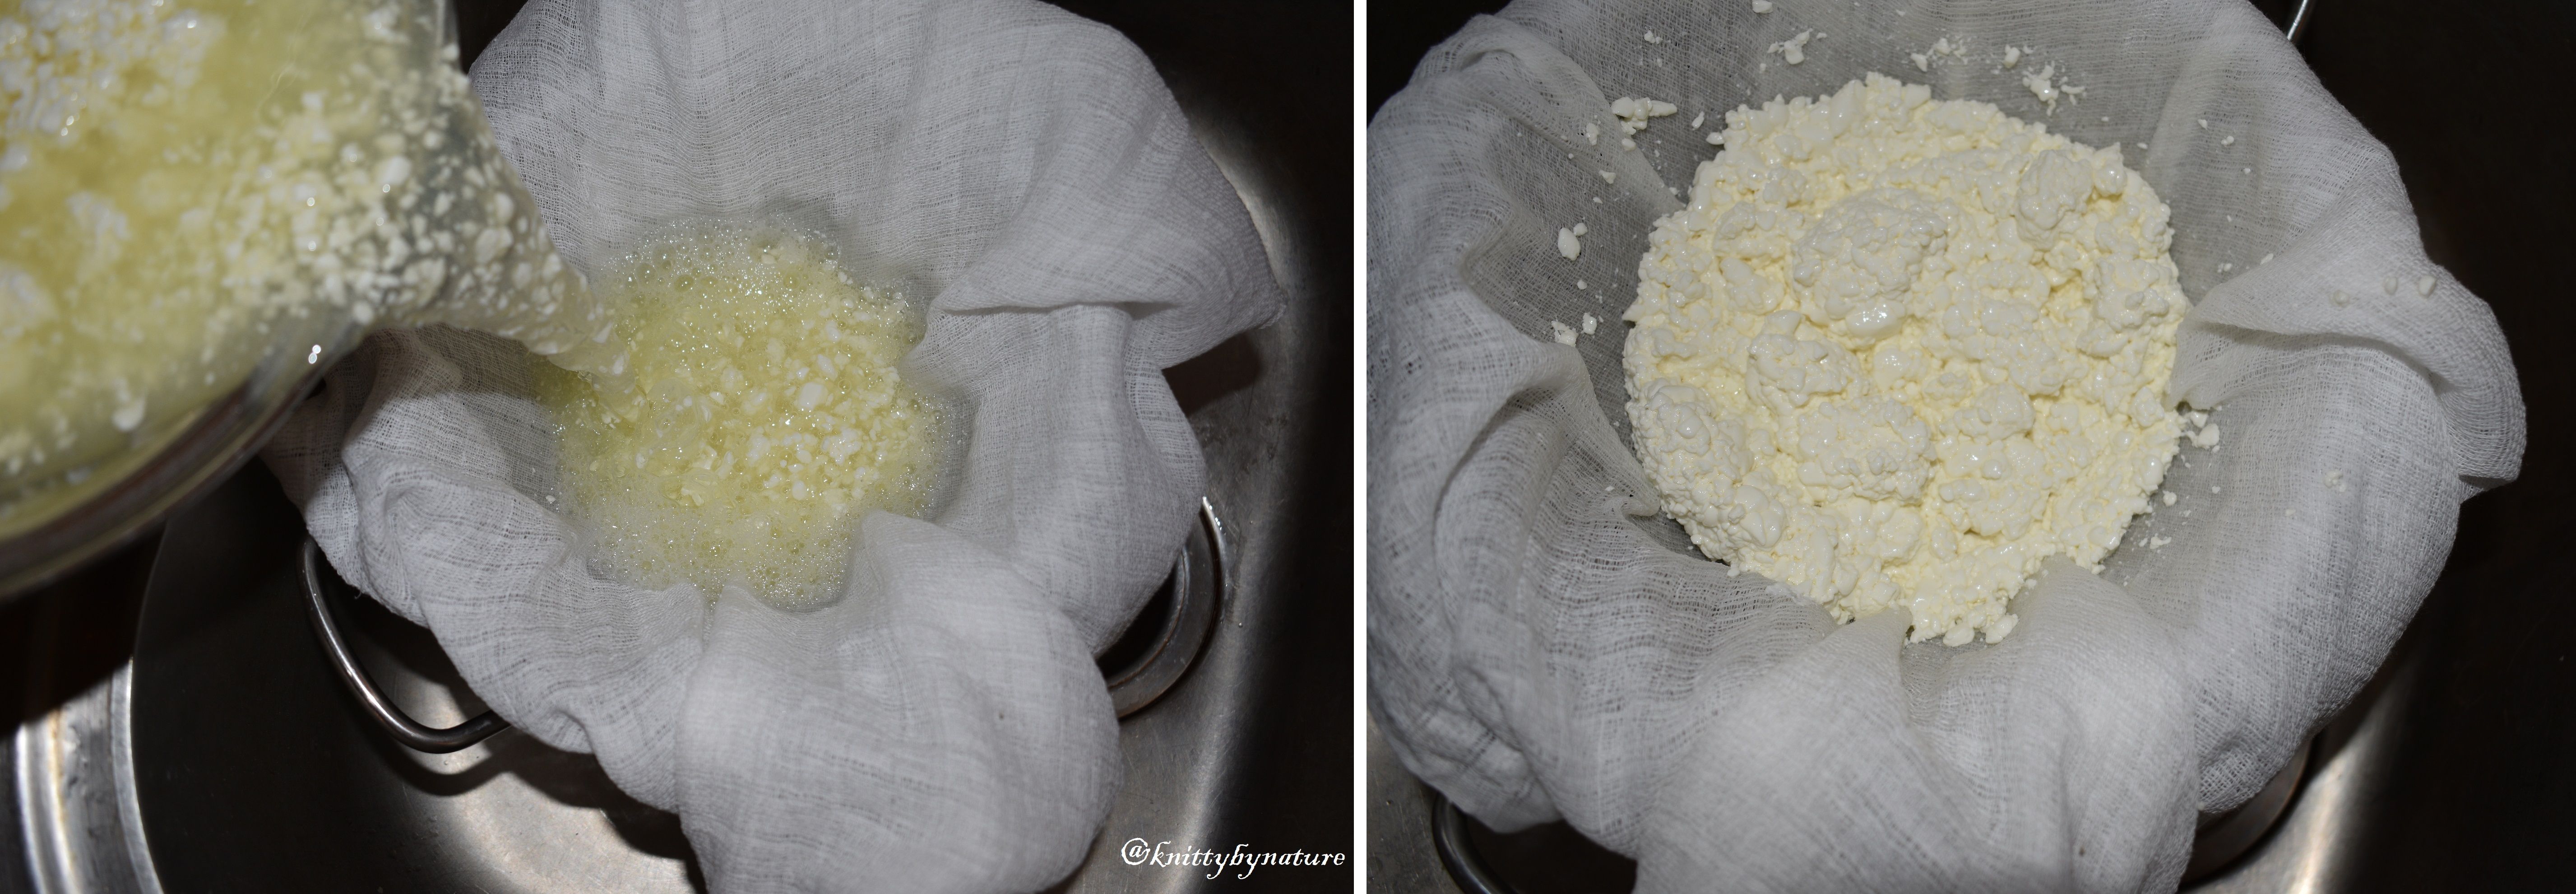
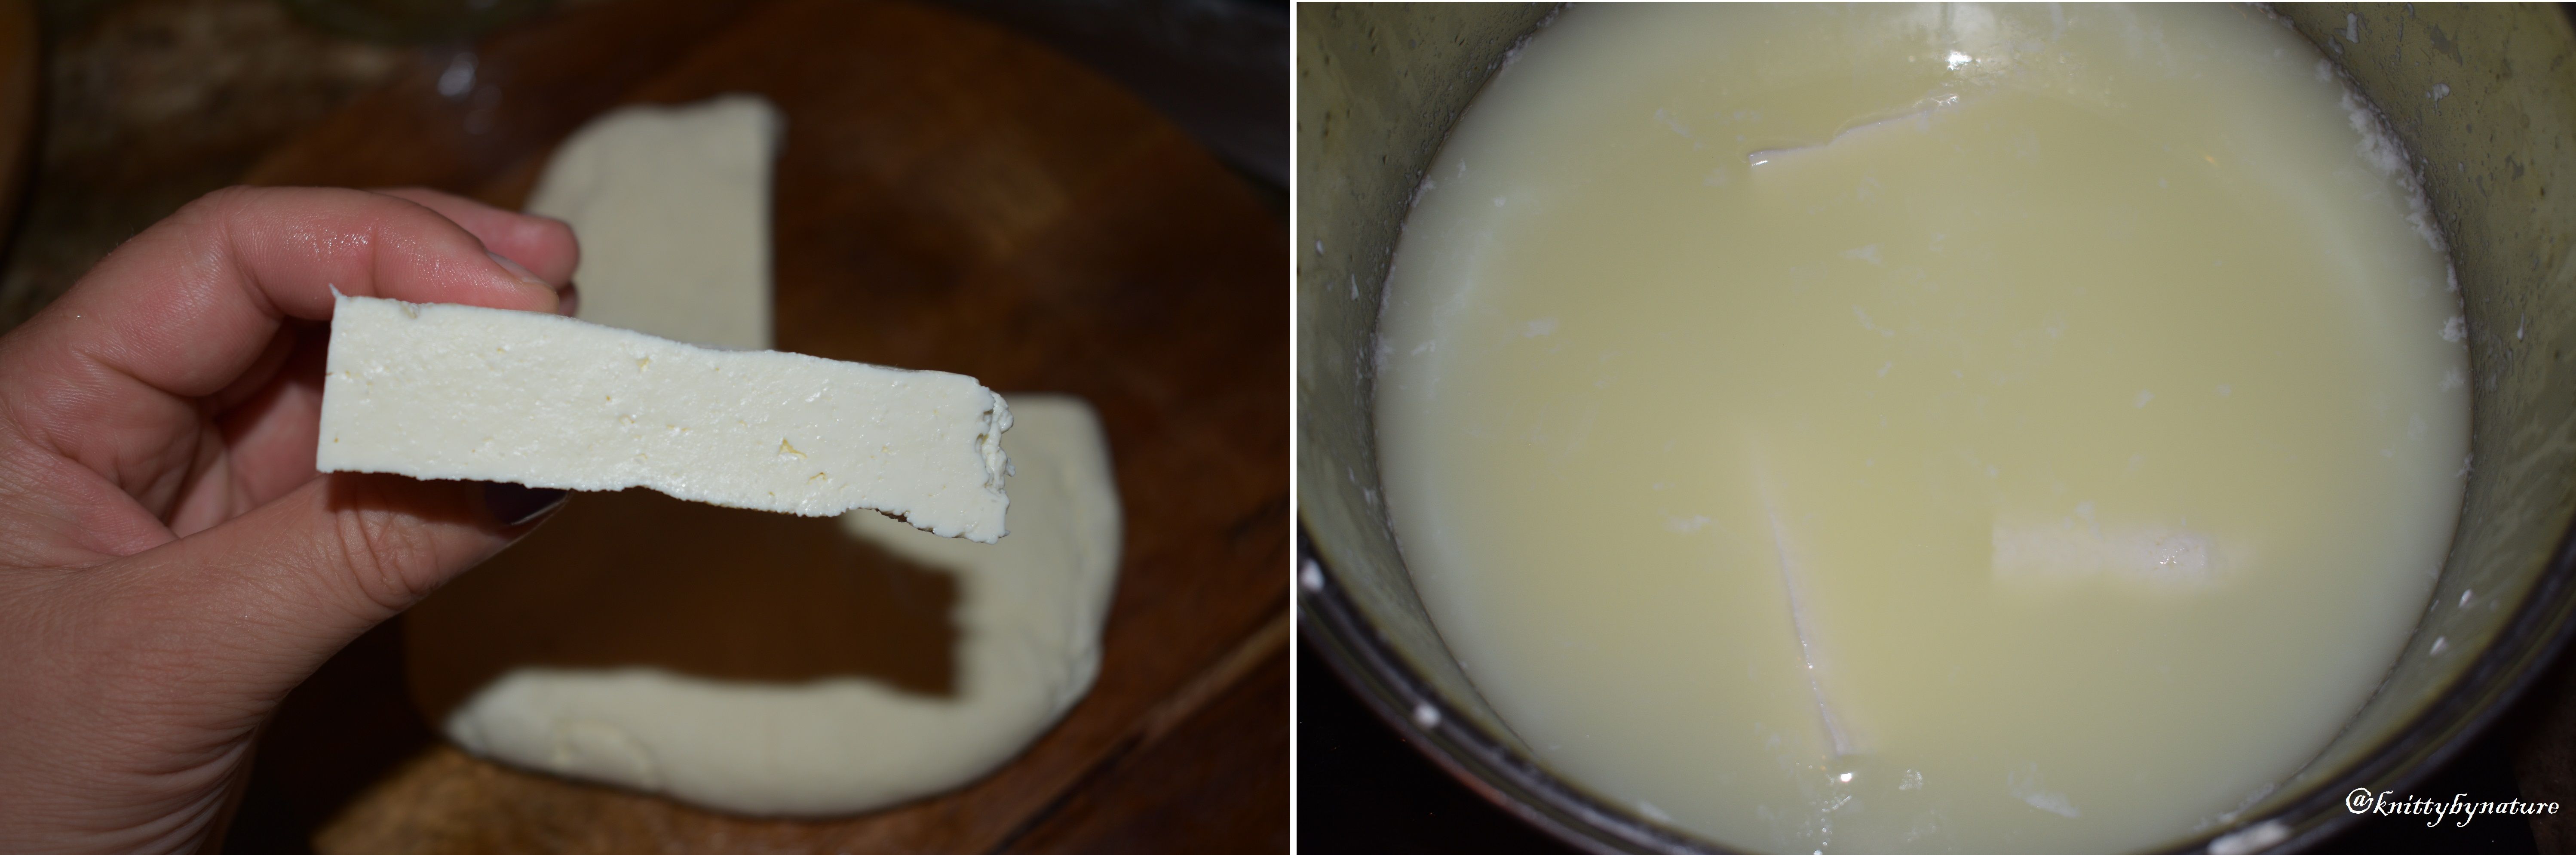
When the temperature is at 40oC let the curds rest in the pot for 10 minutes. The curds will drop to the bottom. Then strain them through a cheesecloth over a colander for couple of minutes. Make sure to keep the whey.
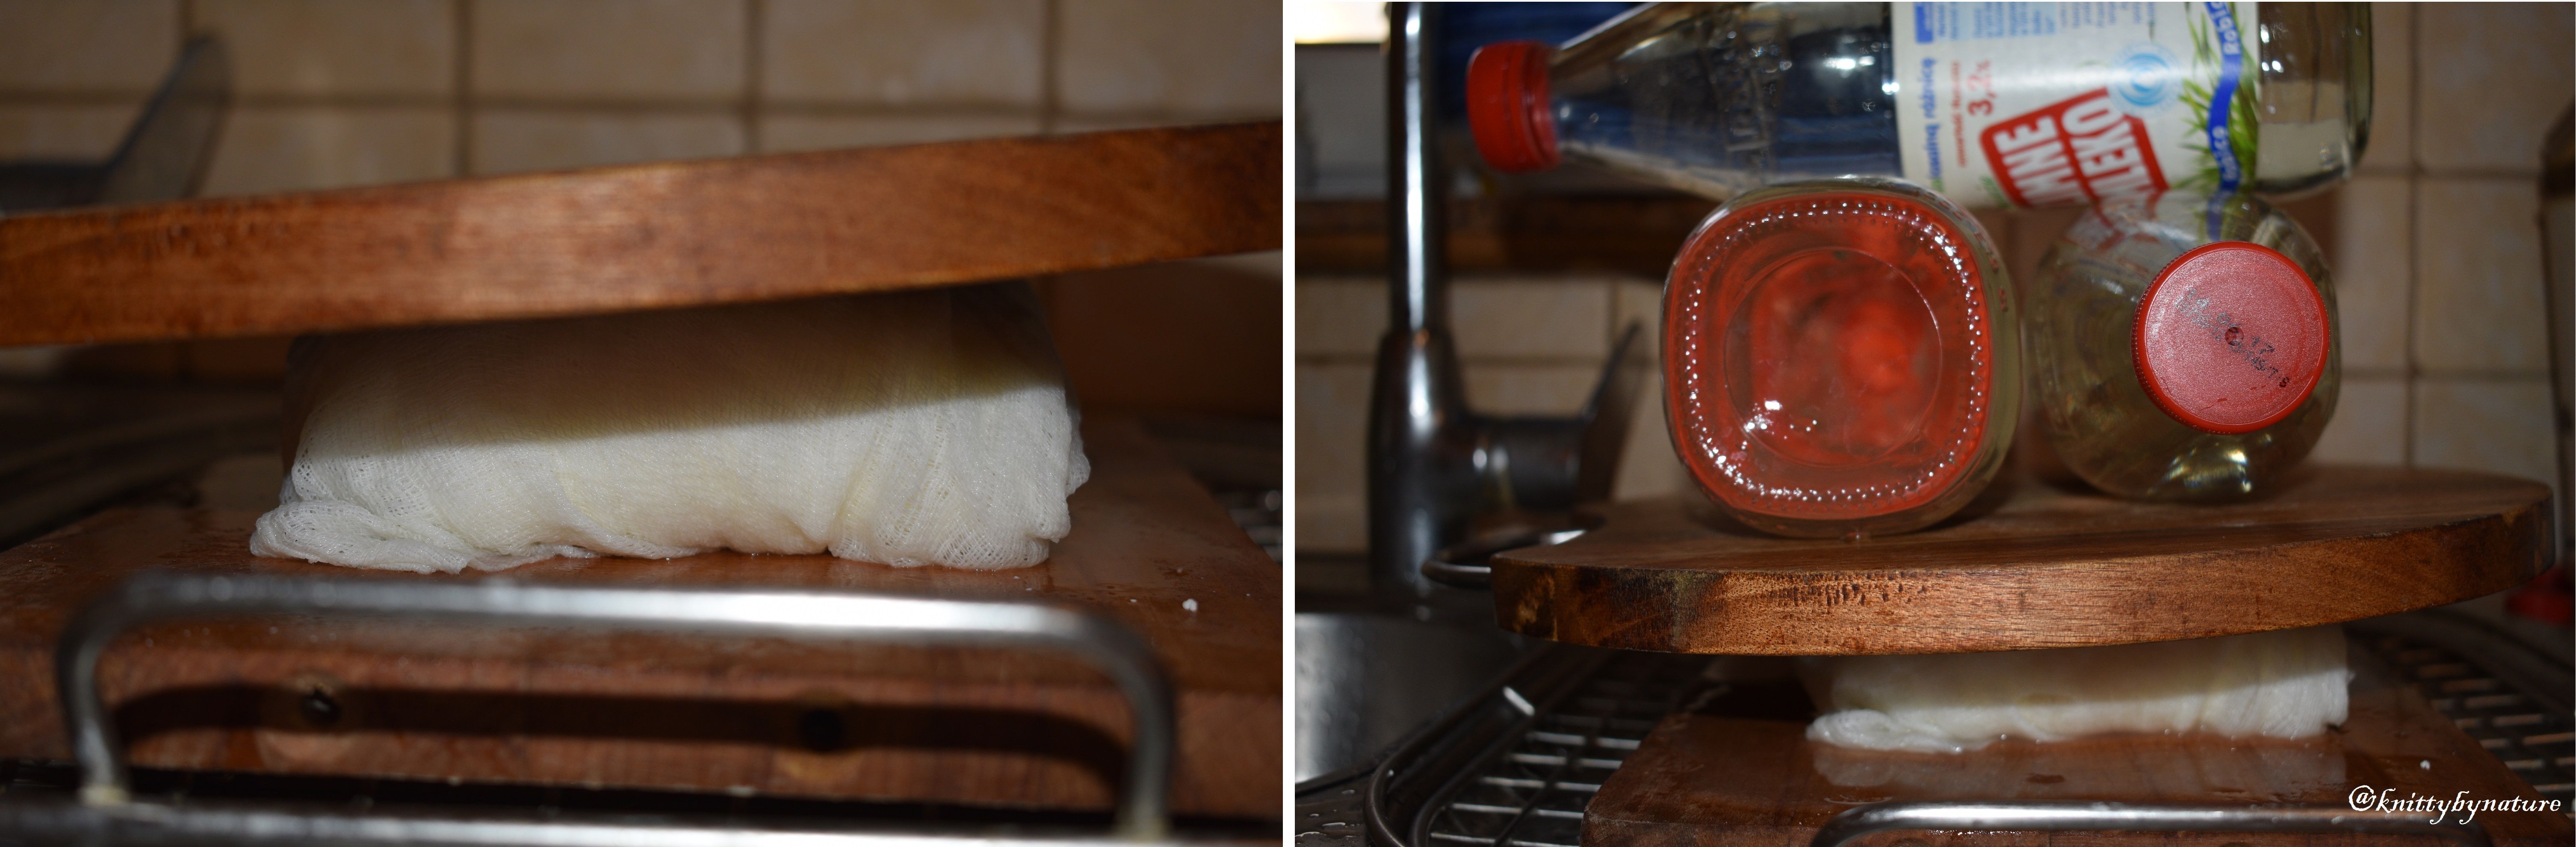
Step 6. - press the curds
Take the curds and wrap them in a cheese cloth and form a rectangular shape then place it on a cutting board. Place another cutting board on top of it and used the water-filled milk bottles as weights to press down the cheese. – keep it pressed for 20 minutes then flip the cheese upside down and again press in similar manner for another 20 minutes. It should be rather flat in the end – I pressed mine for too short period of a time and I ended with very thick cheese.
Step 7. – cure the cheese
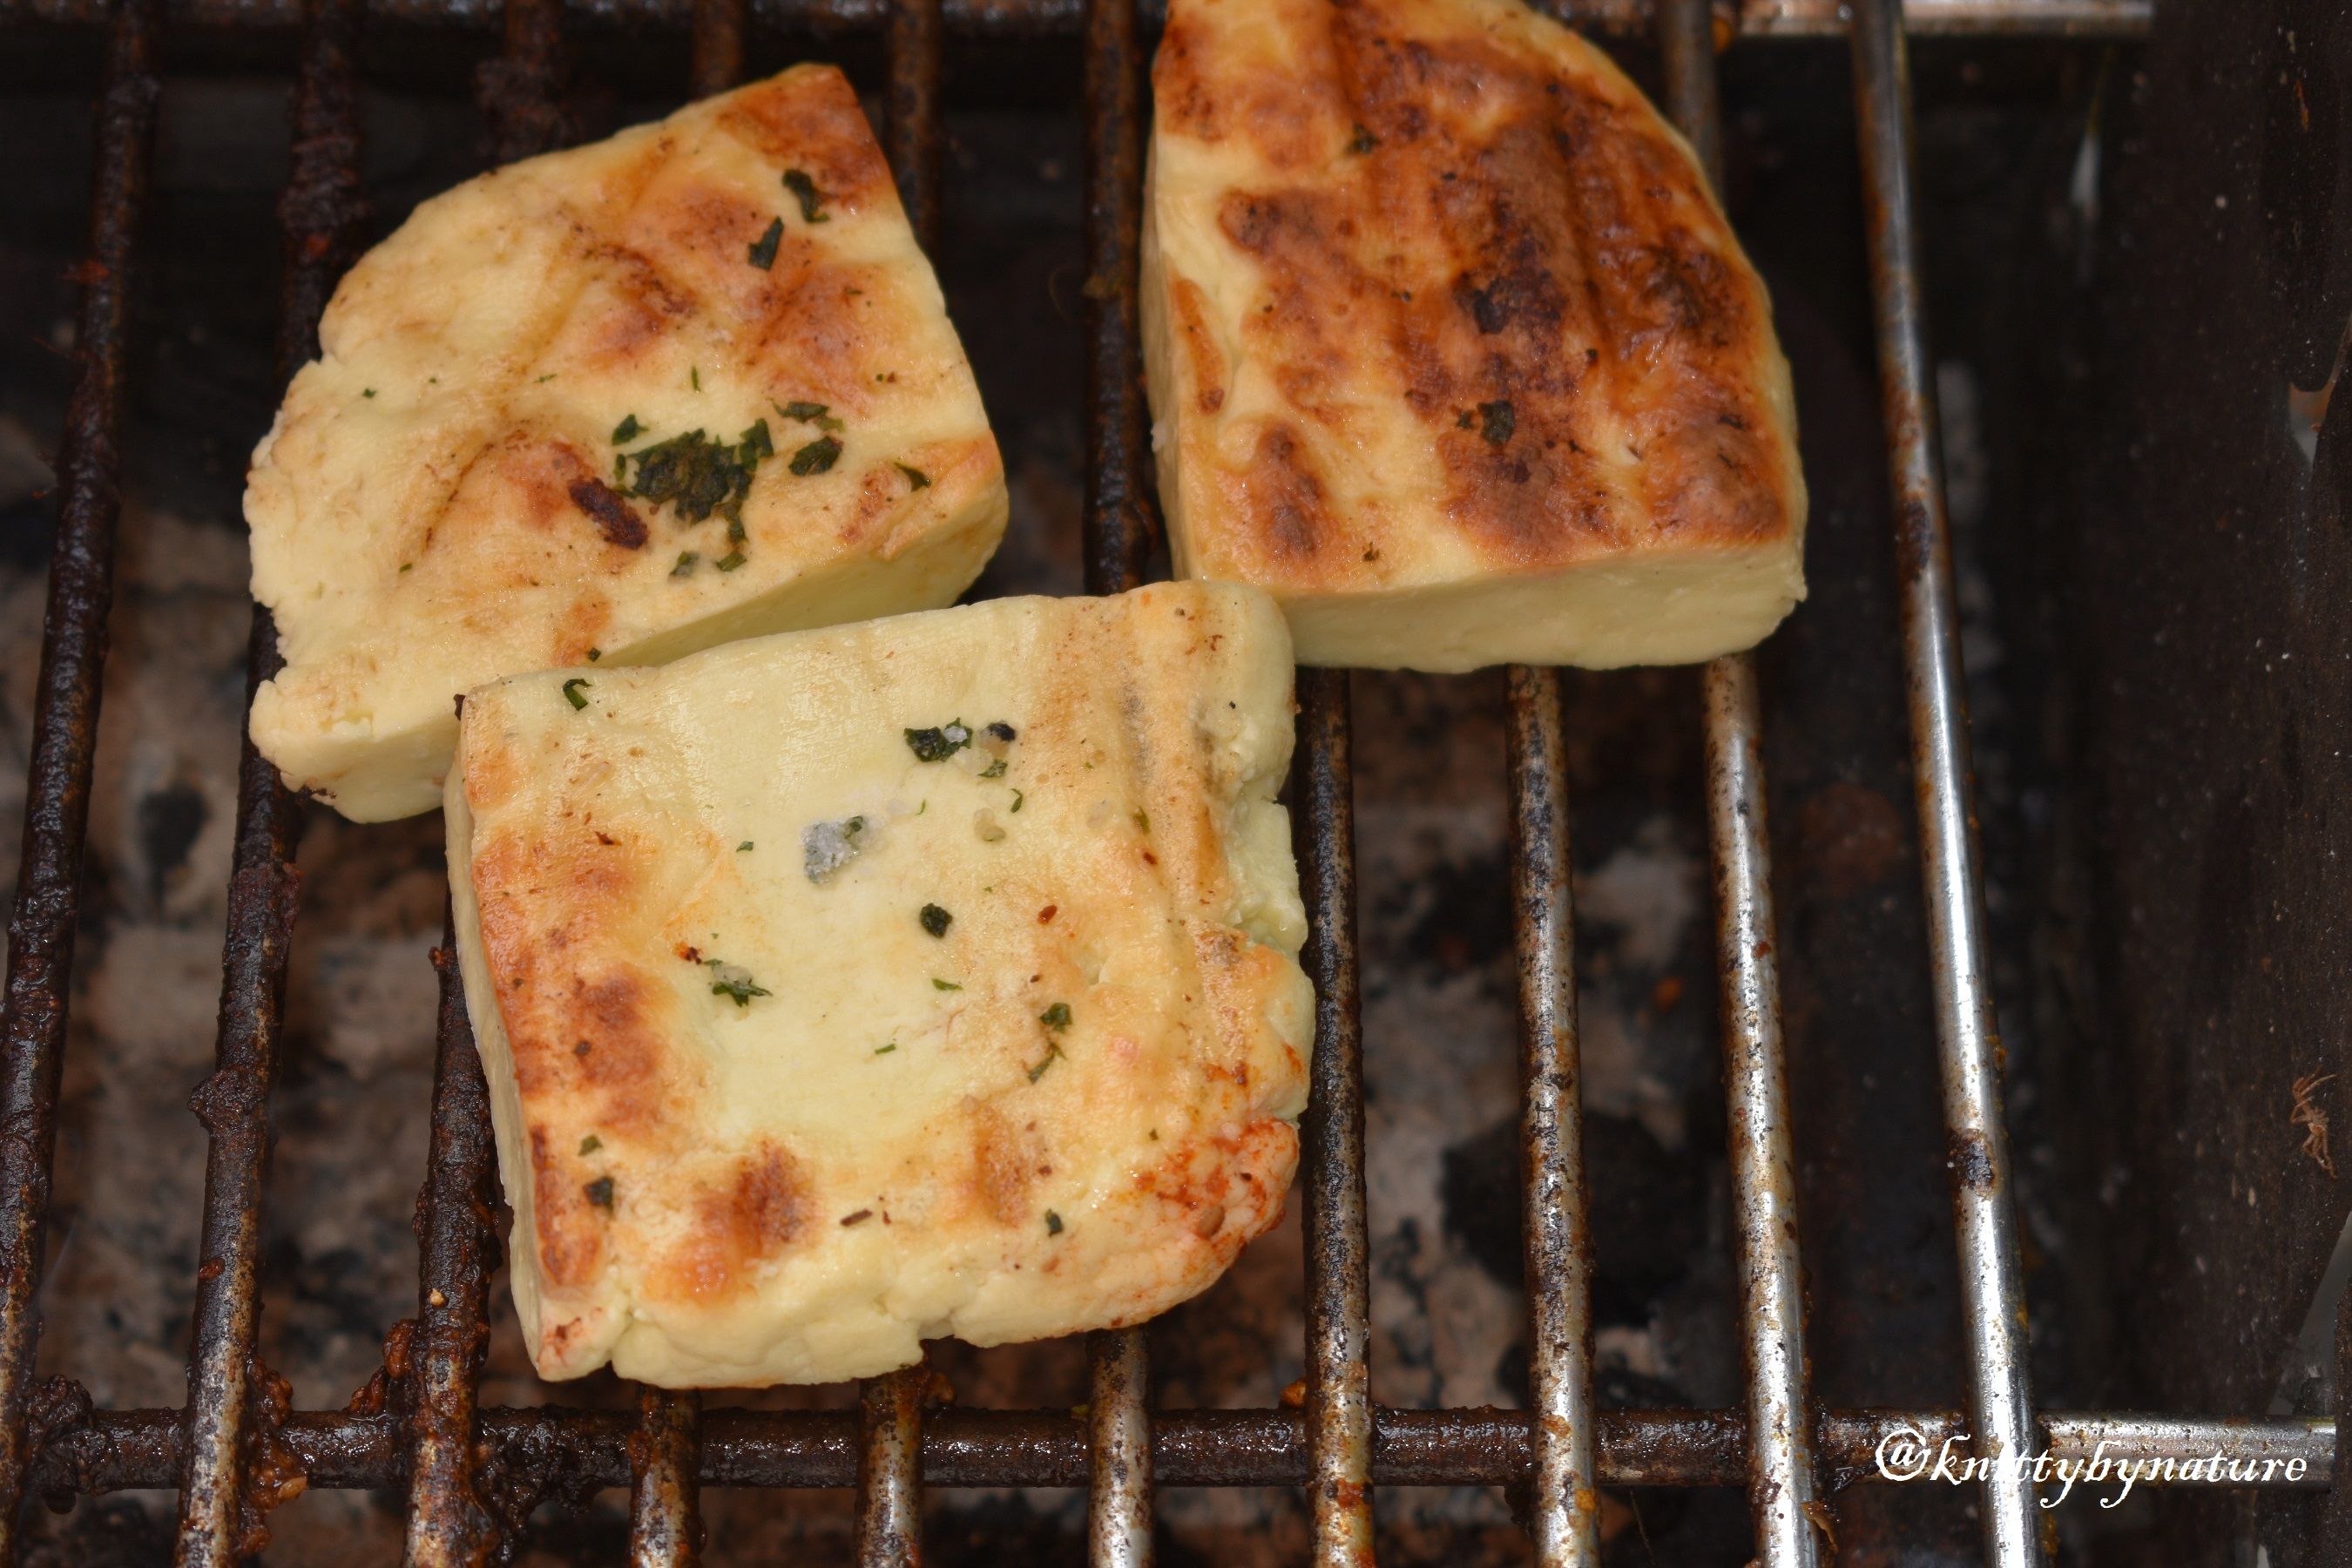
When the cheese is being pressed, heat up the whey to 97oC. There will be come curds “foaming” on the surface so try to remove them. Cut the cheese in pieces and drop them into a hot whey. They will sink to the bottom and then they will come up to the surface when ready. Apparently, this will stop halloumi from melting later on. The curing process can take anywhere between 15 min-1 h.
Step 8. – salt the cheese
As the cheese emerge on the surface, remove it from whey and coat it in salt and mint. If the pieces are thin enough they can be folded in half. Mine were rather thick so I left them as it is. Wrap the cheese in plastic wrap and mature it for up to 60 days.

Looks wonderful! Well written. I will give it a try!
Thank you @thedeplorable1. Let me know if you do! The whole process is really easy just slightly time consuming :)
Looks delicious! Thanks for sharing, I have never made cheese before but I may have to try!
Thank you @jeffjagoe! It was my first attempt to make cheese so I do recommend to try :) Let me know if you do!!
Just got more hungry seeing this post. Looks great, thanks for sharing
Thanks @charles1!! I am glad that the first cheese I ever made makes others hungry :)
welcome
You are a real experimenter in the kitchen. Who would have thought that you can make cheese easily at home. Thanks for sharing! :)
Thank you @alinalisa! I have some free time recently, so I thought that doing things that I thought would be impossible would be a good idea. And so far I like the experience. I am preparing new cheese right now. I hope it will be a success so I can make a post about it :)
@ knittybynature congratulation for doing that and sharing with us!!1 It is not easy ,you have to make a good try. I was in Cyprus last summer and eat a lot Halumi, that is what you reminded me!!! Thank you!!
Thank you @evimeria!! I am glad I could remind you about your holidays :)
I like Hallumi a lot , also you can combine it with seftalia :)
http://www.seriouseats.com/2014/07/sheftalia-cyprus-sausage-in-caul-fat.html
Wow this combination must be delicious!! I will try it next time :)