How to Mine Haven (XHV): Complete Beginner’s Guide

Haven is a coin based on Monero, so it inherits Monero’s privacy aspects such as RingCT and stealth addresses. The Goal of Haven, is to make a system where one can trade their Haven for stable coins in different currencies (USD, EUR etc) This allows people to store funds that are stable and anonymous, unlike other stable coins that are not anonymous. Haven uses a modified version of the cryptonight heavy algorithm.
Haven Mining Pools
The first thing we need is a mining pool. You can solo mine, but the payouts could take months depending on how powerful your mining rig is, and the mining pools usually charge a very small fee (1% or less). Using a pool will allow you to receive consistent payouts, multiple times per day. For Haven, there are a few pools. I chose to mine at https://xhv.fairpool.xyz/
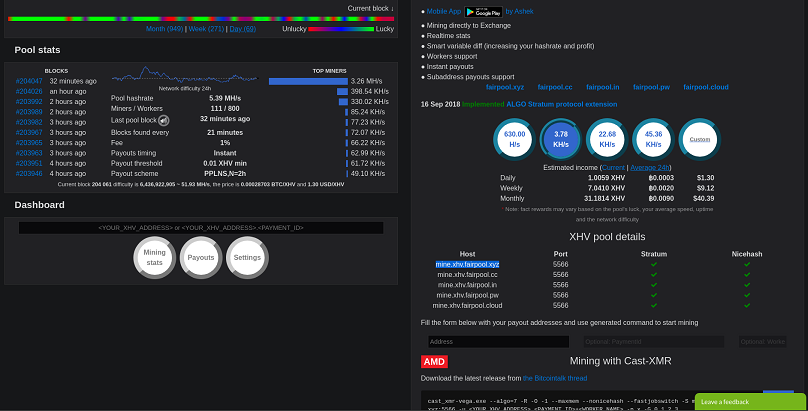
As for their features, their a medium sized pool with 1% fees with a PPNLS structure of around 2 hours.
Now that we have a pool, lets configure the mining software!
Configuring the Mining Software
For the CPU, GPU – Nvidia and GPU – AMD tutorials, we will be using xmr-stak. It is open source, the most customizable, and allows you to mine using a mix of Nvidia and AMD GPU’s as well as your CPU, all from one window. It is also available for Windows and Linux.
You can download xmr-stak at https://github.com/fireice-uk/xmr-stak/releases The latest version is 2.6.0, which is what we will be using in this tutorial. This tutorial will not be focusing on how to build xmr-stak from source.
The first time you run xmr-stak you will have to configure it a little bit. We will cover the initial configuration here, and then you can read about how to configure the miner in the section that pertains to you (CPU, GPU – Nvidia and GPU – AMD)
When you first run xmr-stak, you will be presented with two cmd window
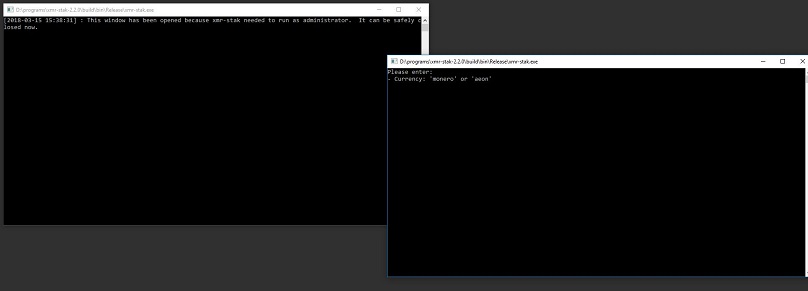
You can close the one that says it needed to be run in order to have administrator privileges.
You will then be presented with a series of steps that will guide you through the first time initialization of the software. Once you have completed this, you will not need to do this again.
The initialization steps will ask the following questions:
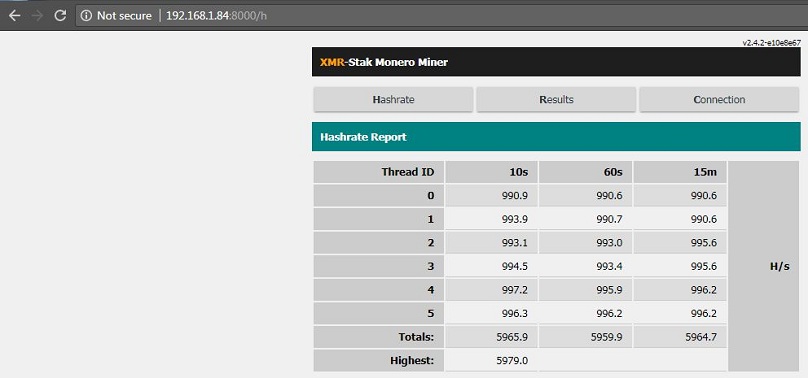
Type in a port you want to use the remote monitoring on. Usually 8000 or 3000 are available on most home computer networks. Later, to monitor your mining computers, you can type the ip address and port you choose of your mining computer, into a web browser on any other device connected to your network, to view your total speed and other detailed reports
Currency: – You will want to type “Haven”
Pool Address – This is the address and port of the pool you want to mine on. For example, I typed in “mine.xhv.fairpool.xyz:5566”
Username – This is your public key for your wallet
Password – type “x”
SSL support – type “n”
Do you want to use Nicehash – type “n”
Do you want to use multiple pools – type “n”
At this point the software should start mining. Wait until it says “logged into mining_pool:port”, and then close the mining software. If you look in the folder where the miner is stored, it should have made text files for your CPU and your graphics card (Nvidia or AMD). They would be named cpu.txt, nvidia.txt, amd.txt. It will also make a config.txt and a pools.txt. In the next sections we will show how to edit the txt files for each mining component, as well as how to disable a certain GPU brand or CPU from mining.
for guidance Visit https://blockonomi.com/how-to-mine-haven/