Rainy Day Umbrella Quilling Craft
"Bismillahir Rahmanir Raheem"
This is @tammanna from #Bangladesh.
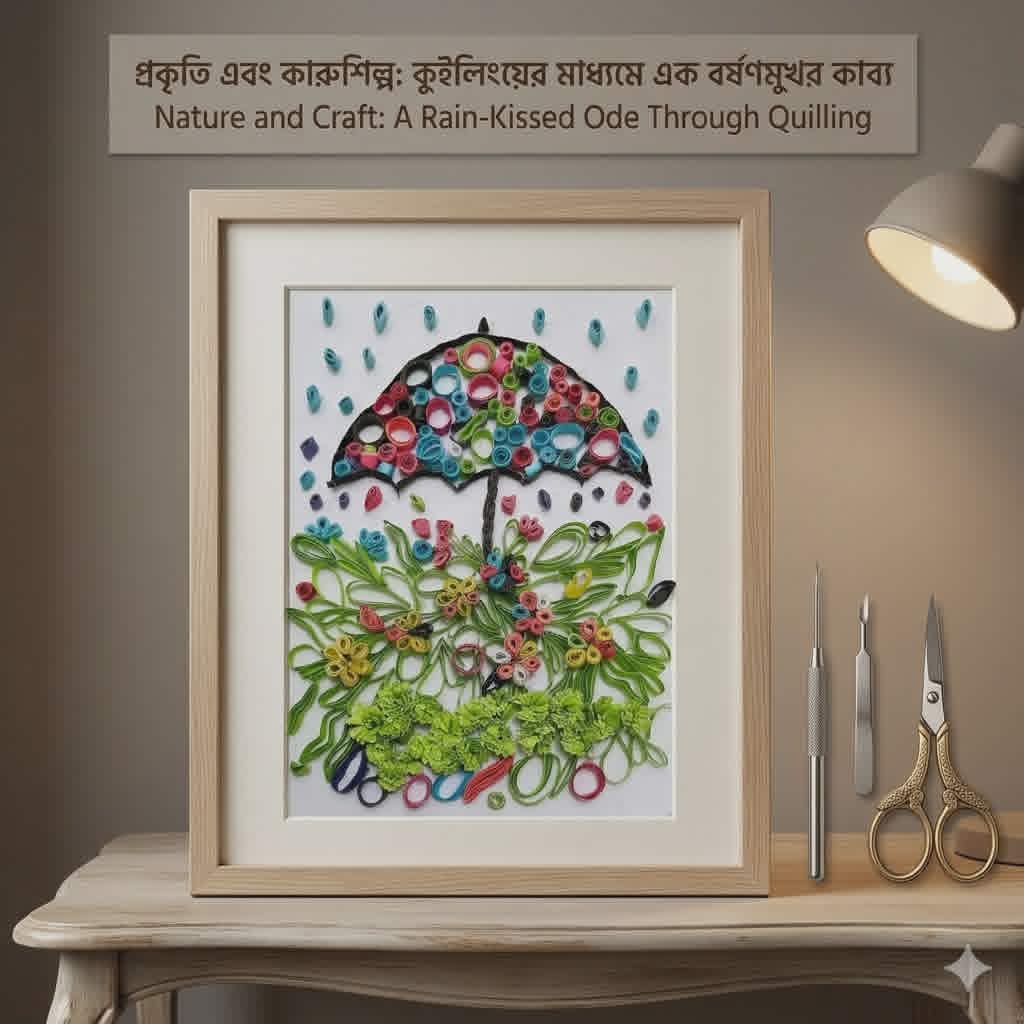
Friends, how are you all? I hope you are all doing well, and I am also doing well, Alhamdulillah. Today, I have come up with a great quilling paper craft for you. You will be very happy to see this today because I have made a quilling craft with an umbrella. It is interesting in many countries. It took some time to make it, but it is very interesting. Let's share with you how I made it.
| craft tools 👇🏾 |
|---|
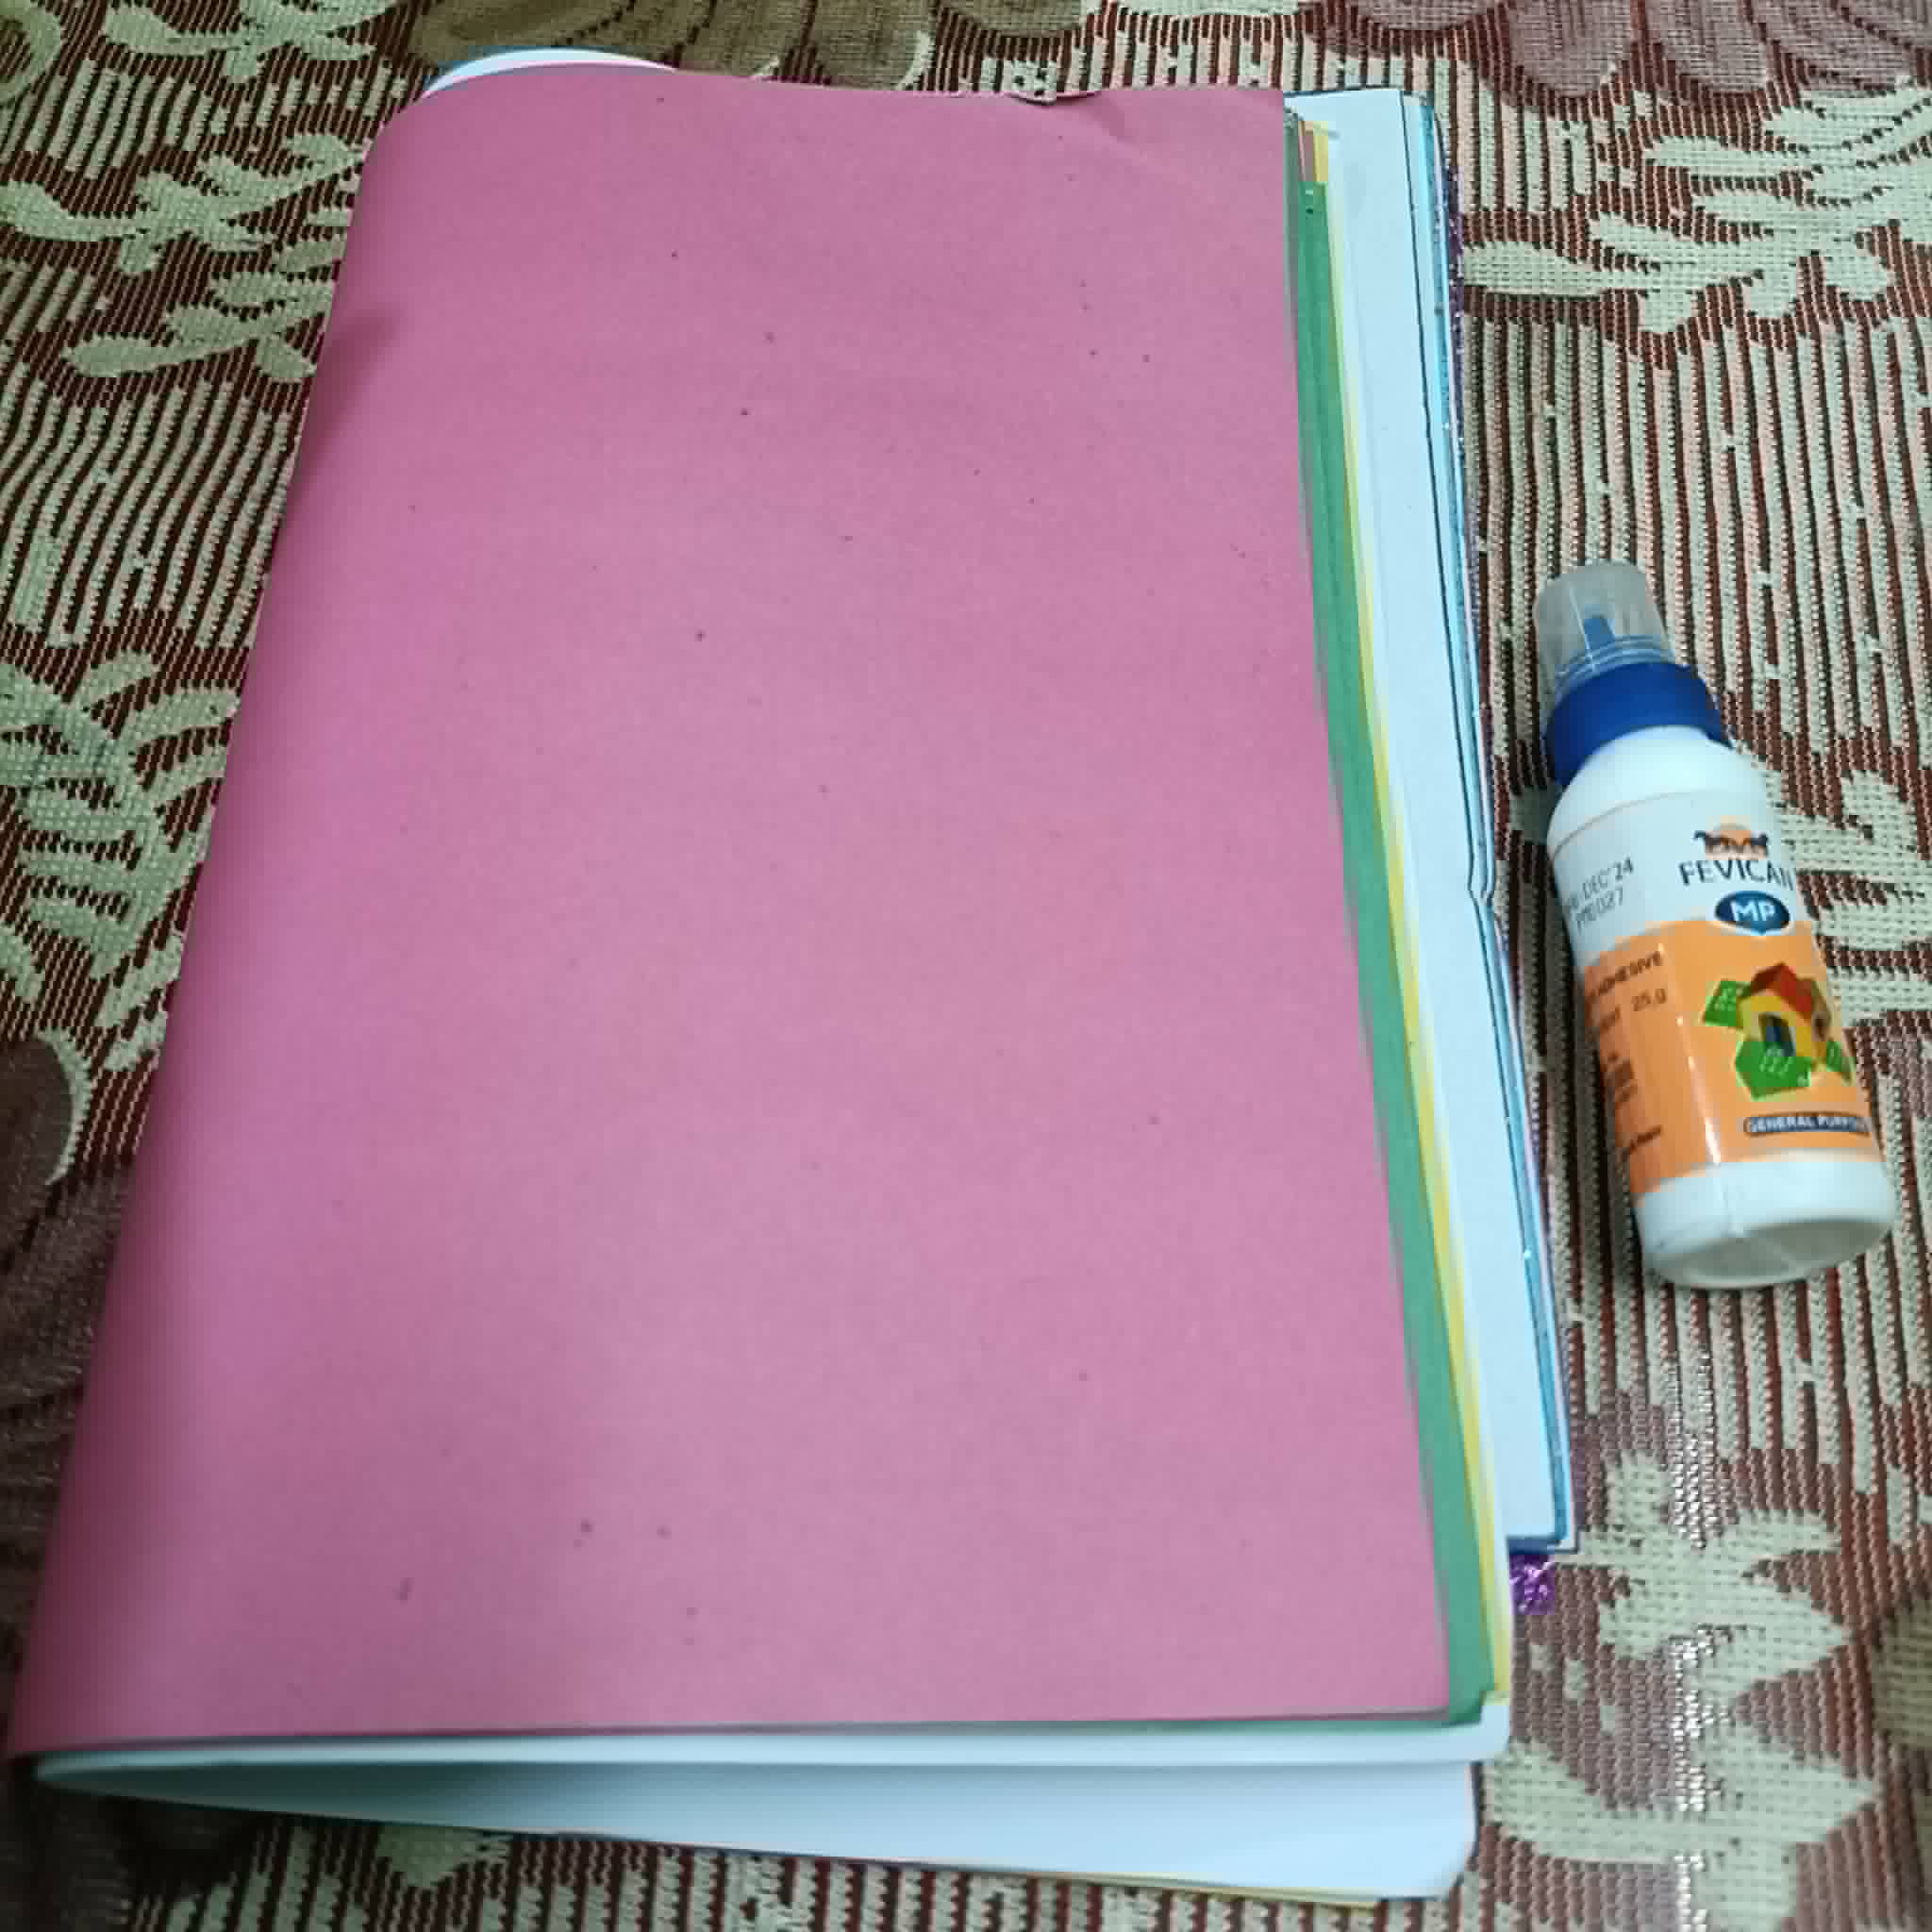
●Quilling paper in different colors
● Glue
● Scissors
●White paper
The Process of craft
🟫 Step 01
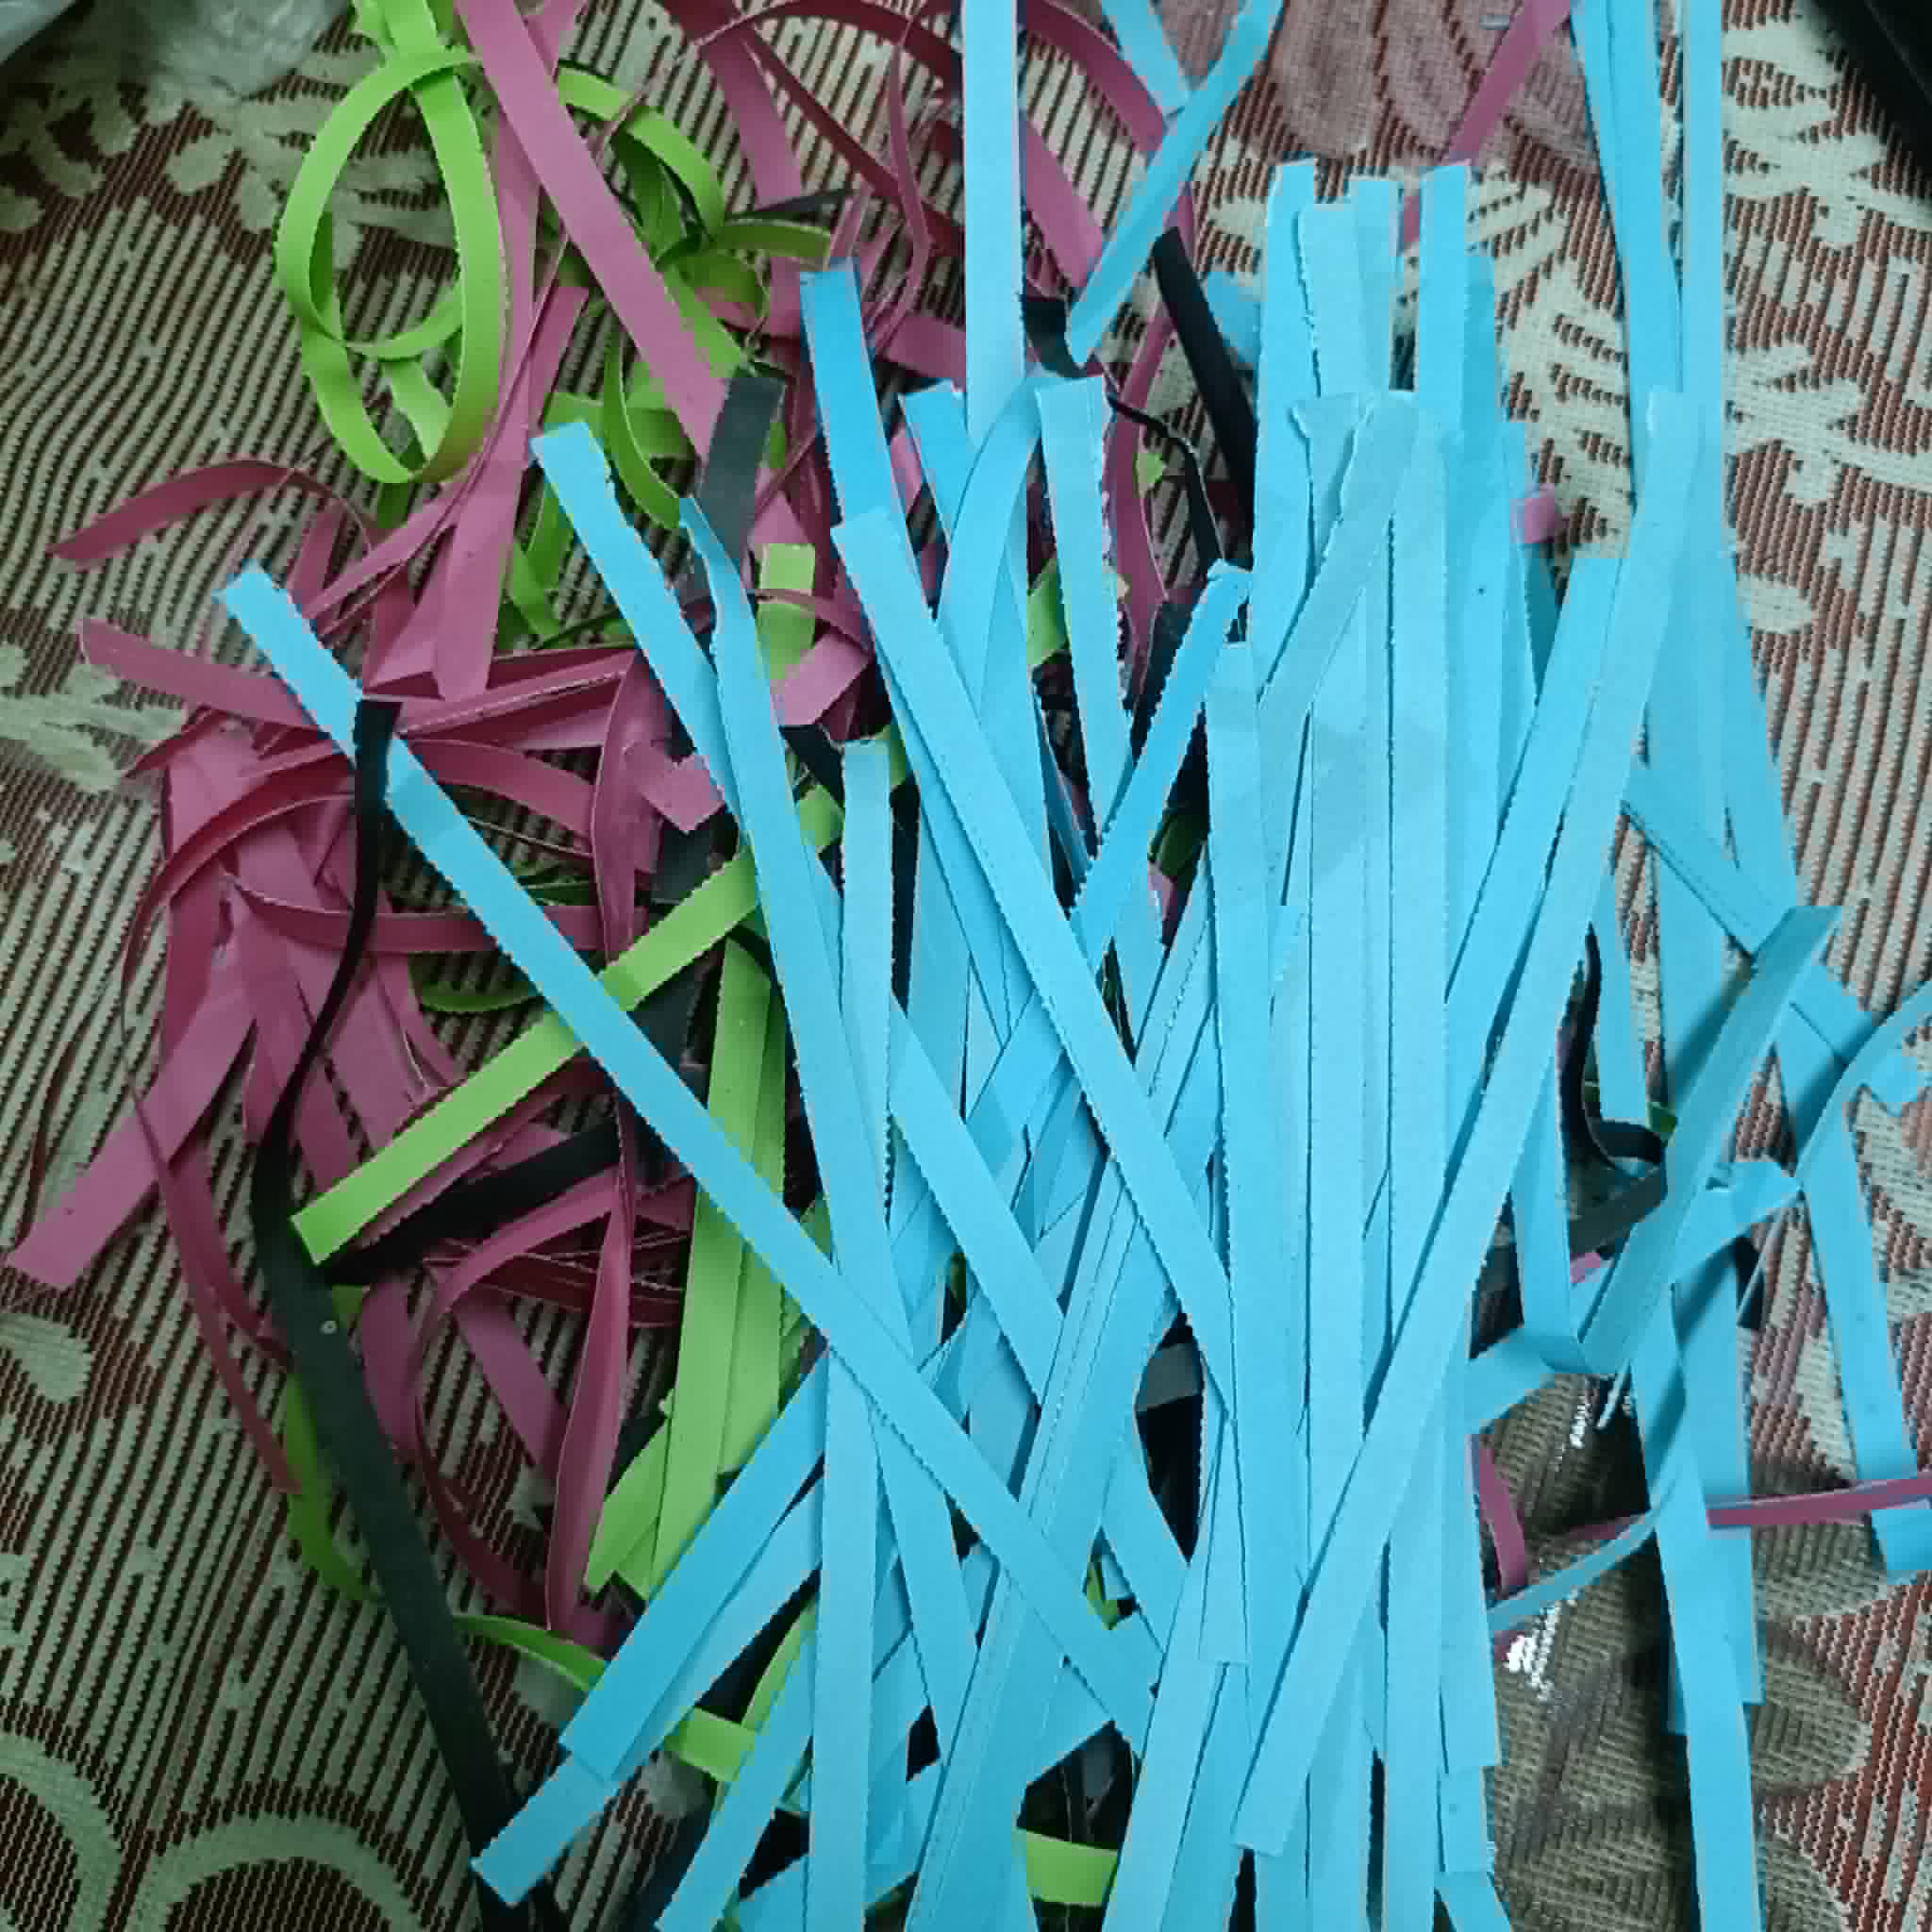
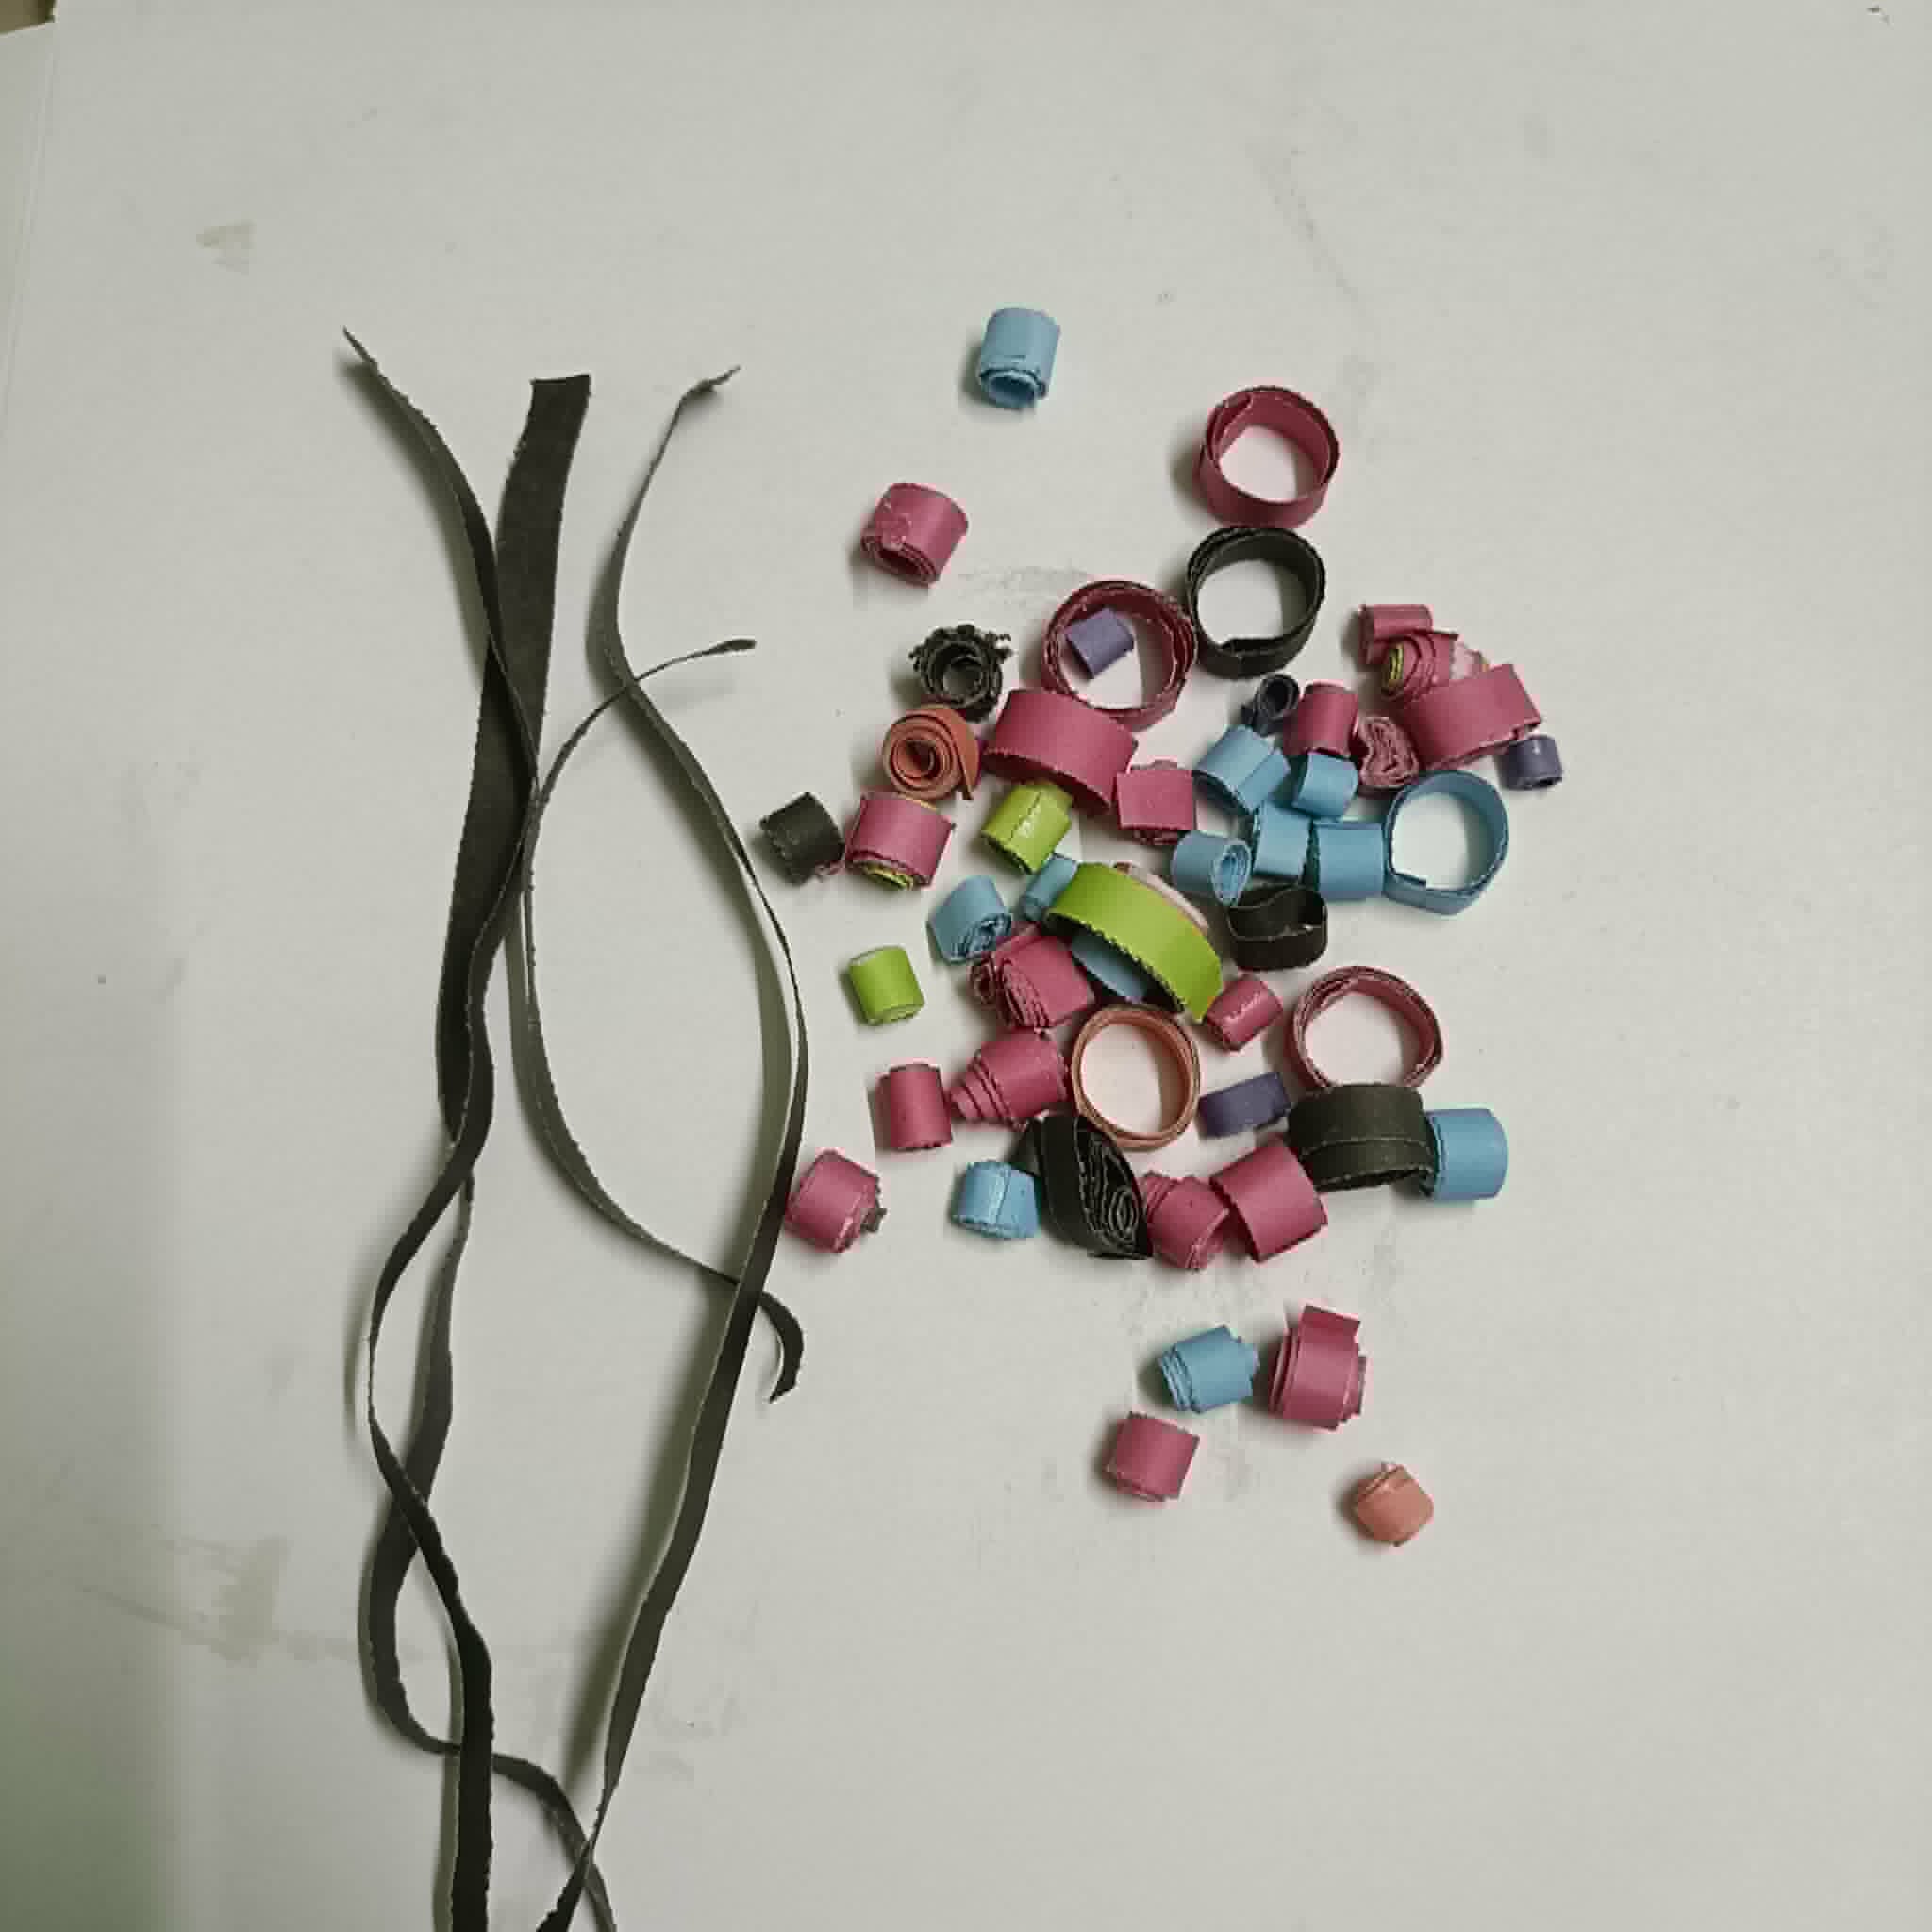
☔First, I made thin sheets of different colored paper for crafting.
🟫 Step 02
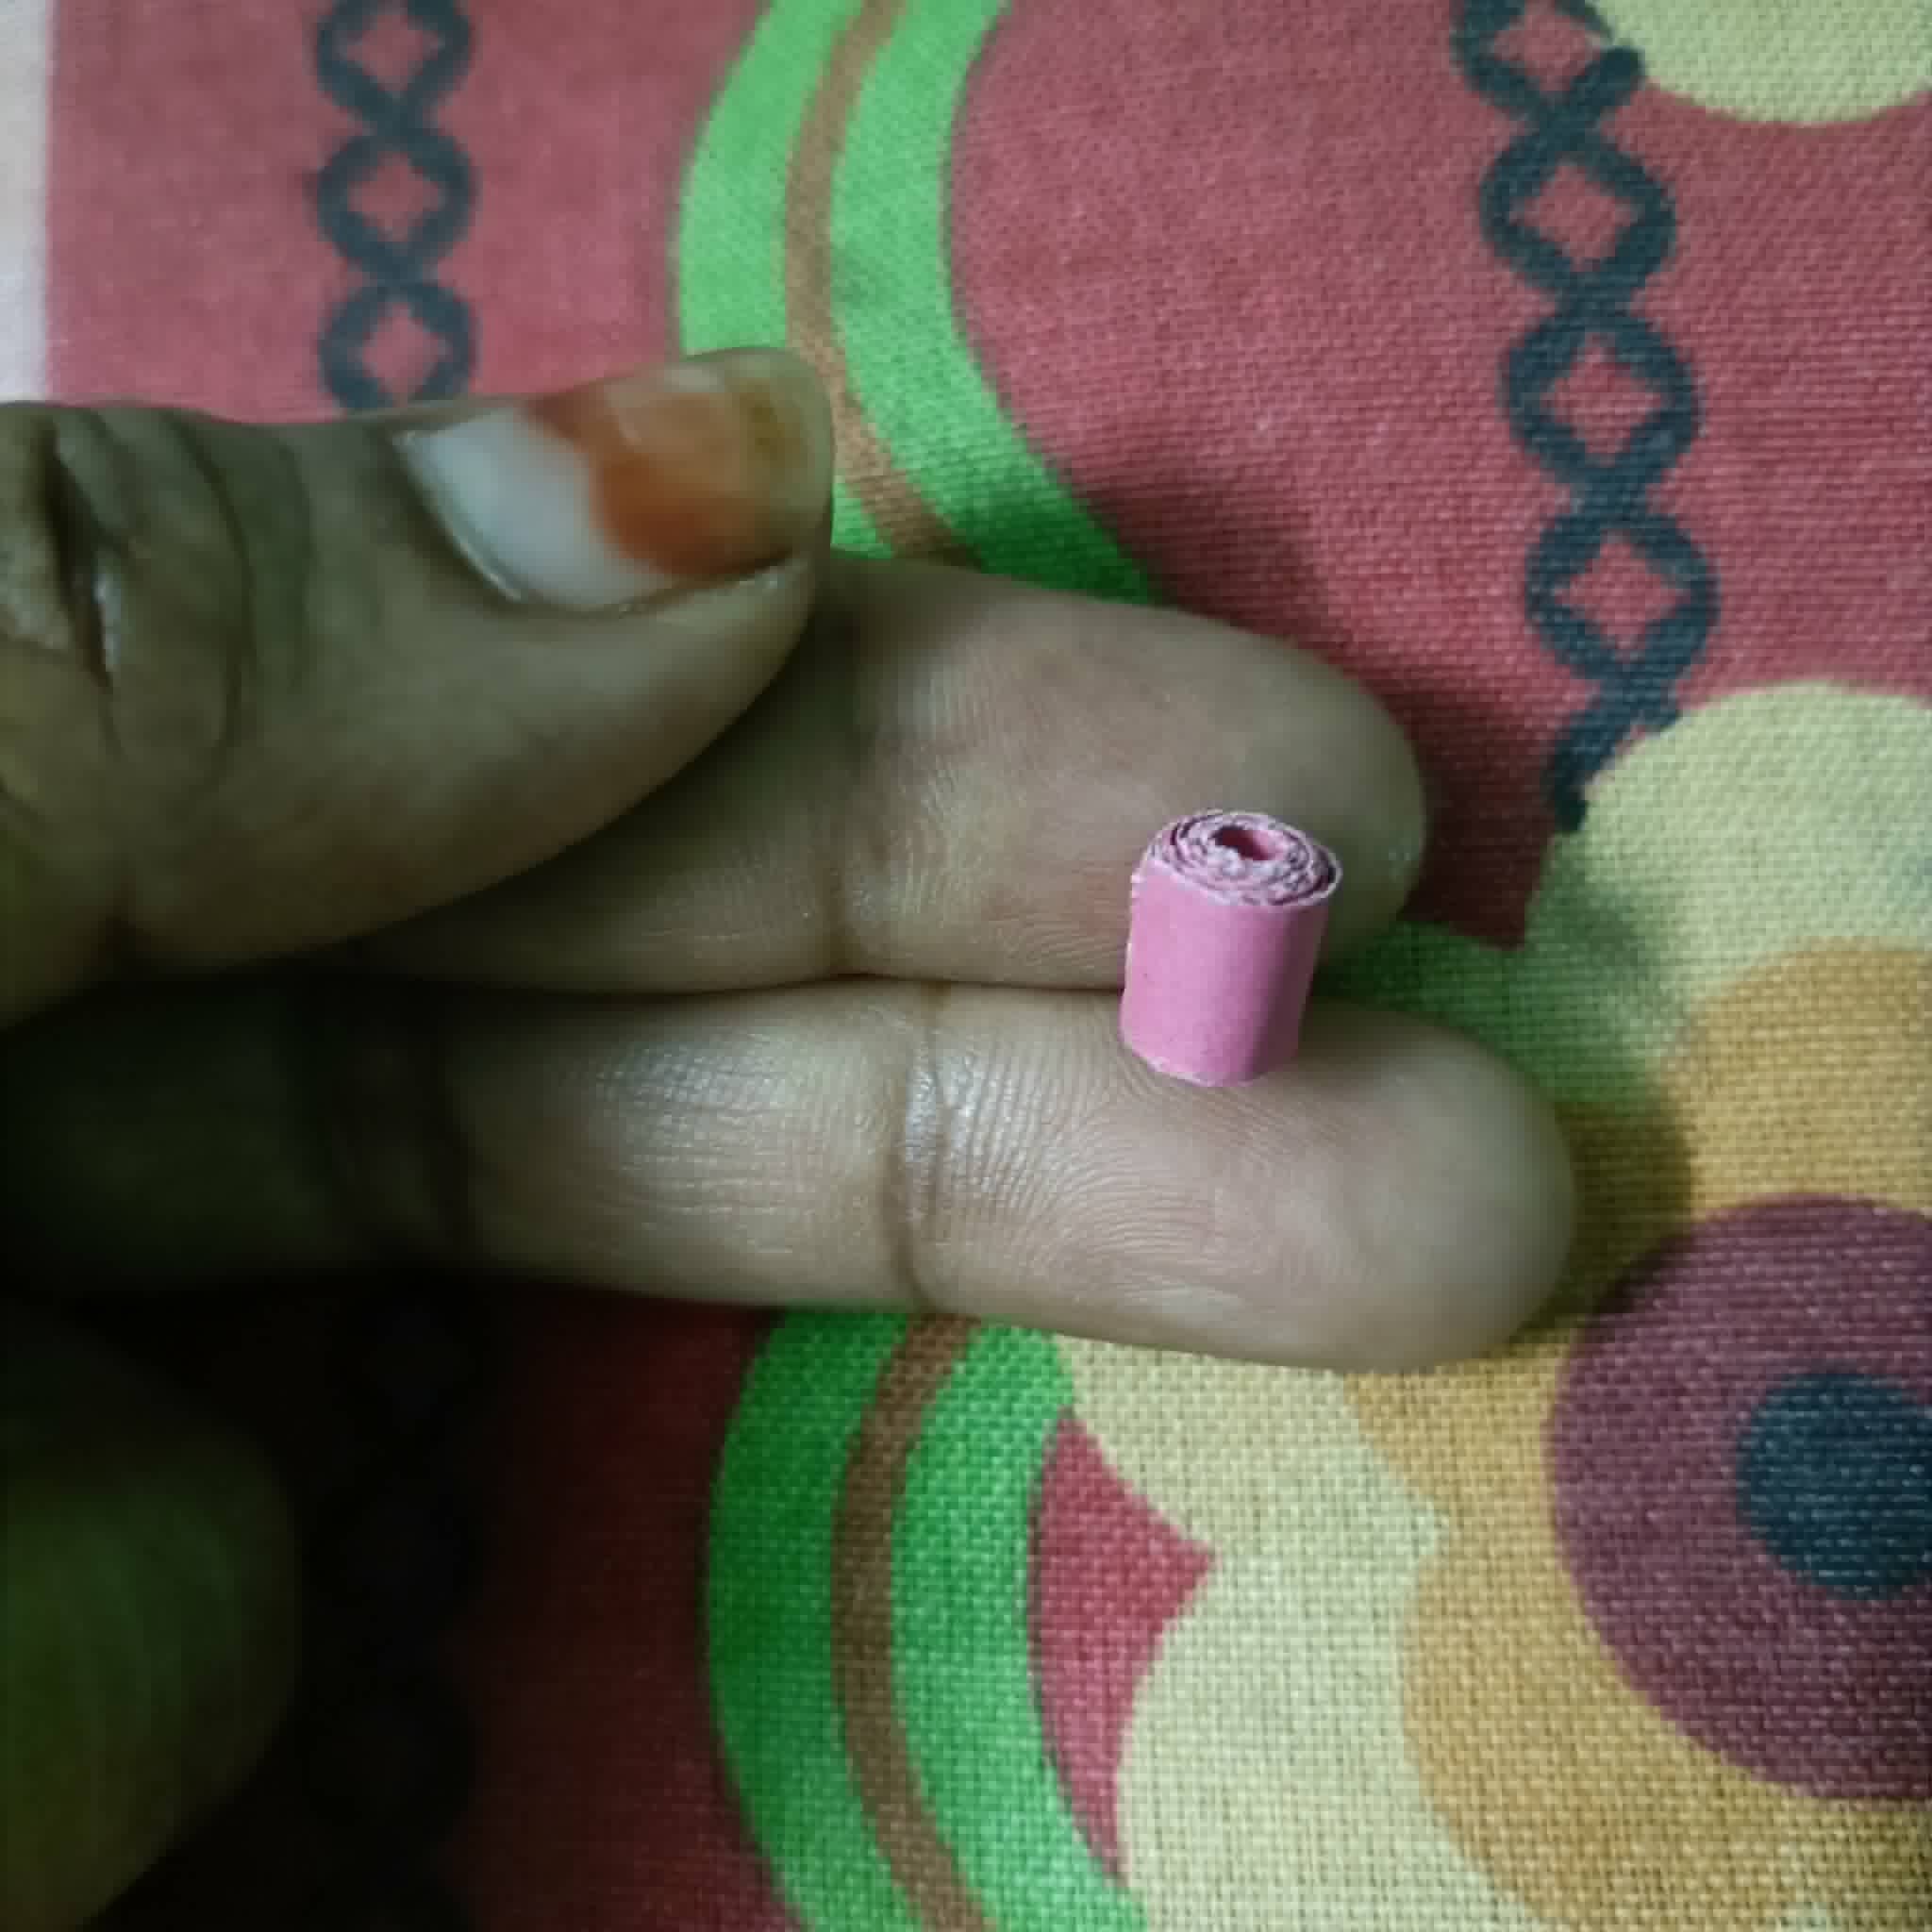
☔Then, look, I twisted it into a nice round shape with my hands and locked it with glue.
🟫 Step 03
☔In this way, I wrapped several small and large-sized papers with glue and kept several black colored papers long.
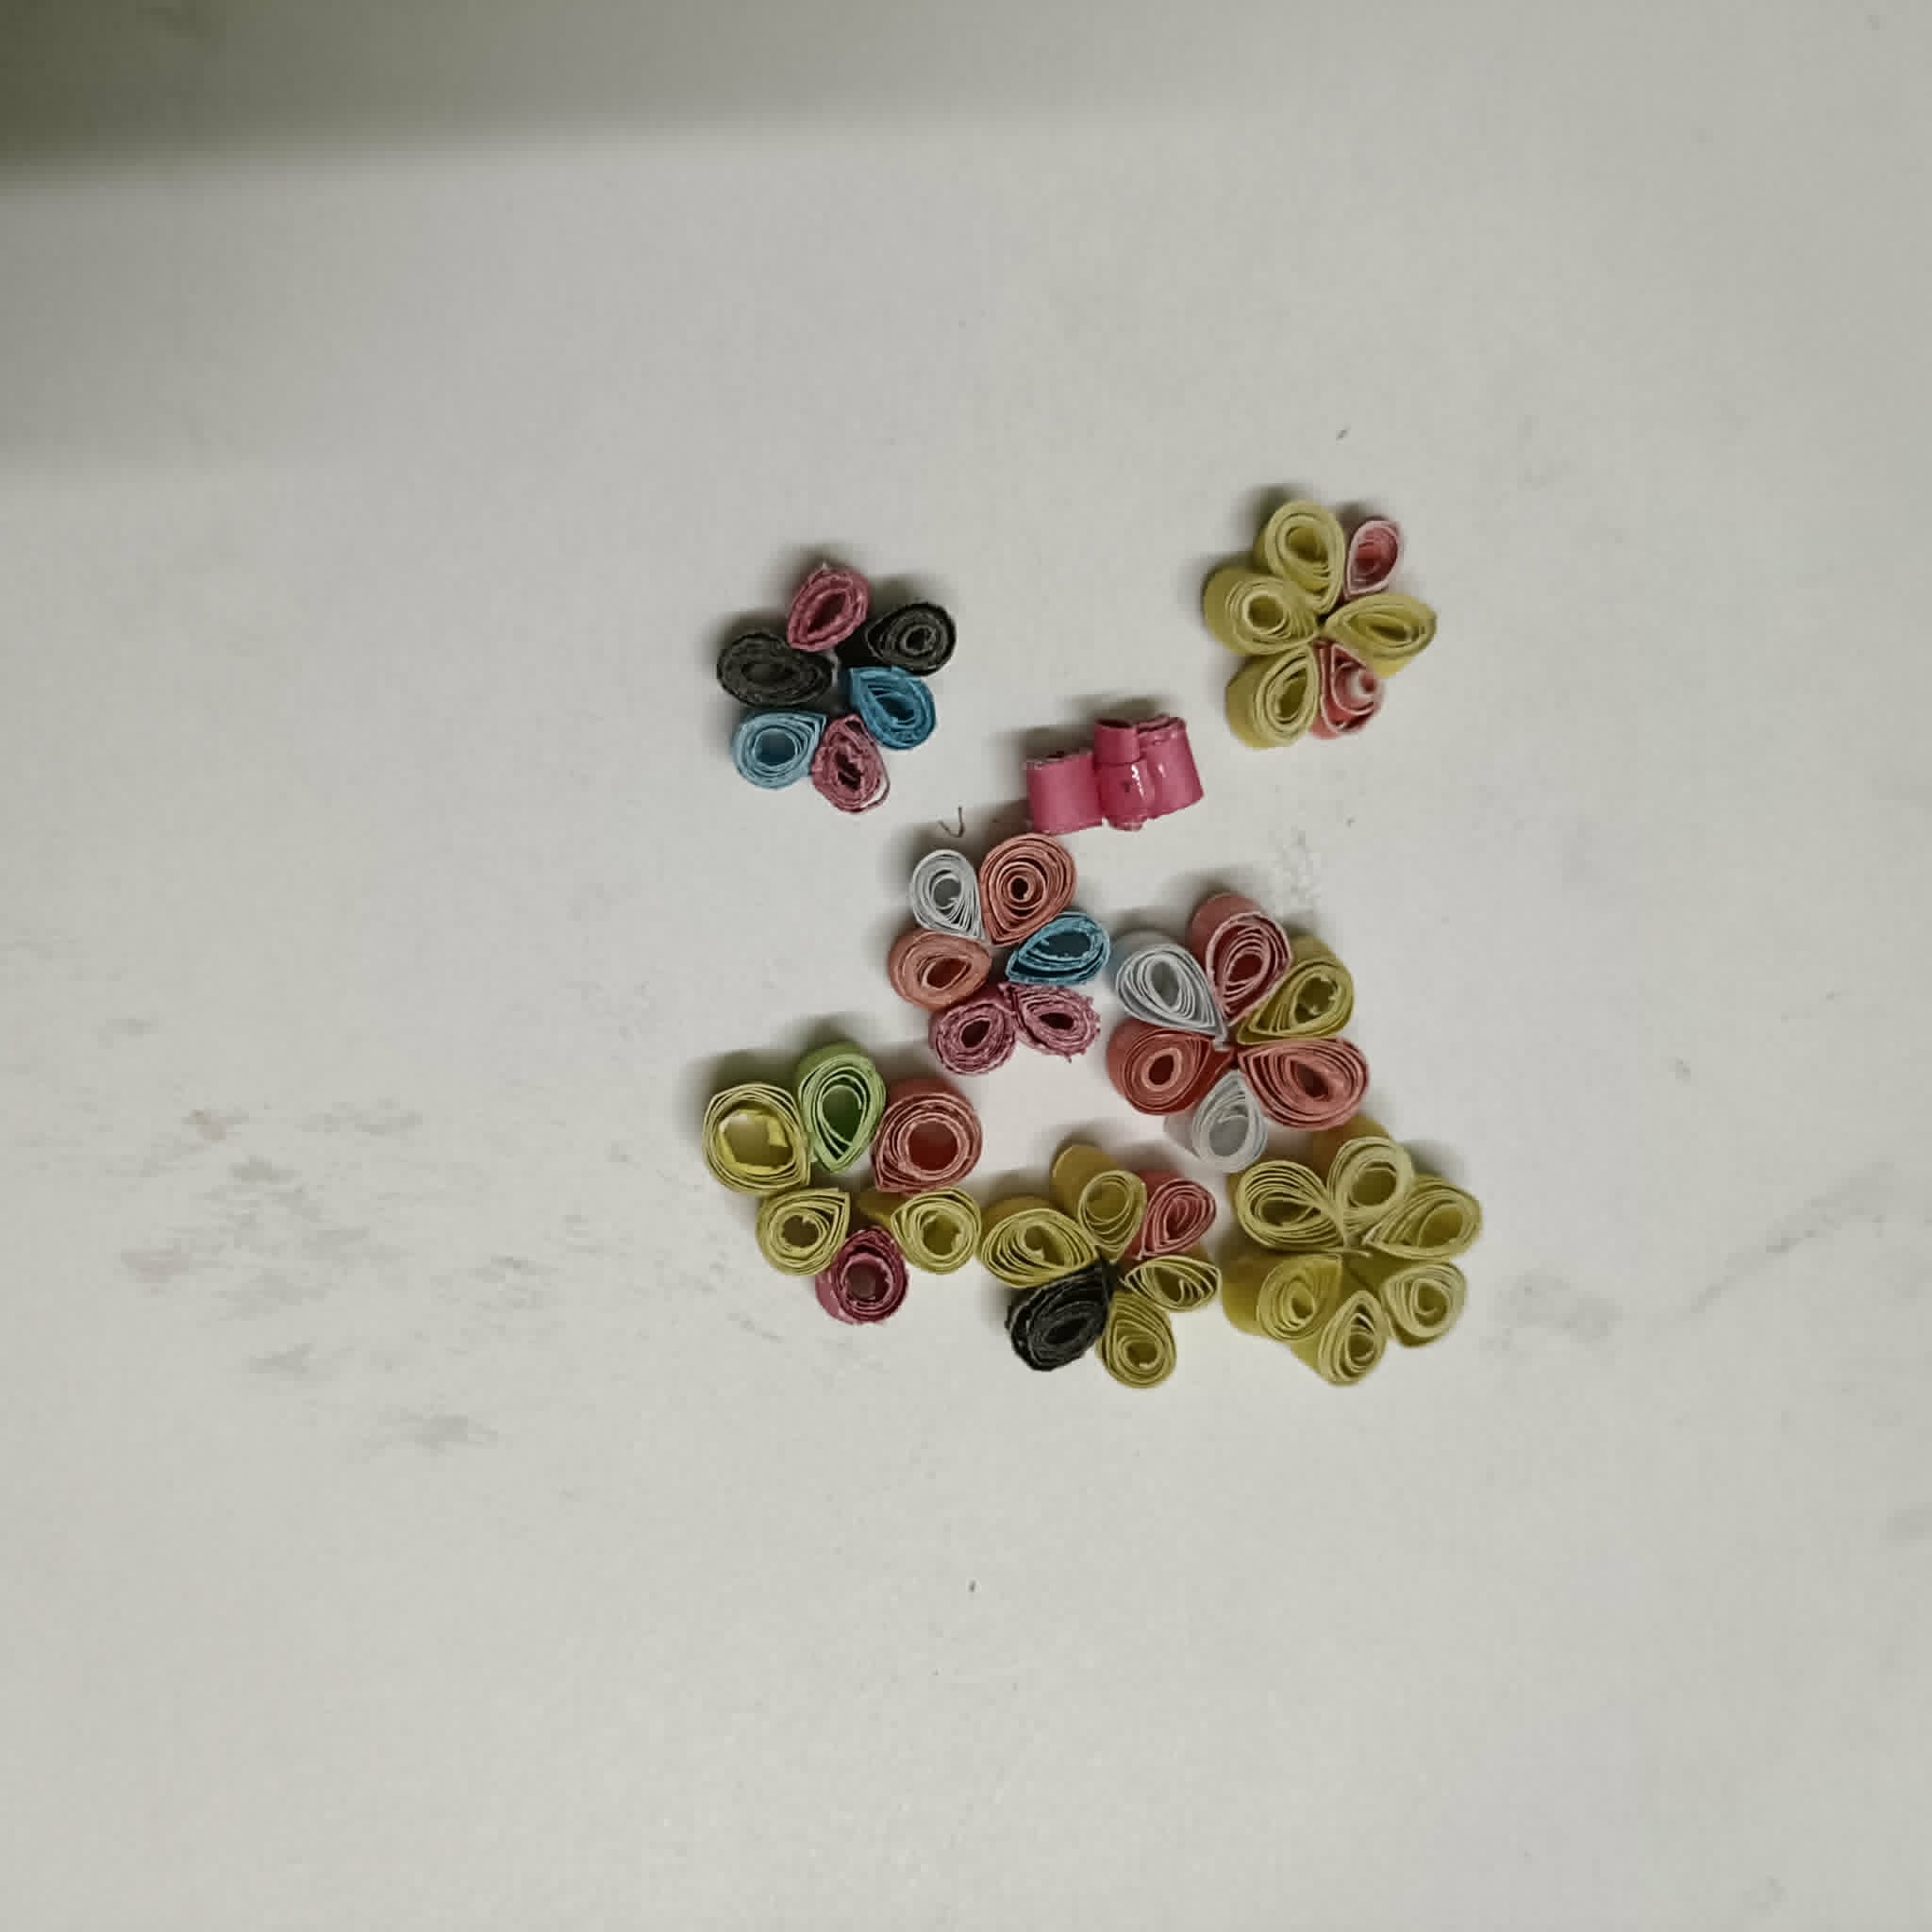
🟫 Step 04
☔Then I made flowers by folding the small pieces of paper together in a ratio of 5:6:1. I made these with glue.
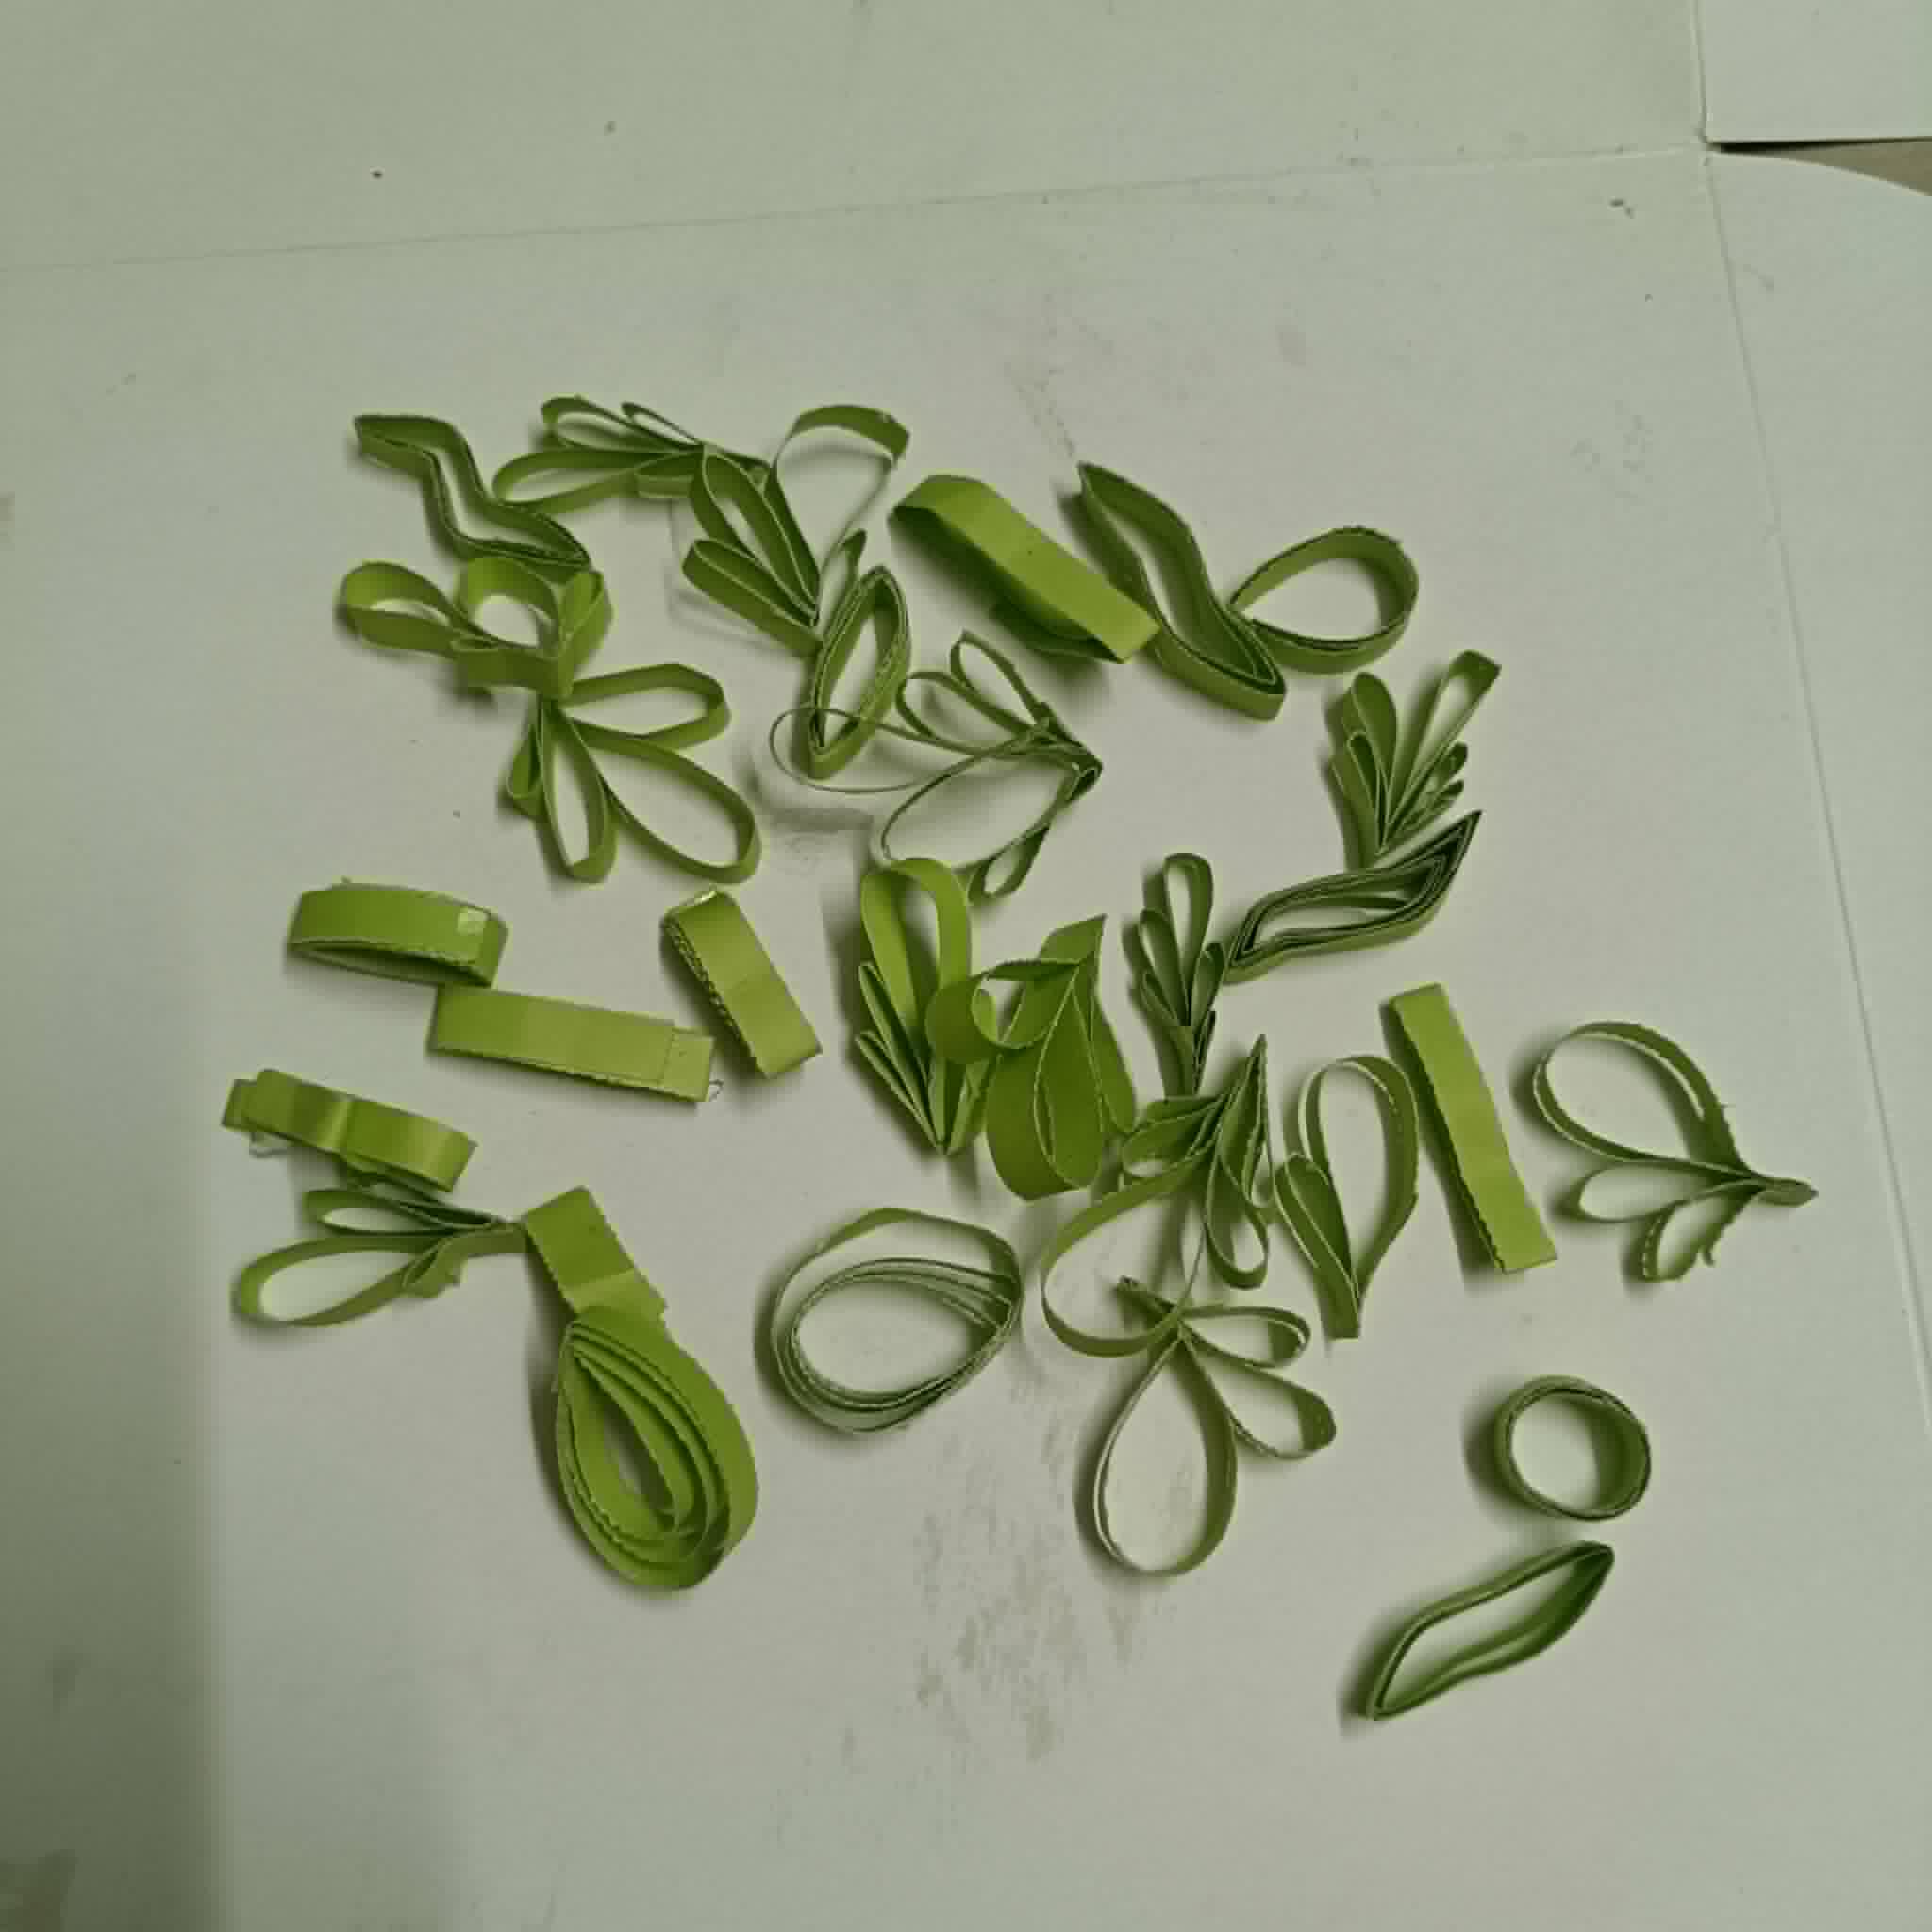
🟫 Step 05
☔Then I just took it and made it into leaves and some flower buds with it.
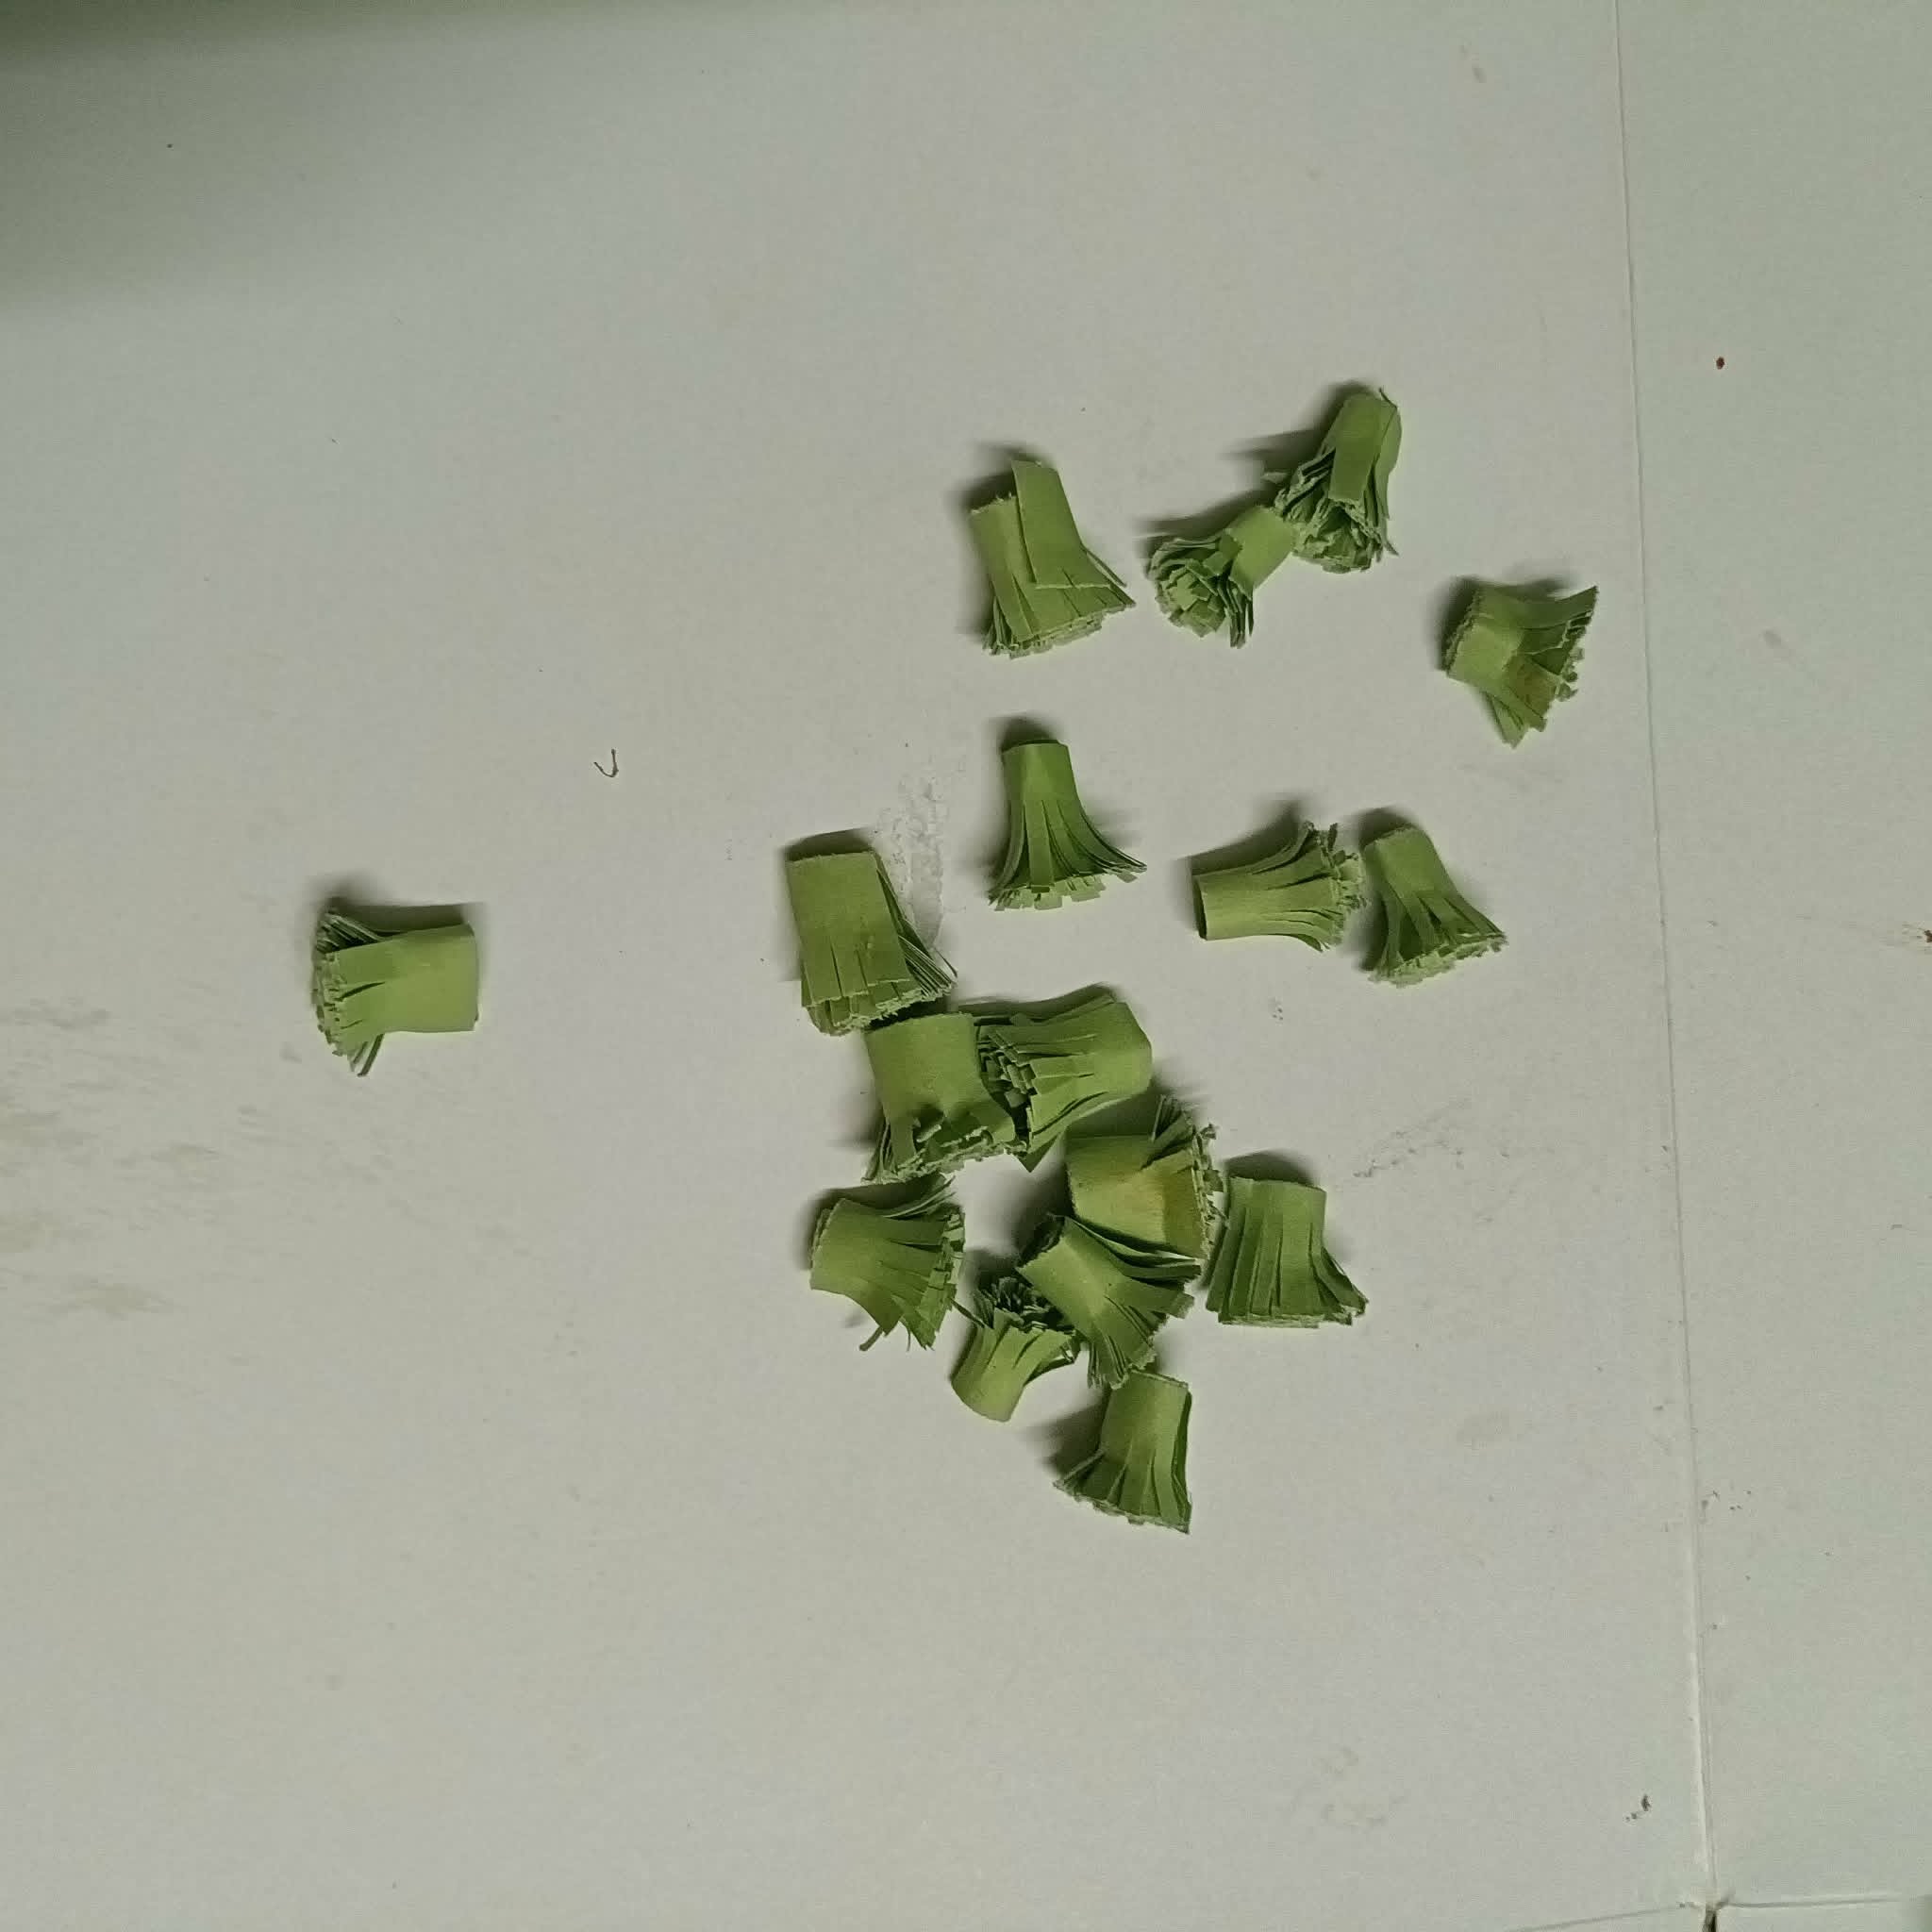
🟫 Step 06
☔Then I made the green paper a little bigger and cut it in the middle to create the middle part of the flower.
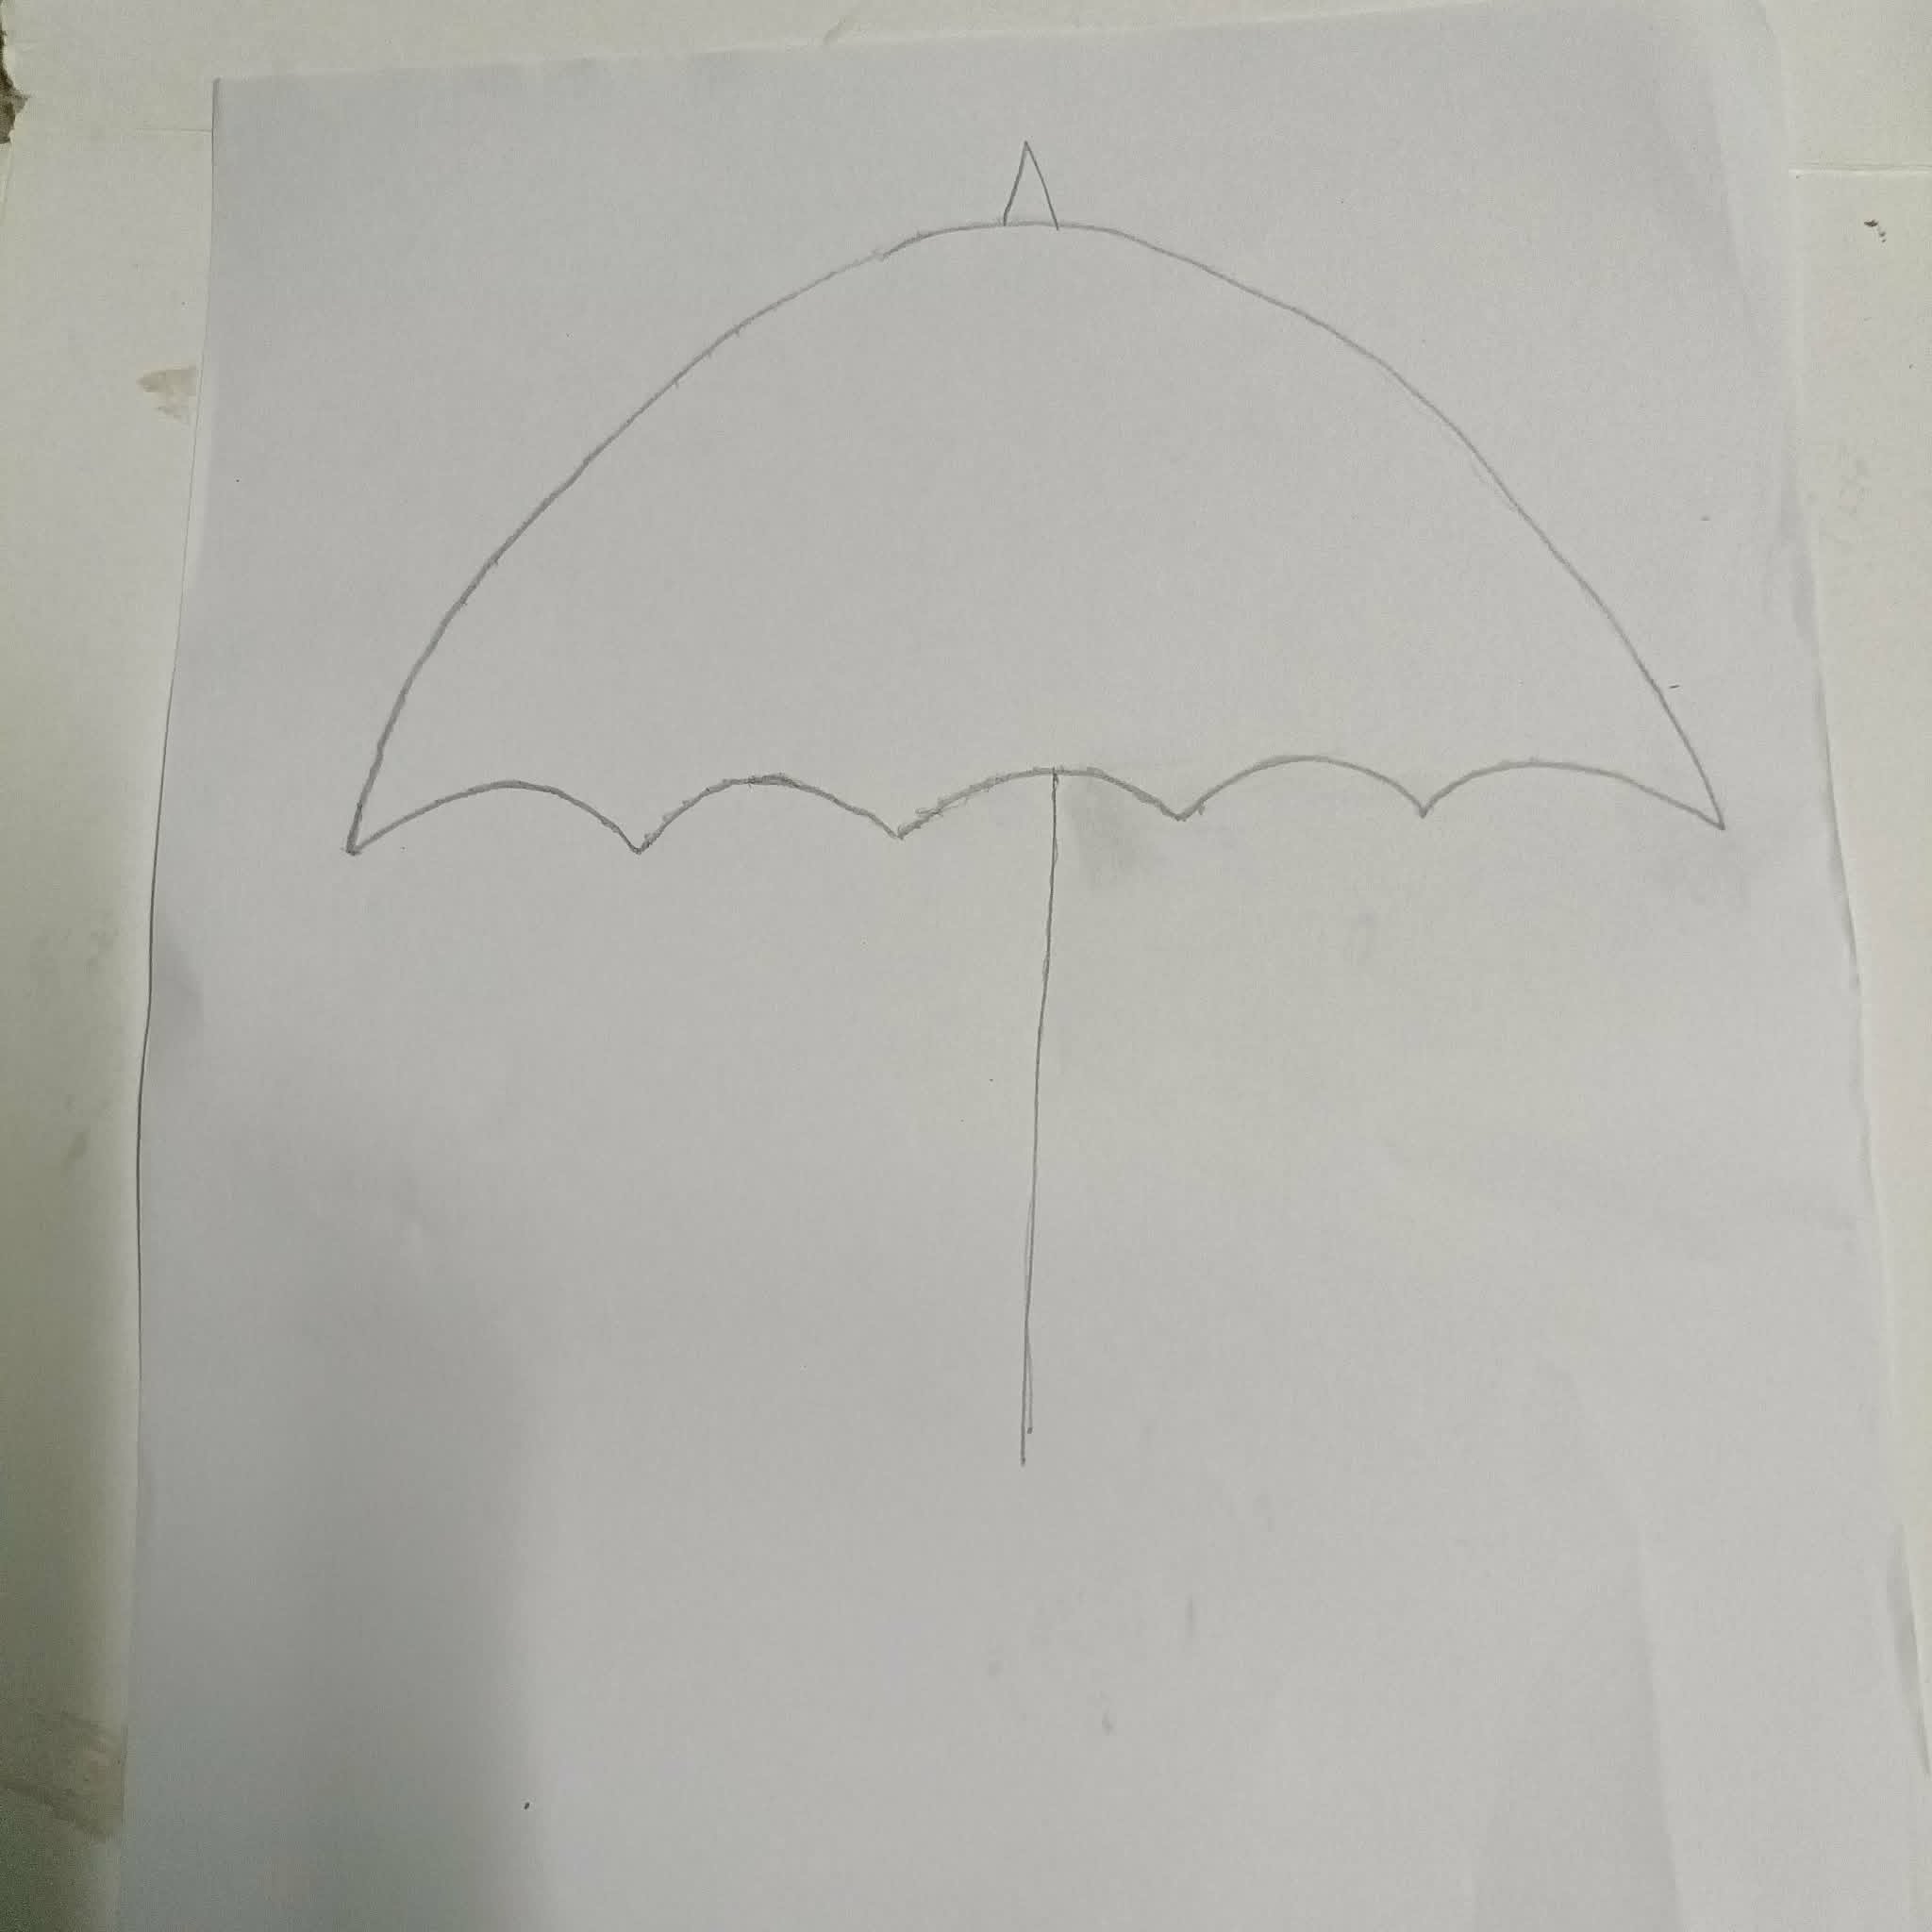
🟫 Step 07
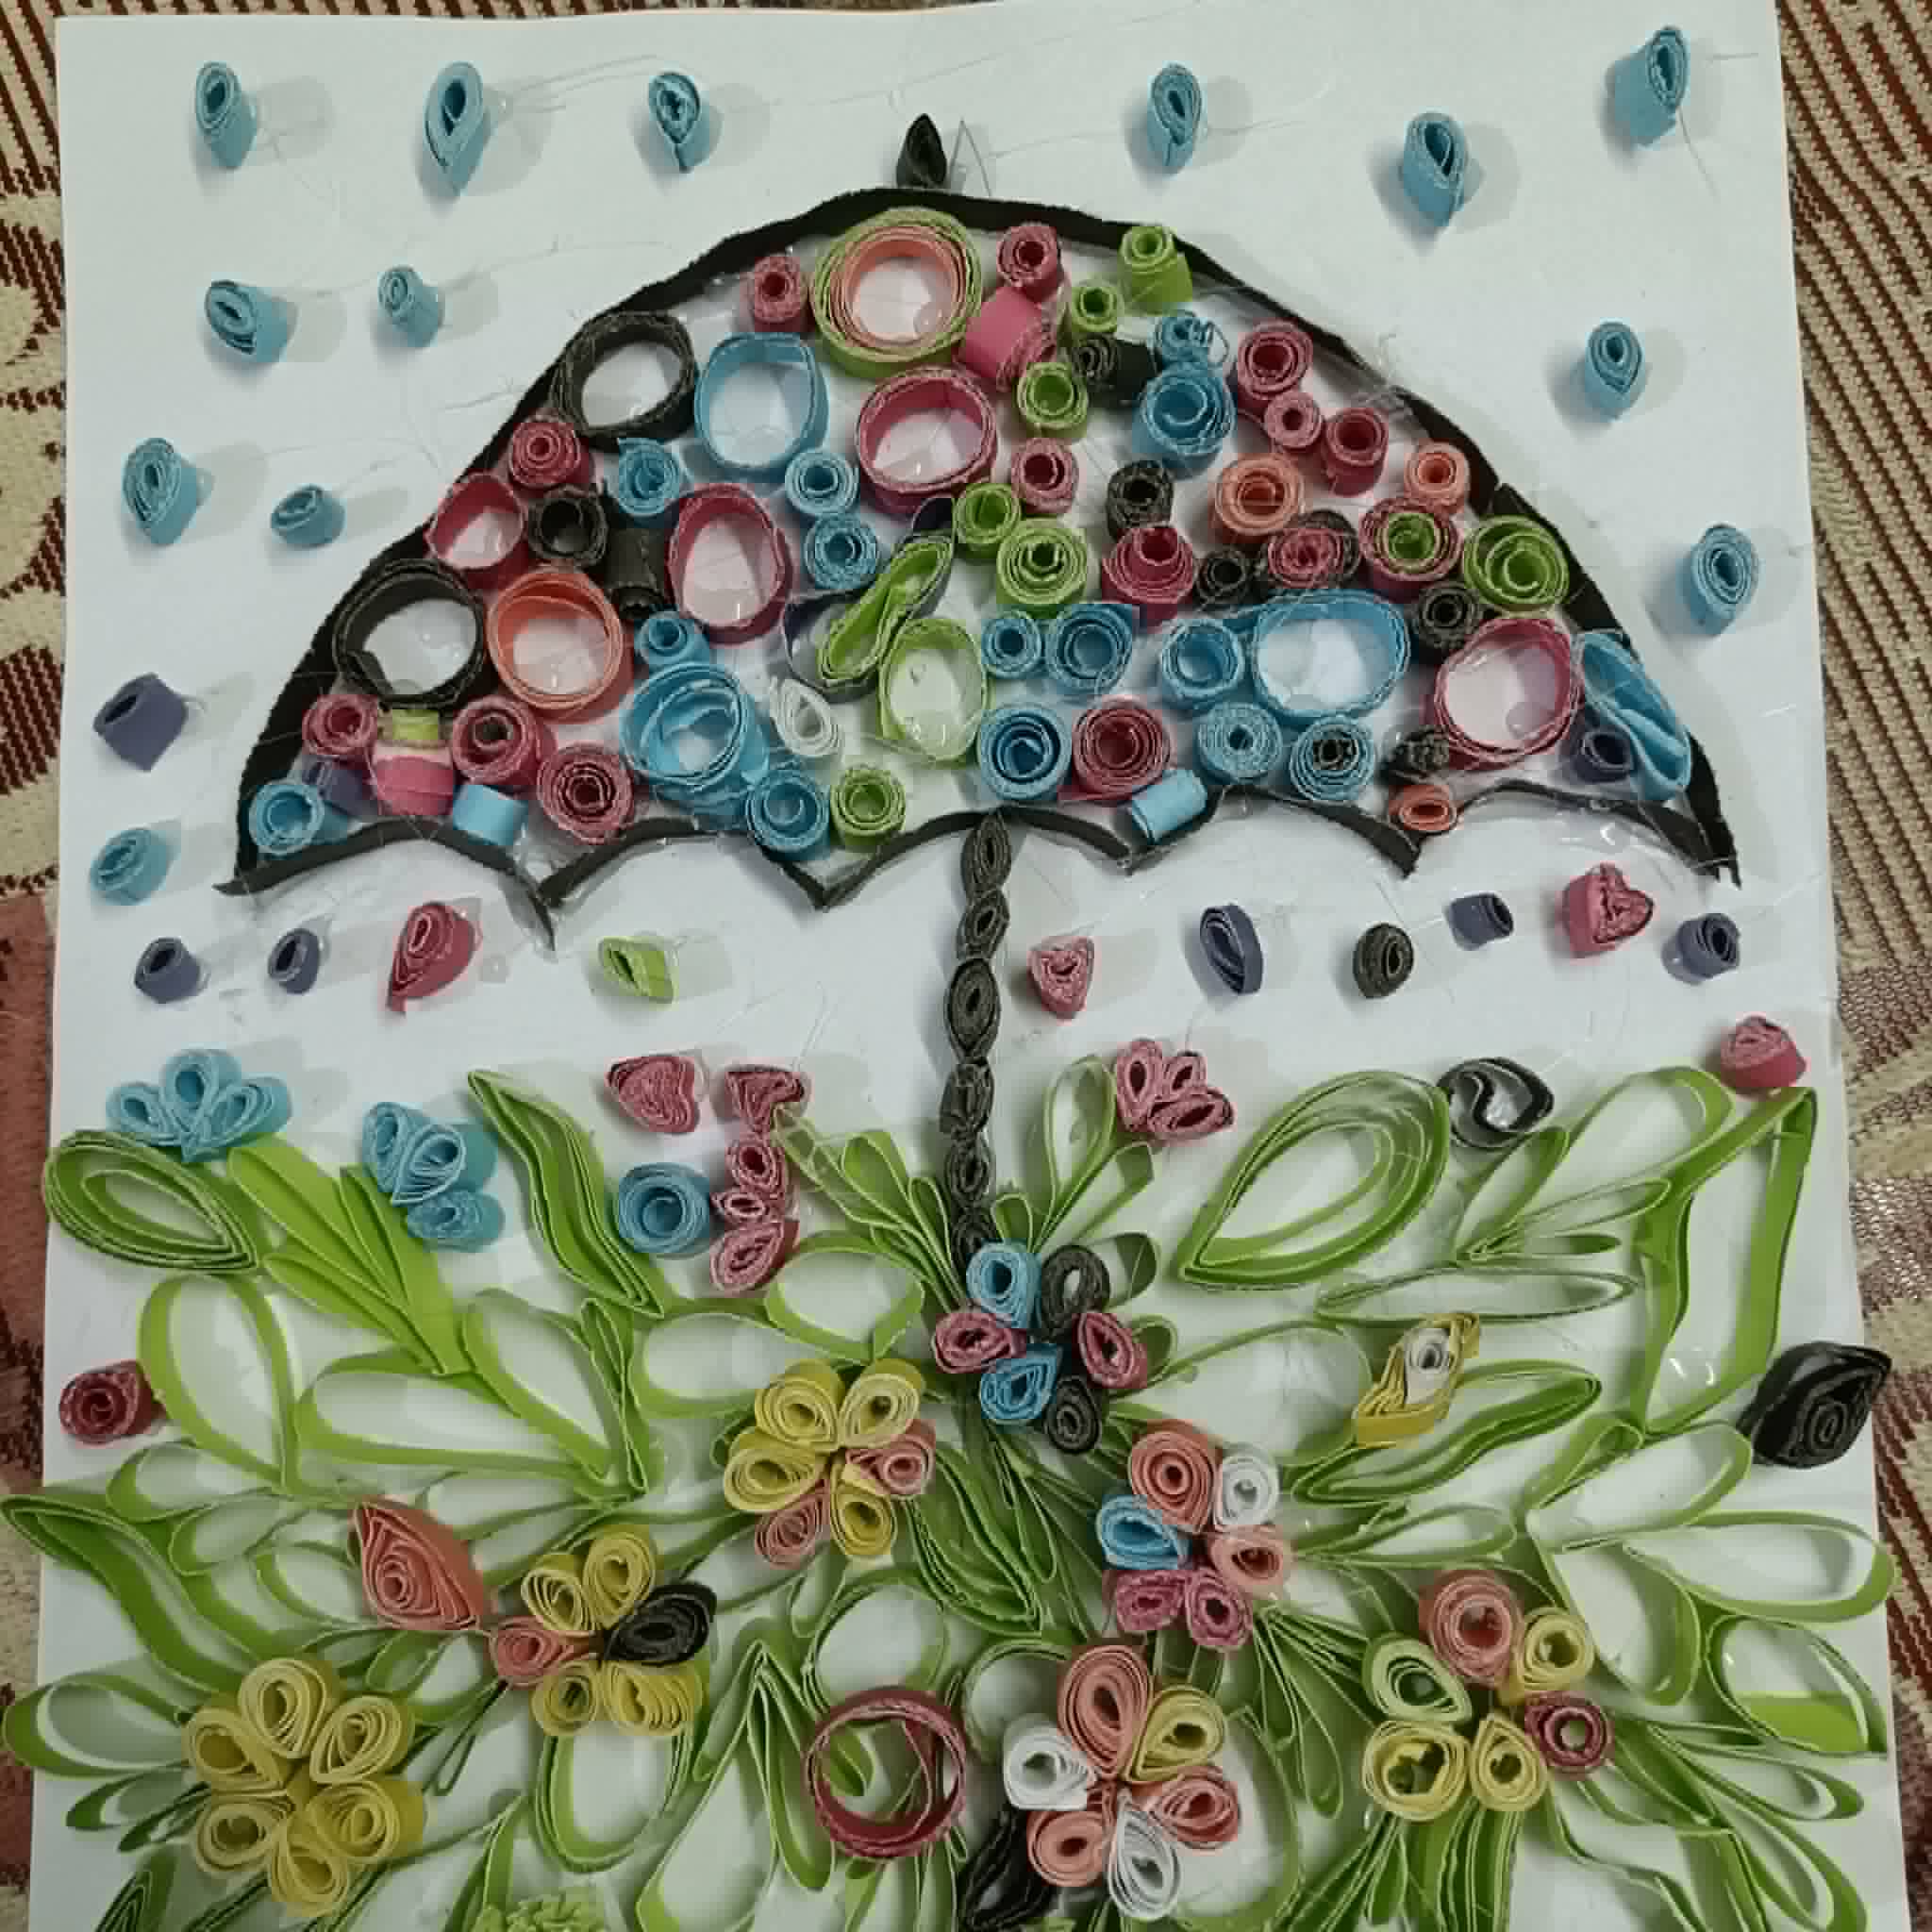
☔Then, for now, my papers are completely ready to make the cooling craft. Then I drew an umbrella in the middle with a pencil on the white paper.
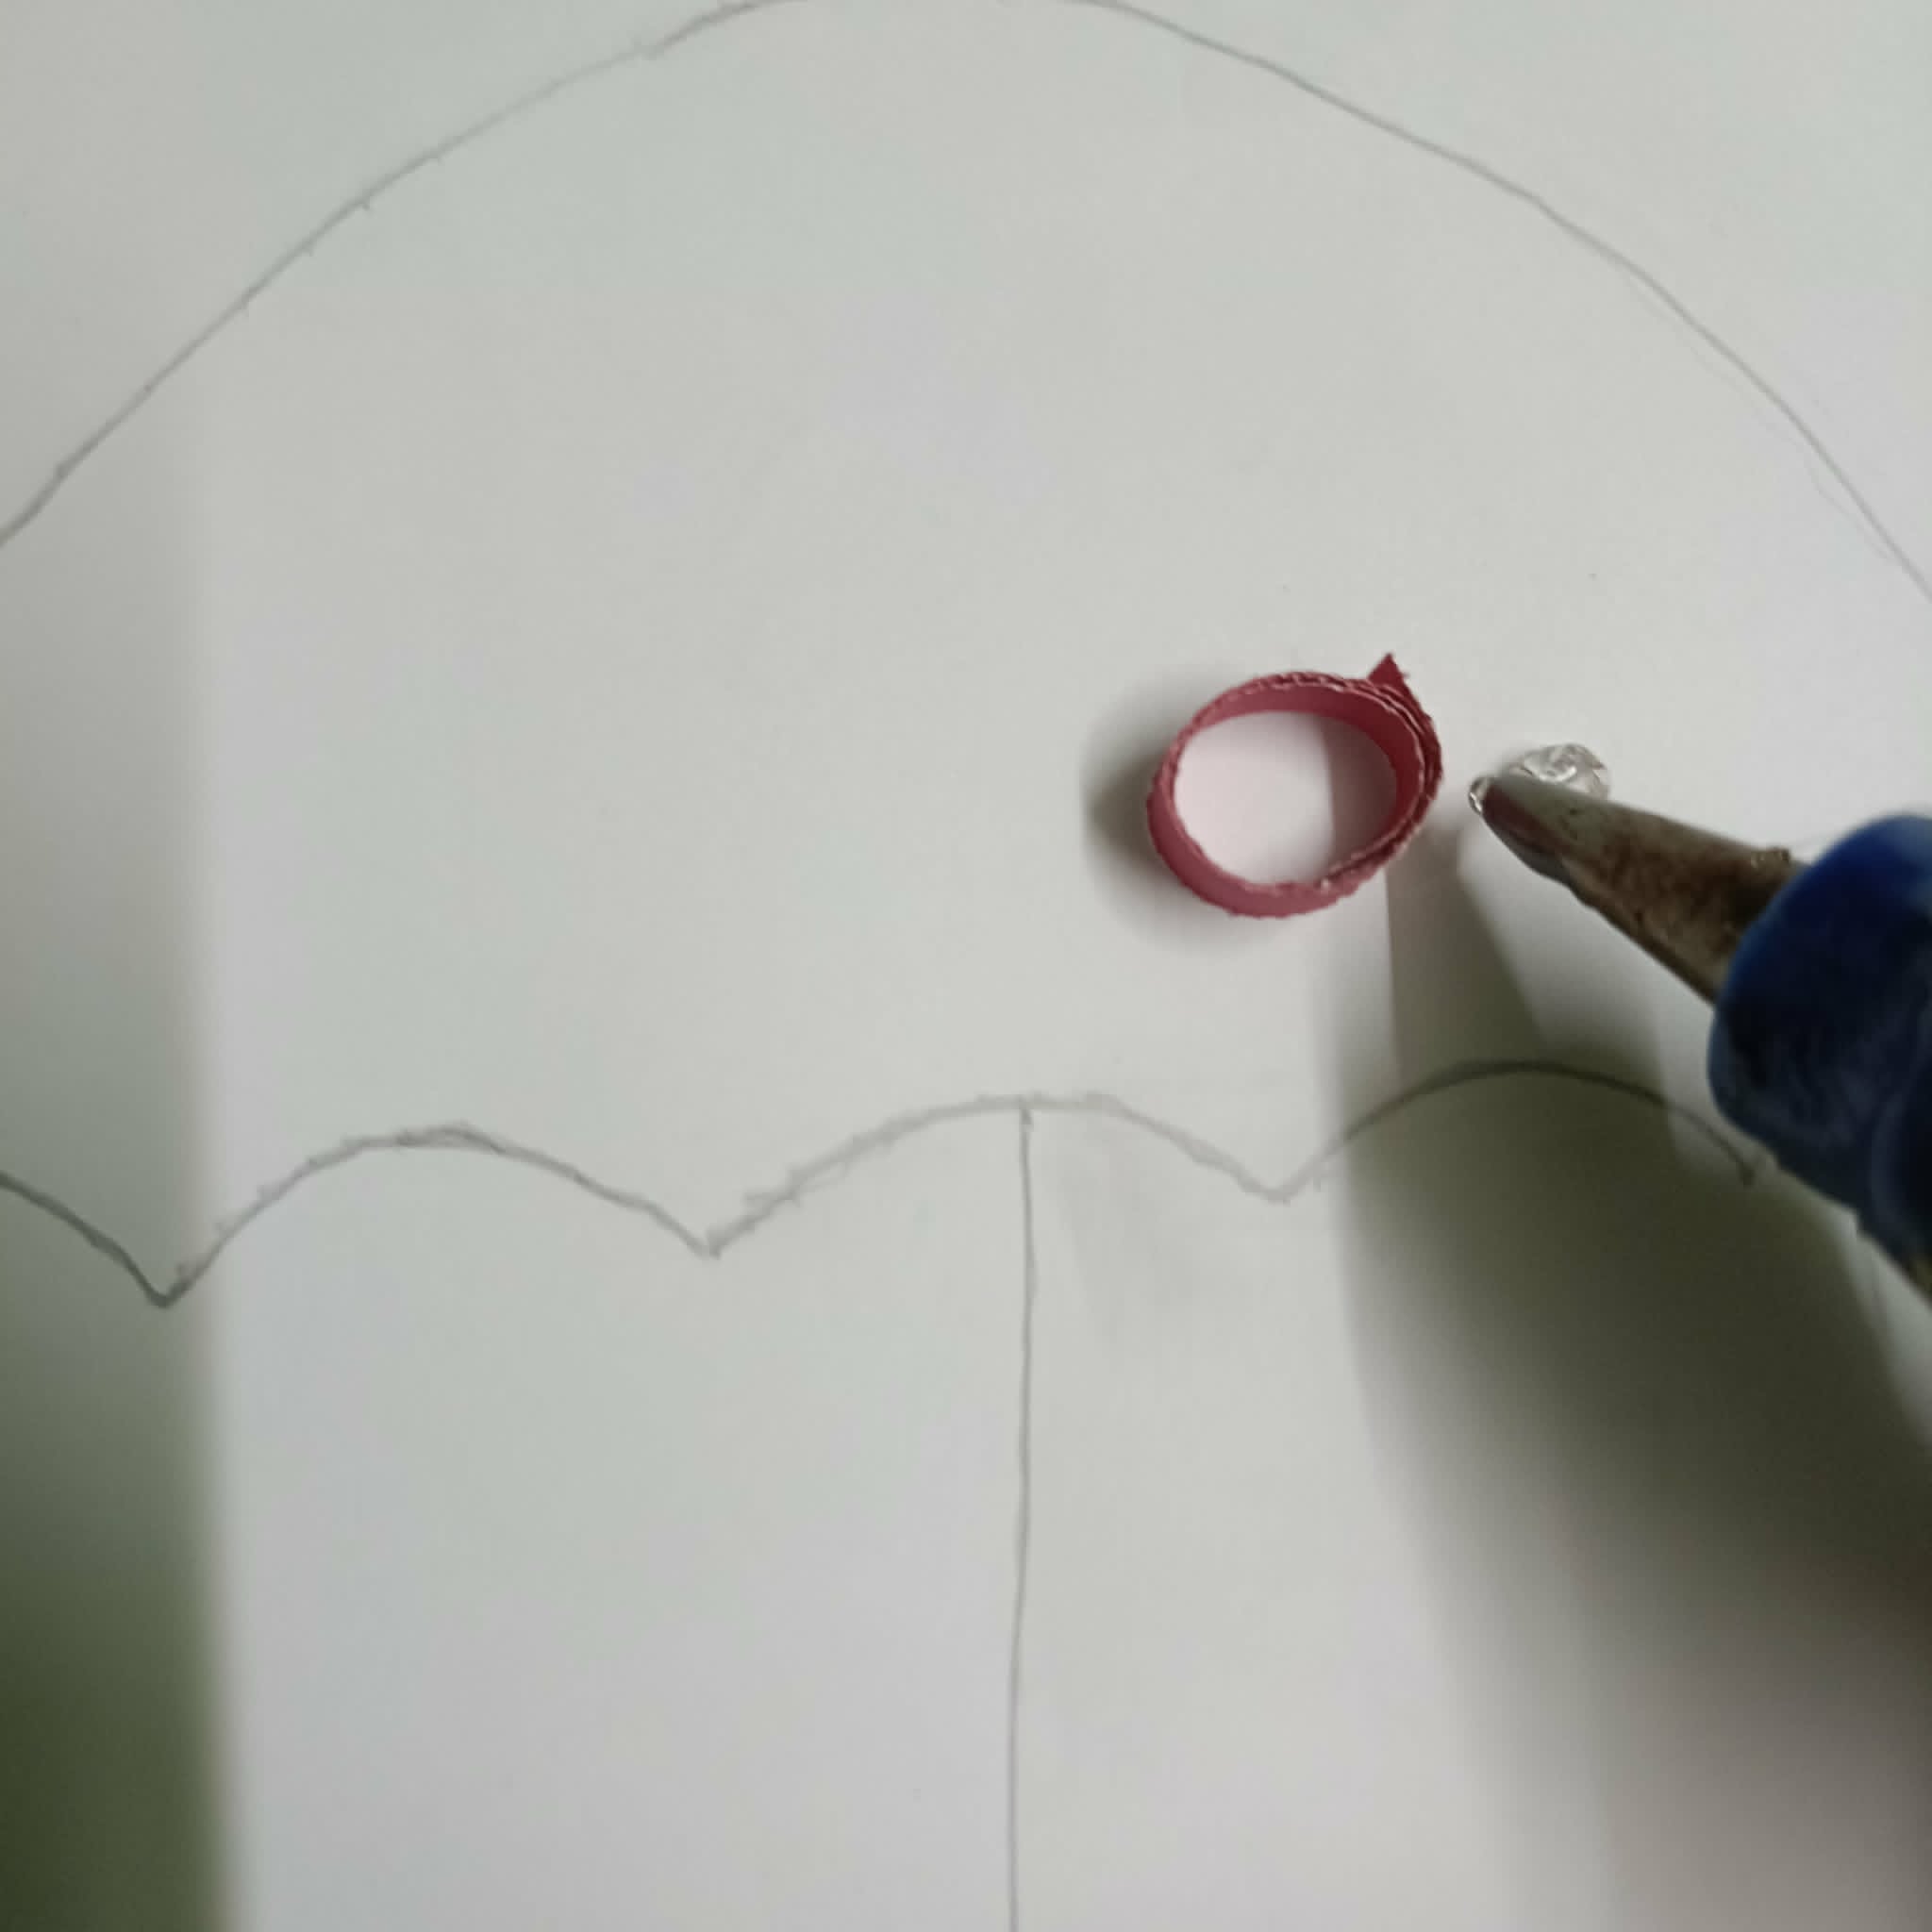
🟫 Step 08
☔Then I will glue the paper mache pieces into the middle of the umbrella.
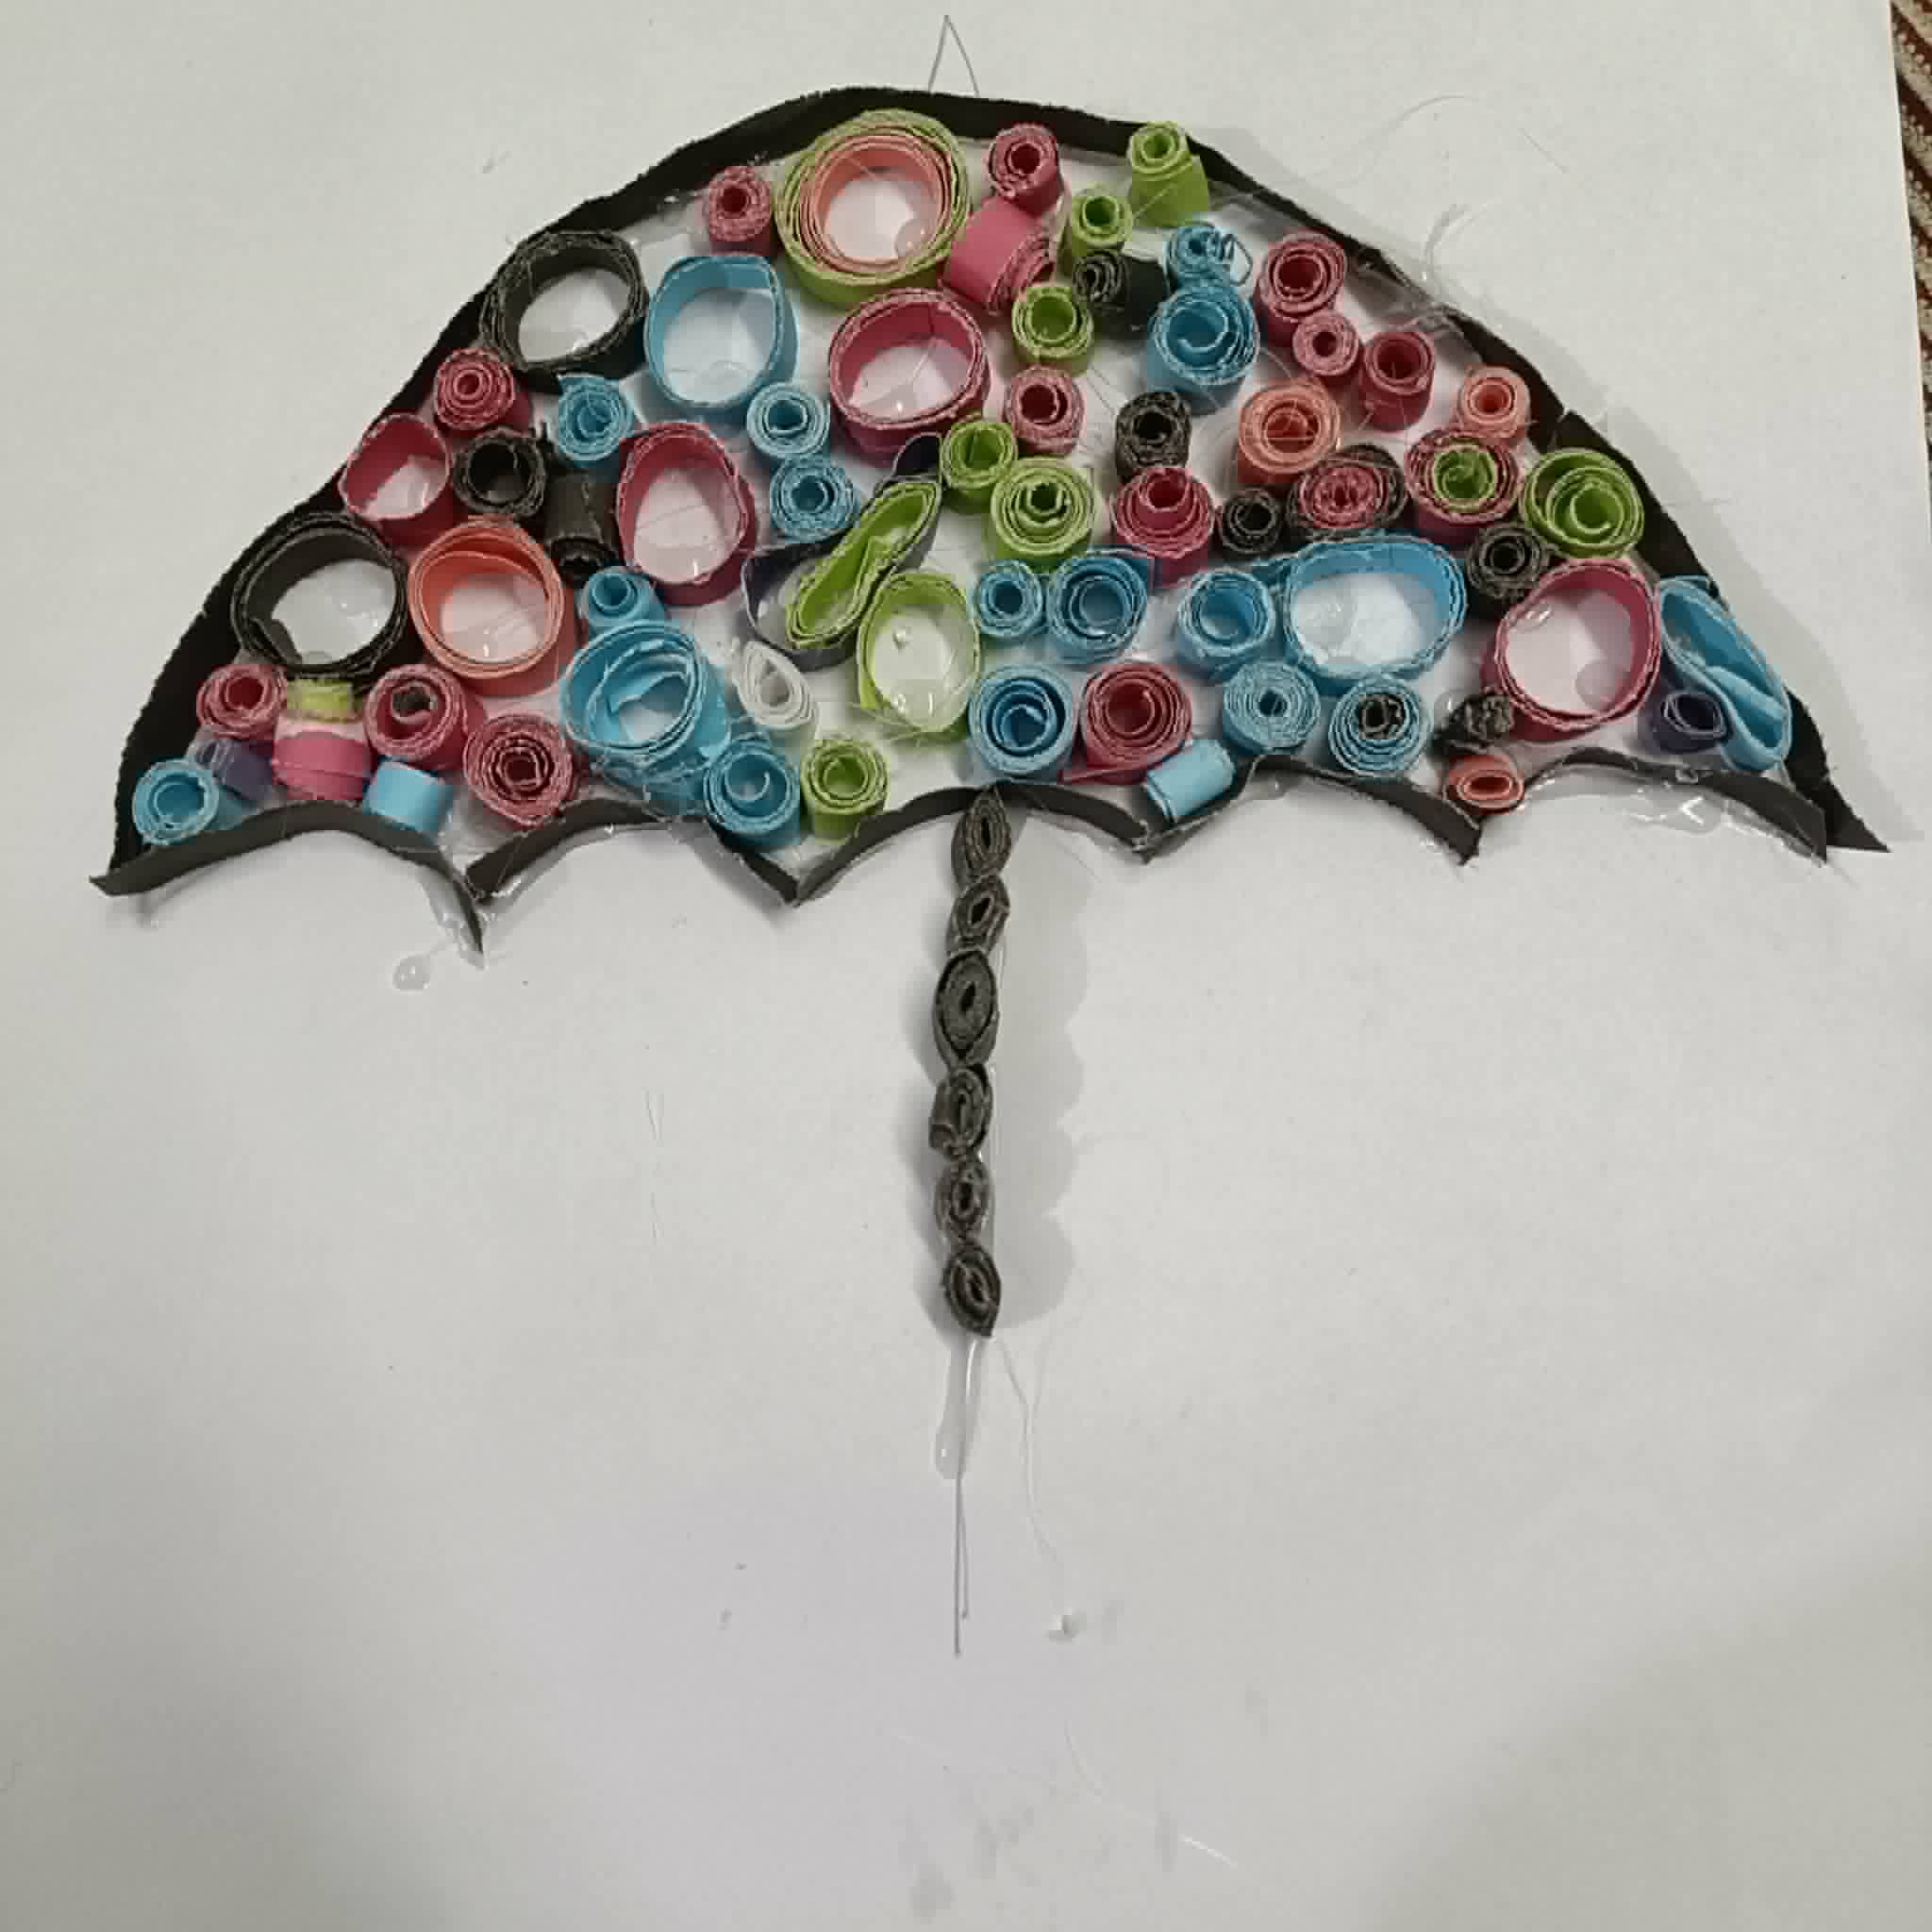
🟫 Step 09
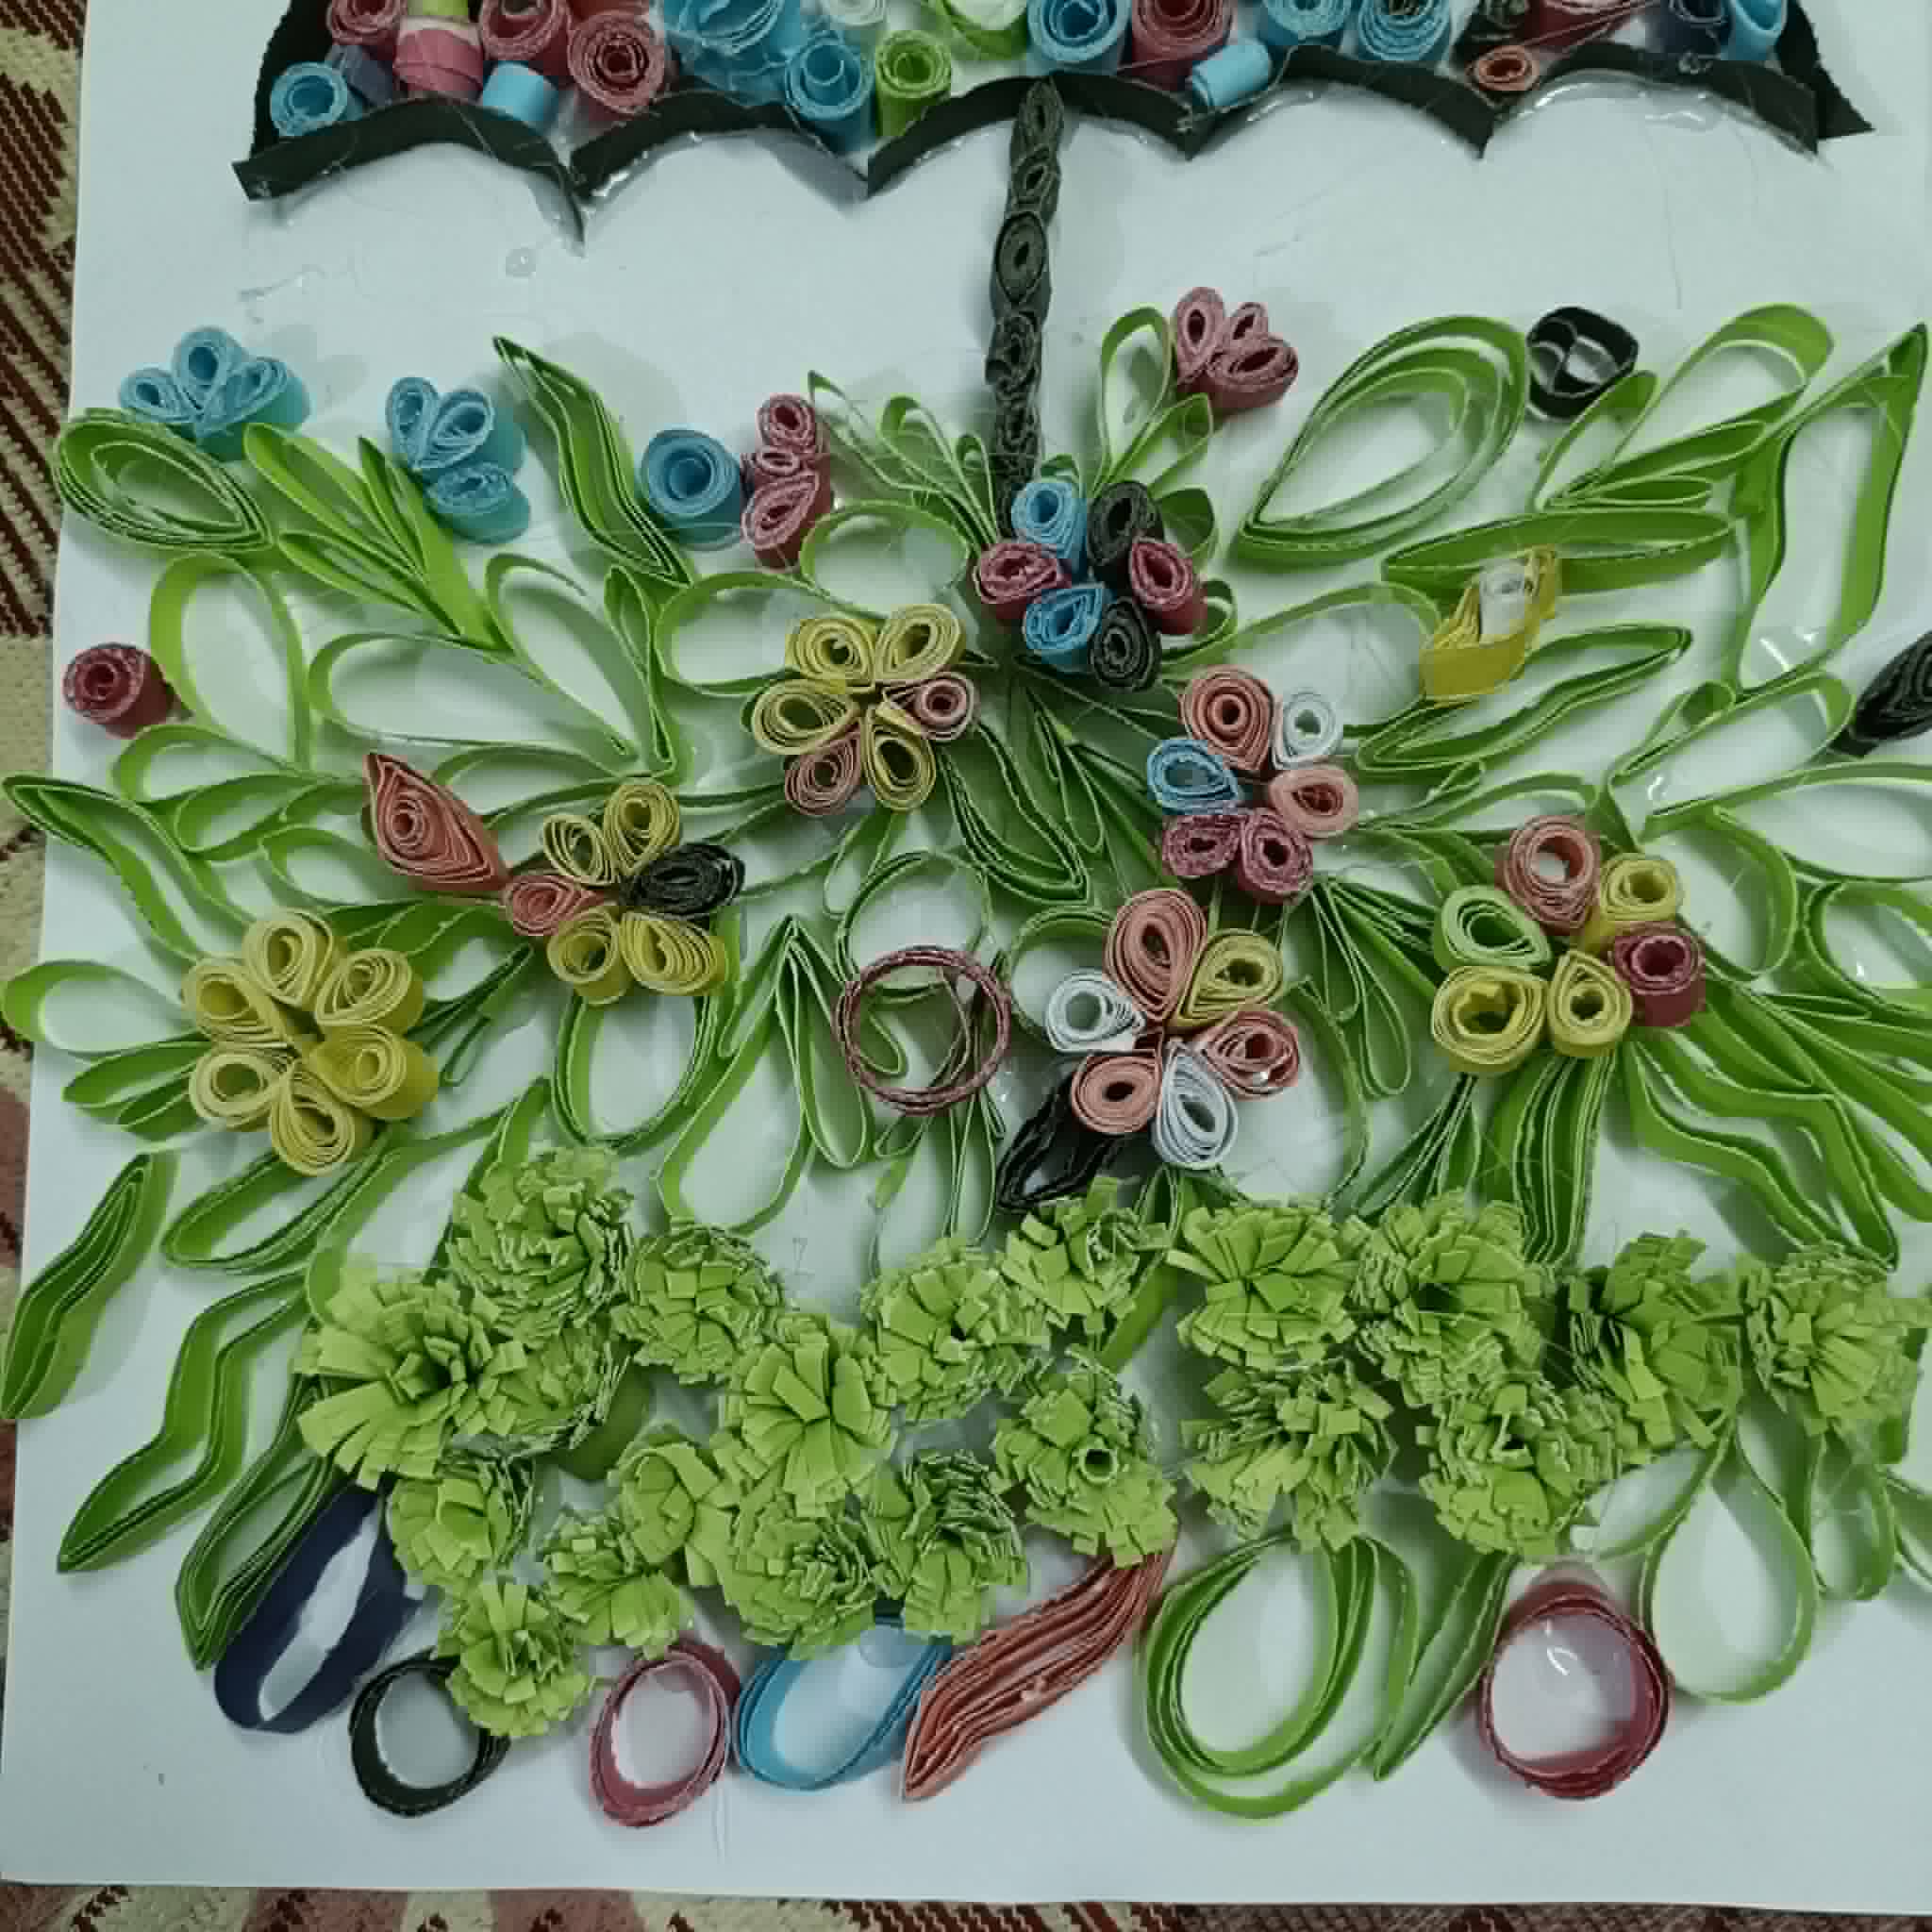
☔In this way, I filled the entire space in the middle of the umbrella and added small black dots in a long line at the bottom.
🟫 Step 10
☔Then I filled my lower space with green leaves and flowers.
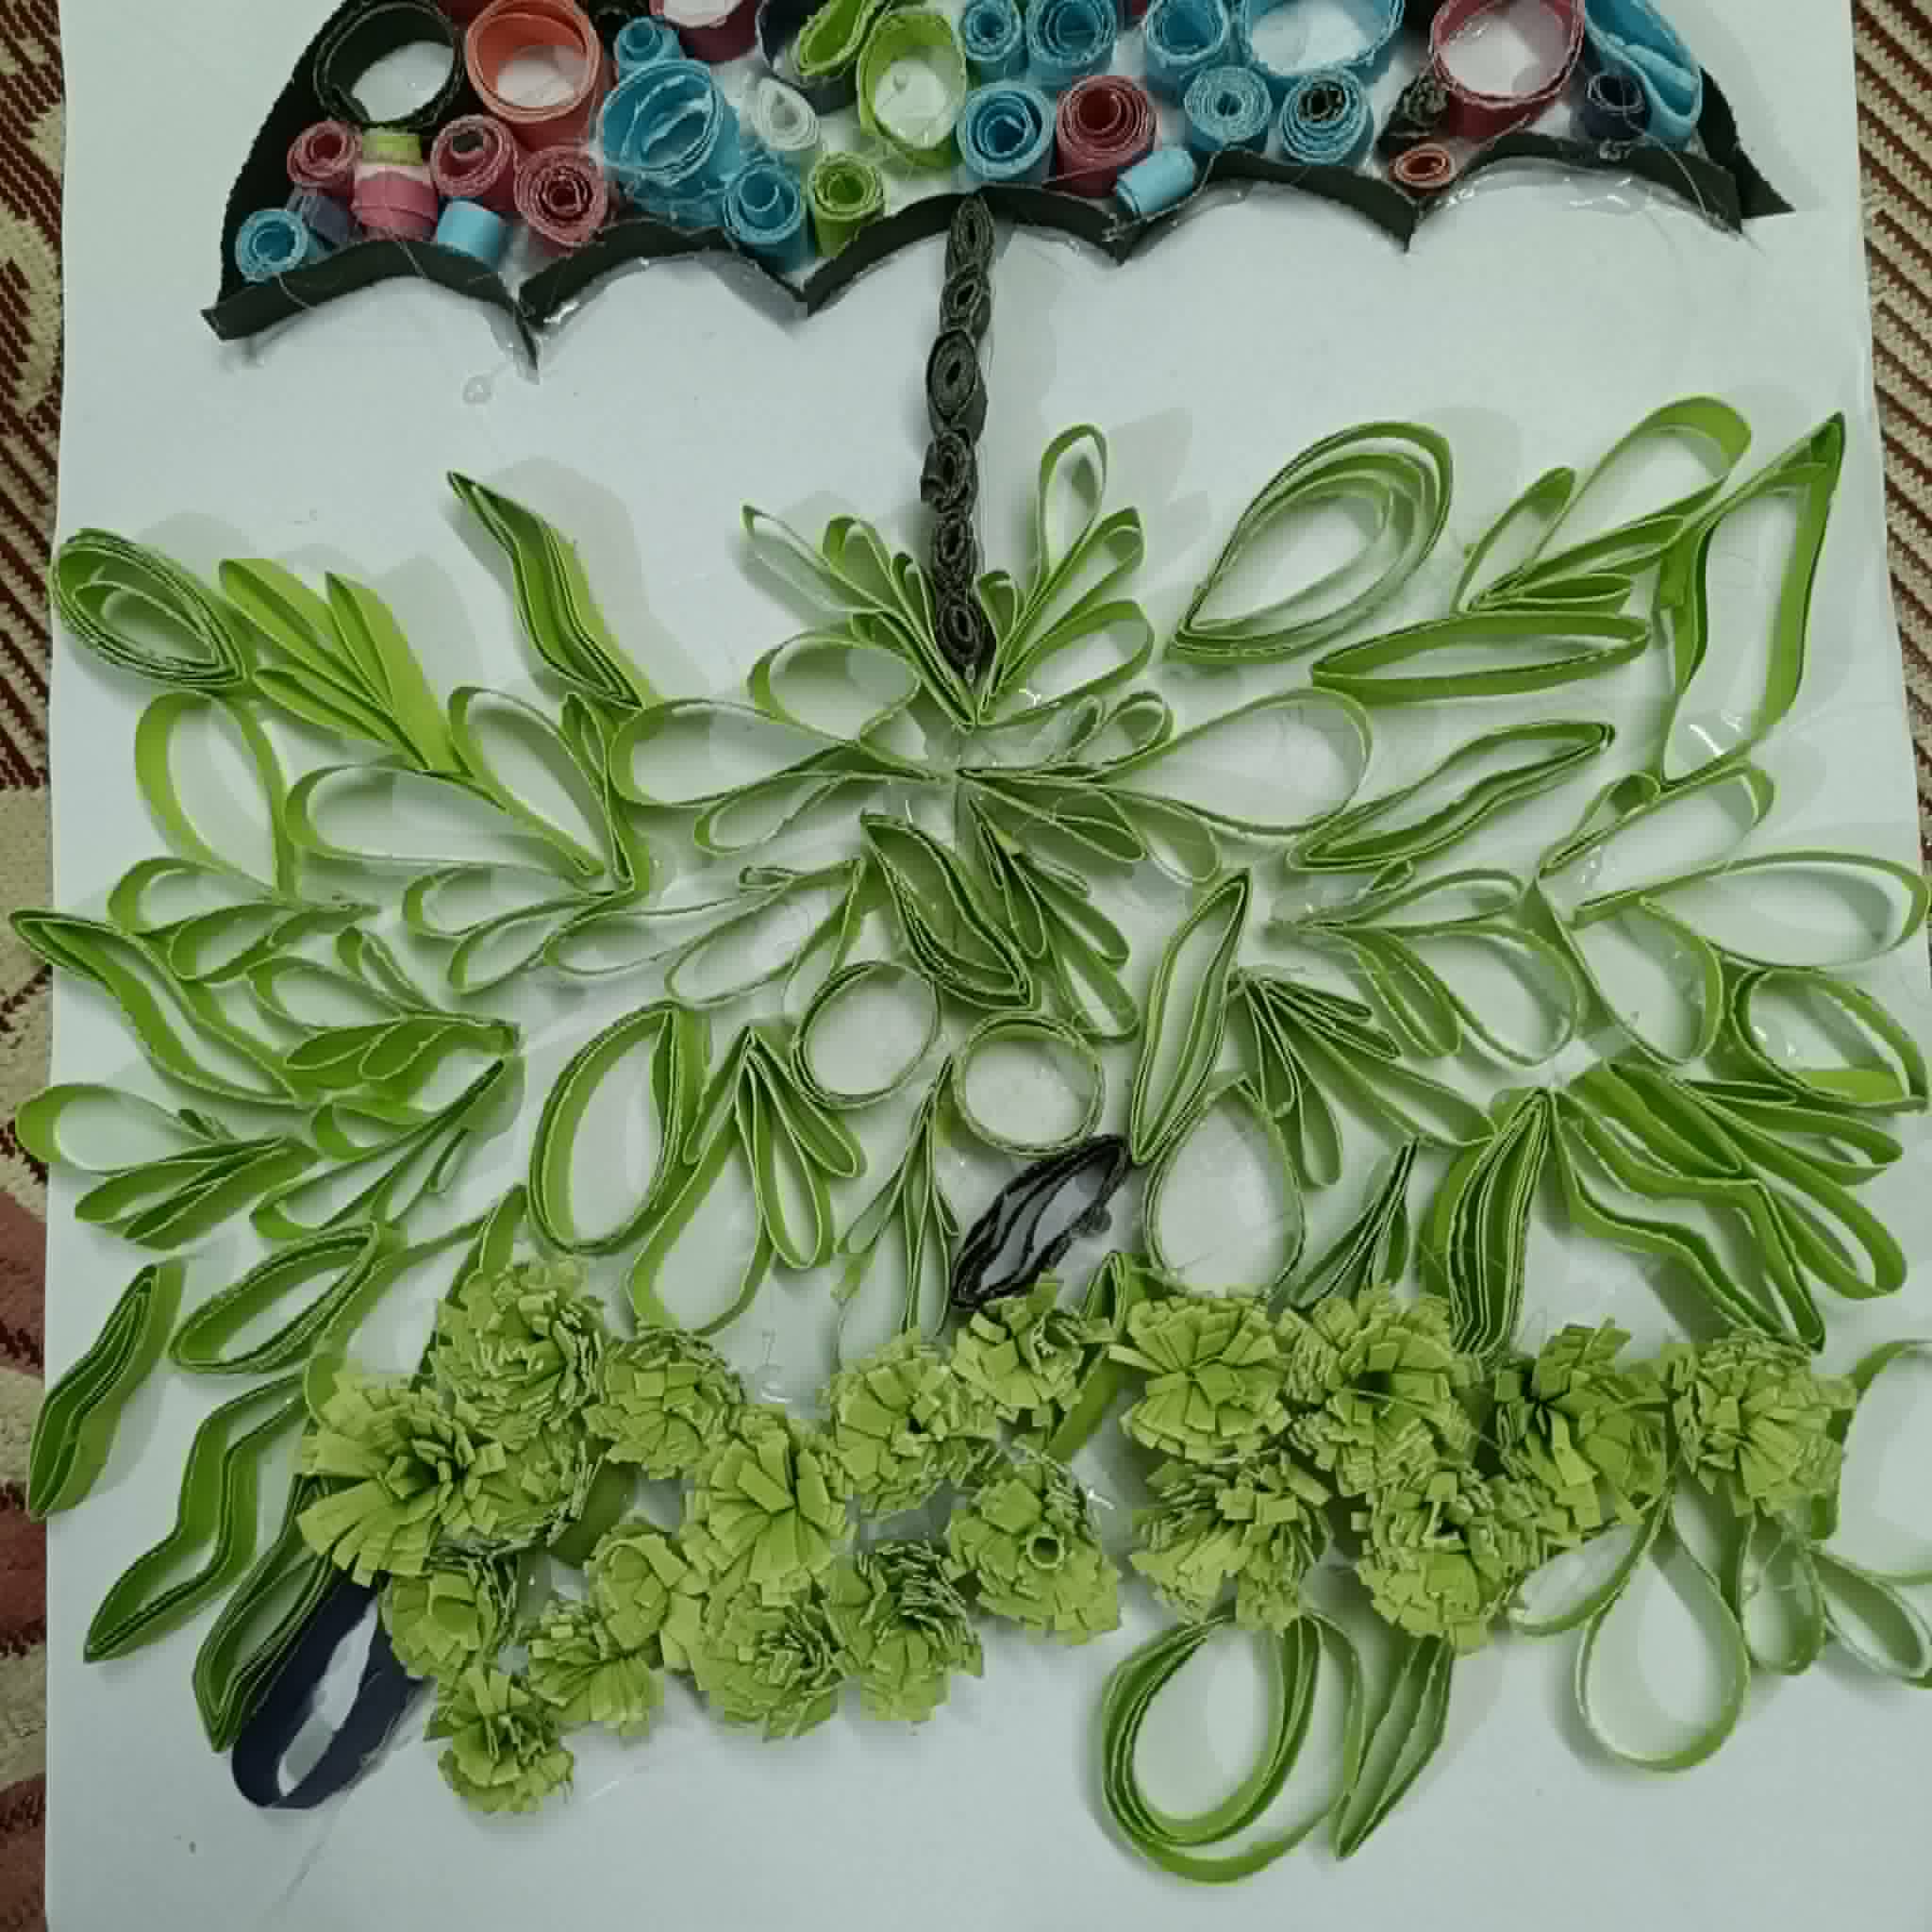
🟫 Step 11
☔Then I glued the flowers I made in different colors onto the leaves.
🟫 Step 12
☔Then glue small blue pieces from top to bottom to represent raindrops.
🟫 Step 13
☔Then my perfect rainy day quilling craft was ready.
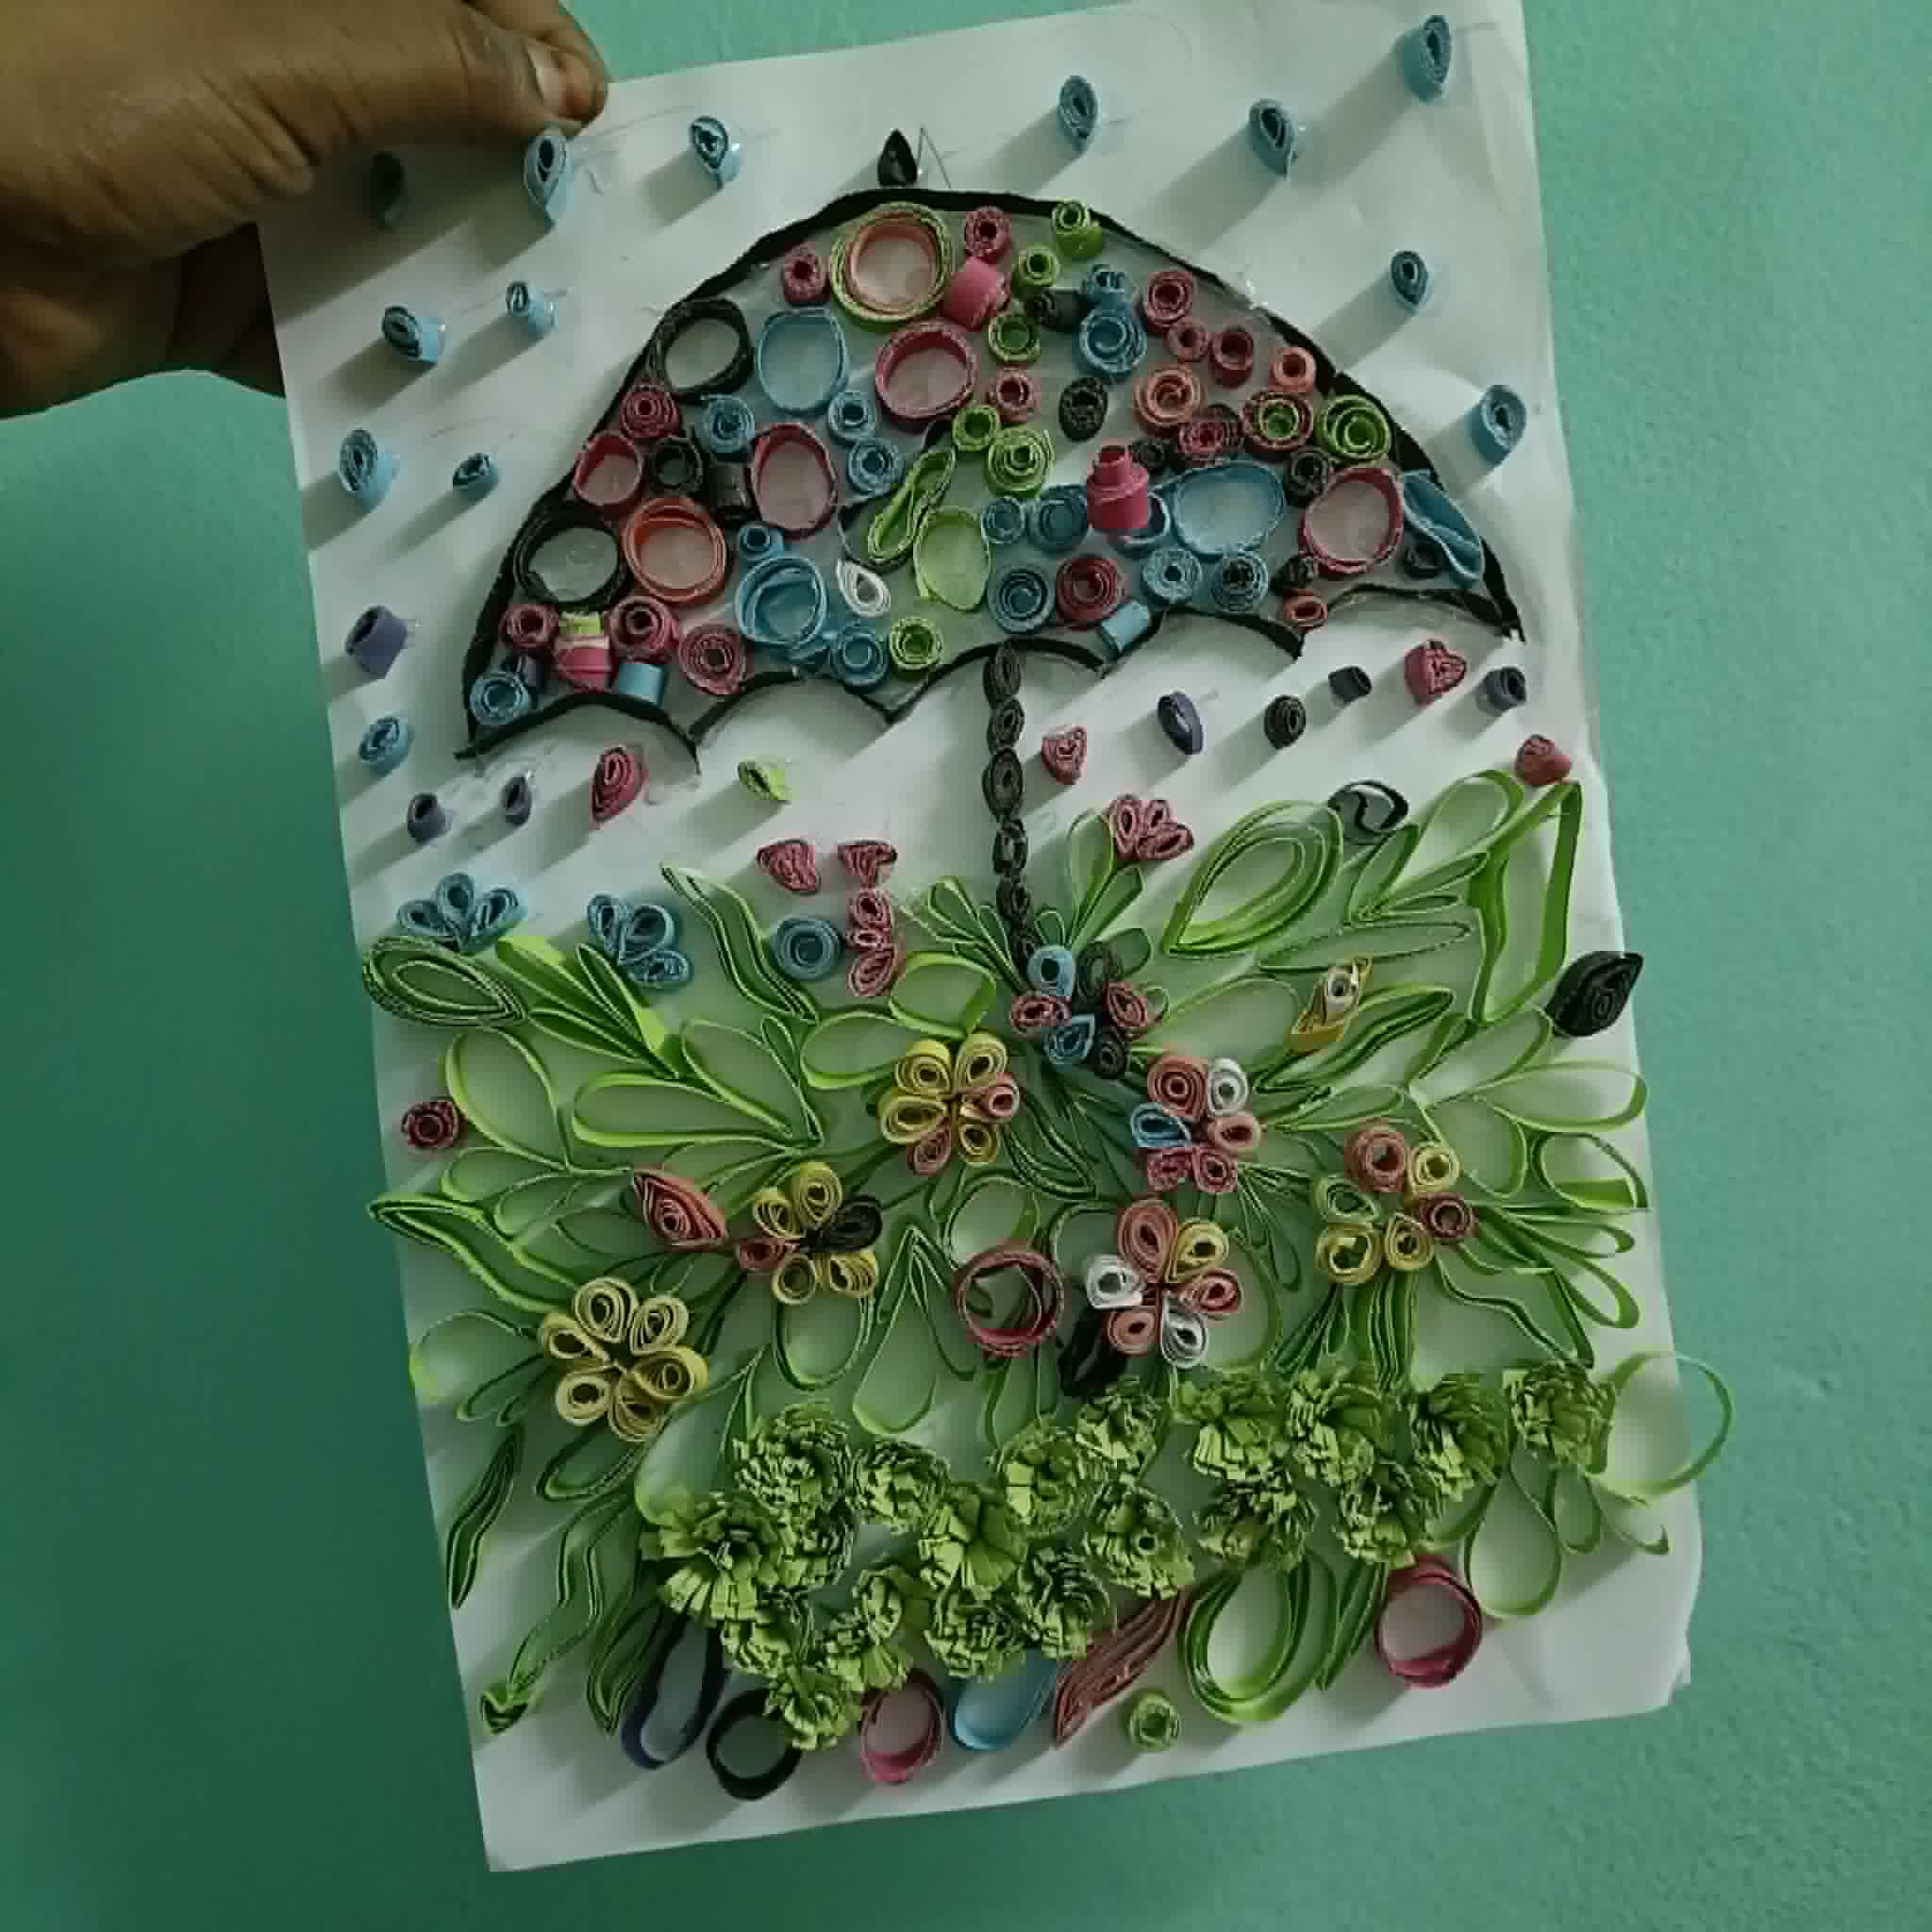
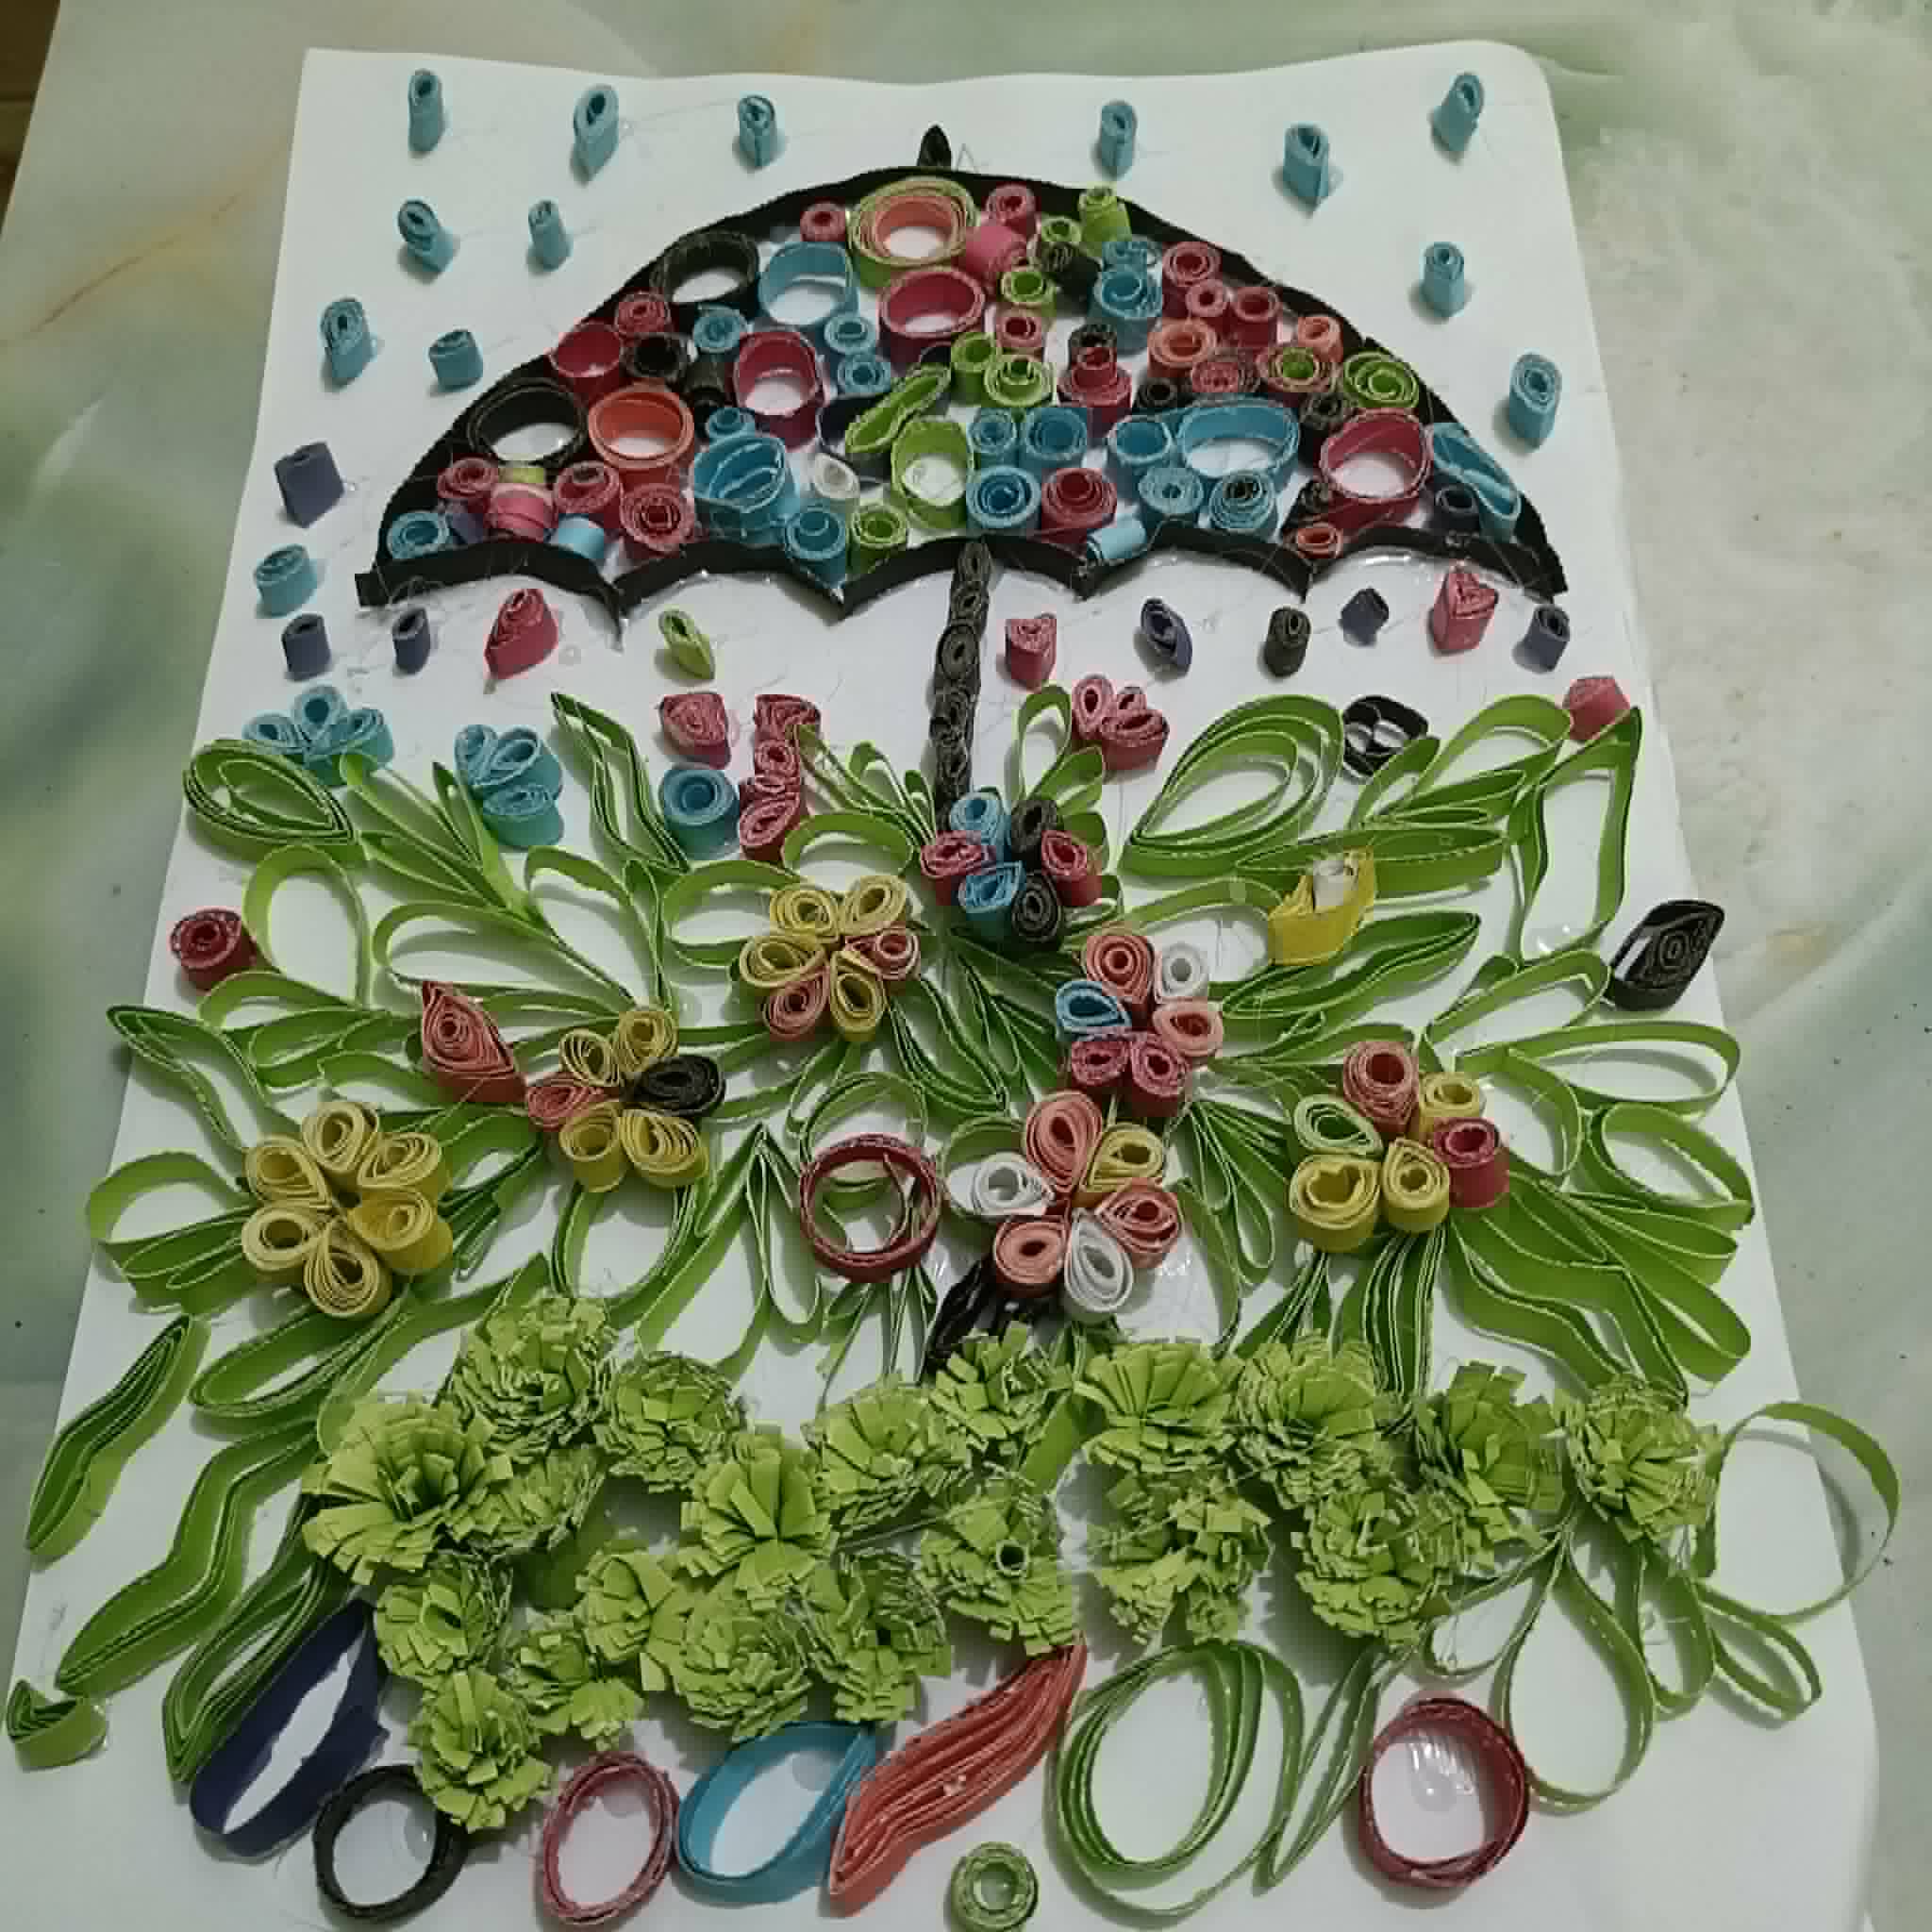
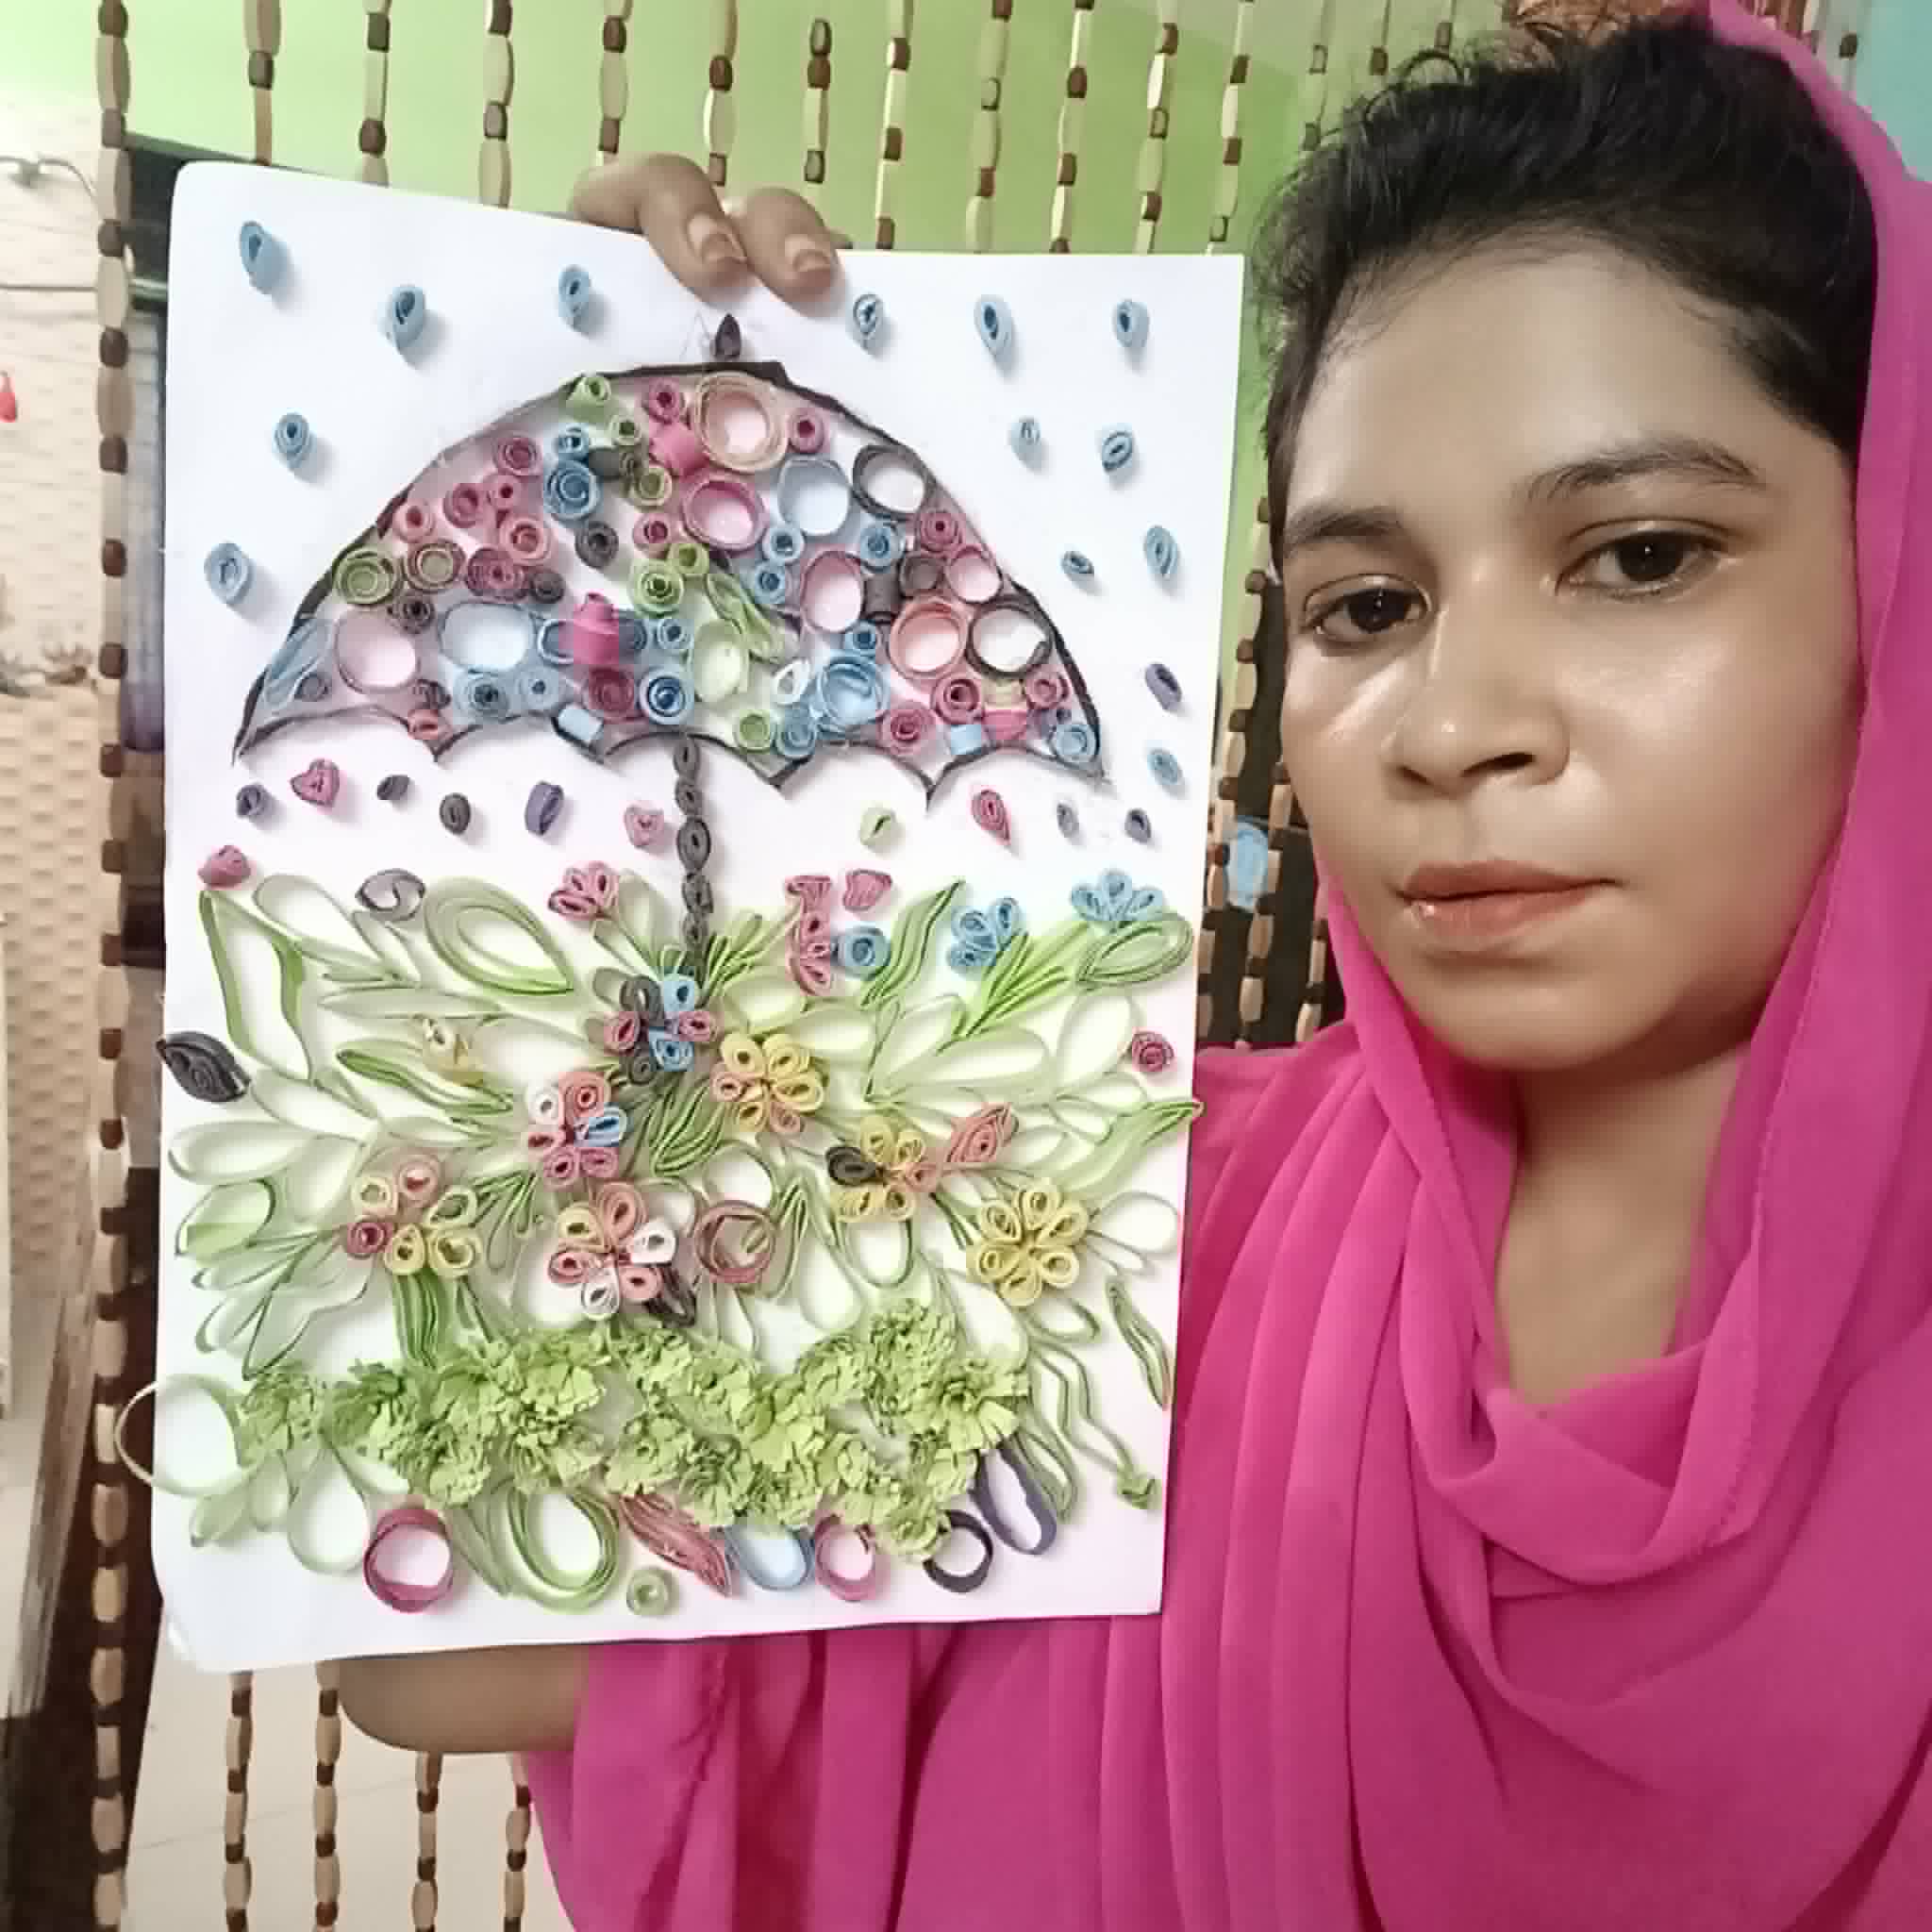
𝒇𝒊𝒏𝒂𝒍𝒆 𝒐𝒖𝒕𝒑𝒖𝒕 |
|---|

My selfie with the craft |
|---|
Craft Tips |
|---|
To make the crafts here, we must wrap the quilling papers well so that the glue does not come off later. Also, after attaching them with glue, we must give them some time so that they dry completely, and then if we prepare them, they will last longer.
Friends, I hope you liked it very much, and you can also make such crafts very easily according to your wishes. I am saying goodbye today. See you in a new post. Stay well, everyone. May Allah protect you.
| Device | oppo 11 pro |
|---|---|
| Photographer | @tammanna |
Thanks everyone for reading my post
Regards
@tammanna

Curated By : @ memamun
Curated by: @ahsansharif
Thank you for valuable support
Your umbrella quilling craft is really beautiful and creative. The umbrella design perfectly fits the rainy-day theme and the quilling work looks clean and well arranged. Handmade crafts like this always have a unique charm. Nicely done and keep creating.
Tnax brother