Learn How to use an Analogue Multi-Meter
A MultiMeter
A multimeter is a test equipment used to measure a number of quantities ranging from current, voltage, resistance , capacitance, continuity, gain, frequency and a little more. It often act as an extension of most technicians sense.
For this post, I will be using a SUNWAI Analogue Multi-Meter and the specific model being the XY-360TRES which has a fuse and diode protection for DC and AC.
What makes it Analogue?
Let's start with the fact that it is able to sense and process physical quantities like voltage, current and resistance which are all Analogue quantities who's intensity is represented by the amplitude of wave.
Why is it a multimeter?
Unlike measuring devices like the ohmmeter specifically design to measure resistance, the ammeter designed to measure the magnitude of an electric current or a voltmeter for voltage. A multimeter is a single device designed to measure a number of quantities
The XY-360TRES is able to measure the following physical quantities:
- DC Voltage
- AC Voltage
- DC Current
- Resistivity
- Continuity
- Gain (hfe)
Description
The multimeter is a moving coil measuring instrument powered by two 1.5 Volte double A battery. It has a dial for selecting various functions, two probs for basic input one being red and the other black. The result is displayed on a multi graduated scale with a pointing needle that deflects to provide a reading.
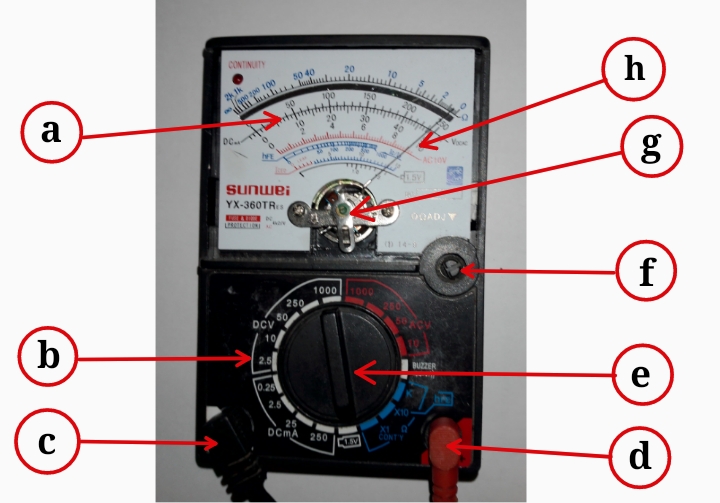
a = Display scale
b = Functions
c = Negative input probe (- Com)
d = Positive input probe (+)
e = Function/scale selector dial
f = Calibration nub
g = Zero error adjustment nub
h = Pointing needle
Getting the device setup for use
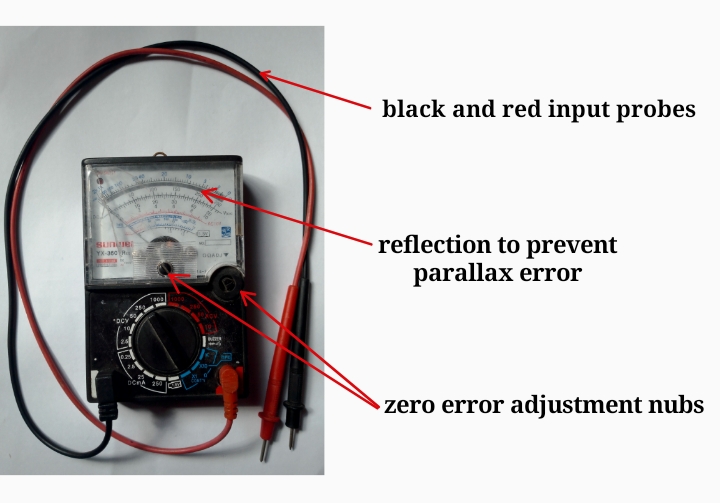
To get the multimeter ready, plug in the probs into the two sockets. The black prob connects to the socket labeled - com while the red prob connects to the other ends with a + sign and a red colour.
Make sure you have installed two 1.5 volte double A battery to power the device.
Make sure the needle' starting point is adjusted right so it starts at the zero point. This you can do by adjusting this two nubs as shown in the picture below. This is to avoid the zero error.
Quantity and Range selection
The function selector nub on this model also doubles as a range selector nub, it is used to select which of the Multimeter's multiple function is to be used at this instance. Correctly selecting the function is very important as selecting the wrong function will cause some damage on the the equipment.
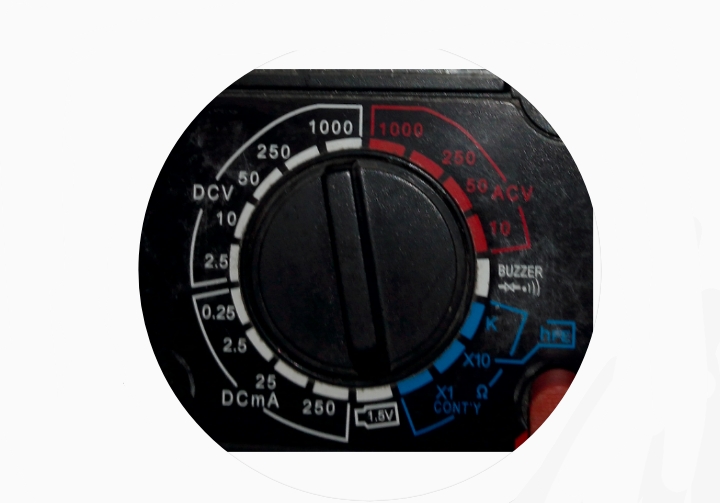
Make sure the slanted edge of the selector dial is pointing to the selected function
How to tell what function and range to use
DCV
The section labeled DCV is used when measuring the Voltage of a direct current source. So the DCV will mean Direct Current Voltage . This includes the output from your:
• laptop charger
• Phone charger
• Any battery
• Soler panel
• DC motor
The range on the DC V section of this multimeter covers the following.
DC Range
| S/N | Selection | Range |
|---|---|---|
| 1 | 2.5 | Millivolts (2.5mv Max) |
| 2 | 10 | From 1 to 10 volts of DC |
| 3 | 50 | Between 10 to 50 Volts of DC |
| 4 | 250 | DC Voltage from 50 to 250 |
| 5 | 1000 | From 250 to 1000 Max |
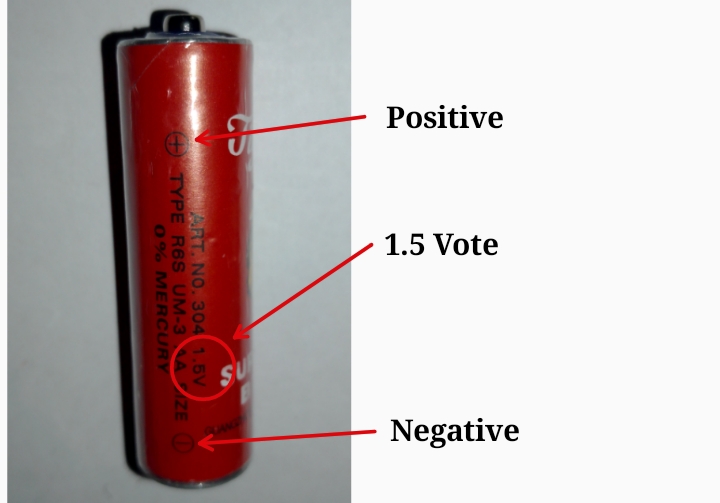
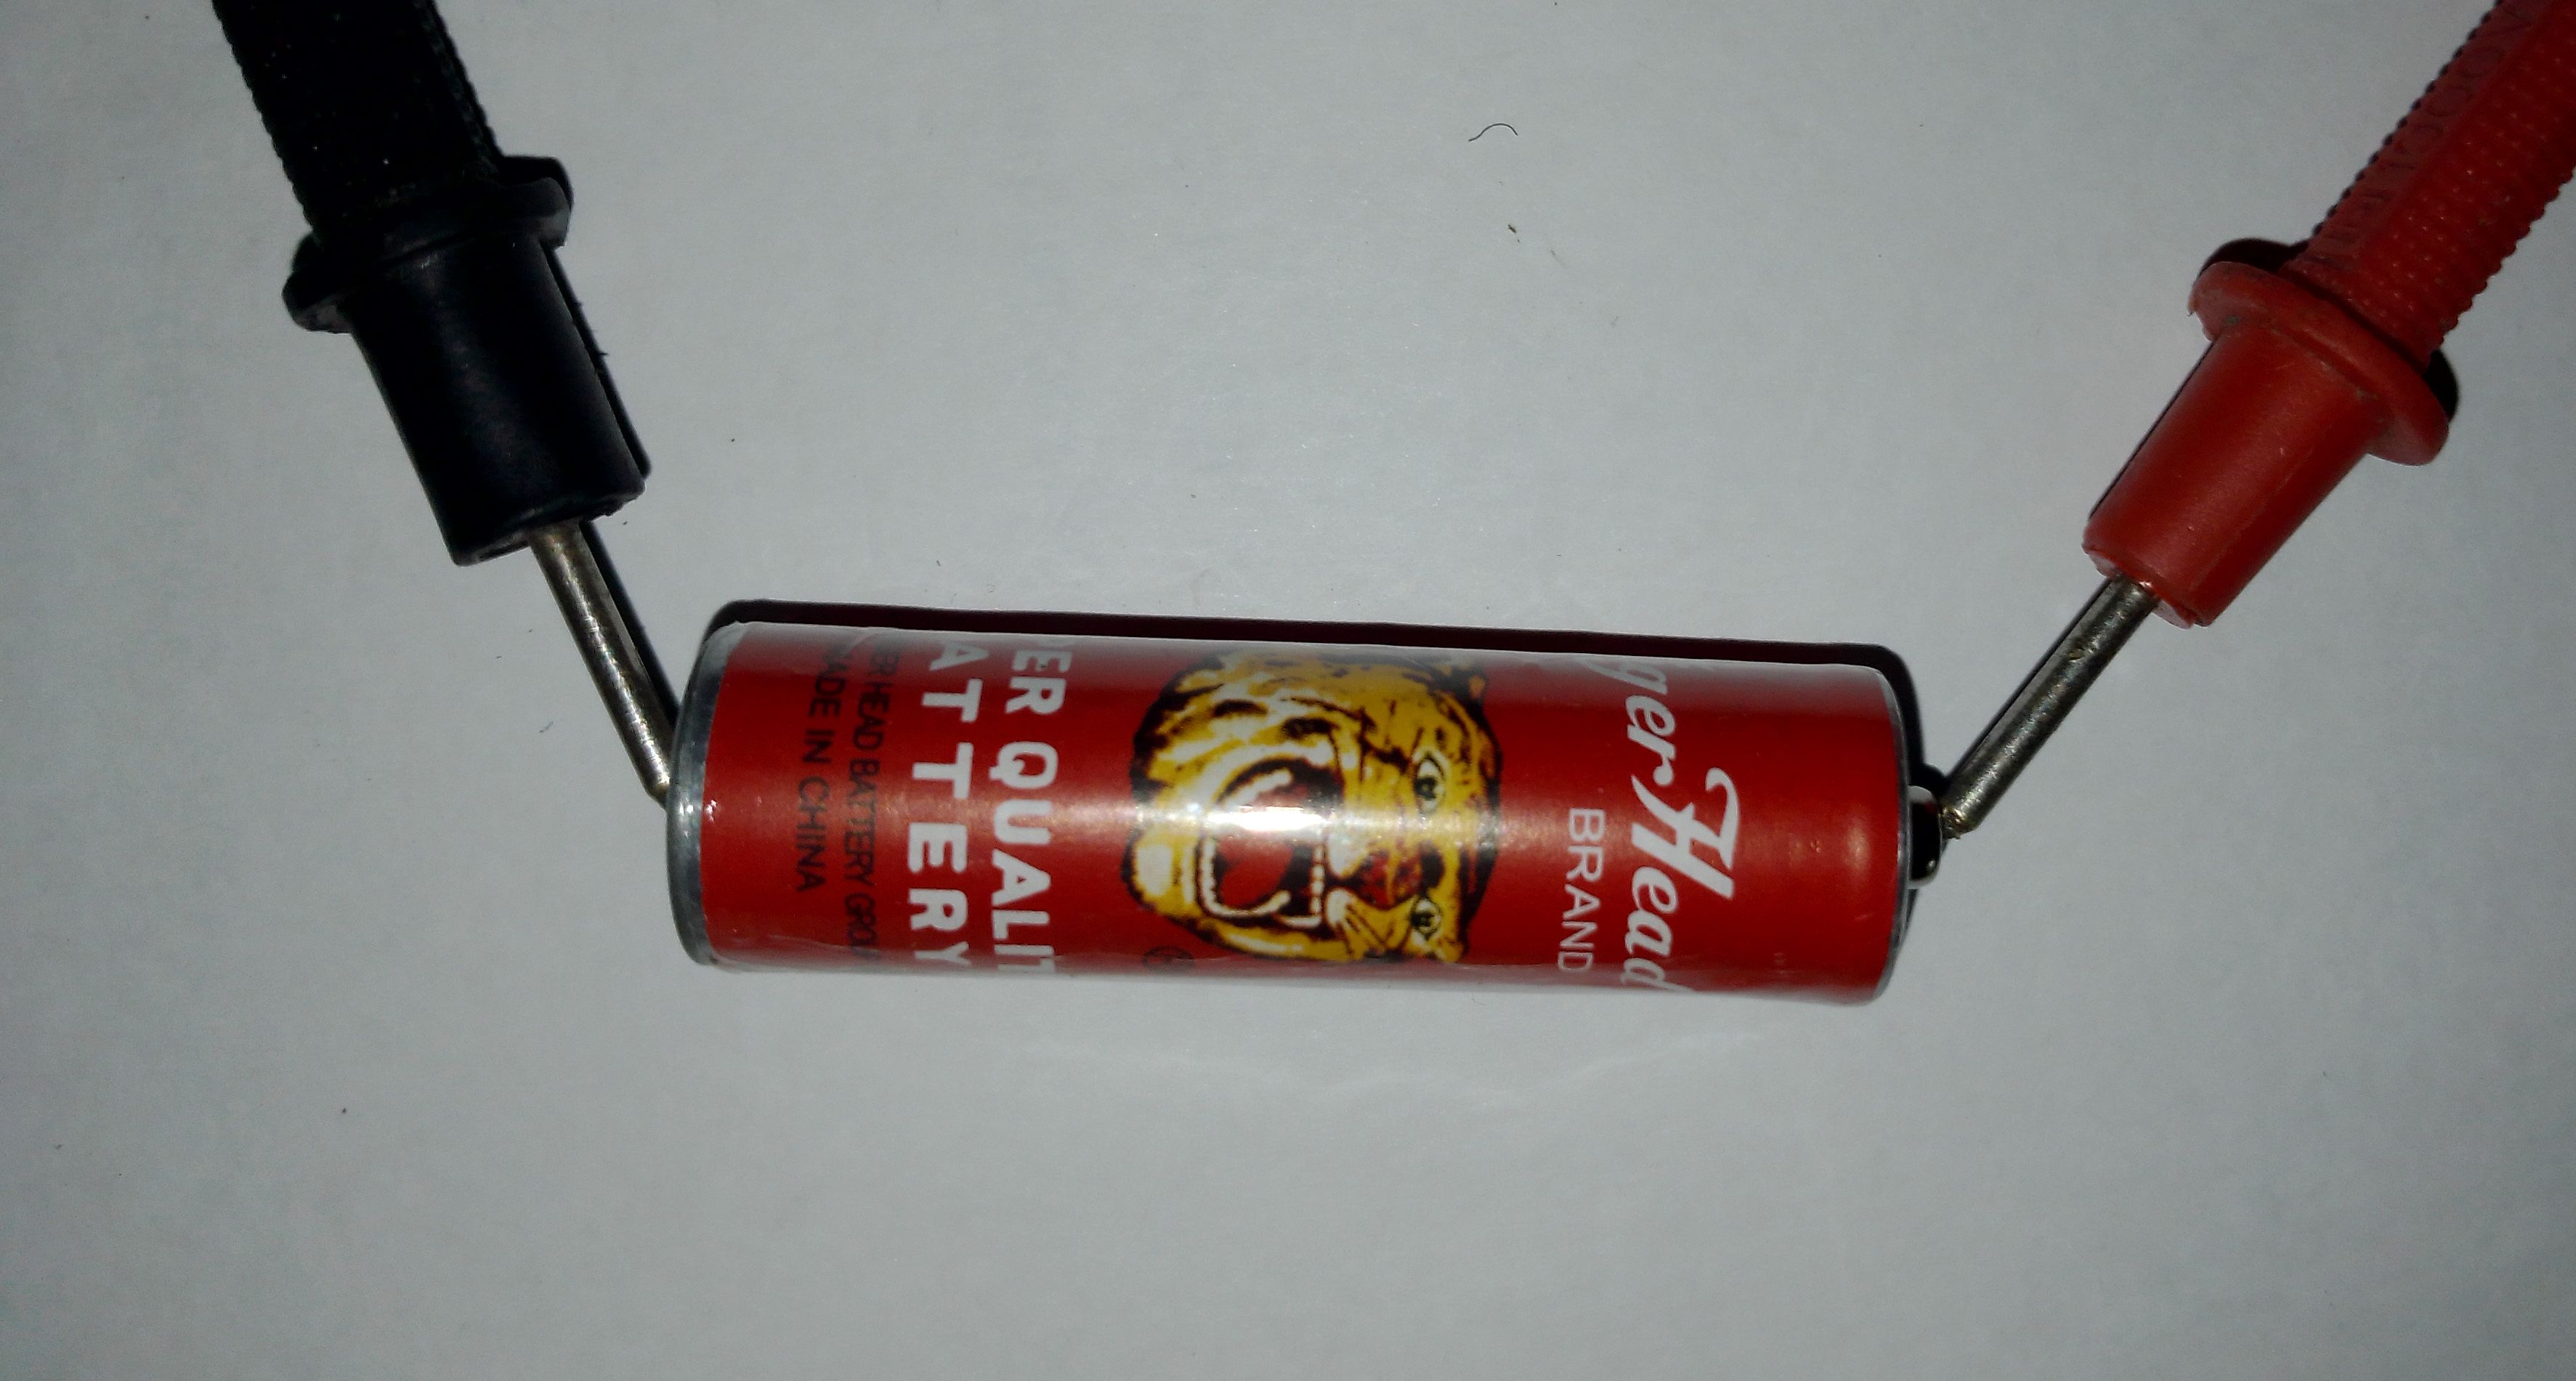
You will Get to know what range to select based on what is stated on the DC Source you are about to measure. For example, this battery has it indicated on it's side that the output is 1.5 volt and it is direct current because it is a battery.
This falls under number two, ranging from 1 to 10 volts and that is where to set the multimeter [DCV 10]
Now that our function and range is set, we have to come up with an expectation.
• What will be the reaction of the needle?
• Is it expected to move?
• If it should move, where should it stop?
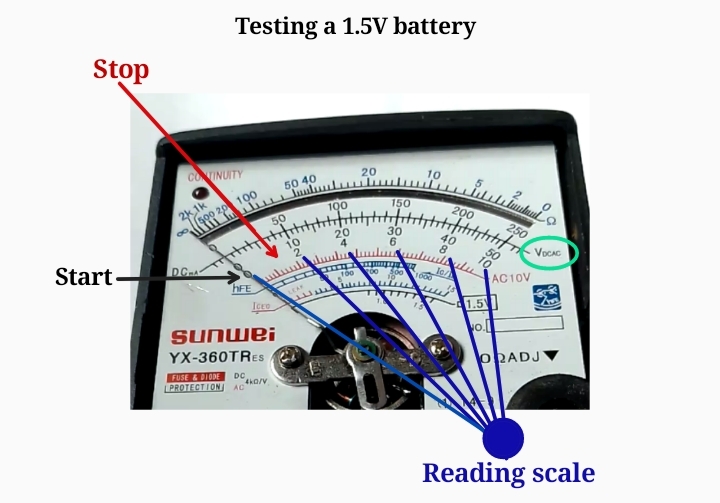
In this case, the needle will have to move and we will be reading along the graduation labeled:
VDC AC
With our eye on the scale marked 2, 4, 6, 8, 10.
It stops at 10 because the range we selected has a max of 10 And a functional 1.5Volt battery should swing the needle across to point indicated on the screenshot below.
This multimeter has a function specifically for testing 1.5Volt batteries. This will give a more accurate output as the whole range is scaled for 1.5
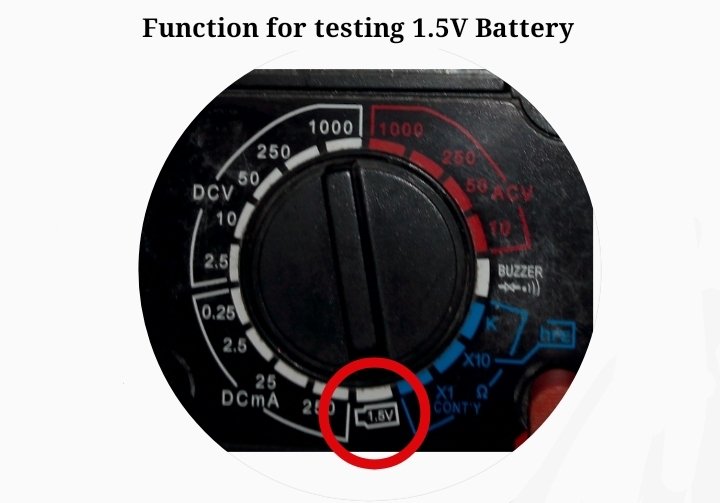
When using this function you will be reading your output on the scale marked 1.5V
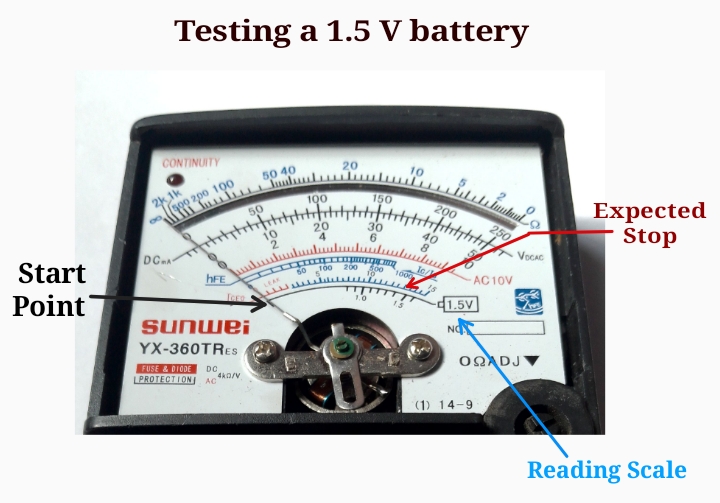
If the needle fails to get to the expected stop point, then the conclusion is evident that the supply voltage is deficient but if it reads beyond the expected point, it still indicating a fault showing excessive voltage.
The probs should be connected to both sides of the double A battery, the positive probe which is red should be connected to positive end of the battery as shown in the picture below
Testing more DC Sources
- My phone's battery gives out 3Volts of Direct Current. Setting the multimeter to DCV [10] will be the best choice.
- On the other hand, my UPS battery gives out 12V of Direct current. Setting the multimeter to DCV [50] will be the most appropriate choice.
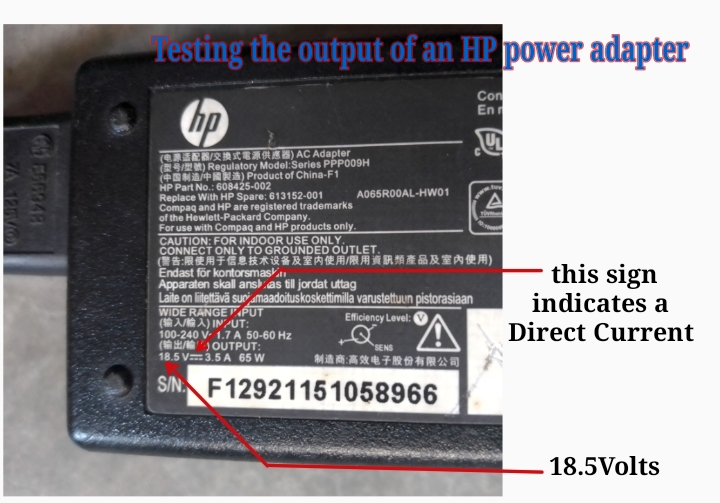
- The power adapter has an output of 18.5V
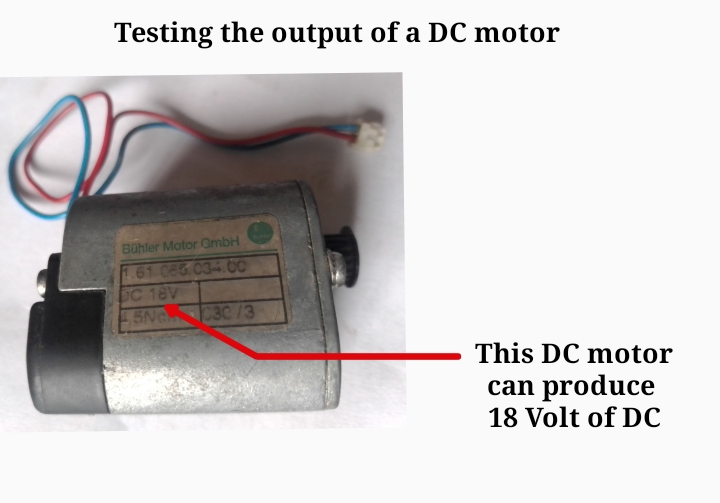
- Tho output voltage produced by this DC motor is 18 Volt, at higher RPM it can produce far more.
- Soler panels are another source of direct current, in this case the value of the output voltage is unknown and to avoid damage on the multimeter, set the range to highest available which is 1000 in this case, test the output from the panel which will create a very insignificant deflection,

now move a step down to the 250 range and test again. You are likely going to get a significant deflection when you get to rang where 10 is Maximum. I expect this panel to produce between 3 to 6 volt.
How to measure alternating current will be addressed in a subsequent post.
Determination of Club Status refers to the https://steemworld.org/transfer-search Web-based Application
Good job bro... Thank you for supporting the #burnsteem25Great job! There are still some uses for a moving needle that a digital scale just can't handle nicely -- like when adjusting something to find a max or min reading.
We can't really kick out Analogue systems because digital systems can not truly replace Analogue devices. The best we can do is to create hybrid devices to gain the best from both worlds.
Thanks for going through my post and for appreciating....
Thank you for contributing to #LearnWithSteem theme. This post has been upvoted by @daytona475 using @steemcurator09 account. We encourage you to keep publishing quality and original content in the Steemit ecosystem to earn support for your content.
Regards,
Team #Sevengers
The #learnwithsteem tag focuses on teaching through tutorials and lessons some knowledge, skill or profession that you have. Please avoid using it if it's not about that. Thank you!