Chakura Symbols -- Designing a Tattoo (( A little exercise and lesson ))
Its been a while since I shared some of my Art knowledge.
Working in the tattooing industry for the last decade has taught me alot about myself and the artwork (style) of the tattooing culture. It has helped me become a better artist in this industry and a better artist in general. I love to exercise my skills constantly (when I have the time) and explore new styles all the time.
I figured I would do a little breakdown of the process of putting together a tattoo design.
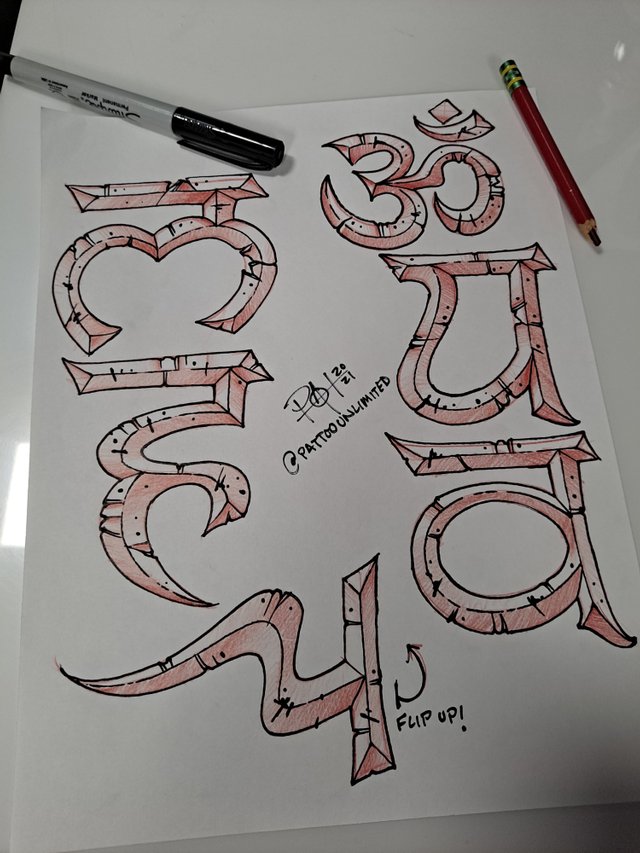
This client wants some Chakura symbols on his arm and asked me to design something for him. He already has work by me so he gave me complete freedom to design this for him. I decided to go with my distressed style that I do with alot of my work. I am trying to perfect it and set myself apart from the rest with this style. I wanted to also have fun with my art and the tattoo. This style already matches one of his tattoos so it only made sense to me to match it and go with a theme on it.
FINISHED:
I will be using these designs as the final draft. I will make a stencil with these after getting them sized up correctly and then do the procedure of the tattoo.
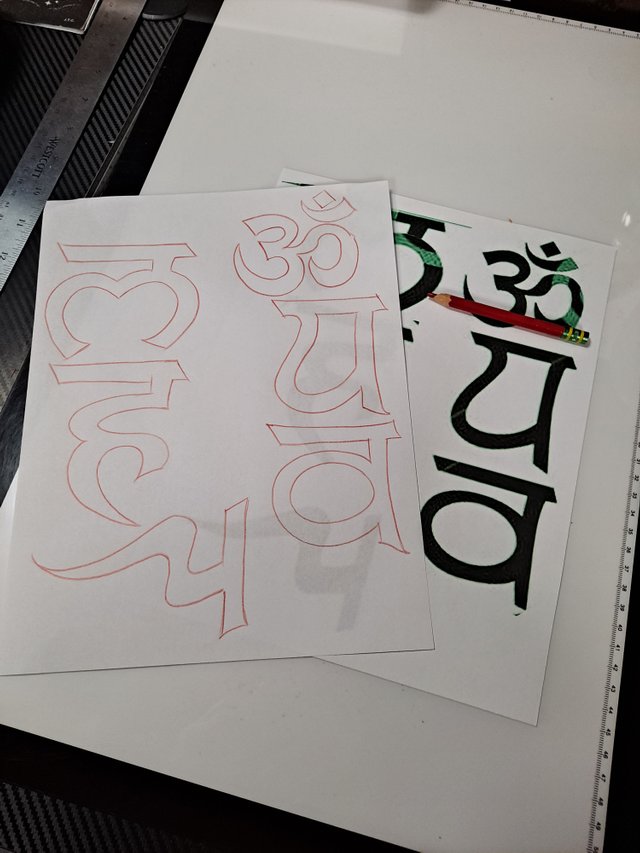
STARTING OUT:
I printed up the symbols that I needed and used the light table to transfer an outline of the symbols. To try and draw these symbols without using this technique would take me alot more time and that is a luxury I dont have between drawing and tattooing. If you follow my work you will see that I use the red pencil to work the form of the design.
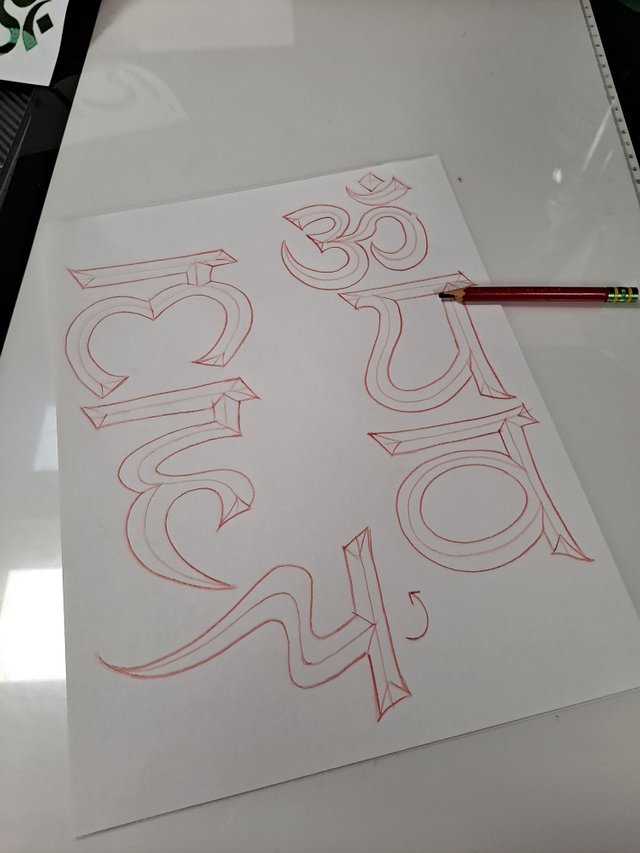
BEVELING:
Beveling is a way to make a 2D object look 3D. Its a classic style thats been around for centuries and used in just about all medians of art styles. I love using this method to create a more textured 3D object on paper and skin.
Once you have your outline of the shape you want to bevel, take the center of the object and draw lines from point A to point B in the areas you wish to Bevel. Once you have a basic line its as simple as connecting lines from the inner line to the outer line.
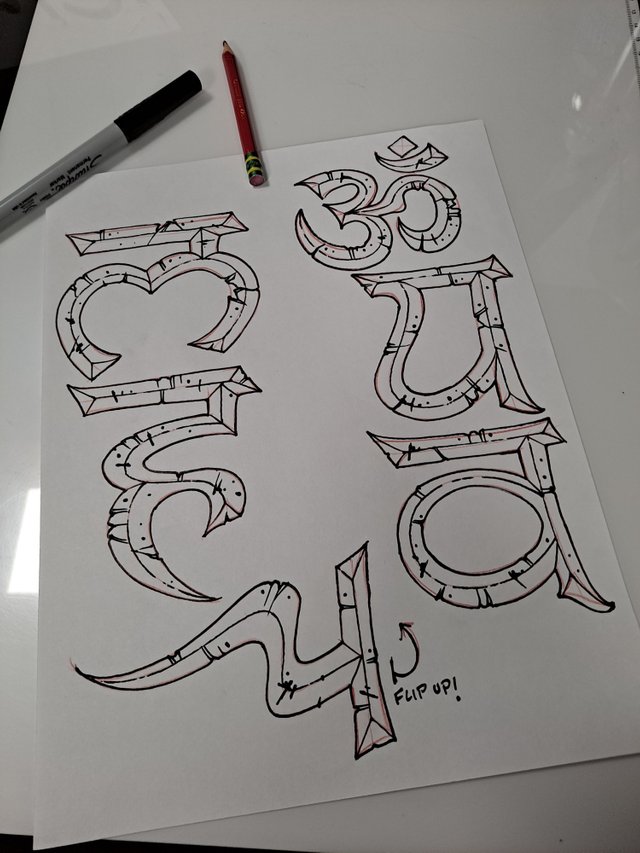
LINED AND DETAILED:
Once I have my basic shapes and forms laid out, its time to make it solid! This takes a little skill as you want to add all the final touches in this step. I use a classic Sharpie, I used these as a kid a lot and have pretty much mastered the pen in general. I use my fancier pens for different projects. I knew the direction I was going with this piece so I didnt need to use the red pencil to sketch out and form details. It becomes more natural the more you do it.
Remember: EVERY DRAWING YOU DO IS AN EXERCISE!!
FINAL TOUCHES:
I dont normally shade my work on paper for the client, unless I really need to convey something to them they dont understand. I will shad my work in when I want a reference to keep me on track while Im doing the procedure. If you ever get a tattoo you might find the artist has a piece of the artwork in front of them for this reason. Using a light source is important when youre shading, this is what brings depth to a piece of work.
Thanks for checking it out! I hope it was helpful.
You can always follow @pattoounlimted to keep up with the work.
Thank you to the ART community for there efforts and love of art on the Steemit platform!!


Thanks: @xpilar / @art-venture / @axeman / @seo-boss / @iansart / @worldofxpilar / @booming01 / @booming02 / @booming03 / @booming04 / @steemcurator01 / @steemcurator02 / @steemcurator03 / @steemcurator04 / @steemcurator05 / @steemcurator06 / @upvu (( for your gracious curation efforts))