Miércoles (01-09-2021) Obras Creativas. Hermoso Cofre para nuestras joyas. @tormenta//Wednesday (01-09-2021) Creative Works. Beautiful Chest for our jewels. @tormenta
Hermoso Cofre
Hermoso Cofre
Hola queridos Amigos¡
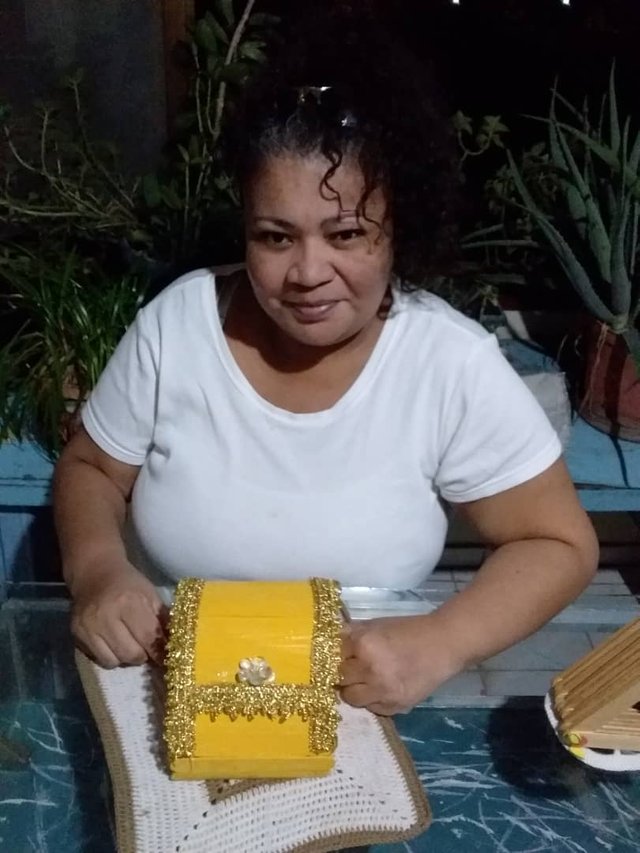
Hoy con mi miércoles creativos para esta hermosa comunidad en crecimiento, y apoyando a su crecimiento, aportando 15% de la Publicación. Espero todos este bien y se mantengan sanos, hoy con un hermoso cofre realizado con paletas de helados y con mucho cariño para ustedes, entregando un tutorial con el paso a paso, acompáñame a realizar este hermoso cofre.
Today with my creative Wednesday for this beautiful growing community, and supporting its growth, contributing 15% of the Publication. I hope everyone is doing well and staying healthy, today with a beautiful box made with ice cream popsicles and with a lot of love for you, giving a step-by-step tutorial, join me in making this beautiful box.
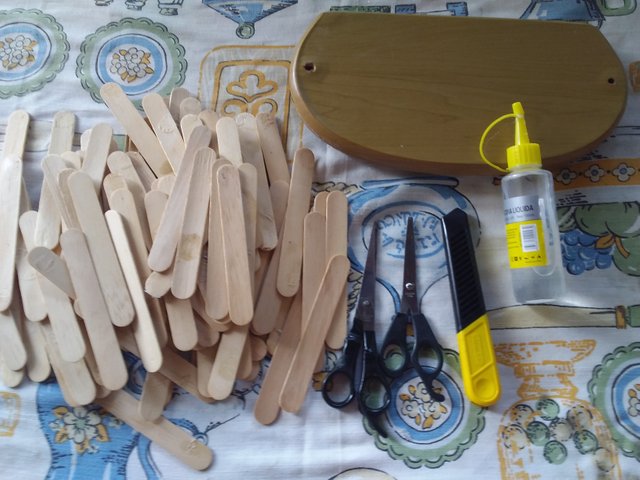
Materiales a Utilizar
- Paletas de Helado.
- Pega.
- Tijera.
- cortador exacto.
- Pintura fría de tu preferencia.
- 2 clavos
The materials to use
- Ice Cream Popsicles.
- Paste.
- Scissors.
- exact cutter.
- Cold paint of your preference.
- 2 nails
Proceso de Elaboración // Elaboration process
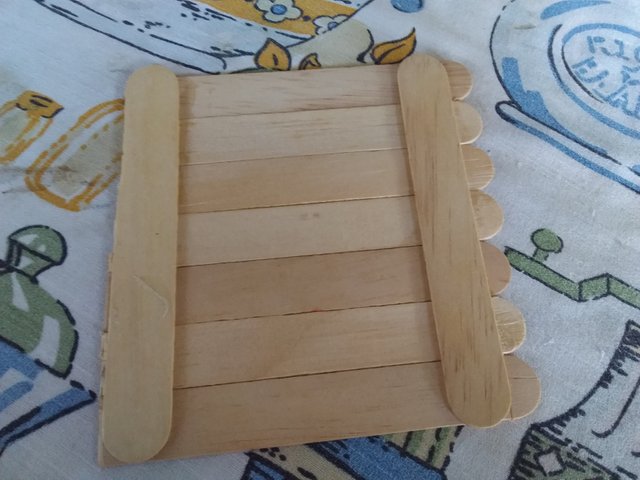
Paso 1 // Step 1
Paso 1 // Step 1
Se van a lineal 7 paletas y pegar soporte por los lados con 1 paleta en cada uno de sus lados.
7 pallets are going to be linear and stick support on the sides with 1 pallet on each of its sides.

Paso 2// Step 2
Paso 2// Step 2
Luego procedemos a cortar las puntas sobrante para que quede un rectángulo.
Then we proceed to cut the excess tips so that a rectangle remains.
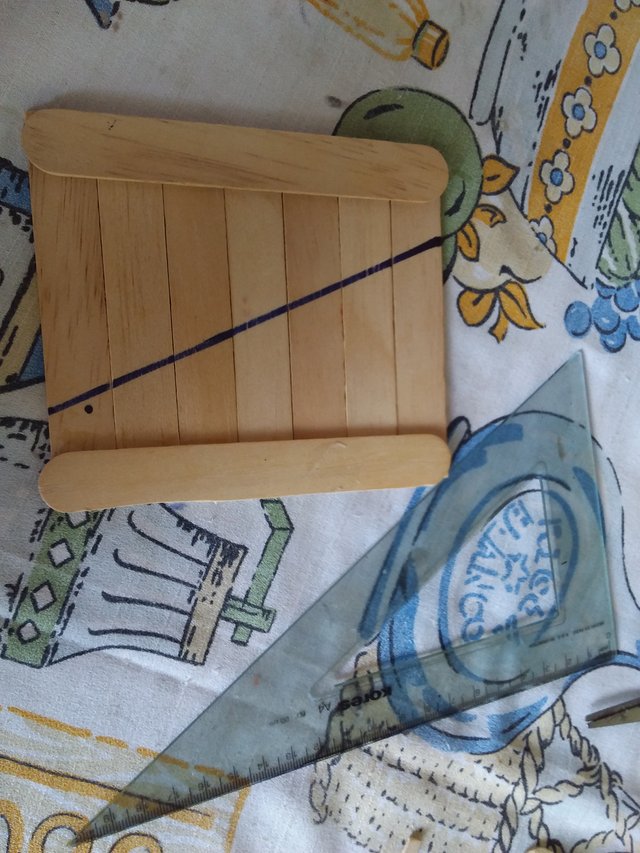
Paso 3// Step 3
Paso 3// Step 3
Se toman las medidas del rectángulo y marcamos 3 cm de largo, como se muestra en la siguiente imagen.
Measurements of the rectangle are taken and we mark 3 cm long, as shown in the following image.
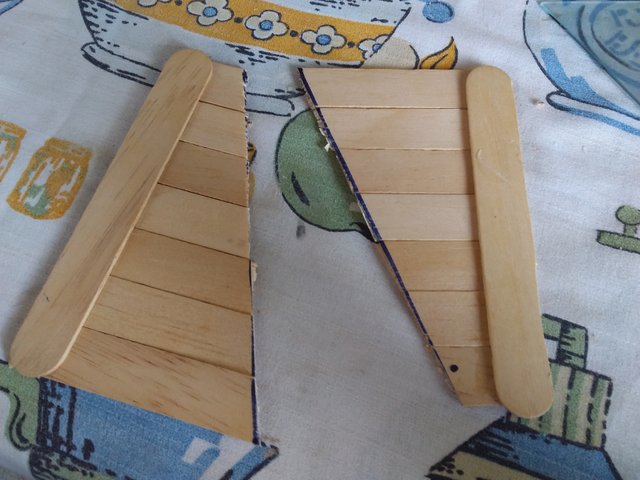
Paso 4// Step 4
Paso 4// Step 4
Luego cortamos justamente por la linea, con mucho cuidado para no romper las paletas.
Then we cut just along the line, being very careful not to break the pallets.
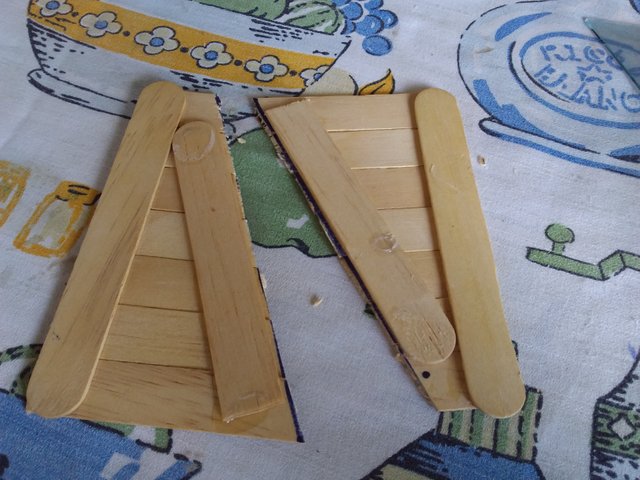
Paso 5// Step 5
Paso 5// Step 5
Se pegan soportes donde las paletas quedaron desprotegidas, esto es para darle mas fuerza, y no se rompa cuando estemos elaborando la estructura del cofre.
Supports are glued where the pallets were unprotected, this is to give it more strength, and not break when we are developing the structure of the chest.
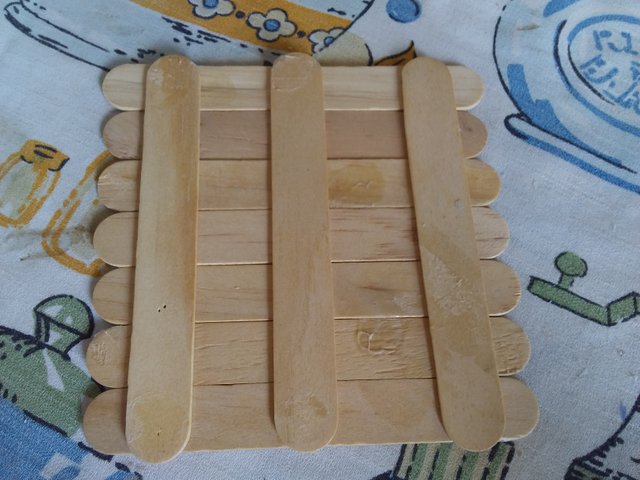
Paso 6// Step 6
Paso 6// Step 6
Para crear la parte inferior del cofre, colocamos nuevamente 7 paletas lineales y colocamos 3 paletas de soporte, como se muestra en la foto.
To create the lower part of the chest, we put 7 linear pallets again and put 3 support pallets, as shown in the photo.
Paso 7// Step 7
Paso 7// Step 7
Luego se pegan las dos partes que hemos cortados por los lados de la base.
Then the two parts that we have cut on the sides of the base are glued.

Paso 8// Step 8
Paso 8// Step 8
En la parte de adelante comenzamos a cerrar la caja del cofre pegando 2 paletas.
In the front part we begin to close the box of the chest by gluing 2 pallets.

Paso 9// Step 9
Paso 9// Step 9
En la parte de atrás se pegan de igual forma paletas, 5 paletas y crea la caja completa del cofre.
In the back, pallets are glued in the same way, 5 pallets and creates the complete box of the chest.

Paso 10// Step 10
Paso 10// Step 10
Para hacer el soporte de la tapa, se pegan nuevamente paletas con su soporte y crear el rectángulo.
To make the lid support, stick pallets with their support again and create the rectangle.

Paso 11// Step 11
Paso 11// Step 11
Se marca de acuerdo a la altura del cofre, creando una curva, para luego cortar.
It is marked according to the height of the chest, creating a curve, and then cutting.


Paso 12// Step 12
Paso 12// Step 12
Luego pegamos ambas parte en la parte de los lados, y abrimos dos agujeros en la parte baja para colocar bien sea unos clavos o unos tornillos. Mas abajo se muestra cada foto de este proceso.
Then we glue both parts on the side, and open two holes in the lower part to place either some nails or screws. Each photo of this process is shown below.


Paso 13// Step 13
Paso 13// Step 13
Luego se van pegado las paletas en los lado para crear la tapa del cofre, va a quedar con mucho estilo, y una gran curva.
Then the pallets are glued on the side to create the lid of the chest, it will be very stylish, and a great curve.

Paso 14// Step 14
Paso 14// Step 14
Se procede a pintar y a decorar el cofre, a tu gusto, en este caso decidí pintar de color amarillo, y colocar cintas decorativa color oro.
We proceed to paint and decorate the chest, to your liking, in this case I decided to paint yellow, and place decorative gold ribbons.


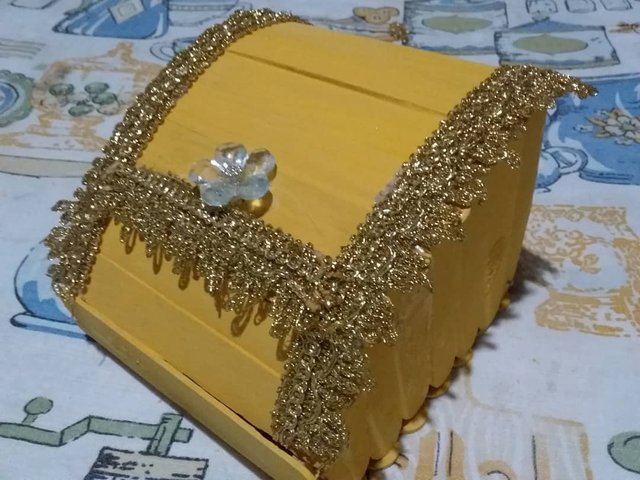
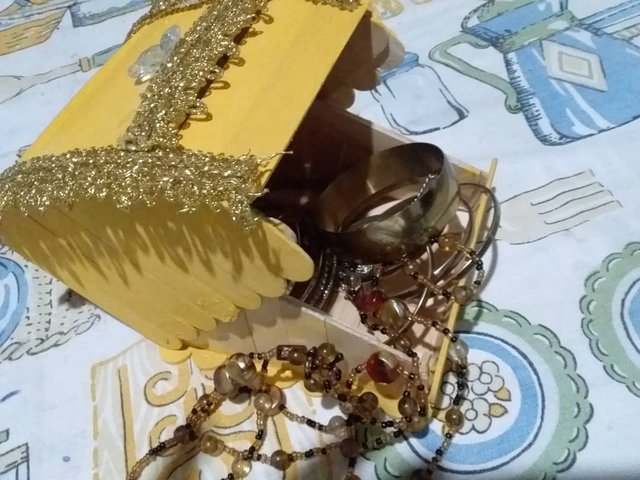
y finalmente terminamos de hacer este hermoso, practico cofre..
and finally we finished making this beautiful, practical chest ..