[ENG/한국어] How to create an Ethereum wallet / 이더리움 지갑 만들기
In order to participate in an ICO, you need your own Ethereum wallet, not an exchange wallet. There are many Ethereum wallet services, but this guide will be explaining how to use MyEtherWallet, the one that is most commonly used.
1. Access the website.
1.1 Go to the website https://www.myetherwallet.com
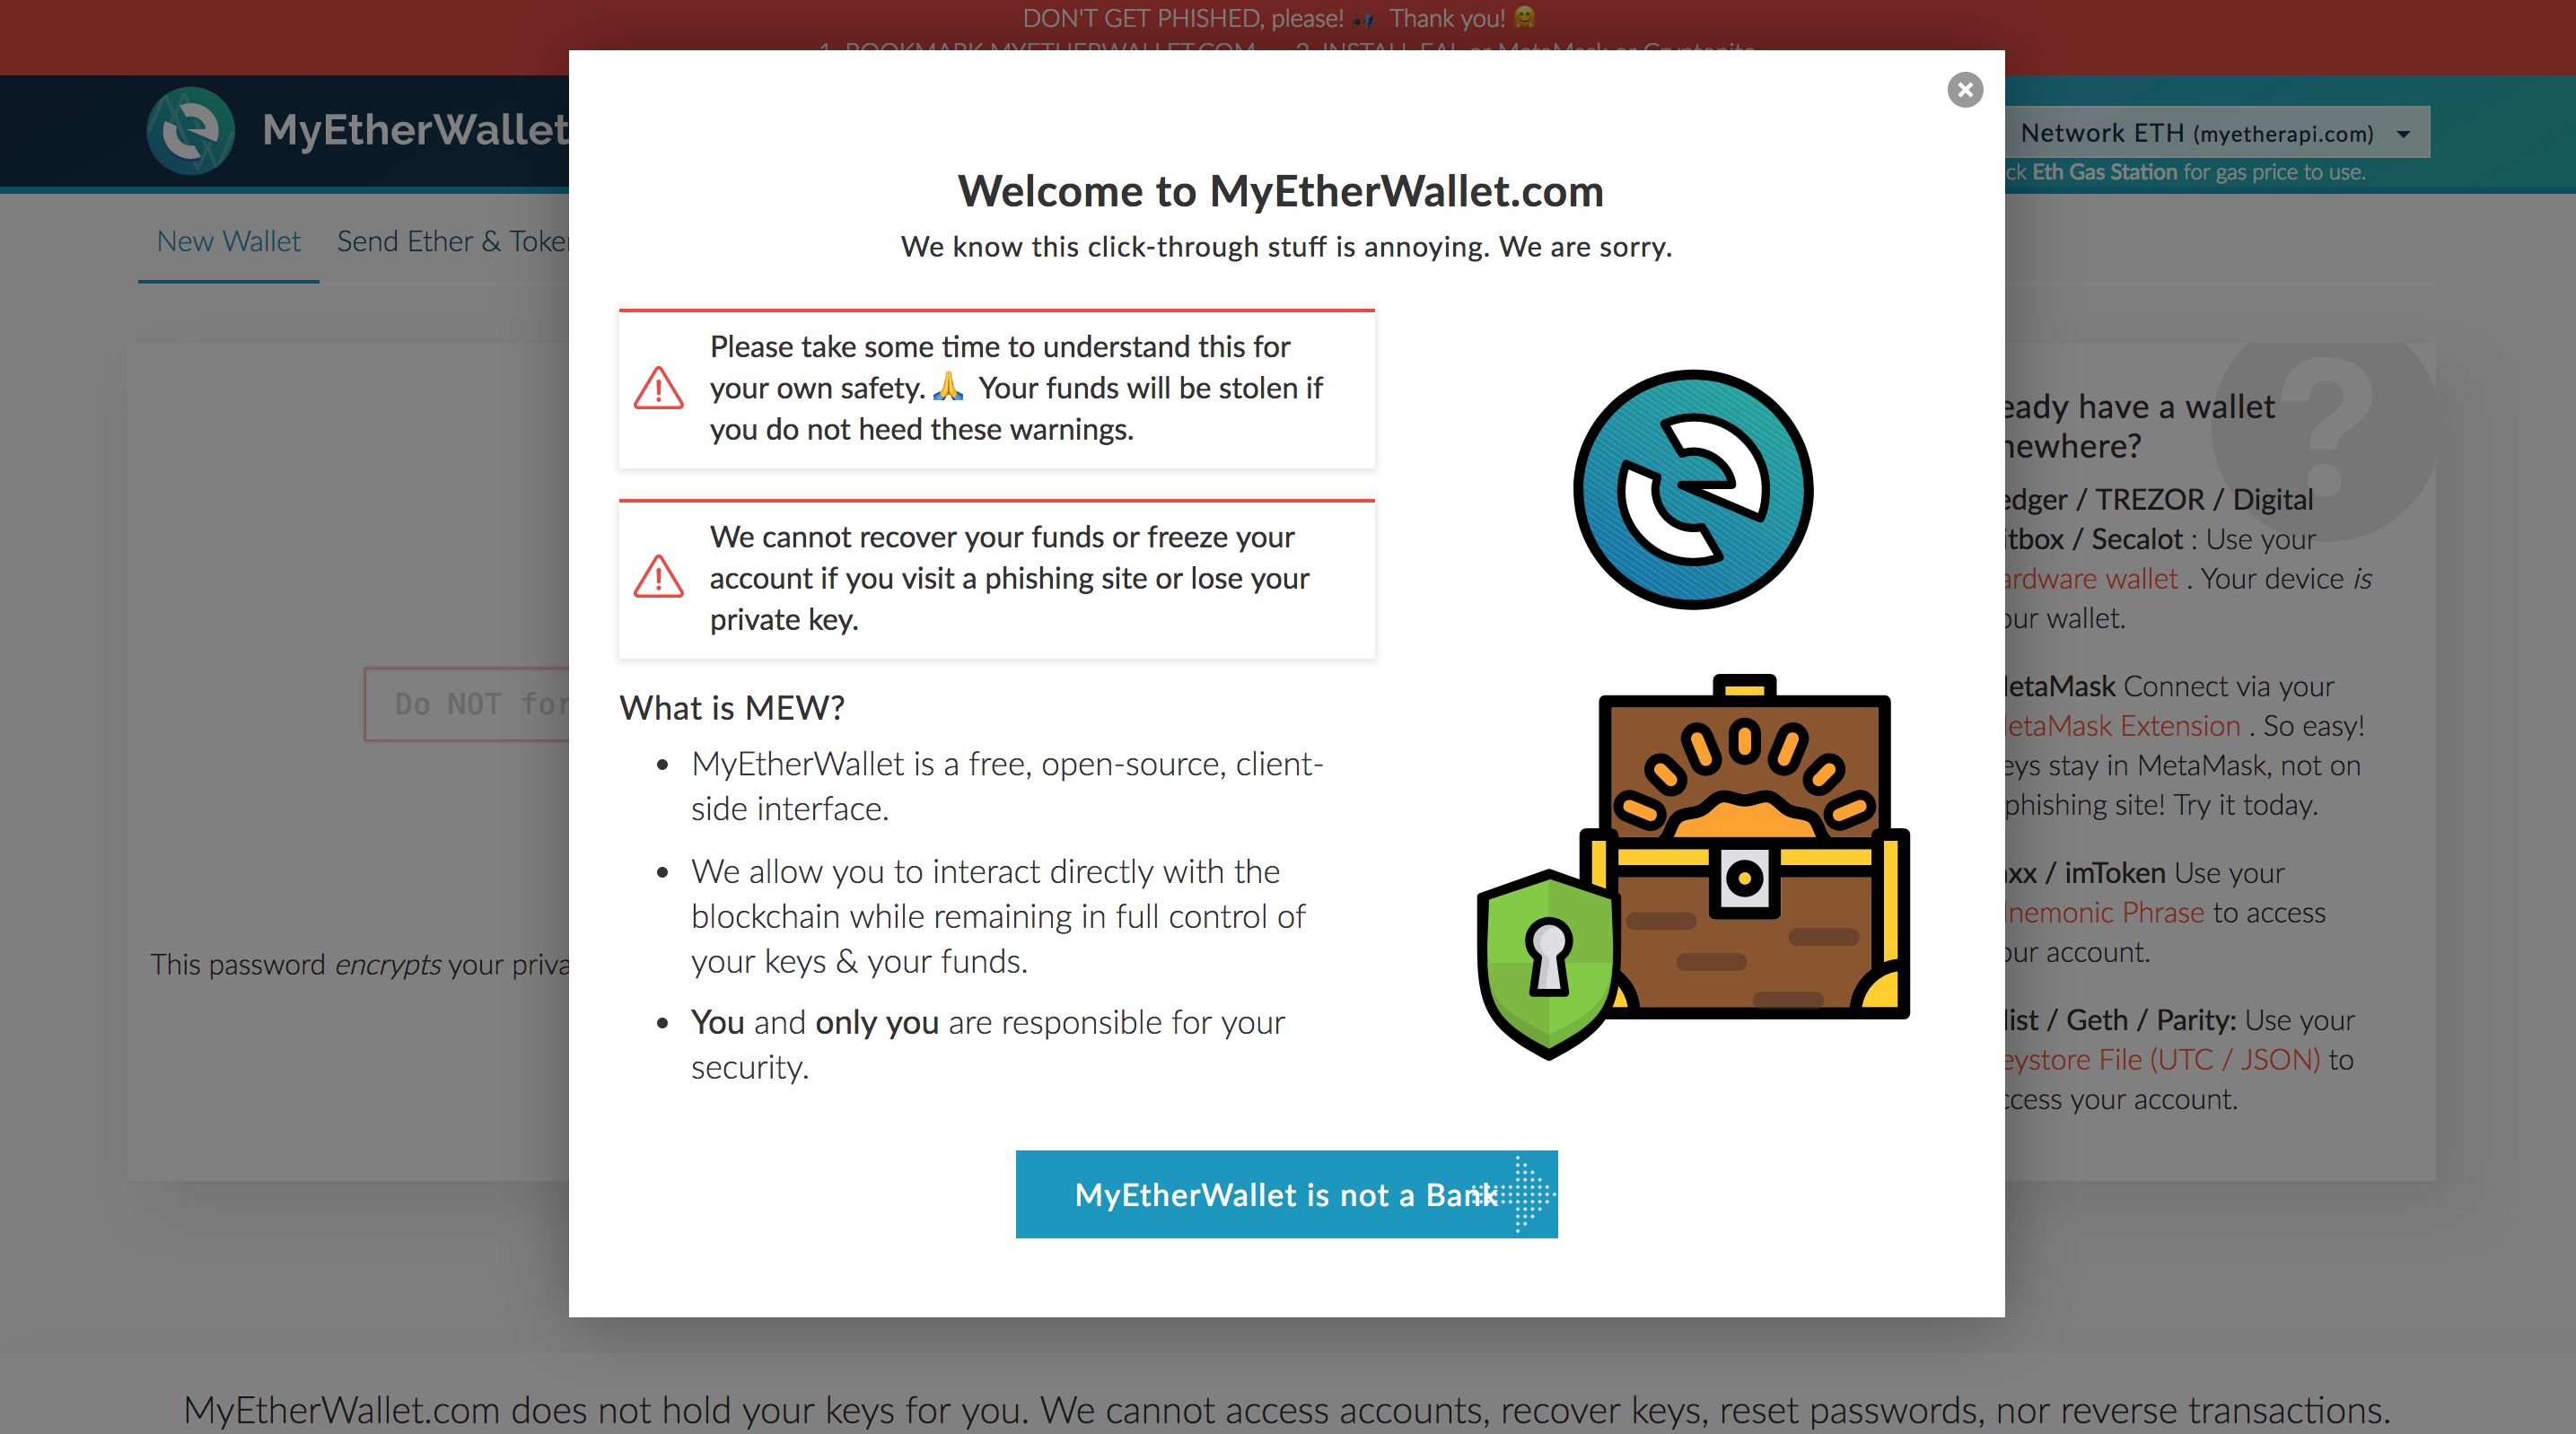
1.2 You can see a pop-up window as below.
1.3 The pop-up contains introduction of MyEtherWallet and warnings. Click the blue button if you wish to continue reading, otherwise click the empty space around or X button to close it and proceed to create the wallet.
2. Change language setting
2.1 MyEtherWallet provides various language interface. Choose a language you are comfortable with.

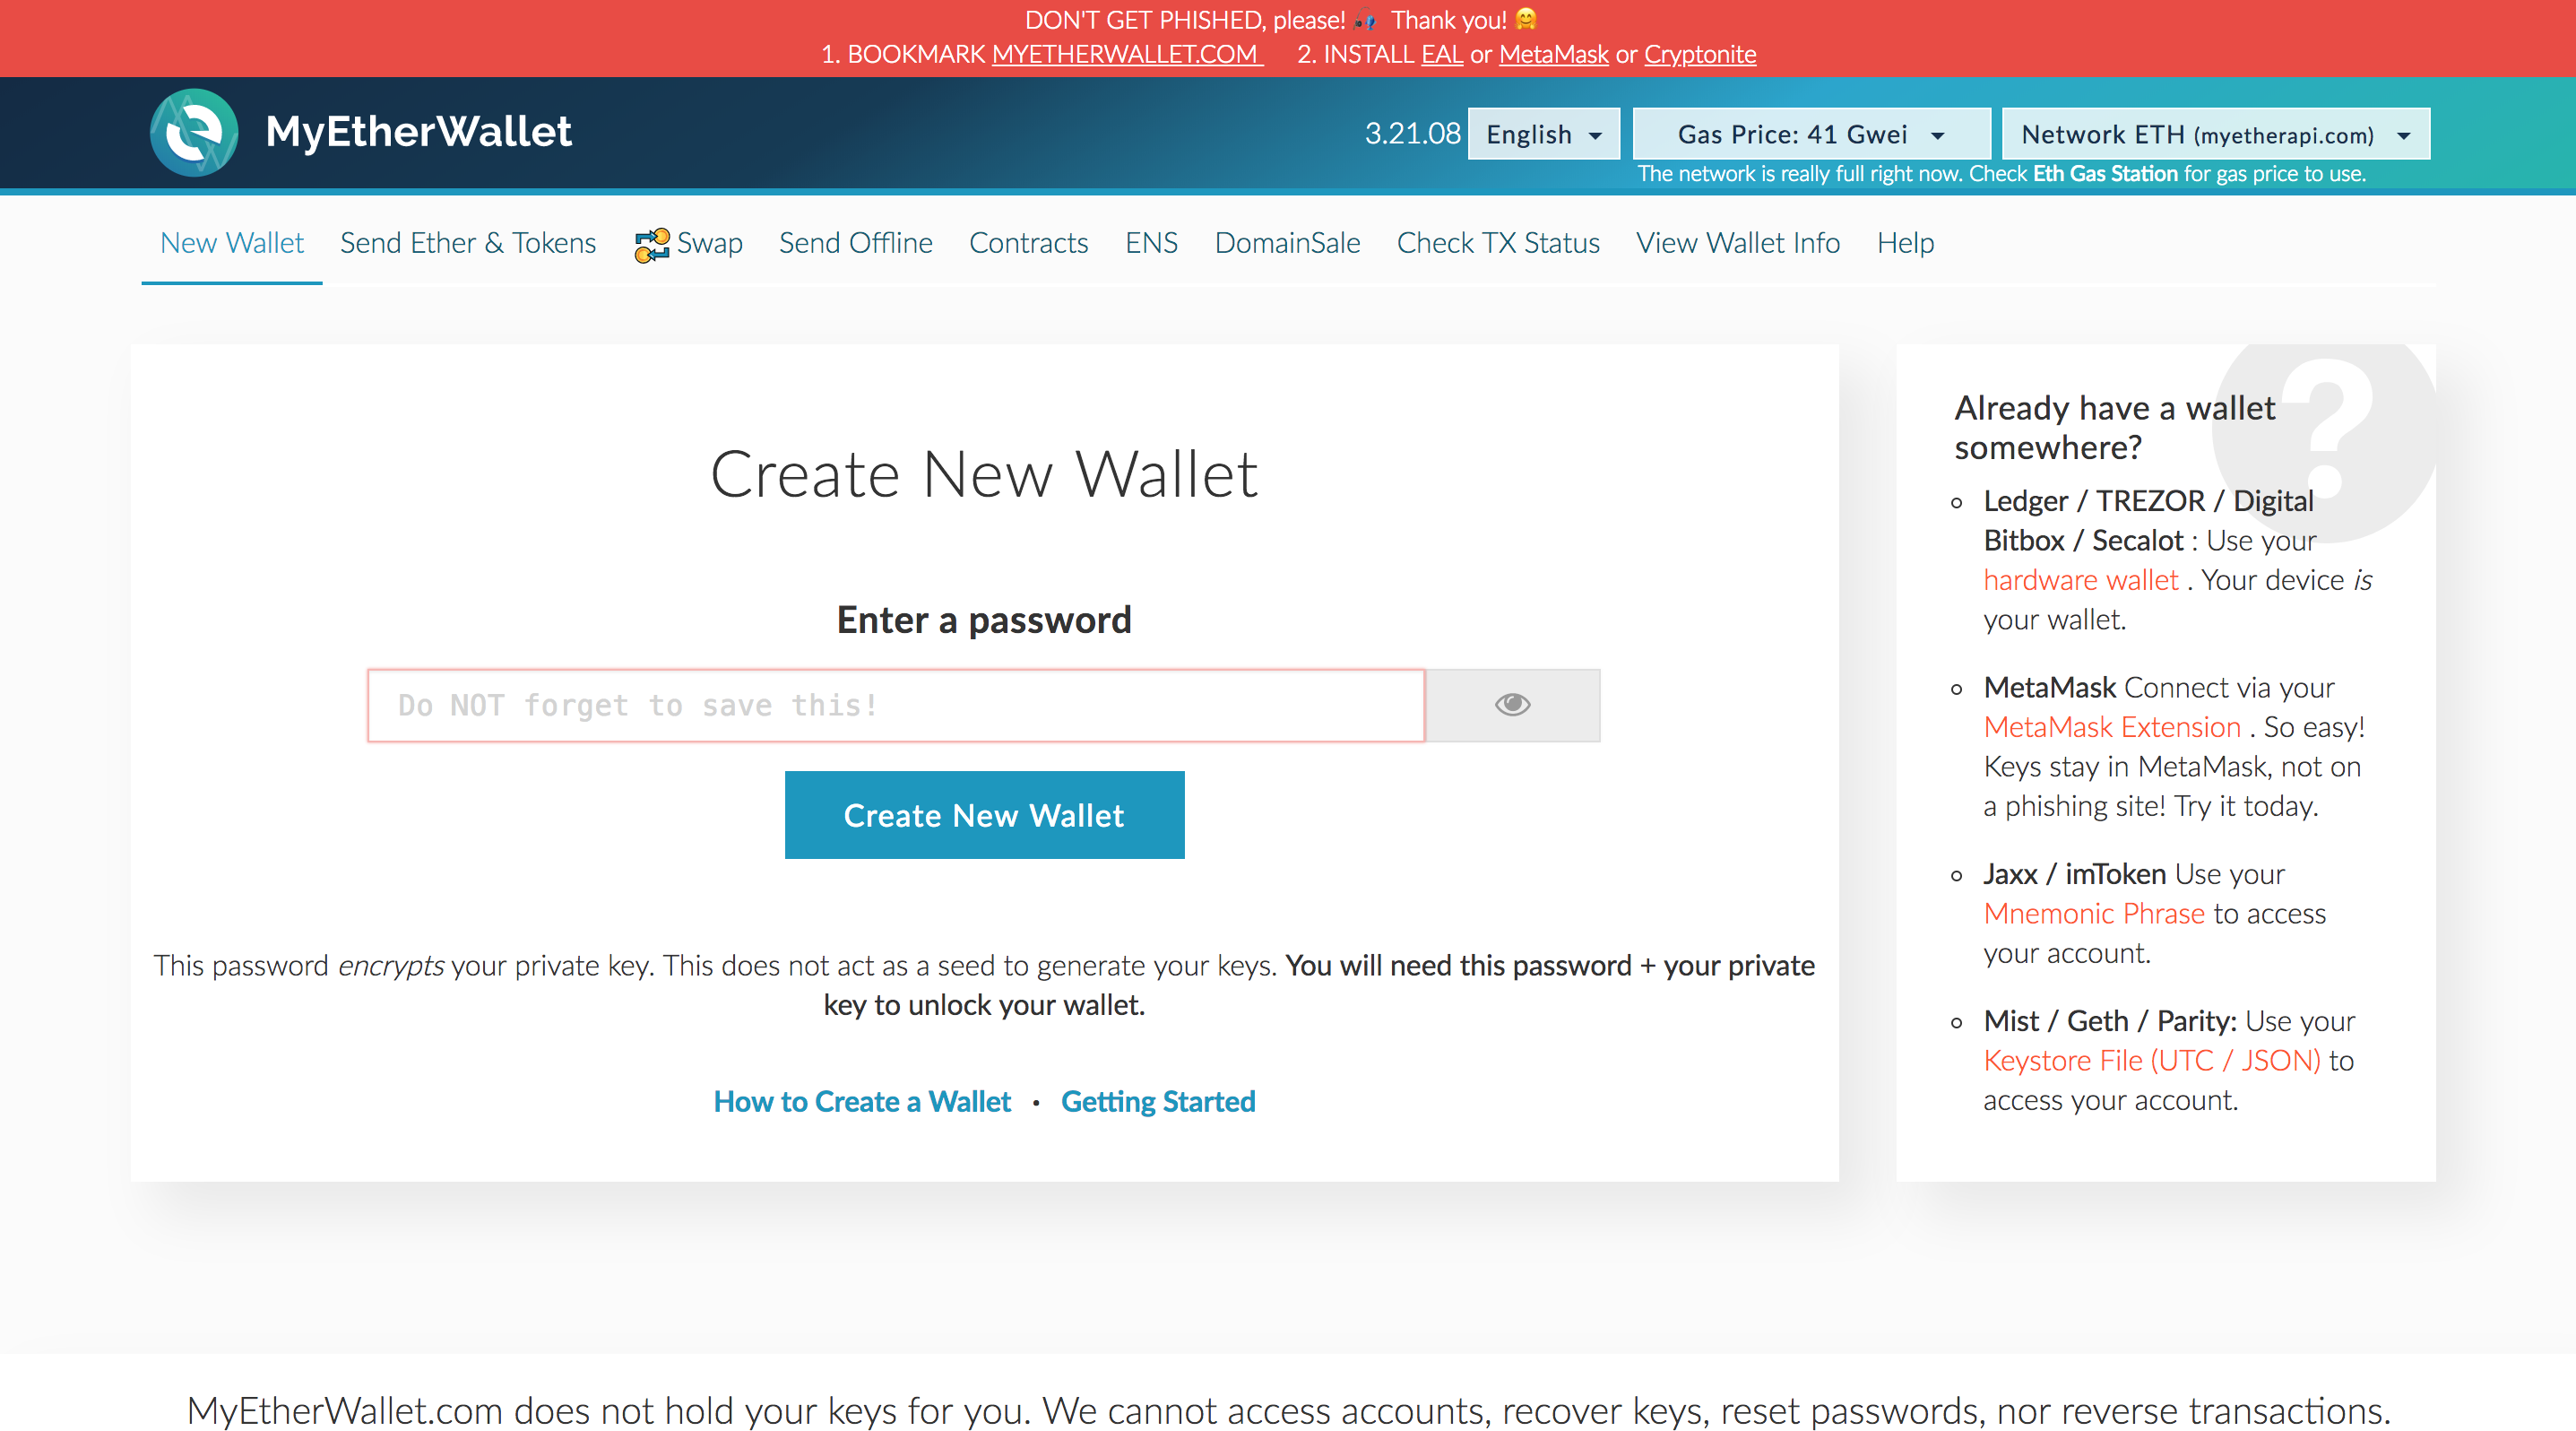
3. Set your password
3.1 Enter a new password (more than 9 digits) and click the “Create New Wallet” button.
4. Store your Keystore file.
4.1 Keystore file contains wallet password and private key and you need it to login. Download and store it in a safe place, such as in your personal USB or external hard drive.
4.2 Once you finish downloading it, click the “I understand. Continue.” button.

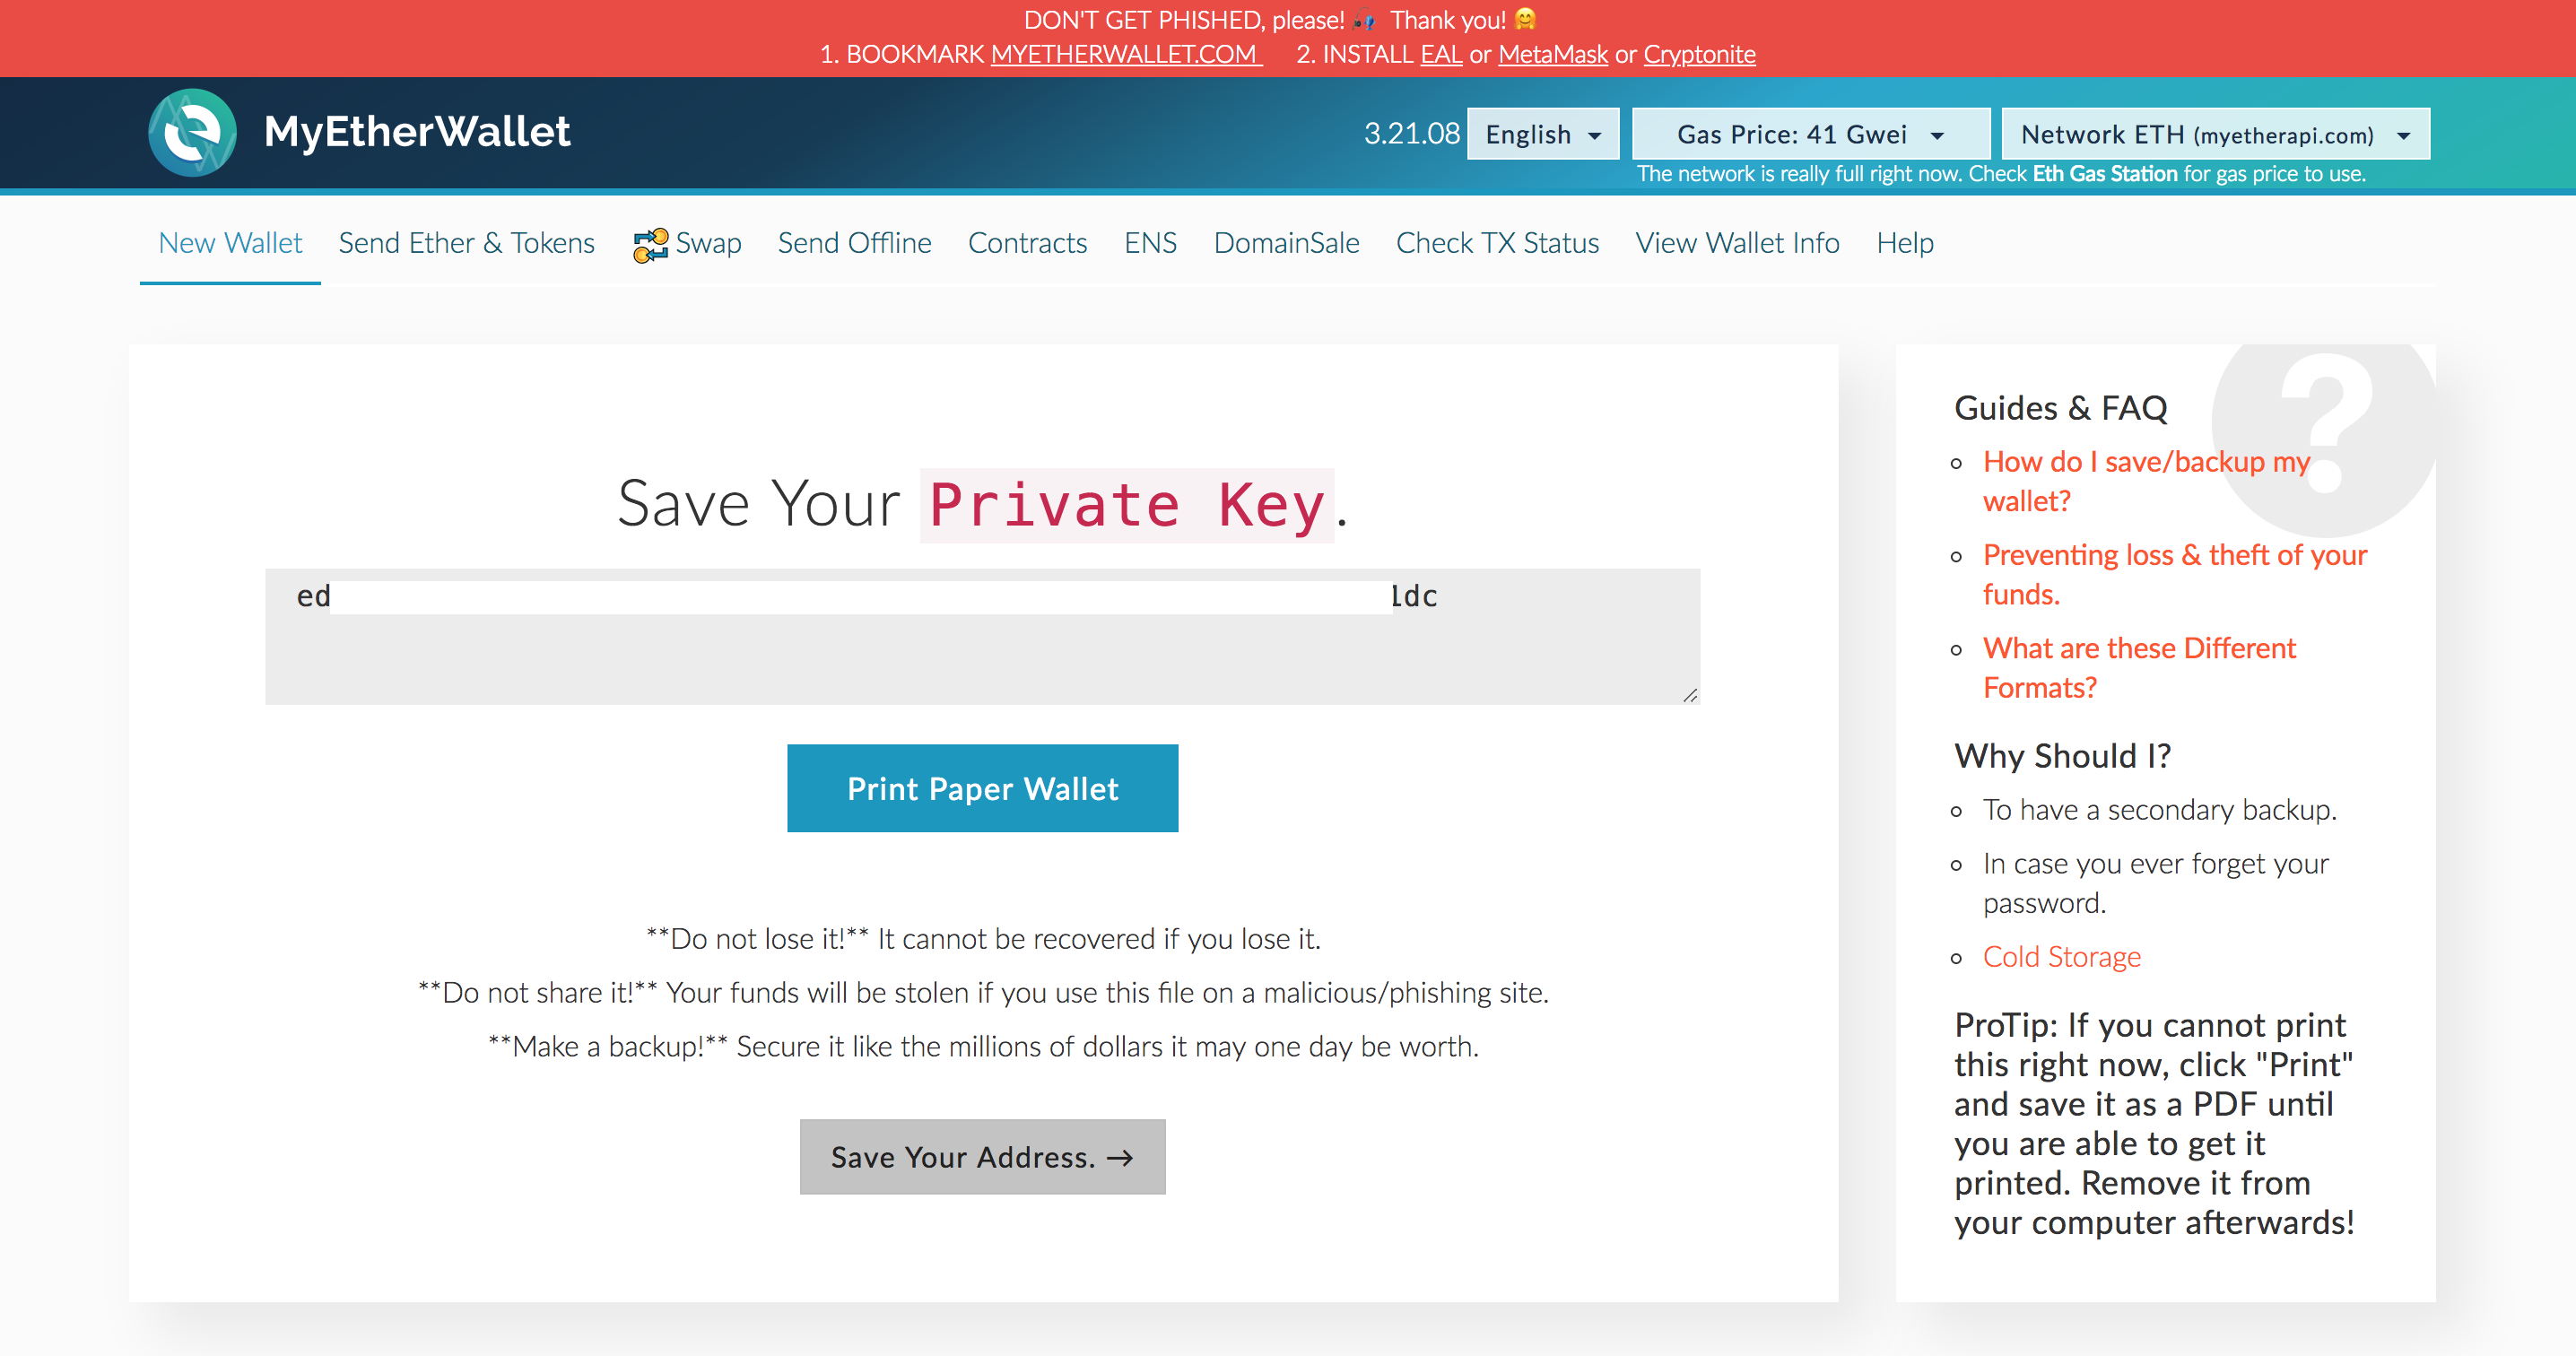
5. Store your private key
5.1 Private key is the combination of numbers and characters shown in the center of the screen. Copy and paste it into a text editor and save it as a file.
5.2 You can also click the “Print Paper Wallet” to print it out or save it as a PDF file.
5.3 Once you save it, click the “Save Your Address”.
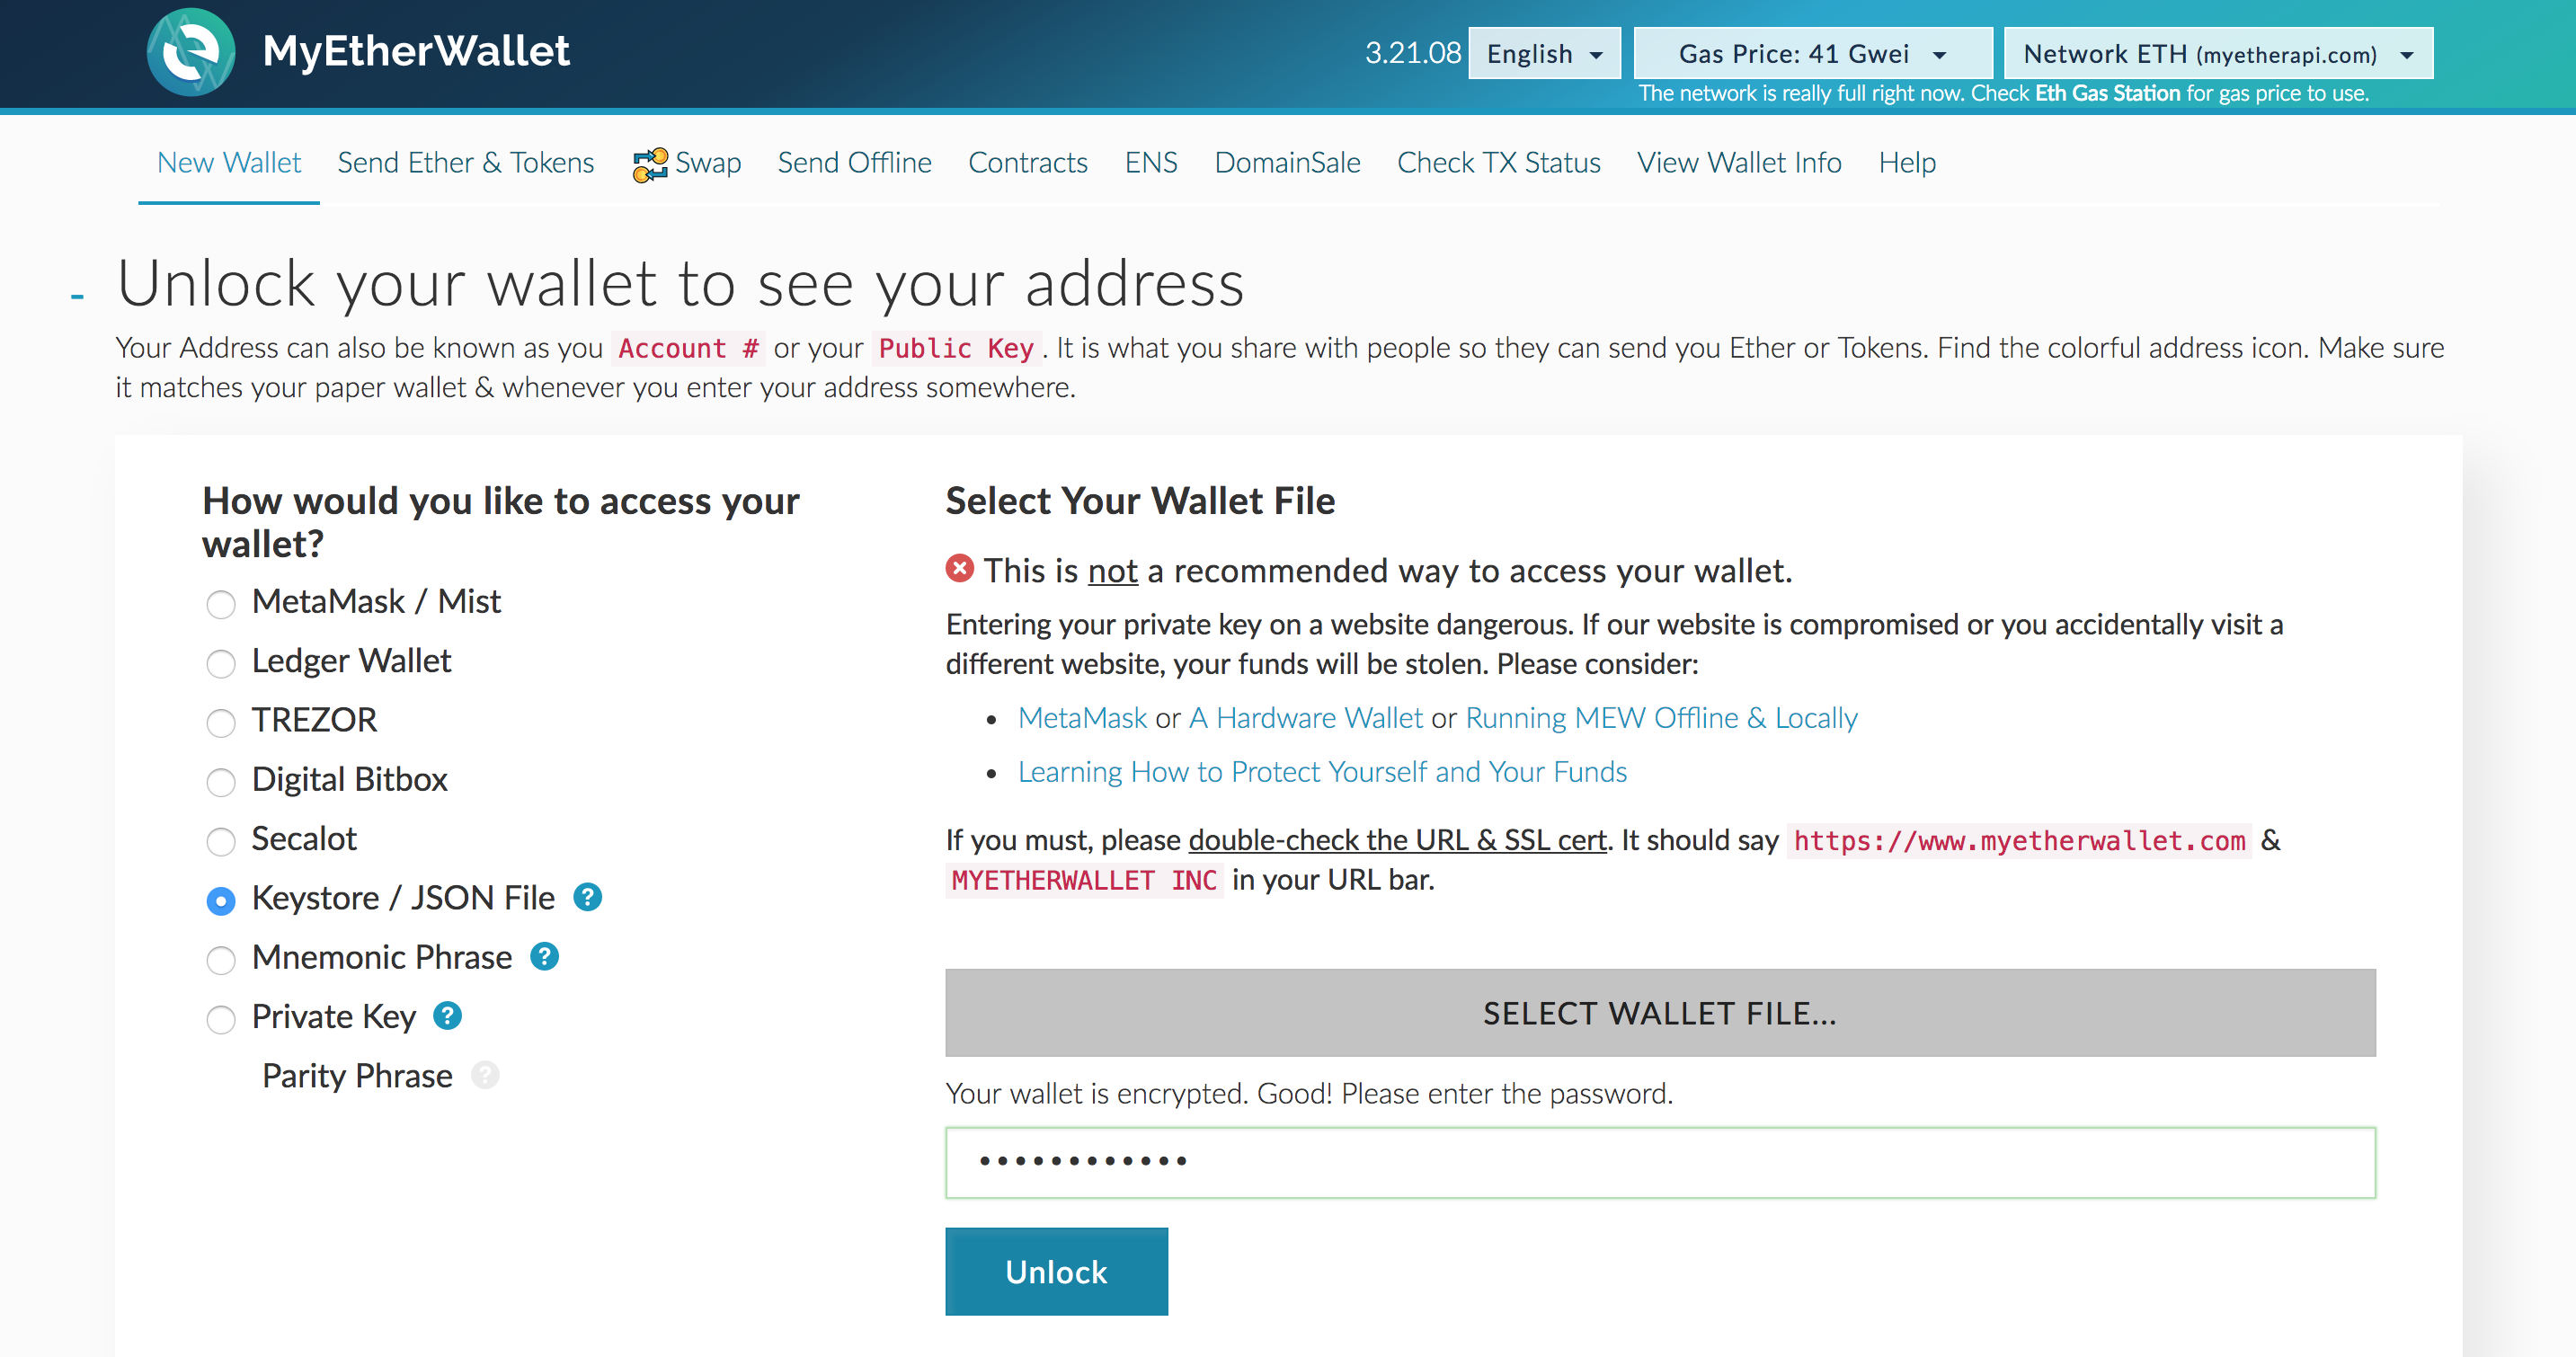
6. Check your own Ethereum wallet address.
6.1 There are several ways to login to your Ethereum wallet, but now we will be using “Keystore / JSON File”, the most common way.
6.2 Click the “Select Wallet File…” button and choose your Keystore file that you downloaded earlier.
6.3 Type your password in and click the “Unlock” button.

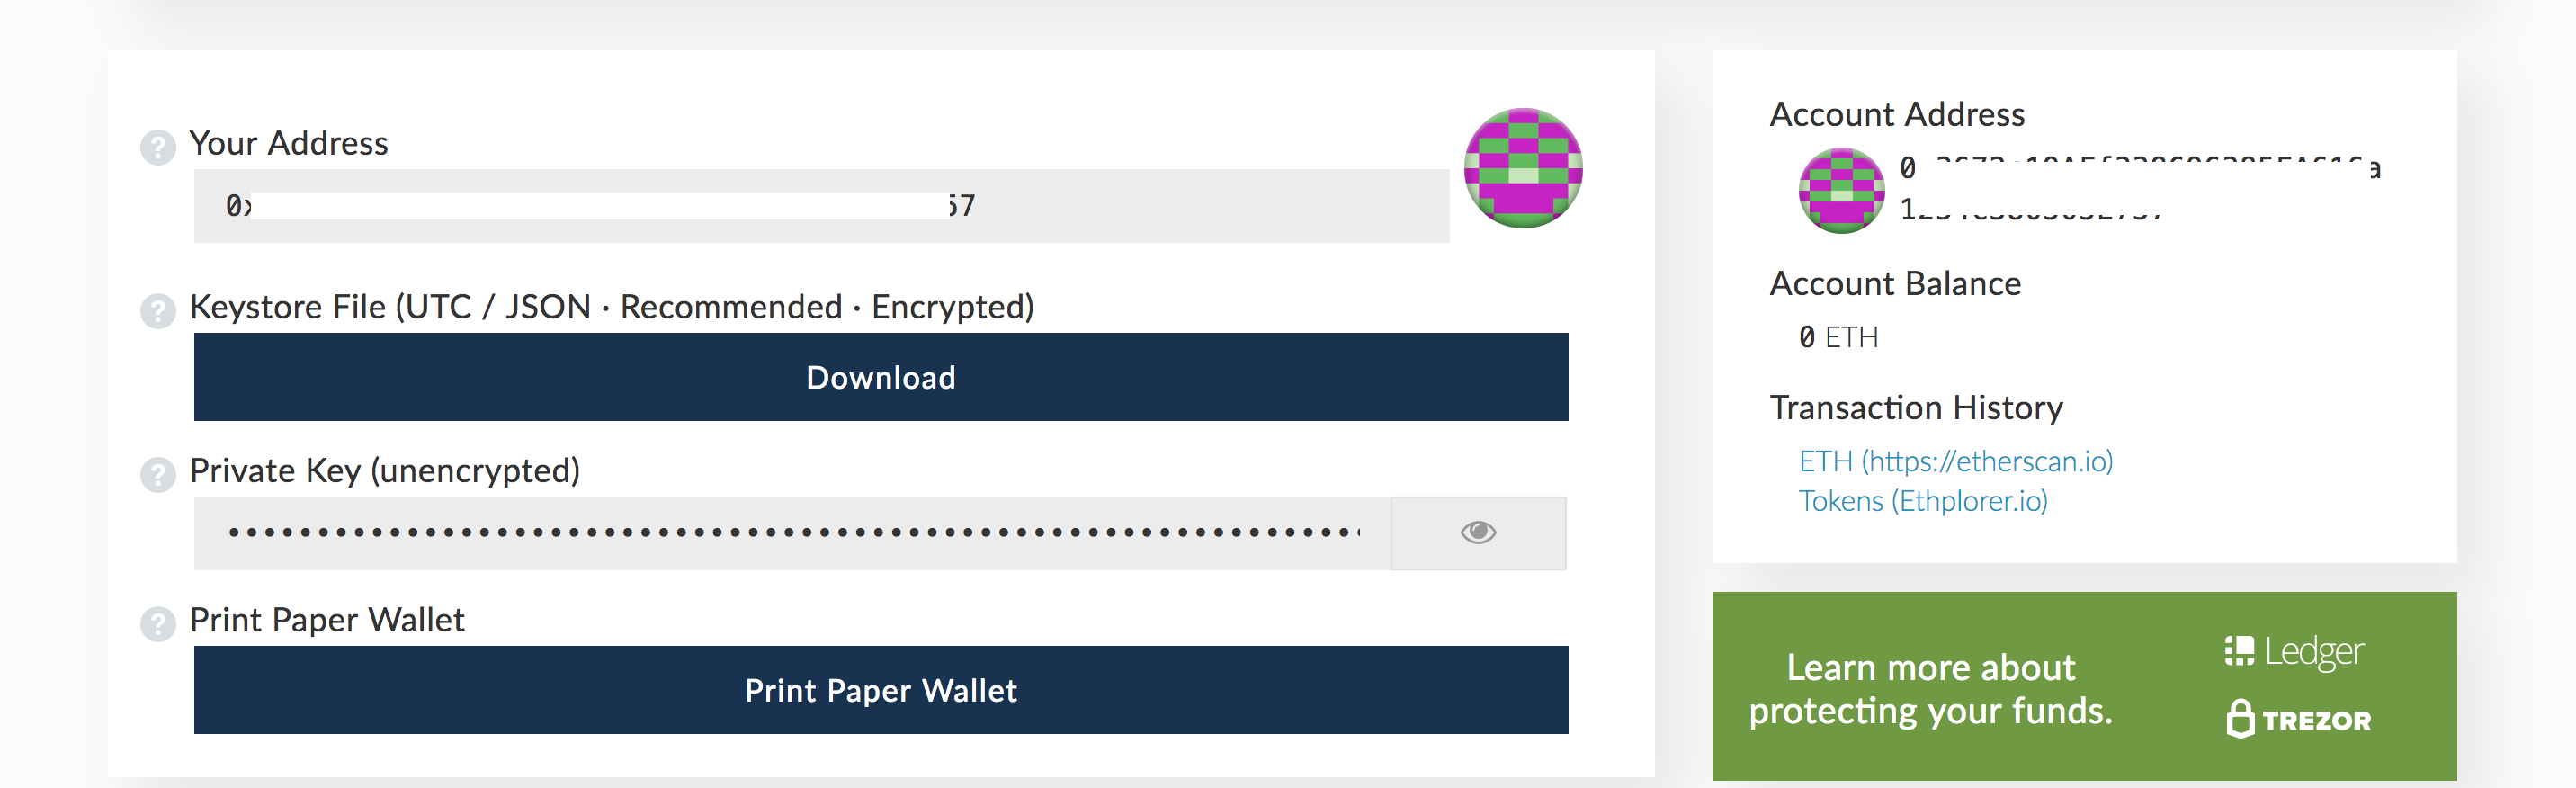
7. Check your wallet.
7.1 After click the “Unlock”, scroll down and you will be able to see your wallet.
Ethereum wallet is compatible with not only Ethereum but also ERC-20 tokens.
* * *
ICO에 참여하기 위해서는 거래소 지갑이 아닌, 개인 이더리움 지갑이 필요합니다.
많은 종류의 개인 이더리움 지갑 서비스가 존재하지만, 오늘은 가장 활발히 사용되는 마이이더월릿(MyEtherWallet)을 사용해보겠습니다.
1. 지갑 만들기 페이지로 이동
1.1 https://www.myetherwallet.com/로 이동합니다.
1.2 페이지 이동시 다음과 같은 팝업을 확인할 수 있습니다.
1.3 팝업에선 MyEtherWallet 소개 및 주의사항에 대한 내용을 담고 있습니다. 내용을 계속해서 보시려면 파란색 버튼을 클릭하시고, 바로 지갑만들기를 진행하시려면 빈 공간 또는 X를 클릭하여 닫습니다.

2. 언어 설정
2.1 MyEtherWallet은 많은 종류의 언어를 지원합니다. 원하는 언어를 선택해주세요.
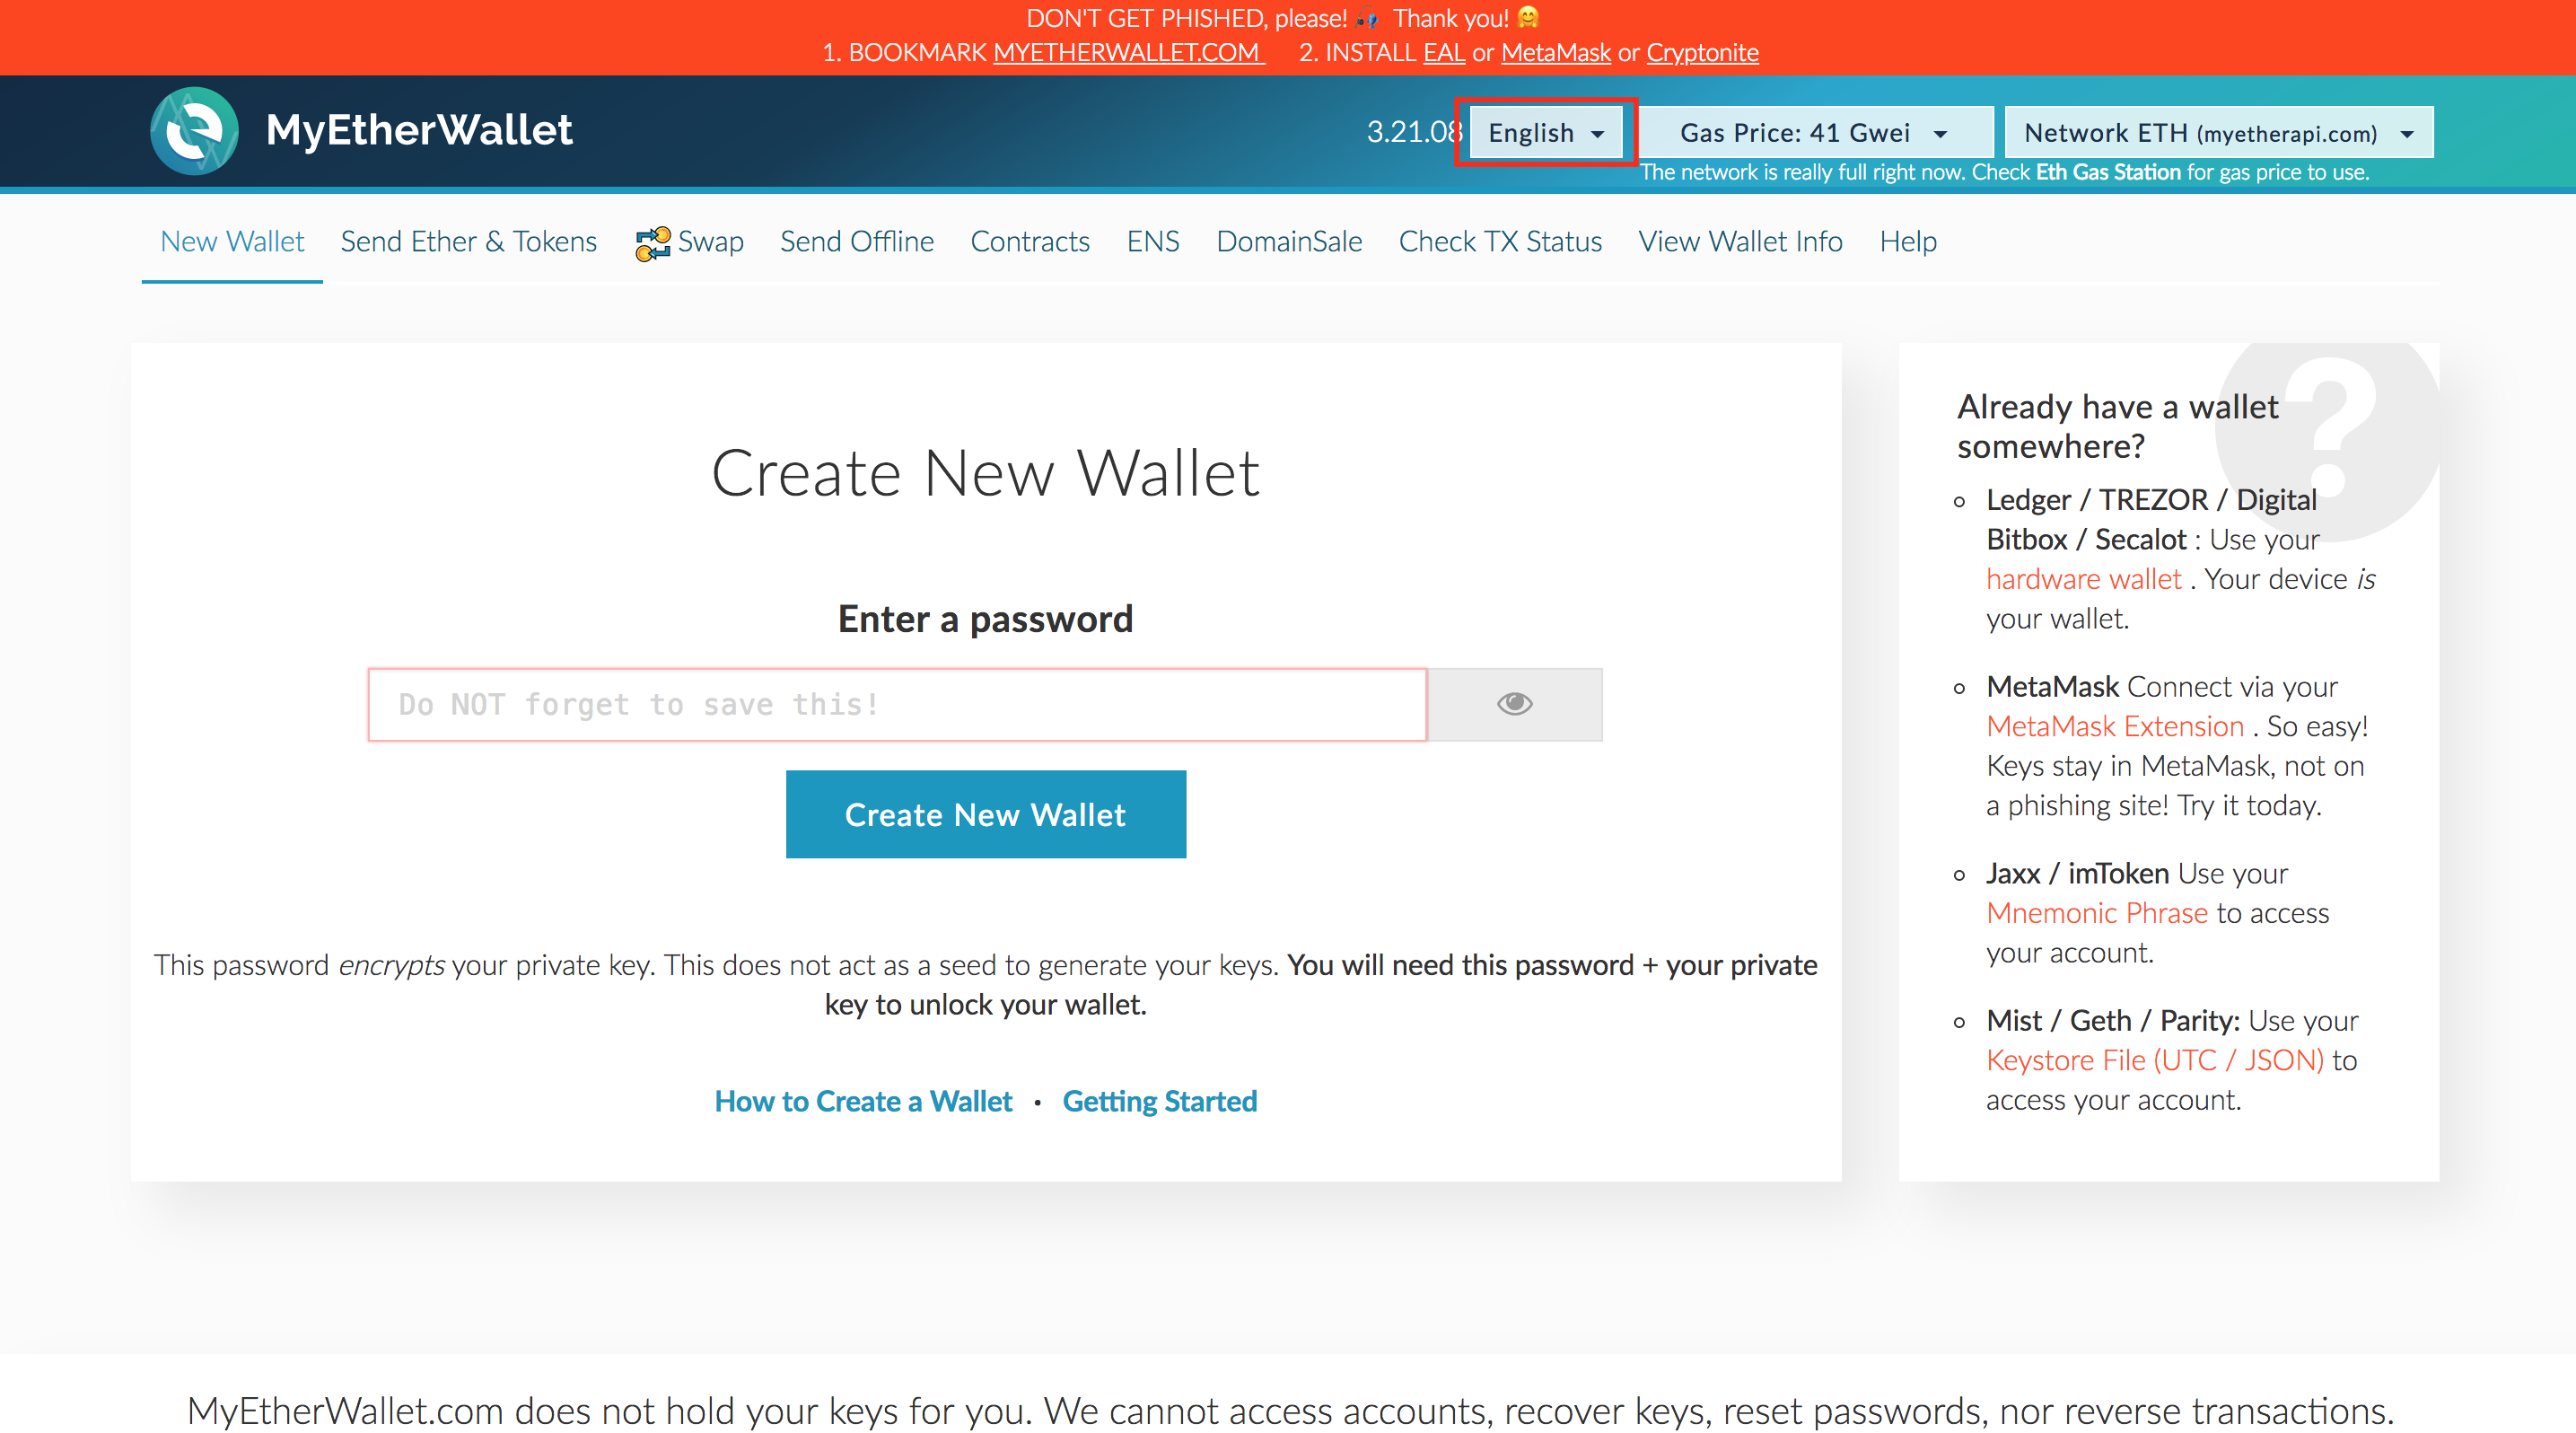
3. 비밀번호 입력
3.1 비밀번호 (9 글자 이상)를 입력하고 “Create New Wallet”버튼을 클릭해주세요.

4. Keystore 파일 저장
4.1 로그인 시 사용되는 파일로, 지갑 비밀번호와 프라이빗 키 등의 정보를 담고 있습니다. 다운로드 후 USB, 외장하드 등 안전한 곳에 보관해주세요.
4.2 다운로드가 완료되었으면 “I understand. Continue.” 버튼을 클릭해주세요.

5. Private key 저장
5.1 숫자와 문자 조합으로 된 화면 중앙의 Private key를 잃어버리지 않도록 메모장과 같이 기억해둘 수 있는 곳에 복사해주세요.
5.2 “Print Paper Wallet” 을 클릭할 경우 출력 또는 PDF 파일로 저장할 수 있습니다.
5.3 저장이 완료되었으면 “Save Your Address” 버튼을 클릭해주세요.

6. 개인 이더리움 지갑 주소 확인
6.1 이더리움 지갑에 로그인하는 방법에는 여러가지가 있지만, 일반적으로 많이 사용하는 “Keystore / JSON File” 방식을 사용하겠습니다.
6.2 “Select Wallet File…” 버튼을 클릭하여 다운로드 해 둔 Keystore 파일을 선택합니다.
6.3 파일을 선택하면 비밀번호를 입력하는 곳이 나타납니다. 3단계에서 입력한 비밀번호를 입력하고, “Unlock” 버튼을 클릭합니다.
7. 지갑 확인
7.1 “Unlock” 버튼 클릭 후, 스크롤을 아래로 내리면 지갑을 확인하실 수 있습니다.

이더리움 지갑은 이더리움뿐만 아니라 ERC20 기반의 토큰들의 사용도 가능합니다.
이상으로 이더리움 지갑을 생성하는 방법을 알아보았습니다.
Get to know us better!
Join our official channels below.
Telegram(EN) : https://t.me/Humanscape
KakaoTalk(KR) : https://open.kakao.com/o/gqbUQEM
Website : https://humanscape.io
Medium : https://medium.com/humanscape-ico
Steemit : https://steemit.com/@humanscape
Facebook : https://www.facebook.com/Humanscape-ICO-128195591375667
Twitter : https://twitter.com/Humanscape_ICO