Knitted Bonnet - 14 January 2026
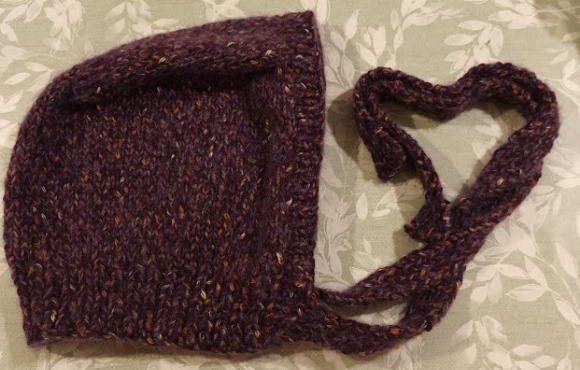
I've been busy knitting accessories for friends. Below you can see a photo of the first knitted bonnet I've knitted:
I didn’t follow a pattern because normally patterns tell you the type or thickness of yarn and the gauge you should achieve to replicate the size and feel of the fabric. I had these two yarns I wanted to combine to make a warm fabric.
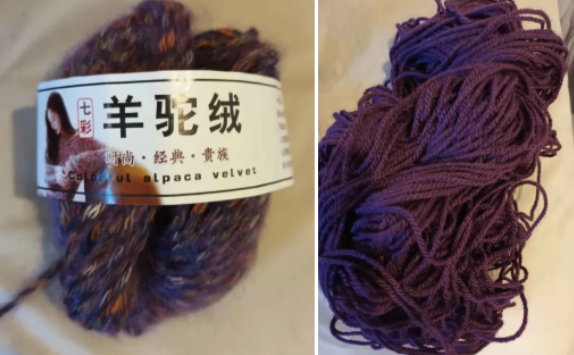
The first one above is like mohair in lightness and fluffiness while the other yarn is a normal Double Knitting acrylic yarn I found in my stash. Together they combined to make a thick fabric that didn’t require lining but protects the wearer from the cold.
I started with a rectangle with 25 stitches using 5.5mm knitting needles :
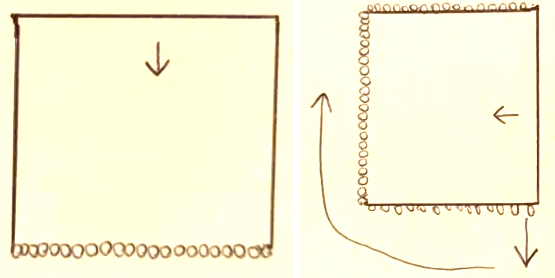
When I’d knitted about 16cm I stopped, cut the yarn and picked up 35 stitches along one side, recovered the open stitches and then picked up another 35 stitches on the other side - hope you can understand my crazy drawings above.
The straight edge you see above then became the ‘forehead’. I continued knitting straight which was a bit uncomfortable because of the shape, but I persevered. When I’d knitted enough to reach my chin length I started to knit about 6 rows of ribbing (one purl and one knit stitch) which became the bottom of the bonnet.
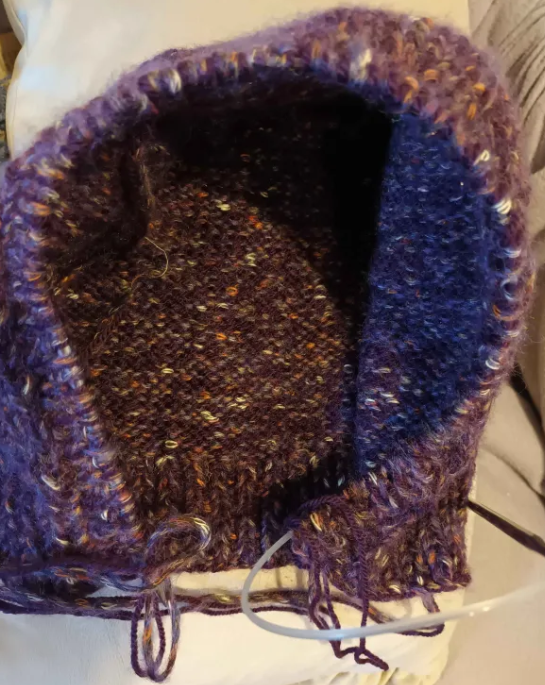
The photo above shows you the stage where I’ve also picked up stitches along the ‘face’ of the bonnet. All this process was fast, but deciding how to tie it became a bit of an issue.
It took me about two weeks to complete this project for the simple reason that I couldn’t decide how wide or long to knit the ties. Sometimes you just need time to decide on things but this thinking time allowed me to contemplate a wide ‘scarf-like’ tie and the implications for yarn amounts and thickness. Eventually I went for a ‘ribbon-like’ width that allows the wearer to make a bow to tie it - as you can see in the first photo.
My friend has commented that it’s very warm but she has to take it off when driving because she’s worried it may limit her visibility, an aspect I didn’t consider at the time.
If I make another one I will knit the body of the bonnet a bit longer and will probably use less thick yarn (at least for myself).
Here’s one of the many videos I watched to get to my own version. I even found some that had been crocheted rather than knitted :
I learnt a lot from this clear tutorial because Kennedy gives tips as you knit along, for instance she pointed out what happens when you have picked up too many stitches - I didn’t pay attention to that but I’ve learnt for future reference.
I'd normally associated bonnets with old fashioned baby outfits but fashion tends to come back so it's been really interesting to investigate shaping and the many possibilities of this type of hat design.
Thank you for reading !
Hello, what a cute model, my friend, always up to date with the latest crochet trends. What a sweet gesture to knit a hat for your friend; those little details are sure to improve along the way. A crocheted piece is a very special gift for those who appreciate it. See you soon 🤗
Thank you for your comment @marito74. There's definitely scope for improvement on the bonnet pattern.
I make stuff for my friends and they sometimes buy me nice meals or yarn in return which is great. 🧶🧶