A Complete Step-by-Step Guide to Migrate from Google Workspace to Microsoft 365
Organizations are choosing to migrate from Google Workspace to Microsoft 365 as their teams grow and requirements change. However, this migration involves more than just migrating emails from one inbox to another. Instead, users can also migrate their other mailbox data, such as contacts, calendars, mail folders, and attachments. Ultimately, it depends on the migration method or the tool you choose. In this guide, we will walk you through the entire process in a simple way.
Why Do Users Migrate from Google Workspace to Microsoft 365?
Every organization has its own reasons for the migration. For example, many users are already comfortable with Outlook, Word, Excel, and Teams for their daily work. As a result, moving to Microsoft feels natural and familiar. Therefore, it's important to understand why businesses increasingly move towards Microsoft 365:
- Works smoothly with Outlook, Word, Excel, and Teams.
- Familiar interface for Windows-based systems.
- Stronger data security and compliance tools.
- Flexible plans for different business needs.
- Easy collaboration across the business applications.
Once the reason for switching is clear, you can start the migration itself. For that, you can choose between two methods based on your needs: a manual method or a professional method. Let’s understand how these methods differ from each other.
Method 1: Manual Method to Migrate from Google Workspace to Microsoft 365
For migrating a small number of mailboxes, users can prefer using Microsoft’s built-in migration options. Here is a step-by-step process you can follow to move your mailboxes safely:
Step 1: Set up your Microsoft 365
- Create user accounts for everyone who needs a mailbox.
- Assign the correct licenses to each account.
Step 2: Add and verify your domain
- Add your existing domain to the Microsoft 365 admin center.
- Verify all the domain steps.
Step 3: Set up the built-in migration tool
- Sign in to the Microsoft 365 admin center as an administrator.
- Select Google Workspace as the source.
- Enter the required credentials.
- Test the connection before proceeding further.
Step 4: Run the email migration batch
- Create a migration batch inside the Exchange admin center.
- Review the migration settings, if needed.
- Monitor the progress and fix any issues that may occur.
Step 5: Move contacts and calendar data separately
- Export contacts from Google Contacts as a CSV file, then import them into Microsoft 365.
- Export calendar events as an .ics file from Google Calendar.
- Import the .ics file into the matching Microsoft 365 calendar.
Step 6: Check the migrated data
- Ask the users to review their emails, contacts, and calendars properly once the migration is done.
Step 7: Point your domain to Microsoft 365
- Update your MX records once verification is complete. This will make sure that all the new incoming mail directly goes to your Microsoft account.
Limitations of the Manual Method:
- It requires multiple setup and configuration steps.
- Takes too much time when handling multiple mailboxes at once.
- Requires strong technical knowledge of both platforms.
- It carries a high risk of data loss without a proper backup.
Method 2: A Professional Method for G Suite to Office 365 Migration
A professional tool can help users to simplify their process by handling multiple mailboxes all at once. The Shoviv G Suite to Office 365 Migration Tool is built for that. The tool migrates email from Google Workspace to Microsoft 365 by providing better control over the migration process. It provides multiple features, such as:
- Job-based processing for organized and repeatable migrations.
- Adds and migrates multiple mailboxes in a single job, with no size limit.
- Maintains the original folder structure and data integrity.
- Filters the data by date range and folder criteria.
- Provides an incremental export facility to resume interrupted jobs.
- It lets you schedule the migrations on a daily, weekly, or monthly basis.
- The tool allows you to set a limit on failed items.
- Also, it supports migration to On-Premises Exchange Server.
- It offers a free trial version to test. The first 50 items per folder will be exported.
Now, let’s take a look at how to migrate from Google Workspace to Microsoft 365 by using the Shoviv Migrator:
Detailed Steps to Migrate G Suite to Office 365 Using Shoviv Software
Step 1: Download and install the Shoviv Migrator
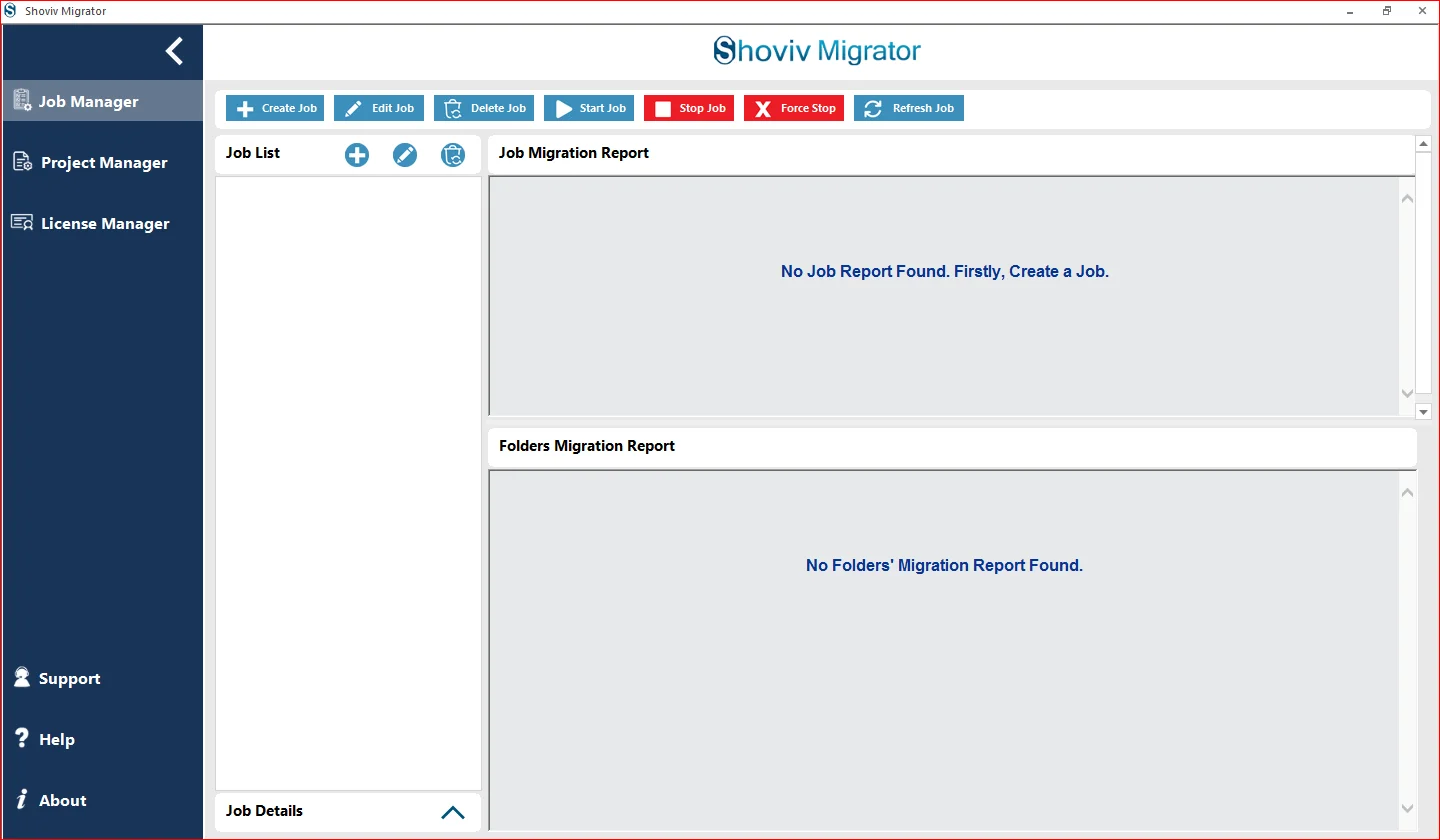
In the dashboard, click on the Create Job button to start a new migration task.
Step 2: Select the Source and the Target
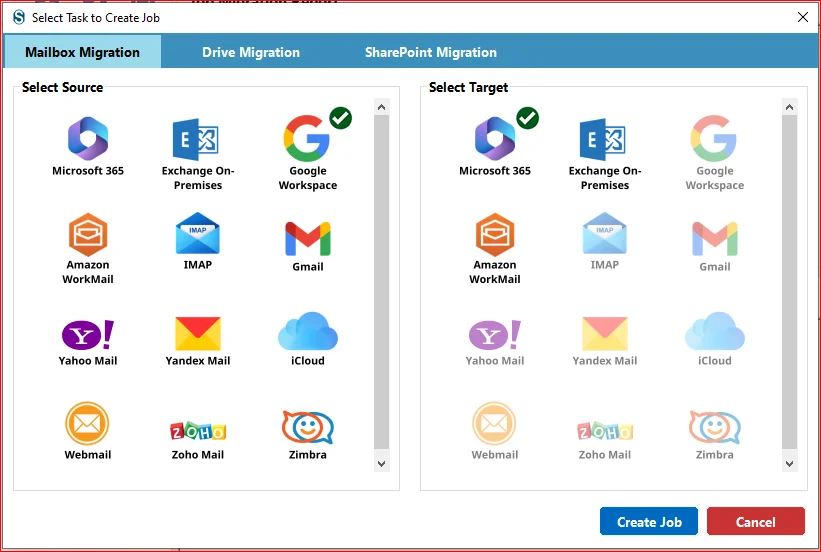
Choose Google Workspace as the source and Microsoft 365 as the target, then click Create Job.
Step 3: Create a job and select mailboxes
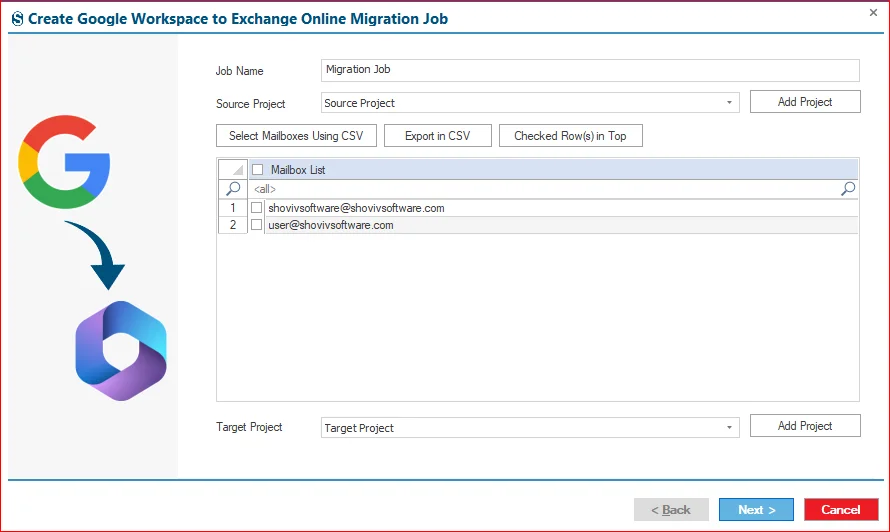
Enter a Job Name, then select the existing source and target project, or add a new one. After that, select the required mailboxes.
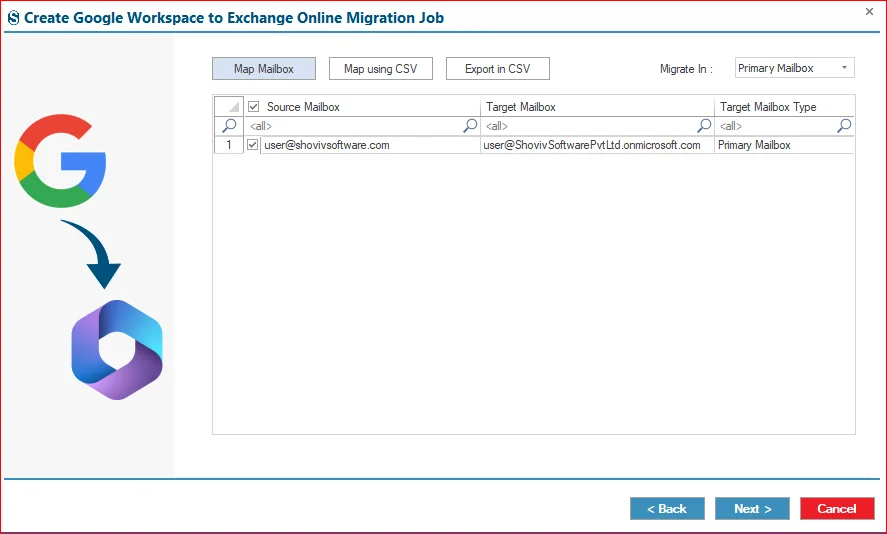
Step 4: Map Source and Target Mailboxes
Connect the source mailbox with its correct target mailbox for an accurate mapping.
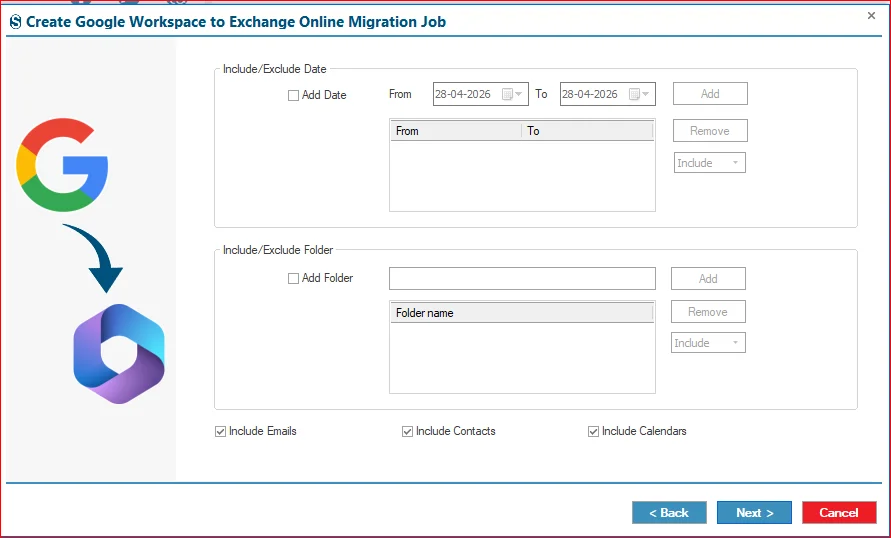
Step 5: Apply the Filters and Settings
Set the filters and configure the settings based on the requirements.
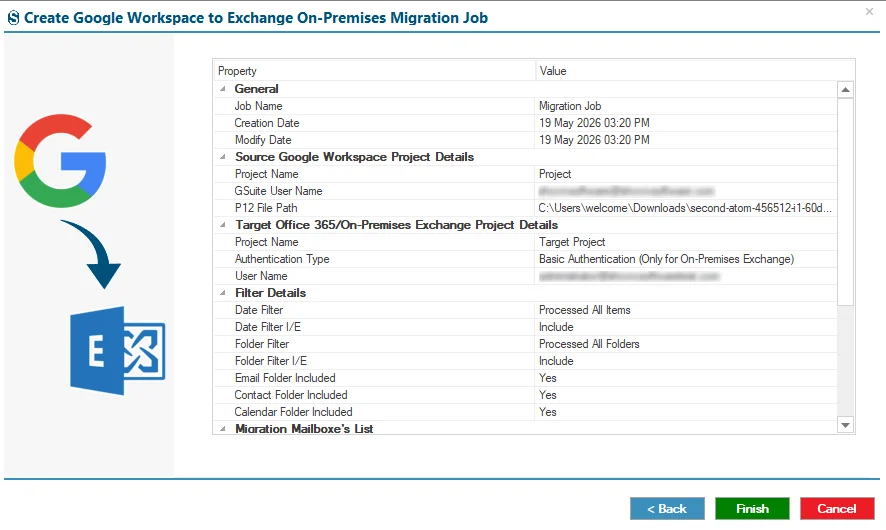
Step 6: Review the job details
Check all the job details on the summary page, then click the Finish button.
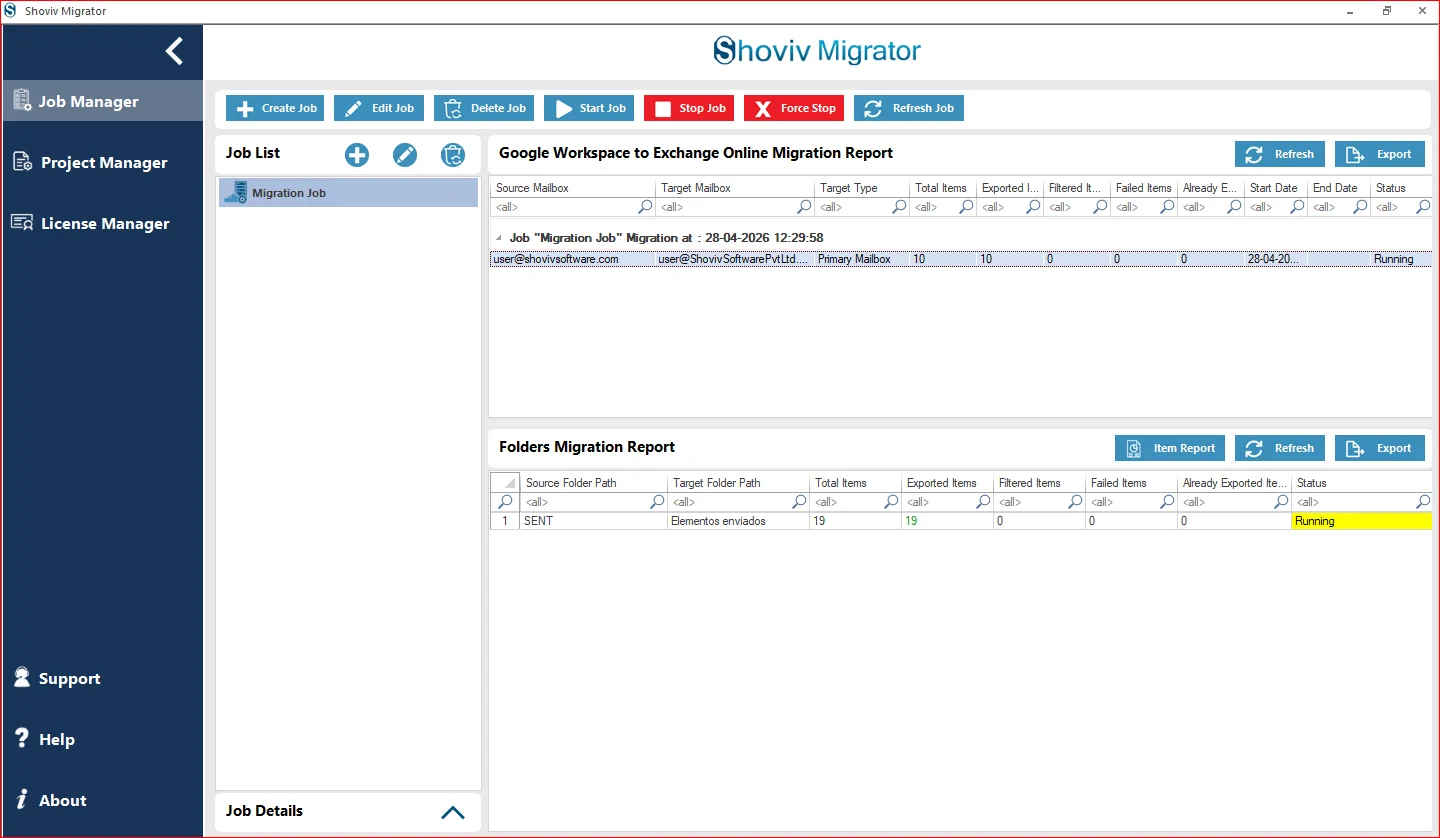
Step 7: Start the migration process
The migration will start as per the selected “Job Run Action”. To run the job manually, click the Start Job button to start the migration process.
Conclusion:
When you migrate from Google Workspace to Microsoft 365, proper planning and the right migration method matter. Manual migration works well for smaller mailbox migrations. On the other hand, professional software like the Shoviv G Suite to Office 365 Migration Tool offers useful features and can easily migrate large and complex mailboxes. Ultimately, the right method depends on your requirements.