Replace electric guitar pickup - Tonabnehmer bei Egitarren austauschen
Replace electric guitar pickup ................................................ First english, below german
Here: Installation Seymour Duncan Invader pickup set black
Here is a guide for installing the pickup in a guitar
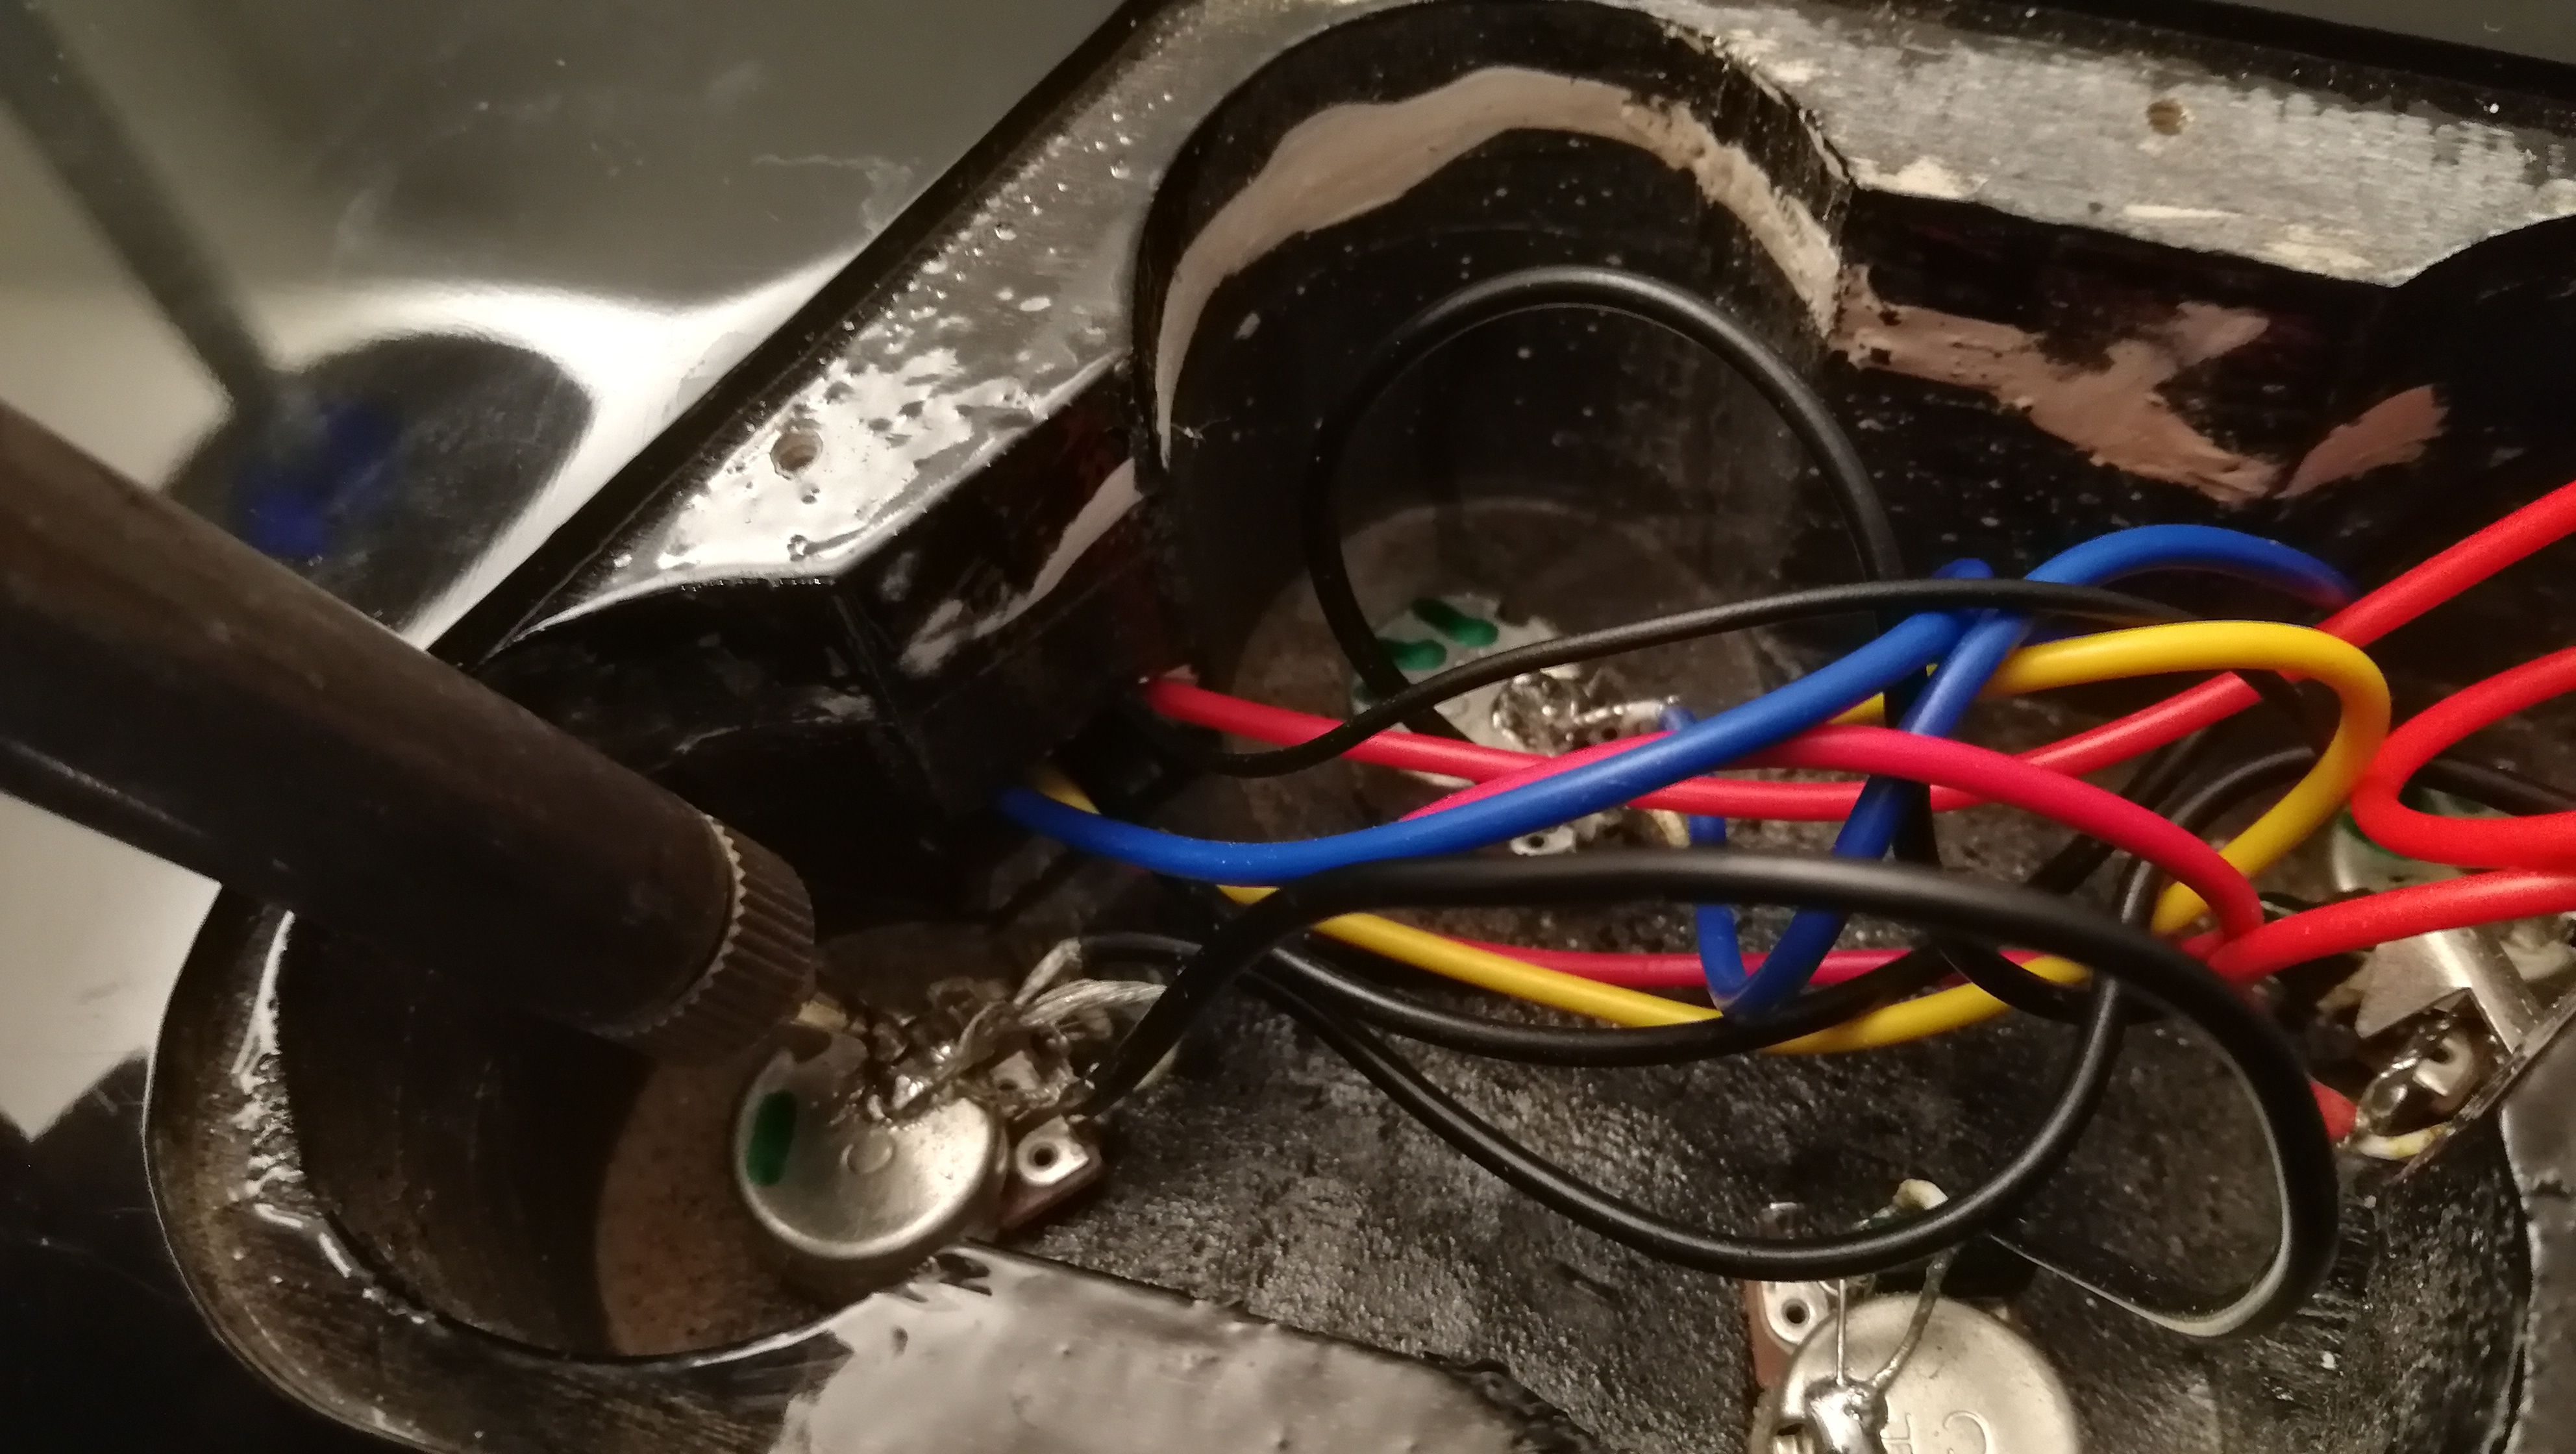
Record the electrical diagram of the existing plan, or make some picture.
Measure the height between the depressed strings and the pickup (bridge and neck).
Before you start providing material:
Soldering station or soldering iron, solder, screwdriver slot and cross, side cutter, wire winder, string winder, pickups, pots, capacitors, containers for screws and springsPlace the guitar on a soft surface, e. g. towels, if you have no other underlay
De-solder the pickups the potentiometers if you want to replace them. Please do not solder 10s otherwise the components are too hot and may be damaged. Apply a small amount of solder to the soldering iron and then to the soldering point.
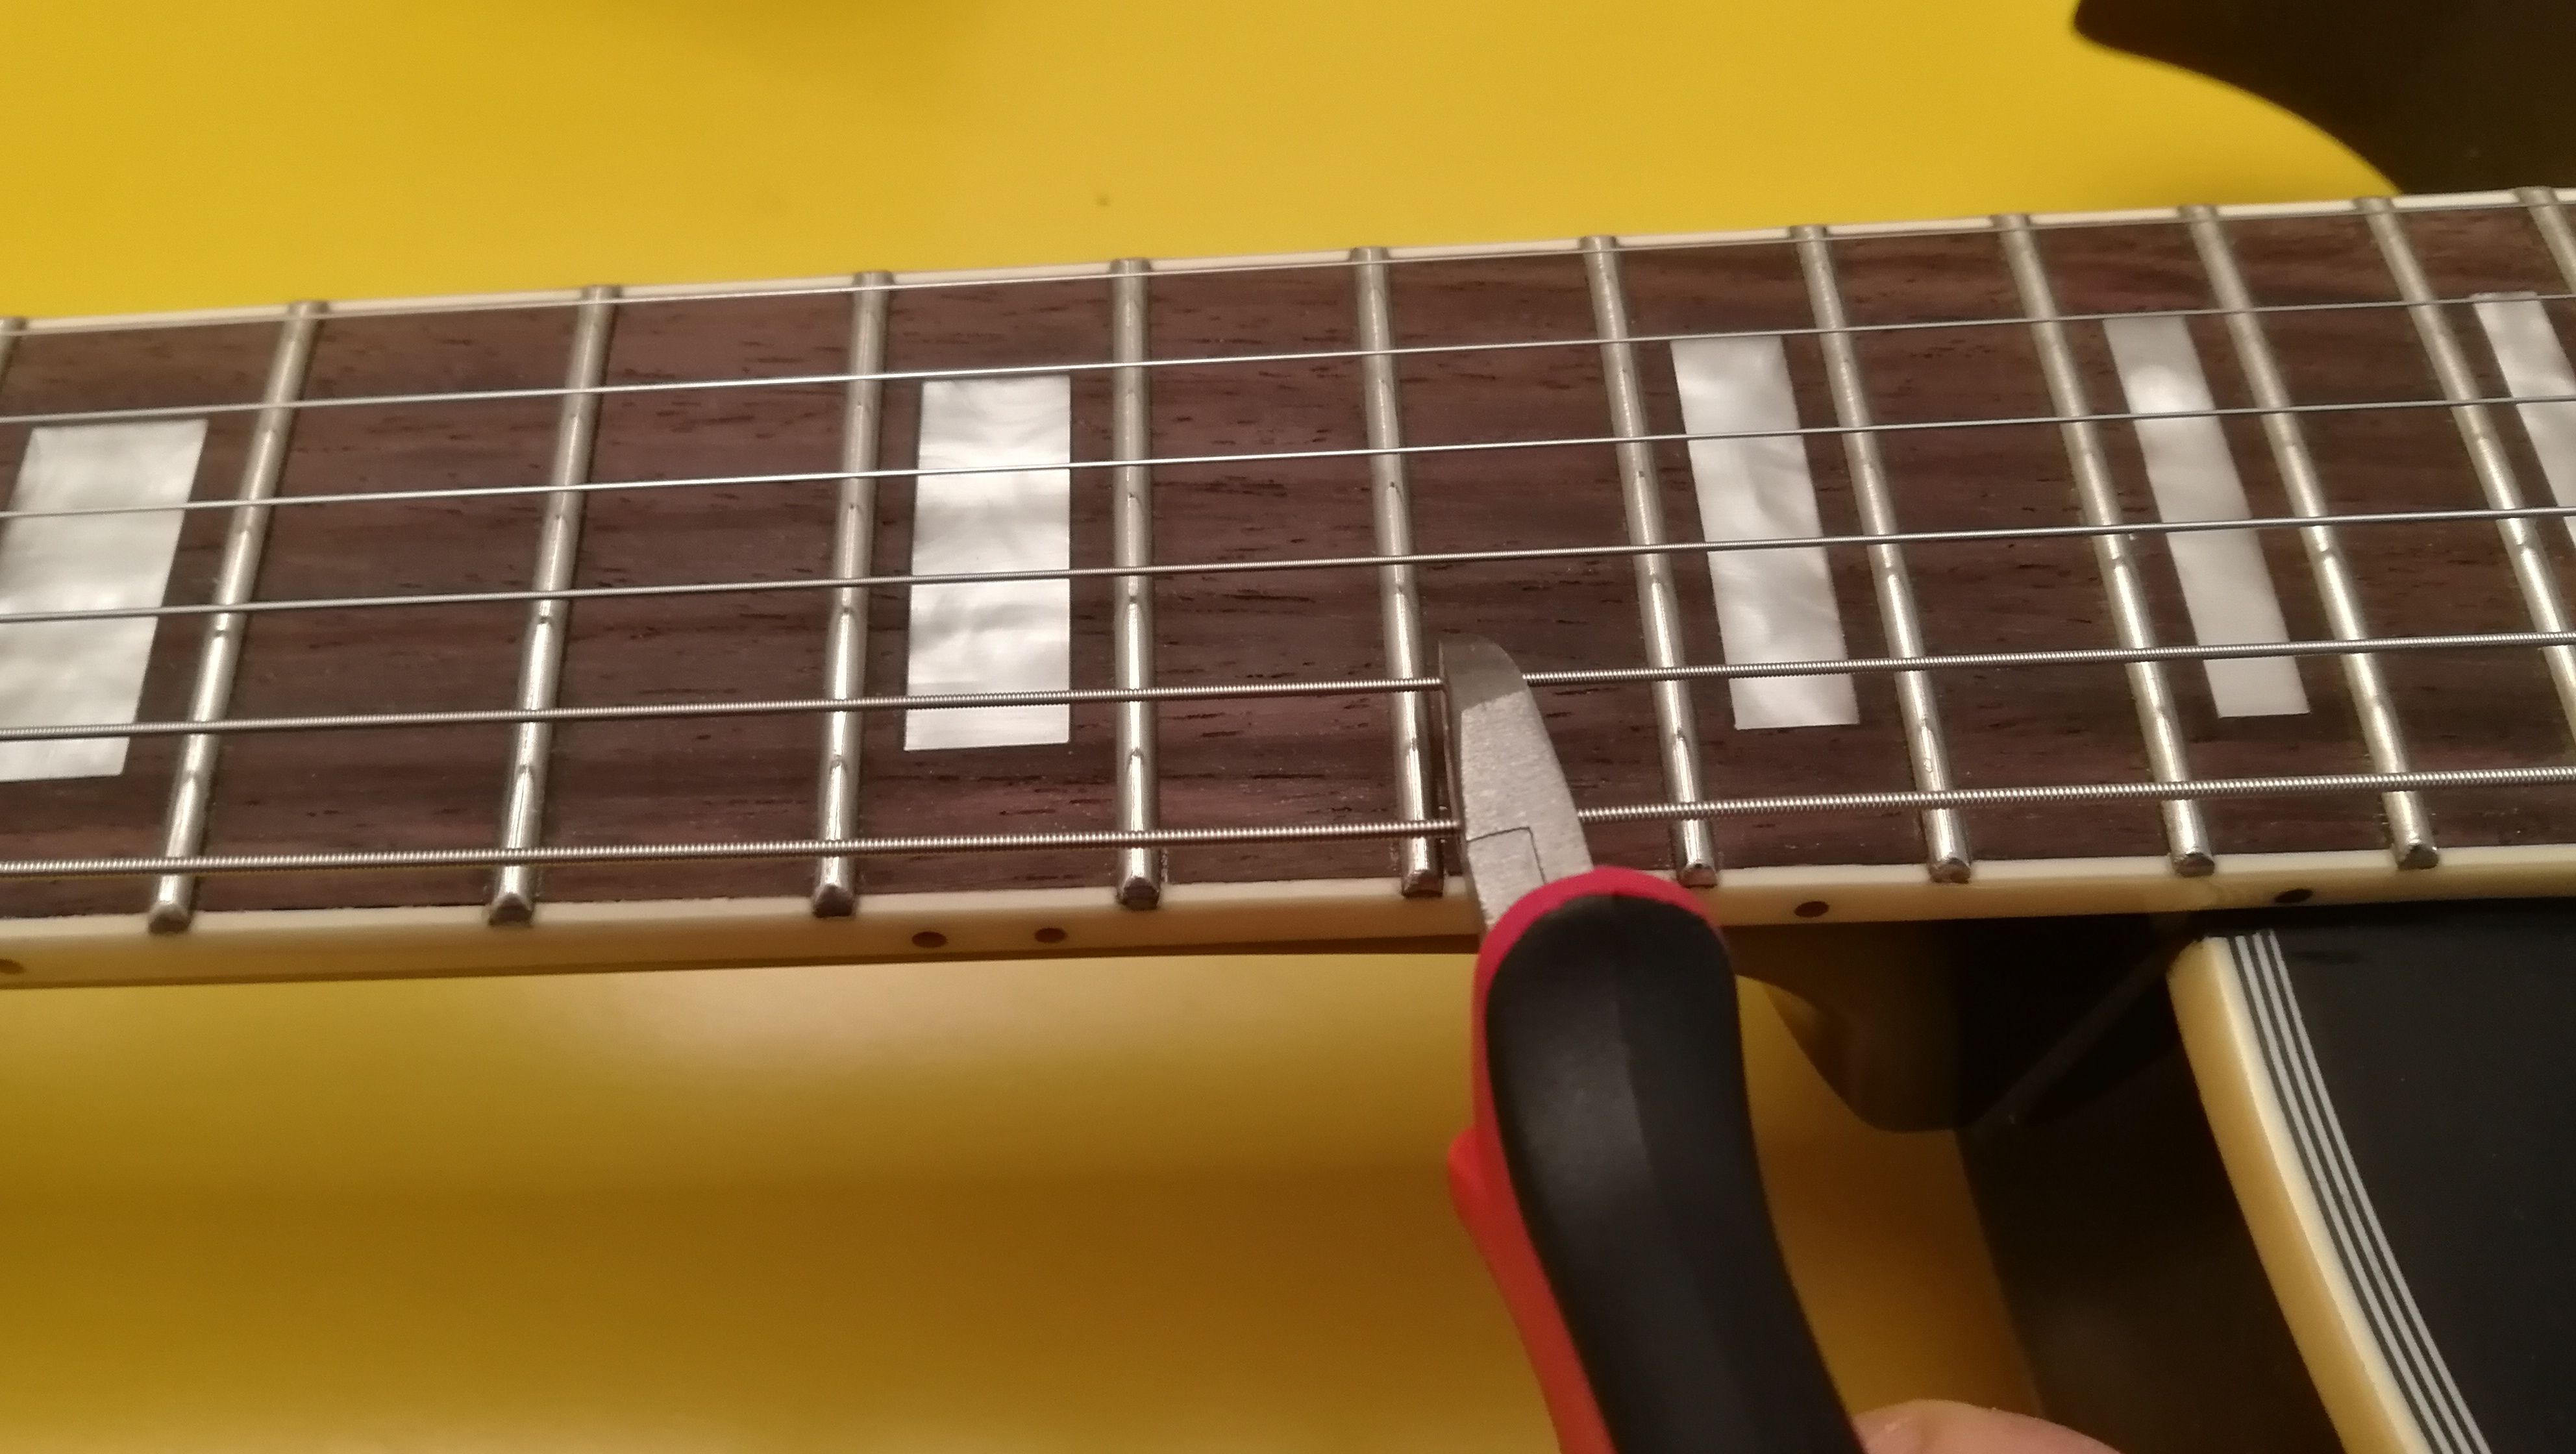
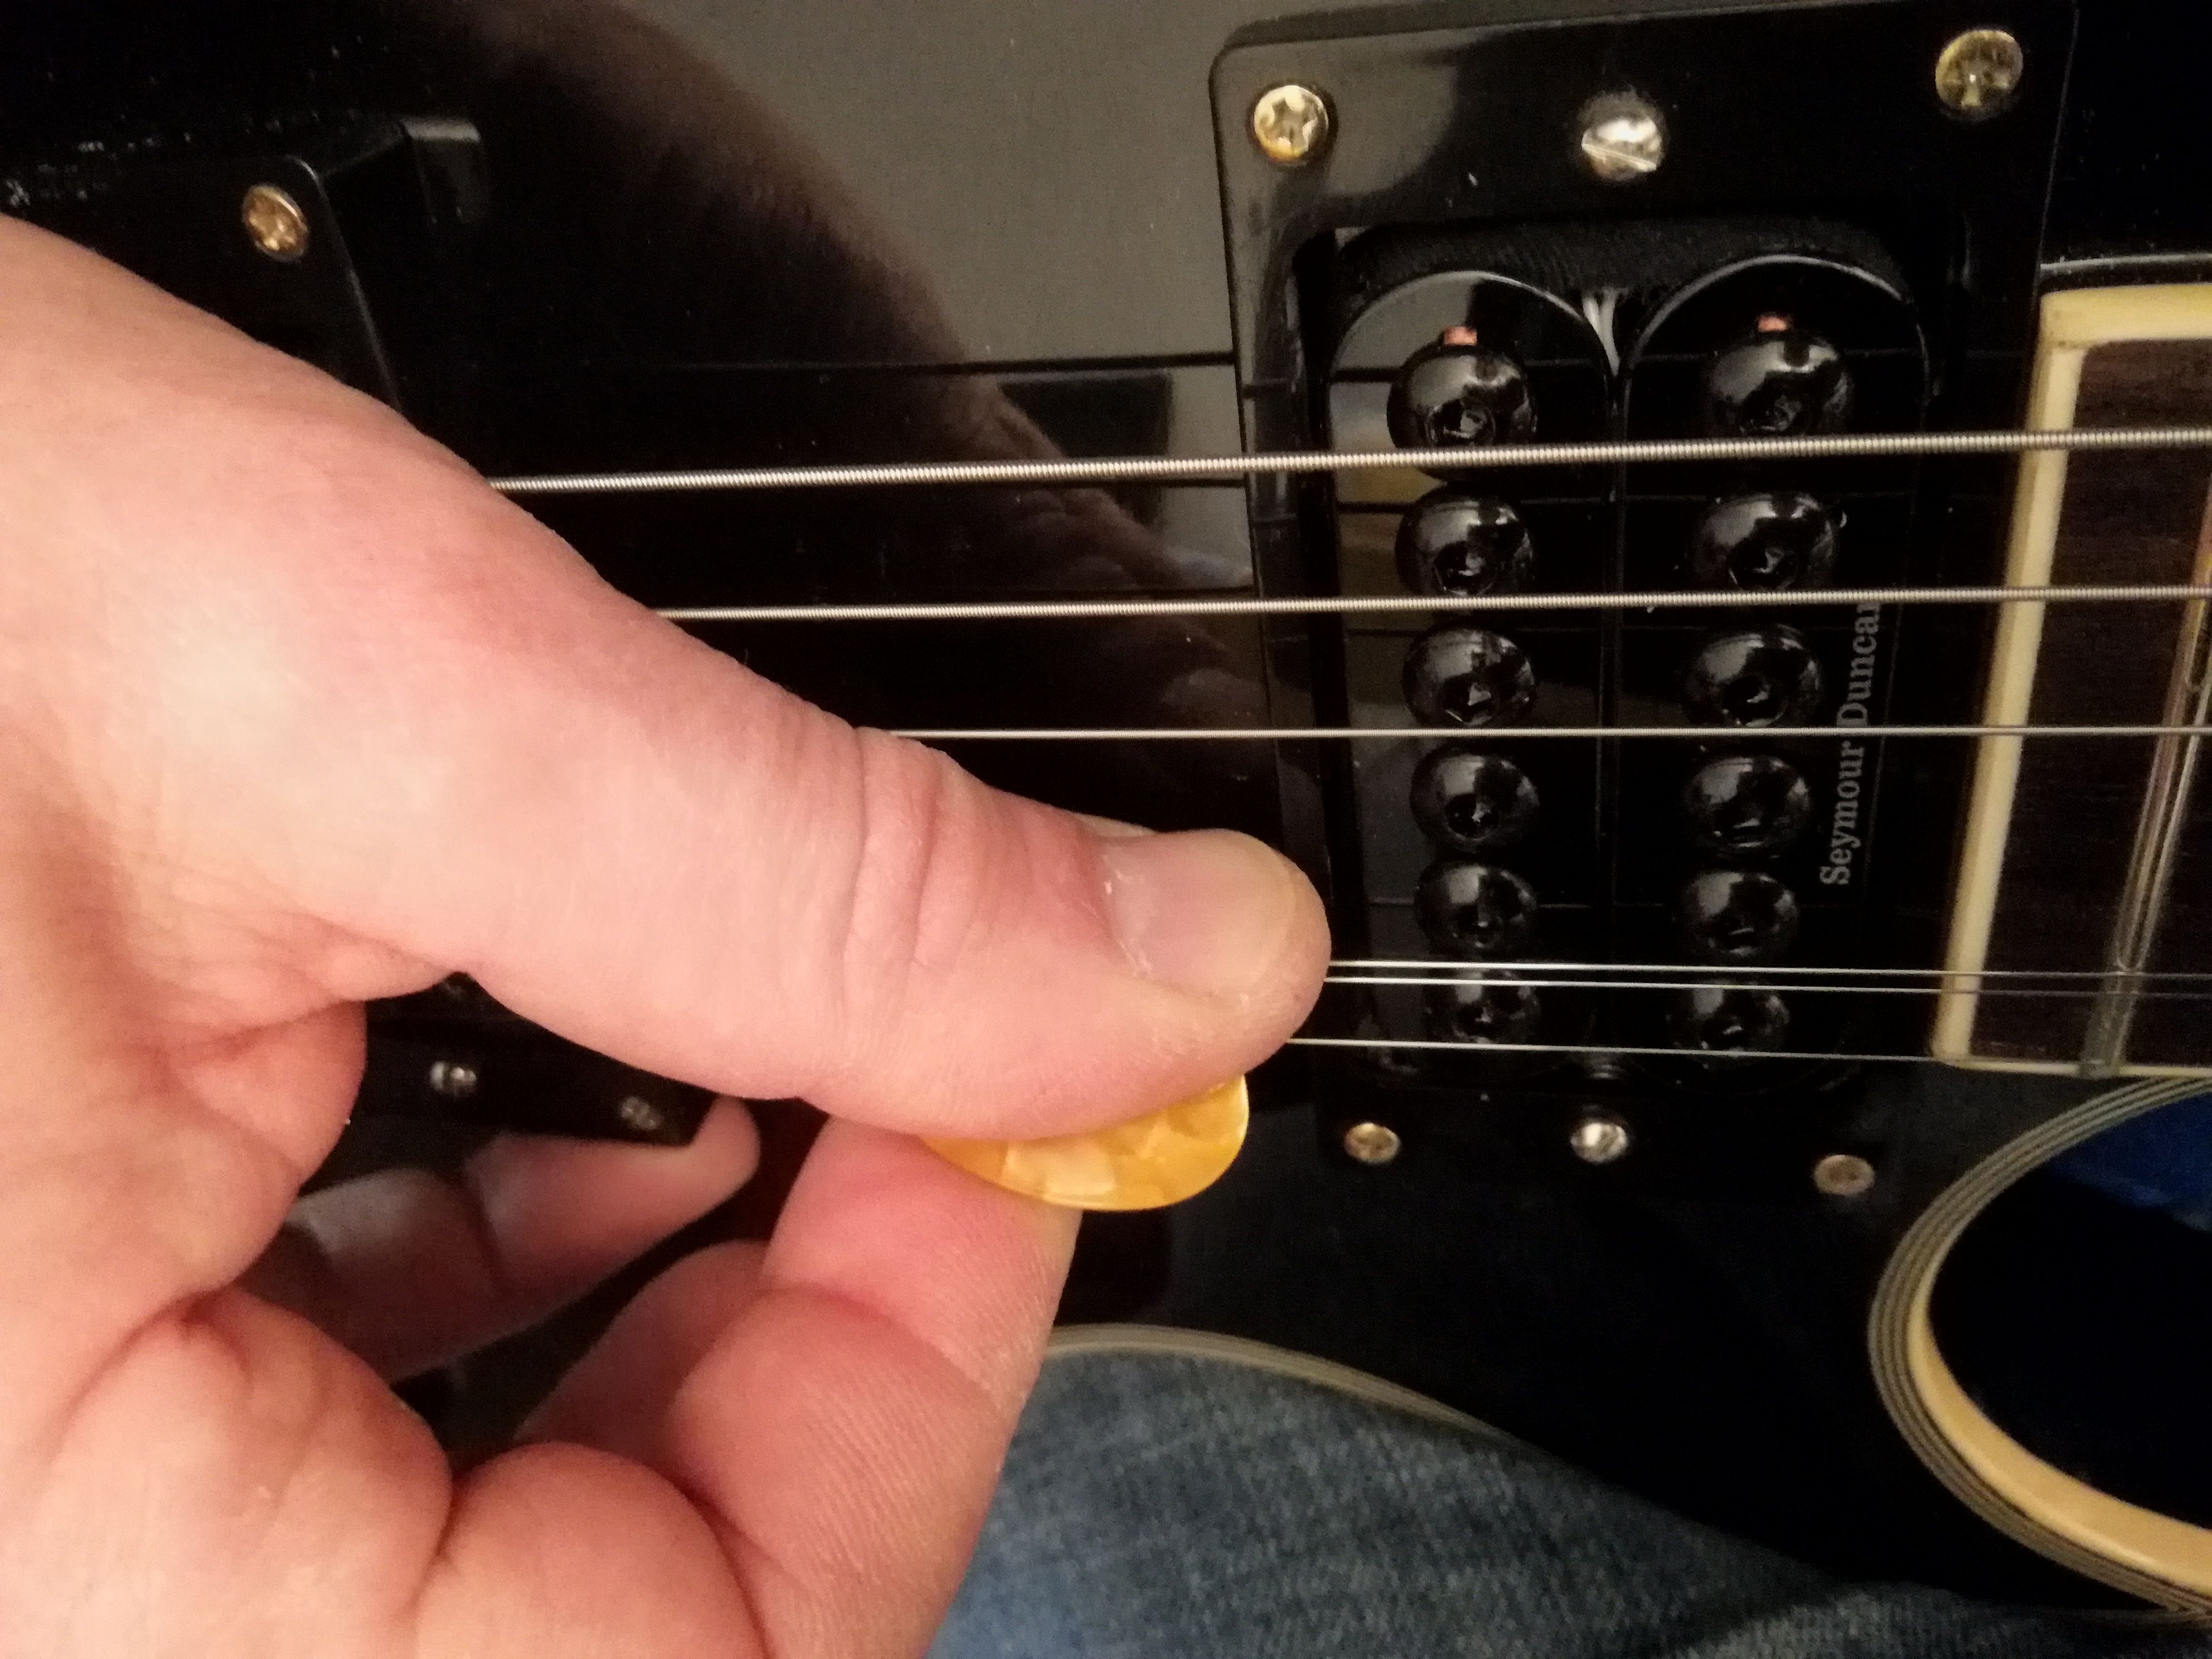
Remove the guitar strings, slightly separate them first with the string winder and then cut it with the side cutter
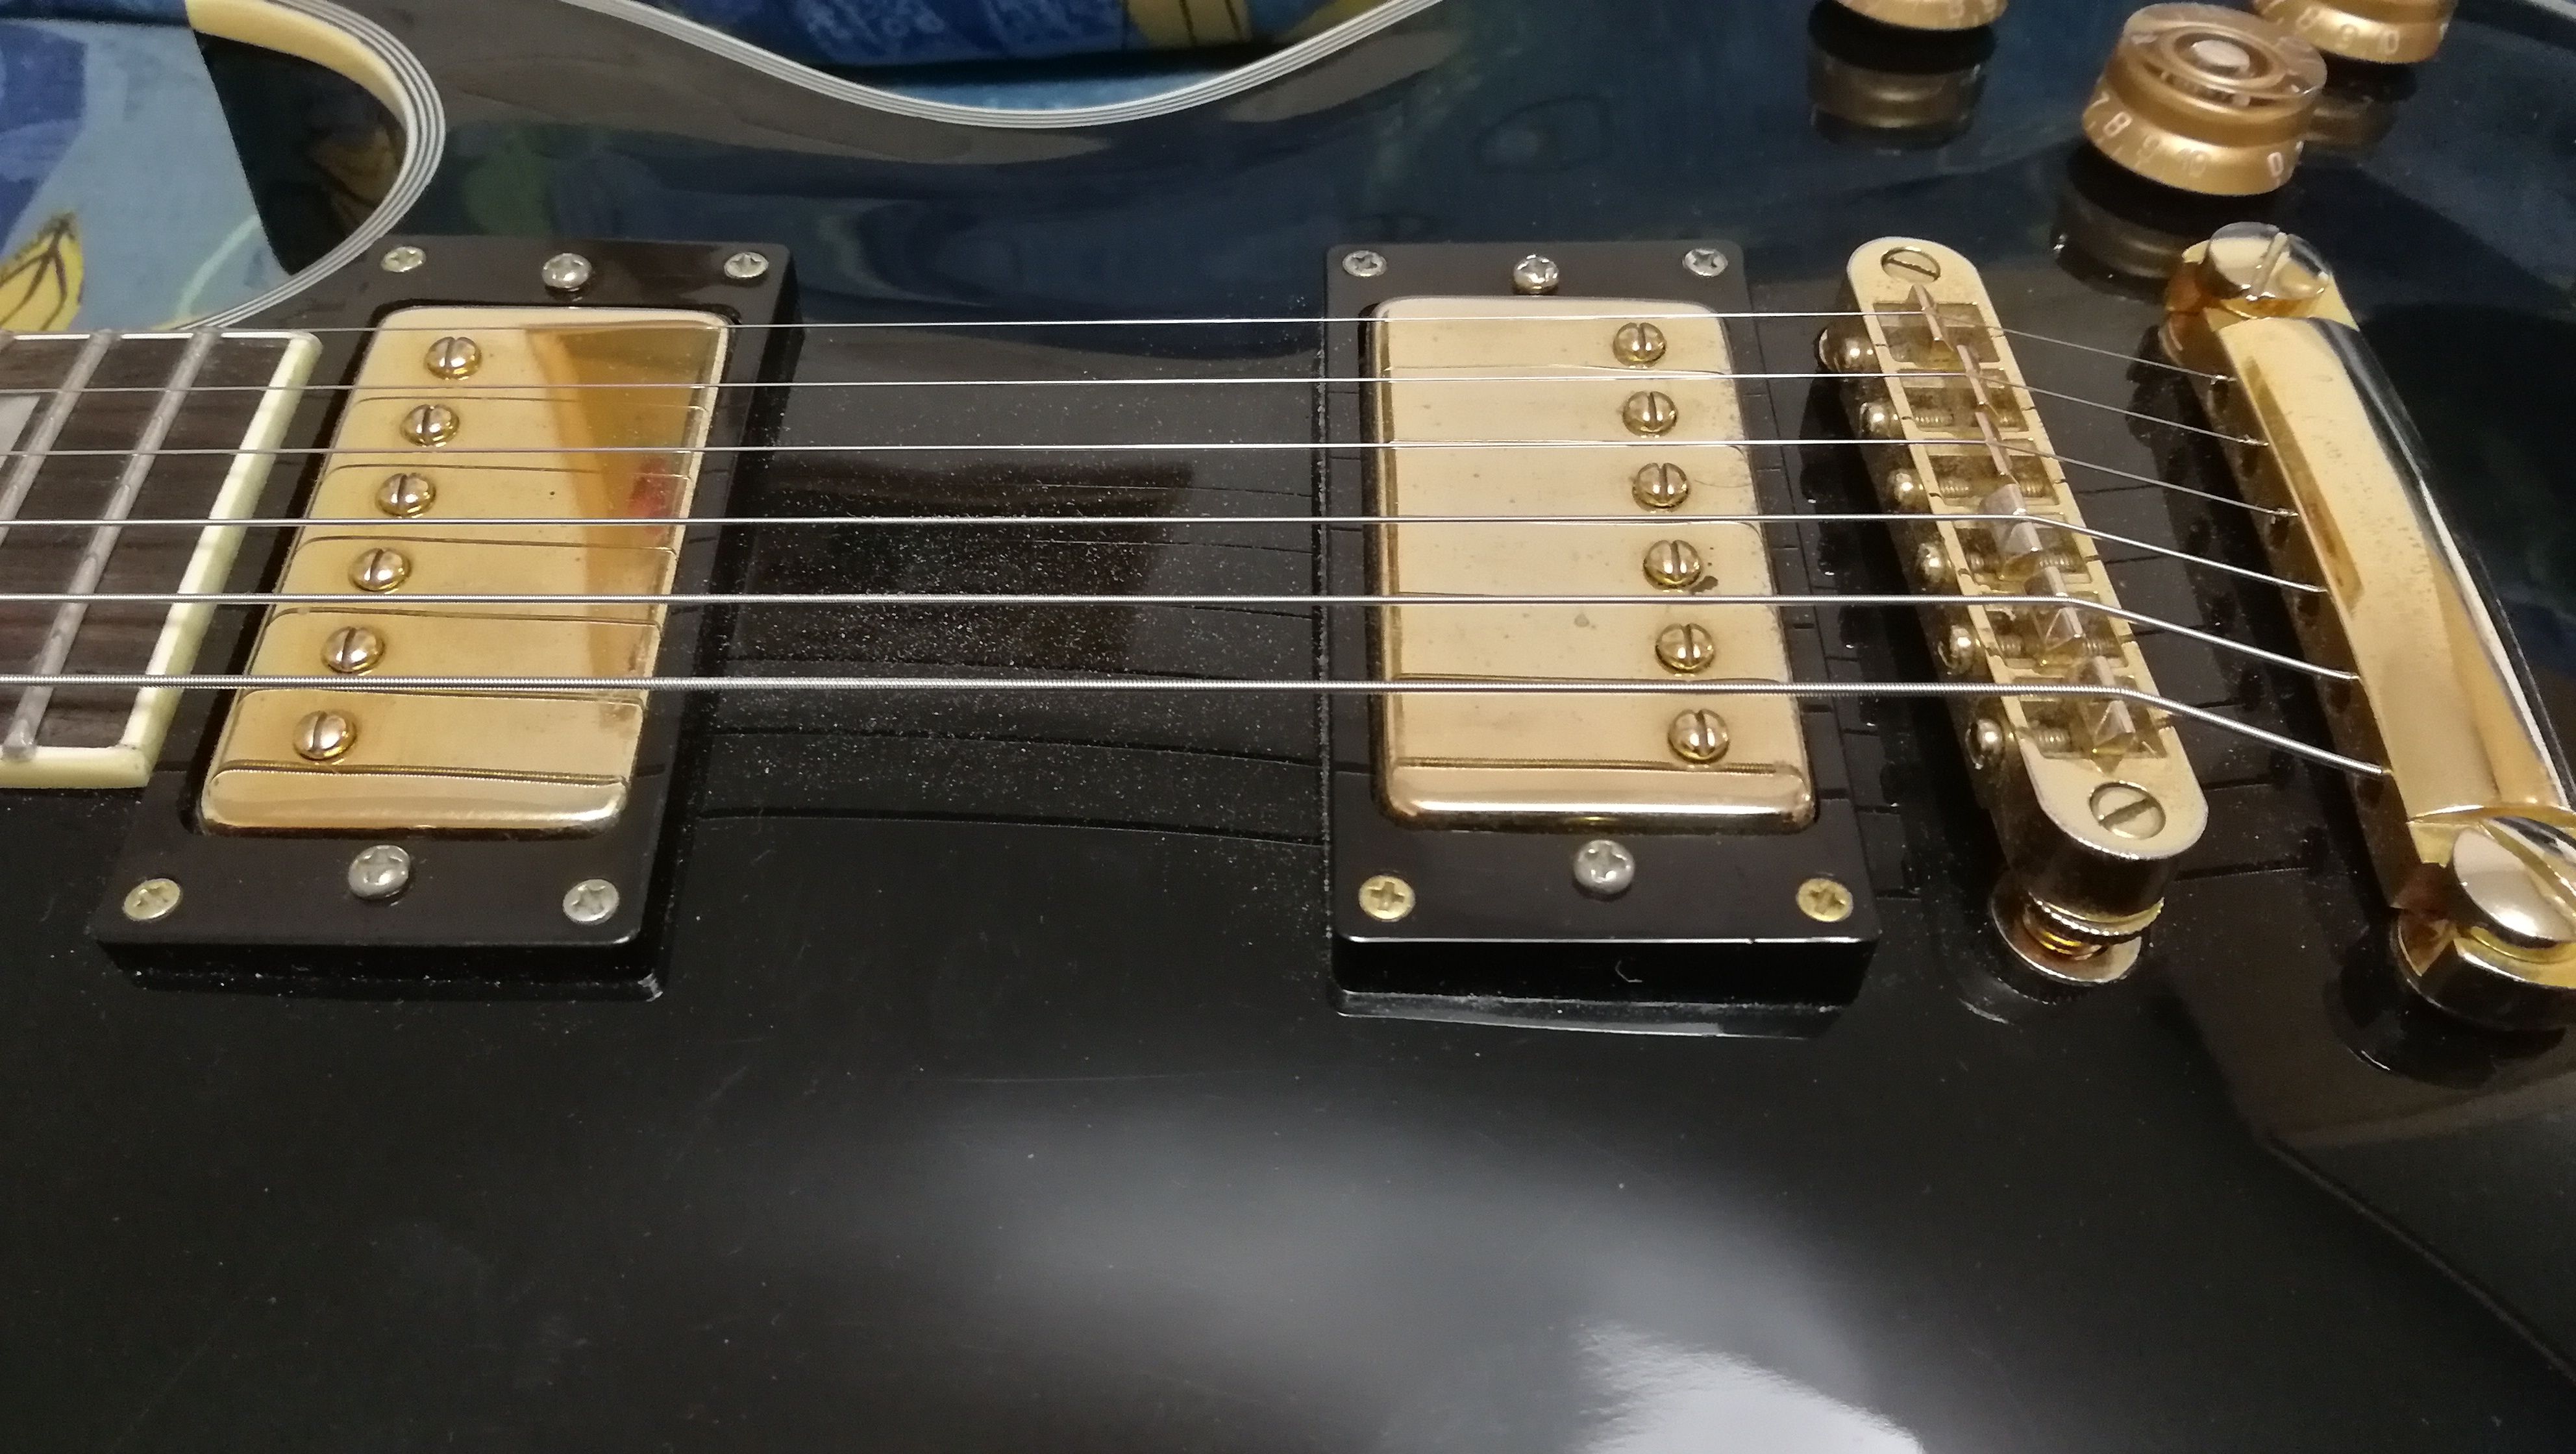
Unscrew the pickup
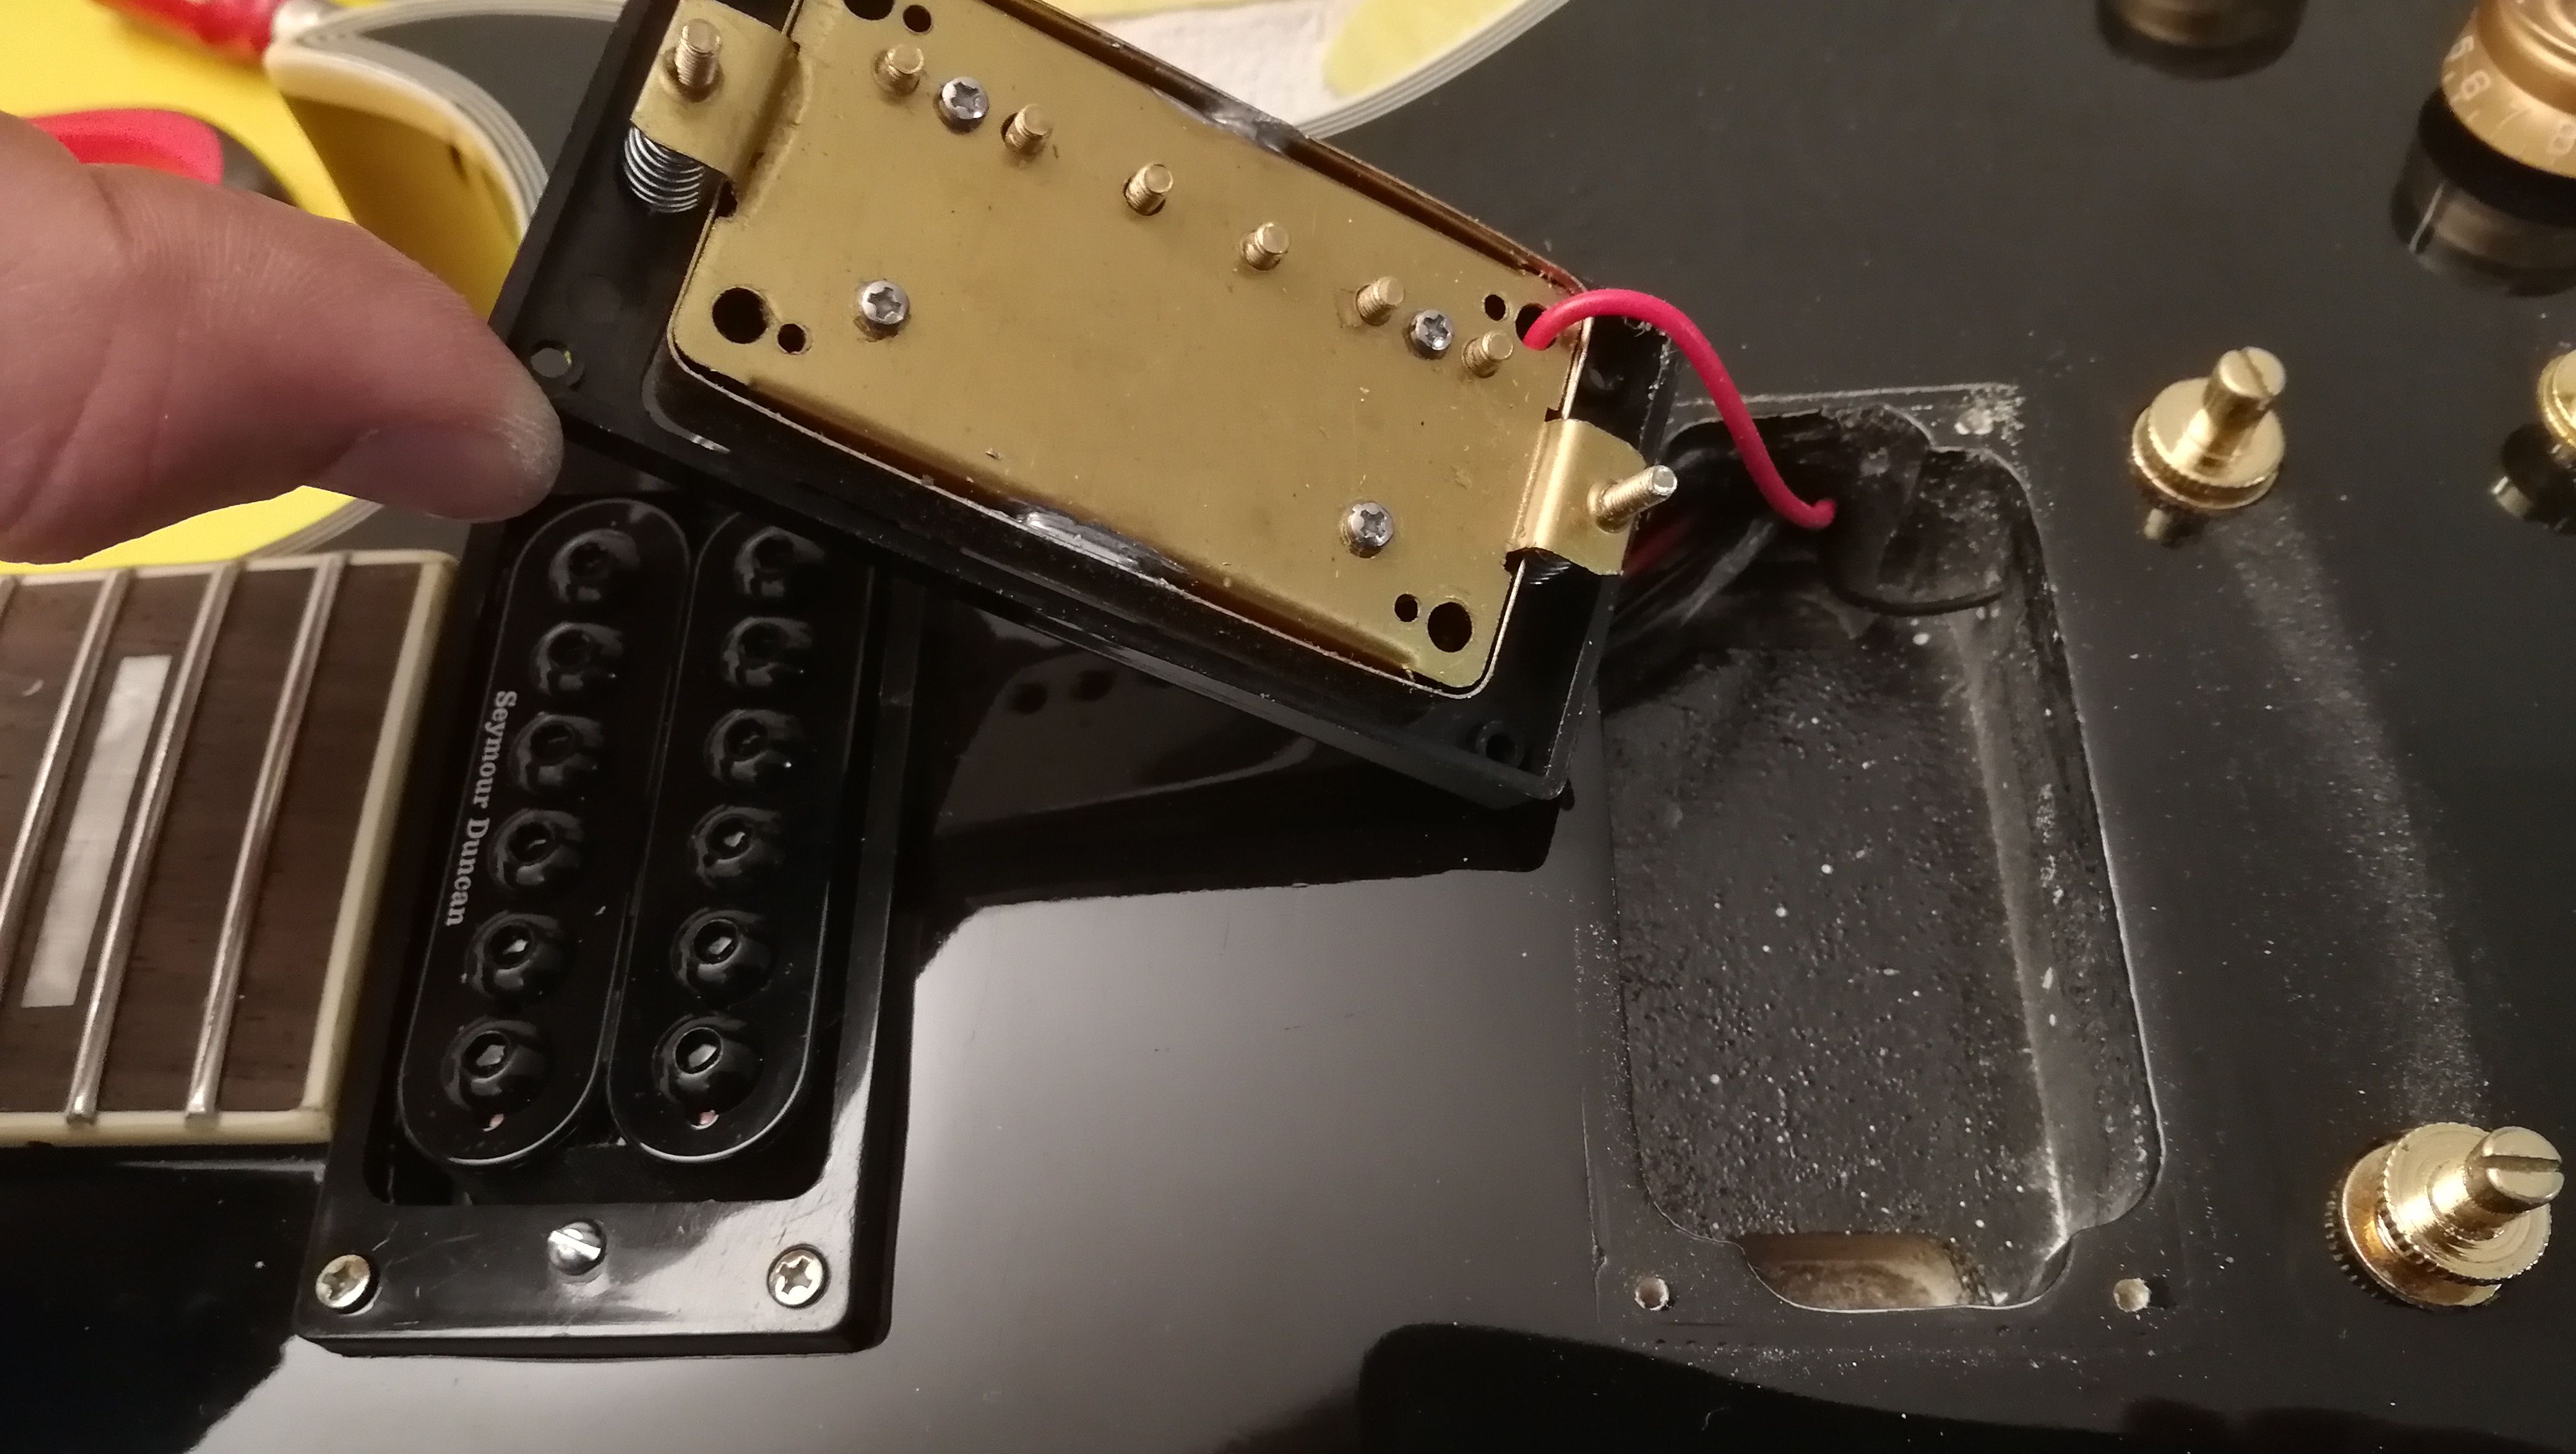
Be careful with the springs, they are faster away than you like.
Install new pickups, pay attention to which pickup where to be installed (bridge and neck) possibly mark cable before which pickup which is. If not, the longer cable is from the bridge pickup. Attention with the springs again!
Mount strings. With prolonged storage of the guitar without strings, may possibly deform the neck. When adjusting, press or pull the strings downwards or upwards (see photo).
Now you can solder the pick ups, or exchange the pots. It is best to exchange one poti after the other.
Pick up the height to set the strings again. 1/8 "to 1/16" with depressed strings.
Sound check - Let's rock
14 Error causes:
- hum the pick up: Mostly shield cable not soldered properly.
- Volume does not completely quite: A connection flag from the potentiometer is not connected to the shield cable
Hope the instructions helped you and have fun! I need about1.5h
Bye for now
Before:
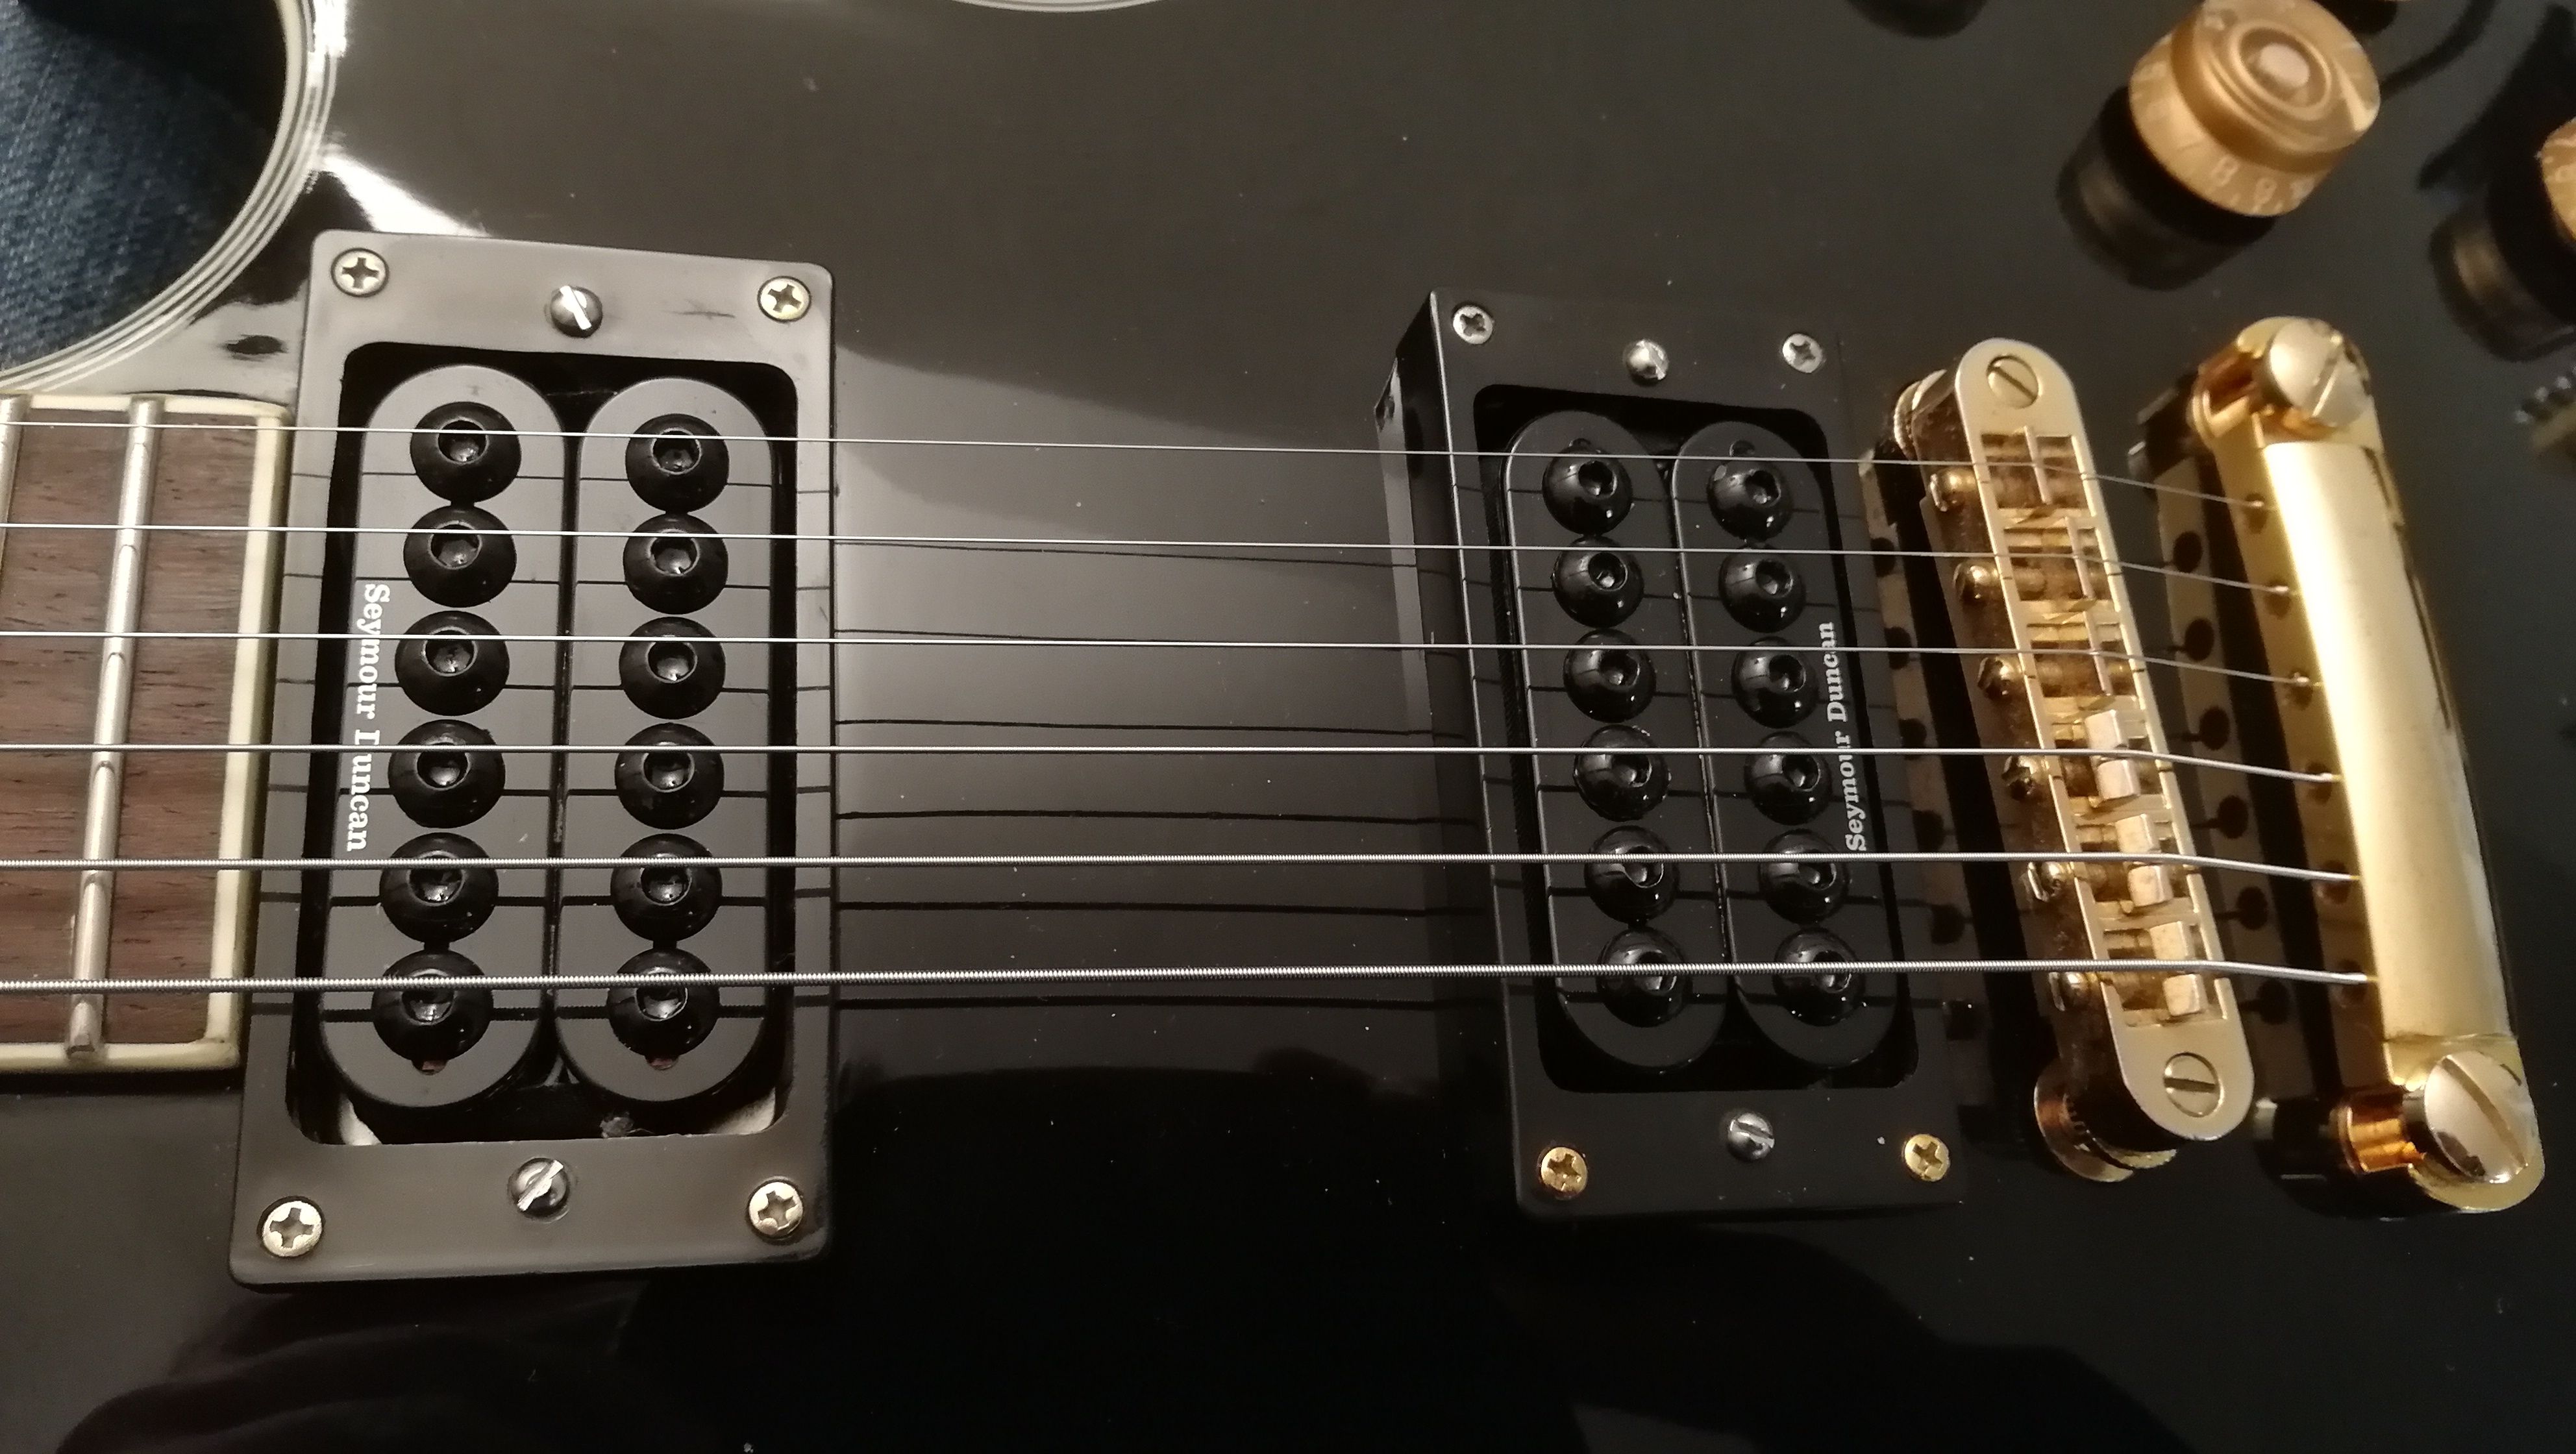
After:
Cut the strings:
Replace pickups:
Adjust the strings:
Welding:
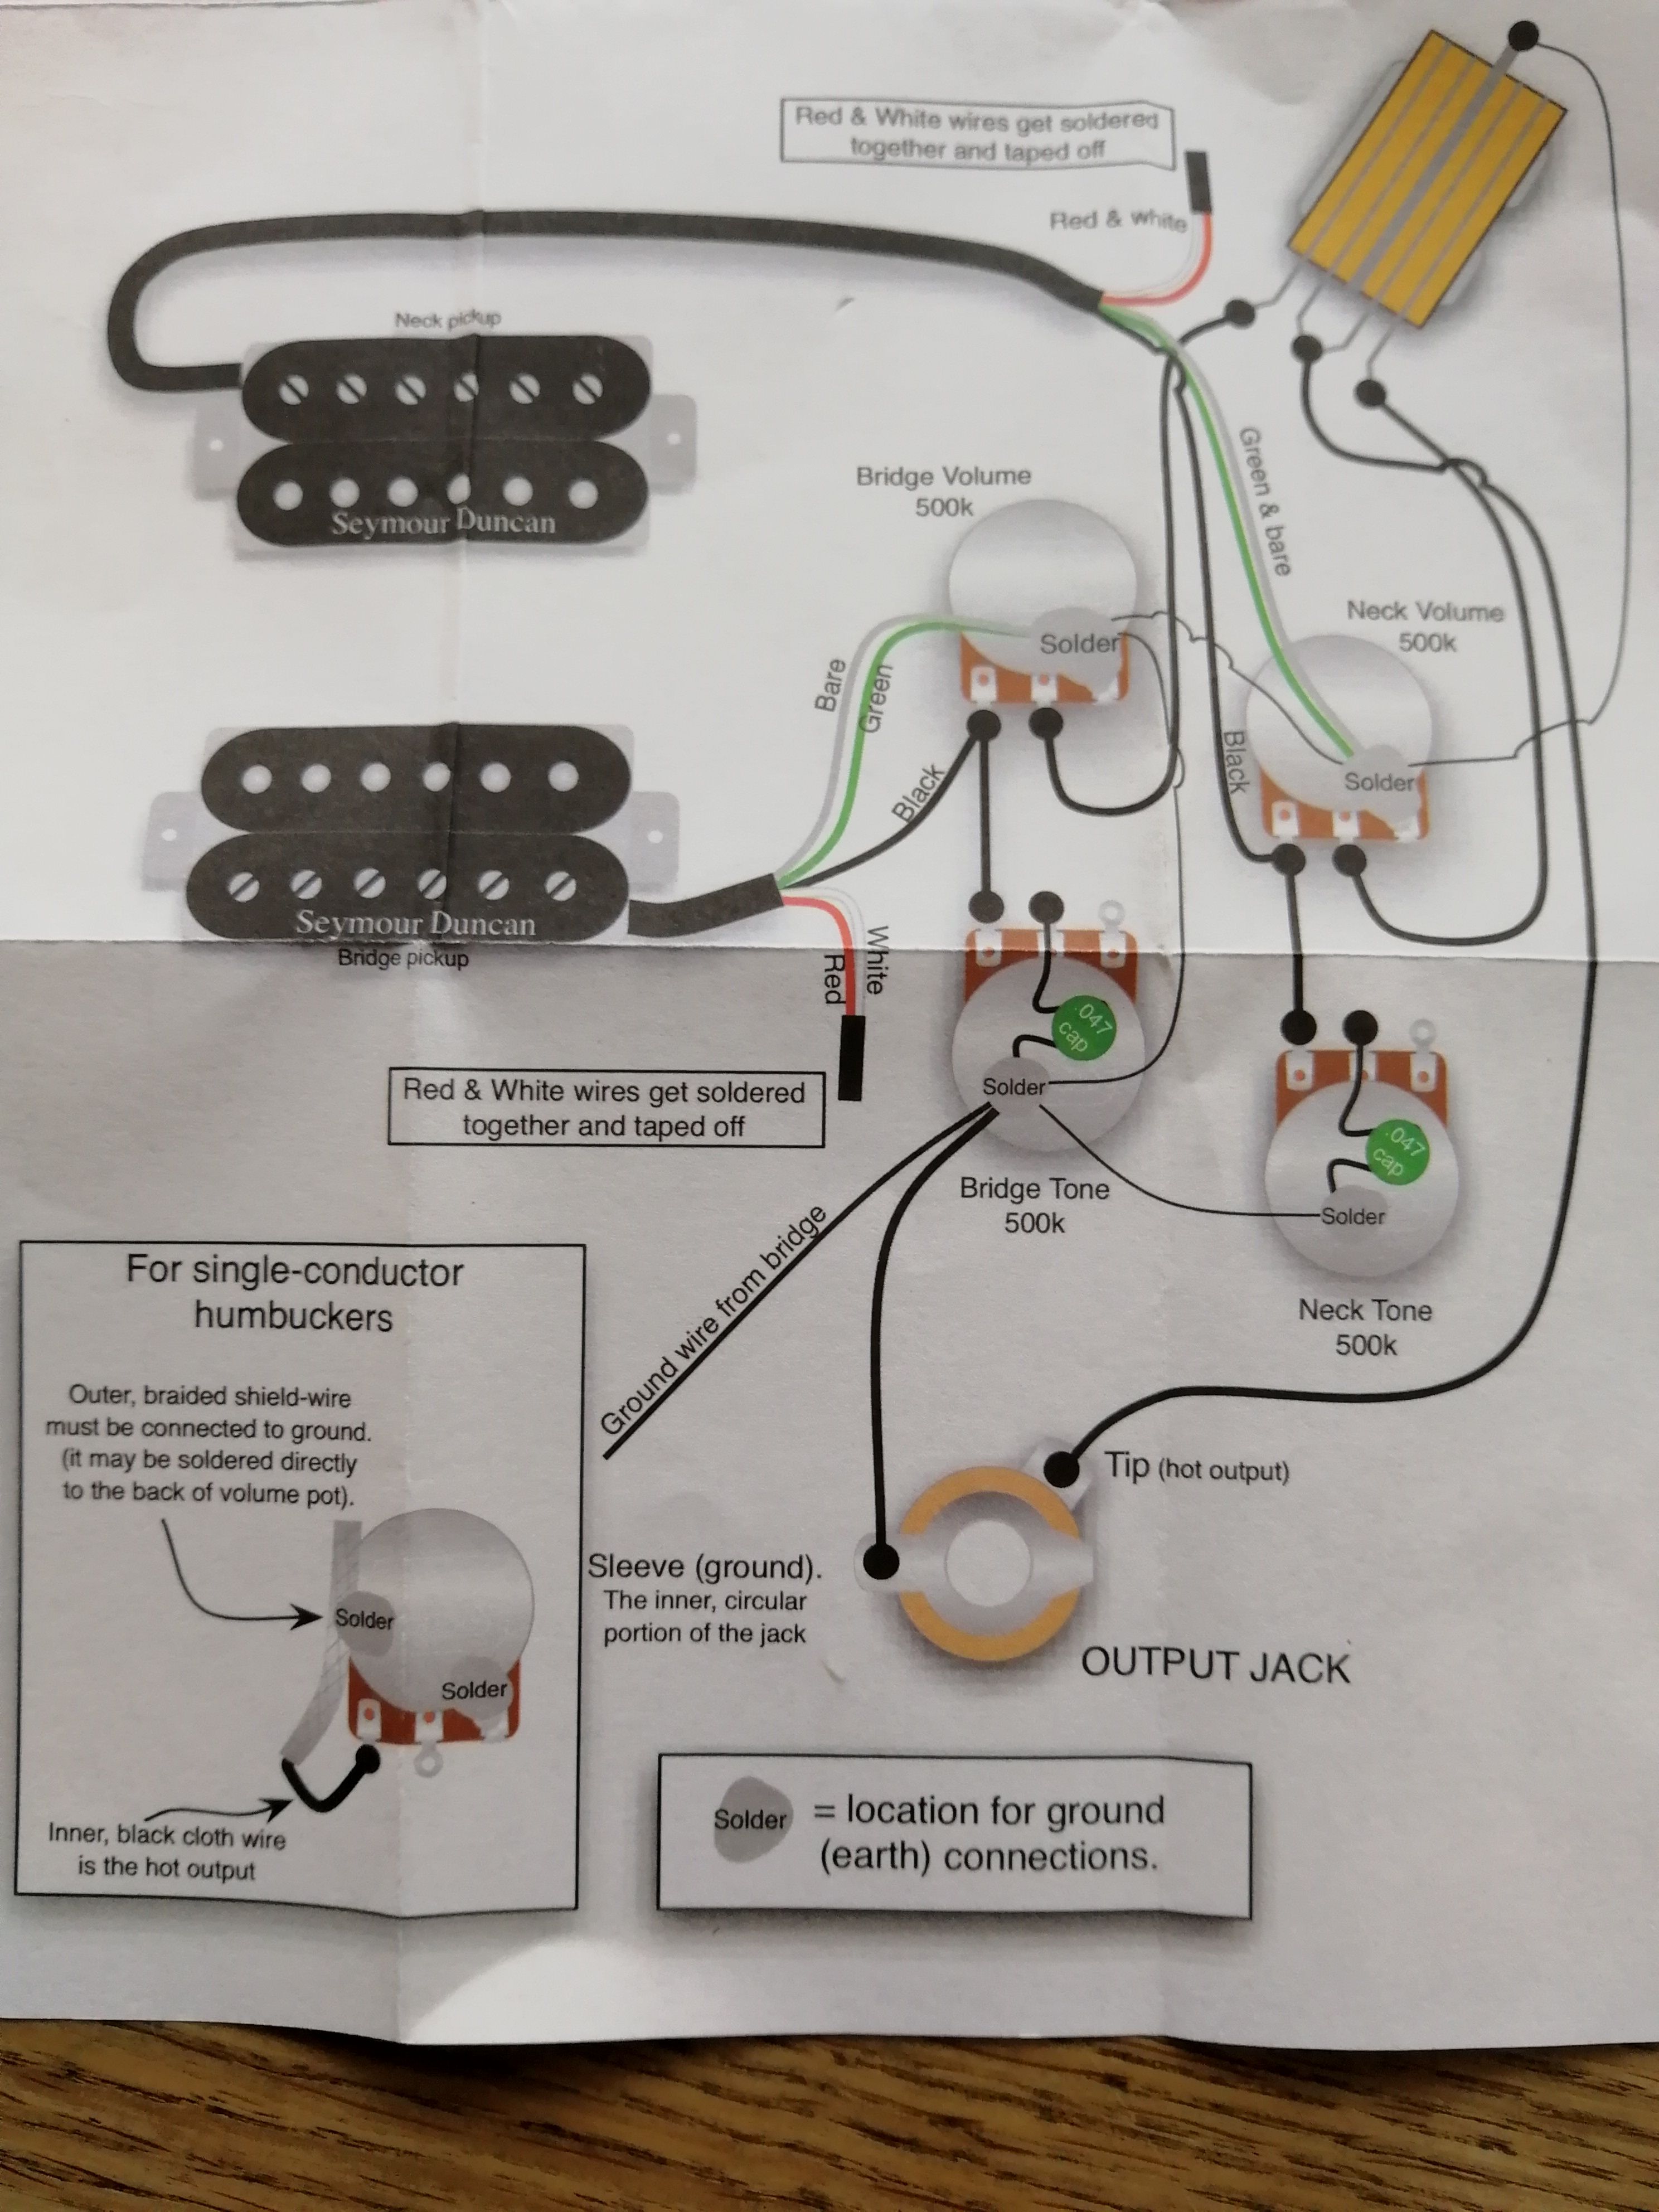
Wiring plan:
E-Gitarre Humbucker Tonabnehmer austauschen
Einbau Seymour Duncan Invader Humbucker set black
Hier eine Anleitung für den Einbau der Tonabnehmer in eine Egitarre
Elektrischen Schaltplan des vorhanden Aufbaus aufzeichnen oder mache ein paar Bilder.
Höhe zwischen den gedrückten Saiten und dem Tonabnehmer (Steg und Hals) messen.
Bevor man überhaupt anfängt Material bereitstellen:
Lötstation bzw. Lötkolben, Lötzinn, Schraubendreher Schlitz und Kreuz, Seitenschneider, Abisolierzange, Saitenkurbel, Tonabnehmer, Potis, Kondensatoren, Behälter für Schrauben und FedernDie Gitarre auf eine weiche Unterlage legen, z. B. Handtücher, wenn man keine sonstige Unterlage hat
Pick ups ablöten gegebenenfalls die Potis wenn man diese auch austauschen will. Bitte keine 10s löten sonst werden die Bauteile zu heiß und werden evtl. beschädigt. Wenig Lötzinn an den Lötkolben geben und dann an die Lötstelle damit.
Gitarrensaiten entfernen, erst leicht mit der Kurbel und dann mit dem Seitenschneider komplett trennen
Tonabnehmer abschrauben
Vorsichtig mit den Federn, sind schneller weg als einem lieb ist.
Neue Tonabnehmer einbauen, darauf achten welcher Tonabnehmer wo eingebaut werden muss (Steg und Hals) evtl. vorher Kabel markieren welcher Tonabnehmer welcher ist. Falls nicht, das längere Kabel ist vom Steg Tonabnehmer. Achtung mit den Federn
Saiten montieren. Bei längerer Lagerung der Gitarre ohne Saiten, kann sich evtl. der Hals verformen. Saiten beim einstellen nach unten bzw. nach oben drücken bzw. ziehen (siehe Bild).
Nun kann man die pick up anlöten, oder noch die Potis austauschen. Am besten einen Poti nach dem anderen austauschen.
Pick up Höhe zu den Saiten wieder einstellen. 0,16mm bis 0,32mm bei gedrückten Saiten
Sound check – Let´s rock
Fehlerursache:
Brummen der pick up: Meistens Schirmkabel nicht richtig angelötet.
Lautstärke geht nicht ganz aus: Eine Anschlussfähnchen vom Poti nicht mit dem Schirmkabel verbunden
Hoffe die Anleitung hat euch geholfen und Spaß gemacht! Brauchte ca. 1,5h
Bis bald
Congratulations @kramer76! You have completed some achievement on Steemit and have been rewarded with new badge(s) :
Click on any badge to view your own Board of Honor on SteemitBoard.
For more information about SteemitBoard, click here
If you no longer want to receive notifications, reply to this comment with the word
STOPThank you very much!
Klasse Anleitung, vielen Dank dafür. Spielst du in einer Band?
Danke auch vielmals. Nein in einer Band spiele ich nicht. Habe mir das Gitarre spielen aber selber beigebracht und spiele seit ca. 4,5 Jahren. Vielleicht klappts mit einer Band irgendwann.
Congratulations @kramer76! You received a personal award!
Click here to view your Board
Congratulations @kramer76! You received a personal award!
You can view your badges on your Steem Board and compare to others on the Steem Ranking
Vote for @Steemitboard as a witness to get one more award and increased upvotes!