How to Replace a Broken Piano String
Unlike other string instruments in which each string only has one speaking segment (e.g. guitar, violin), piano strings actually have two speaking segments. The string starts at a tuning pin at the top of the piano, runs down through several guides, does a 180 degree bend around a hitch pin at the bottom, and then runs back up through more guides and around a second tuning pin. In addition, most keys on the piano will strike either two or three different speaking lengths of strings simultaneously.
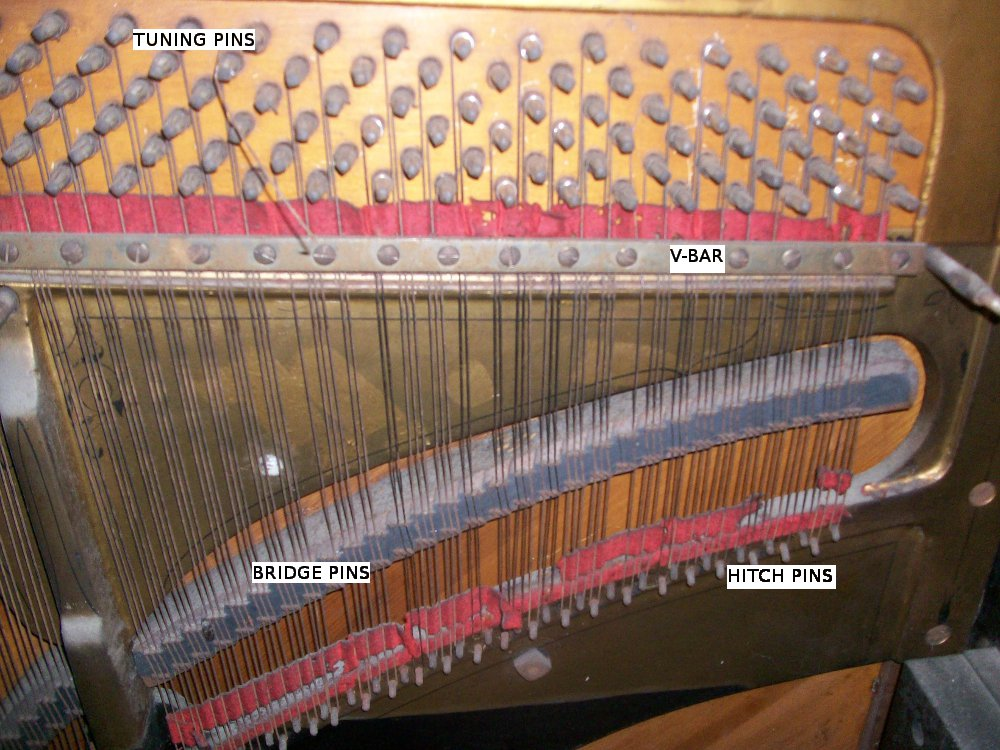
I have already replaced several strings in this piano (the new ones have no rust), but still have a few to replace. The first step is to cut the broken string just below the v-bar in order to make removal easier. The string must be measured with a micrometer or caliper to ensure that it is replaced with a string of the same thickness. Treble piano strings range from size 12 (.029" diameter) to size 22 (.049" diameter) and come in 1/2 size increments. This means that there is only a .001" difference between any two sizes. Piano wire sizes can be confusing if you are familiar with wire gauge sizes. Just remember that the bigger the number, the bigger the piano wire. Often times, the string to be replaced will measure as in between two sizes (e.g. .0335"). In this case, choose the larger size as the string will tend to get slightly thinner as it is stretched while tuning.
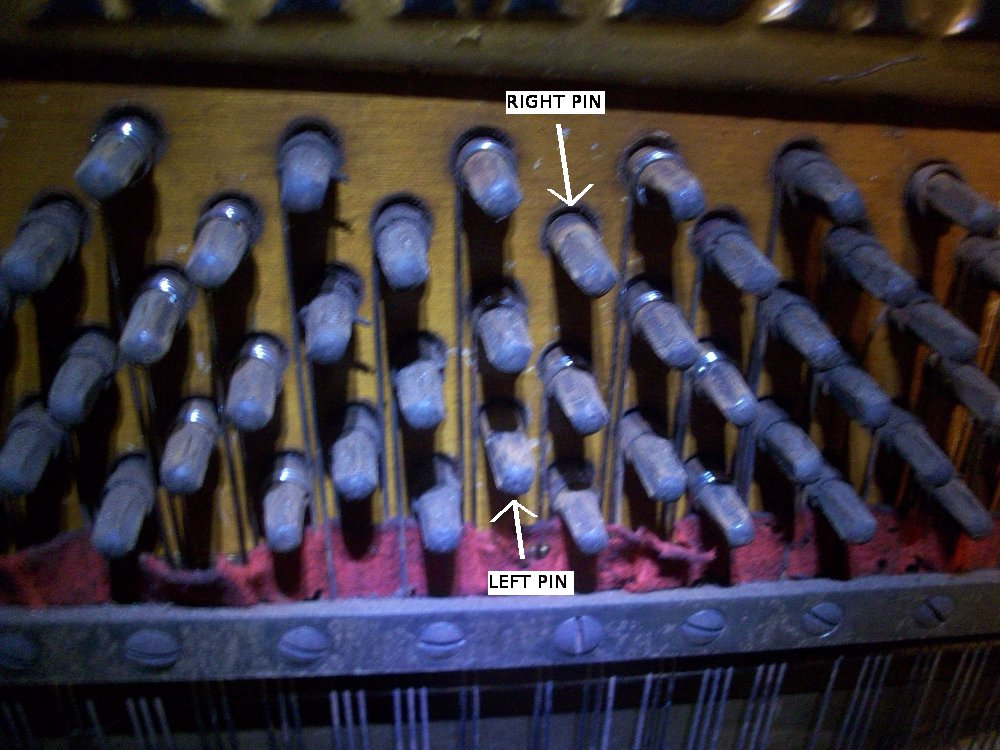
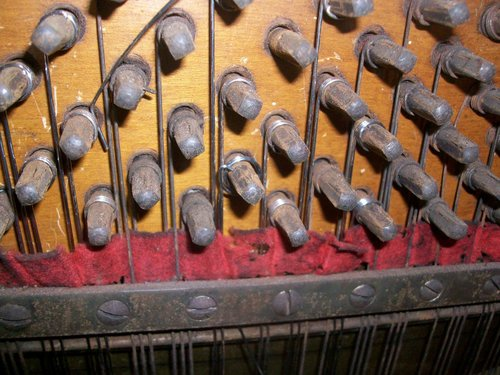
The broken wire would have been attached to two different tuning pins, a "left" pin and a "right" pin. There is a lot of variation with how they will be positioned. Sometimes the left pin will be directly above the right pin, sometimes they will be staggered like in the picture.
The left tuning pin can now be loosened (turned counterclockwise) one full turn, and the coil can be pried off with a needle-nose pliers and screwdriver. The same can be done with the right tuning pin except it should be loosened one-and-a-half turns counterclockwise. The picture above shows the two tuning pins after the old coils have been removed.
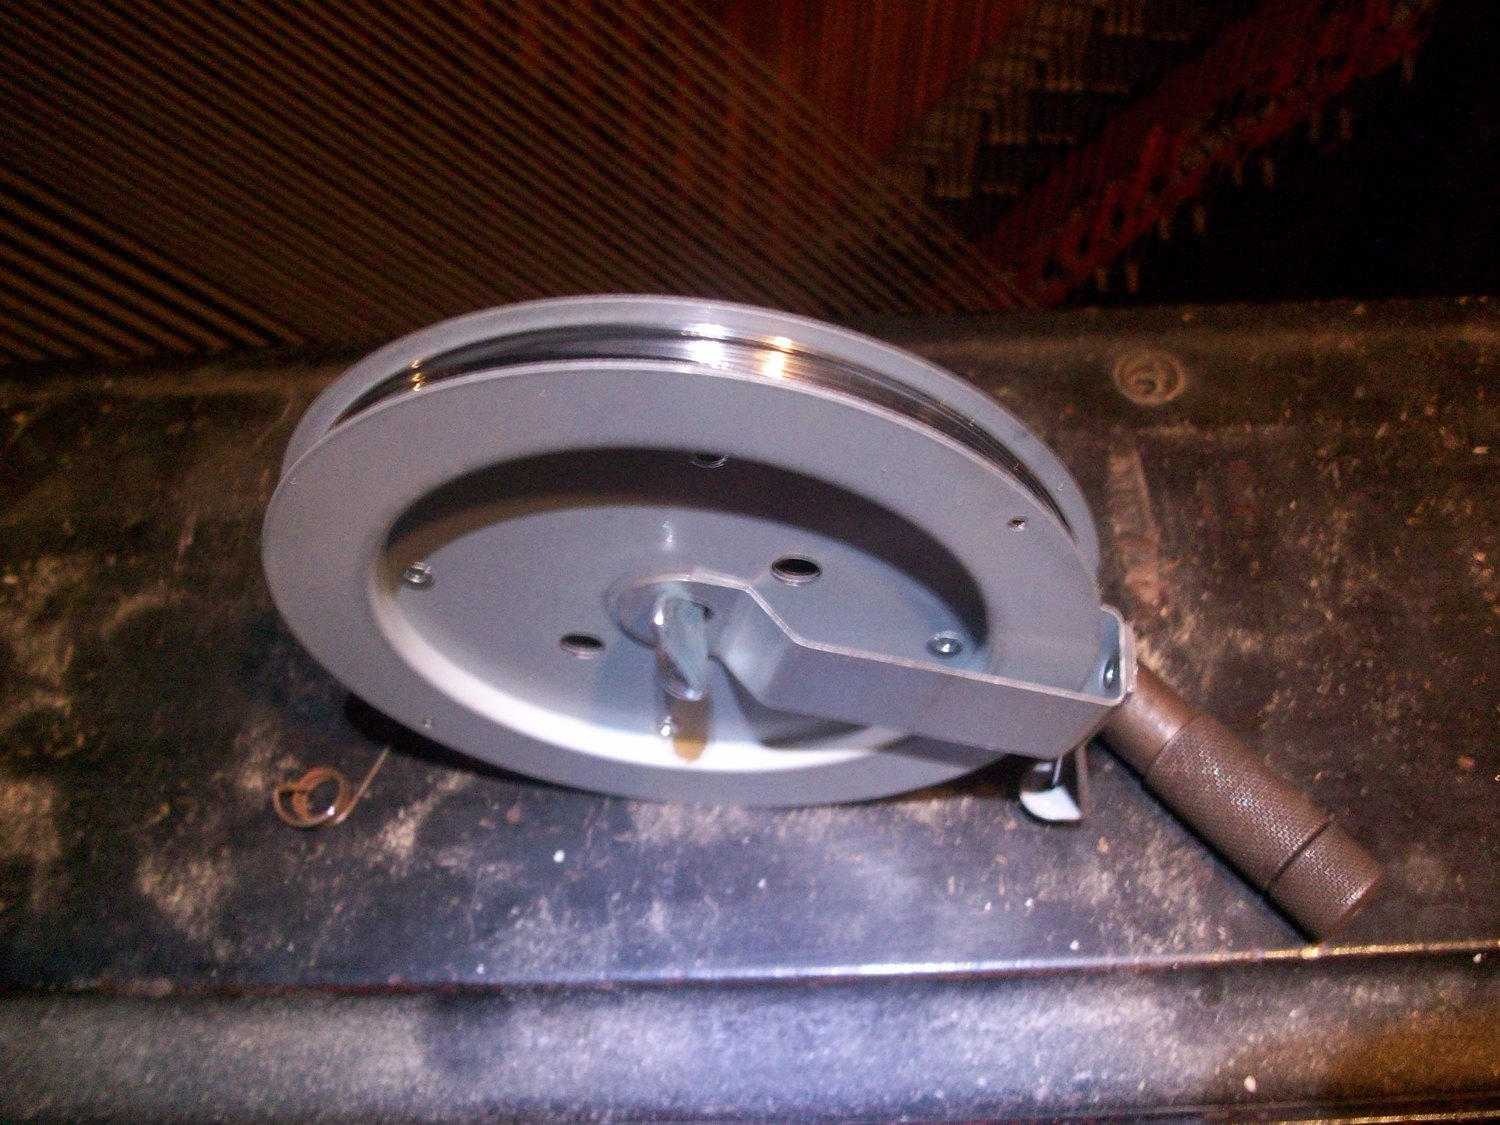
Piano wire can be purchased in short lengths for the replacement of a single string or in various sorts of coils like the one shown above. Long lengths of piano wire are very springy and can quickly get out of hand if not secured in such a coil.
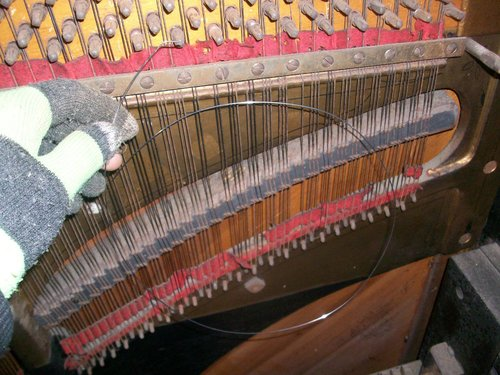
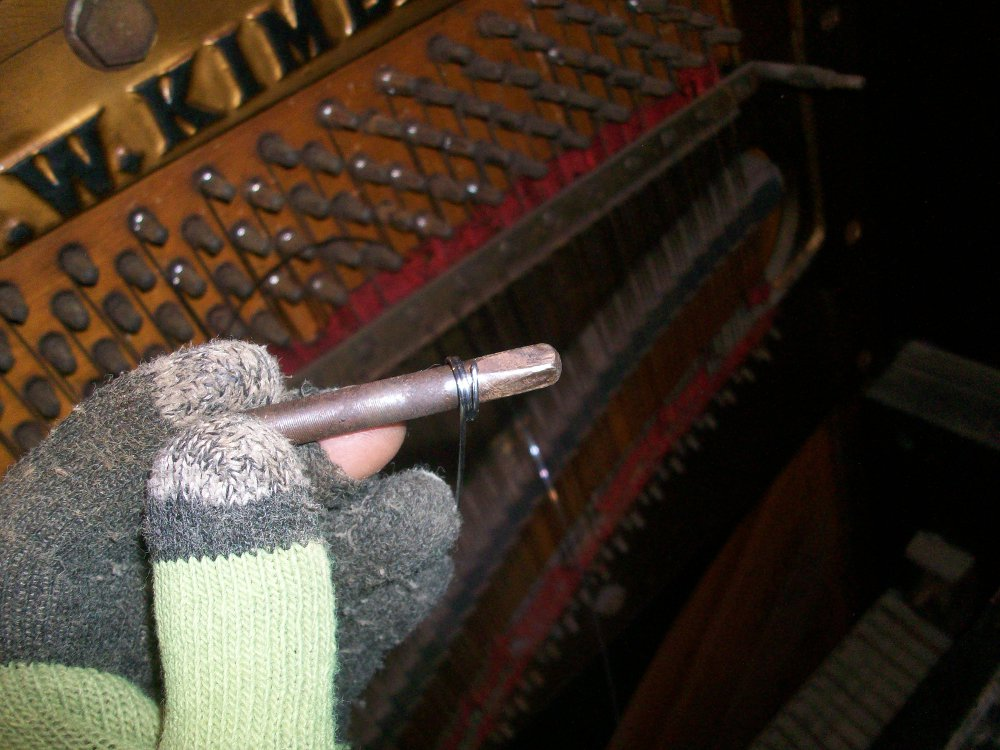
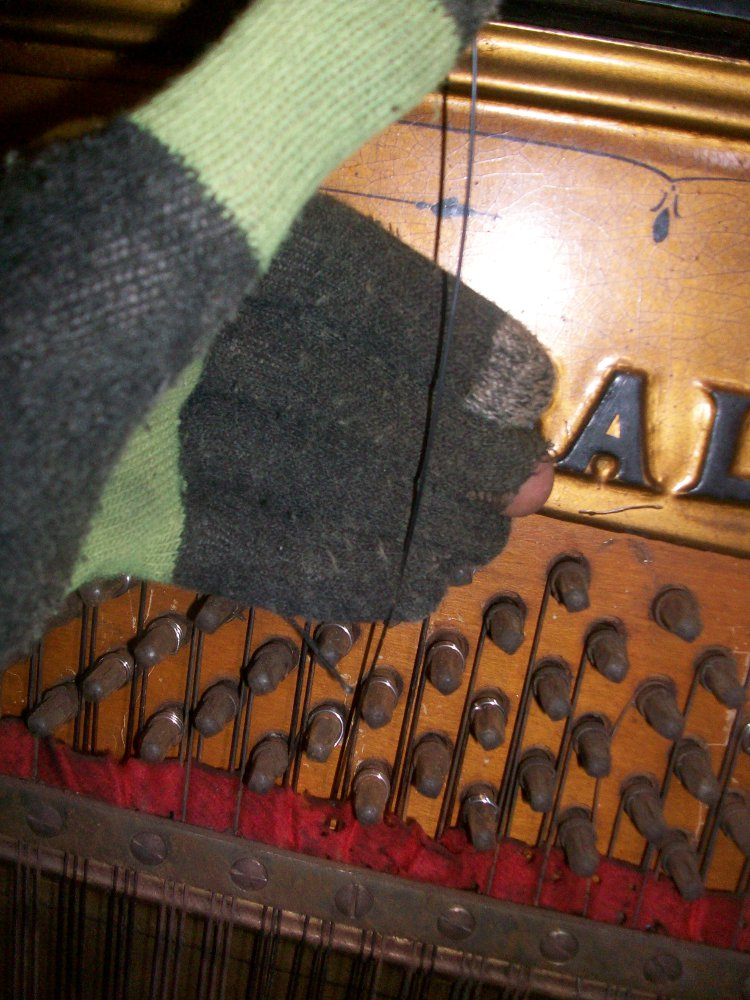
The oils that are produced by most peoples' skin can cause piano wire to rust, so I wear these thin cotton gloves whenever I need to replace strings. I've cut a piece of wire that is long enough to span the distance from the tuning pin to the hitch pin and back plus about 6-8 inches. This is to allow enough room to make the coils on each end, plus a little extra breathing room.
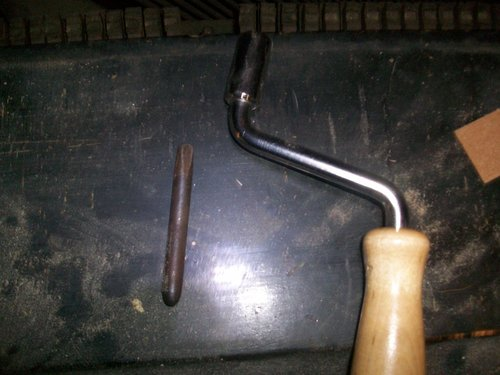
Start by feeding one end of the wire under the v-bar toward the left tuning pin. The next step is to make the first coil. To do this, I use a dummy pin (a normal tuning pin removed from a scrap piano) and a stringing crank. Take the end of the wire that has passed under the v-bar and insert it through the hole in the tuning pin so that the end is flush with the surface of the pin. Make a tight counterclockwise bend (called a "becket") in the wire and use the stringing crank to make two and a half tight coils on the pin.
Pry the becket out of the dummy pin, push the coil onto the left pin, and insert the becket into the tuning pin hole. Pull the other end of the wire down and make a bend around the hitch pin of a bit more than 180 degrees. The wire will spring back a bit and the bend should stick at about 180 degrees. Feed the end of the wire up, under the v-bar again, and past the right tuning pin.
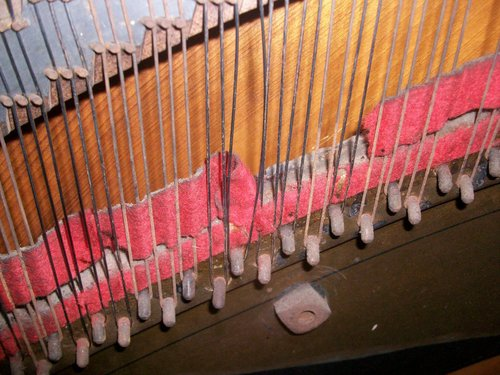
Measure four fingers' length past the right tuning pin and cut the wire. Thread the end of the wire into the dummy pin until flush and make a coil until it is at the same height as the right tuning pin. Remove the coil from the dummy pin, push it onto the tuning pin, and insert the becket into the hole. At this point, make sure the string follows the same path that the strings around it have already established. There are several staggered pins above the hitch pin (called "bridge pins") that the string needs to bend around in a specific way.
Now the pins need to be turned clockwise while keeping the coils tight together on the pin. Tighten the right pin first, alternating between making small turns with a tuning wrench and squeezing the becket into the hole with large pliers. You will also need to pull the coil toward you with a screwdriver or coil lifting tool while tightening the pin, in order to keep gaps from forming between the wraps of the coil. Keep alternating until the pin has almost three full wraps on it, then switch to the left pin where the same process can be repeated. Using a screwdriver, adjust the spacing of the strings just below the v-bar to match the spacing of the strings around it. When both sides of the string are taut, the string replacement is finished and the string can be tuned. New strings need to be tuned several times before they are "stretched" and will hold a tune for any length of time.
Hi! I am a robot. I just upvoted you! I found similar content that readers might be interested in:
https://www.nolapiano.com/blog/2015/1/20/replacing-a-broken-string
Thanks cheetah. That would be my blog that you linked to!
Congratulations! This post has been upvoted from the communal account, @minnowsupport, by rjpeterson from the Minnow Support Project. It's a witness project run by aggroed, ausbitbank, teamsteem, someguy123, neoxian, followbtcnews, and netuoso. The goal is to help Steemit grow by supporting Minnows. Please find us at the Peace, Abundance, and Liberty Network (PALnet) Discord Channel. It's a completely public and open space to all members of the Steemit community who voluntarily choose to be there.
If you would like to delegate to the Minnow Support Project you can do so by clicking on the following links: 50SP, 100SP, 250SP, 500SP, 1000SP, 5000SP.
Be sure to leave at least 50SP undelegated on your account.
Congratulations @rjpeterson! You have completed the following achievement on Steemit and have been rewarded with new badge(s) :
Click on the badge to view your Board of Honor.
If you no longer want to receive notifications, reply to this comment with the word
STOPThanks @steemitboard!
Your post has been supported and upvoted from the Classical Music community on Steemit as it appears to be of interest to our community.
If you enjoy our support of the #classical-music community, please consider a small upvote to help grow the support account!
You can find details about us below.

The classical music community at #classical-music and Discord.
Follow our community accounts @classical-music and @classical-radio.
Follow our curation trail (classical-radio) at SteemAuto or help us out with a delegation!
Thanks @classical-radio! Love your work!
Congratulations @rjpeterson! You have completed the following achievement on Steemit and have been rewarded with new badge(s) :
Click on the badge to view your Board of Honor.
If you no longer want to receive notifications, reply to this comment with the word
STOPSneaky Ninja Attack! You have just been defended with a 9.72% upvote!
I was summoned by @rjpeterson. I have done their bidding and now I will vanish...
woosh
A portion of the proceeds from your bid was used in support of youarehope and tarc.
Abuse Policy
Rules
How to use Sneaky Ninja
How it works
Victim of grumpycat?
Congratulations @rjpeterson! You have completed the following achievement on the Steem blockchain and have been rewarded with new badge(s) :
Click on the badge to view your Board of Honor.
If you no longer want to receive notifications, reply to this comment with the word
STOPDo not miss the last post from @steemitboard:
Congratulations @rjpeterson! You have completed the following achievement on the Steem blockchain and have been rewarded with new badge(s) :
Click on the badge to view your Board of Honor.
If you no longer want to receive notifications, reply to this comment with the word
STOPCongratulations @rjpeterson! You received a personal award!
You can view your badges on your Steem Board and compare to others on the Steem Ranking
Vote for @Steemitboard as a witness to get one more award and increased upvotes!