Tutorial: How to make a Maple Leaf Rose!
Make a folded rose from maple leaves!
In this step-by-step picture-based tutorial, I will show you how to fold a rose from fresh maple leaves. The leaves I used here were from a Japanese Maple, which is known for its brilliant red hues in the autumn, but differently shaped leaves will work as well, and they don't even necessarily need to be maple leaves. I have tried this with sugar maple leaves as well, but they tend to be not as brightly coloured.
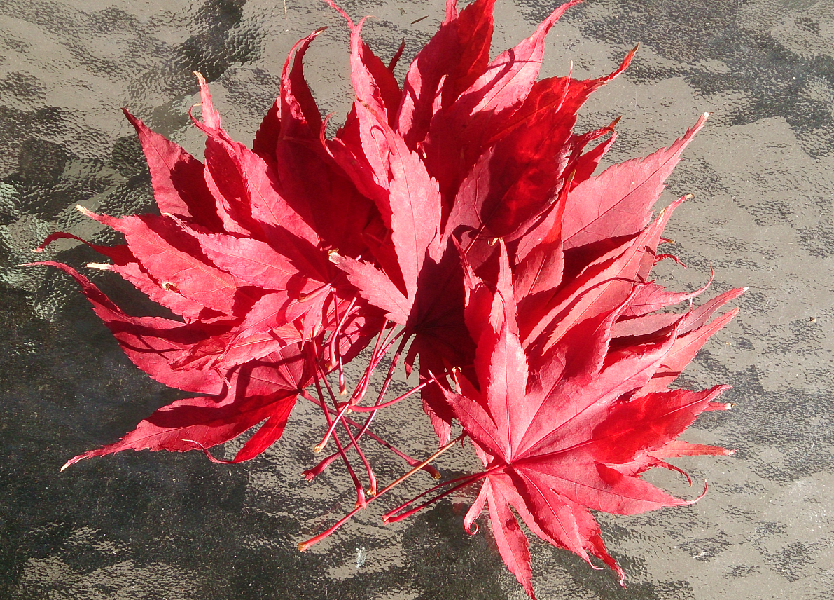
Step 1. Gather some leaves!
You'll need about 8-15 leaves of varying sizes to make one rose, depending on how large you want the rose to be. You will want to gather fresh leaves that are still soft. If the leaf is too dry, you won't be able to fold it without it crumbling apart.
You will also need either a rubber band, some tape, or a bit of wire to hold the leaf together with.
Step 2. Fold the bottom of the leaf gently
Starting with a small-sized leaf, begin by folding the lower part of the leaf upwards. The angle you choose to fold them at can vary. Here, I have folded it at roughly a 60 degree angle, but anywhere from 20 to 60 degrees is fine.
Tip: Make sure to fold the leaf as gently as possible! The leaf is very fragile and will break apart at the crease if you press too hard.
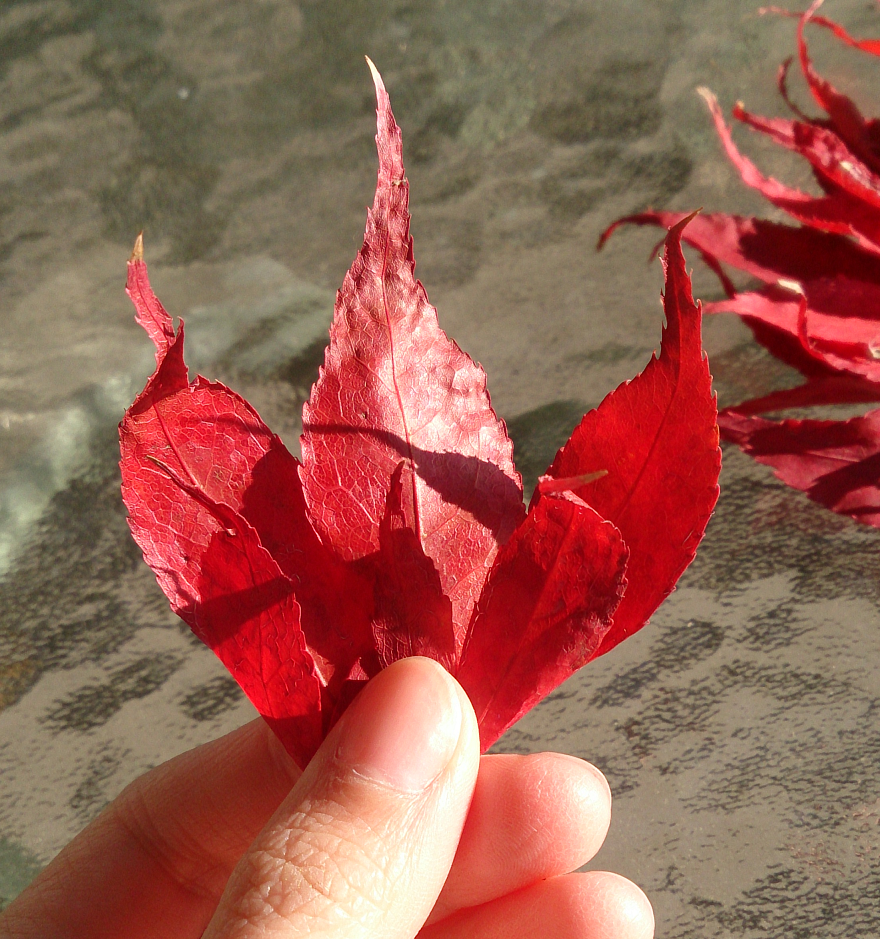
Step 3. Fold the top of the leaf down
Try to fold the top parts of the leaves down into a rounded shape. The final shape of the leaf should be like a diamond!💎
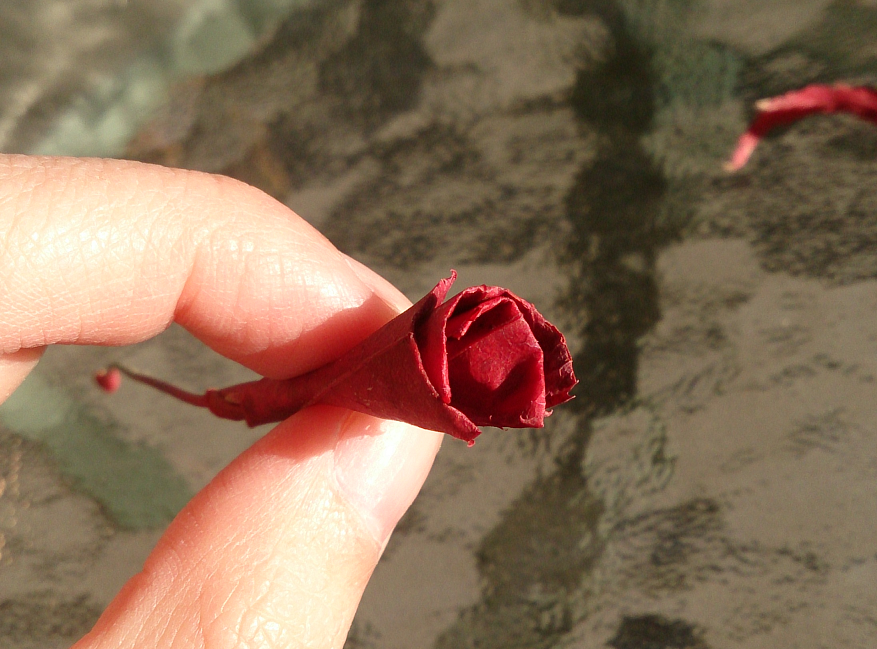
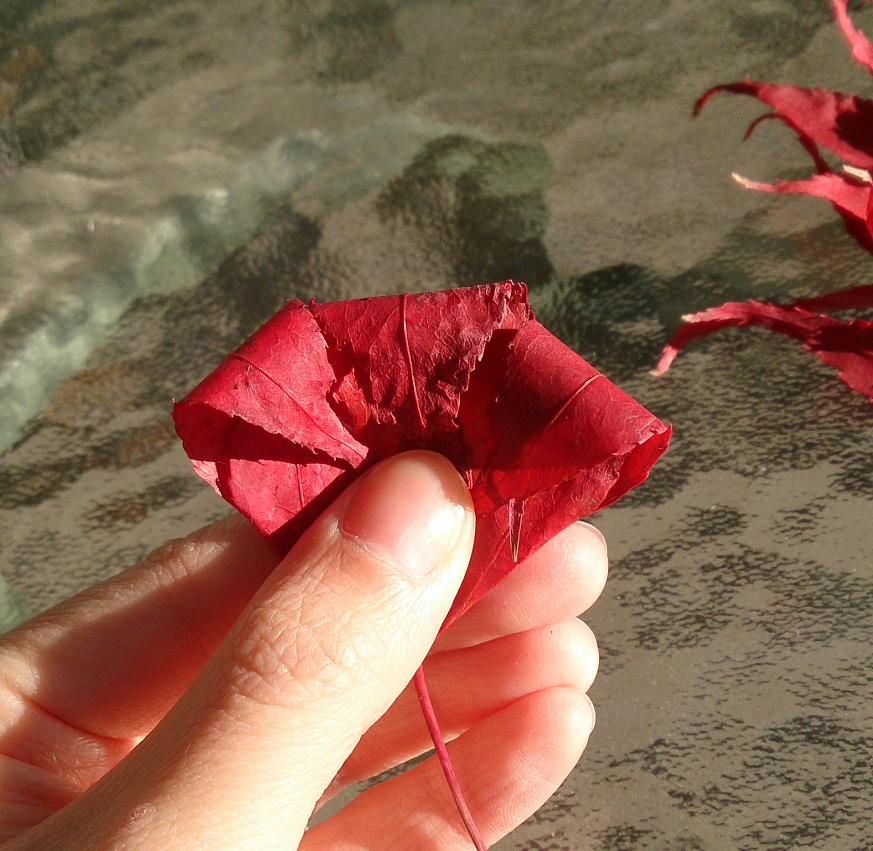
Step 4. Roll the leaf up
As tightly as possible, roll the folded leaf up from one end to the other. This roll will form the the core, or center, of the rose.
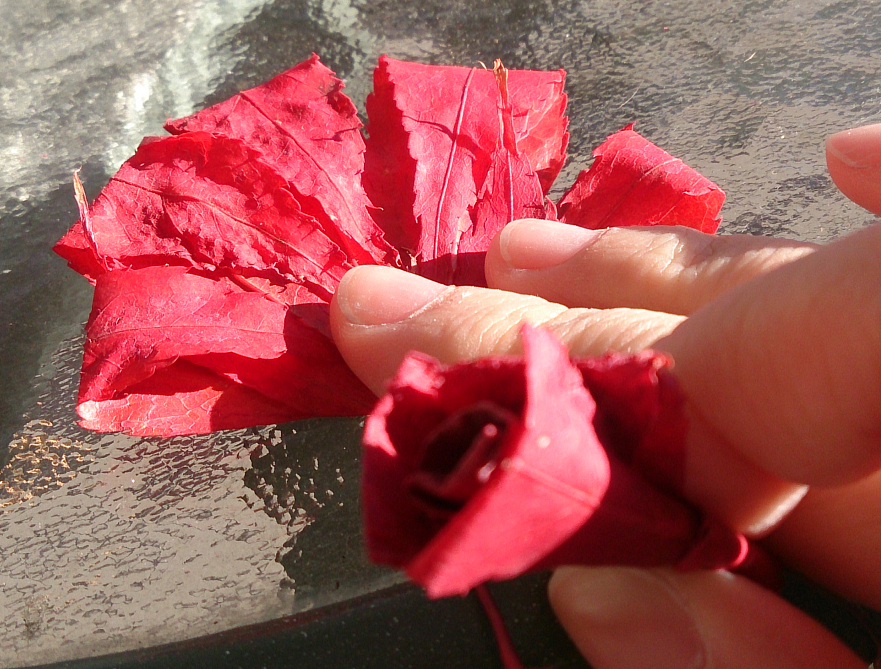
Step 5. Fold more leaves
Fold another leaf without letting the rolled up leaf unwind. The reason why I prefer to fold and roll the leaves as I go along is that the gently folded leaves will not hold their shape if you don't keep them pressed down.
Tip: I used my index finger and thumb to hold the roll, while I folded the leaf with my remaining fingers and my other hand.
Step 6. Wrap the newly folded leaf around the other one
Place the roll on top of the newly folded leaf, and then roll it up as well. Try to alternate where the overlapping parts in the leaves dip, so that the 'petals' formed by each layer will alternate.
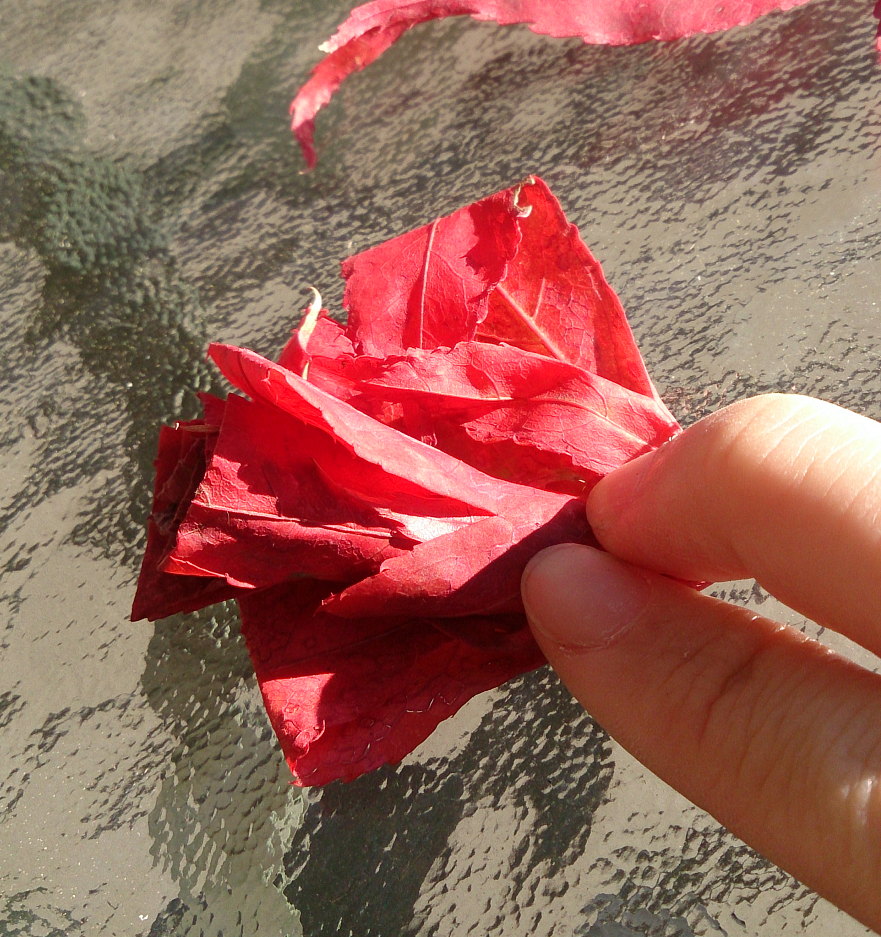
Step 7. Continue adding leaves to the rose
Keep folding and rolling up the leaves around the core of the rose. The more leaves you add, the larger the rose will become.
Tip: At the very end, you can add unfolded leaves to last layer, which adds the leaf tips to the final shape of the rose. Different kinds of leaves will have different leaf tips, resulting in a variety of rose shapes! I particularly like the way these Japanese Maple leaves look.
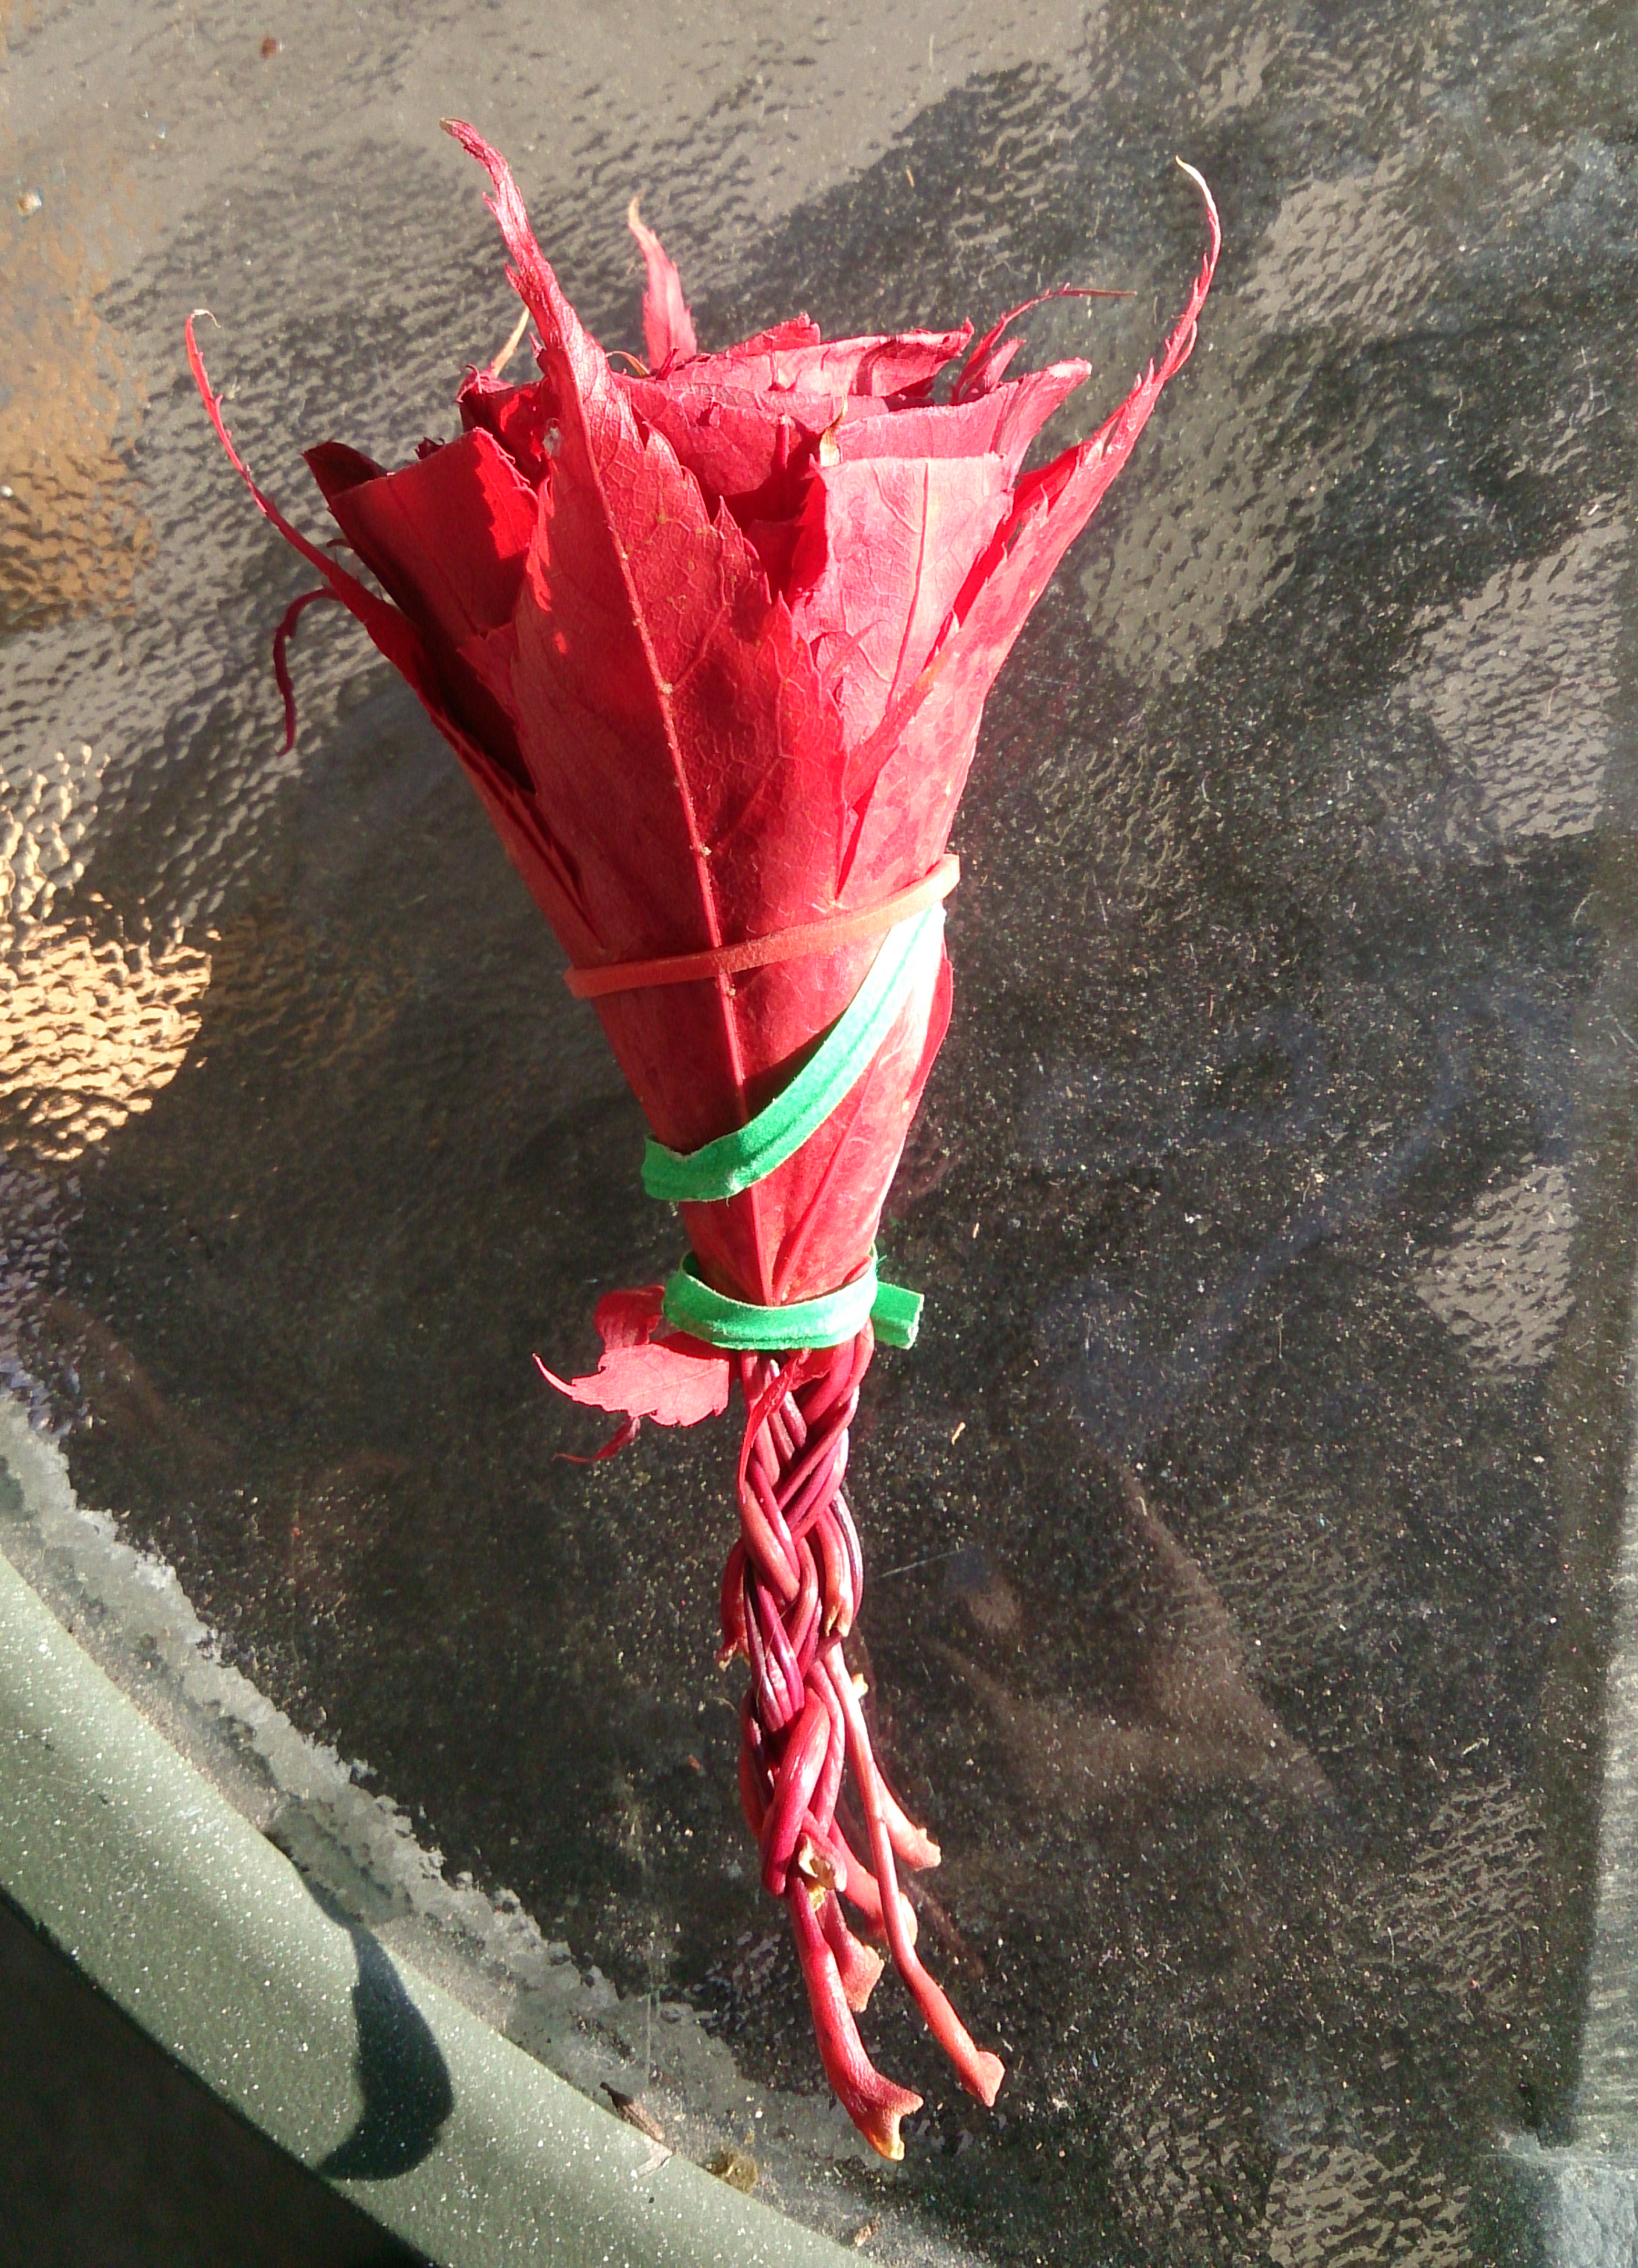
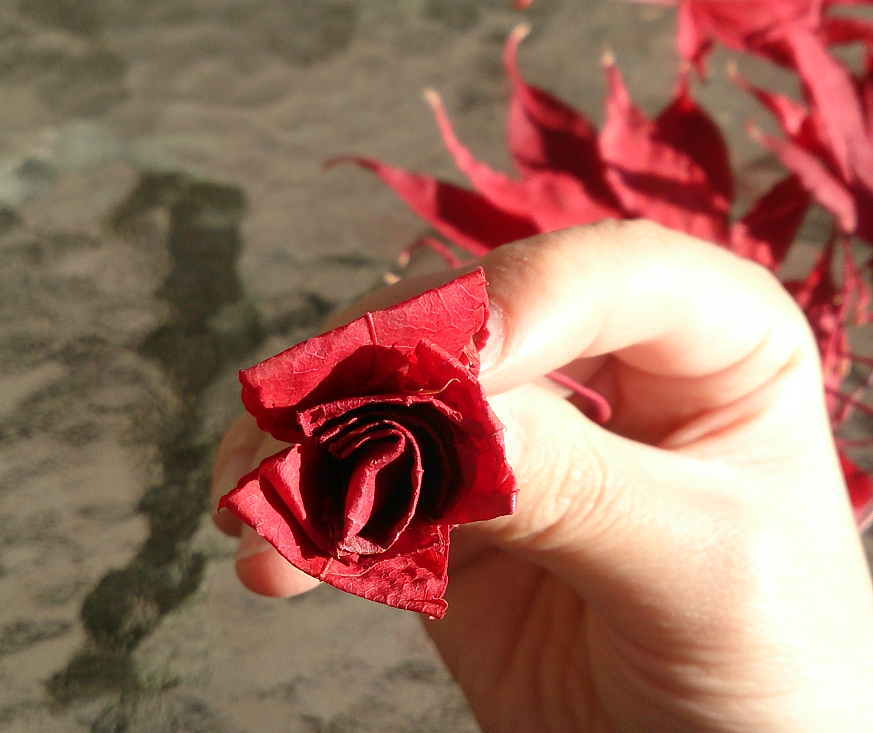
Step 8. Bind the rose to keep it from unraveling
Using a rubber band or a bit of wire, gently bind the leaves together. Then, you can either braid the stems together as I have done here, or use a bit of tape or wire to keep the stems together. A good type of wire to use is florist's wire, which is very thin, and is normally green. I just used a twist-tie from the grocery store here, because I am planning on drying the rose, and once the rose is dry it will hold its shape naturally.
Tip: If you want to use the freshly folded rose for anything, you will want to only bind the lower part of the roll, and avoid using any colours that stand out too much compared to the leaves themselves.
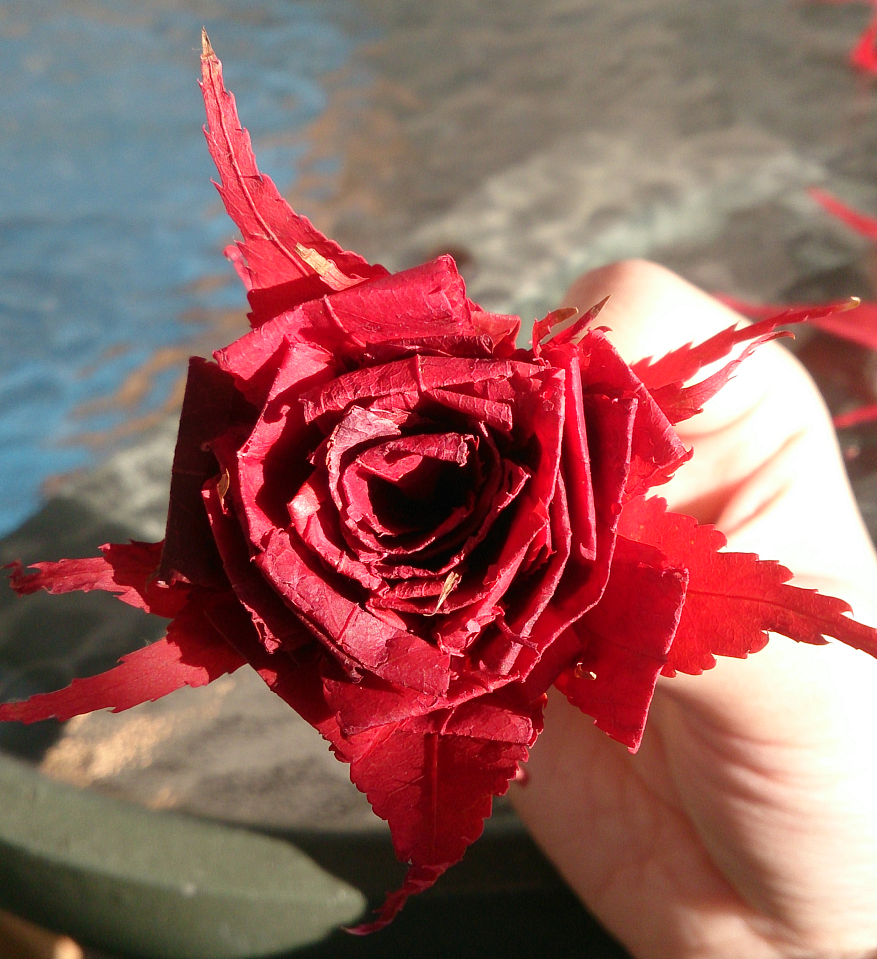
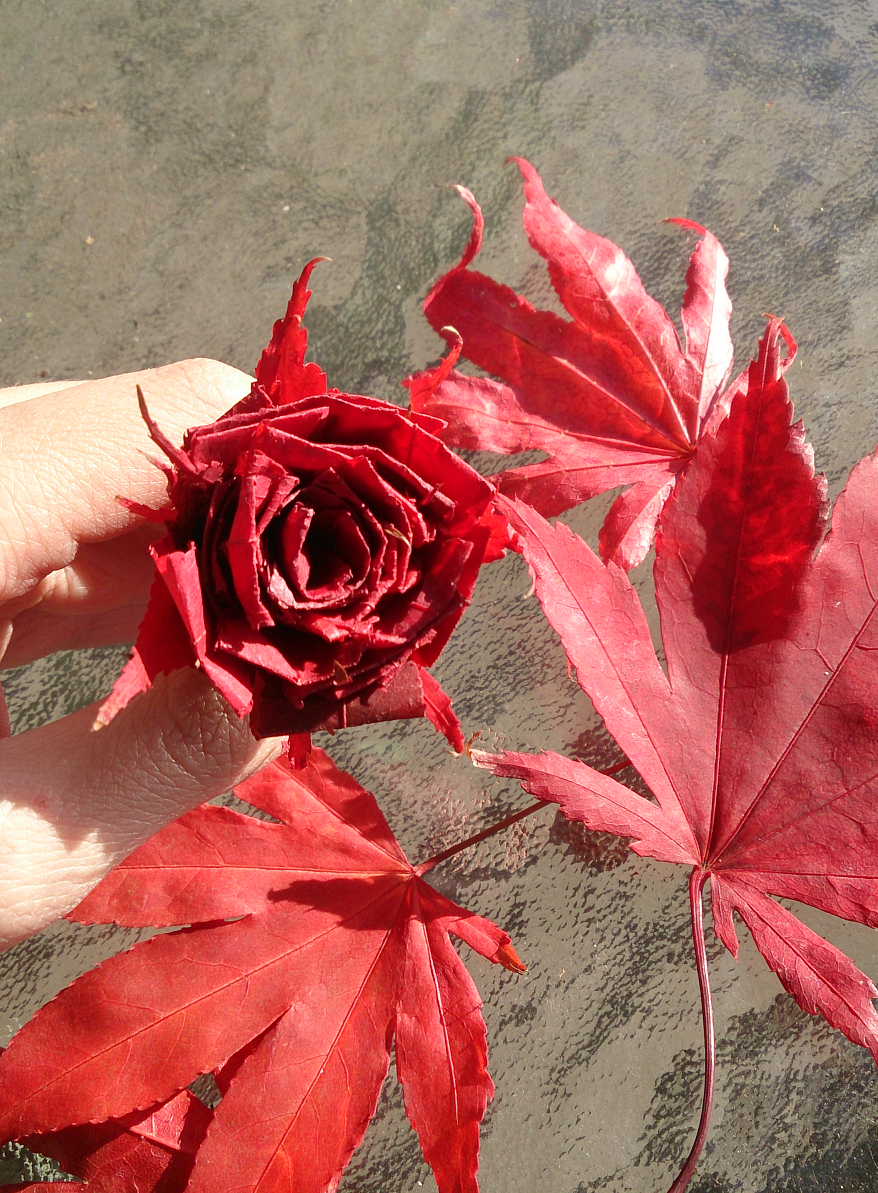
The completed rose!
Congratulations, you're done! It's really quite simple, isn't it? I like to dry these by hanging them upside down for a few days. I plan on folding a bunch of them and then displaying them in a vase with some branches and dried flowers. They do lose a bit of their colour once dried, but are still very lovely.
Edit: Thank you everyone for your support! I'll be making more arts and crafts related tutorials soon, so feel free to follow me if you're interested!
~Mel.
Nice tutorial !
I saw you do origami too.
If you do a tutorial on how to make a rose like that in
origami it would be awesome ! :)
Thank you! I do plan on making origami tutorials soon! I just need to get a stand for my camera. 😅
Looks so gorgeous !!!!! Wonderful nature
Thank you!
Nice Tutorial
Thank you!
Very cool!! Beautiful!
@meliorish Nice! Can't wait to give this a try :) Best wishes.
This is outstanding!
these are so beautiful!!
Thanks!
I live in the eastern US and we are right in the middle of LEAF Season! I love this. I hike and backpack a lot and i love this time of year. Seeing all the reds, yellows, and purples I want to just keep them all. Typically I just take pictures and bring home the occasional awesome rock or something I see. This is a great idea. NOW i have a reason to pick up some leaves! Cant wait to try it out.
I know what you mean! Autumn is always really beautiful where I live, and every year I get the urge to try to preserve a little bit of that colour and splendor.
Congratulations! This post has been upvoted from the communal account, @minnowsupport, by sk from the Minnow Support Project. It's a witness project run by aggroed, ausbitbank, teamsteem, theprophet0, someguy123, neoxian, followbtcnews/crimsonclad, and netuoso. The goal is to help Steemit grow by supporting Minnows and creating a social network. Please find us in the Peace, Abundance, and Liberty Network (PALnet) Discord Channel. It's a completely public and open space to all members of the Steemit community who voluntarily choose to be there.
Congratulations @meliorish! You have completed some achievement on Steemit and have been rewarded with new badge(s) :
Click on any badge to view your own Board of Honor on SteemitBoard.
For more information about SteemitBoard, click here
If you no longer want to receive notifications, reply to this comment with the word
STOP