SLC21W2 | Tracing the base pattern of the shirt 👚|Class 2
Greetings and welcome to my blog. Thank you @lunasilver for this enlightening class. Today am writing on how I make the back pattern of my models shirt.
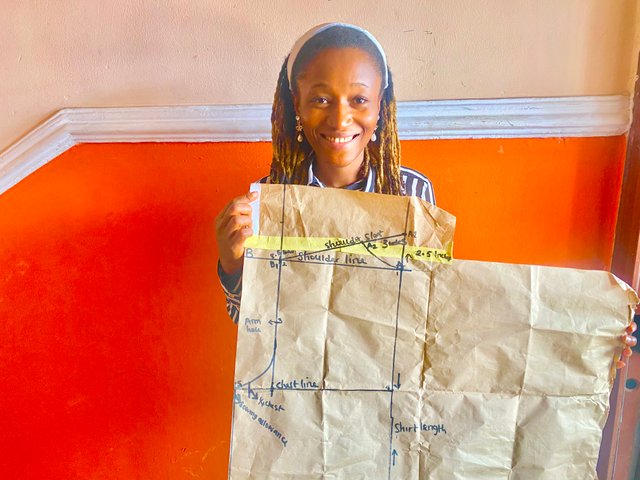
Our measurements and pattern over here in my country differ slightly but what matters is that we get what we want. From my last assignment in the last module, I expand on this.
Describe how you made the layout of the back of the men's shirt. |
|---|
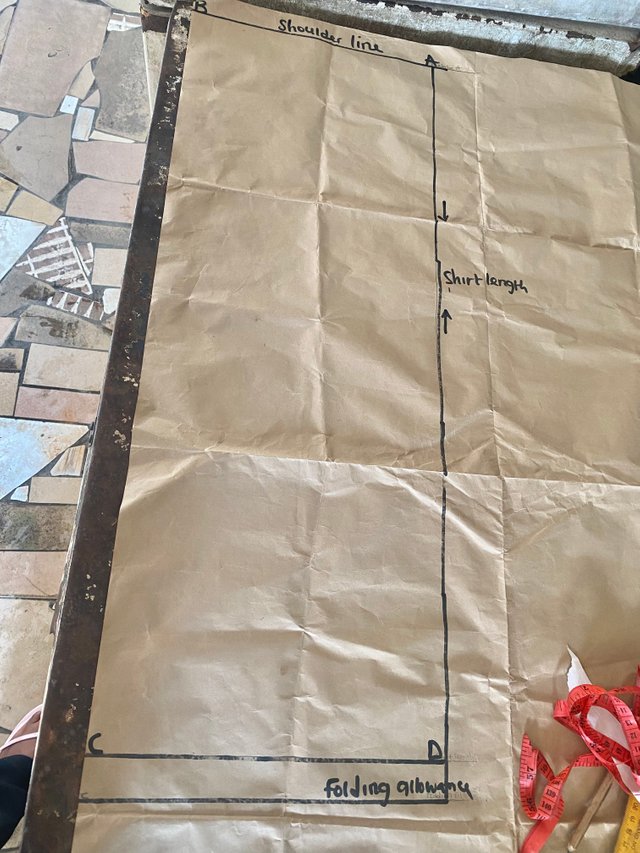
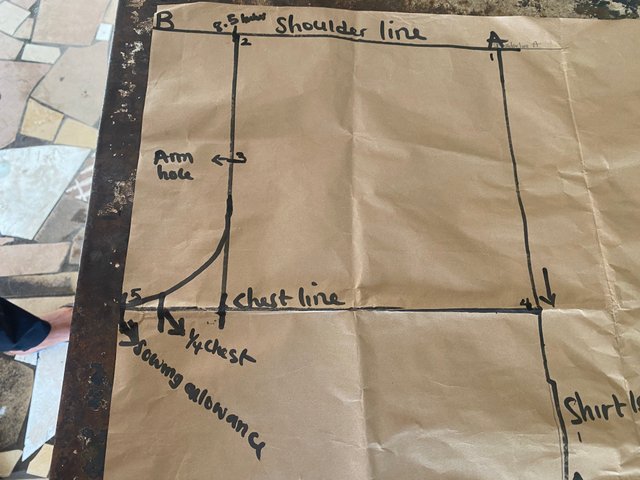
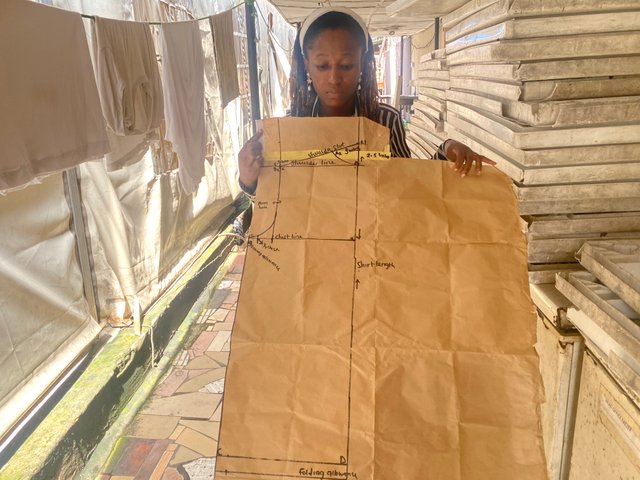
Step 1: I drew a horizontal line which serves as my shoulder line from point A-B which is 17 inches and from point B to C is my shirt length which is 29 inches and joining to D to get my box. From point A-D is my shirt length + 1 inch folding allowance.
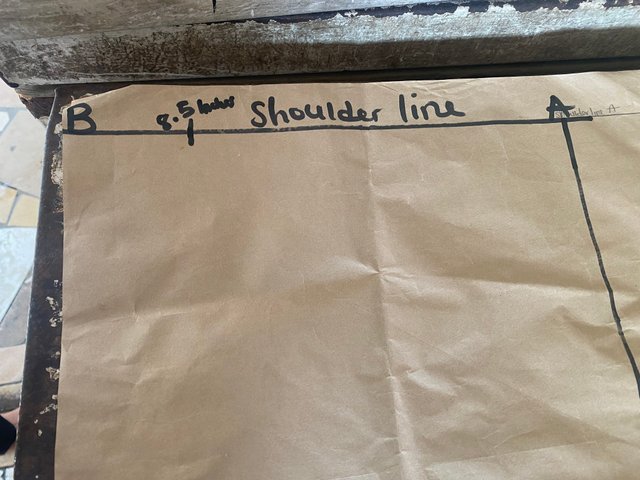
Step 2: From point A-B, I measured the shoulder 17/2= 8.5inches.
Step 3: I measured the half of the shoulder as chest line which is 8.5 inches. Measure 1/4 of the chest on the chest line + 1 inch for sewing allowance.
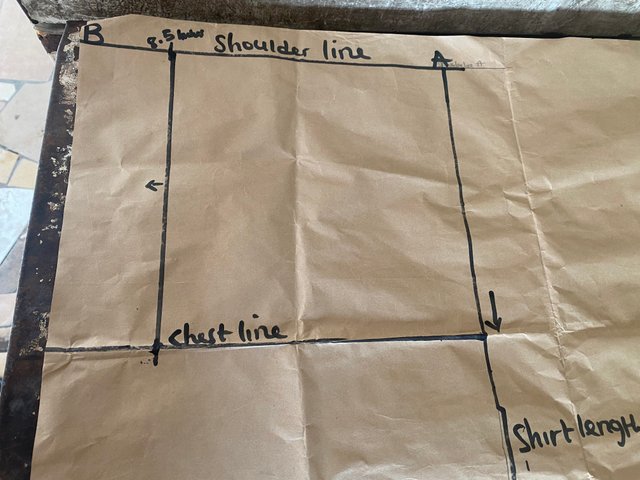
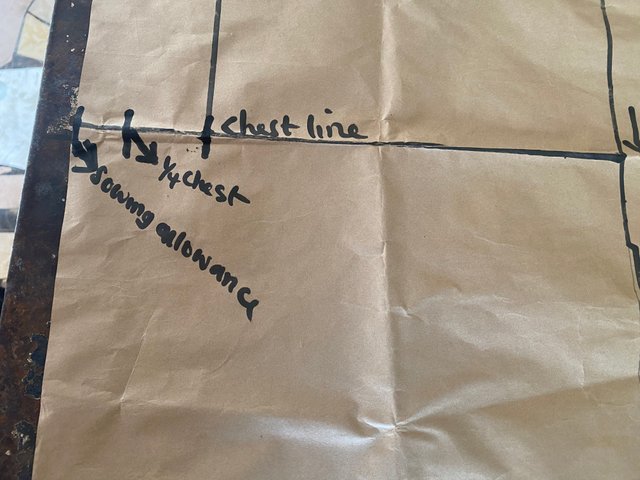
Step 4: For the arm hole, divide the arm hole line into 1/2 and use French curve to connect from the half inch of the arm hole line to the sewing allowance on the chest line from point 3 to 5.
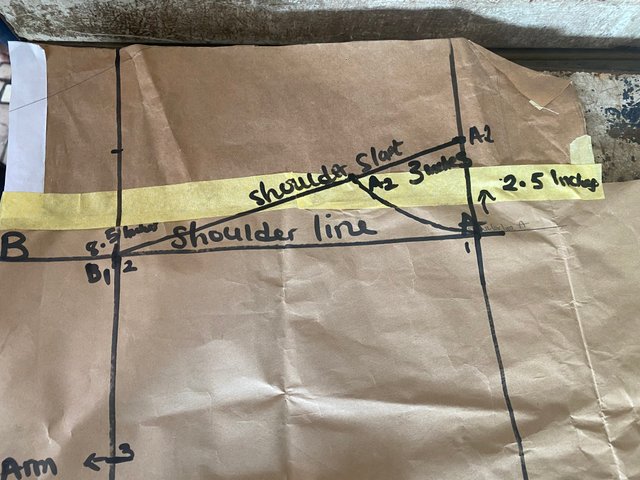
Step 5: For shoulder slant, I attached an extra paper and went up by 2 and 1/2 inches to get my shoulder slant. To get the shoulder slant, I connected point A1 to point B1. For the neck, connect point A2 to point A.
My entire patter layout
Research the types of collars used in men's shirts. Draw the one you would like to use on your model's shirt. |
|---|
There are different types of collars used in men’s shirt and some of them includes:
Straight point collars: These are very popular and widely used on settings that are both formal and informal. This type of collar has a small gap in between the collar points and can be worn with or without a tie.
Spread collars: The gap in beteeen the collar points are wider and these have collars points that are shorter than straight point collars. This type of collar is good for people with long face and is used in wearing larger ties.
Button down collars: This type of collar has buttons on both collar points which keeps the buttons down and they can be made invisible or visible. It’s good for people with round faces.
Band collars: These are also called collarless collars. They do not fold and also do not have band collars. This comes in handy in hot weather and can have a top button or not.
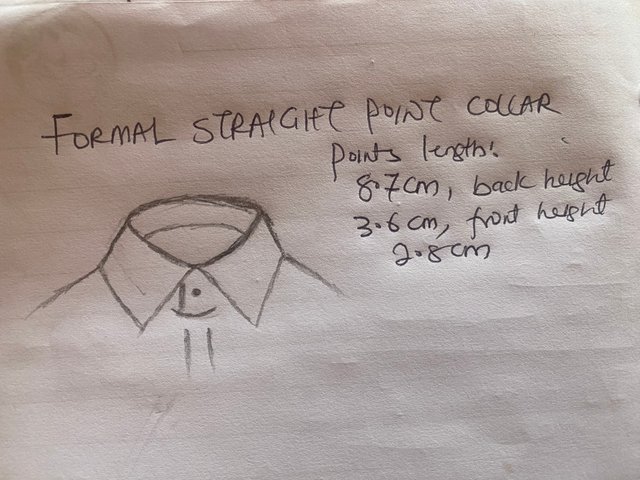
Formal straight point collar: This type of collar is recommended for those that want a collar that is noticeable and for those with long necks . There’s an updated version of this that has short points and looks triendier and can be worn with or without a tie.
The small straight point collar: This is a trendy and youthful type with short points. It’s better worn with a narrow tie or just open. The points length is about 5.5cm with a front height of 2.6cm and back height of 3cm.
High band straight point collar: This has ann Bbm points length of about 8.5cm, front height of about 3cm and back height 3.8cm. It’s better worn without a tie and it’s also trendy.
There are other types of collars too such as club collar, tab collar, high straight point collar with two buttons, narrow straight point collar, classic collar l, wing collars and etc
The collar I want to make for my model is the formal straight point collar and below is the diagram.
Thank you for reading through. I ask @juliusinimotimi, @divinelife and @wendy50 to join this learning challenge.
Uff son muchas propuestas de cuellos, todas me encantan, son un reto mas a superar, suerte
Me has dejado impresionada con la descripción de los tipos de cuello, es información interesante que me hace querer indagar a un más de manera que pueda lograr distinguirlos y recomendar el más a apropiado según el caballero y la ocasión.