Long exposure photography. What settings and gear I use. Multiple photos inside!
Dear fellow Steemians.
Today no travel blog. Today I want to show you some of my longer exposure photos, tell a bit about the gear and settings I use, in the hope it will passionate people to grab there camera and go out there.
Personally I love long exposure photo’s because they can show you things you cannot see with your own eyes. For example this photo I took of the Fuego volcano in Guatemala.

ISO 200 | 55 mm | F 8.0 | 25 sec
I took a lot of these pictures because my remote broke down that day, so I had to time the eruptions with the shutter delay function. But I ended up with a couple of very nice shots like the one above. The long light trails rolling of the mountain is an example of what I meant by things we cannot see with our own eyes. Same goes for water. If you take a long exposure photo it will start to appear almost as a misty flow. Like in this picture:
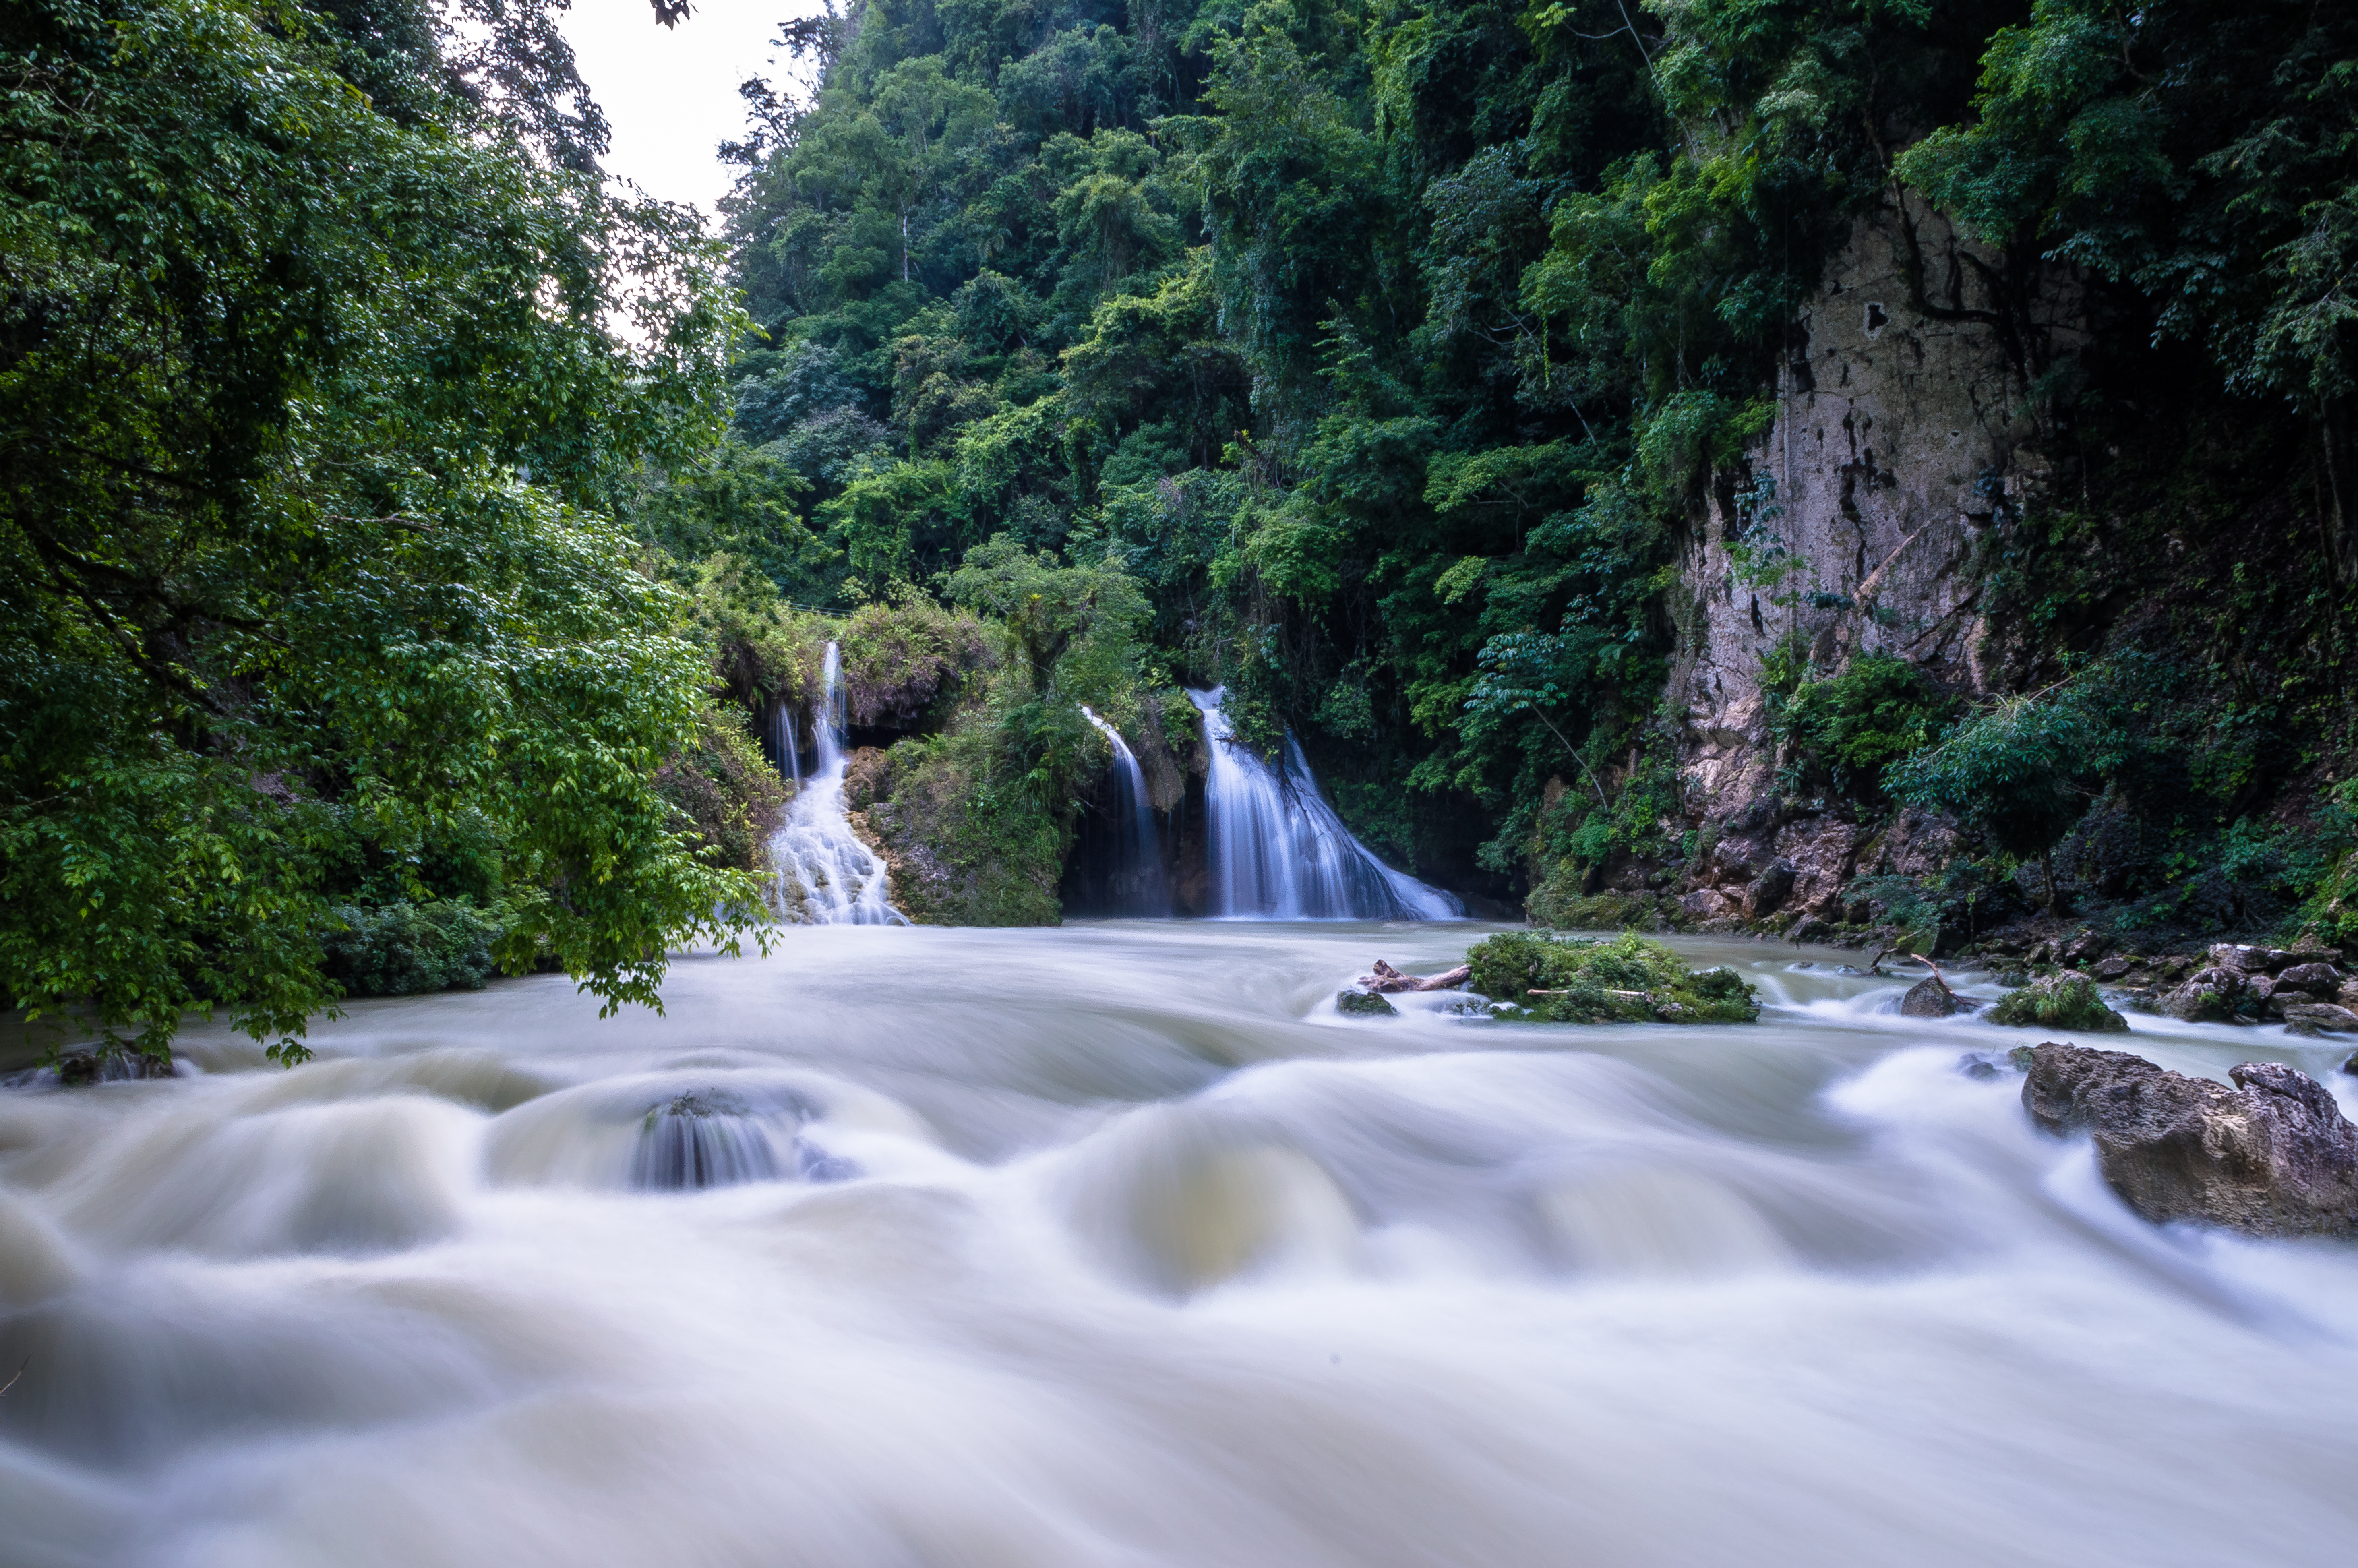
Semuc Champey Guatemala
ISO 100 | 18 mm | F 22 | 4 sec
Or this picture that I took at the Sulphur natural baths of Bagni di San Filippo in Italy.

ISO 100 | 18 mm | F 22 | 2 sec
Three examples of why I love long exposure photography.
Settings I use
To get a long exposure photo, the trick is in decrease your shutter time. One thing is for sure, it’s easier to make a long exposure photo when it’s dark than during the day. During daylight, most of the time your camera won’t even consider offering you a shutter time that is lower than let’s say: 1/80 or 1/60 of a second. By far not long enough to get a nice result. I shoot almost all my photo’s in the A (Aperture) mode (Nikon). In this mode I choose the desired F number and the camera will come up with a matching shutter time. Here are some settings that might help you lowering down the shutter time:
ISO
Go for the lowest ISO. ISO is the light sensitivity of your camera. The higher the ISO the more sensitive the camera will be for light sources i.e. the higher your shutter time will be because the camera needs less light to take the shot. So when you have a situation where you have a limited amount of light, for example inside a building, a higher ISO may help you to take a proper (sharp) picture. The disadvantage is that a higher ISO will, from a certain point, start to add grain to your photo. Normally (depending on your camera) I would avoid taking pictures with an ISO higher than 800 or 1600, unless you have no choice. But as I mentioned before, if you want to decrease your shutter time, lower the ISO.F number.
Turning up the F number will close your aperture and through a smaller aperture fits less light i.e. the sensor needs more time to collect enough light to make a decent picture i.e. it will lower the shutter time to get more time. I’ve learned over the years to avoid turning the F number higher than let's say F 22, because it will affect the overall quality of your picture. The maximum and minimum F number you can choose depends of the chosen focal point of your objective.Exposure compensation.
Normally I take my photos with a little compensation of -/- 0.3. A negative compensation will increase your shutter time whilst a positive compensation will decrease it.
These are the basic settings you can tweak to get achieve some nice results.
Of course you can also use the S (shutter) mode on your camera and set the shutter time you desire. The camera will then look for a matching F number. But I personally like to work the other way around.
Gear I use
Some simple basic gear can help a lot, for instance:
Grey Filter
It doesn’t necessarily require a (D)SLR camera to make long exposure photos. However it does come with some advantages. For instance, the use of filters. When I want to make a long exposure photo during the day, I use a ND filter. This grey filter is added in front of your objective and will make it possible to decrease your shutter time. The filter I use for example will lower it with 8 steps. So where I would have to coop with a shutter time of 1/1000 sec during the day, with the filter attached it will be reduced 8 steps to 1/4 of a sec. This will help a lot if you want to make a long exposure photo during the dayTripod
Essential for making long exposure photos because it is almost impossible to take such pictures with your hands. A rule of thumb is usually that your focal point is the lowest shutter time you can achieve when shooting without a tripod. For instance if your focal point is 200 mm, try not to go lower than 1/200 sec. Depending on the person, try to avoid shooting with a shutter time lower than 1/60 without the use of a tripod.Remote
The use of a remote will eliminate any movement the camera makes when you press the shutter button. I just use a simple wired remote that just cost me around 15 Euro’s. It’s descend and does the job (although after some years it did fail on me). Another good thing is that you can use BULB mode with a remote. BULB means that the shutter time will be equal to the time you hold the shutter button (available if you select the Manual mode on your camera). So buy a remote that has a lock mode. This way you can lock the shutter button on the remote and just release it when you think it’s time. This way you can achieve shutter times of 15 minutes or an hour etc. where normal camera settings are mostly limited till 30 or 60 seconds.
Here some more long exposure pics I took over the years.
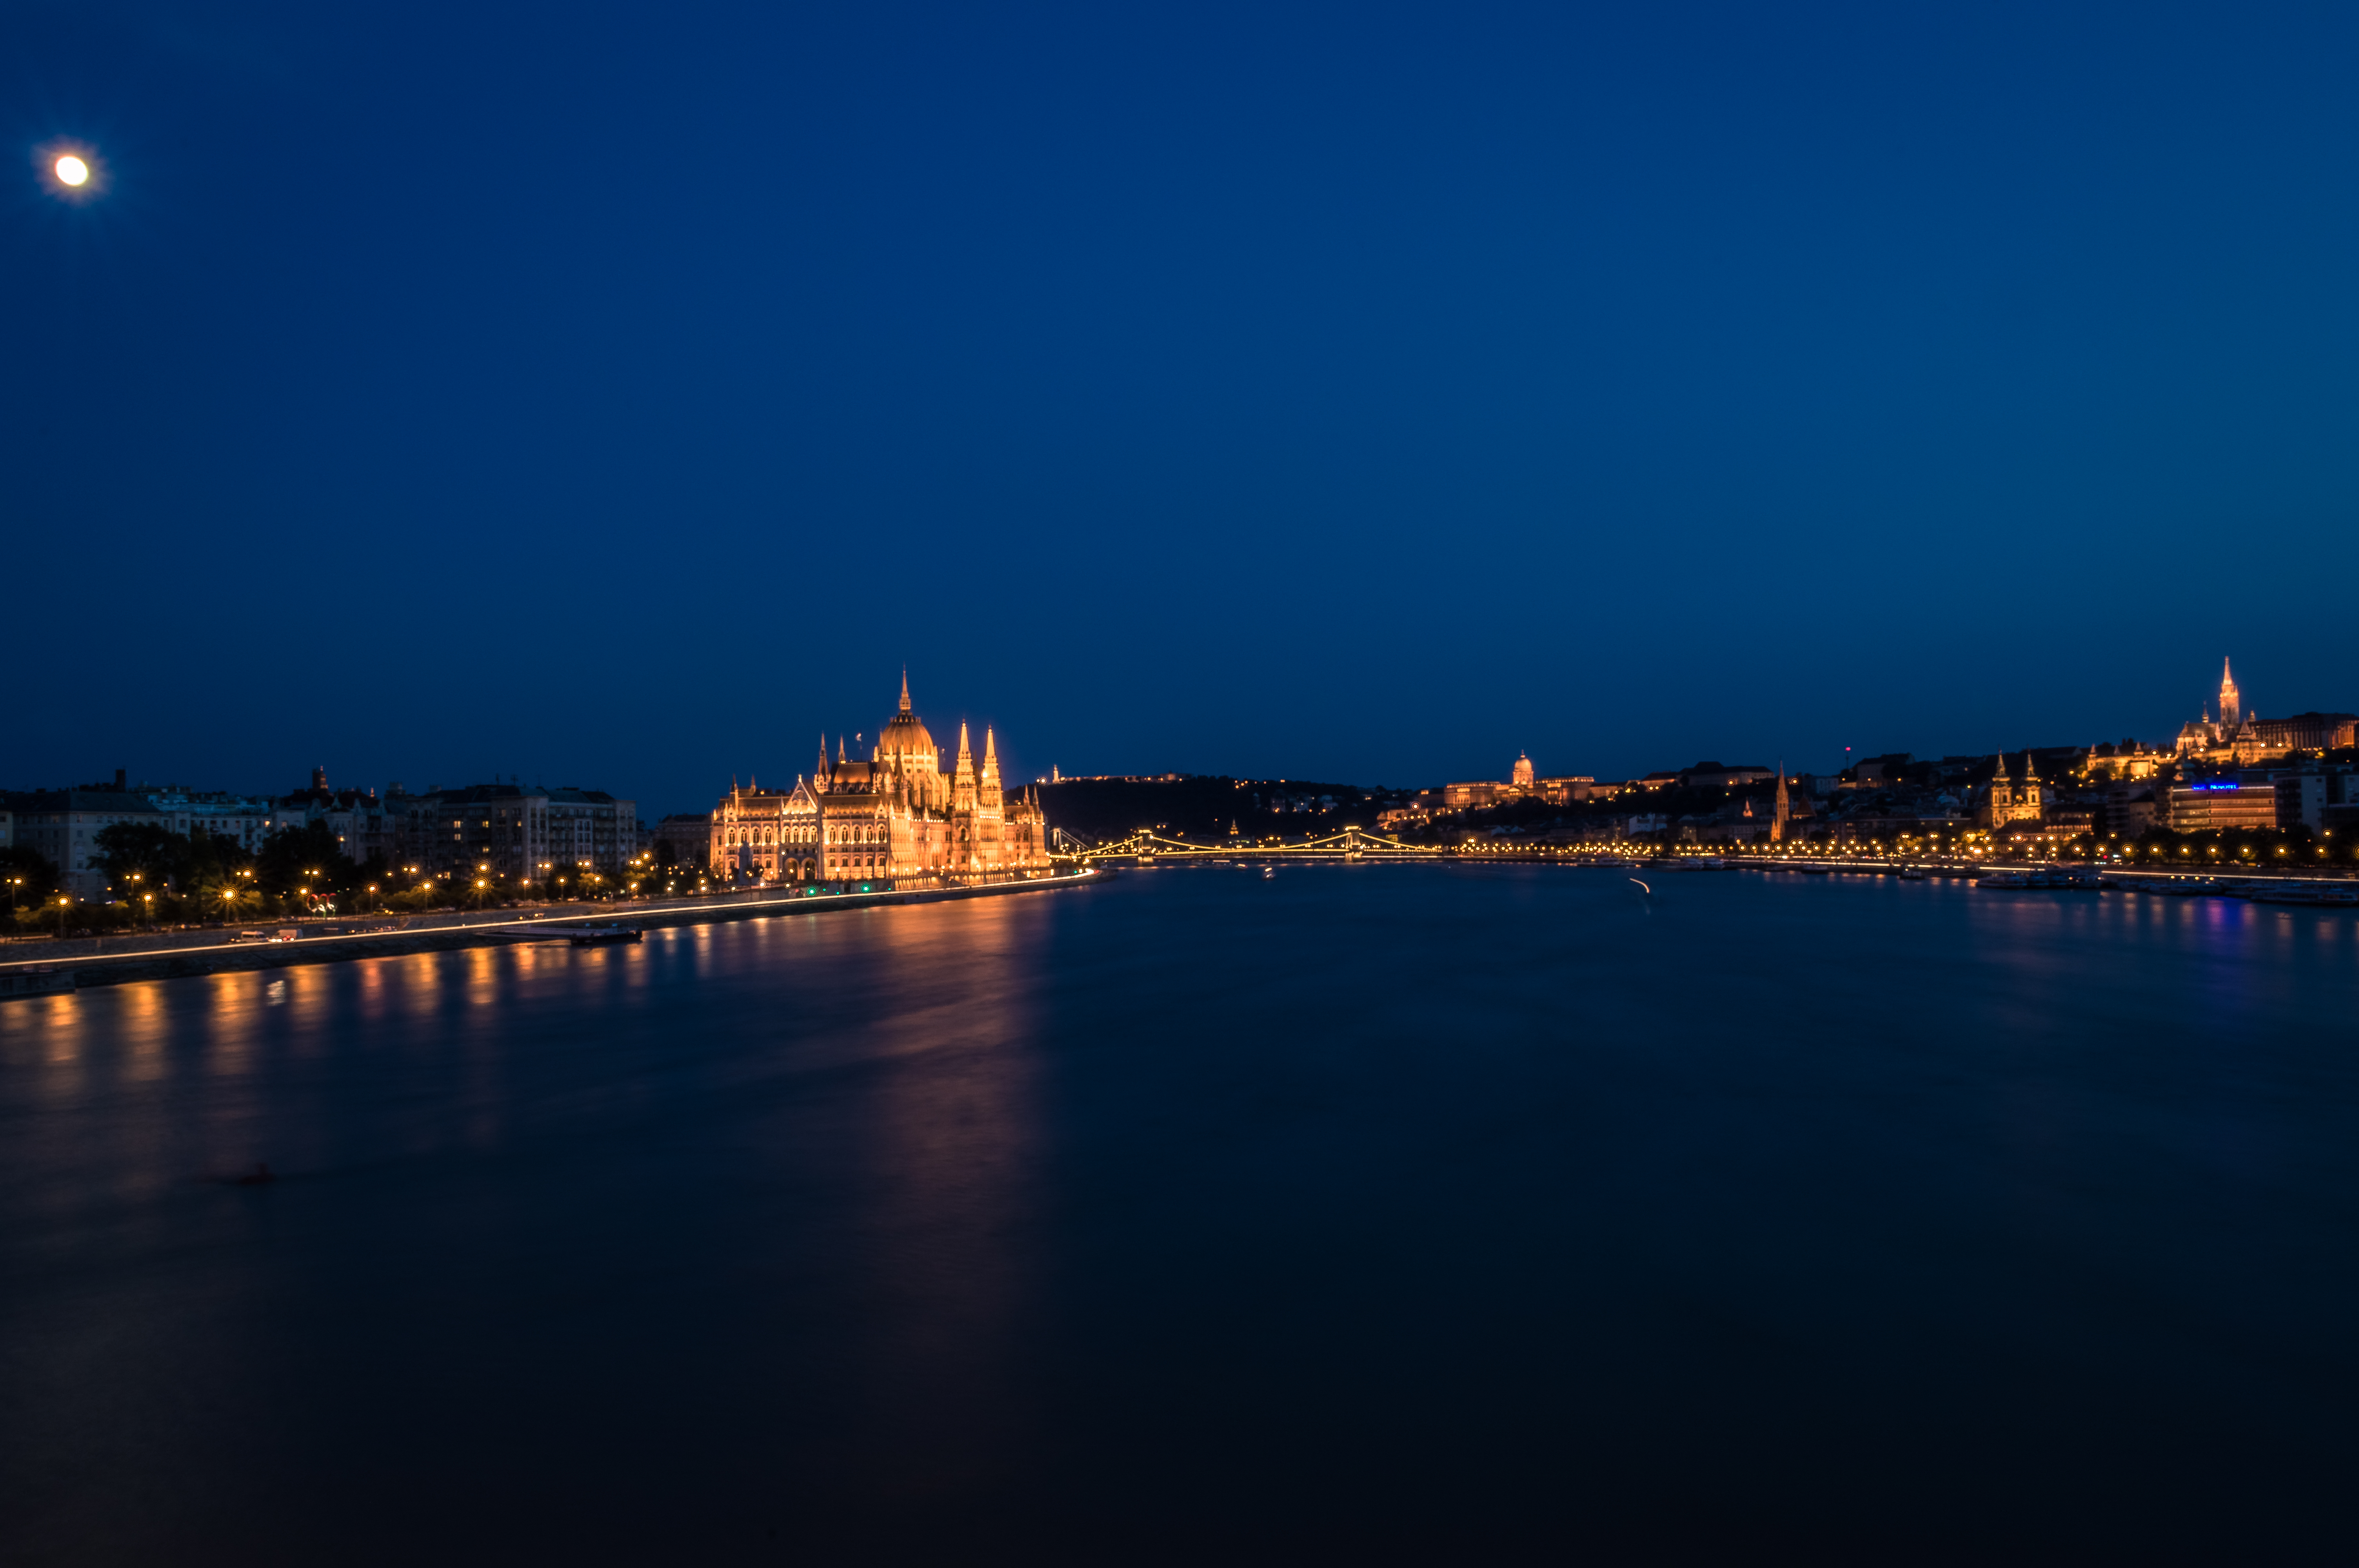
Parlement (Orszaghaz) Budapest
ISO 100 | 18 mm | F 22 | 30 sec

Dray Sap waterfall near Buon Ma Thuot in Vietnam
ISO 100 | 18 mm | F 22 | 1/6 sec

Ouzoud waterfalls Morocco
ISO 100 | 46 mm | F 20 | 0,6 sec
I post process most of my photos in Lightroom.
Hopefully my post gave you some insight in how to make long exposure photos. If you have any question about my photos or techniques (post and/or pre), feel free to put a comment down below. If you enjoyed my post please consider upvoting my work and feel free to follow me!
Cheers Stephan
@originalworks
The @OriginalWorks bot has determined this post by @steef-05 to be original material and upvoted it!
To call @OriginalWorks, simply reply to any post with @originalworks or !originalworks in your message!
Man - that volcano shot is amazing! When I went to the Ouzoud falls it was barely more than a trickle. Nice work.
Thanks. I have a lot of volcano pictures. But because I had to manually focus, sadly not all of them are sharp.
Sounds a bit of a disappointment then, the Ouzoud for you. I mean we had the mud show, but at least the water came down with some force ;)
Thanks for directing me to this post from your other one. You wrote a very detailed post about the technique. Well done! I used to do a lot of long exposure shots back in the day when I was using a 4x5 large format camera. Everything was totally manual of course back then. A couple of years ago when I was back in Scotland I went chasing The Northern Lights, but only had a flimsy tripod. I didn’t think I had captured anything, because all I saw was a faint glow in the sky, but when going through a file from that year a couple of weeks ago and processing it in Adobe Raw, I was amazed to see that there was something there! Not enough to be a spectacular Northern Lights shot , but still maybe something I could write a post about!