Light setup breakdown
I've been asked by a lot of people on social media to write a breakdown on how I achieved this photo.
Lights & Camera
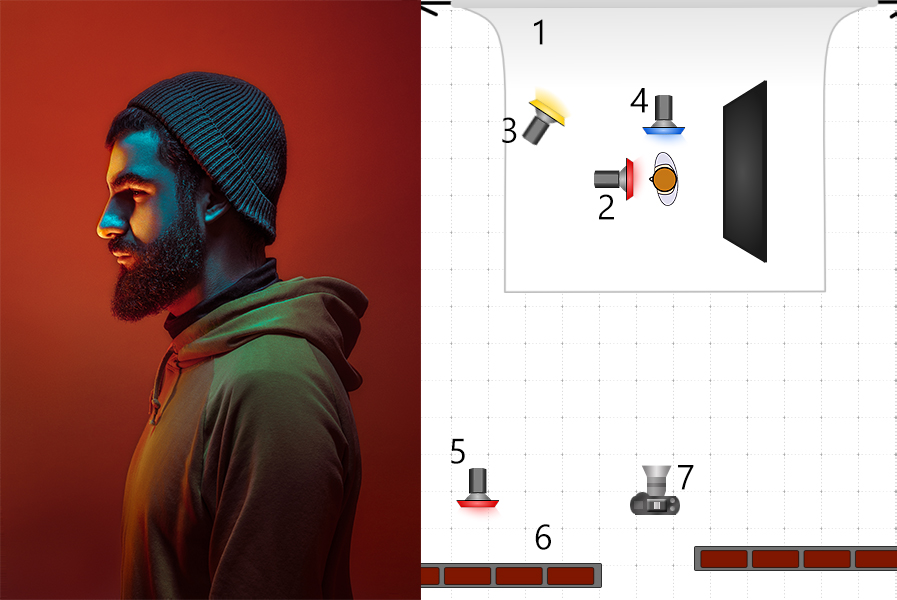
I use a white wall as a background for most of my photos. By controlling the light a white wall can become any color you want, even black.
This is key light in this photo. Was gelled red and placed under my models face pointing upwards towards him
This is the second light and was fired upwards too and gelled orange but from above my models head and it served 2 purposes. The reflection from the ceiling will give me color on the background and the light spill from it will act as a contour light on his face giving me nice separation from the background
This light was placed inside a 80cm octobox (thats 32" for my american friends) and was positioned right above my model gelled in with green-cyan. This one acts at a fil light but at the same time it helps me with some shadows and the pleasant look of the key light coming from above not from underneath .
And finally the last light acted bot as a master for all of my lights and as a soft fill light that would balance out the greenish overhead one. it was fired against a wall (#6) to make it softer and to reduce its power
Just another white wall used as a reflector
Lastly I used an 80-200 lens on my Nikon D7000 that's the equivalent of a 120mm lens on a full frame.
My settings are quite basic for studio work ISO 100 for best image quality, 1/250 as this is my maximum sync speed, and and f/9. The aperture being the only way to control exposure in this kind of environment.
Post processing
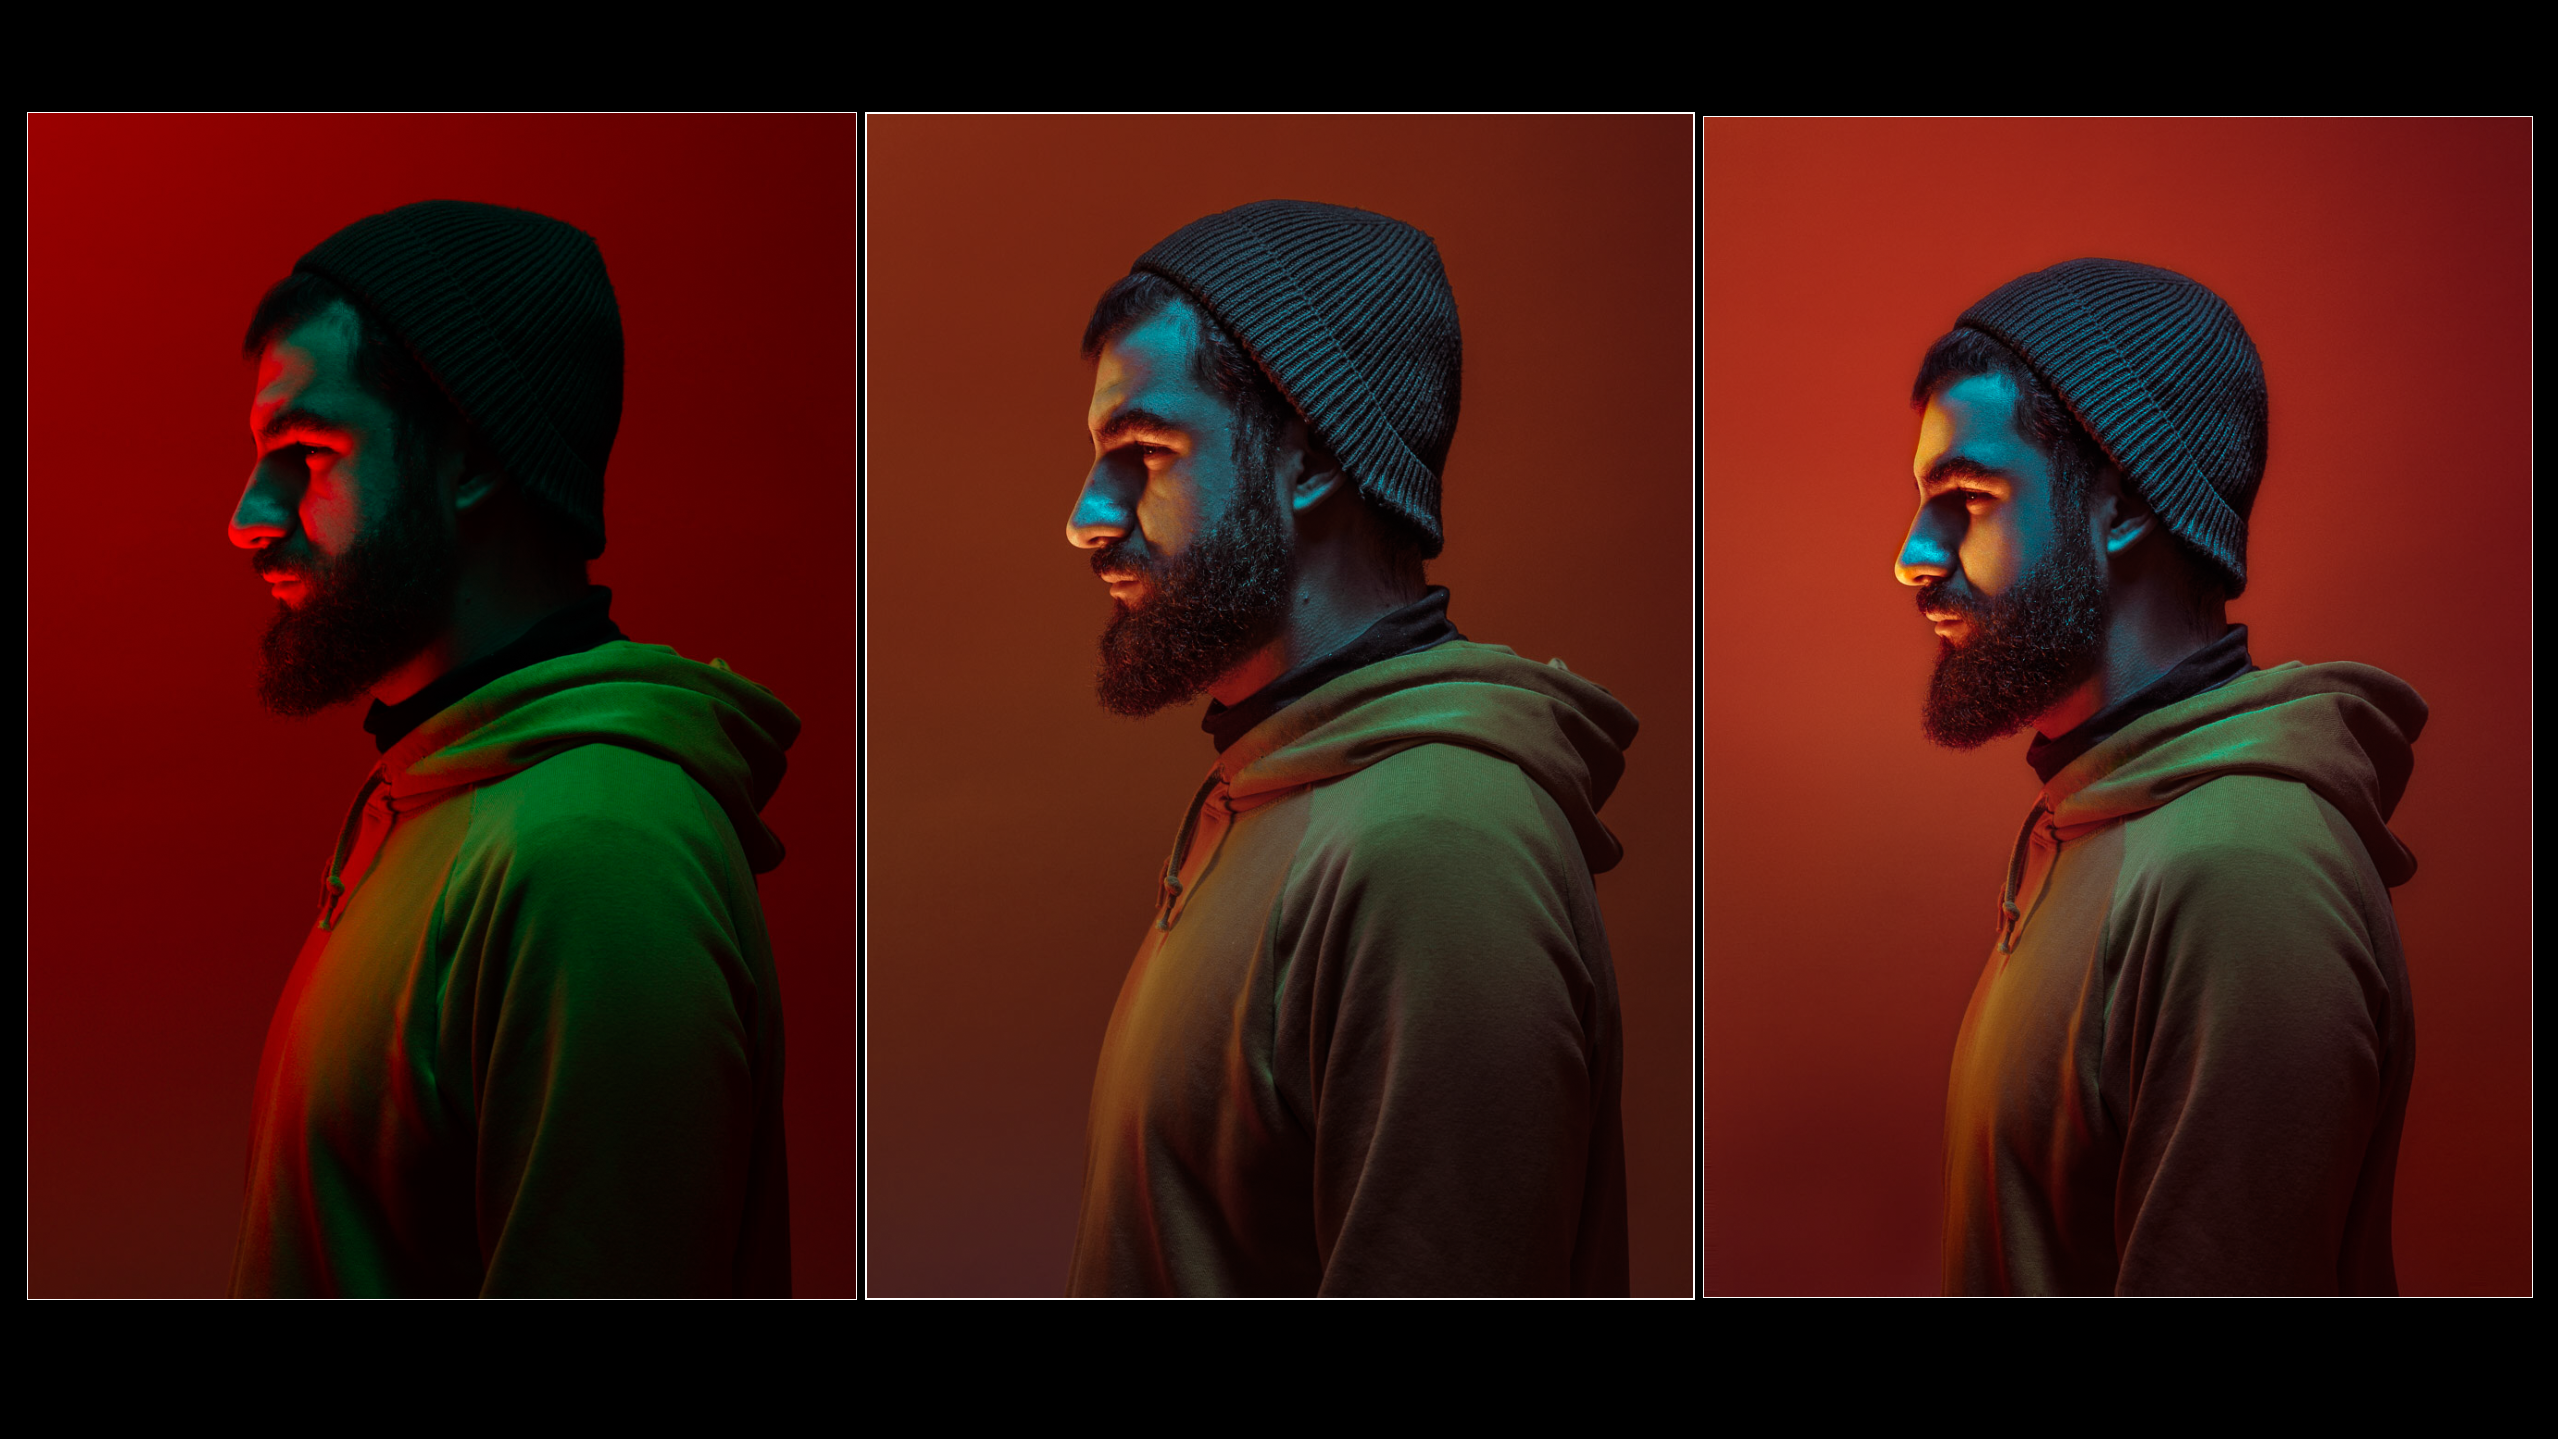
First photo is the straight out of camera. Underexposed so i wont clip the highlights on the face since that's the most important part in a portrait
The second one is after processing my Raw file in lightroom. My goal here is to get an image with as many details as possible and a pleasant color toning that is close to what i want as the final result.
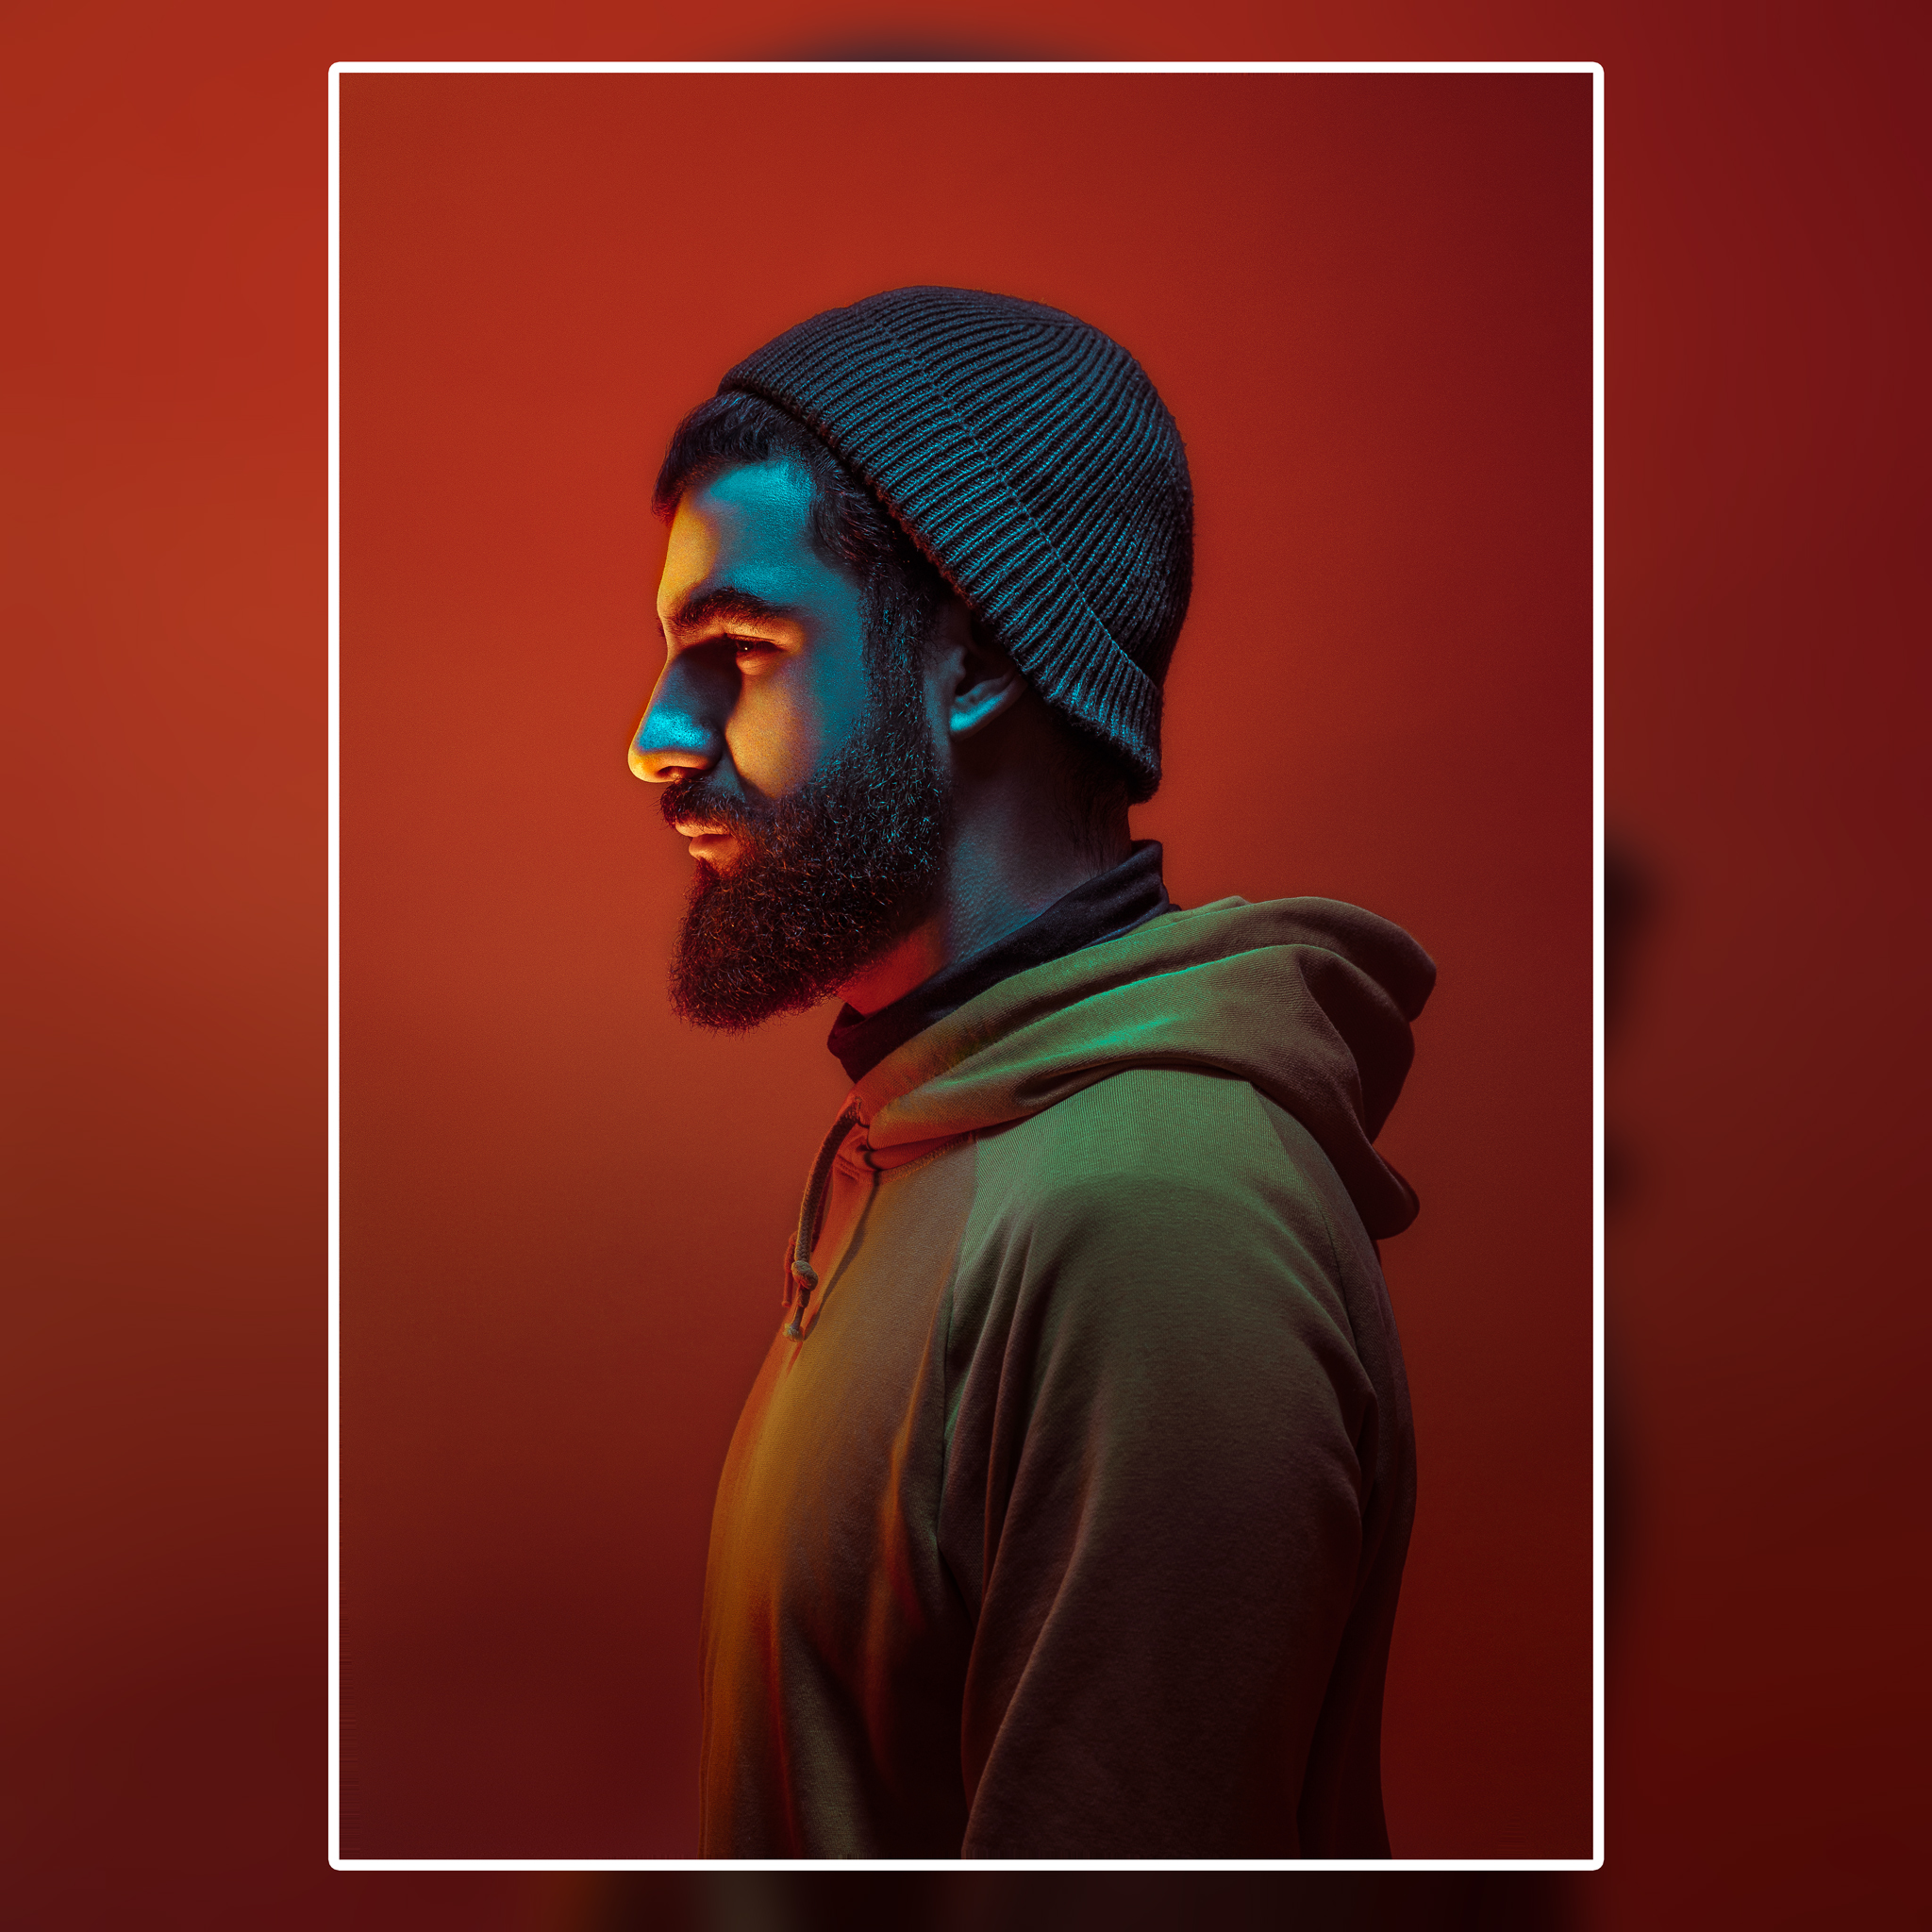
And the last one is the final image after refreameing it and doing all the skin work in photoshop. (Frequency separation and lot osf dodge and burn)
Tips & Tricks
- I don't use photography gels, they are out of my budget and overpriced for a colored piece of plastic. The diy outh for this is to use the A4 plastic covers they use at prinshtops and xeroxs as covers. I bought around 10 sheet for 2$ so i don't mind replacing them every now and then.
- When shooting with gels you will get more saturated colors with hard light than diffuse one so you can forget about your big soft umbrellas.
- Be patient. Gel lighting is not easy but if you master it you will become better at studio light in general
If you have any other questions hit me un with a DM on facebook or instagram and i will be happy to add to this post.
wow loved this little tutorial, so much detail and great tips, really great!
this post will be proposed to be curated by the @celfmagazine project
cool, thank you
Great tips man, Thanks for the breakdown !
Resteemed this post, since it's cool to see the process as well.
thank you >:D<
A whole lot of work goes into making something extremely difficult look easy! Great shot man
thank you. studio lighting is something i enjoy big time so its quite fun for me
Great tutorial about your light setup! :)
Lovely how you can control the light with just a few strobes isn't it? 😎
it's something you learn in time. patience. discipline. and long photoshoots
Really instructive breakdown! Thank you @vmoldo. I have a question: how would you go about pre-visualize your final result ? For instance, it your post processing section, there’s nearly no details in the hat in the raw file. How did you know you’d be able to recover all of it in post production? Thank you!
Posted using Partiko iOS
90% of the time i go for +100 shadows so i know my cameras limitations quite well. Also i have a custom neutral profile loaded in my dslr that shows me a lot more details in the camera than in standar lightroom with adobe color profile
Congratulations @vmoldo! You have completed the following achievement on the Steem blockchain and have been rewarded with new badge(s) :
Click here to view your Board
If you no longer want to receive notifications, reply to this comment with the word
STOPDo not miss the last post from @steemitboard: