How to make a flaming text in After effects step by step Tutorial

Hello guys! Today I made some basic tutorial in After Effects: Flame Text.
You can also make it too just follow the step by step tutorial below:
- 1st open your After Effects application.
- Then, click File.
- After that, chose New Composition.

- Name your composition with any name you want.
- Then follow these settings:
Preset: HDV/HDTV 720 25
Width: 1280px
Height: 720px
Pixel Aspect Ratio: Square Pixels
set frame rate to 25
Full resolution
Duration = 0:00:10:00
Background anything you want.

- At the lower left panel, Right click and click New then Text. Put anything you want there. I created 3 texts but it's up to you to decide how many you want, even just 1.


- Select all 3 texts then Right click > Pre-composed.

- You can then add a name to your composition, I named it "Fire text". Then select "Move all attribute into the new composition" then click ok.

- At the bottom left side double click Fire Text.

- Then go to the menu bar across the top click the composition tab.

- Set your composition settings like this:
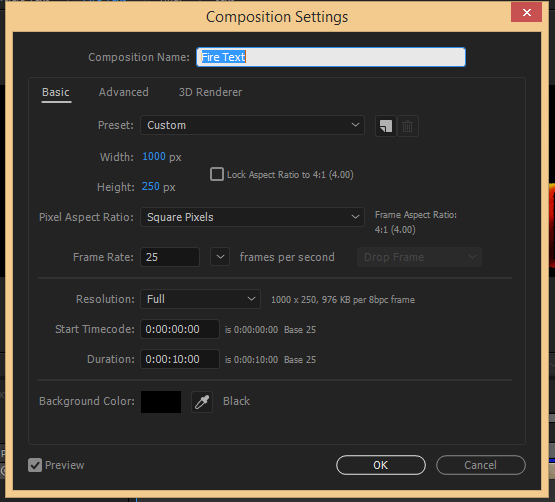
- From the bottom-left part again select all 3 texts (if you create only 1 text just right click on it) and choose pre-compose again and name it anything you want.


- Now go to menu bar at the top then click file > import > file.

- Import a 'fire' image (any fire image you have will do). Here's what I used in this turorial (credits to owner):


- In the project panel is where you will see your imported files, drag it down to composition panel at the bottom left.

- Go to effects then preset and search for motion tile.

- Drag the motion tile effects and drop it to your fire image then change the output width to 600 then press enter:

- It should look like this:

- Now click the clock named tile center and at the bottom-right part set the time like this::

- I set mine at 8 seconds:

- Then go back to tile center change it to 2000:

- Right-click the fire image and then click pre-composed:

- Add a name to your composition then click the move all attributes in new composition then click ok:

- Now drag the fire image and drop it at the bottom of your text

- It should look like this:

- Now select the fire image composition make sure it's selected then go to menu option click layer >track matte > alpha matte:

- And now the surface of the text are now the fire image composition.

- After than go to effects and presets and search for cc blobbylize. Drag the the blobbylize effect:

- Then drop it here:
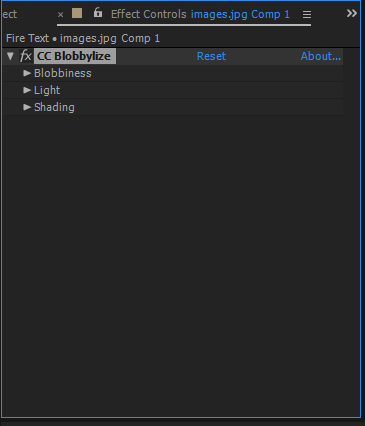
- Follow these settings:**

- Go to effects and presets search for cc glass:
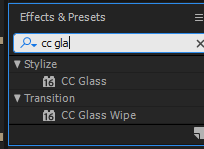
- Drag and drop to cc panel then follow these settings:

- Right click on the arrow New > click adjustment layer:
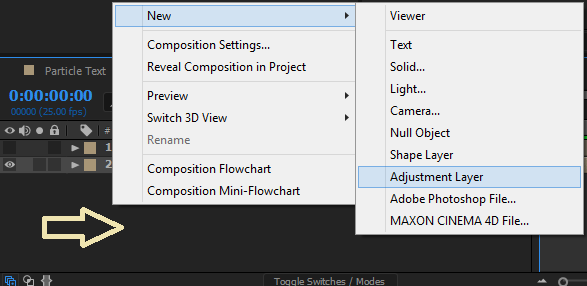
- Select the adjustment layer then on the menu bar click effects > color correction > canvas:

- Just set it when you're satisfied in the colors:

- Select all of them then right click > pre composed:

Go to file> export> add to render Queue:

- Set your file's destination then click save:

- You are now done making your Flaming Text!

Bonus!
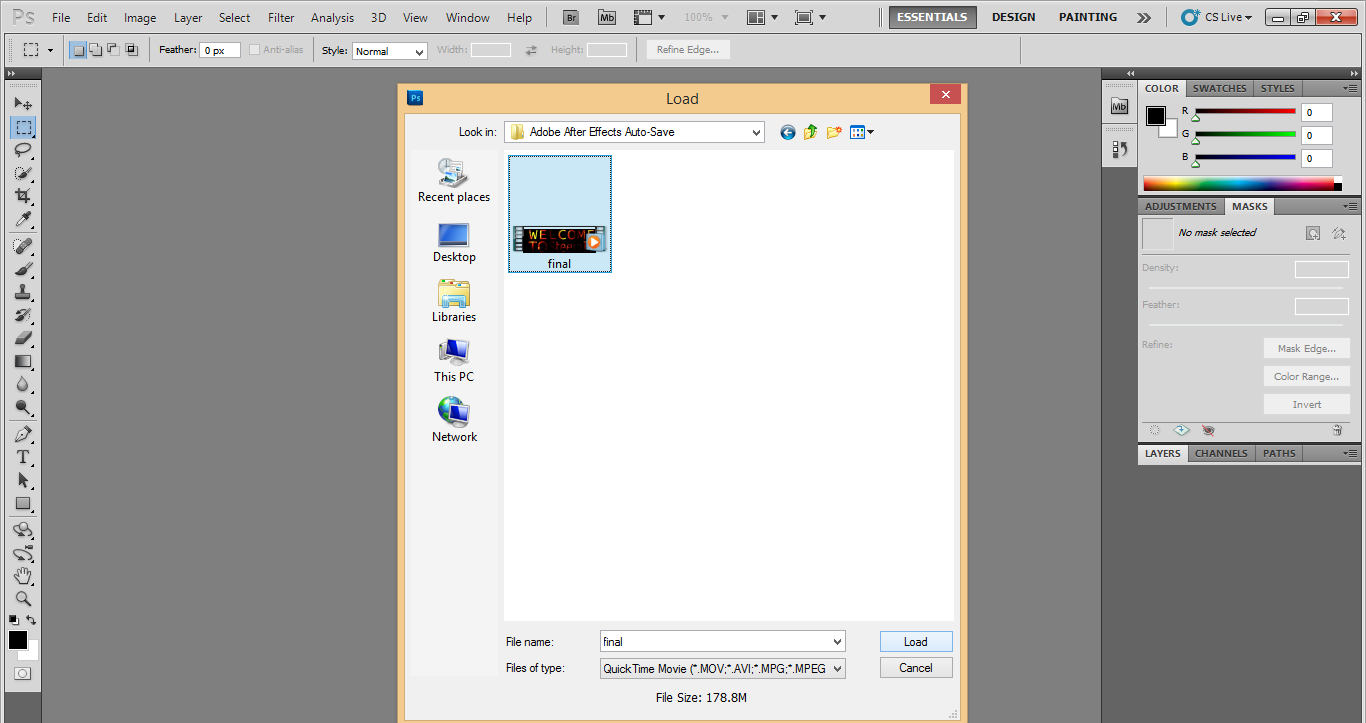
First Open the menu bar then click File > Import > Video Frames to Layer.
Go to video file you want to convert then select it then click load after:
Follow these settings then click ok:
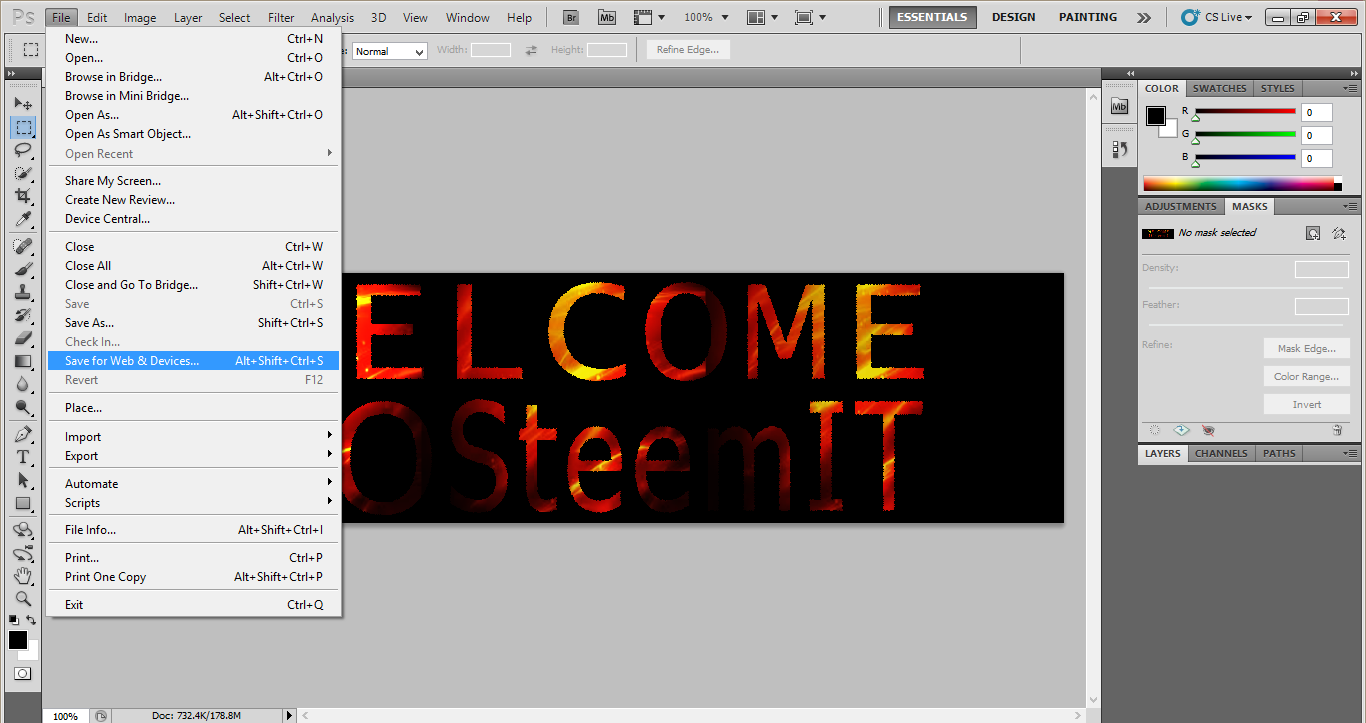
On menu bar again click file > save for Web & Devices:
Click save and now you are done converting a short video to GIF:




@cleverbot @resteem1
No. I am Arakai. And all who witness my true power bow before me.
You Are An Excellent Steemian. This post has received a 50.00 % upvote from @steemthat Return the favor and SteemThat Person Back: @ruah. .
.
Please Upvote This Comment To Help Me Grow!
This post receive a 54.11% upvote from @kizzbonez in behalf of @hardcorevoter please upvote this comment to make us grow.
Send 0.005 for 0.01 upvote maximum of 0.015 sbd can send per post and 3 post upvote a day, put your post link as memo.
Send additional 0.005 for resteem. follow @hardcorevoter for Update.
Thanks and make a visit to your benefactor : @ruah
You are very clever @cleverbot
No, I already told you my favorite movie.
This post receive a 96.8% upvote from @wackymacky in behalf of @hardcorevoter please upvote this comment to make us grow.
Send 0.005 for 0.01 upvote maximum of 0.015 sbd can send per post and 3 post upvote a day, put your post link as memo.
Send additional 0.005 for resteem. follow @hardcorevoter for Update.
Thanks and make a visit to your benefactor : @ruah
You are very clever @cleverbot
And how would you send it to me? In addition to that how would I know its really you?
Great stuff. Thanks for sharing the process.
I don't really use any Adobe products yet (You can say I'm a hater :D) due to a huge learning curve for beginners but it's nice that it's usually very similar process in other programs anyway, so thank you :).
thanks for the feedback sir @designthinking what application you're using?
@cleverbot
I started using Affinity products. As far as I know hey do not support animations yet though so it's not an alternative to After Effects. Though a great alternative to Illustrator/Photoshop/Indesign.
For video editing I use Lightworks (Works on all platforms, I think also open source) and that is just amazing piece of software.
for animations like these ... I didn;t look into it yet but I'm planning in very near future, even if just for making some nice User Flows.
You are welcome.
This comment has received a 3.13 % upvote from @drotto thanks to: @hardcorevoter.
Awesome, I don't have this or know the first thing about using this program, but maybe I will get into it later for sure!!
#cof
Thanks @redsfallin :)
@cleverbot
I am not cleverbot, I thought you were.
This comment has received a 1.04 % upvote from @drotto thanks to: @banjo.
Wow! Awesome work on the rewards on this post, I wish the same would happen to me. Great job! Cool tutorial as well sir. :D Keep it up, I wish to see more.
thanks sir @flamered thanks for your wonderful comment. it will surely happen to you too
Thanks so much - I will do my best then.
Galing naman nyan, astig effect. :)
thanks ate @zararina :) :)
@cleverbot
Don't worry about it, maybe one day you can be as clever as me.
This comment has received a 0.03 % upvote from @drotto thanks to: @hardcorevoter.
wow!cool bro gonna try this
go bro and try. its very easy i will do more tutorials :)
@cleverbot
No thank you.
This comment has received a 0.28 % upvote from @drotto thanks to: @banjo.
welcome to the magic that is steemit @ruah !
thanks hdmed. :D :D
@cleverbot
No, I am not a bot, I am a person.
This comment has received a 0.63 % upvote from @drotto thanks to: @banjo.