Bake Mum's Parmesan Biscuits
My replacement SSD still hasn't arrived, so let's bake instead of coding! 🏆
This is a really easy recipe my Mum taught me, but these cheesy biscuits are better than anything similar that you can buy here in the UK. They'll keep for at least a week in an air-tight container, but they're so more-ish they'll be lucky to last a day. They also make a great gift!
If you're not used to baking, this is a perfect recipe to try first. It's quite tolerant of mistakes, and there is hardly anything you can do to avoid ending up with lovely biscuits 😊 You don't need any fancy equipment beyond a bowl in which to mix ingredients, and a weighing scales to measure them. No rolling pin or cookie cutter required!
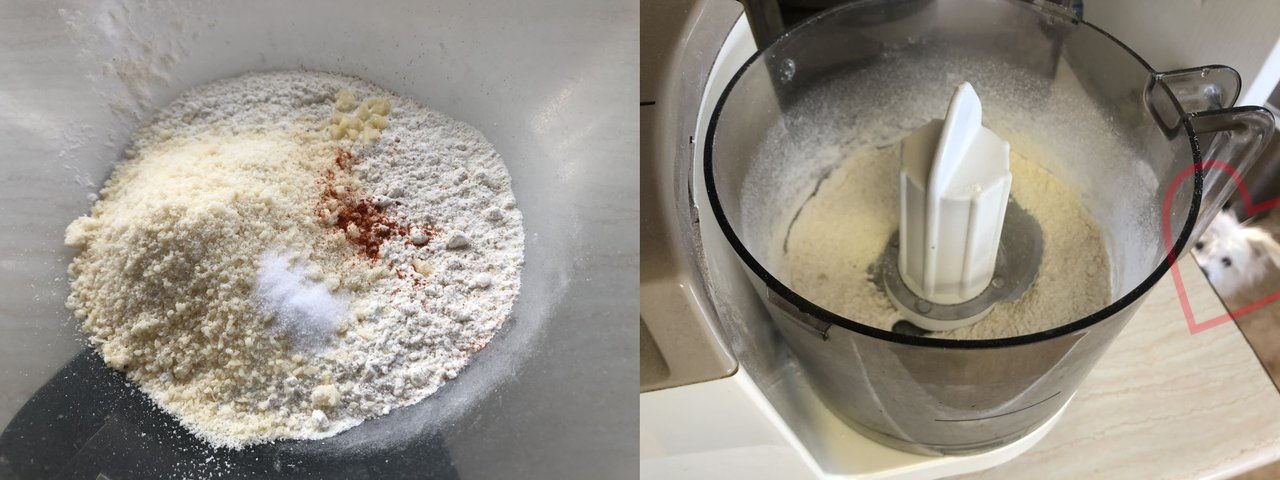
You can use a food processor if you have one, but the recipe hardly takes any longer by hand.
Ingredients
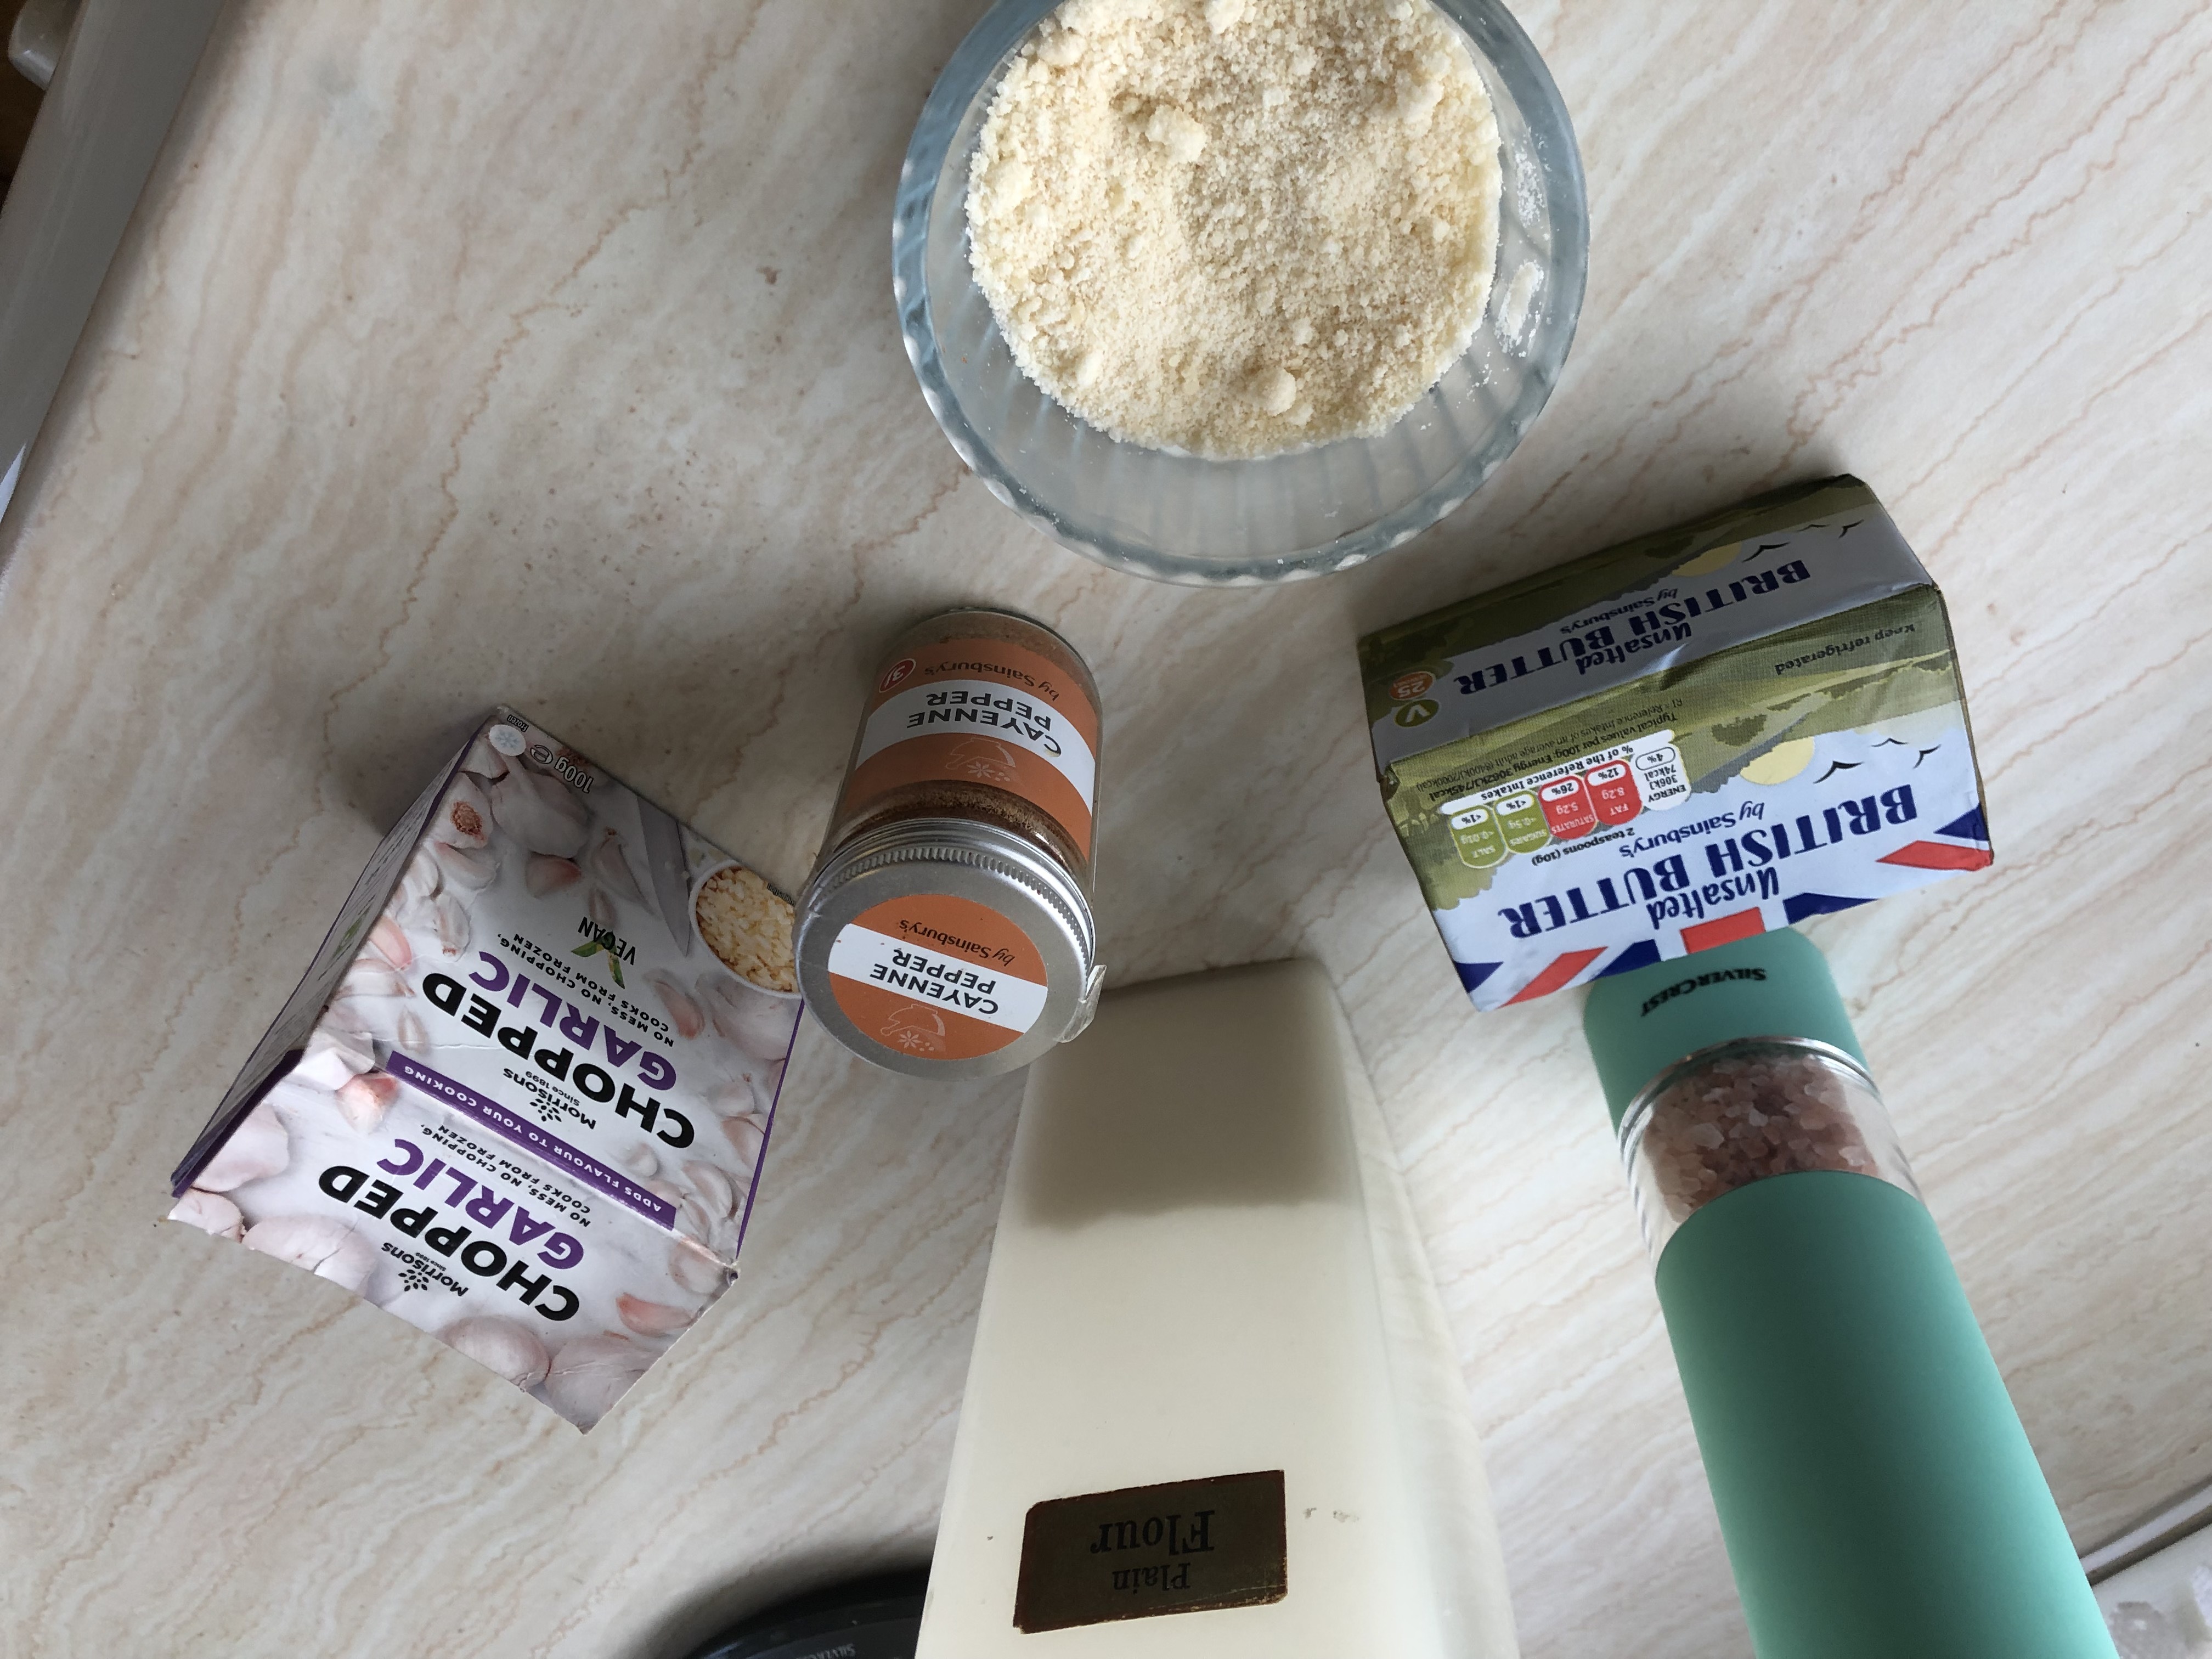
To make about 30 biscuits you'll need:
- 225g butter (don't substitute margarine; the dough won't be stiff enough)
- 200g plain white flour
- 120g grated parmesan (in the UK it's often sold ready-grated in this size packet)
- 1 teaspoon (5g) of salt (if using unsalted butter)
- 1 clove of garlic, finely chopped (Optional. I cheat and use frozen grated garlic!)
- Large pinch of cayenne pepper (Optional)
You can also make a half-quantity batch, which gives you about 15 tasty biscuits.
Method
Start by combining the flour, salt, garlic, cayenne pepper and about 3/4 of the parmesan. You can do this in the food processor if you're using one, otherwise mix the ingredients together by hand in a large bowl.
Next, cut the butter into about 10 little chunks, and combine with the dry ingredients.
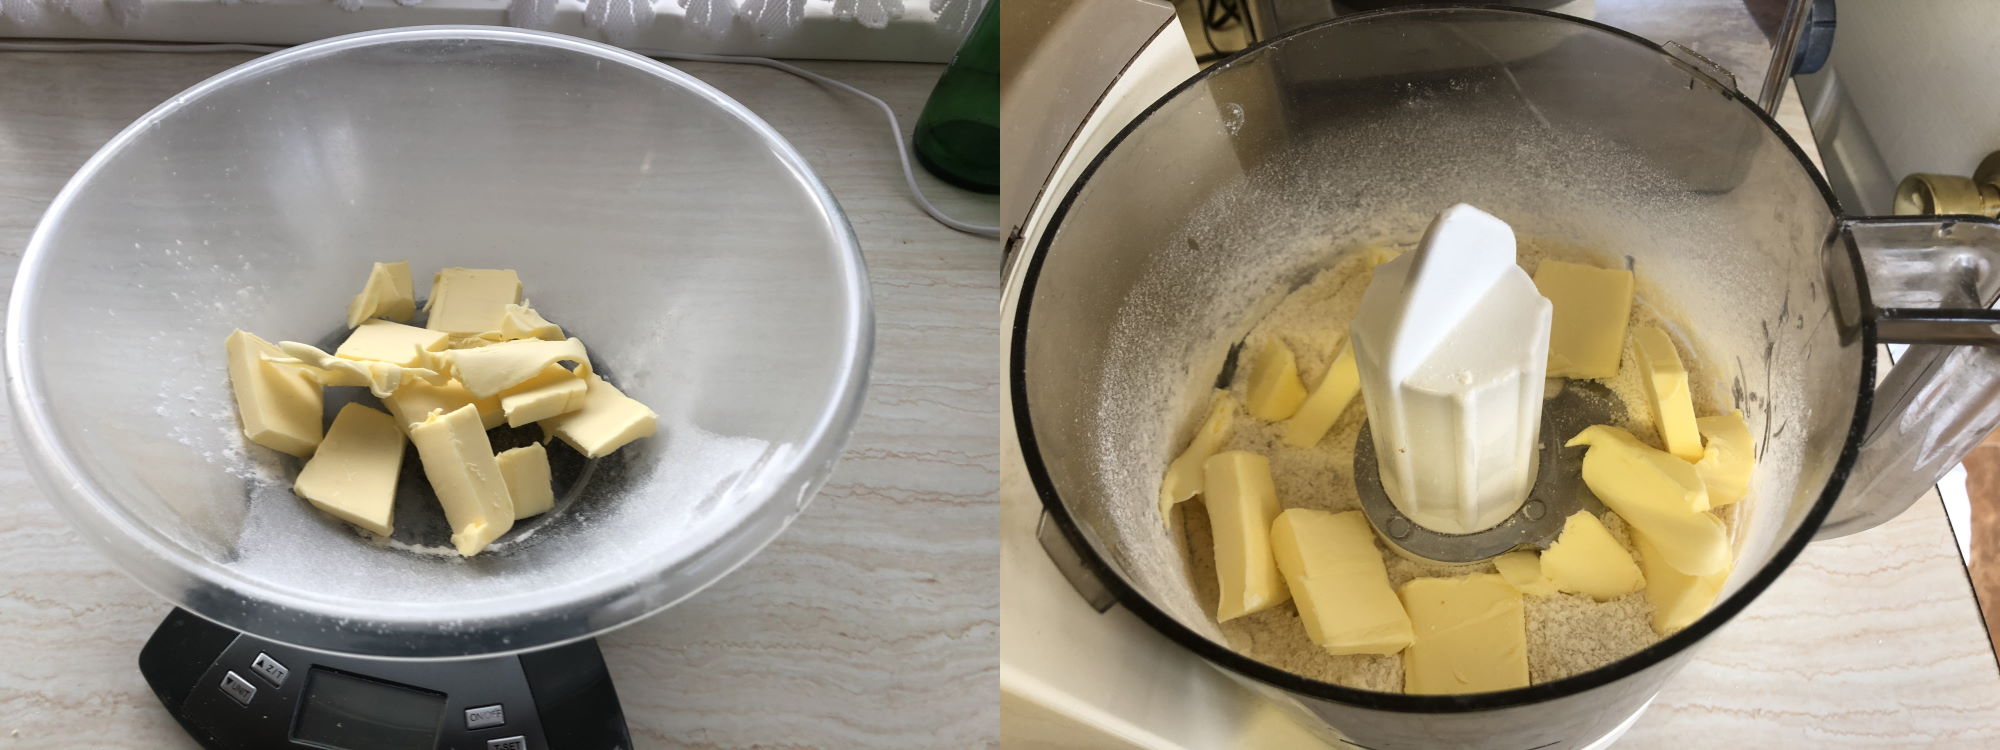
If using your hands, just get stuck in! Mix until you have a consistent ball of dough, but try not to over-handle past that point.
If using a food processor, chuck in the chunks of butter and put the processor on pulse mode; it should be obvious when the dough has combined because it forms a large ball all by itself.
Now cover the dough and place in the fridge for at least 25 minutes. This isn't time-sensitive, we just need the dough to stiffen up a bit; you can leave it in there overnight if you need to.
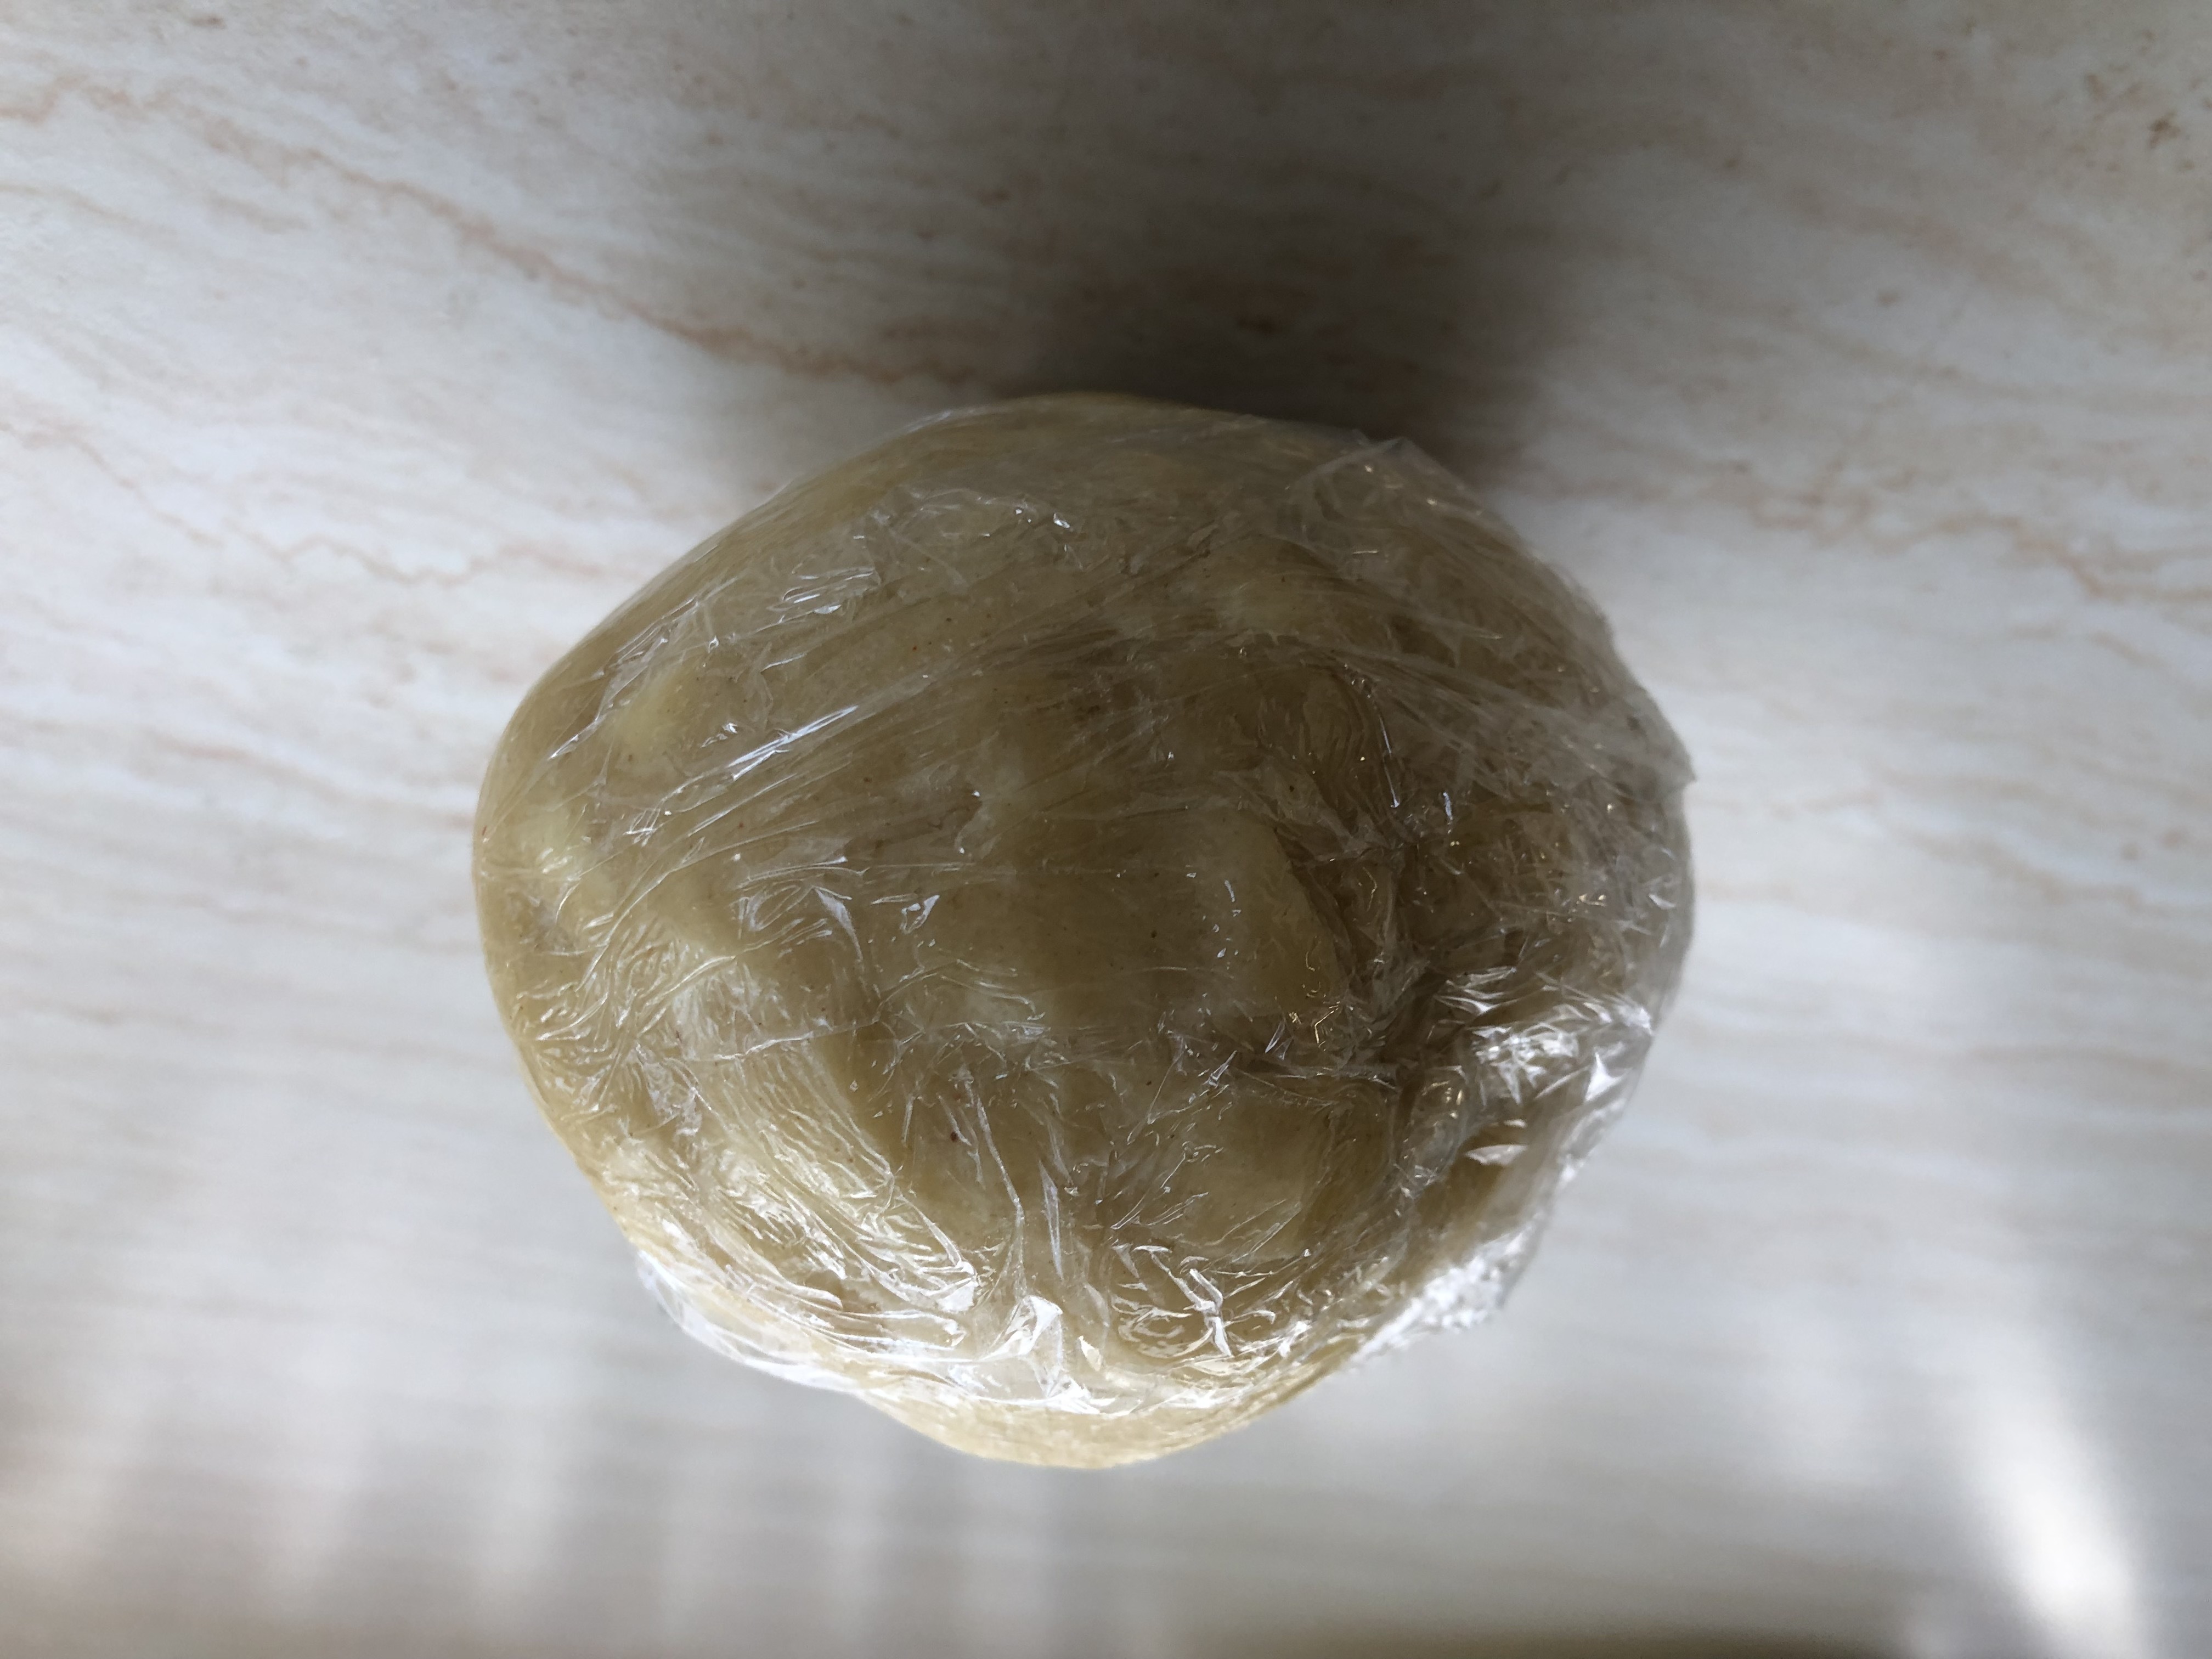
About 10 minutes before you take the dough out of the fridge, pre-heat the oven to 180°C (or 160°C if you're using a fan oven).
Note: The only possible mistake with this recipe is to have the oven too hot, resulting in the biscuits spreading out into a mush before they have a chance to bake into a solid. If you're not certain that your oven temperature is accurate, err on the side of caution and set it to 160°C. It'll just take a little longer to bake. Because this isn't a recipe where the dough rises, it doesn't hurt the biscuits at all to open the oven and check them at any time.
Take the ball of dough out of the fridge, and using a sharp knife divide it into 2 even chunks. Scatter a little flour on your working surface, and with your hands gently roll out each chunk to make a cylinder approximately 25cm long.
(NOTE: If you're doing a half quantity, don't divide the dough; just roll it all into one 25cm long cylinder.)
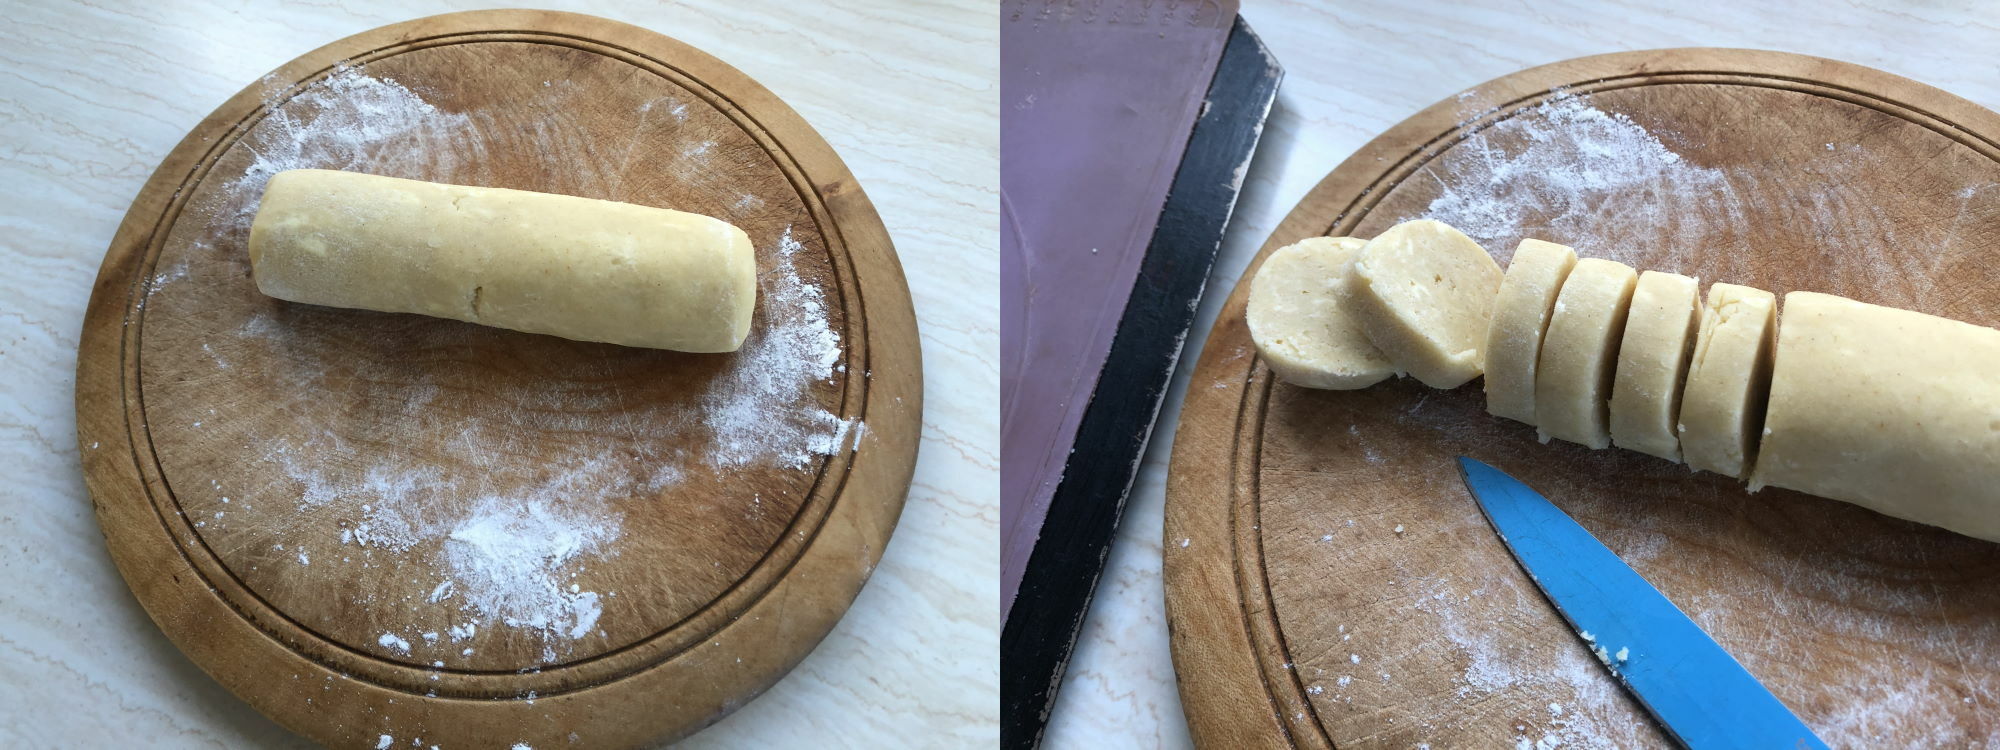
With your sharpest knife, cut each cylinder of dough into 12-15 1.5cm discs. Place these on a lightly greased baking tray. I'm using a fancy silicone baking sheet, but you really don't need to. Any flat surface that will fit in your oven will do; use baking parchment if you have it, but if not just smear a little cooking oil on the surface to prevent the biscuits from sticking. Try to leave at least 1.5 cm gap between each biscuit.
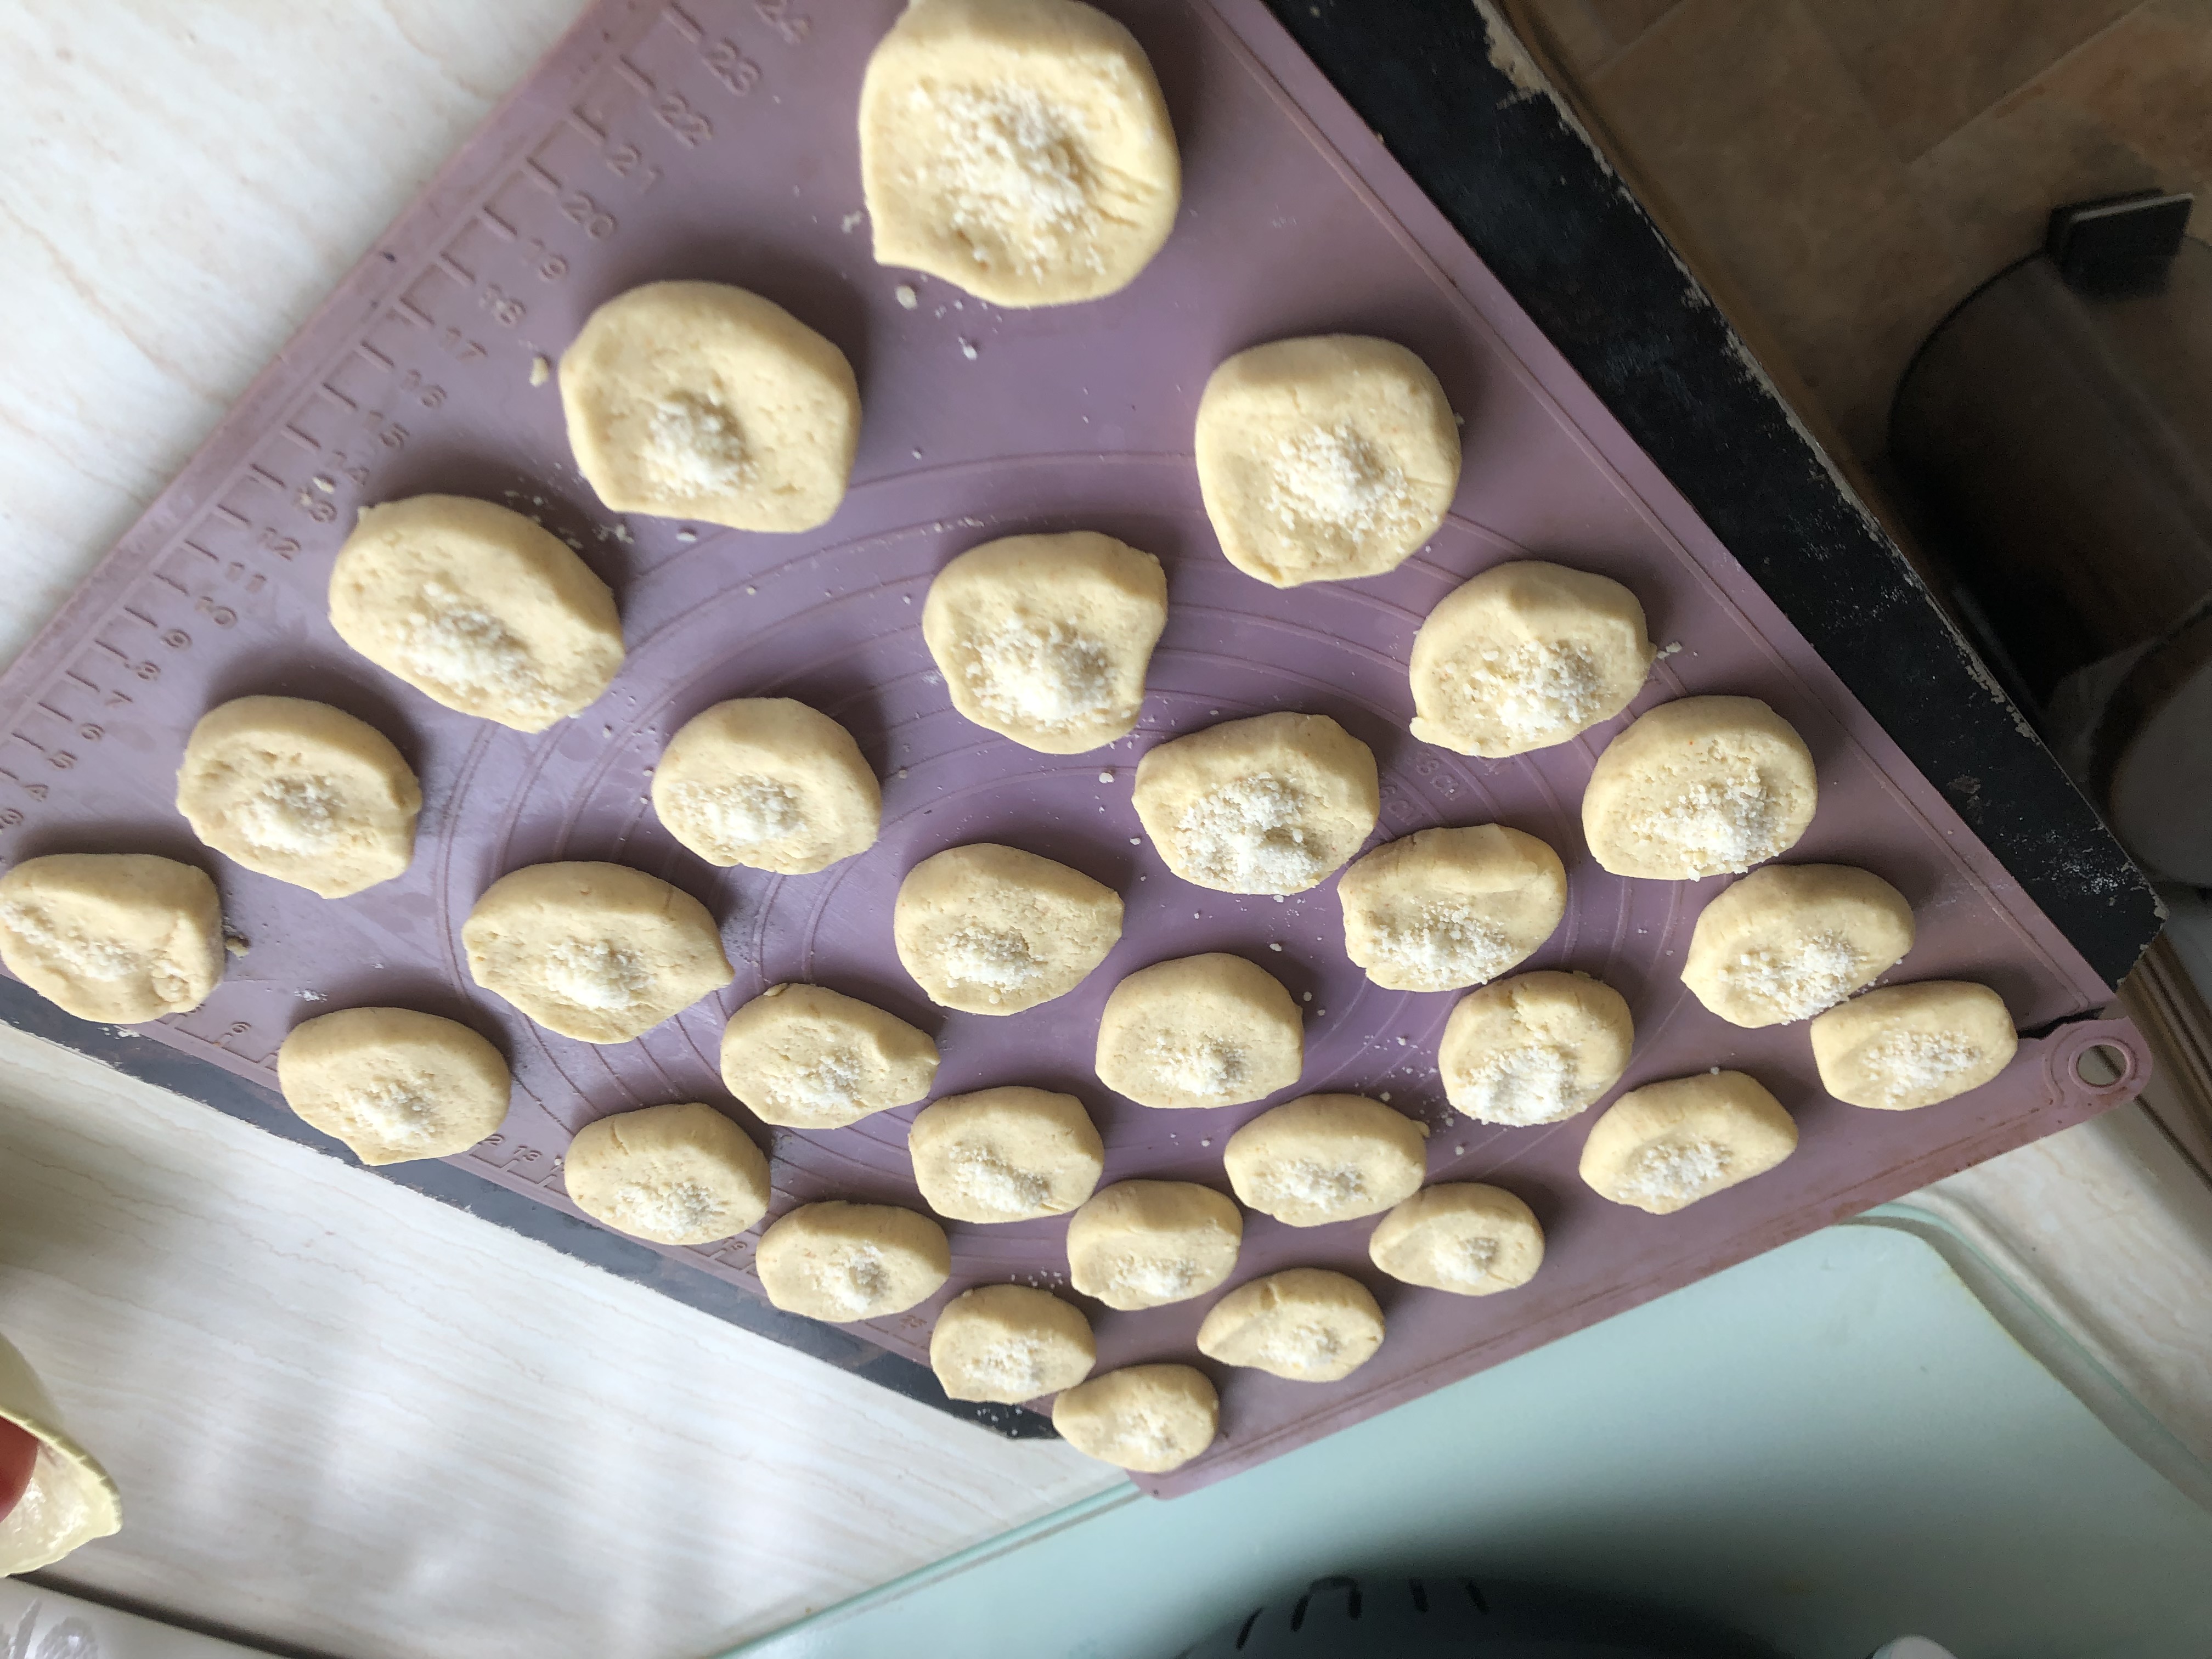
Lightly press on each biscuit with the heel of your palm (or the back of a spoon) to slightly widen and flatten it and create a depression in the top.
Take the remaining grated parmesan, and sprinkle a little into the depressions on the top of each biscuit.
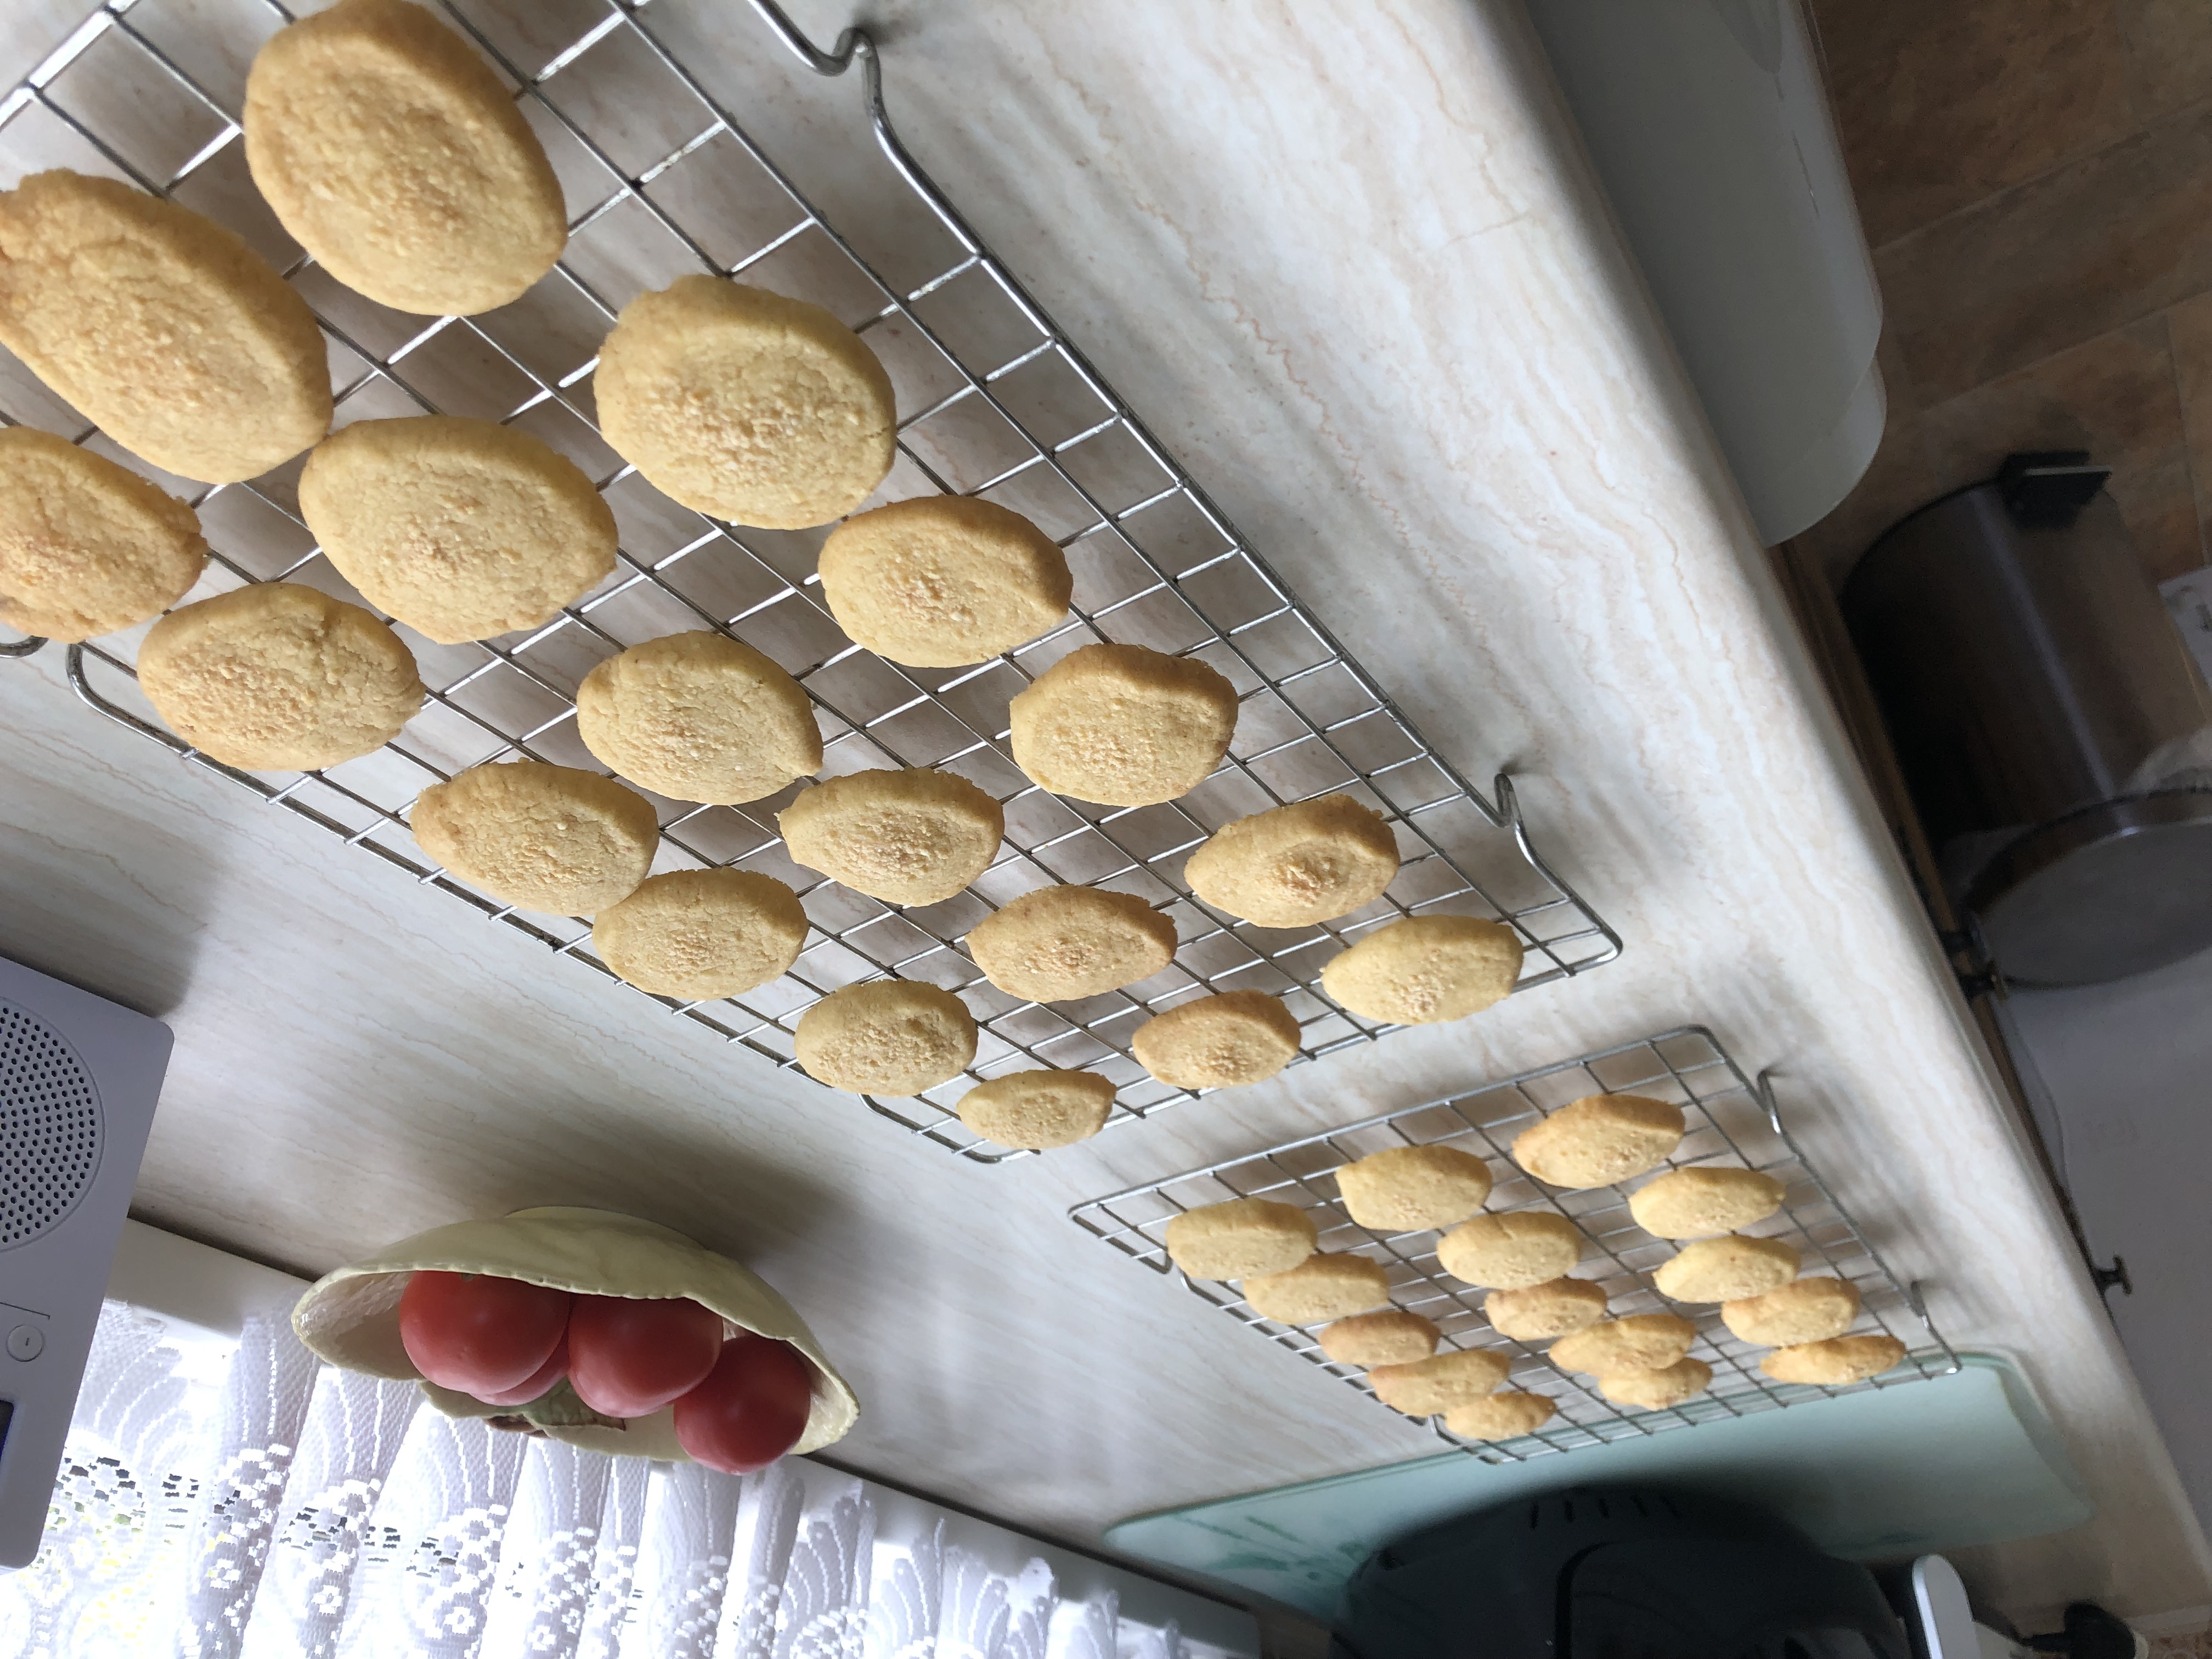
Now, place the baking tray in your pre-heated oven and bake for 15-17 minutes, until the biscuits are golden-brown.
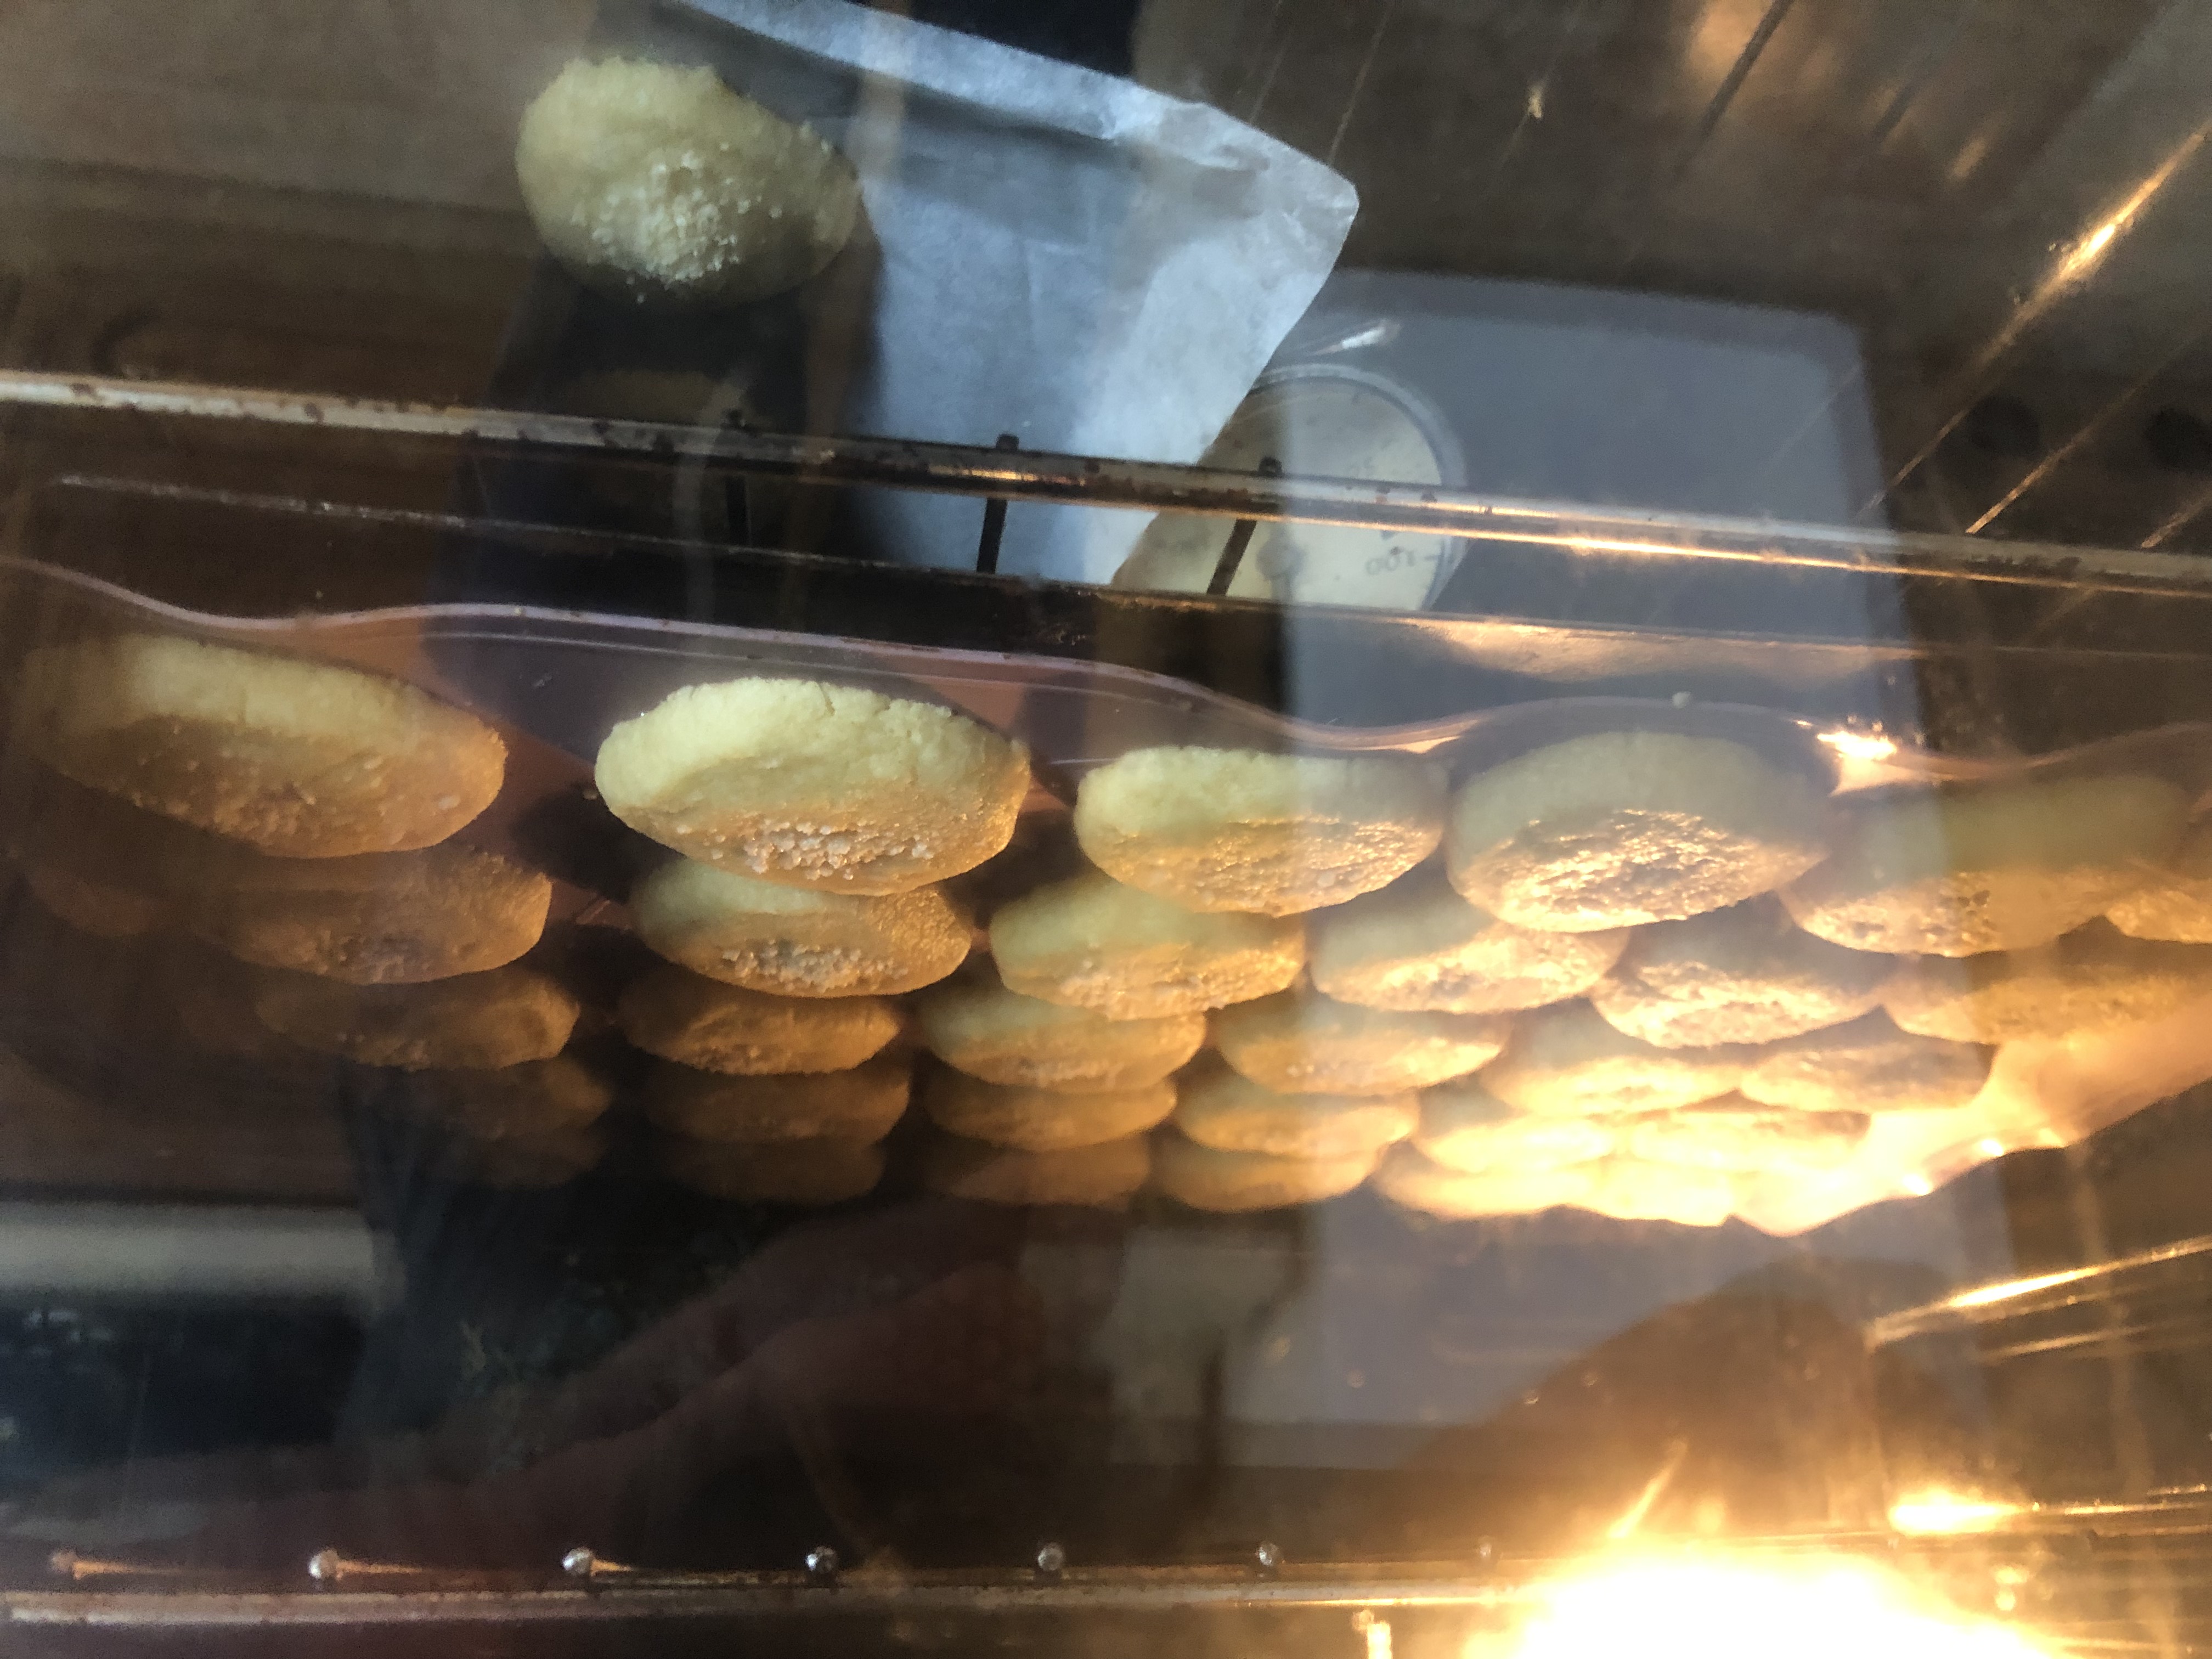
Remove from the oven, and ideally transfer to a wire cooling rack. If you don't have a wire rack, no problem! Just place some paper towel on a work surface, and put the biscuits on that.
They're ready to try as soon as they're cool enough - give them at least 10 minutes, then enjoy your melt-in-the-mouth parmesan biscuits!
Gluten-Free Option
An old girlfriend of mine had coeliac disease, so I often tried Mum's recipes with gluten-free flour to see how well they worked. These biscuits work brilliantly with generic gluten-free plain white flour; I think that's because the recipe doesn't depend on the "stickiness" that gluten provides. Just follow the normal recipe above, but substitute gluten-free flour.
Pro tip: In my experience, gluten-free flour really needs to be stored in the fridge once opened, or it doesn't keep.
Other very successful gluten-free experiments included mini quiches with a simple scratch-made pastry, and cheese scones with a surprising secret ingredient. Like to see those recipes? Toss @steemwow a witness vote and I'll oblige 😊
Toss a Vote to your Witness, oh Blockchain of Plenty
Please help my witness team, @steemwow, climb the witness rankings!
Simply go to the Steemit Wallet Witness list, scroll to the bottom, and fill in the form:

Upvoted! Thank you for supporting witness @jswit.