Step by Step making of my First Hyperrealistic Graphite portrait
My hobby is just normal portraiture, but I saw many posts on my feed that are done using only normal pencils and graphite pencils that looked like realistic.
I was challenged and tried it myself. 😁😁😁
I used Graphite pencils (8b, 5b,4b), blending stump and kneaded eraser for this artwork
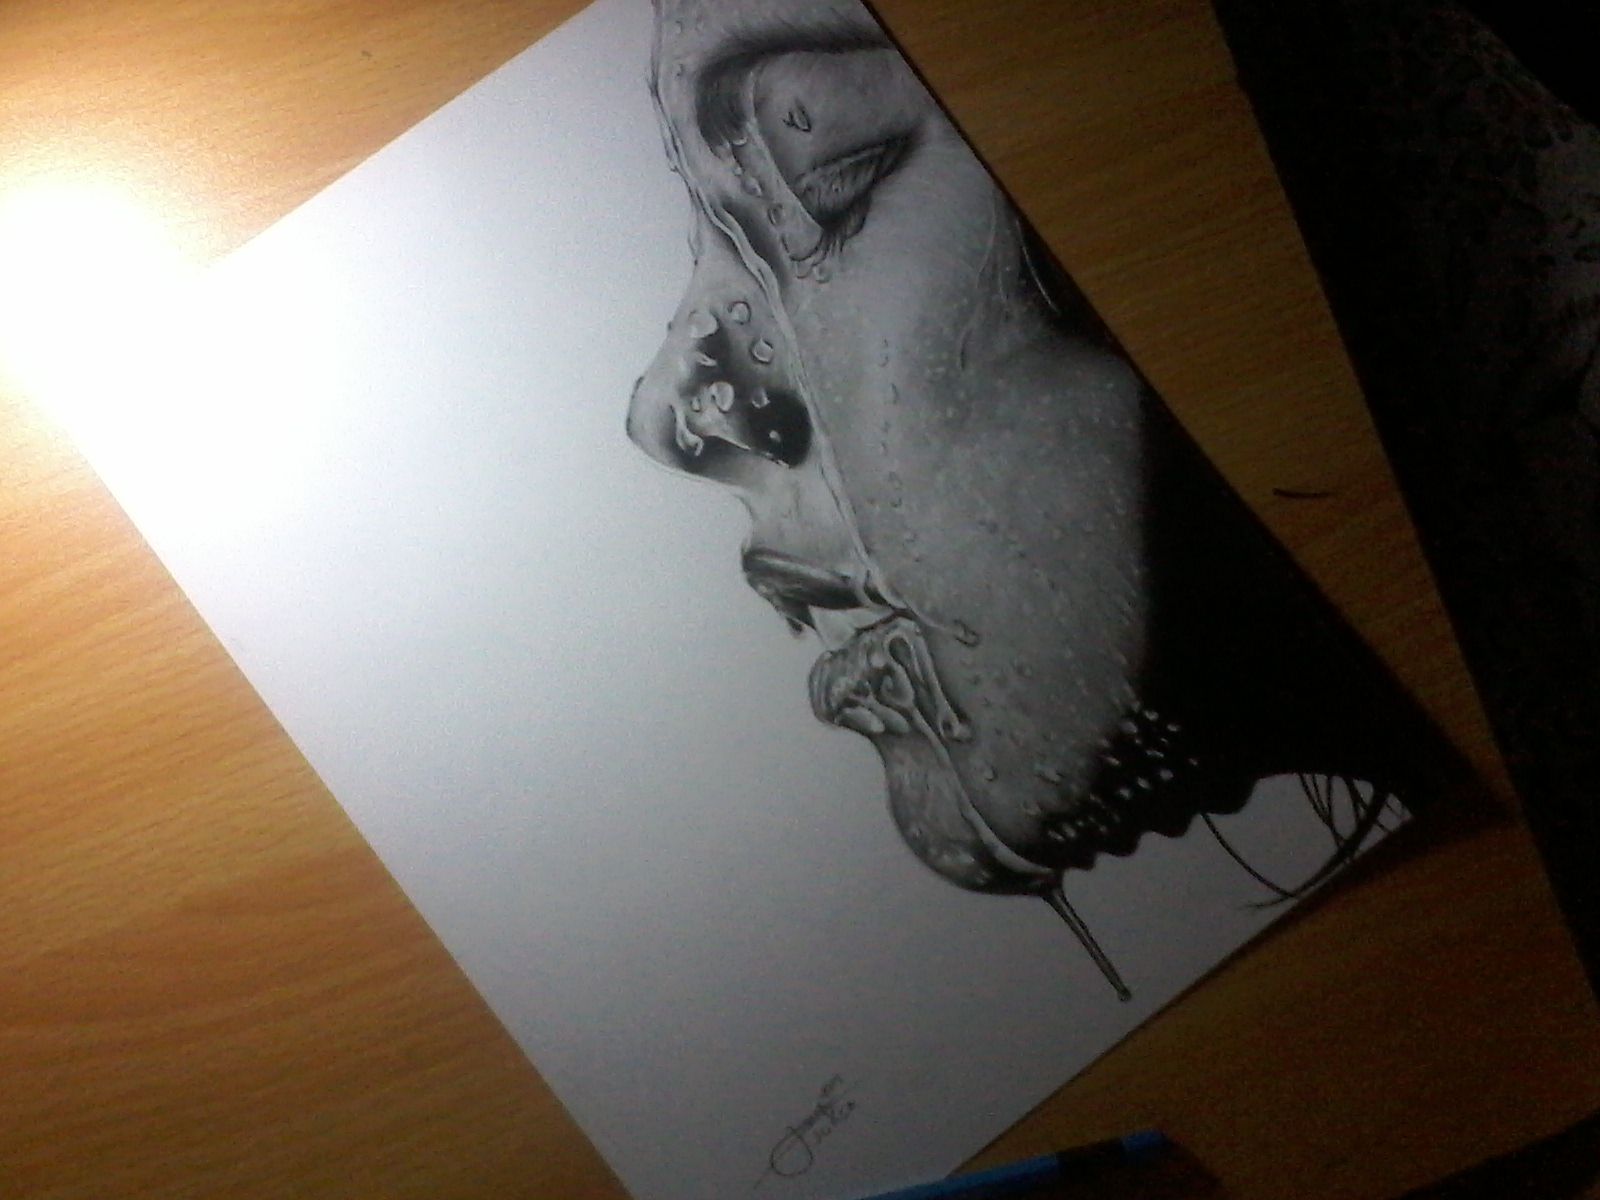
After seeing the posts, I quickly started searching for a reference as my next subject, I saw a picture a girl soaked with water in her face and it gave me an idea.
I was really excited to start doing the realistic portrait because aside that it is my first time, I think doing realistic portrait is somethig special because not all artis mastered the realistic style approach of portrait.
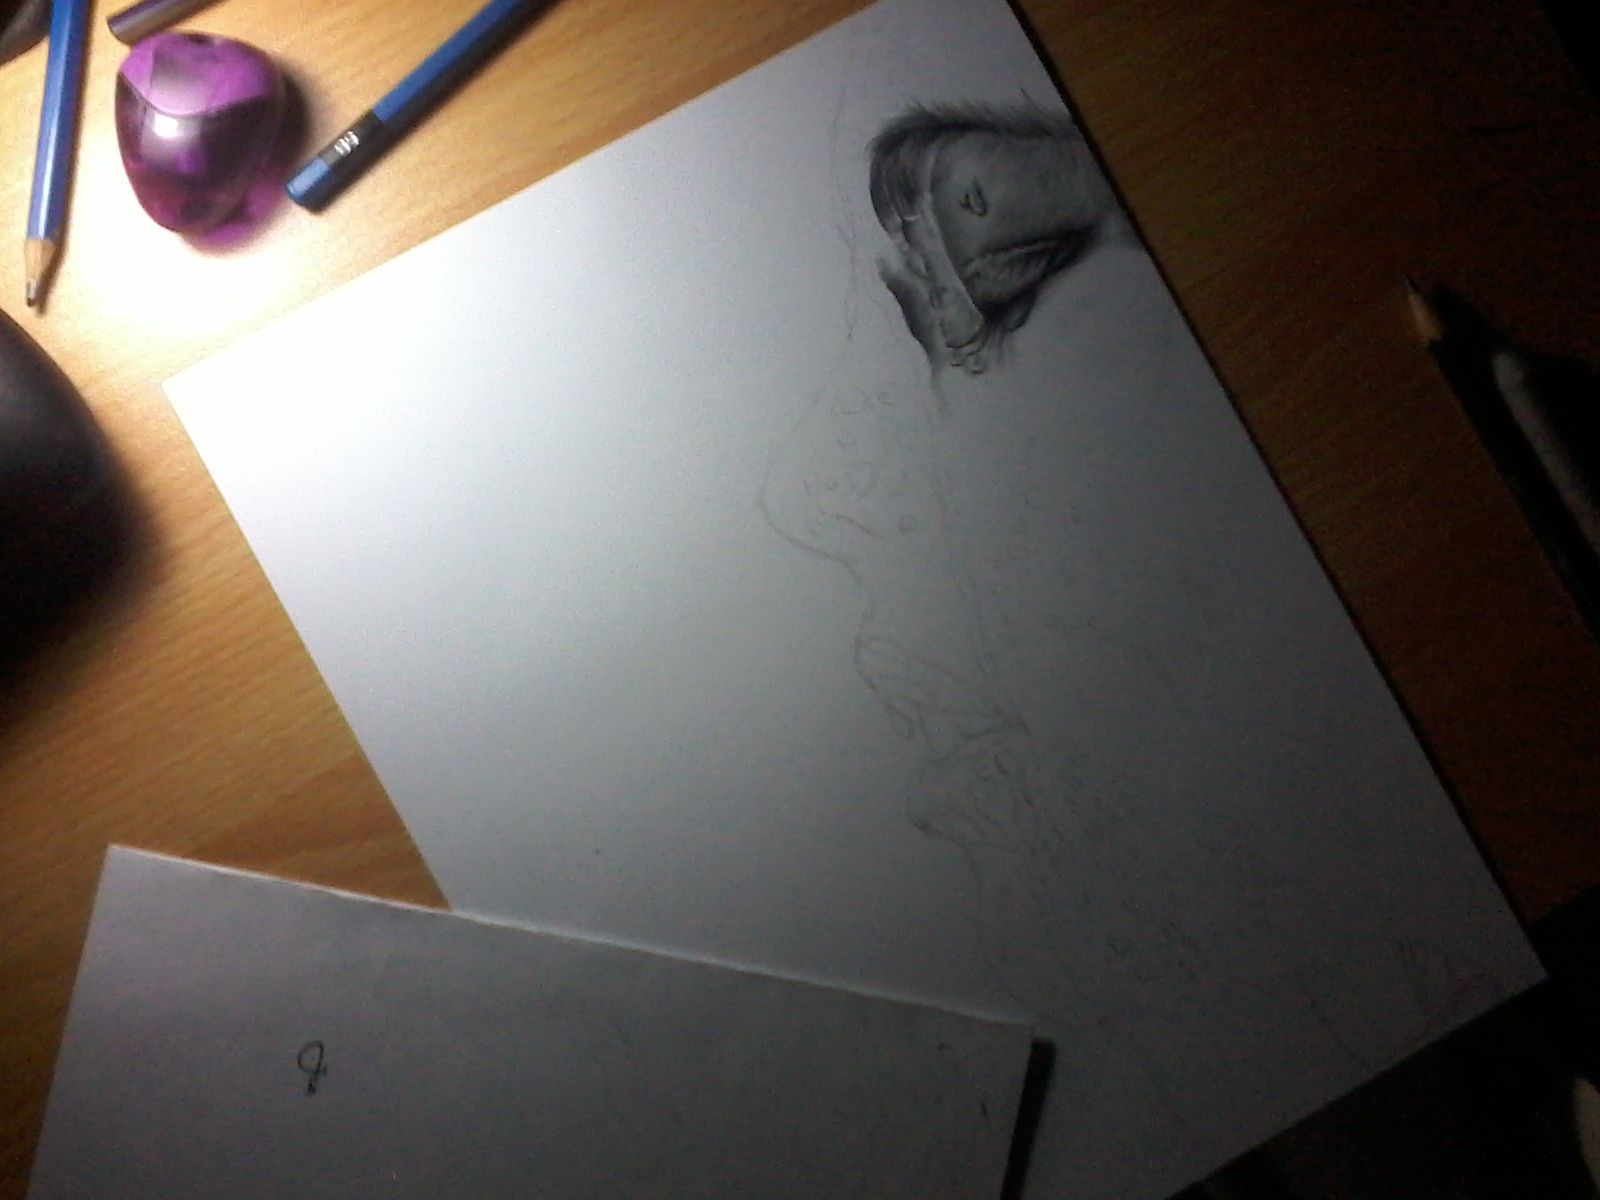
I firstly make the eye part because aside that it is my favorite part as a base, it serves as the center of attraction. I am new to doing artworks that are so dark because all of my artworks in the past months have only light tones.
This is the first stage: 😁
After doing the eye part. I started doing the nose part where I used 5b Stadtler for dark tones of skintone, but after doing the nose, a problem had popped out, I do not have any idea doing the WATER EFFECTS 😱, so I decided to just experiment on another piece of paper and when it went well, I'll copy the water droplet to the main drawing. The eraser made a big part in making the droplet look realistic, because it added a lot of white spaces that made the droplet realistic.
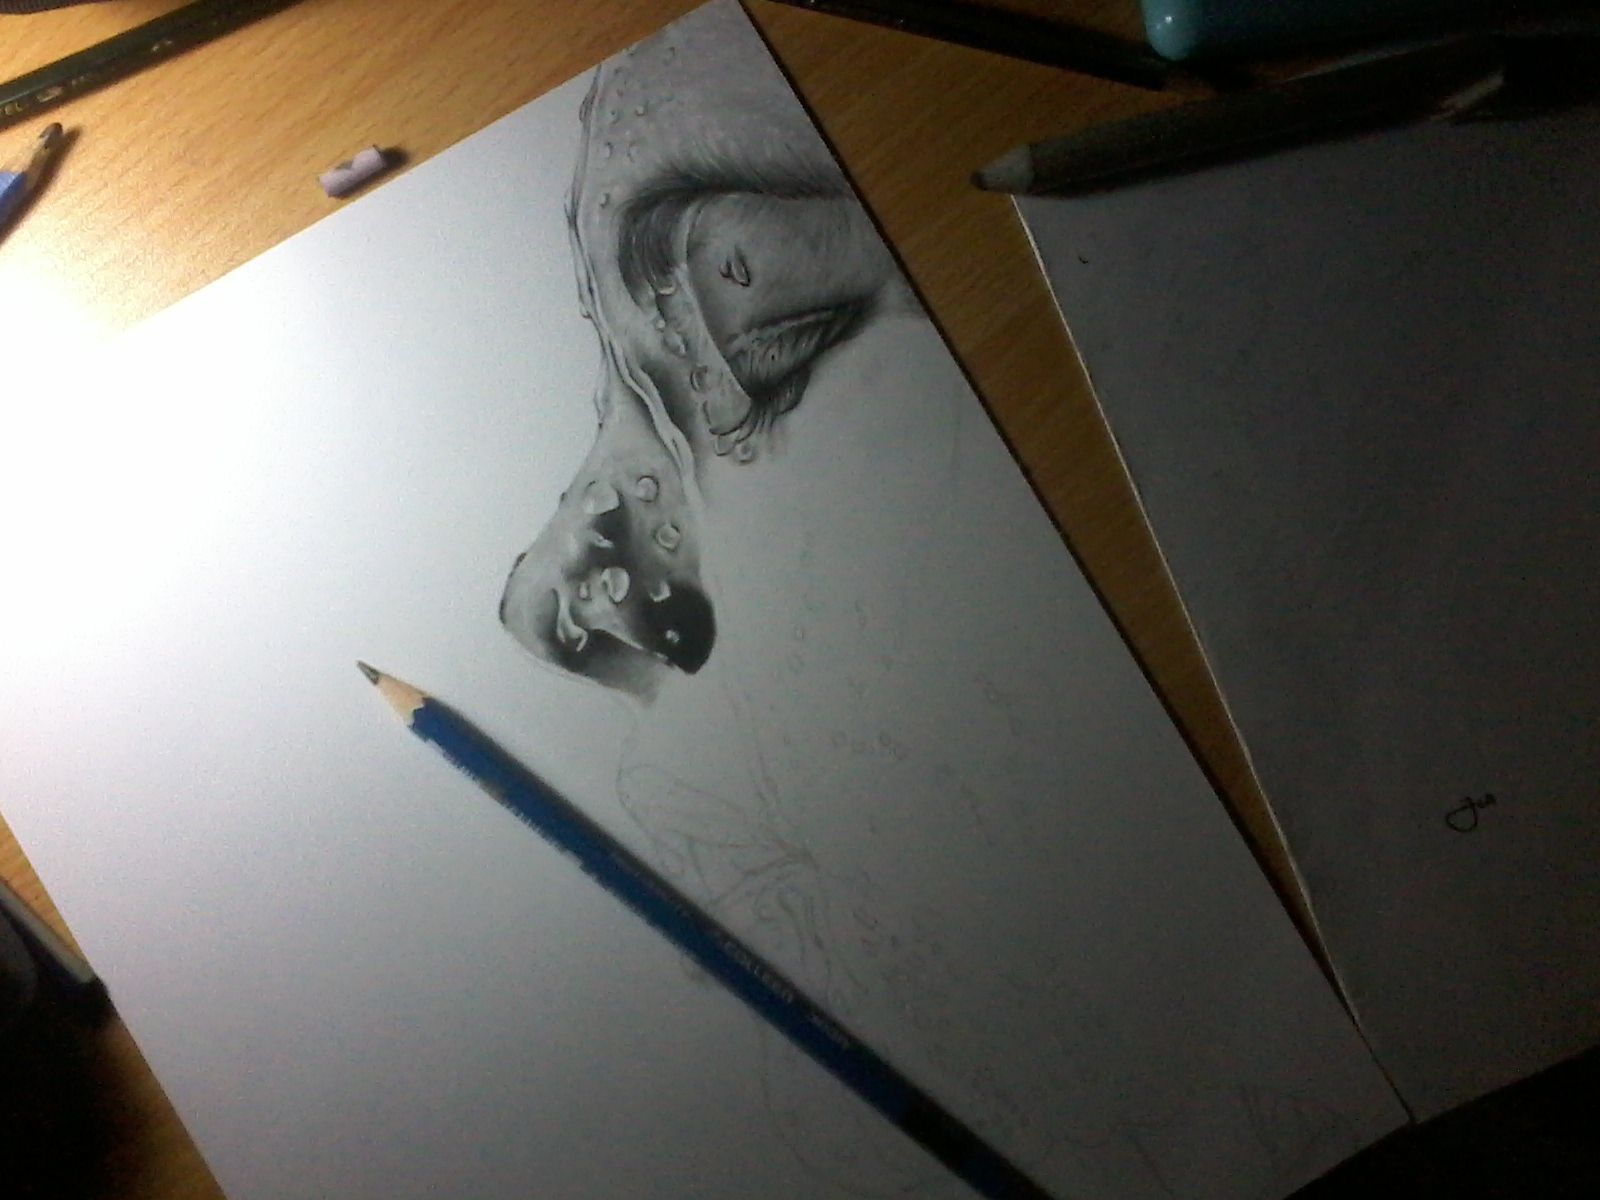
I moved on after making the nose and the top part, now I am doing the lip part where there are so many water droplets that are so detailed, I found out a style to make it easier. I used a blending stump to smudge the darl part and just erase the white parts that are needed for highlights then add another layer of dark penil. Then it went well and suited the drawing.
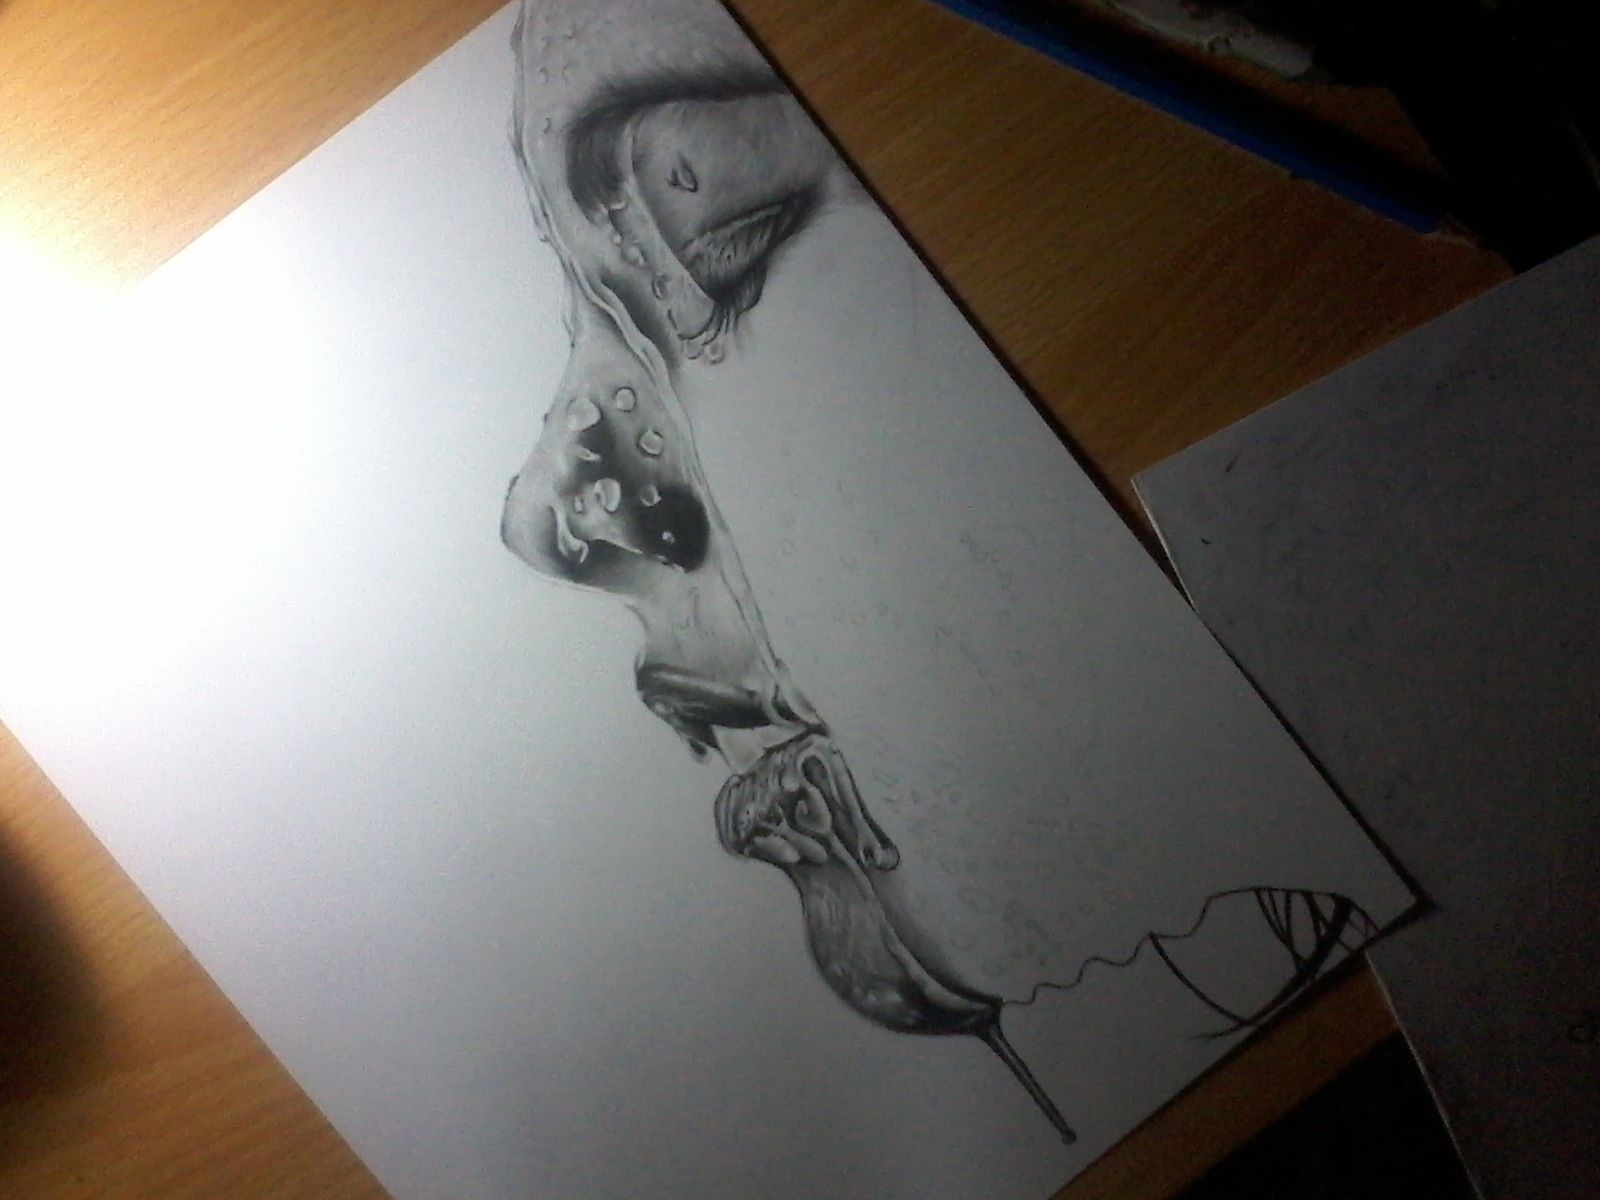
The bottom part is much easier than I expected because I only did it in just an hour, compared to the other parts that I spent 2-3 hours of work. The bottom part is an all black part so I just used a single pencil which is 8b Stadtler pencil and used the cross hatching technique so that the paper will not be destroyed while applying the dark pencil.
This is the finished product! Hope you guys like it!
SPECIAL THANKS TO STEEMIT ACHIEVERS! 😁😁😁

looks fantastic
Thank you Dowha!
OMG.. i hope this gets curied!!
I hope also, I'm kind of nervous. Idk why
@Originalworks
share me some talent ㅜㅜ haha this is so good
You're also talented ishang, practice it and you'll definitely reach my spot or even surpass me, You can do it! 😁
woahh this is halimaw..
Thank youuuuuu! Oh my god!
This post deserves to be resteemed. Congrats because it is amazing! Keep impressing people by producing a piece like this. The water effect is stunning! #steemitachievers rocks.