Setting Up Live Streaming on PC (Optimized with Easy Gamer Utility)
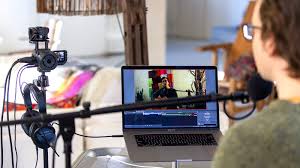
Live streaming has become one of the most effective ways to share gameplay, tutorials, and live content with a global audience. Whether you plan to stream on Twitch, YouTube, or another platform, setting up your system correctly is essential for smooth performance. Running a game and streaming software at the same time can put heavy strain on your PC, so optimization plays a major role in achieving stable results.
Using tools like Easy Gamer Utility, available from ComputerSluggish, can help improve system performance before you begin streaming.
What You Need to Start Live Streaming
Before going live, make sure you have the following:
1. A Capable PC
Streaming requires a solid CPU, enough RAM (at least 8GB recommended), and a decent graphics card. The stronger your hardware, the smoother your stream will run.
2. Streaming Software
You’ll need broadcasting software such as:
OBS Studio
Streamlabs Desktop
XSplit Broadcaster
These programs allow you to capture gameplay, webcam footage, and audio.
3. Streaming Platform Account
Create an account on your preferred streaming platform, such as:
Twitch
YouTube
Facebook Gaming
You will receive a stream key from your platform, which connects your software to your channel.
4. Stable Internet Connection
A minimum upload speed of 5 Mbps is recommended for 720p streaming. Higher resolutions require faster speeds.
Step-by-Step Guide to Setting Up Live Streaming
Step 1: Install Your Streaming Software
Download and install your chosen program. Launch it and complete the initial setup wizard.
Step 2: Add Video and Audio Sources
Inside your streaming software:
Add a game capture or display capture source
Add a microphone input
Add webcam capture if desired
This ensures your viewers can see and hear everything clearly.
Step 3: Configure Stream Settings
Open the settings menu and:
Select your streaming platform
Enter your stream key
Set resolution and frame rate
Common settings:
720p at 30 FPS for lower-end systems
1080p at 60 FPS for stronger systems
Step 4: Test Before Going Live
Record a short test stream or run a private broadcast to confirm audio and video quality.
Optimizing Your PC Before Streaming
Streaming while gaming increases CPU and RAM usage. If background processes are running, they can reduce performance and cause dropped frames.
Easy Gamer Utility helps optimize your system by:
Cleaning temporary and junk files
Freeing up memory
Reducing unnecessary background processes
Improving overall system responsiveness
Running this tool before launching your streaming software can help your PC focus on the game and broadcast instead of non-essential tasks.
How to Use Easy Gamer Utility Before Streaming
Download the tool from ComputerSluggish.
Install and open the application.
Run a system scan to detect junk files.
Use the optimization feature to free up RAM and reduce background activity.
Launch your game and streaming software after optimization is complete.
This preparation step can help reduce lag and improve stream stability.
Additional Tips for Better Streaming Quality
Use a wired internet connection instead of Wi-Fi for stability.
Close unnecessary programs manually.
Lower in-game graphics settings if performance drops.
Monitor CPU usage during streaming to prevent overload.
Keep drivers and Windows updates current.
Conclusion
Setting up live streaming on a PC requires proper software configuration, stable internet, and system optimization. While hardware plays a major role, keeping your system clean and optimized can significantly improve streaming stability.
Using performance tools like Easy Gamer Utility before each session ensures your PC is prepared for the demands of gaming and broadcasting at the same time. With the right setup and preparation, you can deliver smooth, professional-quality live streams to your audience.