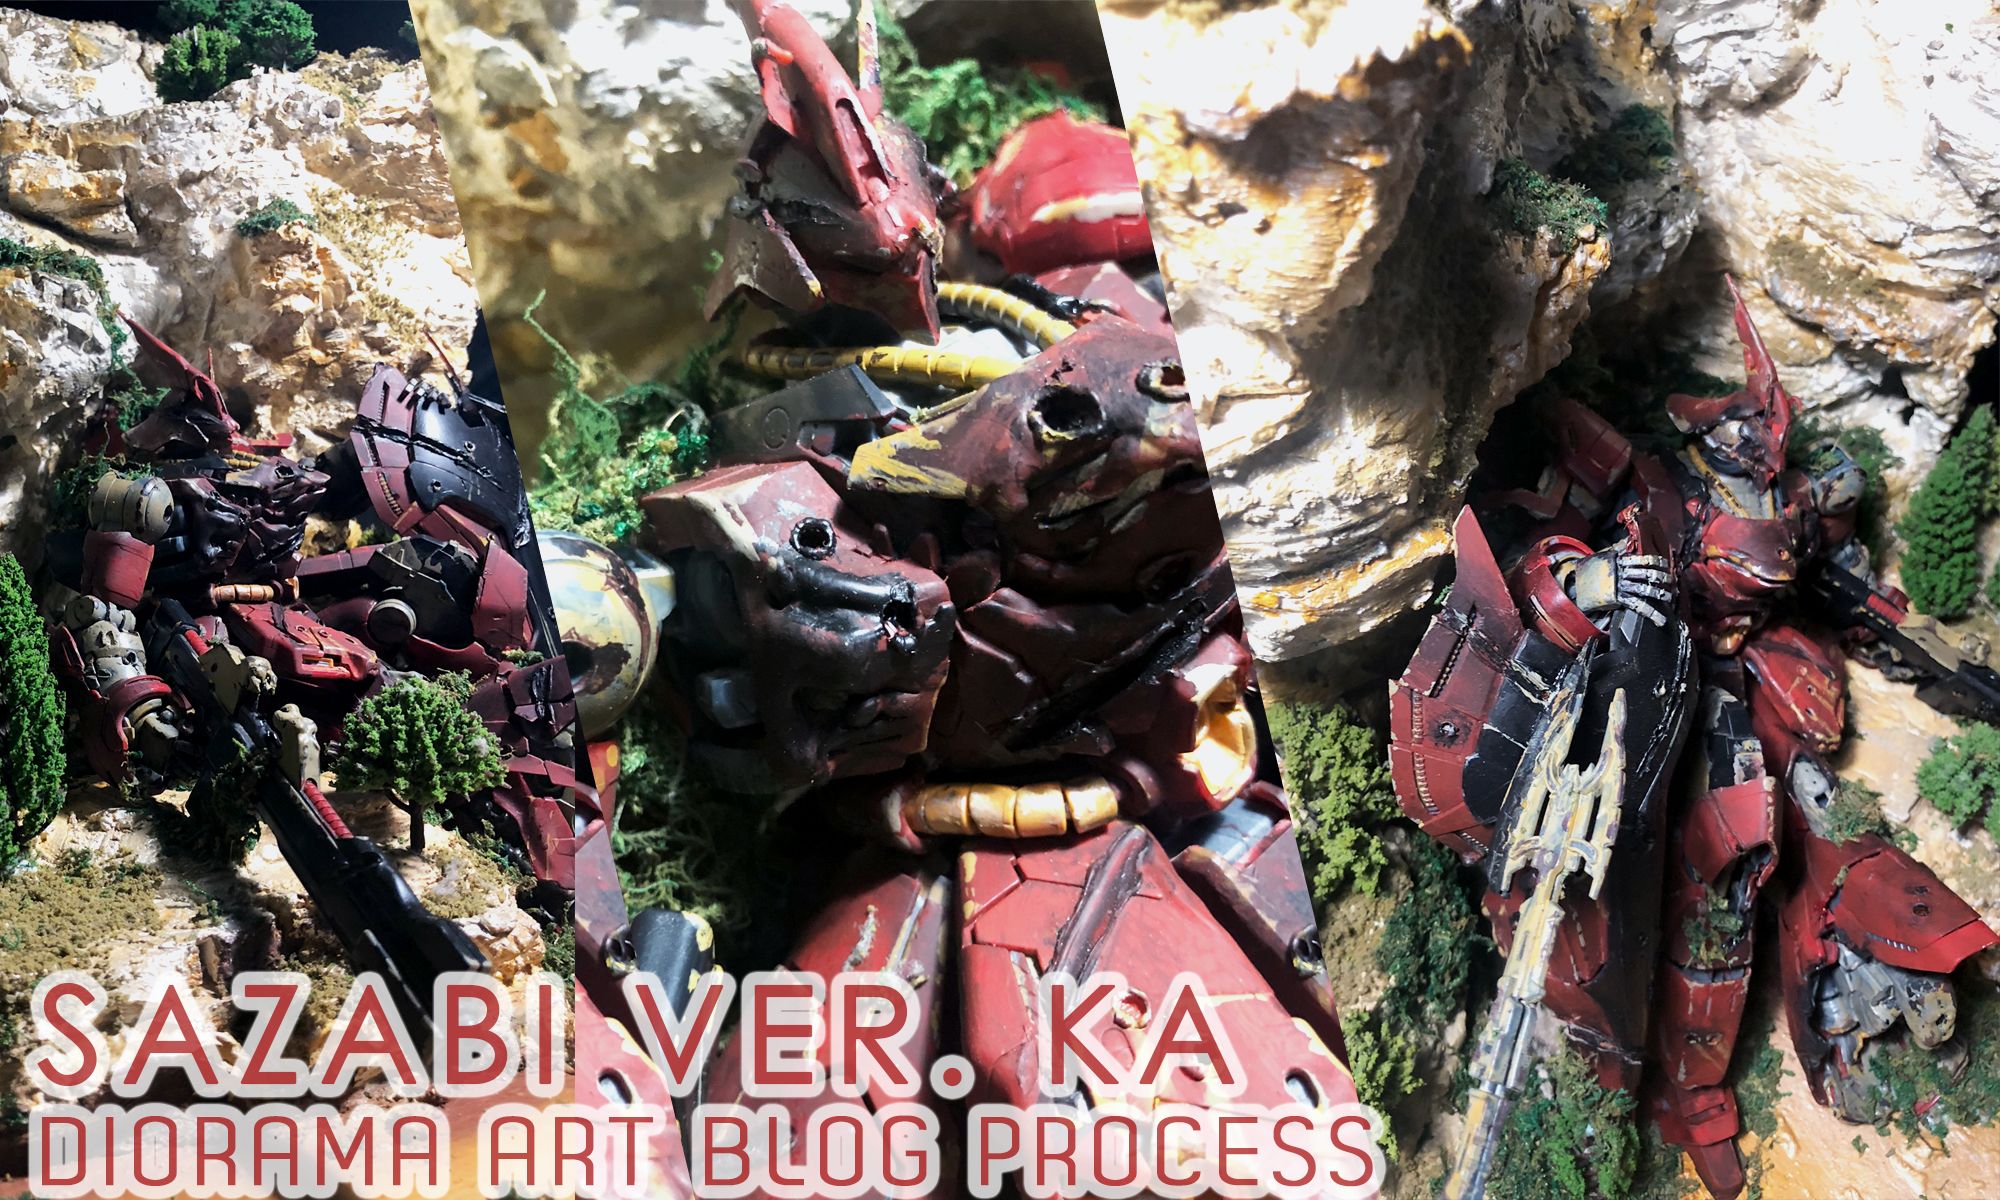
ULOG #03 My First Diorama Completion Art-Process Part II (end process)
The wait is finally over!. Hello steemians I'm on my 3rd ULOG post, and I'm about to continue the second part of my Diorama masterpiece, which is the modification of the GUNDAM itself. I would like to thank @bayanihan for noticing my last Art-Process post,featuring me to their blog, @bayanihan is a very encouraging group that support Filipinos with fresh Ideas and interesting topics, I highly recommend you guys check their page. Also @surpassinggoogle for this ULOG experience, I'm actually getting a bit addicted to this #ULOG fever, Thank you good Sir.

Finished Diorama with Sazabi on it. <3
On my last post, I shared the step by step process on how to create a Diorama Scenery from scratch, I include the material used, techniques and the final outcome of the Project. If you guys haven't seen it yet, just click the link below for you follow the first step of my project, I hope you'll find it very interesting and helpful.
ULOG #02 My First Diorama Completion Art-Process Part I : https://steemit.com/surpassinggoogle/@criz1404/ulog-02-my-first-diorama-completion-art-process-part-i
So it's the third day of our gundam diorama project, and we can finally do some modification for Sazabi. Me and my friend finished the Diorama in time with a little spare time to retouch the whole thing.
On the day of the Competition, there were 7 entries with different themes, some uses cotton for smoke effect, the other one uses small scaled plastic humans to make their work more appealing and realistic. We Got the title "1st Runner up" from the competition (not bad for our very 1st diorama contest) coz our diorama exceeded the standard size by almost a half, the standard size was 30cm x 30xm x 30cm and we did a * 50cm x 50cm x 60cm* I know right ? reading the criteria really helps a lot. By the way the winner of the completion deserves it, I can also tell that they gave loads if effort to their entry, and it pays off.
So getting back to the Art-Process,
you'll be needing the following materials/tools :
📌Glue or any type of paste
📌masking tape
📌Acrylic Paint
📌Set of Artist Brush
📌G.I Wire / Nails / Any kind of strip metal
📌candle / lighter
📌water in a container
📌Synthetic vegitation
Step I: Burn the G.I wire with candle and let it heat for a while in about 20- 30 seconds, when the you feel like the heat on the wire is enough to cut through or pierce the plastic, you can now slightly touch your GUNPLA for battle damage like sword mar, axe mark and lightsaber ( Just use your imaginantion). Put holes with different sizes to obtain a randomized bullet holes like regular bullet, bazooka, laser etc.
@ianceaz burning my gundam, he looks happy and I don't know why.
Step II: Snap any part of the GUNPLA which you want to be destroyed, again use your imagination, it doesn't need to be cut perfectly, the more you inaccurate cut it, the more it will look naturally destroyed.
Applying the base to the leg part of the GUNPLA
Step III: This is the fun part of the process where you paint the your GUNDAM, first apply the base base color of your gundam depending on your desired color, I used red for sazabi coz it's the original color of the model, anyway you can use different color.
Step IV: Add darker color at edges for rust effect and leave it to dry, then paint some lighter color probably silver or white to create a scratch effect on the edges of the gundam, you can also put scratch marks on the different of the gundam depending on your desired battle damage.
Add a little yellow acrylic mixed with water and paint it downward to obtain a wash down rust, you'll be amaze when you mixed all of this after it gets dry.
You'll have something that looks like this, broken shield with battle scars.
Step V: In step I, we drilled holes on our gundam for bullet holes effect, use black acrylic and paint some on the sides of the bullet holes to create a burnt effect. you can also paint black acrylic on the destroyed portion even in battle scars.
Step VI: Top coat it with clear flat pylox spray paint to remove the glossiness of the plastic since our theme is about the remain of a fallen GUNDAM.
Step VII: place your gundam on the Diorama, if you're satisfy with the pose, you can now fix it using Glue (but it will take forever to dry) or you can sue mighty band and shoes glue for fast drying.
Step VIII: A Finally add some glue on the parts where you want to place your additional vegetation sprouting from within your GUNPLA.
That ends my Art Process guys, I hope you enjoyed reading my blog, thank you for lending me your precious time and I'm looking forward to see you guys on my future posts.
Love Ya'll
Christian