Tutorial Build Server #1 || How to Configuration DNS Server on Debian Linux || Bagaimana Cara Mengkonfigurasikan DNS Server di Linux Debian

Domain Name Server (DNS) is a name system for a computer connected to the Internet or just with in a Local Area Network (LAN). Without DNS, to access a computer with a service or resource must access by using the IP Address, which is rather difficult to remember.
IP Address is the main requirement of a device or computer in order to connect with other devices. Before starting to install and configure Domain Name Server (DNS) in Debian, we must first set the IP Address or Netwok Interfaces on the computer.
Network Configuration (ip address)
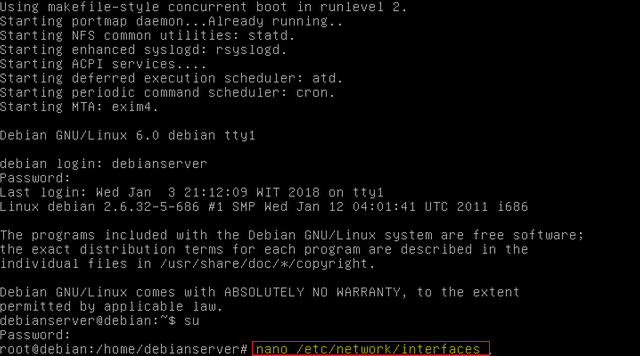
Before the configuration we should first check whether the network on your linux already in the settings or not, if not to check is type if config then enter, if not set then do the following :
change network interfaces by typing command:
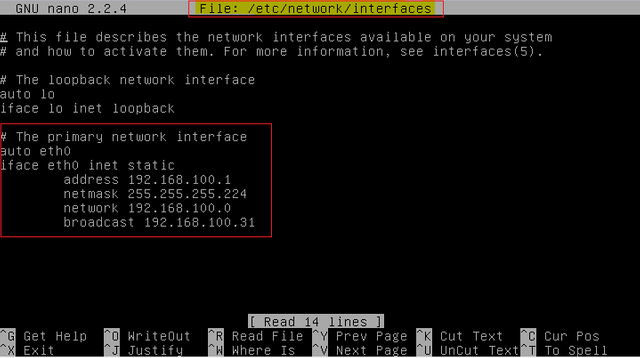
nano /etc/network/interfaces
delete dhcp replaced with static because we setting the address manually.
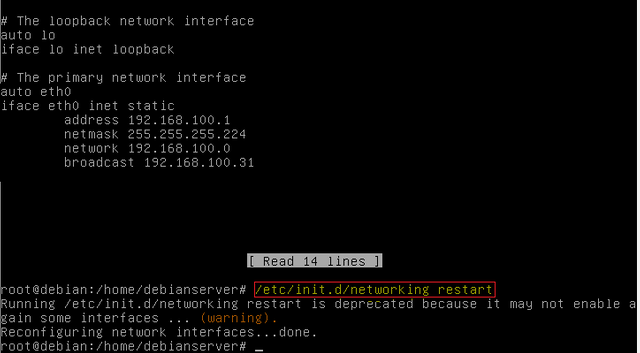
After we configure and save with command :
Ctrl+X > Save > Enter
Next restart the network, type the command :
/etc/init.d/networking/restart
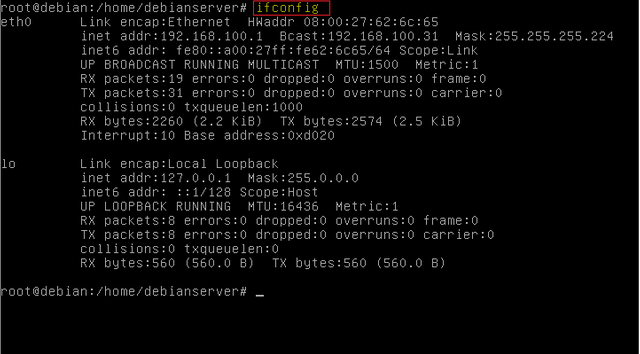
next to check we can do by using the command:
ifconfig
after completion of ip address configuration, then configuration Domain Name Server (DNS).
Configure Domain Name Server (DNS)
Domain Name Server (DNS) is a name system for a computer connected to the Internet with a Local Area Network (LAN).
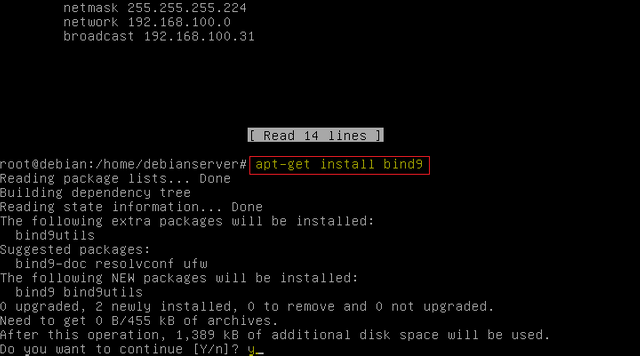
The first thing we have to do is install the packet Bind9 :
apt-get install bind9
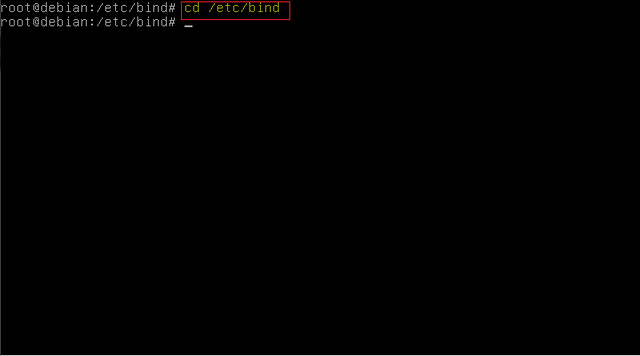
Then to edit the file contained in packet bind9, to edit it we use the command :
cd /etc/bind
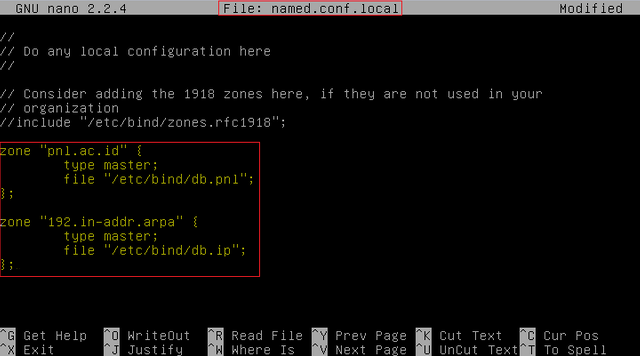
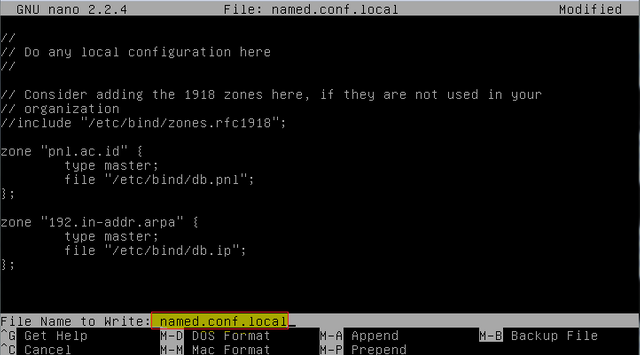
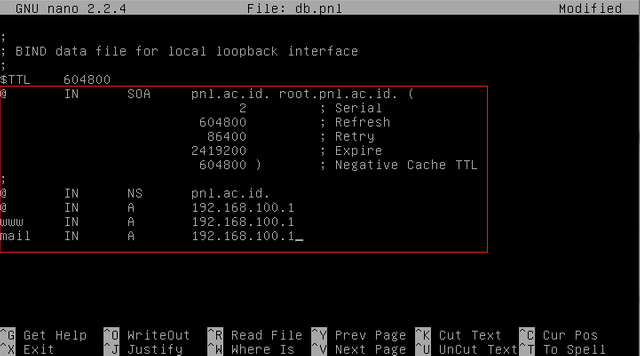
then we edit the name of the address we want to make into a domain and we also edit the appropriate ip address you want to create.
For example:
domain: pnl.ac.id
Ip: 192.168.100.1
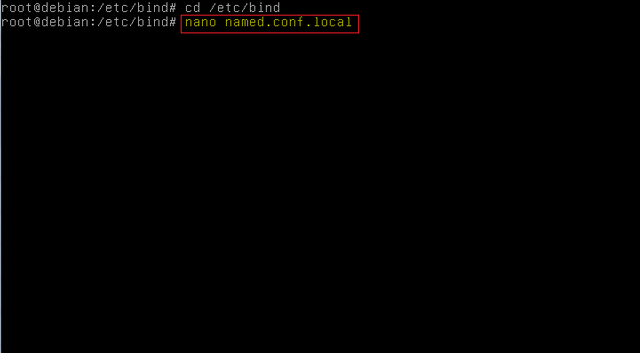
we can edit it using the command:
nano named.conf.local
After we configure and save with command :
Ctrl+X > Save > Enter
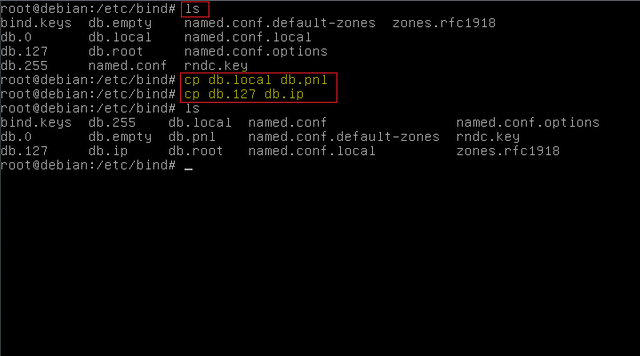
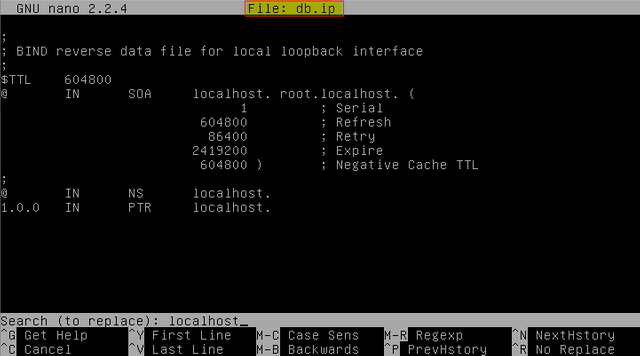
Then to see the contents in bind9 we use the command ls, after that we copy it :
db.local to db.pnl and db.127 to db.ip
You can use the command :
cp db.local db.pnl
cp db.127 db. ip
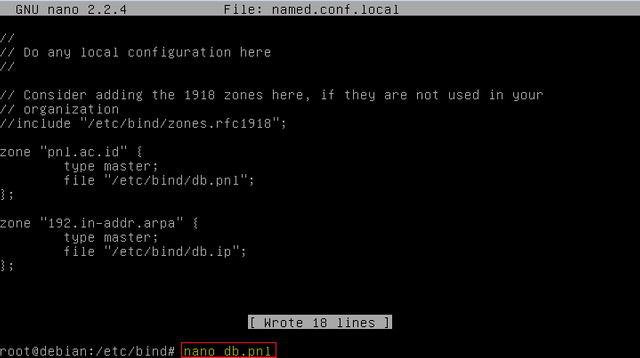
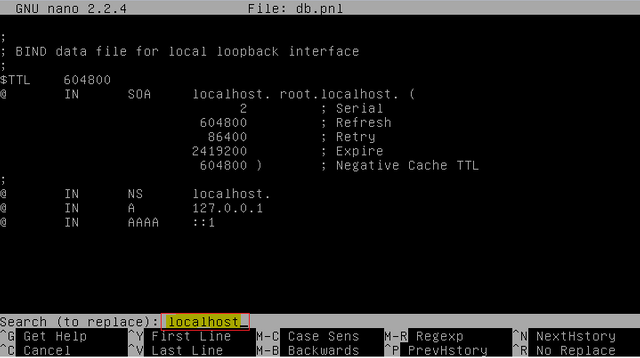
then to edit db.pnl using command :
nano db.pnl
then edit the file to be like in the picture below to replace the default address:
localhost becomes the domain address: pnl.ac.id
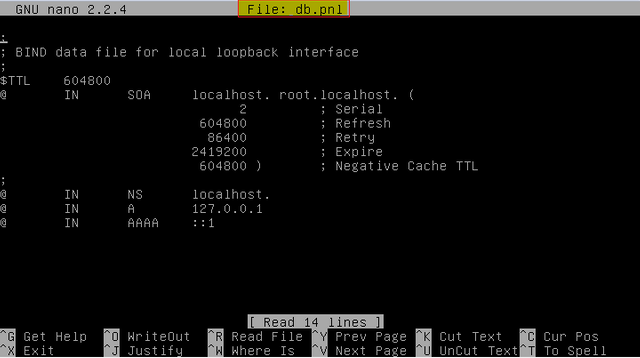
for how fast we can use :
Ctrl+W > Ctrl+R > localhost > pnl.ac.id
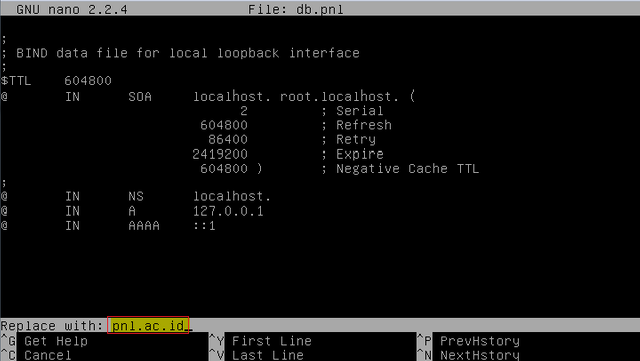
After we configure and save with command:
Ctrl+X > Save > Enter
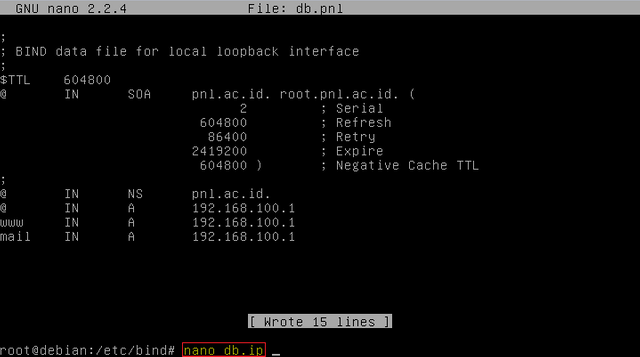
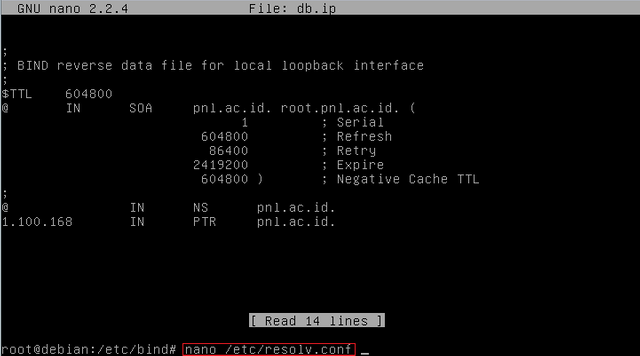
then we do the same to edit db.ip using command :
nano db.ip
then edit the file to be like in the picture below to replace the default address:
localhost to pnl.ac.id and 127.0.0 . to 1.100.168. the opposite of three ip addresses you create.
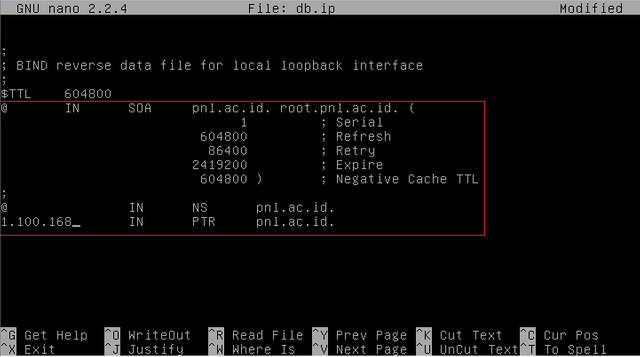
After we configure and save with command:
Ctrl+X > Save > Enter
Next to edit the resolver on your dns by using the command :
nano /etc/resolv.conf
then replace the domain with www.pnl.ac.id
and replace nameserver with ip address 192.168.100.1
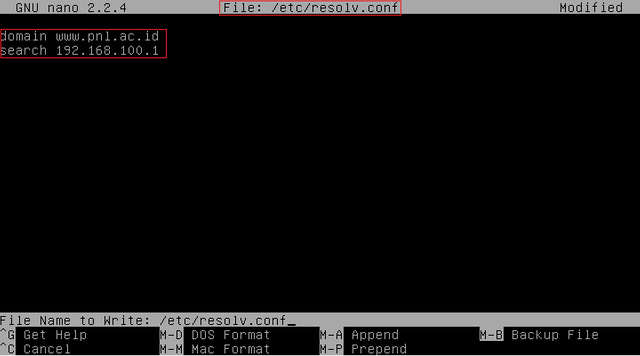
After we configure and save with command :
Ctrl+X > Save > Enter
After we configure and save with command :
Ctrl+X > Save > Enter
then restart bind9 with command:
/etc/init.d/bind9 restart
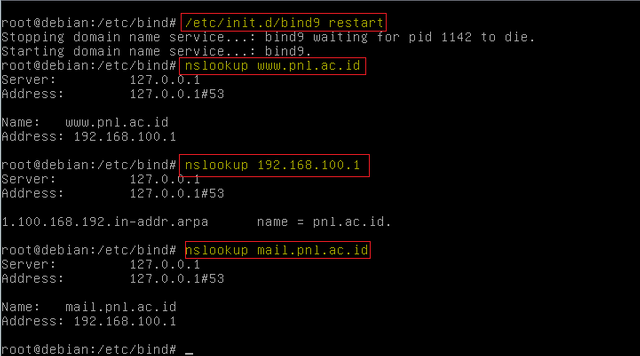
Finally, to test whether our dns succeed we can see it using the command :
nslookup www.pnl.ac.id
nslookup 192.168.100.1
nslookup mail.pnl.ac.id
The Testing Stage :
Then we can test the dns by connecting to one client computer. In the following way:
- Open the client computer that the Windows operating system.
Control Panel >> Network and Internet >> Network andi Sharing Center >> Local Area Network >> Properties >> Internet Protocol Version 4 (TCP/IPv4)
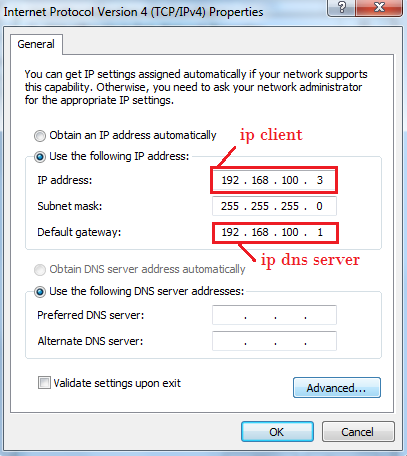
Ip Address computer Client (Windows 7)
ip address : 192.168.100.3
subnet mask : 255.255.255.0
default gateway : 192.168.100.1
then type the command ping (ip computer client) to (ip dns server).
ping 192.168.100.1 (IP DNS Server).
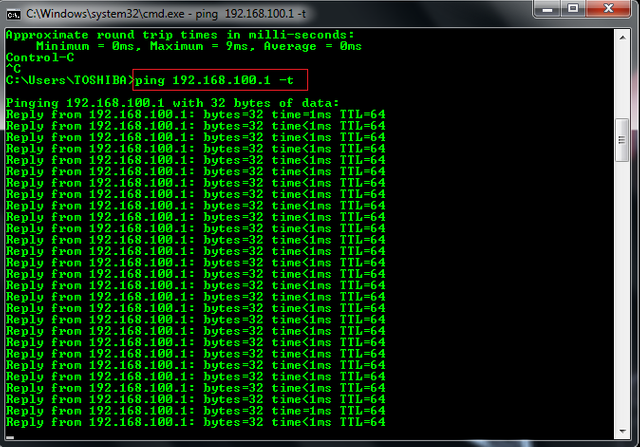
the computer is connected when it appears :
Reply from 192.168.100.1: bytes=31 time=1ms TTL=64
Then we do testing from server computer to client computer with the following command :
ping 192.168.100.3 (IP Client).
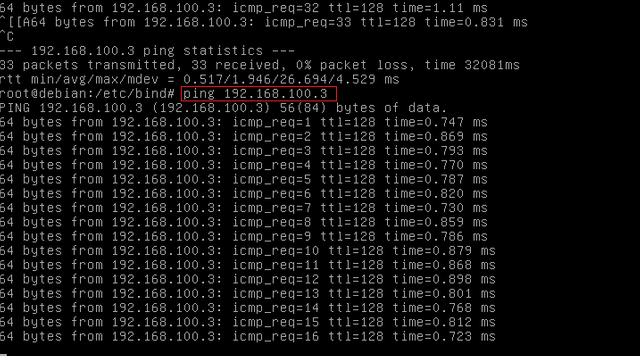
When this appears :
64 bytes from 192.168.100.3: icmp_req=1 ttl=128 time=128 time=0.747 ms
then the computer is connected.
note :
when both these computers have been connected then the system we created has been successful.
If one is still not connected to the computer (error) check the configuration on the DNS Server again.
Posted on Utopian.io - Rewarding Open Source Contributors
Thank you for the contribution. It has been approved.
You can contact us on Discord.
[utopian-moderator]
@manishmike10 thank you all for suggestions
Your contribution cannot be approved yet because it is attached to the wrong repository. Please edit your contribution and fix the repository to
torvalds/linuxto reapply for approval.Also, please put the codes in the code blocks.
Like thisYou may edit your post here, as shown below:
You can contact us on Discord.
[utopian-moderator]
@manishmike10 thanks for suggestion
Please put the codes in the code blocks
@manishmike10 where? i don't now
Your post cannot aprove :v
Hey @fandimuhammad11 I am @utopian-io. I have just upvoted you!
Achievements
Suggestions
Get Noticed!
Community-Driven Witness!
I am the first and only Steem Community-Driven Witness. Participate on Discord. Lets GROW TOGETHER!
Up-vote this comment to grow my power and help Open Source contributions like this one. Want to chat? Join me on Discord https://discord.gg/Pc8HG9x
thanks @utopian-io
nice tutorial and it works,
but you should explains some bind9 'db' file properties such as TTL, serial, expires, etc, why using symbol '@' , then everybody could understand your tutorials
salam dari informatika 2013 :D